Garmin O2AWGD LOW POWER TRANSMITTER (2400-2483.5 MHz) User Manual
Garmin International Inc LOW POWER TRANSMITTER (2400-2483.5 MHz)
Garmin >
Contents
- 1. Users Manual 1
- 2. User Manual 2
Users Manual 1
TITLE
SIZE PARTNO: REV:
SCALE Sht. Of
Dimensionsanddrawingsforreferenceonly.Drawingsarenottoscale.
Trimmedandbounddimensions
Cover
5.15"
2.4"
Specications
1. Description Productdocumentation:FenixQuickStartManual(EN-US)
2. Size Trimmedandbound:Width=2.4”,Height=5.15”.
3. Tolerance ±0.0787”(±2mm)
4. Pagination 16pages
5. Material 120-lbmatte-nishoffset.ApprovedEquivalentsAllowed.
6. Finish Matte
7. Color 4-colorprocess
8. Bindery Saddle-stitched.
9. Folds N/A
10.ElectronicArtwork ShallconformtoGarminArchive190-01507-01_01.zip
11.Languages EN-US
12.Notes ThispartshallcomplywithGarminBanned&RestrictedSubstances(GPN001-00211-00).
Files
The following les have been archived under the above ARCHIVE FILENAME.
File Name File Contents
190-01507_01_01_Spec.indd InDesignCS4forPC,documentspecicationsheet
190-01507_01_01.pdf PortableDocumentFormat,manualandspecicationsheet
fenix_QSM_WEB_EN.pdf PortableDocumentFormat,foronline
SPECIFICATION
CONTROL
DRAWING
Revisions
Rev. Date Description ECO No.
16/12/12 ExperimentalRelease ––––
CONFIDENTIAL
Thisdrawingandthespecicationscontainedhereinaretheproperty
ofGarminLtd.oritssubsidiariesandmaynotbereproducedorusedin
wholeorinpartasthebasisformanufactureorsaleofproductswithout
writtenpermission.
GarminLtd.oritssubsidiaries
C/OGarminInternational,Inc.
1200E.151stStreet
Olathe,Kansas66062U.S.A.
Initials Date Fenix Quick Start Manual (EN-US)
DrawnBy: SMW 6/12/12
A190-01507-01 1
CheckedBy:
ProjectManager:
N/A
ApprovedBy: 1 17
fēnix™ Quick Start Manual
WARNING
See the Important Safety and Product
Information guide in the product box for
product warnings and other important
information.
WARNING
Always consult your physician before you
begin or modify any exercise program.
Getting Started
When using your device the first time, you
should complete these tasks to set up the
device and get to know the basic features.
1Charge the device (page 2).
2Register the device (page 13).
3Learn about the sensor data and modes
(page 4).
4Acquire satellites (page 7).
5Go for a hike (page 8).
6Create a waypoint (page 9).
7Get the owner's manual (page 12).
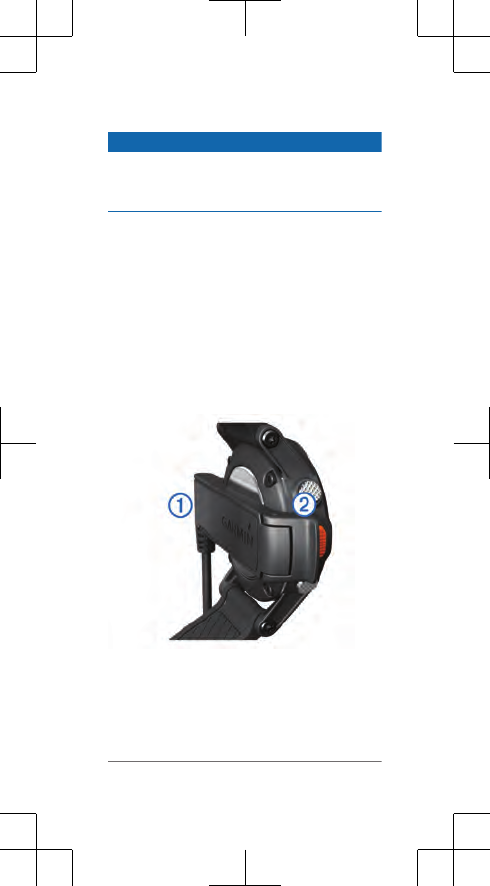
Charging the Device
NOTICE
To prevent corrosion, thoroughly dry the
contacts and the surrounding area before
charging or connecting to a computer.
The device is powered by a built-in lithium-ion
battery that you can charge using a standard
wall outlet or a USB port on your computer.
1Plug the USB end of the cable into the AC
adapter or a computer USB port.
2Plug the AC adapter into a standard wall
outlet.
3Align the left side of the charging cradle
with the groove on the left side of the
device.
4Align the hinged side of the charger
with the contacts on the back of the
device.
When you connect the device to a power
source, the device turns on.
2
5Charge the device completely.
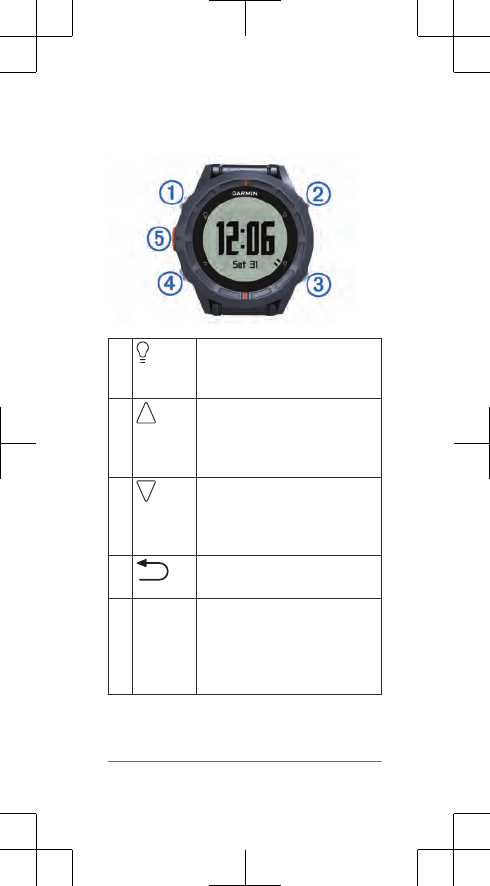
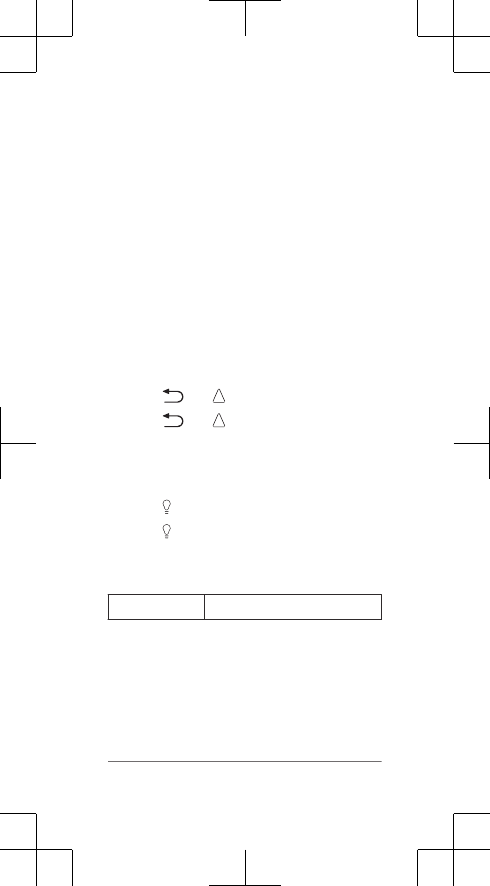
Keys
Select to turn the backlight on
and off. Hold to turn the
device on and off.
Select to scroll through the
data pages, options, and
settings. On the map, select
to zoom out.
Select to scroll through the
data pages, options, and
settings. On the map, select
to zoom in.
Select to return to the
previous screen.
Orange
key
Select to open the menu for
the current screen. Select to
choose an option and to
acknowledge a message.
Hold to mark a waypoint.
3
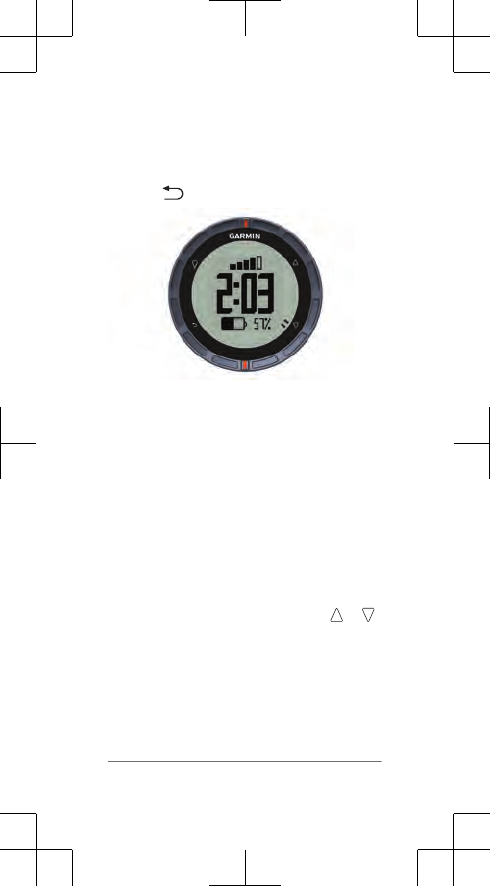
Viewing the Status Page
You can quickly switch to this page to view the
time of day, battery life, and GPS status
information from any other page.
Hold .
After five seconds the display
automatically switches back to the
previous page.
Viewing the Sensor Data
You can quickly access real-time data for the
compass, altimeter, barometer, and
temperature sensors.
NOTE: These data pages automatically time
out to low-power mode.
NOTE: This data is not recorded to the device
(page 7).
1From the time of day page, select or .
4
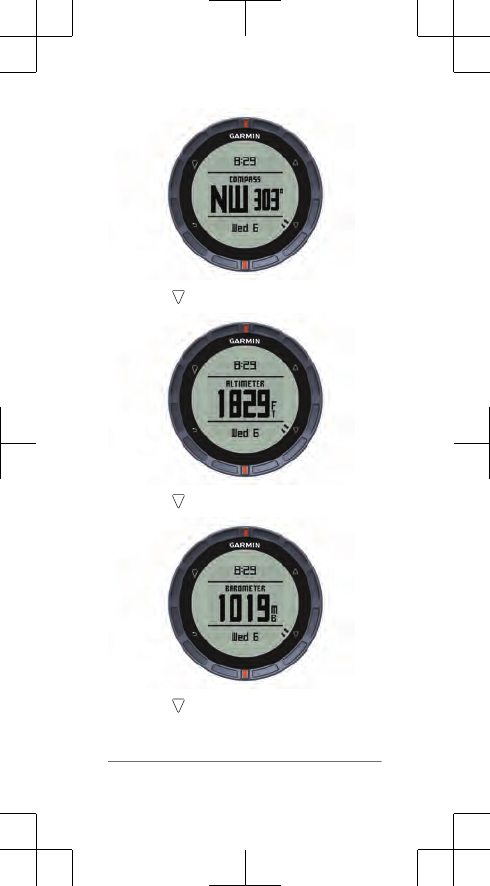
2Select .
3Select .
4Select .
5

NOTE: Your body temperature affects the
temperature sensor. To get the most
accurate temperature reading, remove the
device from your wrist and wait 20–30
minutes.
TIP: To purchase a tempe™ wireless
temperature sensor, go to
www.garmin.com. See the owner's manual
for more information.
Turning On a Sensor Mode
You can put the device in compass, altimeter,
barometer, or temperature mode to display
continuous sensor data. For example, you can
put the device in altimeter mode and
continuously monitor elevation data.
NOTE: If you have an optional heart rate or
cadence sensor paired with the device, the list
will include those data modes.
1Select the Orange key.
2Select Compass, Altimeter, Barometer,
or Temp..
6

Acquiring Satellite Signals and
Recording a Track
Before you can use the GPS navigation
features, such as recording a track, you must
acquire satellite signals.
The device may need a clear view of the sky to
acquire satellite signals. The time and date are
set automatically based on the GPS position.
1Hold to turn on the device.
2Select your language (first time only).
3Select the Orange key.
4Select GPS.
5Wait while the device locates satellites.
The device displays your coordinates
when it has located satellites.
6Select Start.
7Walk around to record a track.
Your distance and time appear.
8Select to view the loop of data pages
including compass data, altimeter data,
ascent and speed, and the status page.
You can customize some data pages. See
the owner's manual (page 12).
9Select to pause tracking.
10 Select an option:
• Select Resume to continue tracking.
• Select Save to save your track.
• Select Clear to erase the track without
saving.
7
Tracks
A track is a recording of your path. The track
log contains information about points along the
recorded path, including time, location, and
elevation for each point.
Going for a Hike
Before you go for a hike, you should charge
the device completely (page 2).
NOTE: The device turns on automatically while
charging. If you do not charge the device
before going for a hike, hold to turn on the
device.
1Select the Orange key.
2Select GPS > Start.
3Start hiking.
4When you want to take a break or pause
the device from tracking, select .
5Select Resume, and continue hiking.
6When finished, select > Save to save
your hiking data.
Sending Your Hike to BaseCamp™
Before you can send data to BaseCamp, you
must download BaseCamp to your computer
(www.garmin.com/basecamp).
You can view your hike, other tracks, and
waypoints on your computer.
1Connect your device to your computer
using the USB cable (page 2).
Your device appears as a removable drive
in My Computer on Windows® computers
8

and as a mounted volume on Mac®
computers.
2Start BaseCamp.
3Follow the on-screen instructions.
Waypoints
Waypoints are locations you record and store
in the device.
Creating a Waypoint
You can save your current location as a
waypoint.
1Hold the Orange key.
2Select an option:
•To save the waypoint without
changes, select Save.
• To make changes to the waypoint,
select Edit, make changes to the
waypoint, and select Save.
Navigating to a Waypoint
1Select the Orange key.
2Select GPS > Start.
3Select the Orange key.
4Select Waypoints, and select a waypoint
from the list.
5Select Go.
9
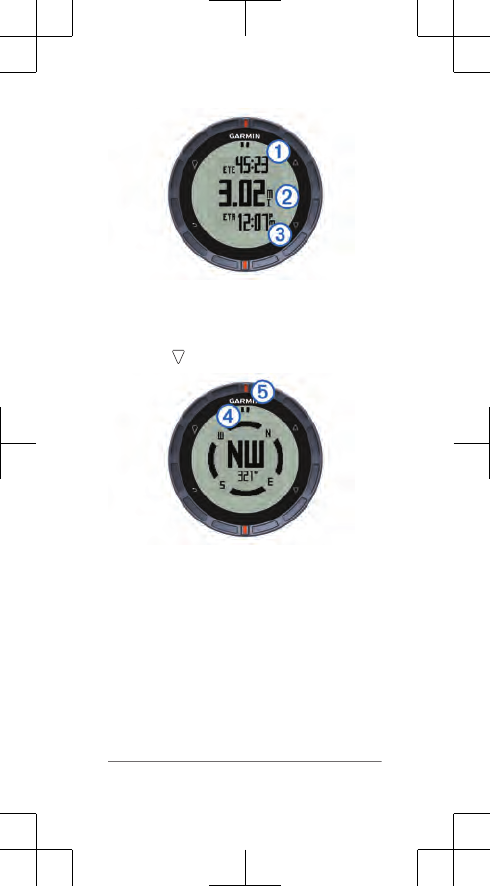
The device displays time to destination ,
distance to destination , and estimated
time of arrival .
6Select to view the compass page.
The two pointer marks serve as a
bearing pointer. The top orange mark
points in the direction you are facing.
7Align the pointer marks with the top orange
mark.
8Continue to walk in that direction until you
reach the destination.
Navigating Using TracBack®
While navigating, you can navigate back to the
beginning of your track. This can be helpful
10
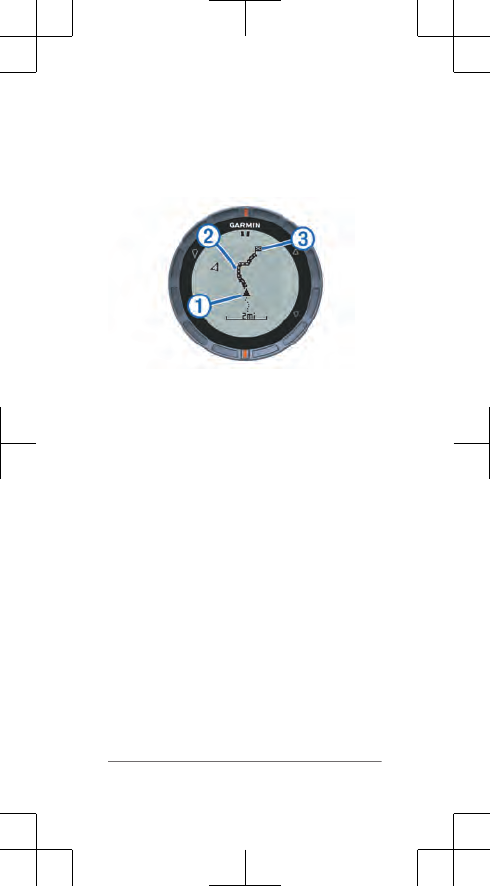
when finding your way back to camp or the trail
head.
1Select the Orange key.
2Select Tracks > Current > TracBack.
Your current location , track to follow
, and end point appear on the map.
Stopping Navigation
1Select the Orange key.
2Select Stop Nav..
Setting Alerts
You can set the device to alert you in many
different situations where your awareness of
the surrounding conditions or other data is
important. For example, you can set the device
to alert you when you reach a specified
elevation.
1Select the Orange key.
2Select Alerts.
3Follow the on-screen instructions.
11
Troubleshooting
Getting the Owner's Manual
You can get the latest owner's manual from
the web.
1Go to www.garmin.com/support.
2Select Product Documentation.
3Follow the on-screen instructions to select
your product.
Locking the Keys
You can lock the keys to prevent inadvertent
key presses.
1Select the data page you want to view
while the keys are locked.
2Hold and to lock the keys.
3Hold and to unlock the keys.
Resetting Your Device
If the device stops responding, you may need
to reset it.
1Hold for at least 25 seconds.
2Hold for one second to turn on the
device.
Specifications
Battery type 500 mAh Lithium-ion battery
12
Battery life Up to 6 weeks
NOTE: The actual battery
life depends on how much
you use GPS, device
sensors, optional wireless
sensors, and the backlight
(page 13).
Water
resistance
Water resistant to 164 ft. (50
m)
Operating
temperature
range
From -4ºF to 122ºF (from
-20ºC to 50ºC)
Radio
frequency/
protocol
2.4 GHz ANT+™ wireless
communications protocol
Bluetooth® Smart device
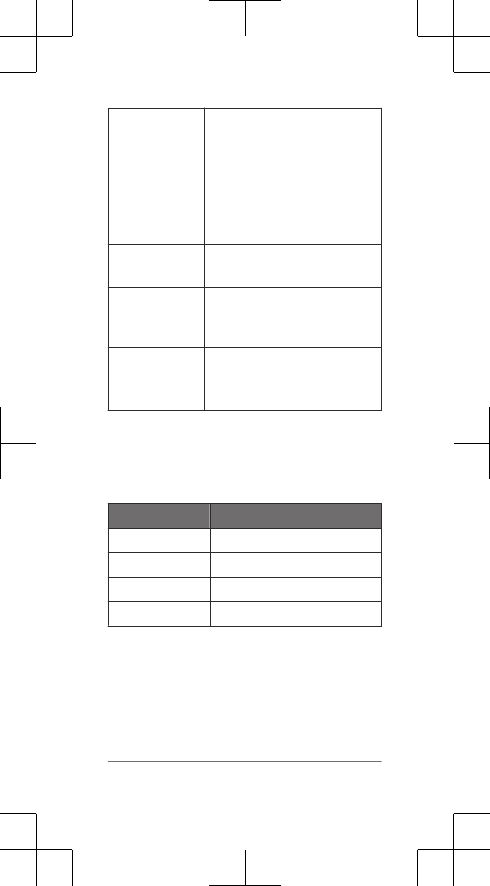
Battery Information
The actual battery life depends on how much
you use GPS, device sensors, optional
wireless sensors, and the backlight.
Battery Life Mode
16 hours GPS normal mode
50 hours GPS long-term mode
2–3 weeks Continuous sensor mode
Up to 6 weeks Watch mode
Registering Your Device
Help us better support you by completing our
online registration today.
•Go to http://my.garmin.com.
• Keep the original sales receipt, or a
photocopy, in a safe place.
13

Device Care
NOTICE
Do not use a sharp object to clean the device.
Avoid chemical cleaners and solvents that can
damage plastic components.
Avoid pressing the keys under water.
Avoid extreme shock and harsh treatment,
because it can degrade the life of the product.
Do not store the device where prolonged
exposure to extreme temperatures can occur,
because it can cause permanent damage.
Getting More Information
You can find more information about this
product on the Garmin® website.
• Go to www.garmin.com/outdoor.
•Go to www.garmin.com/learningcenter.
• Go to http://buy.garmin.com, or contact
your Garmin dealer for information about
optional accessories and replacement
parts.


Garmin® and the Garmin logo are trademarks of
Garmin Ltd. or its subsidiaries, registered in the USA
and other countries. These trademarks may not be
used without the express permission of Garmin. ANT
+™, BaseCamp™, fēnix™, and tempe™ are
trademarks of Garmin Ltd. or its subsidiaries. These
trademarks may not be used without the express
permission of Garmin.
The Bluetooth® word mark and logos are owned by
the Bluetooth SIG, Inc. and any use of such marks by
Garmin is under license. Mac® is a registered
trademark of Apple Computer, Inc.Windows® is a
registered trademark of Microsoft Corporation in the
United States and other countries. Other trademarks
and trade names are those of their respective
owners.
© 2012 Garmin Ltd. or its subsidiaries
Garmin International, Inc.
1200 East 151st Street
Olathe, Kansas 66062, USA
Garmin (Europe) Ltd.
Liberty House, Hounsdown Business Park
Southampton, Hampshire, SO40 9LR UK
Garmin Corporation
No. 68, Zangshu 2nd Road, Xizhi Dist.
New Taipei City, 221, Taiwan (R.O.C.)
www.garmin.com/support
June 2012
190-01507-01_01
Printed in Taiwan