Garnet Systems Co GV-4400 VGA Card User Manual View
Garnet Systems Co Ltd VGA Card View
users manual
1
Garnet GeForce 2 MX
Twin View
(Model No. : GV-4400)
User's Manual
GARNET SYSTEMS CO., LTD.
2
¢º
This equipment has been tested and found against harmful radio
electromagnetic interference and can be installed and used in any
residential areas as well as offices.
¢º
Any copying or reproduction of this whole manual or part of
contents is strictly prohibited.
¢º
Information in this manual is subject to change without prior notice
for improvement.
Copyright(C) 2000 GARNET SYSTEMS CO., LTD.
¡Ú
GeForce2 MX is a registered trademark of nVIDIA
¡Ú
Windows 95/98/2000/NT is a registered trademark of Microsoft
Corporation.
¡Ú
Other trademarks are registered properties by their respective
holders.
3
Table of Contents
1. About Garnet GeForce2 MX Twin View ---------------------------- 4
1.1 Features of Garnet GeForce2 MX Twin View -------------- 4
1.2 Recommended System Requirements --------------------- 4
1.3 Delivery Check ------------------------------------------------------5
1.4 Contents of Installing Program CD -------------------------- 5
2. Installation ------------------------------------------------------------------ 6
2.1 To install the Graphic Card into PC --------------------------6
2.2 Driver Installation --------------------------------------------------6
2.2.1 Driver Installation in Windows 9x ---------------------- 6
2.2.1.1 When replace existing VGA Card with Garnet
GeForce2 MX Twin View ---------------------------------7
2.2.1.2 When Windows 9x is re-installed after replacing
Graphic card ------------------------------------------------ 11
2.2.2 Driver installation in Windows 2000 ------------------ 23
2.2.3 Driver update in Windows NT4.0 ---------------------- 27
2.3 Installation of DirectX 7.0a ------------------------------------- 35
3. To Change Properties Set-up ------------------------------------ 36
4. To set up Twin View ----------------------------------------------- 37
5. To set up TV Out -------------------------------------------------- 38
6. Q & A -------------------------------------------------------------------- 39
GARNET GeForce2 MX
4
1. About GARNET GeForce2 MX Twin View
Thank you very much for purchasing GARNET GeForce2 MX Graphic
Card. Please read carefully this manual in order to use this equipment
right. The information in this book including program and driver is
subject to change for updating and improvement of its performances.
1.1 Features of GARNET GeForce2 MX Twin View
This Graphic Card supports twin-view function with two D-SUB and
execute its role for Twin View such as office purpose and game and
other tasks at the same time.
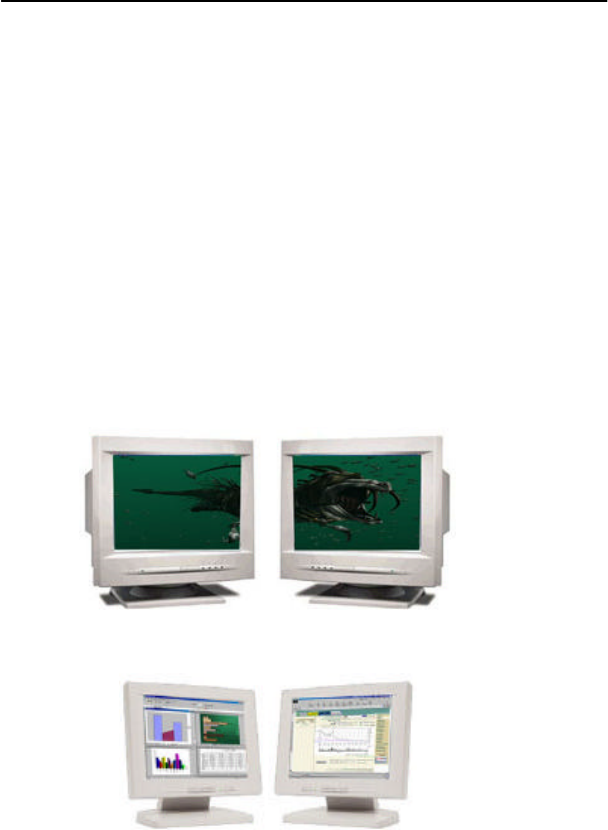
¢Á
Extended Mode
- enables users to view with two monitors at the same time
- enables users to multitask with two different monitors.
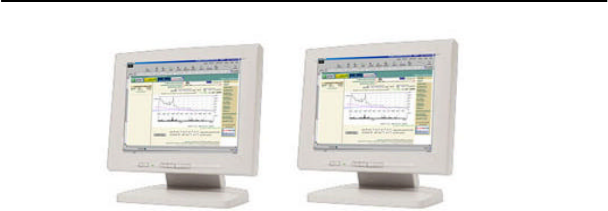
¢Á
Clone Mode
GARNET GeForce2 MX
5
- Mounted with High-speed GeForce MX chip, made by nVidia
- Supports AGP Execute Mode in AGP 4X or 2X, AGP Texturing, Fast
Write
- Capable to process 20 Mil Triangles, 700 Mega Texels
- Supports 2 independent Pixel Rendering Pipelines
- Realize superb graphic with Digital Vibrance Control
- Perform perfect graphics with newly-equipped NSR(Nvidia Shading
Rasterizer)
- Perform dynamic real image with 2nd generation T&L(Transform and
Lighting) engine
- Supports superlative game conditions with DirextX 7.0a, OpenGL
- Smooth surface control with H/W FSAA (Full Scene Anti-Aliasing)
function
- Supports stable 2048x1536 high resolution through 350MHz Ramdec
- Supports Video Acceleration function through such as Direct-
Show, MPEG-I, MPEG-II(DVD) for moving picture
- High-speed 32MB SDRAM
- Supports TV-Out Functions(Optional)
- 2048x1536 @60Hz Support.
1.2 Recommended System Requirements
PC : Pentium/P-II/P-III-grade or compatible system with AGP Slot
O/S : Windows 9x, Windows NT 4.0, Windows 2000
Memory : 64MB or more
Monitor : VGA Monitor (800 x 600 or higher @ 60Hz)
Hard Disk : 20MB or more
1.3 Delivery Check
- GARNET GeForce 2 MX Graphic Card 1 Piece

GARNET GeForce2 MX
6
- Installation Program CD 1 Piece
- User's Manual 1 Piece
- composite Cable (TV-Out Model Only)
1.4 Contents of Installation Program CD
- DirectX 7.0a Microsoft DirectX 7.0a
- Win9x Driver Windows95/98 Driver
- Windows NT4.0 Driver Windows NT 4.0 Driver
- Win2000 Driver Windows 2000 Driver
- User's Manual GARNET GeForce2 MX Twin View User
Manual
¢Ñ
For your reference, this graphic card may not be compatible with
some minor main boards, which do not perfectly support AGP
2.0-Compliant constant current 6A.

GARNET GeForce2 MX
7
2. Installation
¢Ñ
The pictures shown in this manual are based on Windows 98 SE
and Windows 2000.
2.1 Installing Graphic Card into PC
Please read carefully and follow the instructions as below in order to
install GARNET GeForce2 MX Twin View.
¨ç
Turn off power of your computer.
¨è
Undress the cover of your computer by unleashing bolts.
¨é
Check whether AGP Bus Slot is in place or not. If not, it is
impossible to install. Remove and save the screw on the slot cover.
You will need it to secure the card in place.
¨ê
Hold the card upright by the metal edge, and carefully slide it
into the expansion slot. Gently apply pressure to the upper metal
edge only, making sure it snaps into AGP Bus Slot.
¨ë
Fasten securely the card into place with the screw that fits into the
top notch of the metal bracket.
¨ì
Dress the cover of your computer by leashing bolts.
¨í
Connect the Monitor with GARNET TNT2 Ultra Video Connector
¨î
Turn power on and check whether display is O.K.
2.2 Driver Installation
This section is the explanation on driver installation. Minimum
requirements for GARNET GeForce2 MX Twin View be Windows95
OSR2.1 or higher, Windows98, Windows NT4.0 (Service Pack 4),
Windows 2000, as O/S. And also, after installing driver, DirectX 7.0a is
recommended for correct display. (for DirectX installation, see page
#24.)
2.2.1 Driver Installation in Windows 9x
GARNET GeForce2 MX Windows 9x driver is operate-able in both
Windows 95 and 98. When operating system in your computer is
Windows 95 or 98 and you would like to replace only graphic card with
our Graphic Card, please review
¡¸
2.2.1.1
¡¹
for driver installation. And
when you would like to change O/S into Windows 9x after installing
GARNET GeForce2 MX
8
Geforce2 MX altogether, please review 2.2.1.2 for driver installation.
2.2.1.1 When you are to replace existing VGA card with Garnet
GeForce2 MX
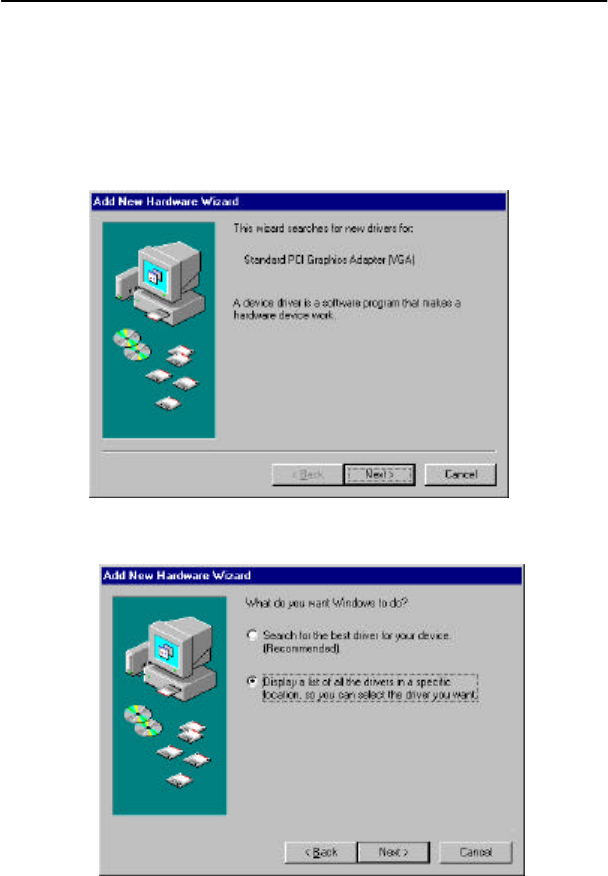
1) When Windows starts, PnP Bios recognized new VGA card and
<Add New Hardware Wizard> will come out on screen automatically as
below. Click <Next> in the following picture.
2) Click <Display a list--you want.> and <Next> in the following picture.
GARNET GeForce2 MX
9
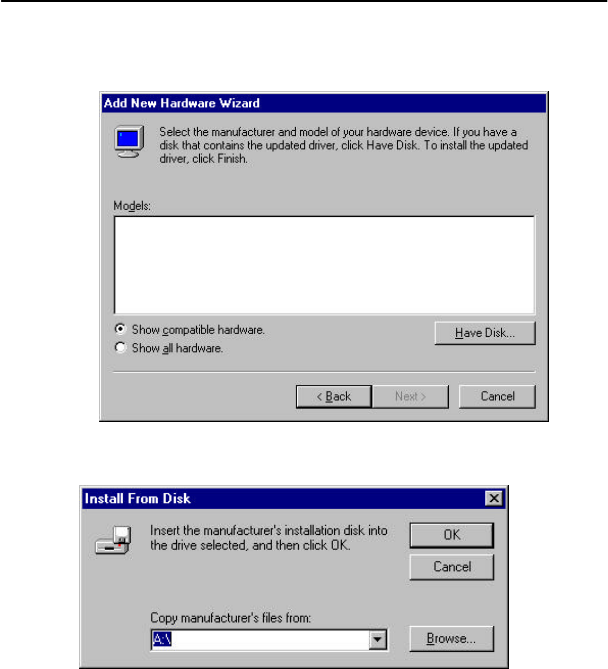
3) Click <Have Disk...> in the following picture.
4) Click <Browse...> and <OK> in the following picture.
5) Put driver installation CD on your CD-Rom drive and select Win9x
Driver and click <OK> in the following picture.
GARNET GeForce2 MX
10
6) Click <Browse> and <OK> in the following picture.
7) Select Garnet GeForce2 MX and click <OK> in the following picture.
GARNET GeForce2 MX
11
8) Click <Next> in the following picture.
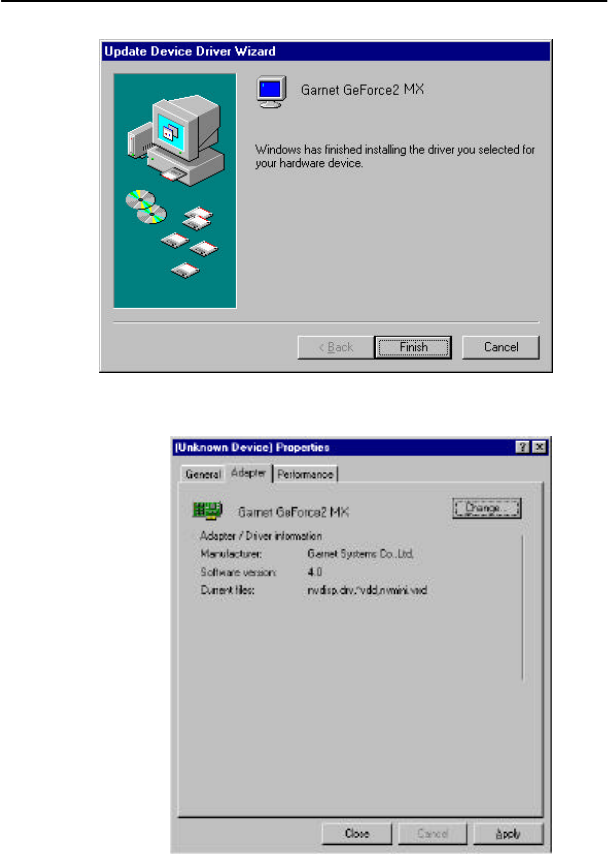
9) Click <Finish> in the following picture.
GARNET GeForce2 MX
12
10) Click <Yes> in the following picture and driver installation is
finished, re-starting your computer.
2.2.1.2 When Windows 9x is re-installed after replacing Graphic Card
in the following picture.
1) Click <My Computer> in the <Desktop> and <Control Panel> in the
following picture.

GARNET GeForce2 MX
13
2) Double-click <Control Panel> in the <Display> in the following
picture.
GARNET GeForce2 MX
14
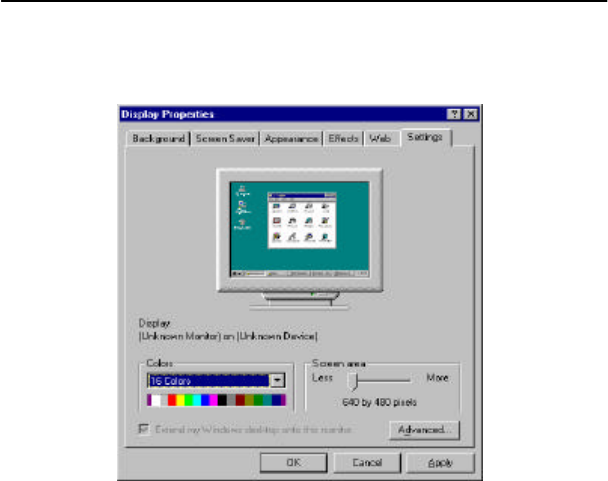
3) Click <Display Properties>, <Settings>, and <Advanced...> in the
following picture.
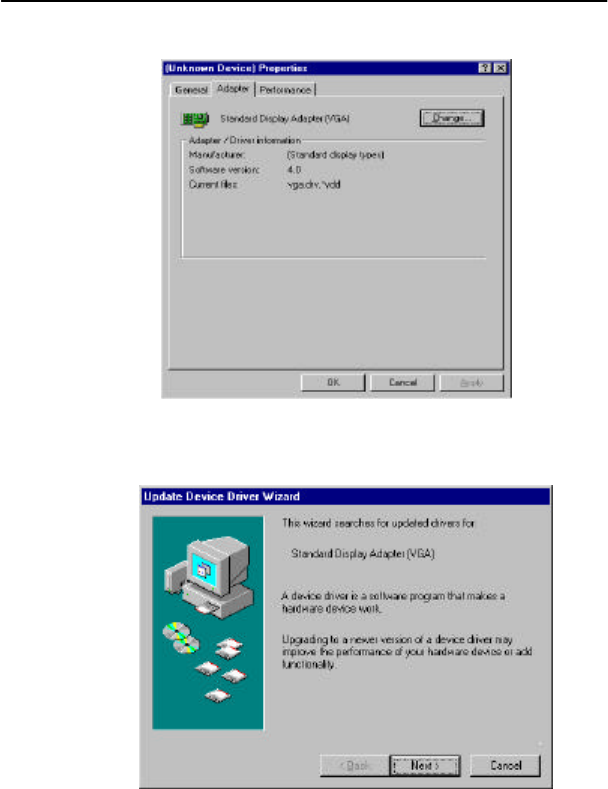
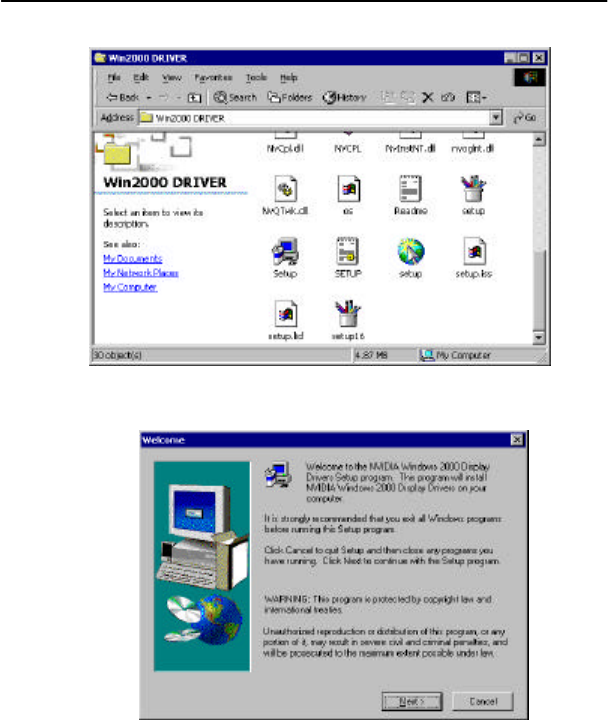
4) Click <Adapter> and <Change> in the following picture.
GARNET GeForce2 MX
15
5) Click <Next> at the <Update Device Driver Wizard> in the following
picture.
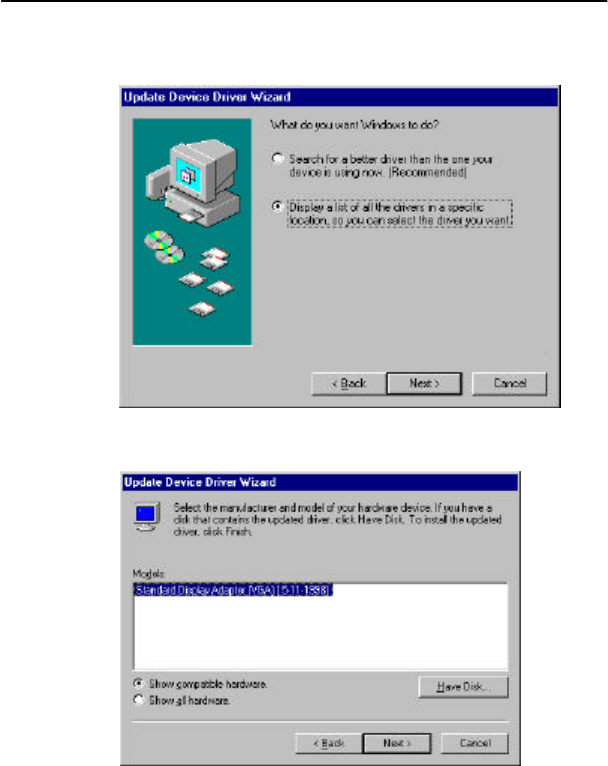
6) Click <Display --- want.> and <Next> in the following picture.
GARNET GeForce2 MX
16
7) Click <Have Disk...> in the following picture.
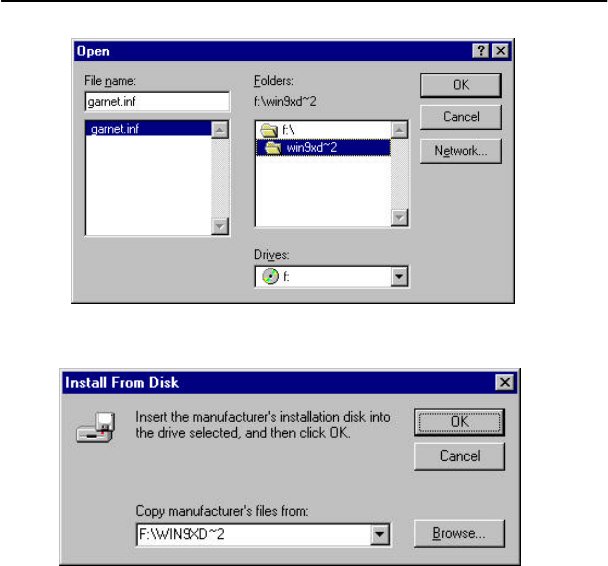
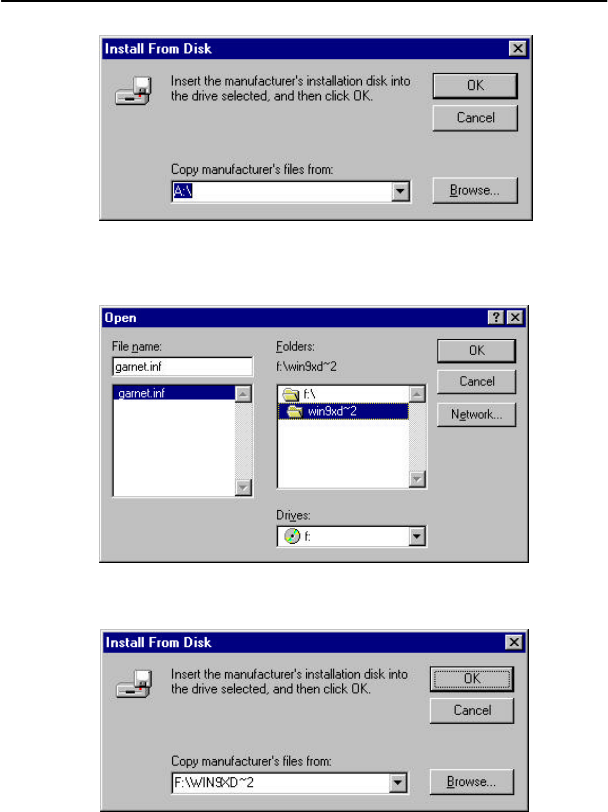
8) Click <Browse...> and <OK> in the following picture.
GARNET GeForce2 MX
17
9) Put driver installation CD, select Win9x driver in the related drive
and click <OK> in the following picture.
10) Click <OK> in the following picture.
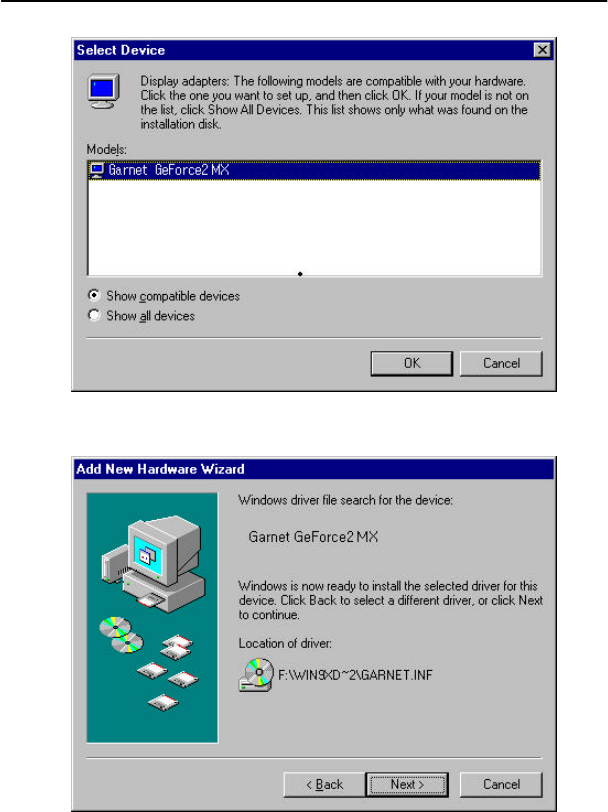
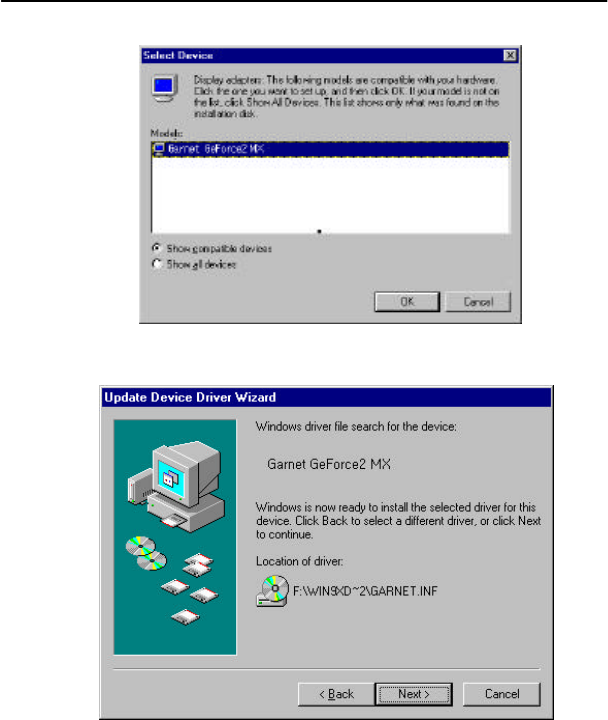
11) Select Garnet Geforce2 MX and click <OK> in the following picture.
GARNET GeForce2 MX
18
12) Click <next> in the following picture.
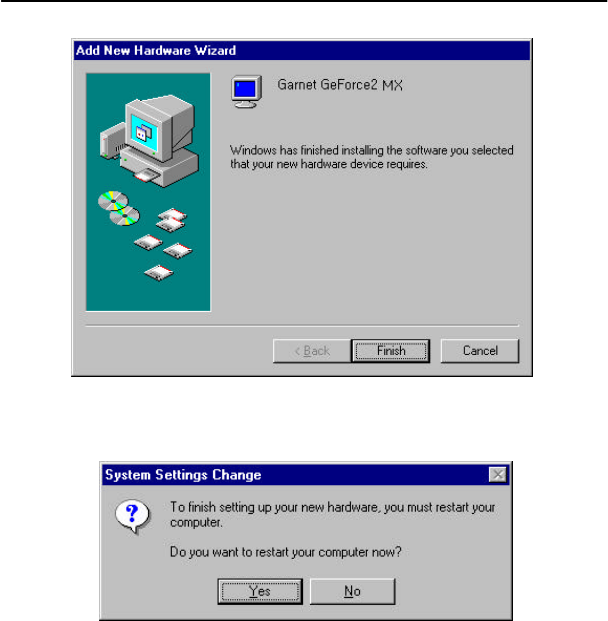
14) Click <Finish> in the following picture.
GARNET GeForce2 MX
19
15) Click <Close> in the following picture

GARNET GeForce2 MX
20
16) Please click <Close> in the following picture.
18) Please click <Yes> in the following picture.

GARNET GeForce2 MX
21
2.2.2 Driver Installation in Windows 2000
?
Windows 2000 installation driver is zipped. Please comply
with following instructions.
1) Click <My Computer> in the <Desktop> and double-click CD Rom
Drive in the following picture.
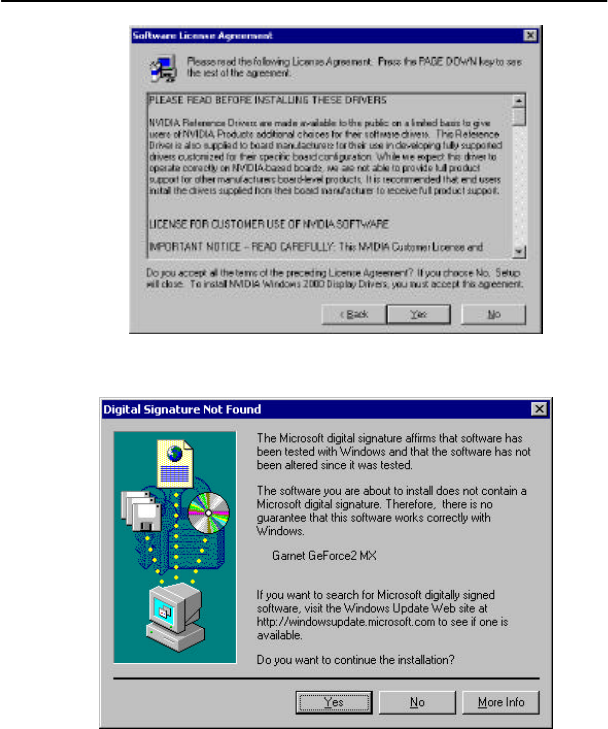
2) Double click <Win2000 DRIVER> folder in the following picture.
3) Double click setup.exe file in the following picture.
GARNET GeForce2 MX
22
4) Driver installation is being set up in the following picture.
5) Click <Next> in the following picture.
GARNET GeForce2 MX
23
6) Please click <Yes> in the following picture.
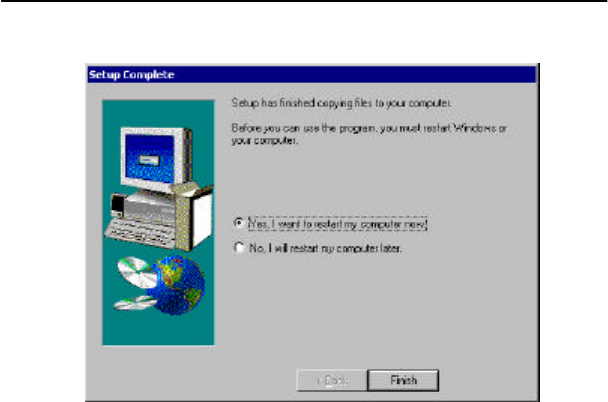
7) Click <Finish> in the following picture.
GARNET GeForce2 MX
24
8) Driver Installation is finished.
2.2.3 Driver update in Windows NT 4.0
In order to install GARNET GeForce2 MX Twin View in Windows NT 4.0,
Service pack Version 4 or over is a must. Service Pack 4 can be
downloaded in web site www.microsoft.com.
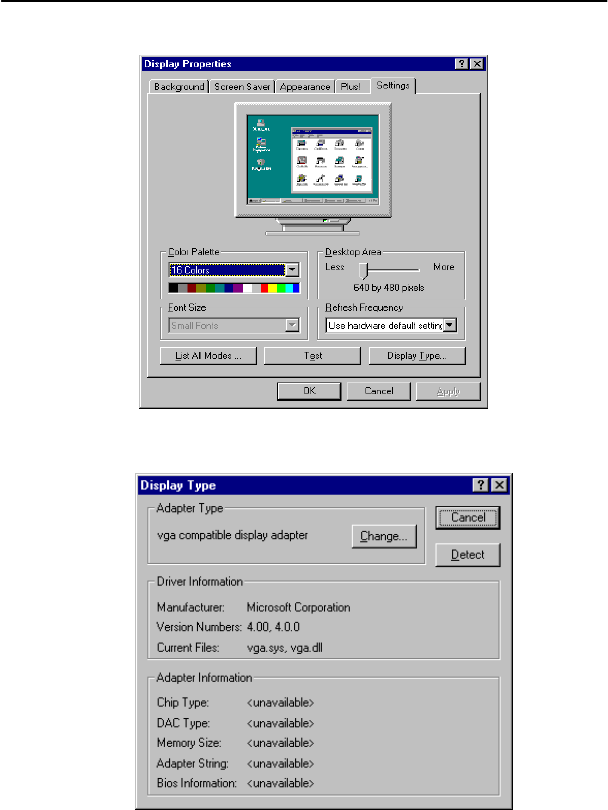
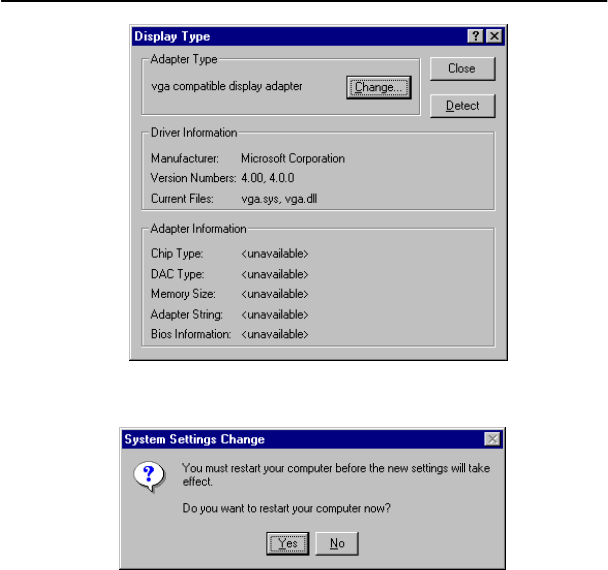
1) Click <My Computer>, <Control Panel>, <Display> and <Display
type> in the following picture.
GARNET GeForce2 MX
25
2) Click <Change> in the following picture.
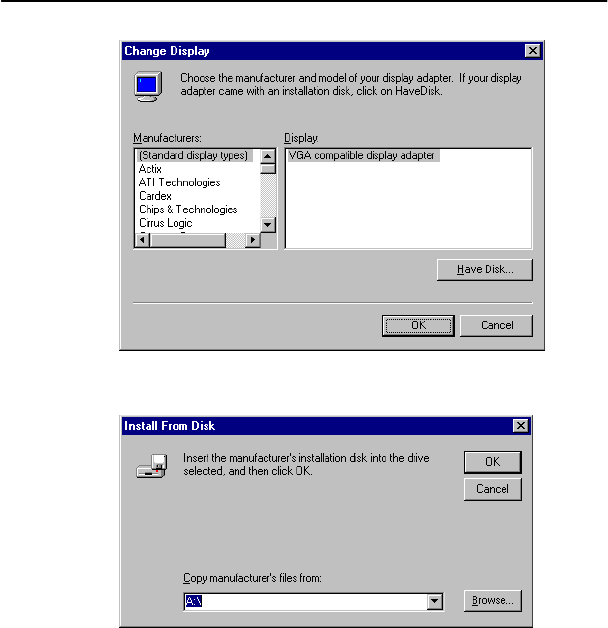
3) Click <Have disk…> in the following picture.
GARNET GeForce2 MX
26
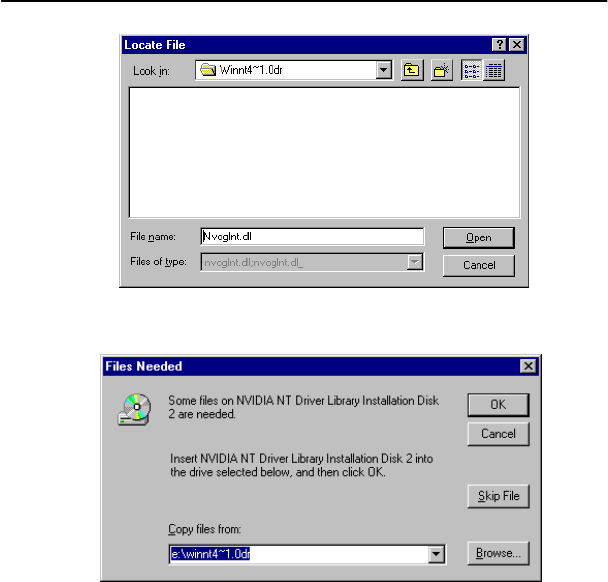
4) Click <Browse…> in the following picture.
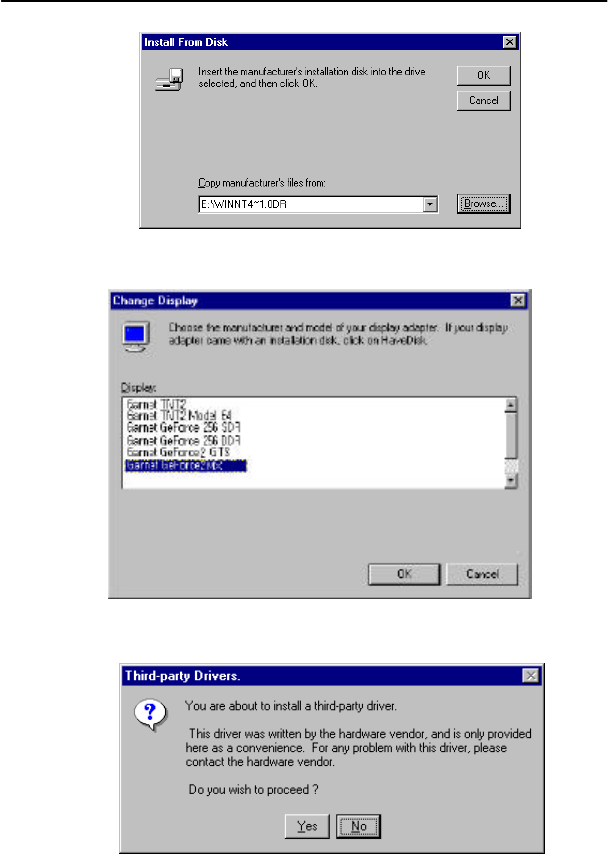
5) Put Installation CD and Click <Browse> in the following picture.
GARNET GeForce2 MX
27
6) Click <Garnet GeForce2 MX> and <OK> in the following picture.
7) Click <Yes> in the following picture.
GARNET GeForce2 MX
28
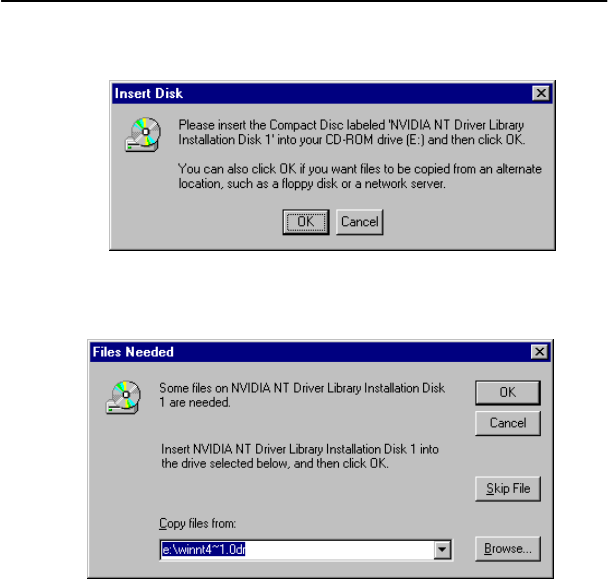
8) Click <OK> in the following picture.
9) Click <Browse> in the following picture.
10) Click <Open> in the following picture.
GARNET GeForce2 MX
29
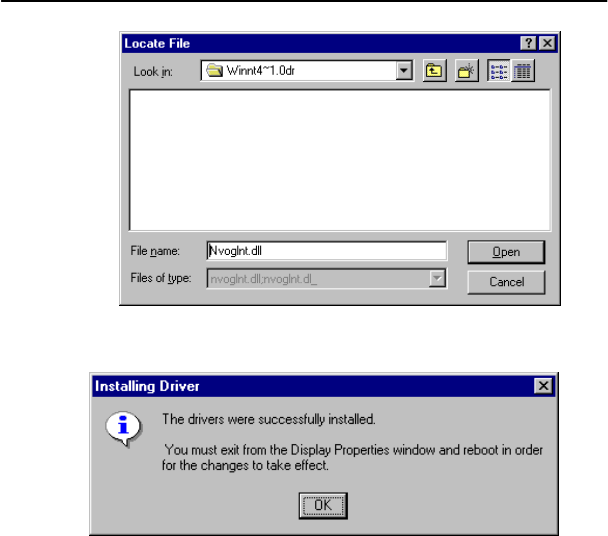
11) Click <OK> in the following picture.
12) Click <Open> in the following picture.
GARNET GeForce2 MX
30
13) Click <OK> in the following picture.
14) Click <Close> in the following picture.
GARNET GeForce2 MX
31
15) Click <Yes> in the following picture.
16) Driver installation is finished.
2.3 Installation of DirectX 7.0a
If DirectX 7.0a is already installed in your PC, you may skip this
section and do not have to re-install DirectX 7.0a. And if you
have to install new DirectX 7.0a, Please follow below
procedures.
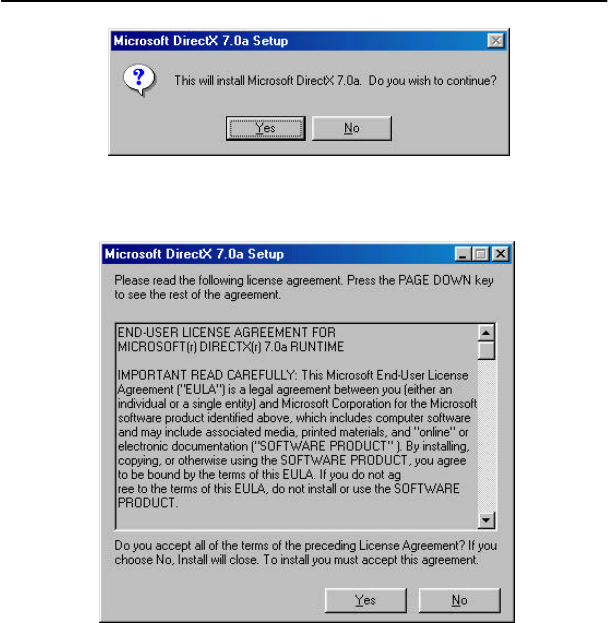
1) Please double click dx7aeng.exe in \Dirctx7.0a\Directx directory and
click <Yes> in the following picture.
GARNET GeForce2 MX
32
2) Click <Yes> in the following picture and the system will restart
booting automatically and installation will be finished.