Getac Technology UHFRFID T800-UHF V3.0 User Manual
Getac Technology Corporation T800-UHF V3.0 Users Manual
Users Manual
User Manual
System Overview
TM-915 is designed of 902MHz to 928MHz reader module for UHF RFID, usually
applied to PC . Our advance technology delivers small, reliable, easy to design and
cost-effective EPC C1G2 UHF reader module solution. TM-915 also compatible with
ISO-18000-6C. Its simplified Uart interface, low power consumption and high
performance, make it easily to integrate any device with UHF technology.
PC system: Windows XP/Vista/7/8 (32 & 64-bit)
USB to UART driver
Above Net_Framework_4.0
FAVEPC Reader Utility software
1. First install PL2303_Prolific_DriverInstaller_v1_12_0 file. The file download Web
side refer to the below
http://www.prolific.com.tw/UserFiles/files/PL2303_Prolific_DriverInstaller_v1_14_0.zip
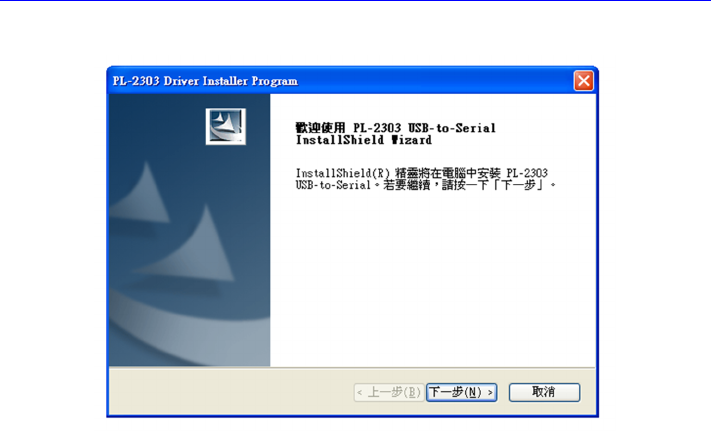
2. Install process:
Step 1: Next
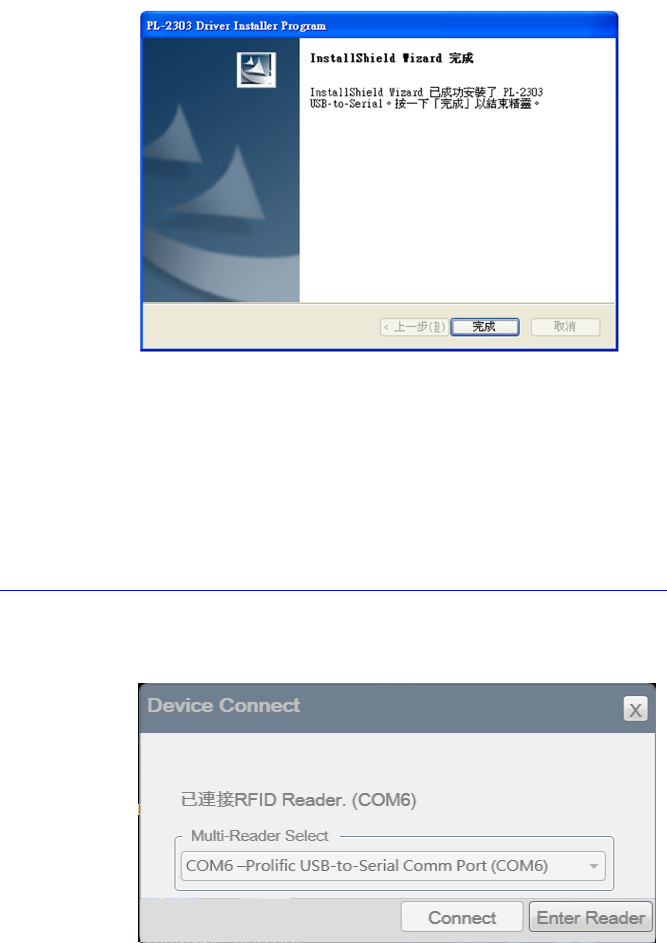
Step 2: Finish and PC restart
3. Install the above Net_Framework_4.0 file,The file download Web side refer to
the below
https://www.microsoft.com/zh-tw/download/details.aspx?id=17718
4. USB Reader plug to PC USB port and Run Reader Utility software,refer to the
below:
Check the box【Enter Reader】and Enter the operating window.
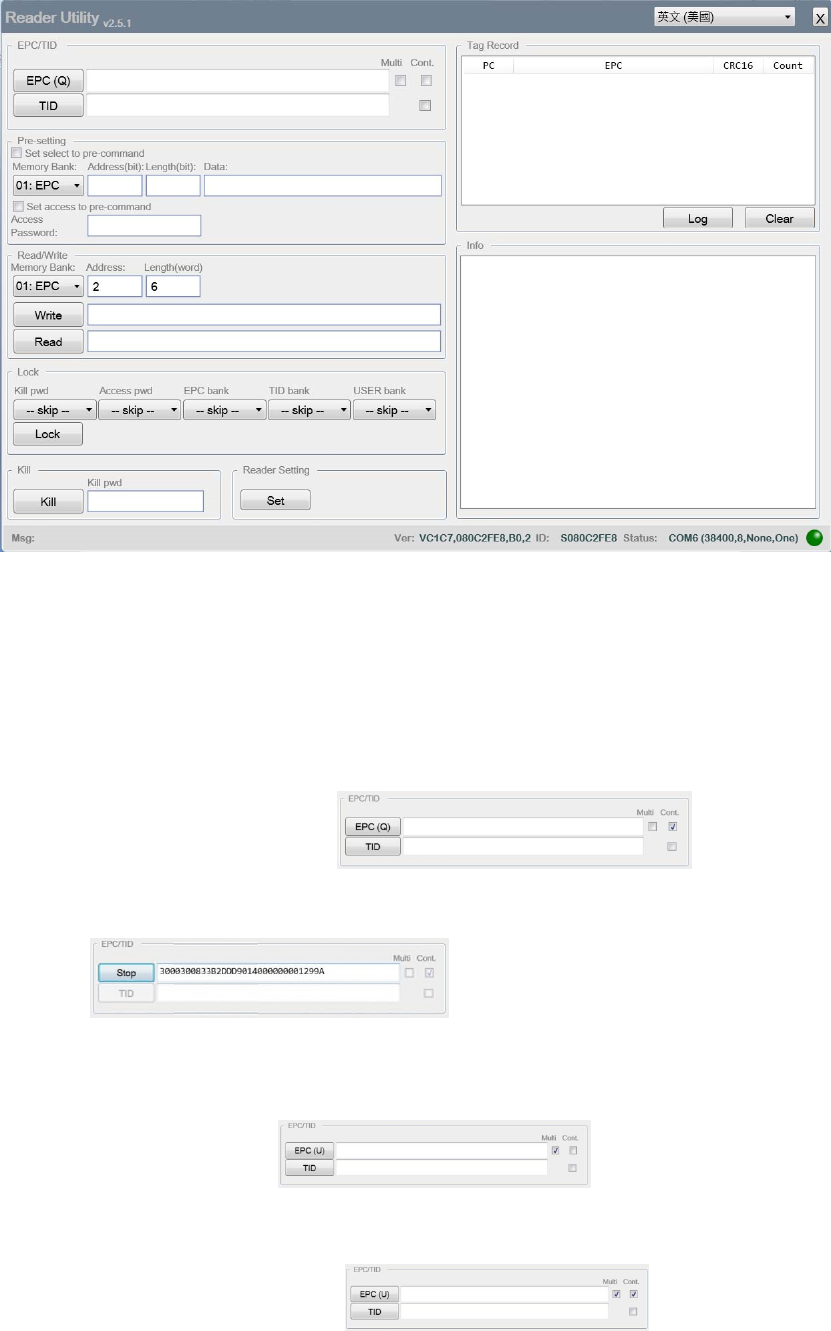
Operating command refers to the below:
1.1 Q command:
Read EPC data from single TAG. Check the box【EPC(Q)】. It can read TAG EPC
data.
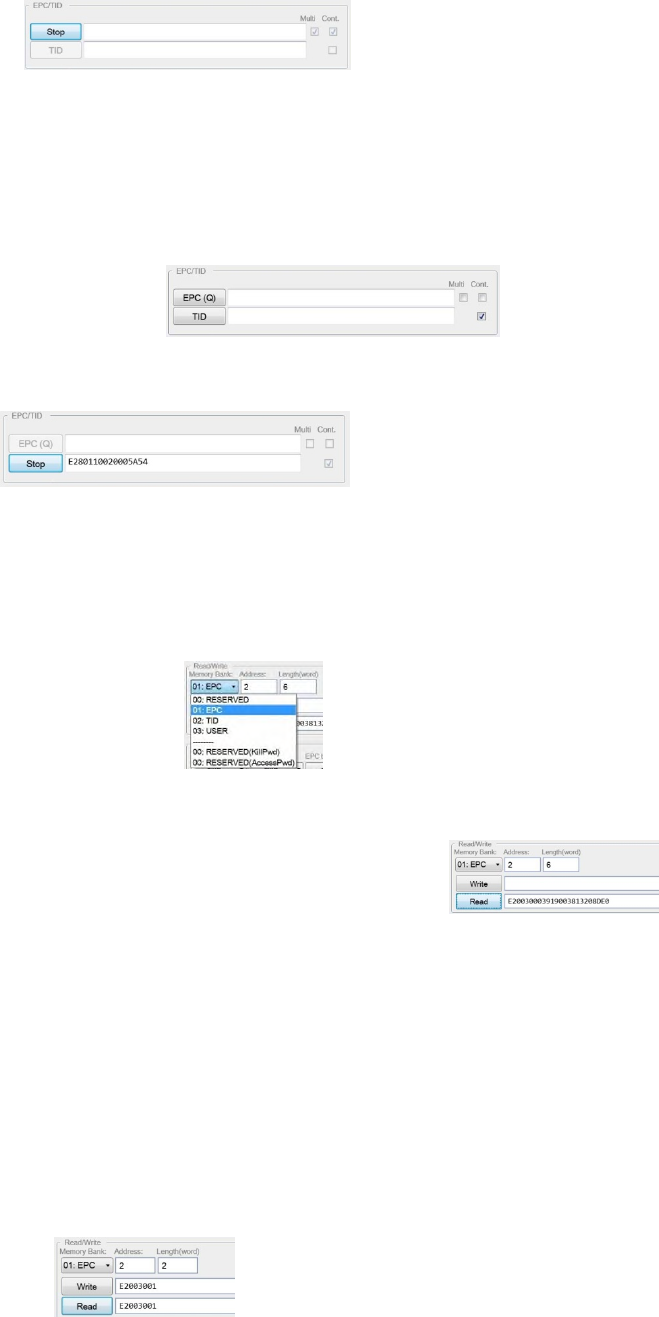
If it need continue to read single TAG. First check the box【Cont.】and check
the box【EPC(Q)】again.
Check the box【STOP】. It stops to read the TAG EPC.
1.2 U command
Read many EPC data from multi-TAG. First check the box【Multi】and check
the box【EPC(U)】
If it need continue to read Multi-TG. First check the box【Cont.】and【Multi】,
check the box【EPC(U)】.
check the box【STOP】. It stops to read multi TAG.
1.3 【TID】button
Real command is <LF>R2,0,4<CR>. It can see the real command in Info
windows at lower right corner. The【TID】button is used to read single TAG.
If it need continue to read single TAG, check the box【Cont.】and check
thebox【TID】.
check the box【STOP】. It stops to read multi TAG.
1.4 R command (Read operation):
1.4.1 First select the 【Memory Bank】,Drop-down menu:【00:RESERVED】
【01:EPC】【02:TID】【03:USER】【00:RESERVED KillPwd】【00:RESERVED
AccessPwd】
1.4.2 Enter number in【Address】and【Length(word)】
1.4.3 Check the Box【Read】to get the data.
1.5 W command (Write operation):
1.5.1 First select the【Memory Bank】
1.5.2 Enter number in【Address】and 【Length(word)】
1.5.3 Enter the HEX data to the write windows
1.5.4 Check the box【Write】. The result show in Info windows at lower right
corner. If it is right, it show the <LF>W<OK><CR><LF>.
1.5.5 Check the box【Read】. It can get the data if it writes data to the TAG.

1.6 Lock operation
1.6.1 Check the box from Kill pwd options. It can select four items.
1.6.1.1 【skip】:not change
1.6.1.2 【Readable and writable】:TAG can be Readable and writable
1.6.1.3 【Permanently Readable and writable】:TAG can be Permanently
Readable and writable. It can’t be change the status after the
setting.
1.6.1.4 【Need password to readable and writable】:TAG need password
to readable and writable
1.6.1.5 【Need password to permanently readable and writable】:TAG
need password to permanently readable and writable. It can’t be
change the status after the setting.
1.6.2 Check the box from Access pwd options. It can select four items.
1.6.2.1 【skip】:not change
1.6.2.2 【Readable and writable】:TAG can be Readable and writable
1.6.2.3 【Permanently Readable and writable】:TAG can be Permanently
Readable and writable. It can’t be change the status after the
setting.
1.6.2.4 【Need password to readable and writable】:TAG need password
to readable and writable
1.6.2.5 【Need password to permanently readable and writable】:TAG
need password to permanently readable and writable. It can’t be
change the status after the setting.
1.6.3 Check the box from EPC bank options. It can select four items.
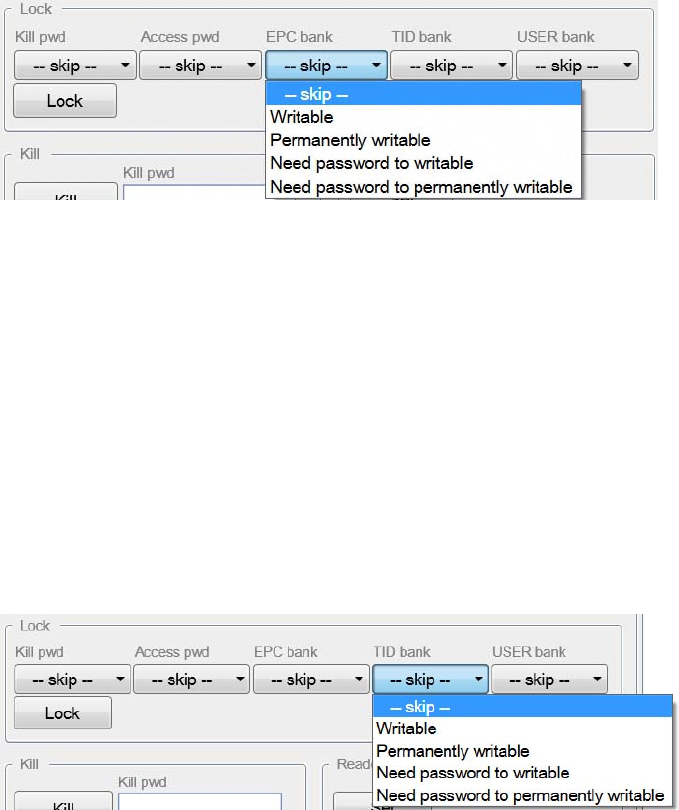
*EPC data always can be read.
1.6.3.1 【skip】:not change
1.6.3.2 【Writable】:TAG can be writable
1.6.3.3 【Permanently writable】:TAG can be permanently writable. It
can’t be change the status after the setting.
1.6.3.4 【Need password to writable】:TAG need password to writable
1.6.3.5 【Need password to permanently writable】:TAG need password
to permanently writable. It can’t be change the status after the
setting.
1.6.4 Check the box from TID bank options. It can select four items.
*TID data always can be read. Normal TAG TID can’t be written. It need refer to the TAG IC
specification.
1.6.4.1 【skip】:not change
1.6.4.2 【Writable】:TAG can be writable
1.6.4.3 【Permanently writable】:TAG can be permanently writable. It
can’t be change the status after the setting.
1.6.4.4 【Need password to writable】:TAG need password to writable
1.6.4.5 【Need password to permanently writable】:TAG need password
to permanently writable. It can’t be change the status after the
setting.
1.6.5 Check the box from USER bank options. It can select four items.
*USER bank data always can be read.
1.6.5.1 【skip】:not change
1.6.5.2 【Writable】:TAG can be writable
1.6.5.3 【Permanently writable】:TAG can be permanently writable. It
can’t be change the status after the setting.

1.6.5.4 【Need password to writable】:TAG need password to writable
1.6.5.5 【Need password to permanently writable】:TAG need password
to permanently writable. It can’t be change the status after the
setting
1.6.6 For example. We will select (Need password to readable and writable)
option at all item. Check the box【Lock】. The result show in Info
windows at lower right corner. If it is right, it show the
<LF>L<OK><CR><LF>.
1.7 Kill Password Setting
1.7.1 At【Memory Bank】of Read/Write operation item,Drop-down menu
select【00:RESERVED KillPwd】item.
1.7.2 Check the box【Read】,Default value is 0000000
1.7.3 For example. Write password is 12345678,check the Box【Write】. The
result show in Info windows at lower right corner. If it is right, it show
the <LF>W<OK><CR><LF>
1.8 Access Password Setting
1.8.1 At【Memory Bank】of Read/Write operation item,Drop-down menu
select【00:RESERVED AccessPwd】
1.8.2 Check the box【Read】,Default value is 0000000
1.8.3 For example. Write password is 12345678,check the Box【Write】. The
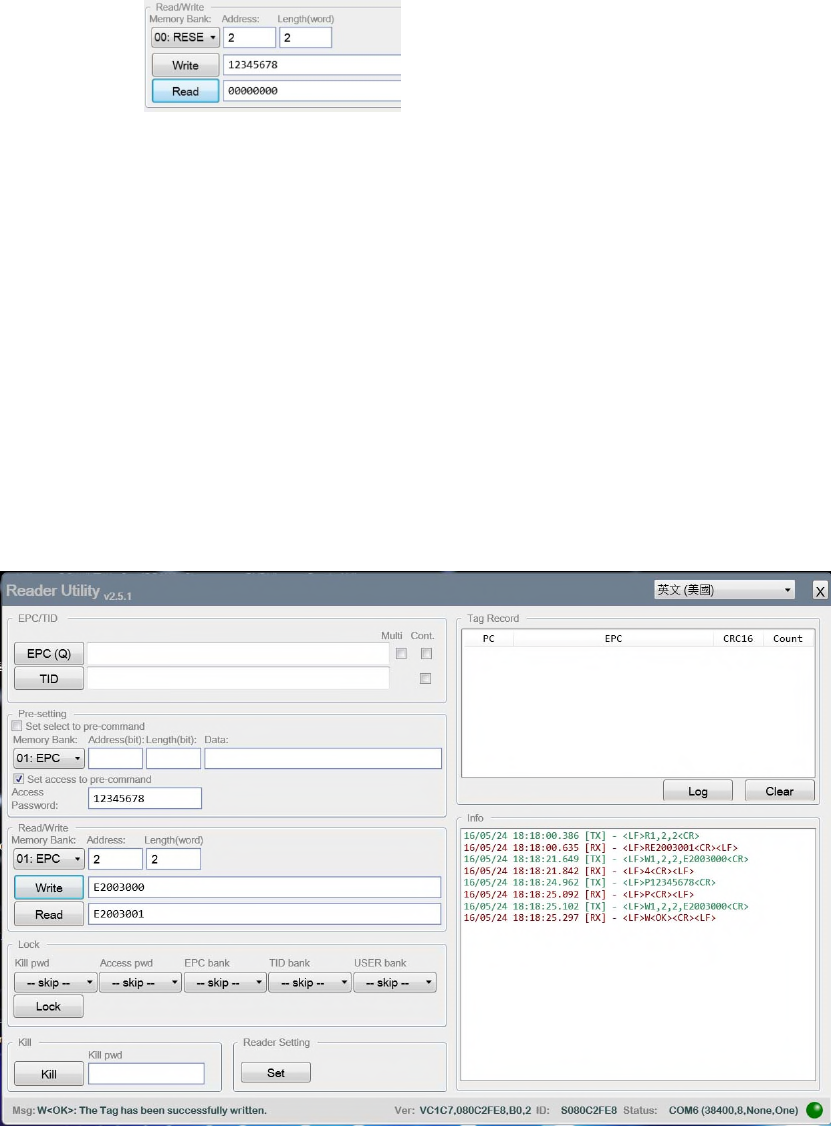
result show in Info windows at lower right corner. If it is right, it show
the <LF>W<OK><CR><LF>
1.9 P command:
1.9.1 The all operations are be locked the password. So we need use P
command before the other command operates.
1.9.2 Write the password (12345678) at Access Password item
1.9.3 Check the box【Set access to pre-command】
1.9.4 We can read TAG to get the EPC data.
1.9.5 We can see the information in Info windows at lower right corner. The
R command. It isn’t need the password to read EPC data. Because the
EPC data always can be read. But we need write the ECP data. If it
doesn’t run the P command, it will resend the error code (4). It means
the memory is locked. So we run the P command first and
immediately run W command. It can write data to EPC bank memory.
1.10 Kill command
1.10.1 Enter kill password 12345678 at Kill pwd item
1.10.2 Check the box【Kill】. The TAG will be kill and can’t be used again.
1.11 T command ---Select TAG operation
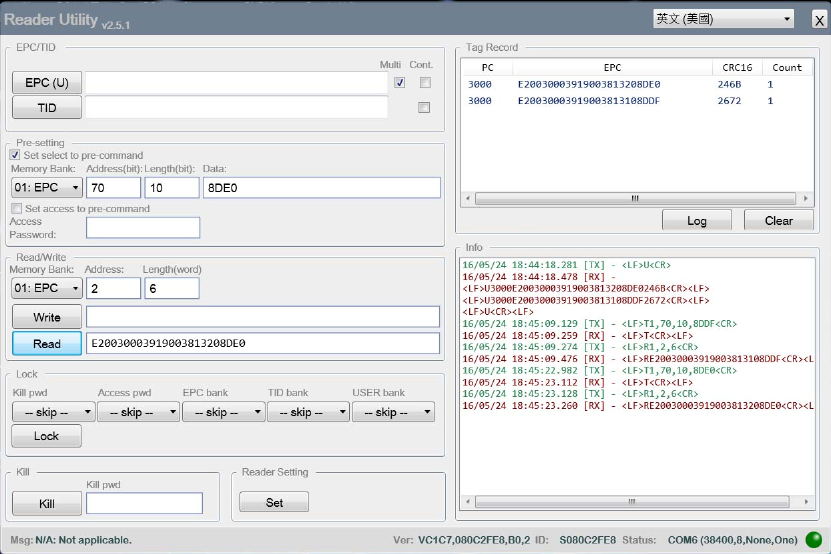
1.11.1 It need select one TAG operation at Multi-TAG. It need use the T
Command to select specific TAG.
1.11.2 Check the box【Multi】first and check the box【EPC(U)】
1.11.3 It show the Multi-TAG data at Top right of the window
1.11.4 At Pre-setting item
1.11.4.1 Check the box【Set select to pre-command】
1.11.4.2 Select【01:EPC】at Memory Bank
1.11.4.3 Enter number(70) at Address(bit) *Warning : Address unit is
bit, the value is HEX. So HEX(7*16)=HEX(112)=70 hex
1.11.4.4 Enter number (10) at Length(bit) * Warning : Length unit is
bit, the value is HEX. So HEX(1*16)=HEX(16)=10 hex
1.11.4.5 Enter last four numbers of EPC at Data item. For example. The
number is 8DE0 or 8DDF.
1.11.5 At Read/Write item
1.11.5.1 Select【01:EPC】at Memory Bank
1.11.5.2 Check the box【Read】. We can get the EPC data by selected TAG
1.11.6 It shows the command process in Info windows at lower right corner.
Federal Communication Commission Interference Statement
This equipment has been tested and found to comply with the limits for a Class B
digital device, pursuant to Part 15 of the FCC Rules. These limits are designed to
provide reasonable protection against harmful interference in a residential
installation. This equipment generates, uses, and can radiate radio frequency energy
and, if not installed and used in accordance with the instructions, may cause harmful
interference to radio communications. However, there is no guarantee that
interference will not occur in a particular installation. If this equipment does cause
harmful interference to radio or television reception, which can be determined by
turning the equipment off and on, the user is encouraged to try to correct the
interference by one or more of the following measures:
•Reorient or relocate the receiving antenna.
•Increase the separation between the equipment and receiver.
•Connect the equipment into an outlet on a circuit different from that to which the
receiver is connected.
•Consult the dealer or an experienced radio/TV technician for help.
FCC Caution:
This device complies with Part 15 of the FCC Rules. Operation is subject to the
following two conditions: (1) This device may not cause harmful interference, and (2)
this device must accept any interference received, including interference that may
cause undesired operation.
Statement:
Changes or modifications not expressly approved by the party responsible for
compliance could void the user’s authority to operate the equipment.
FCC Radiation Exposure Statement:
This equipment complies with FCC radiation exposure limits set forth for an
uncontrolled environment. This equipment should be installed and operated with
minimum distance 20cm between the radiator & your body.