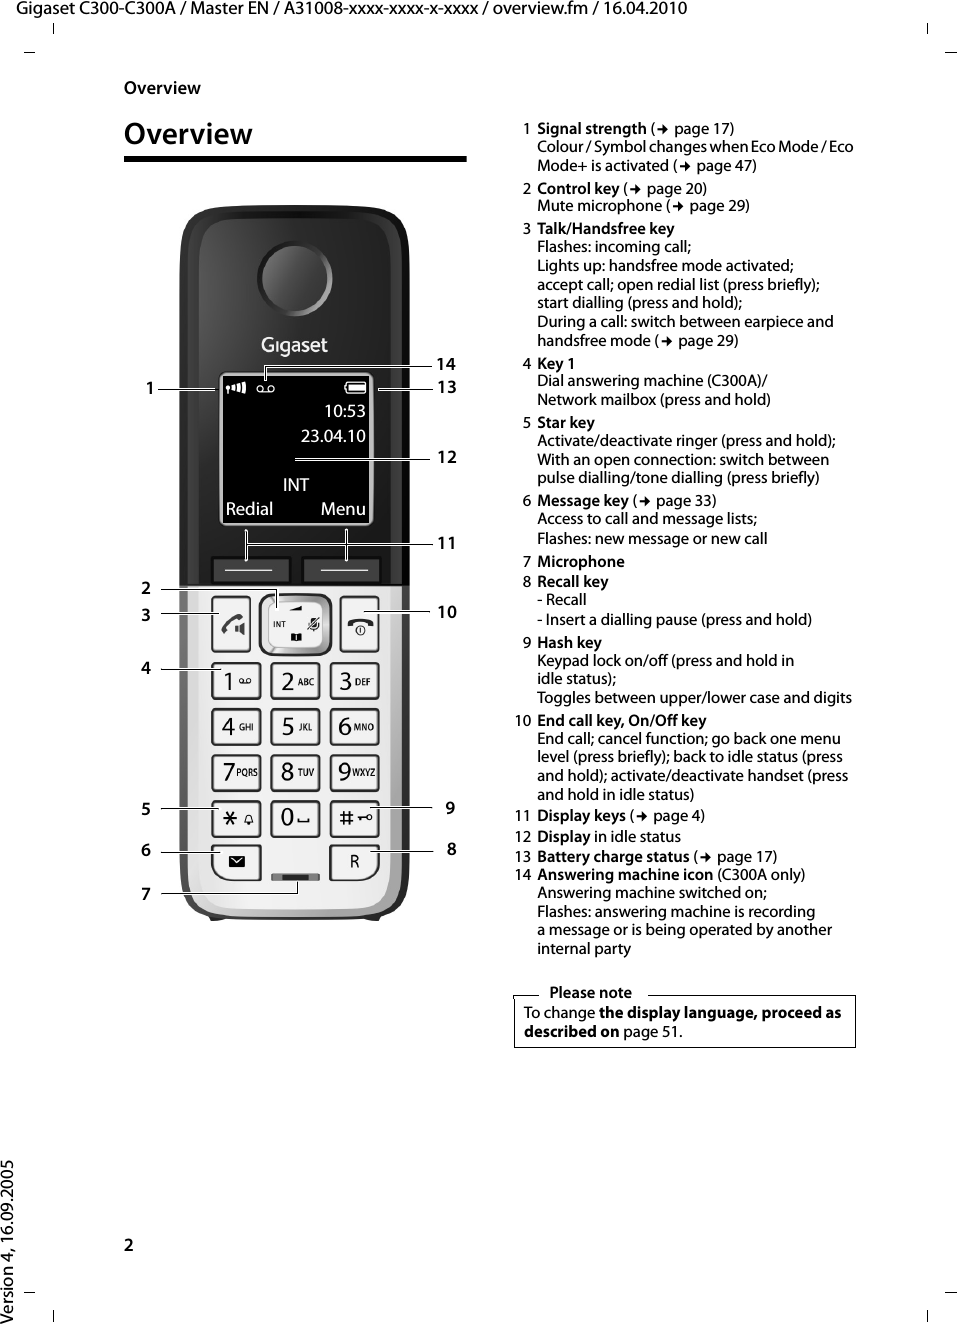
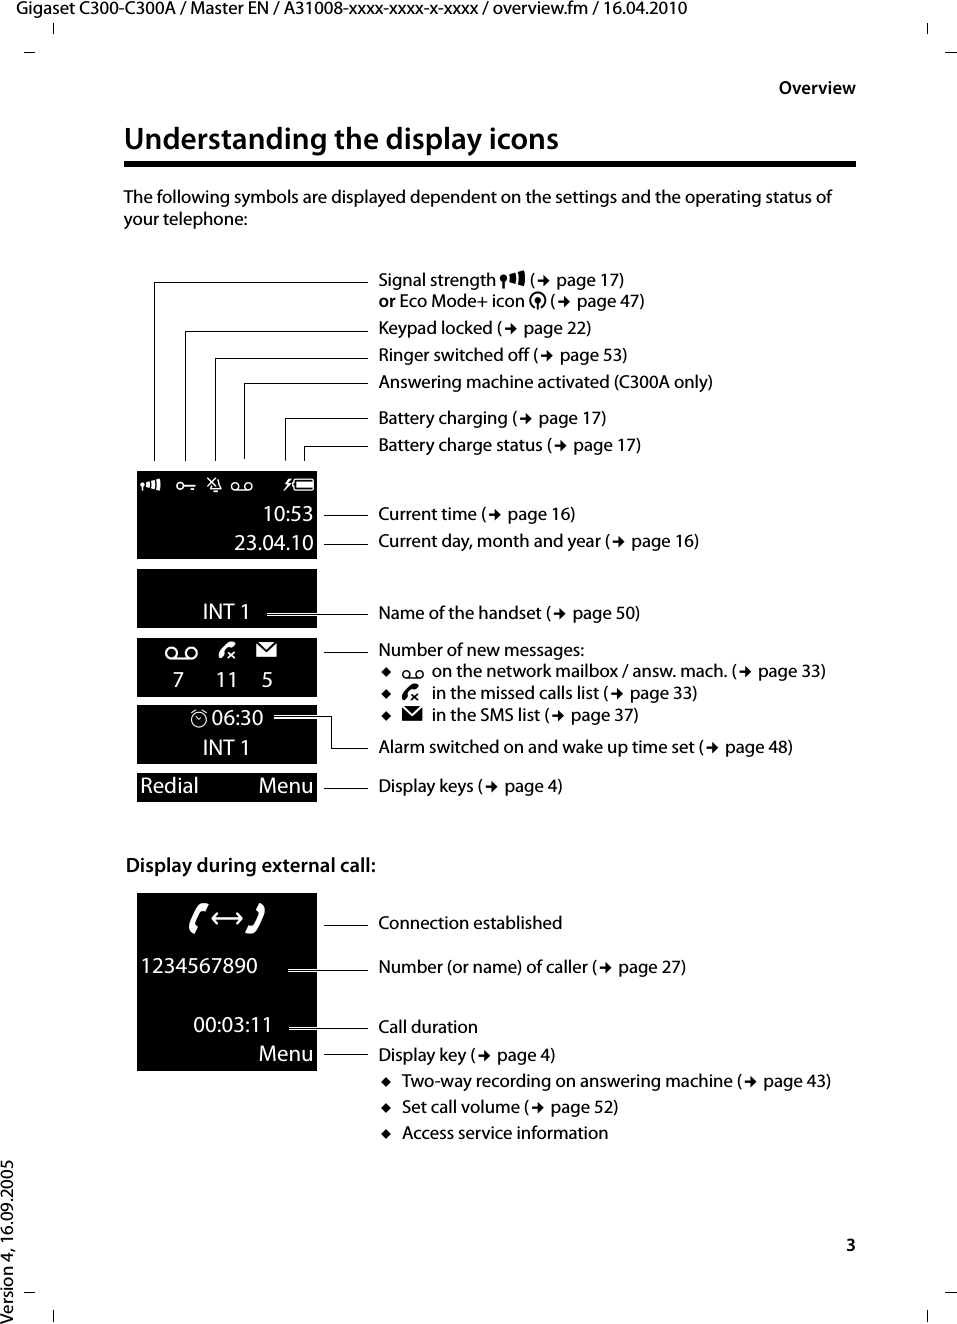
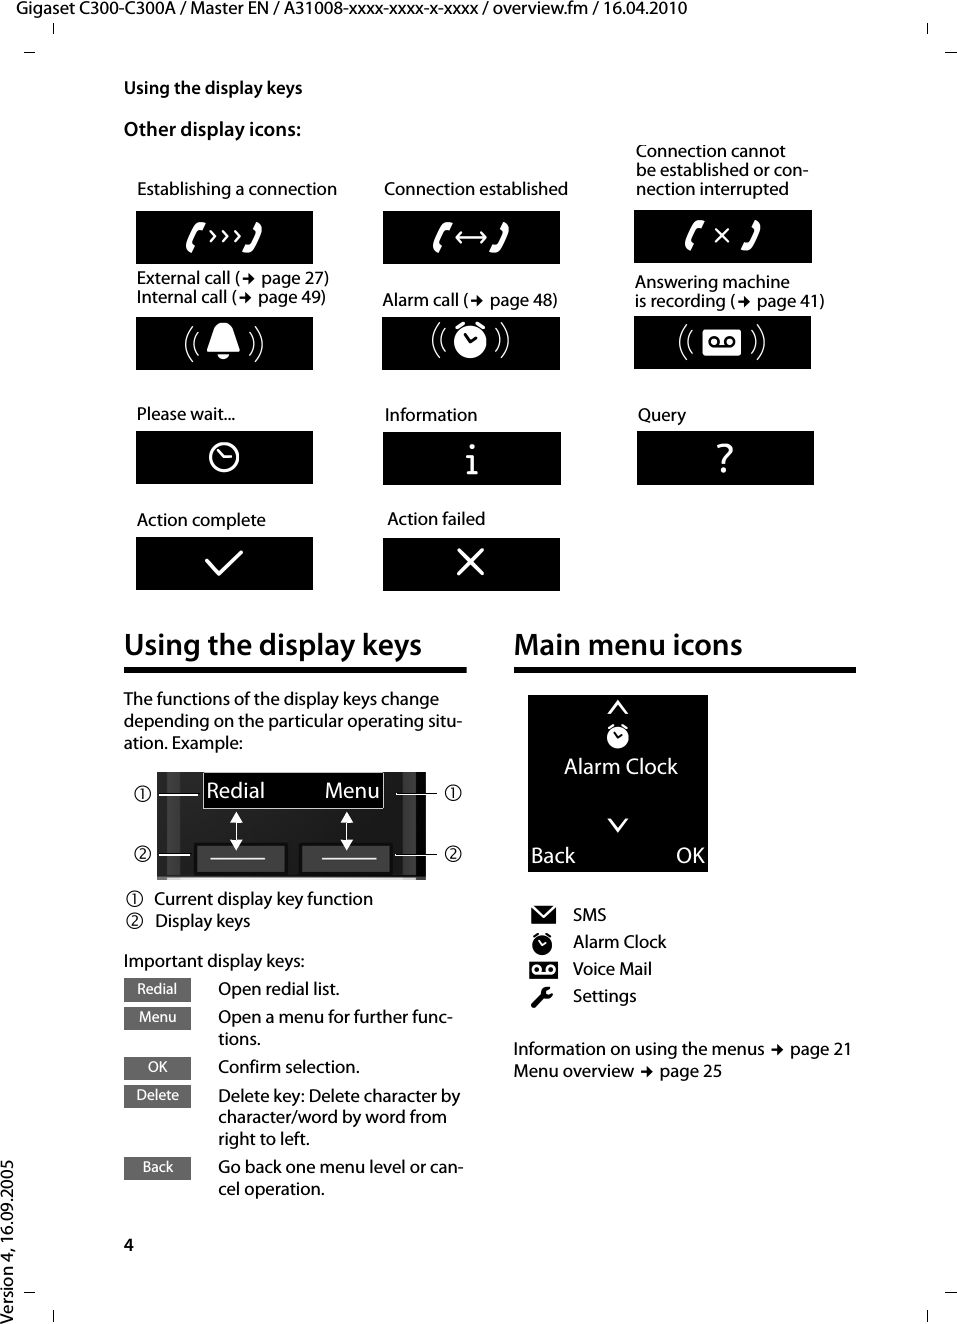
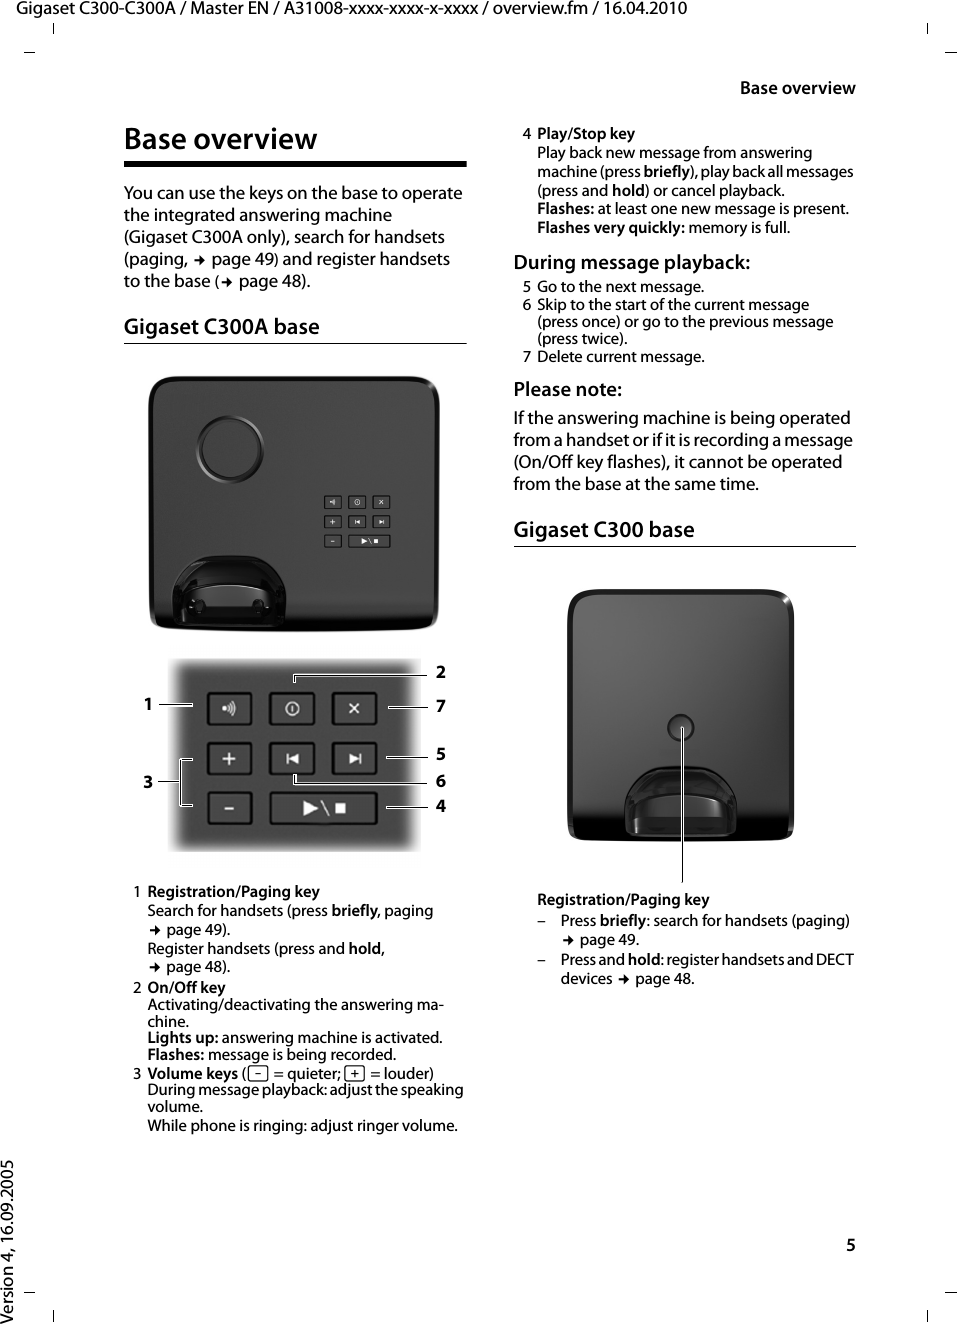
Gigaset Communications C300H UPCS Phone User Manual Master BA SL565
Gigaset Communications GmbH UPCS Phone Master BA SL565
UserManual.wiki
>
Gigaset Communications
>
C300H User Manual
User Manual
Navigation menu
Upload a User Manual
Namespaces
Wiki Guide
HTML
PDF
Info
Views
User Manual
Discussion / Help
Navigation

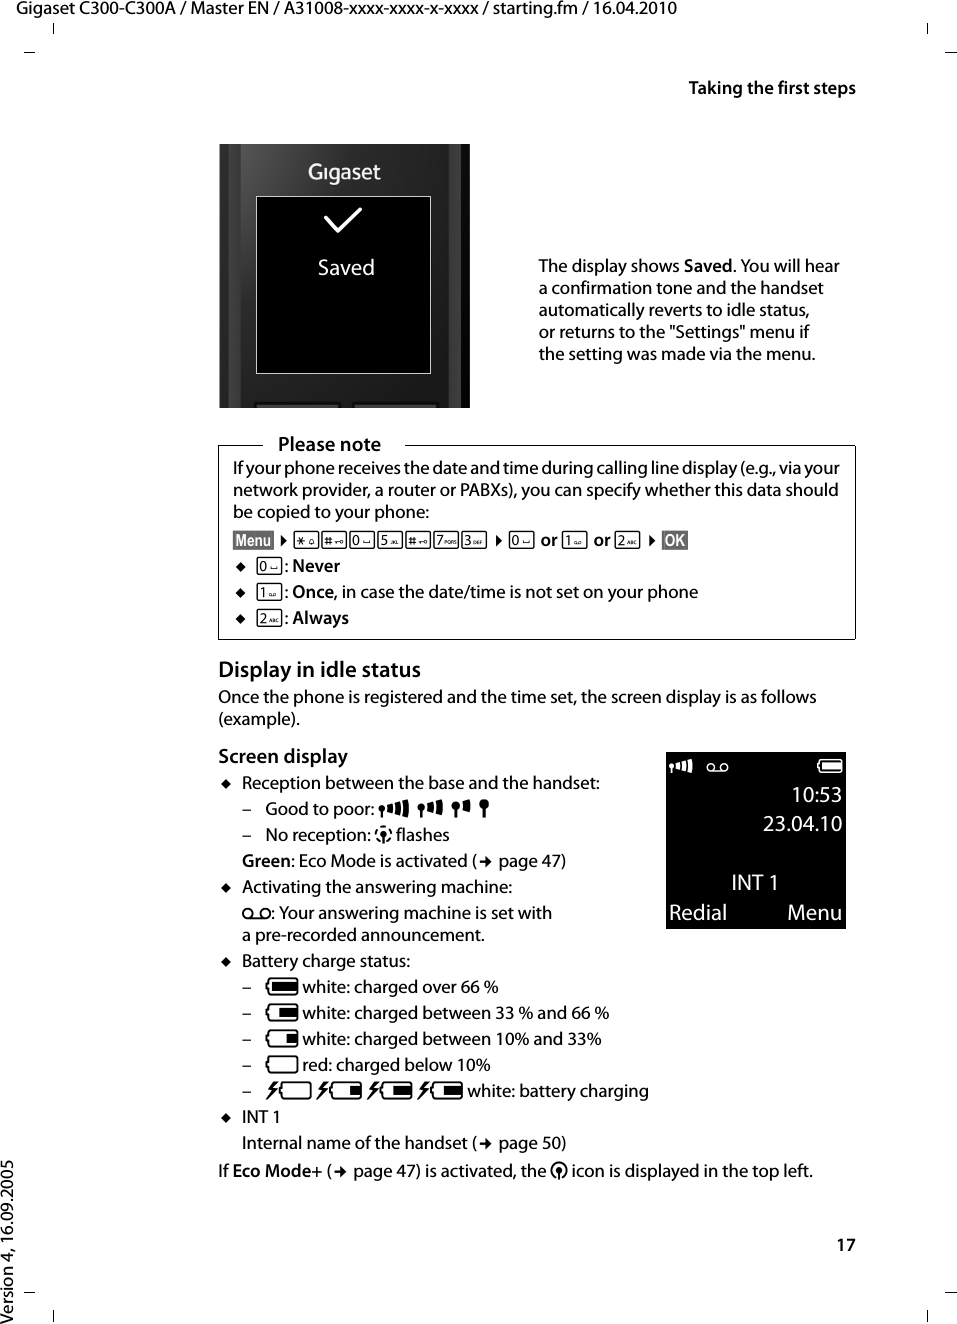
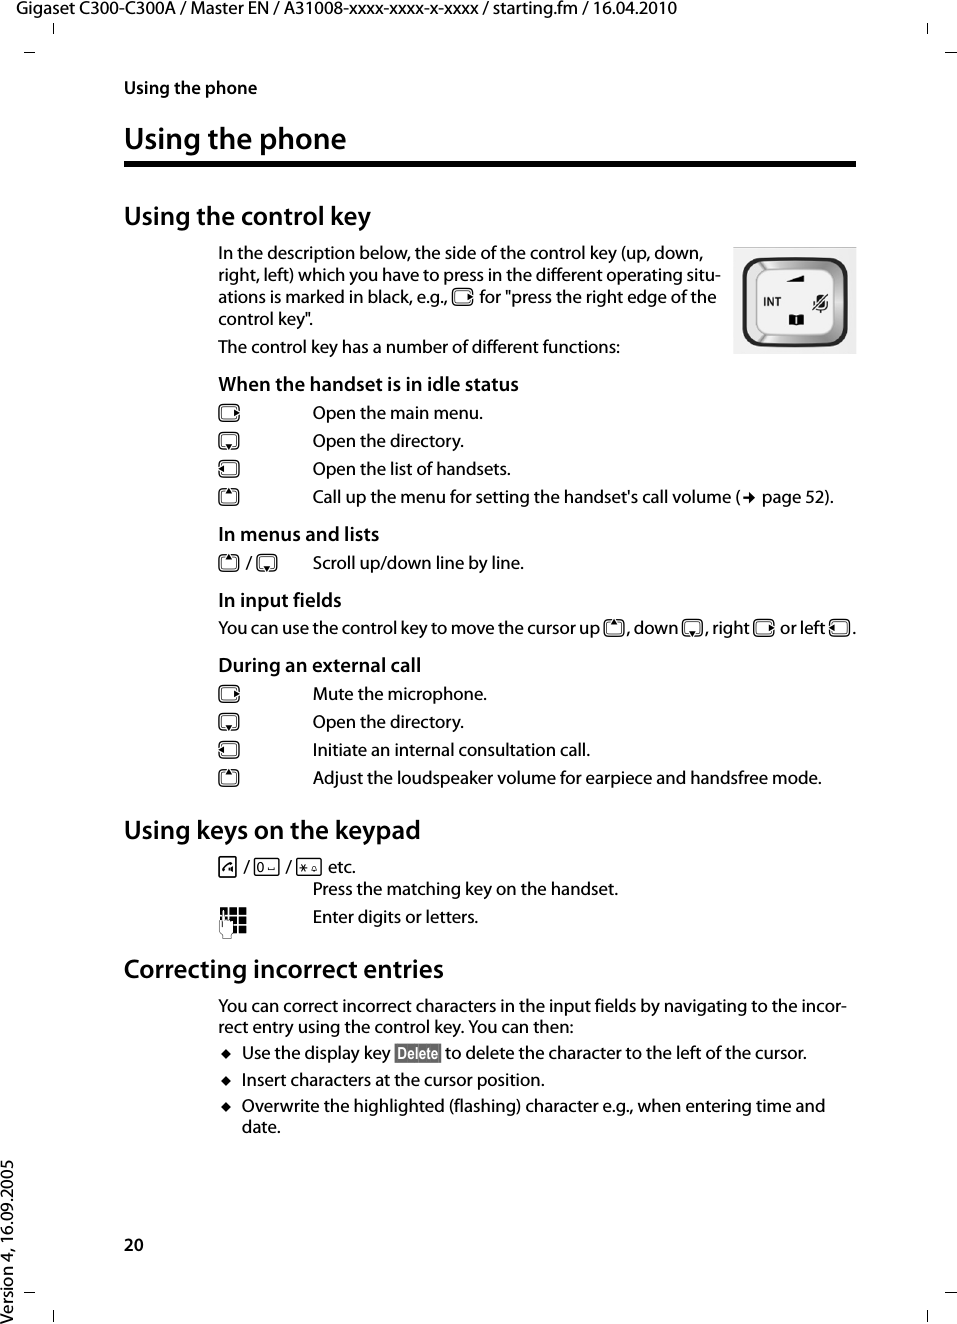
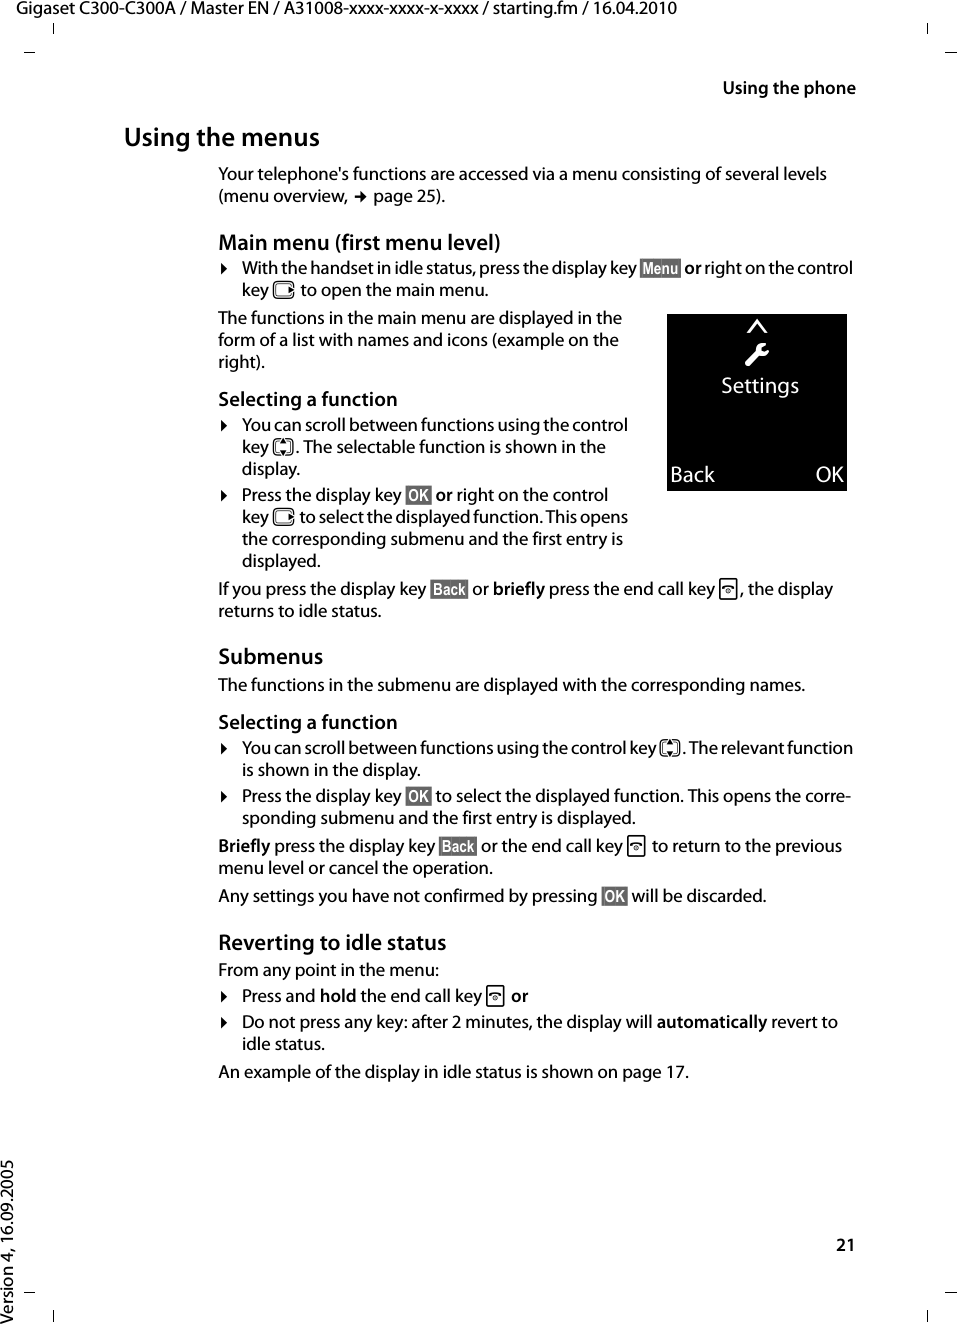
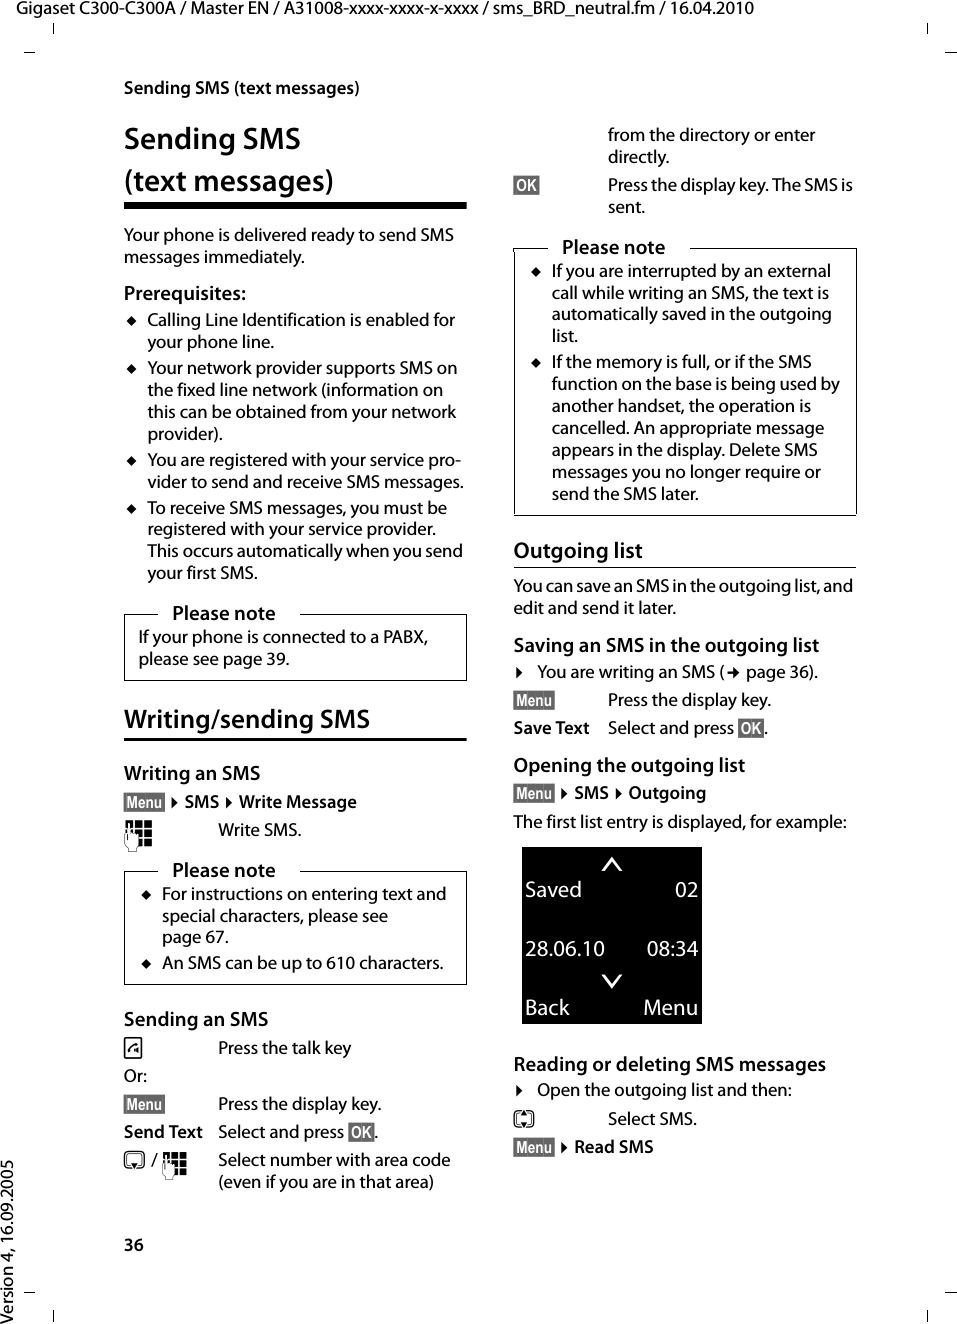
![16Taking the first stepsGigaset C300-C300A / Master EN / A31008-xxxx-xxxx-x-xxxx / starting.fm / 16.04.2010Version 4, 16.09.2005Setting the date and timeSet the date and time so that the correct date and time can be assigned to incoming calls, and so that the alarm can be used.Please noteDepending on your network provider, the date and time may be displayed automatically.Enter Date:[04.04.2010]¤Press the key below §Time§ on the display screen to open the input field. (If you have already set the time and date, open the input field via the menu ¢page 26.)The Date/Time submenu is shown on the display.¤The active input position flashes.Enter the day, month and year as an 8-digit number via the keypad, e.g., Q4Q42QQ for 4 April 2010.INT 1Redial TimeTo change the input position, e.g., to correct an entry, press right or left on the control key.¤Enter the hours and minutes in 4-digit format via the keypad, e.g., QM5for 07:15 am. Change the input position with the control key if necessary.¤Confirm with §OK§.xBack OK¤Press the key below §OK§ on the display screen to save your entry. Enter Time:[07.15]xBack OK](https://usermanual.wiki/Gigaset-Communications/C300H/User-Guide-1277149-Page-16.png)