Gigaset Communications SX762-SX765 WLAN 802.11b/g Access Point User Manual SX763
Gigaset Communications GmbH WLAN 802.11b/g Access Point SX763
UserManual.wiki
>
Gigaset Communications
>
SX762 SX765 User Manual
User Manual
Navigation menu
Upload a User Manual
Namespaces
Wiki Guide
HTML
PDF
Info
Views
User Manual
Discussion / Help
Navigation


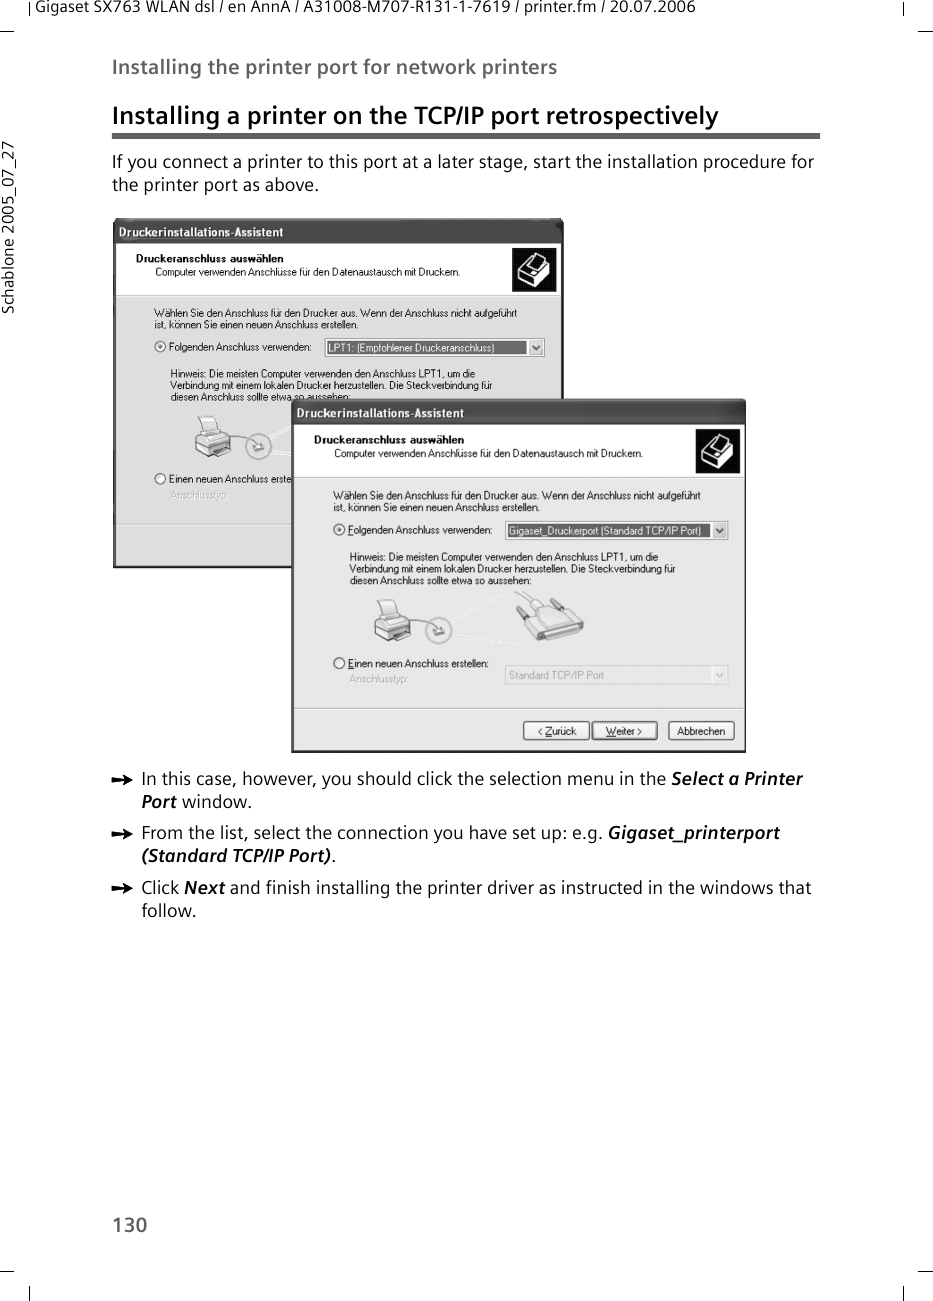
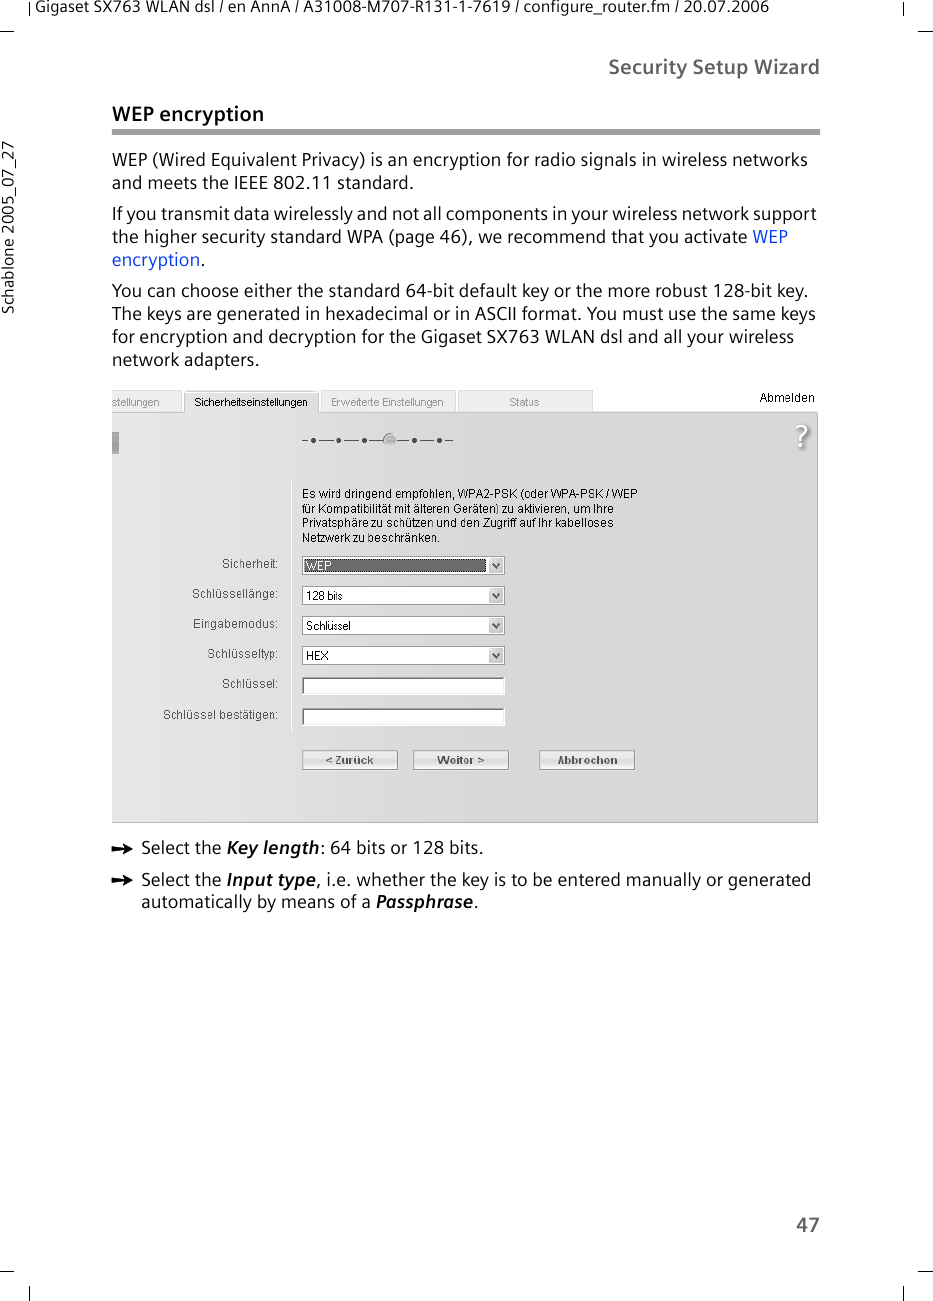
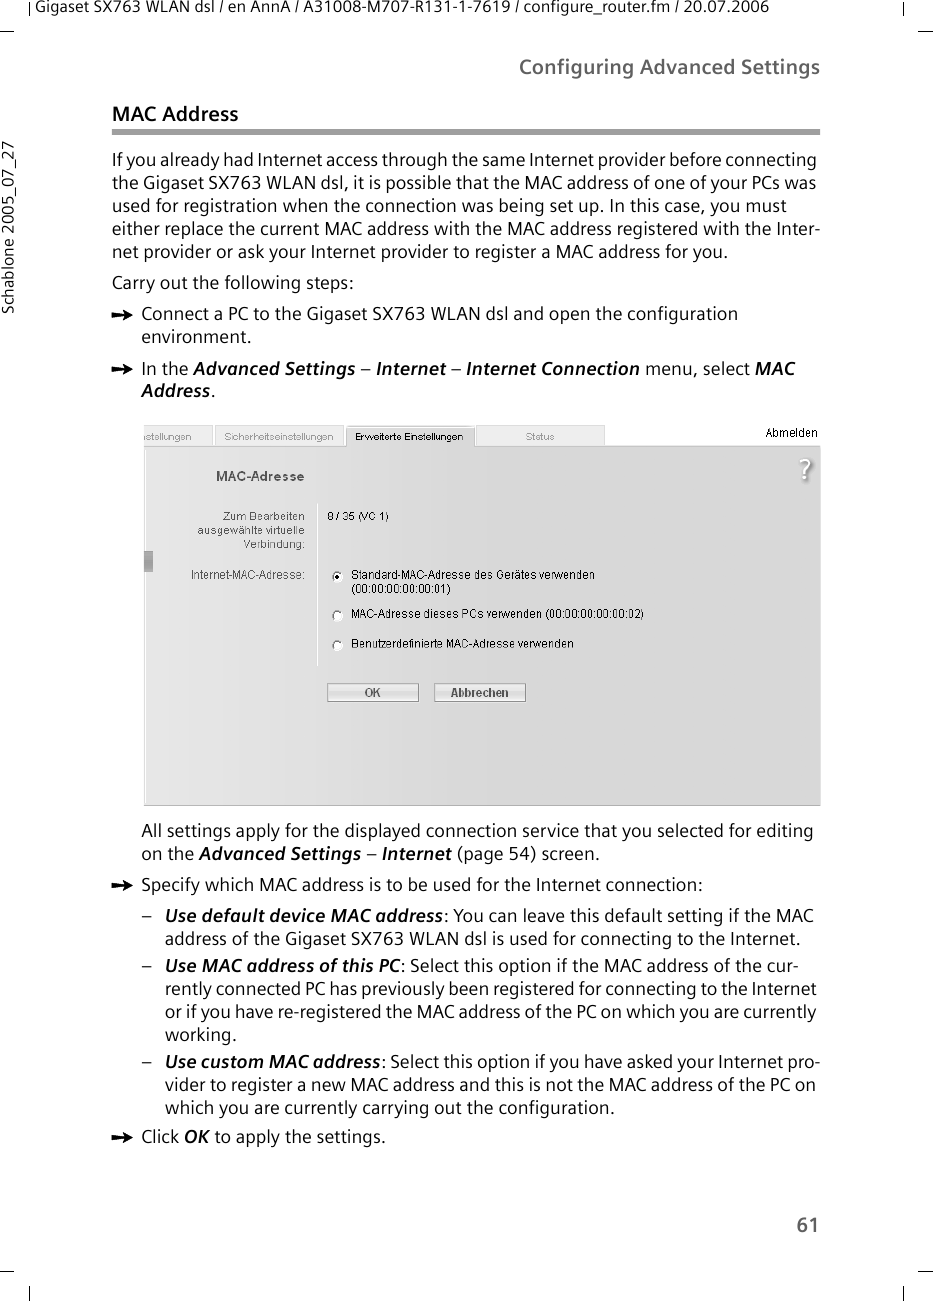
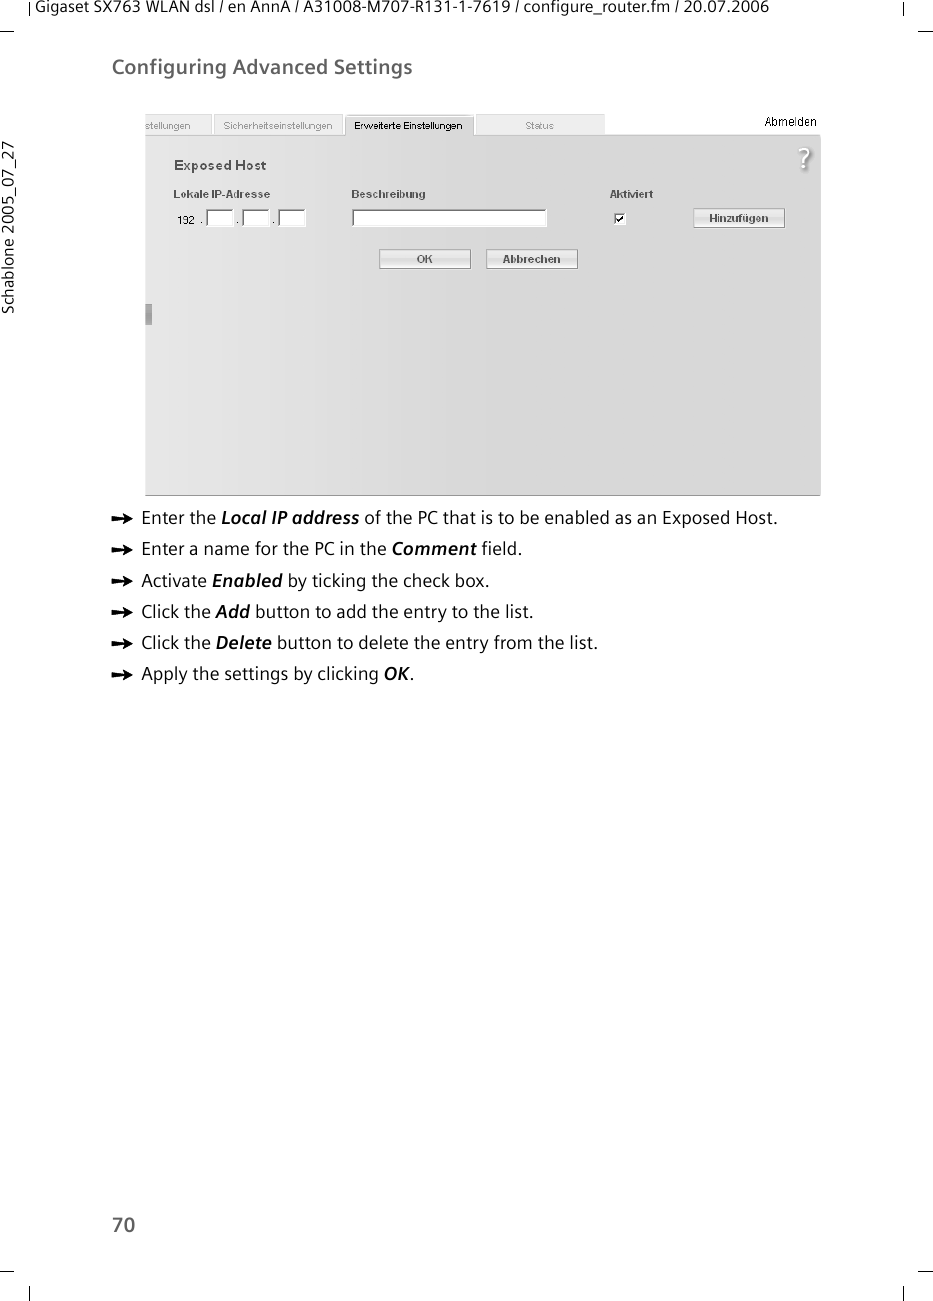
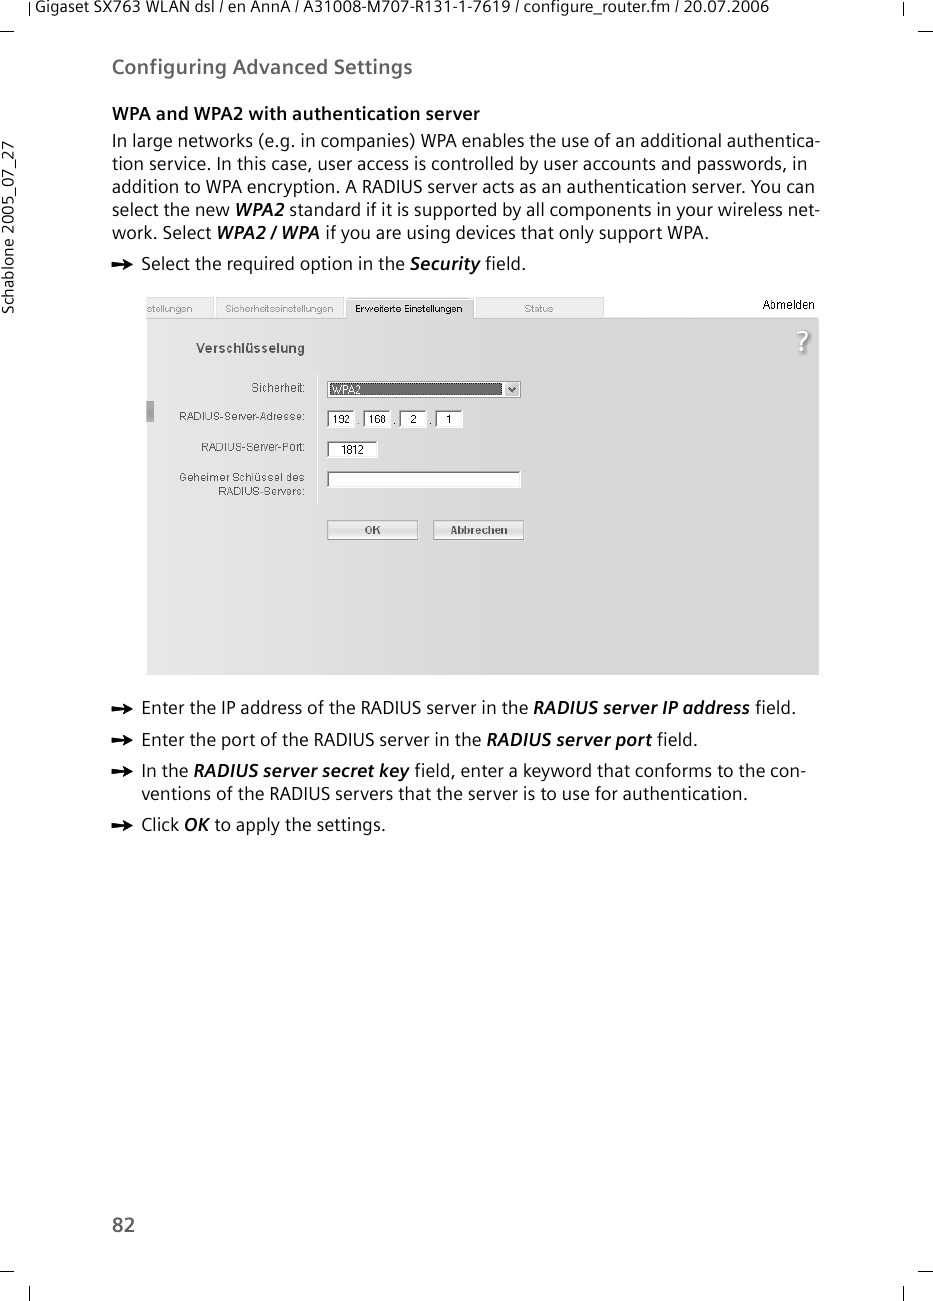
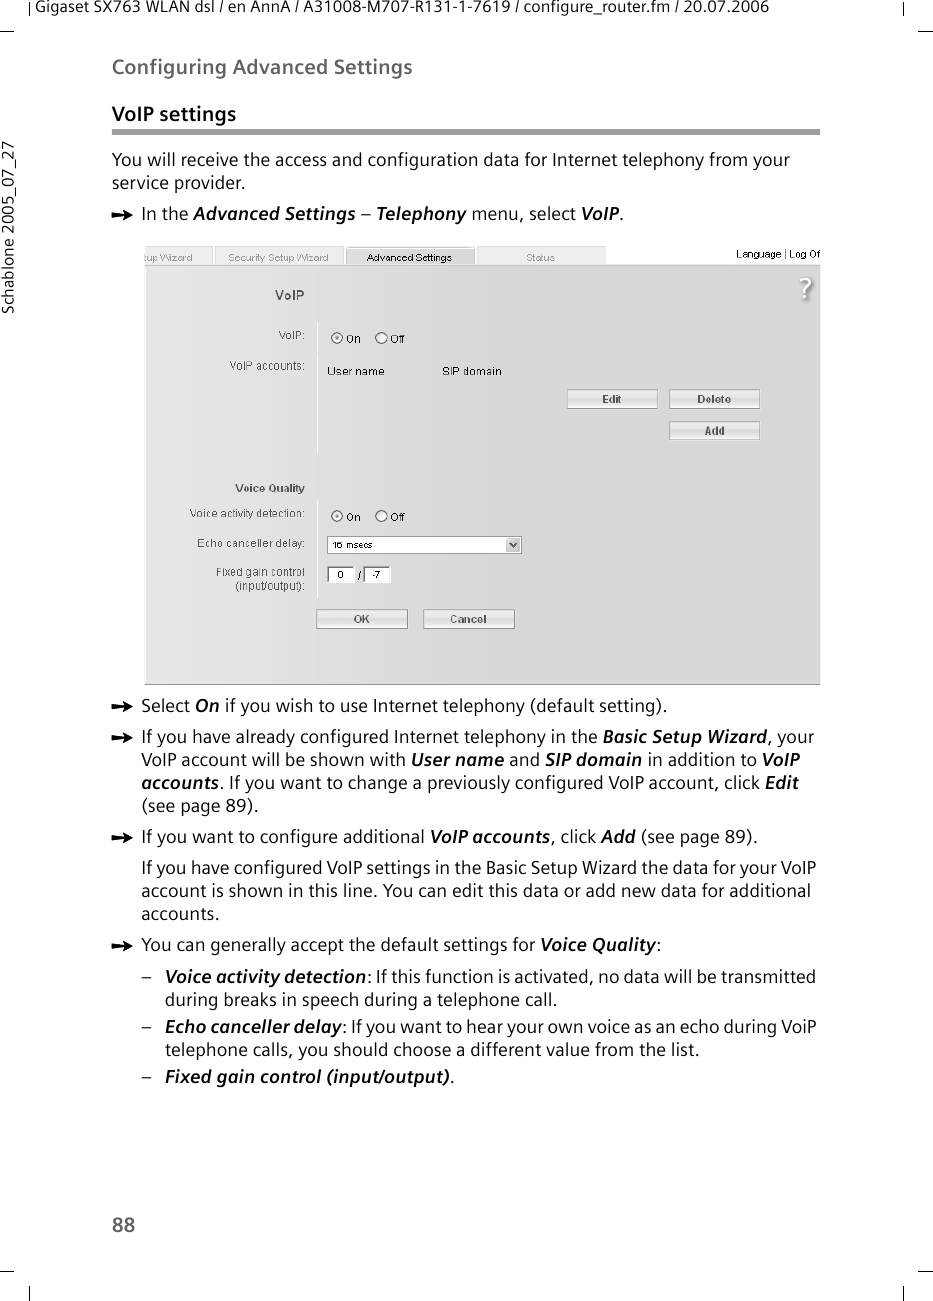
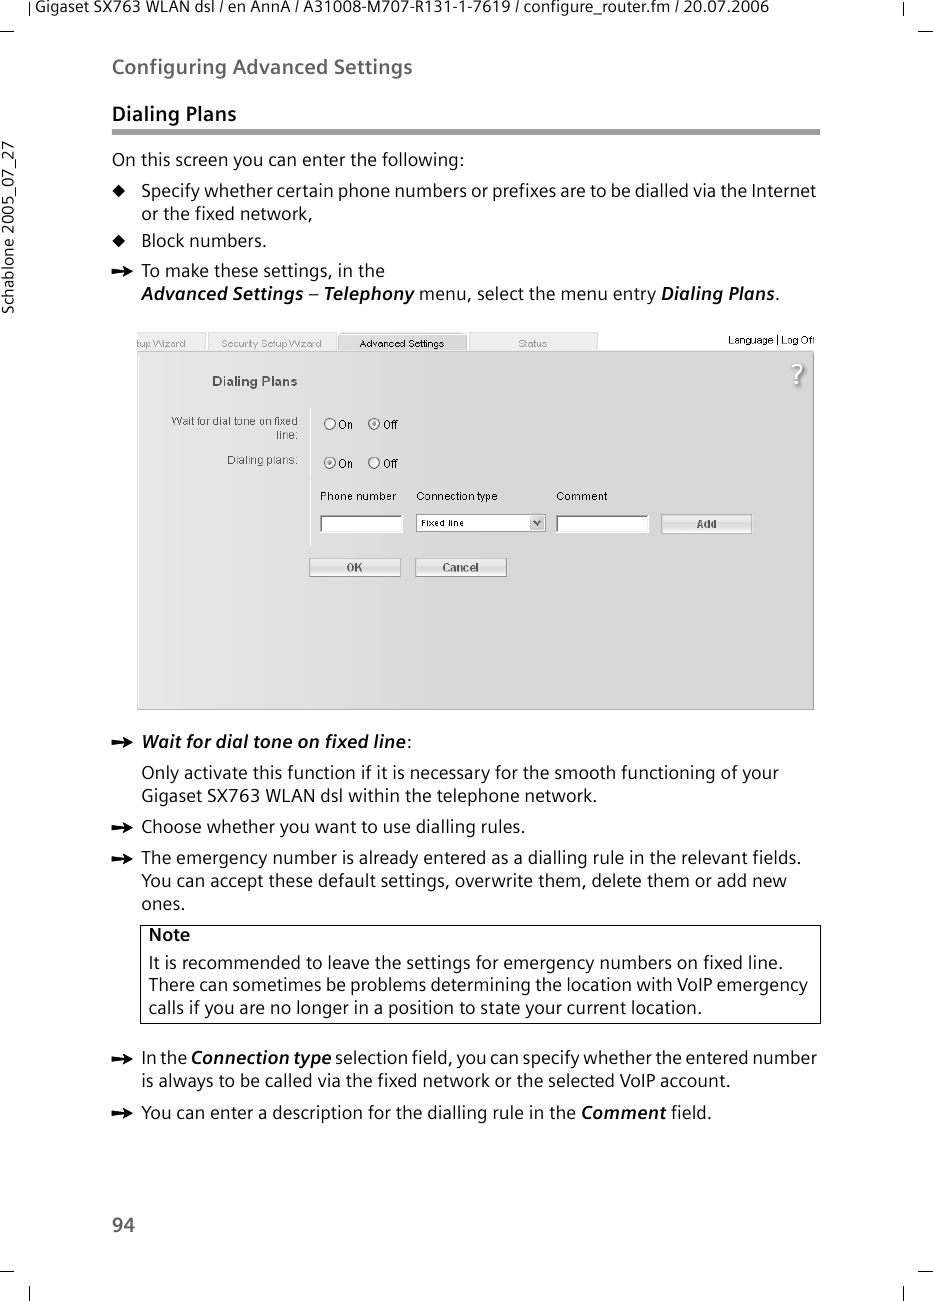
![45Security Setup WizardGigaset SX763 WLAN dsl / en AnnA / A31008-M707-R131-1-7619 / configure_router.fm / 20.07.2006Schablone 2005_07_27Setting up security functions for the wireless networkIn the next step you can set up the encryption and authentication methods for your wireless network.Wireless networks are even more susceptible to eavesdropping than wired networks. With conventional network adapters, an intruder only needs a device with a WLAN adapter (e.g. a notebook or a PDA [Personal Digital Assistant]) with an appropriately configured network card in order to eavesdrop on every communication made via a nearby wireless LAN.The Gigaset SX763 WLAN dsl makes use of effective encryption methods to prevent unauthorised eavesdropping as far as possible.You can use the following security mechanisms:uWPA2-PSK or WPA2-PSK/WPA-PSK (page 46)uWEP encryption (Wired Equivalent Privacy, see page 47)We recommend that you use WPA2-PSK if it is supported by all components in your wire-less network.You will find further options for setting up data encryption and authentication in the Advanced Settings menu (page 80).](https://usermanual.wiki/Gigaset-Communications/SX762-SX765/User-Guide-749486-Page-45.png)


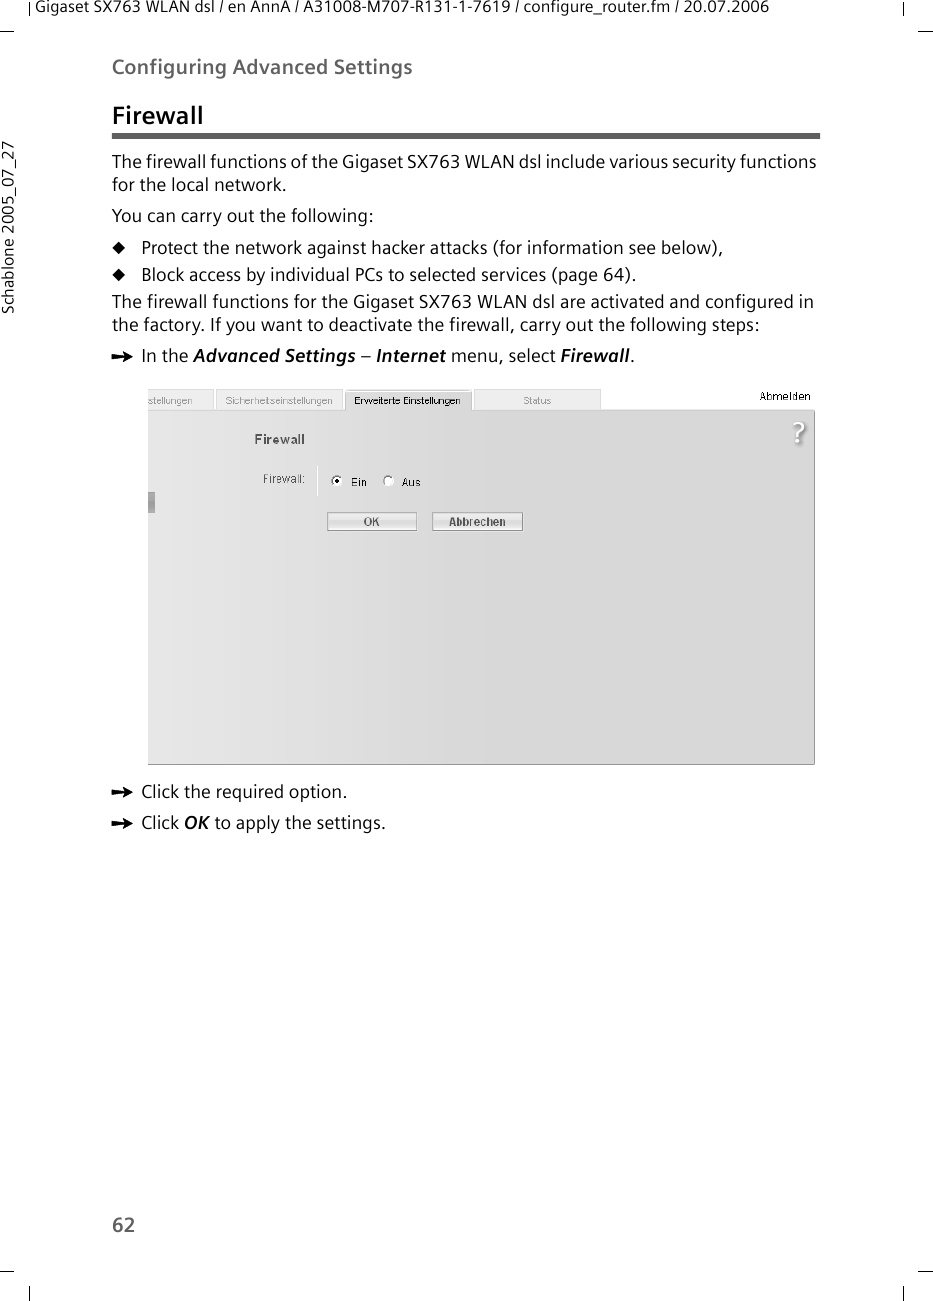

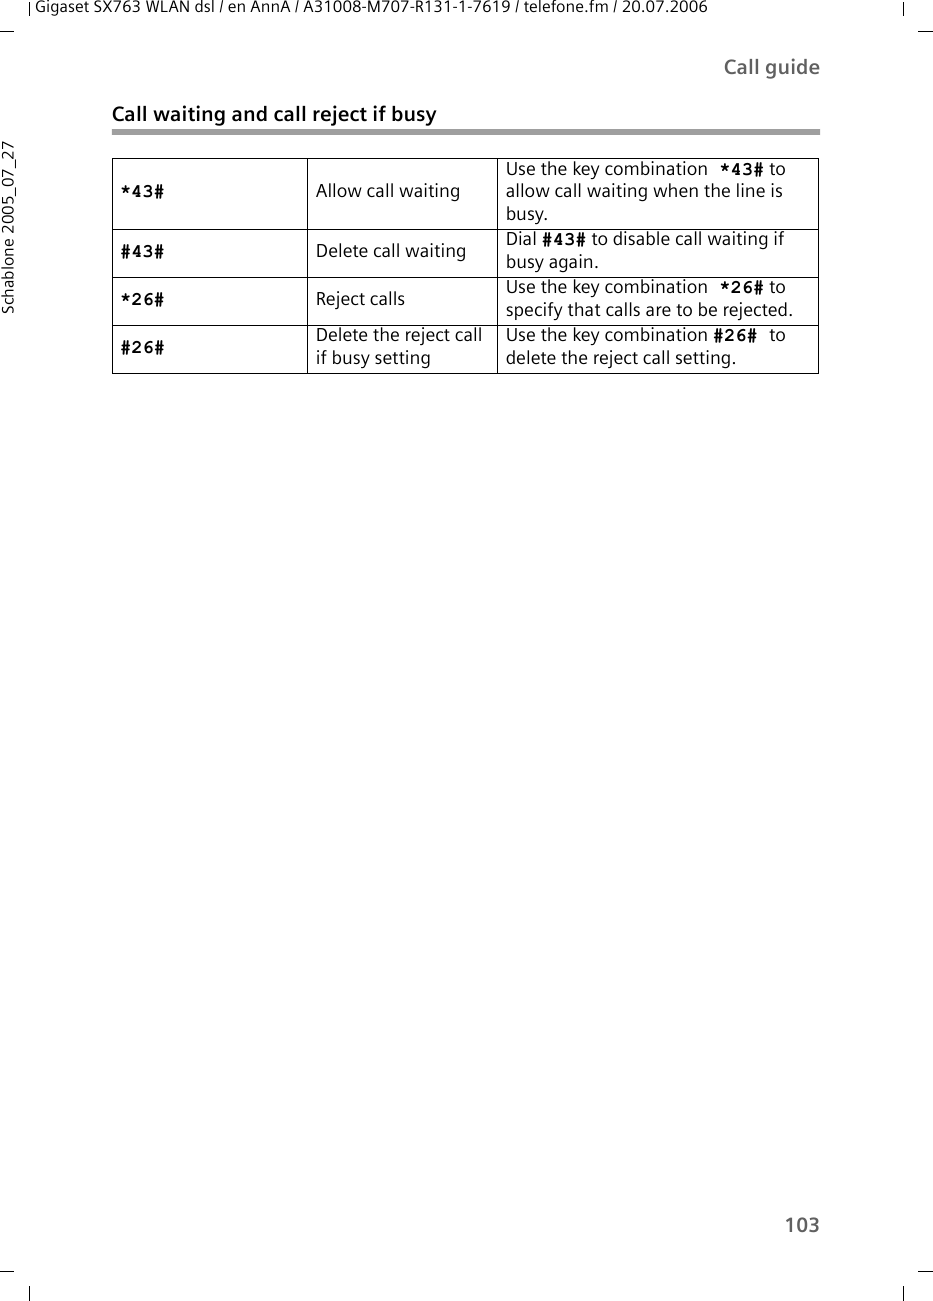
![102Call guideGigaset SX763 WLAN dsl / en AnnA / A31008-M707-R131-1-7619 / telefone.fm / 20.07.2006Schablone 2005_07_27Call answering and forwardingKey combination Effect Description*21*[number]# Forward to internal phone numberDial *21* and the desired internal phone number to which all calls are to be forwarded that are received on this extension and then press the #key.#21# Delete call forwardingUse the key combination #21# to delete internal call forwarding, which you set up as described above.*61*[number]# Call forwarding to internal number if absentDial *61* and the desired internal phone number to which all calls are to be forwarded that are received on this extension and then press the #key. The call is forwarded after 20 seconds with this key combination.#61# Delete call forward-ing if absentUse the key combination #61# to delete internal call forwarding (if absent), which you set up as described above.*67*number# Call forwarding to internal number if line busyDial *67* and the desired internal phone number to which all calls are to be forwarded that are received on this extension and then press the #key. The call is forwarded with this key combination if the line is busy.#67# Delete call forward-ing if absentUse the key combination #67# to delete internal call forwarding (if line busy), which you set up as described above.#77# Delete all call for-warding settingsUse the key combination #77# to delete all call forwarding settings described above.](https://usermanual.wiki/Gigaset-Communications/SX762-SX765/User-Guide-749486-Page-102.png)