Gigaset Communications V310H UPCS Phone User Manual Master BA SL565
Gigaset Communications GmbH UPCS Phone Master BA SL565
UserManual.wiki
>
Gigaset Communications
>
V310H User Manual
User manual
Navigation menu
Upload a User Manual
Namespaces
Wiki Guide
HTML
PDF
Info
Views
User Manual
Discussion / Help
Navigation


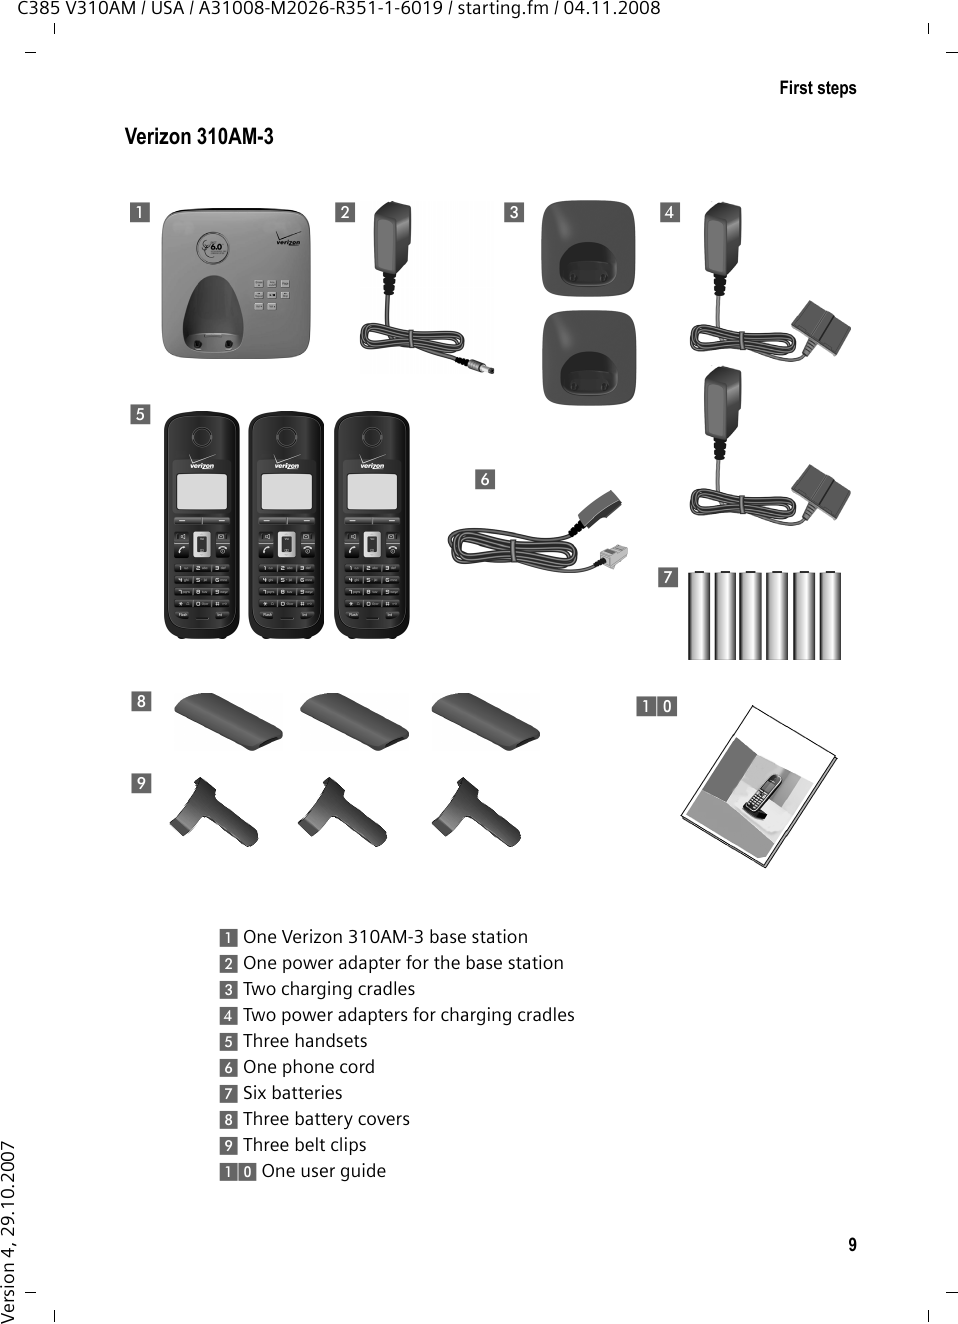
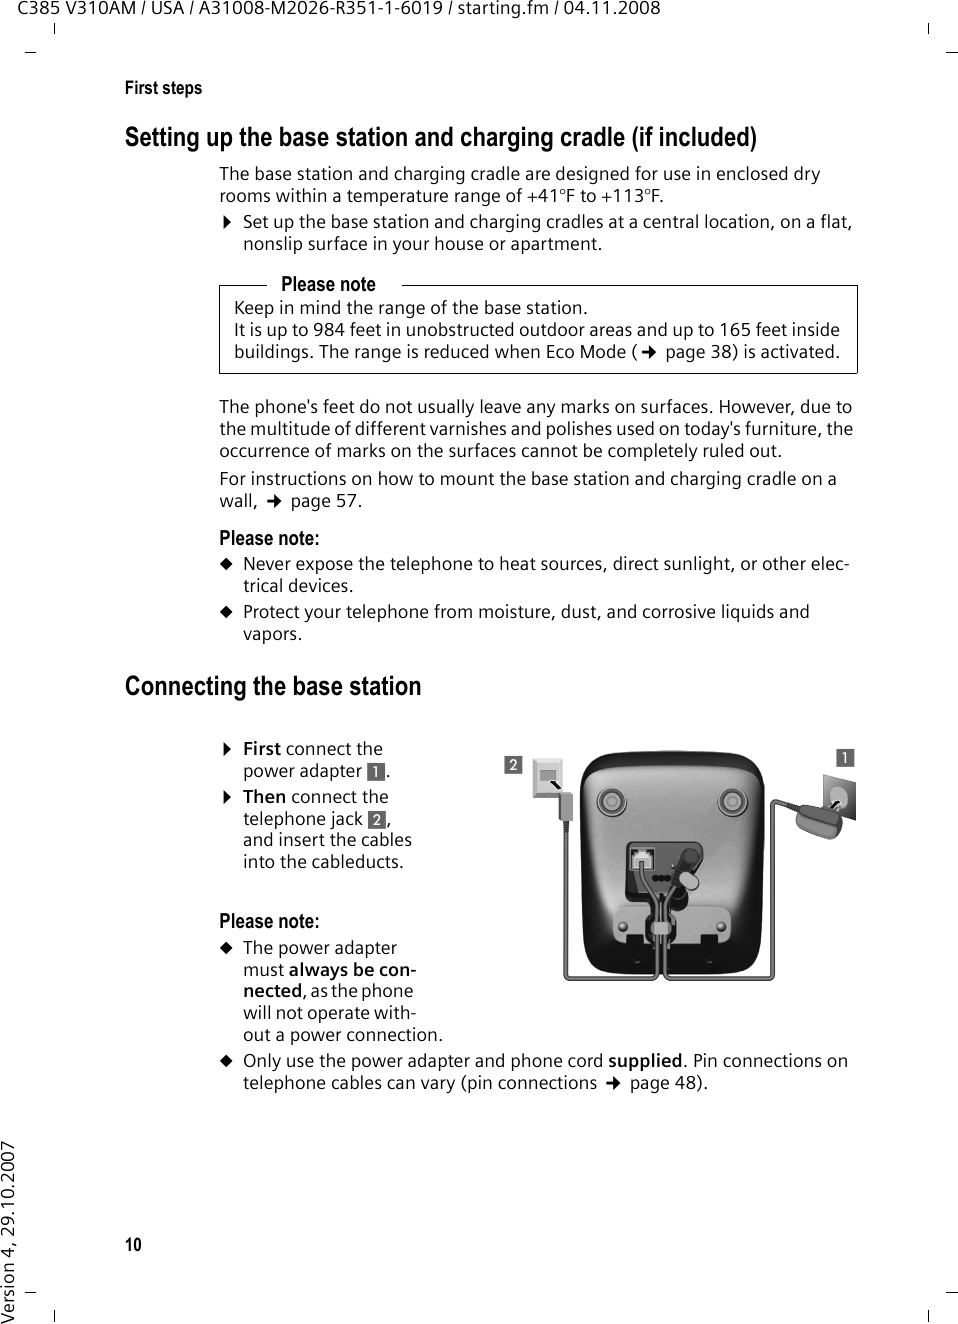
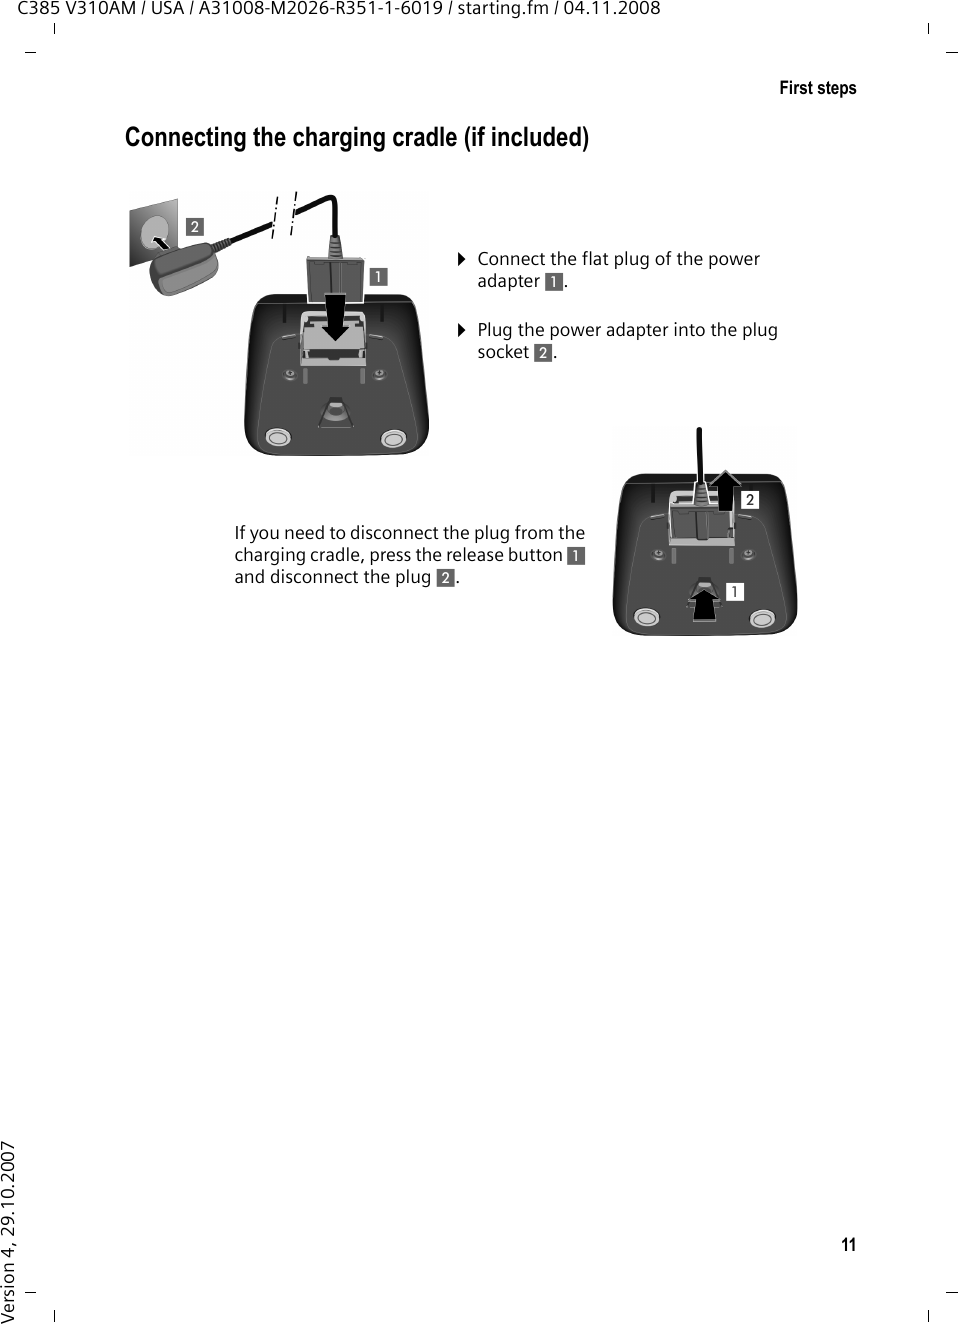


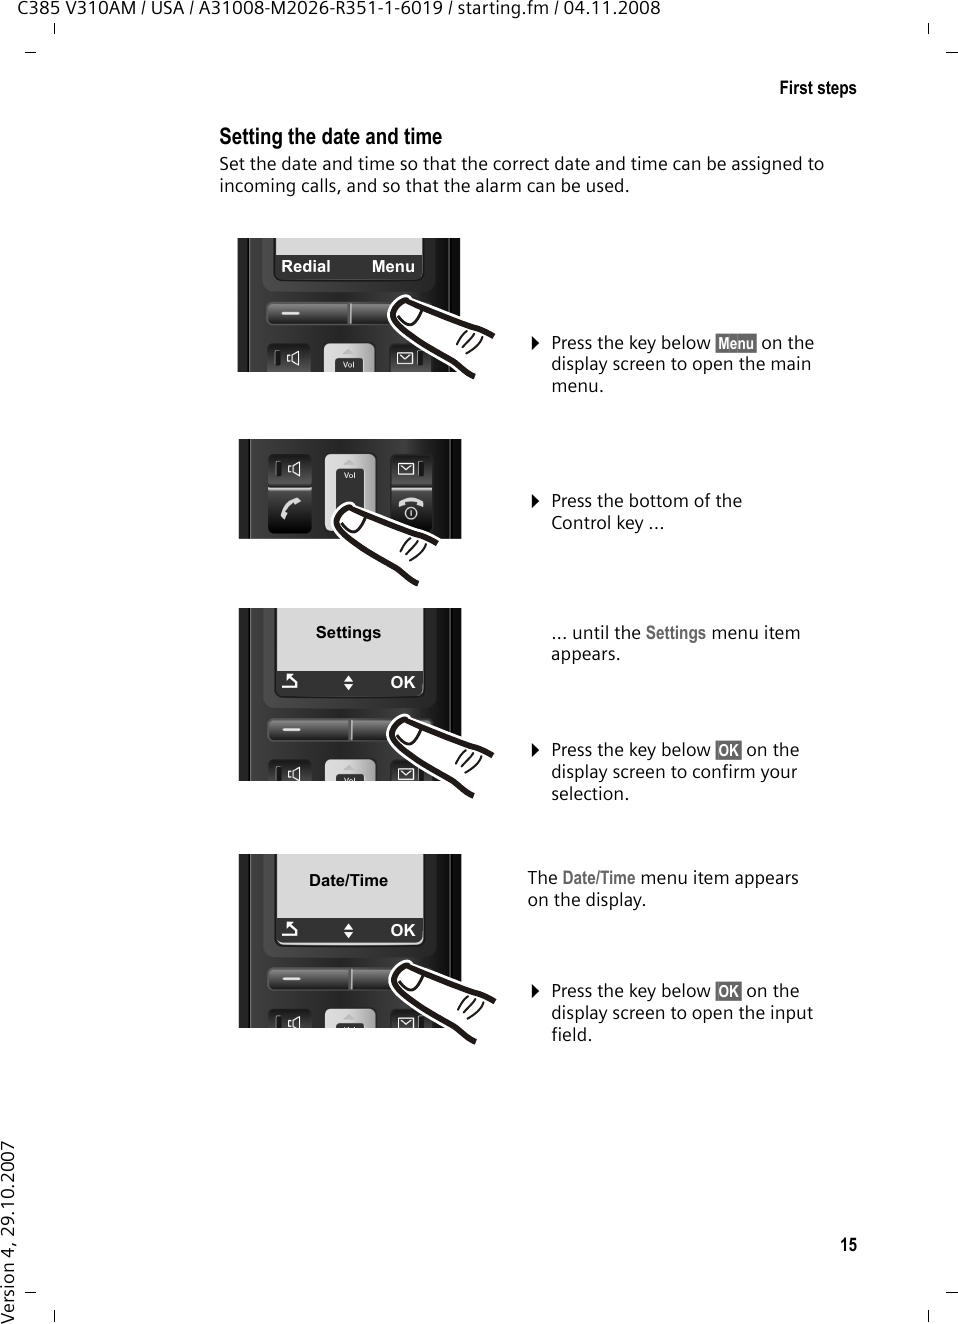
![16First stepsC385 V310AM / USA / A31008-M2026-R351-1-6019 / starting.fm / 04.11.2008Version 4, 29.10.2007Enter Date:[10.01.2008]ÇTOK¤Enter the hours and minutes as four digits using the handset (e.g. QM5for 07:15 AM).If necessary, use the Control key to toggle between fields.¤The active line is marked [...].Enter month, day and year as an 8-digit number using the handset (e.g. QQ 2QQNfor 10/1/08).If you want to correct an entry, press the top or bottom of the Control key to toggle between fields.¤Press the key below §OK§ on the display screen to confirm your selection. Enter time:[07:15]ÇTOKÇTOK¤Press and hold the End Call key a to return to the idle status. The display shows Saved. You will hear a confirmation tone.¤Press the key below §OK§ on the display screen to confirm your selection. Saved](https://usermanual.wiki/Gigaset-Communications/V310H/User-Guide-1065192-Page-16.png)