Gigaset Communications V500AM 1.9GHZ CORDLESS PHONE User Manual V500 kombi
Gigaset Communications GmbH 1.9GHZ CORDLESS PHONE V500 kombi
UserManual.wiki
>
Gigaset Communications
>
V500AM User Manual
USERS MANUAL
Navigation menu
Upload a User Manual
Namespaces
Wiki Guide
HTML
PDF
Info
Views
User Manual
Discussion / Help
Navigation
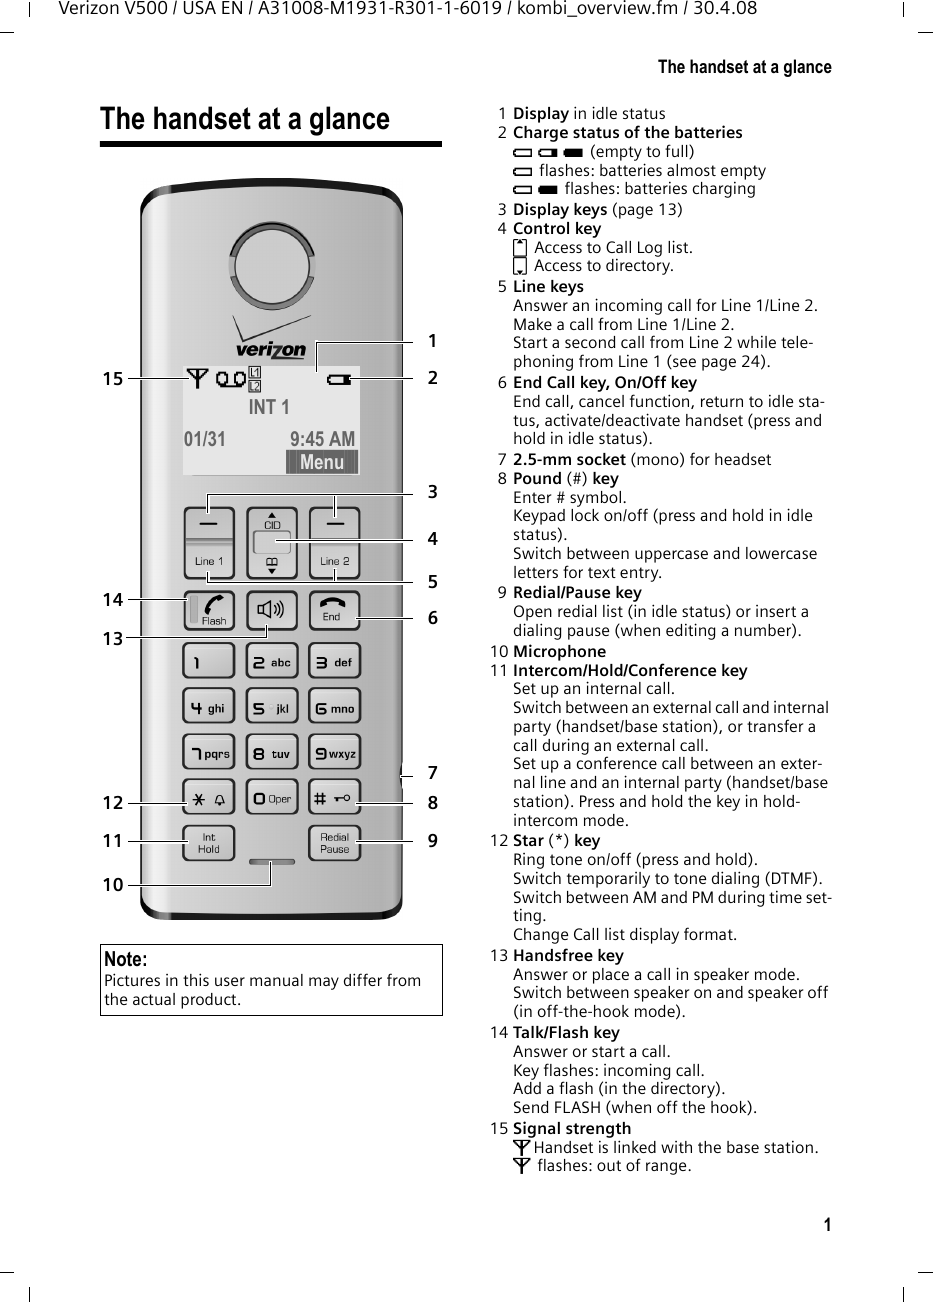

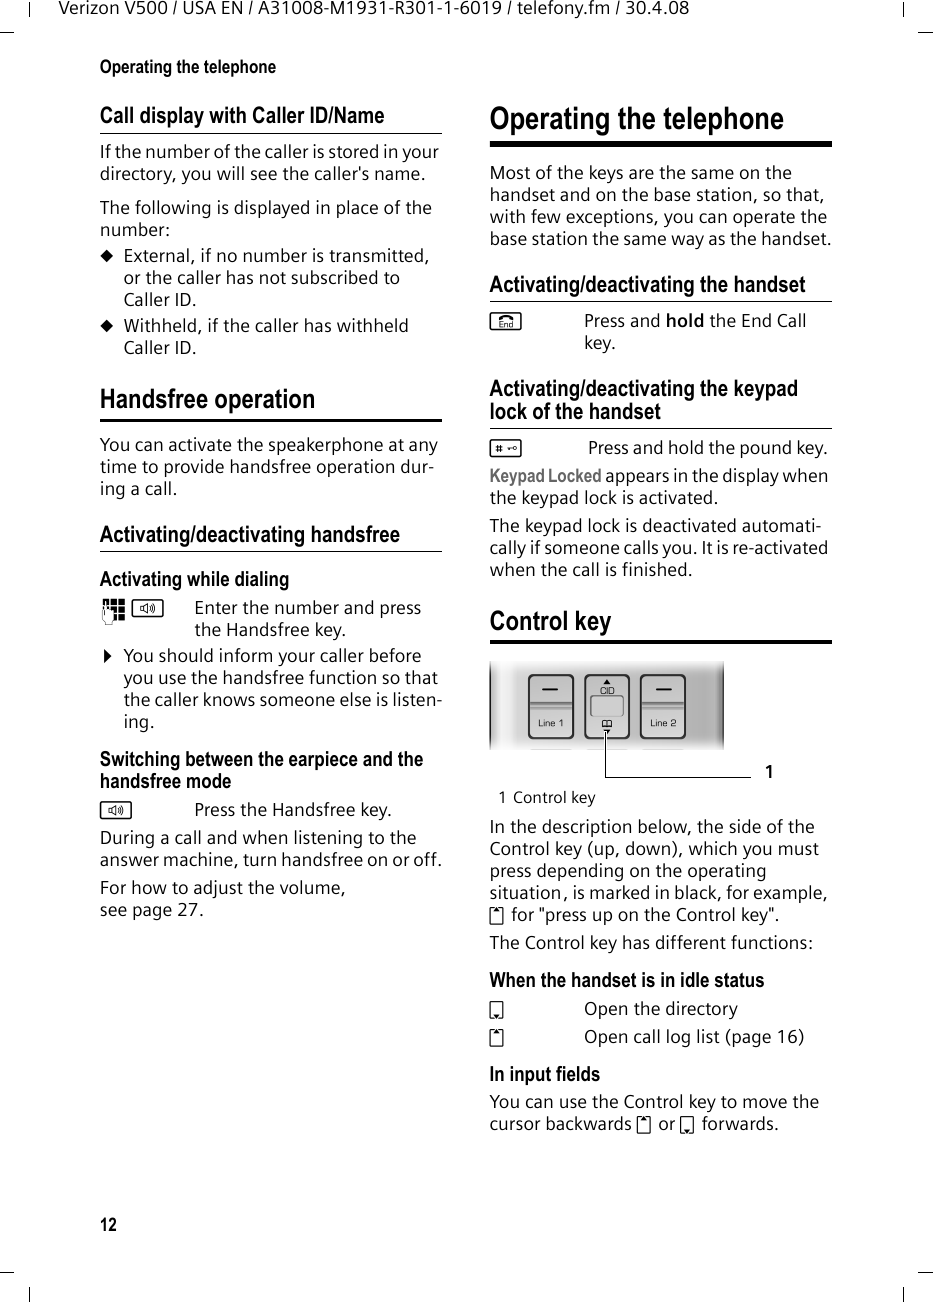
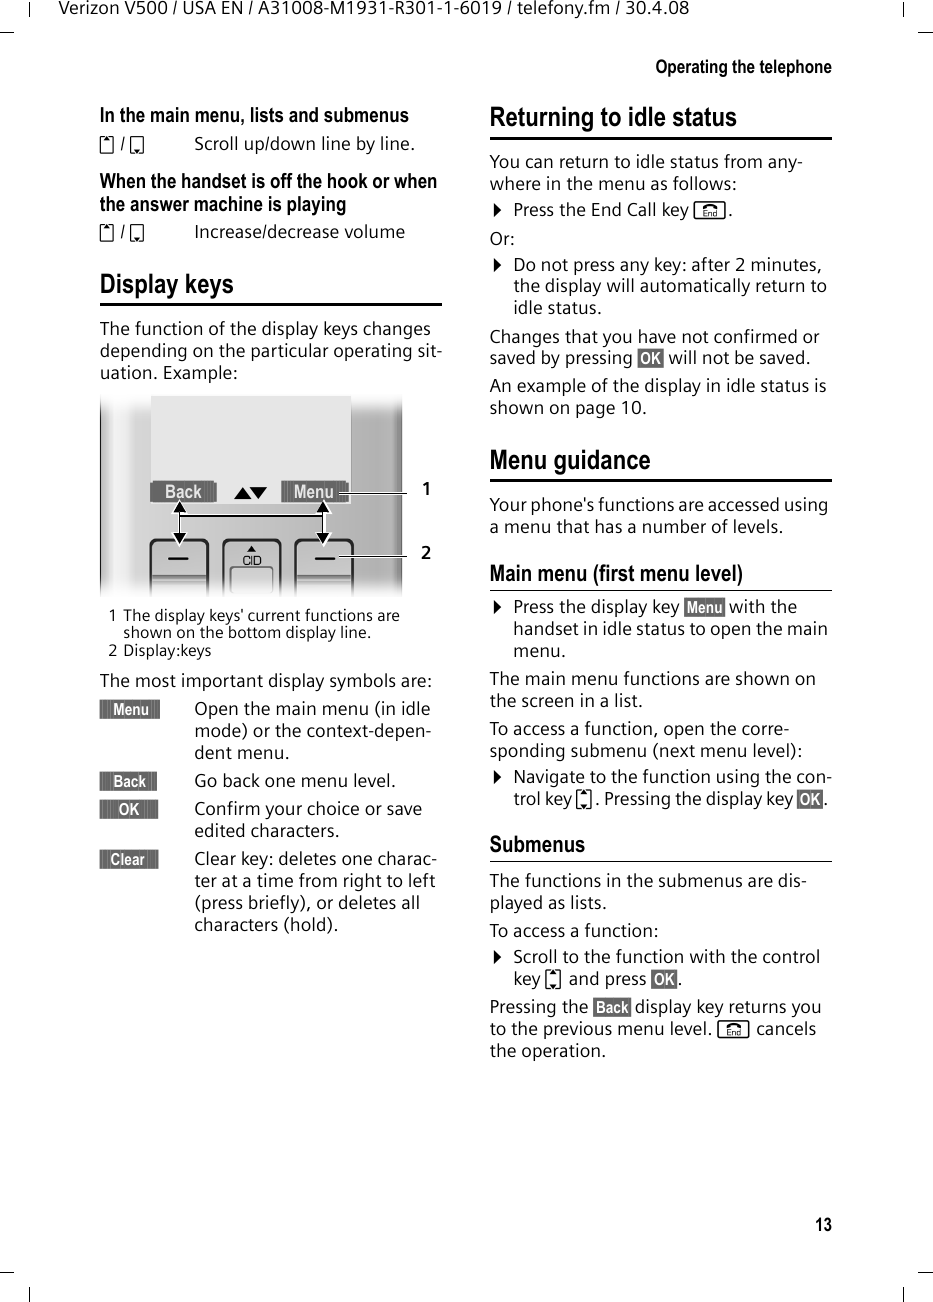
![14Operating the telephoneVerizon V500 / USA EN / A31008-M1931-R301-1-6019 / telefony.fm / 30.4.08Writing, editing, and correcting entriesCorrecting incorrect entriesYou can correct incorrect characters in the text by navigating to the incorrect entry using the control key. You can then:uPress §§§§Clear§§§§§ to delete the character to the left of the cursor. uInsert characters by typing.Writing and editing namesThe following rules apply when creating an entry:uControl the cursor with q.uPress the pound key # to switch between uppercase and lowercase.Entering special characters You can enter special characters using the Q or 1 key.Q .0,/:;"’!?*+-%\^~|1 SPACE1@_#=<>()&$[]{}](https://usermanual.wiki/Gigaset-Communications/V500AM/User-Guide-966231-Page-14.png)