Grandstream Networks GWN7600LR Long Range Wi-Fi Access Point User Manual Quick Start Guide
Grandstream Networks, Inc. Long Range Wi-Fi Access Point Quick Start Guide
Contents
- 1. Quick Start Guide
- 2. quick Start Guide
Quick Start Guide
For Warranty and RMA information, please visit www.grandstream.com
Grandstream Networks, Inc.
126 Brookline Ave, 3rd Floor
Boston, MA 02215. USA
Tel : +1 (617) 566 - 9300
Fax: +1 (617) 249 - 1987
www.grandstream.com
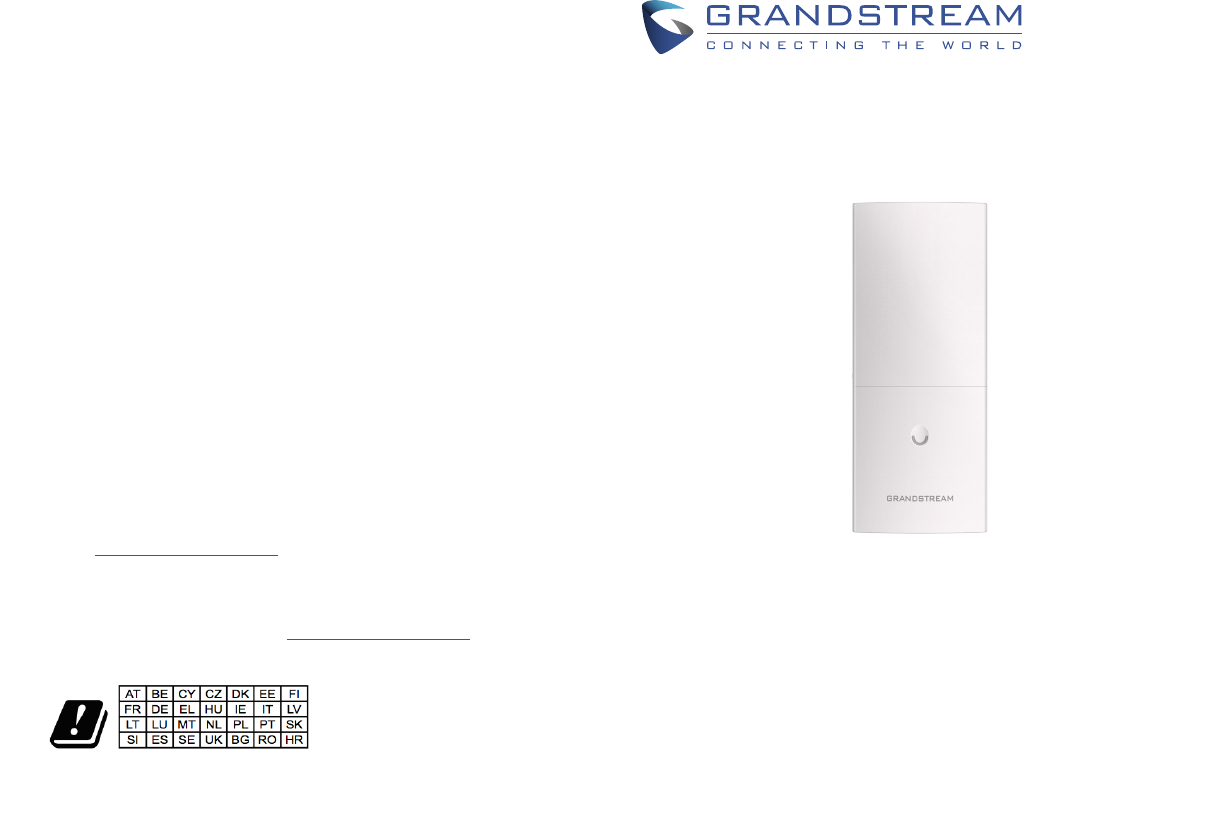
GWN7600LR
Enterprise 802.11ac Wave-2 Outdoor
Long Range WiFi Access Point
Quick Installation Guide
In all EU member states, operation of 5150
-5350 MHz is restricted to indoor use only.
~1~ ~2~
OVERVIEW
This WiFi long range access point is designed to provide extended coverage support. Ideal
for outdoor WiFi solutions thanks to its waterproof casing and heat resistant technology.
The GWN7600LR comes equipped with dual-band 2x2:2 MU-MIMO with beam-forming
technology and a sophisticated antenna design for maximum network throughput and
extended WiFi coverage range of up to 300 meters. To ensure easy installation and
management, the GWN7600LR uses a controller-less distributed network management design
and an embeded controller within the product’s web user interface. This allows each access
point to manage a network of up to 30 GWN76xx series APs independently without
needing separate controller hardware/software and without a single point-of-failure. Its easy
installation and management features packed with extra coverage support and advanced
performance features make the GWN7600LR an ideal enterprise AP for mid-size wireless
network deployments.
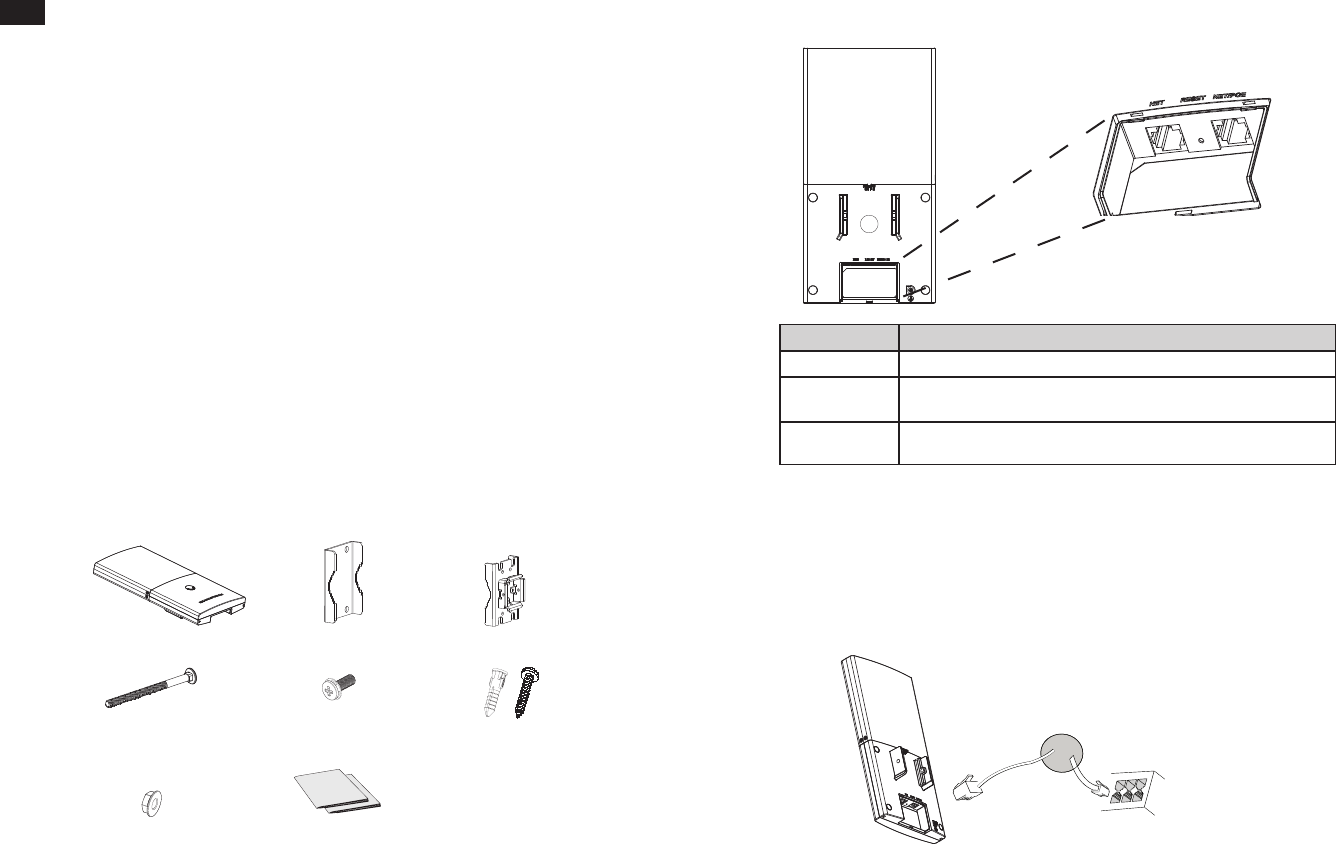
1 x GWN7600LR Access Point
1 x Quick Installation Guide
1 x GPL Statement
4 x Screw (PM8 x 115)
4 x Locknut
4 x Screws and Anchors
EN
1 x Base Bracket
PACKAGE CONTENTS
2 x Assembled Screw
1 x Cover Bracket
GWN7600LR PORTS
Port Description
NET/POE Ethernet RJ45 port (10/100/1000Mbps) supporting PoE.
NET Ethernet RJ45 port (10/100/1000Mbps) to your router or another
GWN76xx.
RESET Factory reset button. Press for 7 seconds to reset factory default
settings.
POWERING AND CONNECTING THE GWN7600LR
Network Port RJ45 Ethernet Cable to
power over Ethernet (PoE)
Switch
●Do not attempt to open, disassemble, or modify the device.
●Do not expose this device to temperatures out the range of -30 °C to 60 °C for operating
and -30°C to 70°C for storage
●Do not expose the GWN7600LR to environments outside of the following humidity range:
5-95% RH (non-condensing).
● Do not power cycle your GWN7600LR during system boot up or rmware upgrade. You
may corrupt rmware images and cause the unit to malfunction.
PRECAUTIONS
GWN7600LR can be powered on via PoE switch using following steps:
Step 1:
Plug a RJ45 Ethernet cable into the network port of the GWN7600LR.
Step 2:
Plug the other end into the uplink port of the power over Ethernet (PoE) switch.
~3~ ~4~
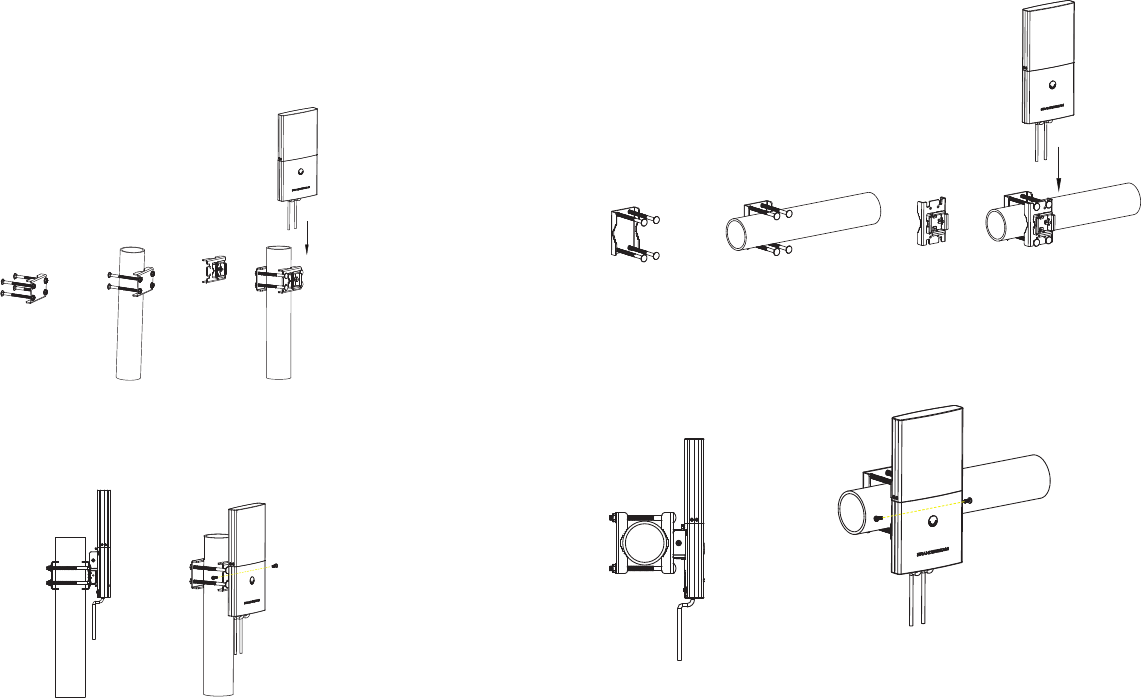
Horizontal Mounting
HARDWARE INSTALLATION
GWN7600LR can be mounted horizontally or vertically on a metal bar.
Please refer to the following steps for the appropriate installation.
Vertical Mounting
4. Connect the Ethernet cable (RJ45) to the correct ports of your GWN7600LR.
5. Align the GWN7600LR with the Base Bracket and pull it down to the right position.
6. Install the 2x Assembled screws to x GWN7600LR on the Mounting Bolt.
1. Prepare the Cover Bracket by inserting the 4 screws (PM8) into corresponding holes.
2. Attach the Cover Bracket with screws on the vertical Mounting Bolt where GWN7600LR
will be installed.
3. Assemble the Base Bracket with the Cover Bracket using provided locknuts and screws
(PM8).
1. Prepare the Cover Bracket by inserting the 4 screws (PM8) into corresponding holes.
2. Attach the Cover Bracket with screws on the horizontal Mounting Bolt where GWN7600LR
will be installed.
3. Assemble the Base Bracket with the Cover Bracket using provided locknuts and screws
(PM8).
4. Connect the Ethernet cable (RJ45) to the correct ports of your GWN7600LR.
5. Align the GWN7600LR with the Base Bracket and pull it down to the right position.
6. Install the 2x Assembled screws to x GWN7600LR on the Mounting Bolt.
123
45
12
3
45
~5~ ~6~
CONNECT TO GWN7600LR DEFAULT WIFI NETWORK
GWN7600LR can be used as standalone access point out of box, or after factory reset with
Wi-Fi enabled by default.
After powering the GWN7600LR and connecting it to the network, GWN7600LR will broad-
cast a default SSID based on its MAC address GWN[MAC’s last 6 digits] and a random
password.
Note: GWN7600LR’s default SSID and password information are printed on the MAC tag
of the unit.
Method 2: Discover GWN7600LR using GWN Discovery Tool
1. Download and install GWN Discovery Tool from the following link:
http://www.grandstream.com/tools/GWNDiscoveryTool.zip
2. Open the GWN DiscoveryTool, and click on Scan.
3. The tool will discover all GWN76XX Access Points connected on the network showing
their MAC and IP addresses.
4. Click on Manage Device to be redirected directly to the GWN7600LR’s conguration
interface, or type in manually the displayed IP address on your browser.
Notes :
●Make sure that the GWN7600LR is not already paired with another GWN76xx Access
Point as slave, or GWN7000 Router Series, otherwise the conguration interface cannot
be accessed.
● If the GWN7600LR is already paired, make sure to unpair it rst, or do a factory reset.
●It is customer’s responsibility to ensure compliance with local regulations for frequency
bands, transmit power and others.
A computer connected to the GWN7600LR’s SSID, or to the same network as the GWN-
7600LR can discover and access its conguration interface using one of the below methods:
Method 1: Discover GWN7600LR using its MAC Address
1. Locate the MAC address on the MAC tag of the unit, which is on the underside of the
device, or on the package.
2. From a computer connected to same network as the GWN7600LR, type in following ad-
dress using GWN7600LR’s MAC address on your browser https://gwn_<mac>.local
Example: If a GWN7600LR has the MAC address 00:0B:82:8C:4D:F8, this unit can be ac-
cessed by typing https://gwn_000b828c4df8.local on the browser.
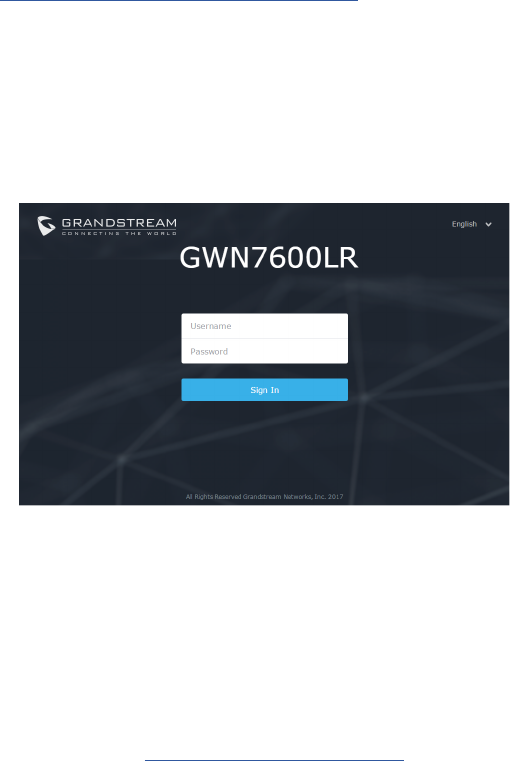
ACCESSING THE CONFIGURATION INTERFACE
Using one of the above methods, the login screen will appear. Type in “admin” in both User-
name and Password elds and click on Sign In.
Refer to online documents and FAQ for more detailed information:
http://www.grandstream.com/our-products
Label's content is for reference only, subject to actual production.
Any Changes or modifications not expressly approved by the party responsible for
compliance could void the user's authority to operate the equipment.
This device complies with part 15 of the FCC Rules. Operation is subject to the following
two conditions: (1) This device may not cause harmful interference, and (2) this device
must accept any interference received, including interference that may cause undesired
operation.
FCC Caution:
Note: This equipment has been tested and found to comply with the limits for a Class B digital
device, pursuant to part 15 of the FCC Rules. These limits are designed to provide reasonable
protection against harmful interference in a residential installation. This equipment generates,
uses and can radiate radio frequency energy and, if not installed and used in accordance with
the instructions, may cause harmful interference to radio communications. However, there is
no guarantee that interference will not occur in a particular installation. If this equipment does
cause harmful interference to radio or television reception, which can be determined by turning
the equipment off and on, the user is encouraged to try to correct the interference by one or
more of the following measures:
—Reorient or relocate the receiving antenna.
—Increase the separation between the equipment and receiver.
—Connect the equipment into an outlet on a circuit different from that to which the receiver is
connected.
—Consult the dealer or an experienced radio/TV technician for help.
FCC Radiation Exposure Statement:
This equipment complies with FCC radiation exposure limits set forth for an
uncontrolled environment. This equipment should be installed and operated with
minimum distance 20cm between the radiator& your body.
This transmitter must not be co-located or operating in conjunction with any other antenna or
transmitter.
