Grandstream Networks GXP2200 IP Phone User Manual ok
Grandstream Networks, Inc. IP Phone ok
UserManual.wiki
>
Grandstream Networks
>
GXP2200 User Manual
Users Manual
Navigation menu
Upload a User Manual
Namespaces
Wiki Guide
HTML
PDF
Info
Views
User Manual
Discussion / Help
Navigation


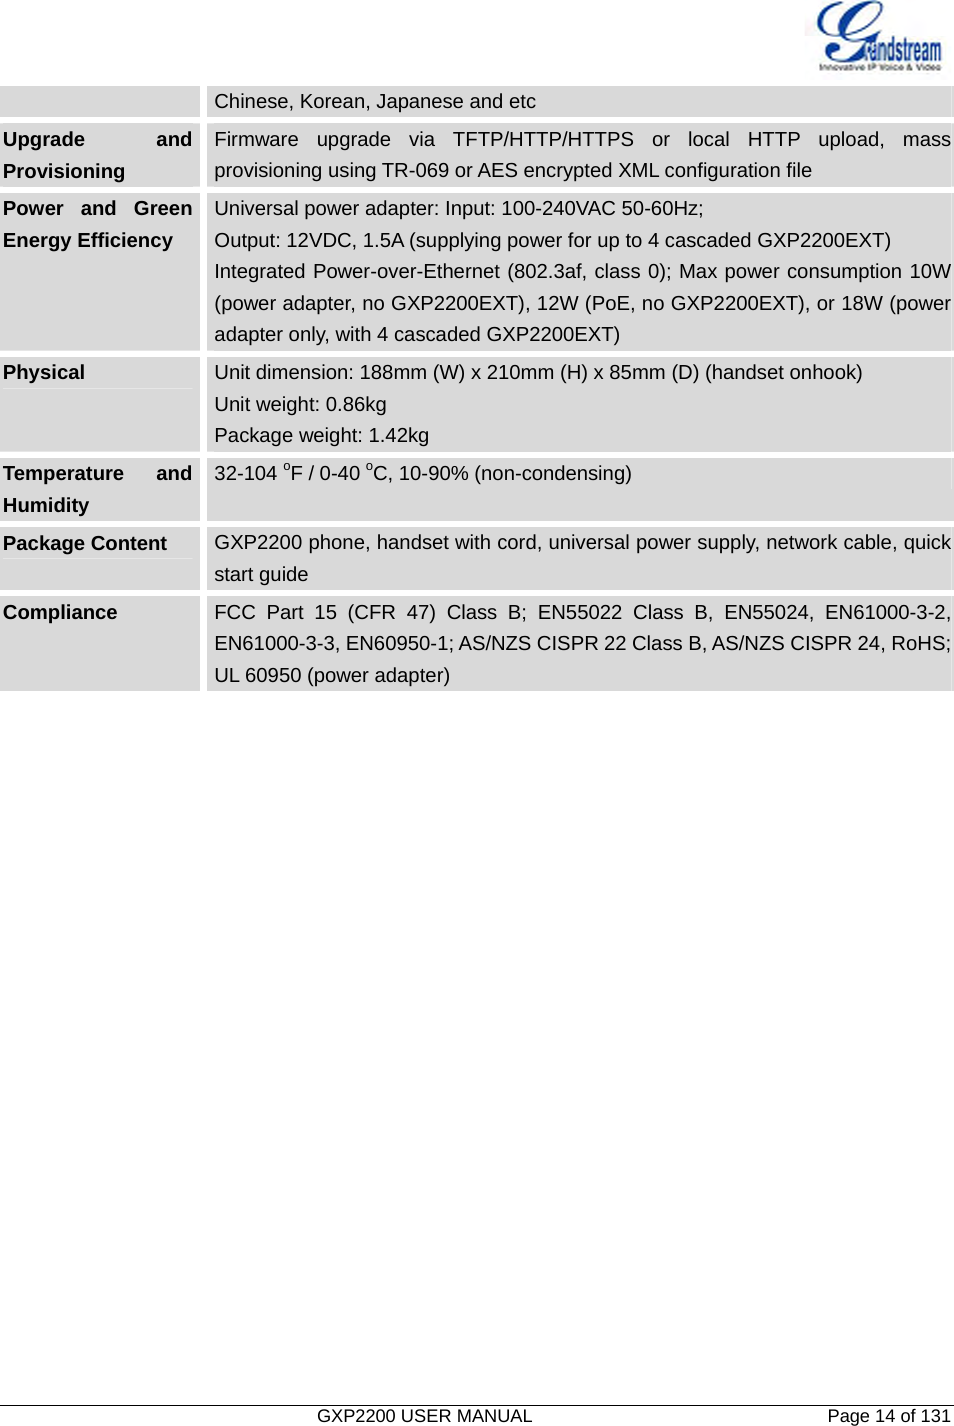


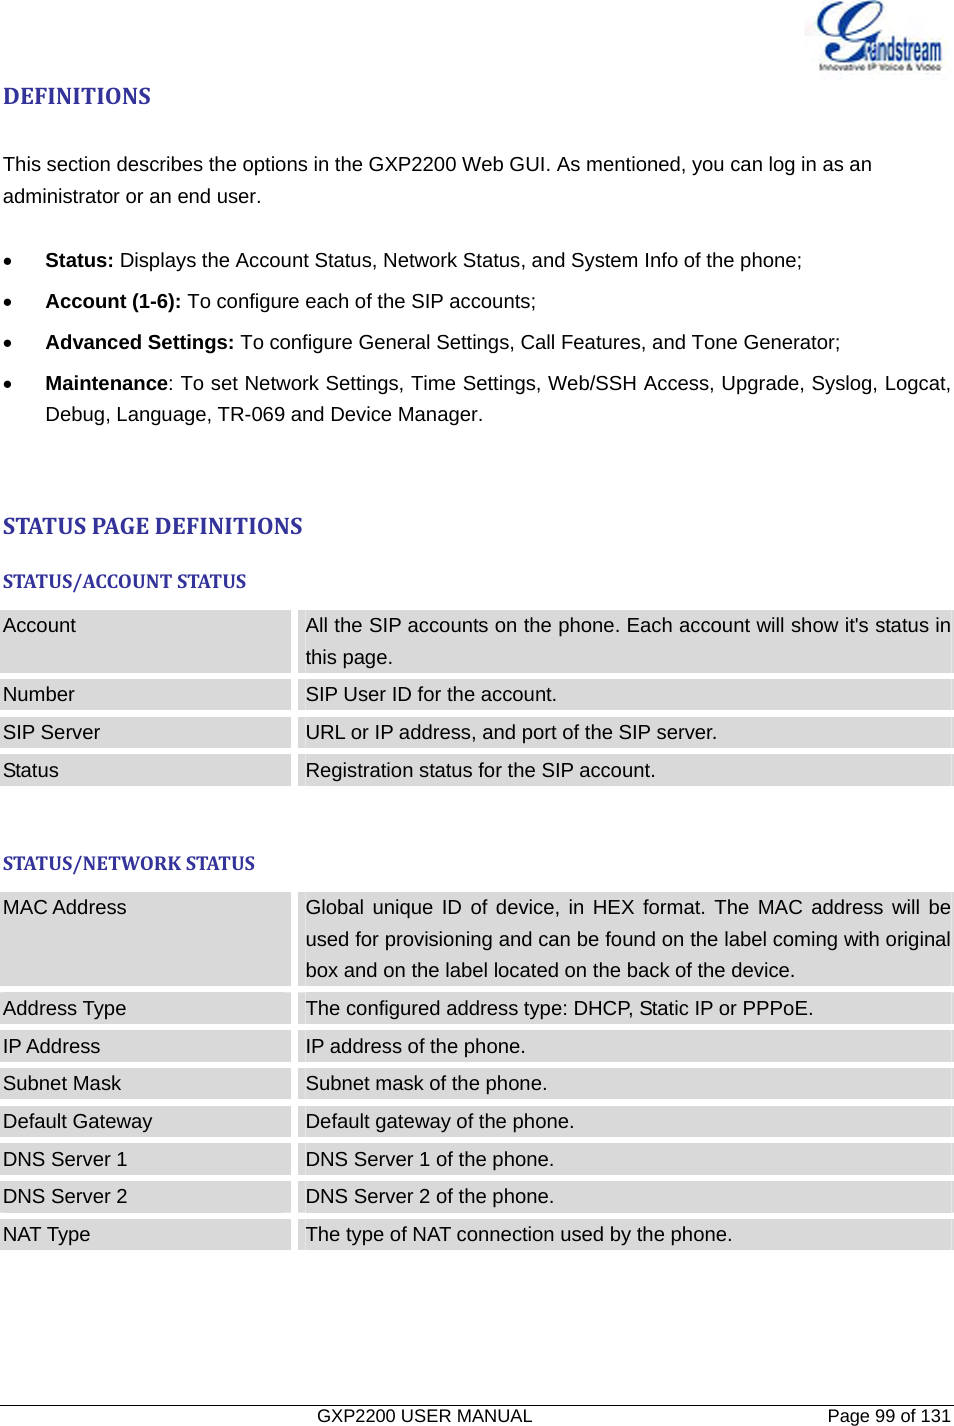
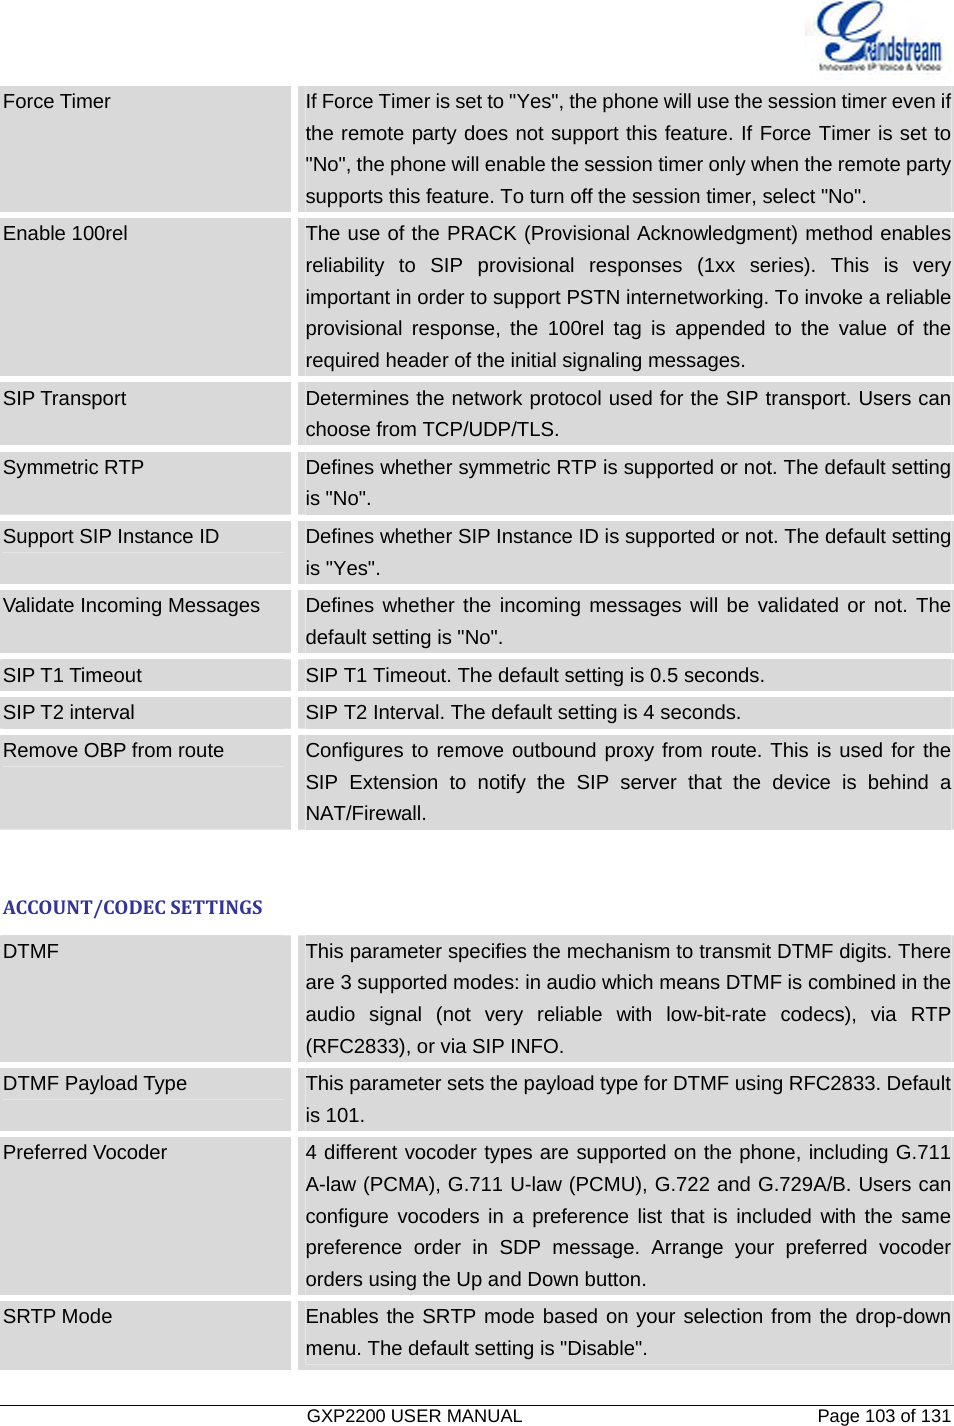
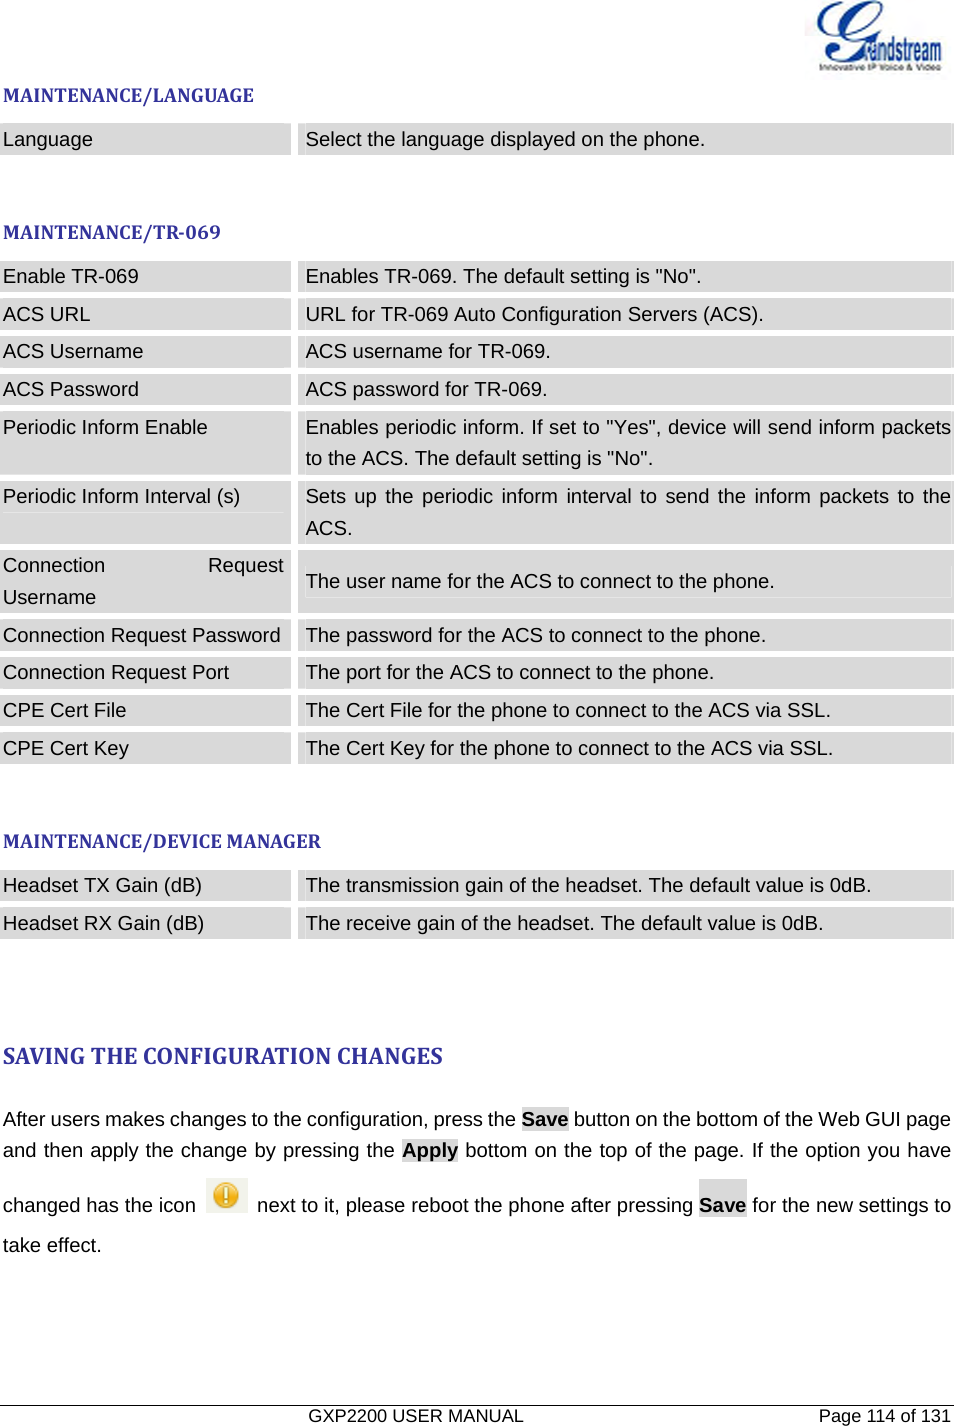
![GXP2200 USER MANUAL Page 104 of 131 Silence Suppression Controls the silence suppression/VAD feature of the audio codec G.723 and G.729. If set to "Yes", when silence is detected, a small quantity of VAD packets (instead of audio packets) will be sent during the period of no talking. If set to "No", this feature is disabled. The default setting is "No". Voice Frames Per TX Configures the number of voice frames transmitted per packet. When configuring this, it should be noted that the "ptime" value for the SDP will change with different configurations here. This value is related to the codec used and the actual frames transmitted during the in payload call. For end users, it is recommended to use the default setting, as incorrect settings may influence the audio quality. Jitter Buffer Type Selects either Fixed or Adaptive based on network conditions. The default setting is "Adaptive". Jitter Buffer Length Selects Low, Medium, or High based on network conditions. The default setting is "Medium". ACCOUNT/CALLSETTINGSDial Plan A dial plan establishes the expected number and pattern of digits for a telephone number. This parameter configures the allowed dial-plan for the phone. Dial Plan Rules: 1. Accepted Digits: 1,2,3,4,5,6,7,8,9,0 , *, #, A,a,B,b,C,c,D,d; 2. Grammar: x - any digit from 0-9; a) xx+ - at least 2 digit numbers b) xx. - only 2 digit numbers c) ^ - exclude d) [3-5] - any digit of 3, 4, or 5 e) [147] - any digit of 1, 4, or 7 f) <2=011> - replace digit 2 with 011 when dialing g) | - the OR operand • Example 1: {[369]11 | 1617xxxxxxx} Allow 311, 611, and 911 or any 10 digit numbers with leading digits 1617;• Example 2: {^1900x+ | <=1617>xxxxxxx} Block any number of leading digits 1900 or add prefix 1617 for any dialed 7 digit numbers; • Example 3: {1xxx[2-9]xxxxxx | <2=011>x+}](https://usermanual.wiki/Grandstream-Networks/GXP2200/User-Guide-1804488-Page-105.png)
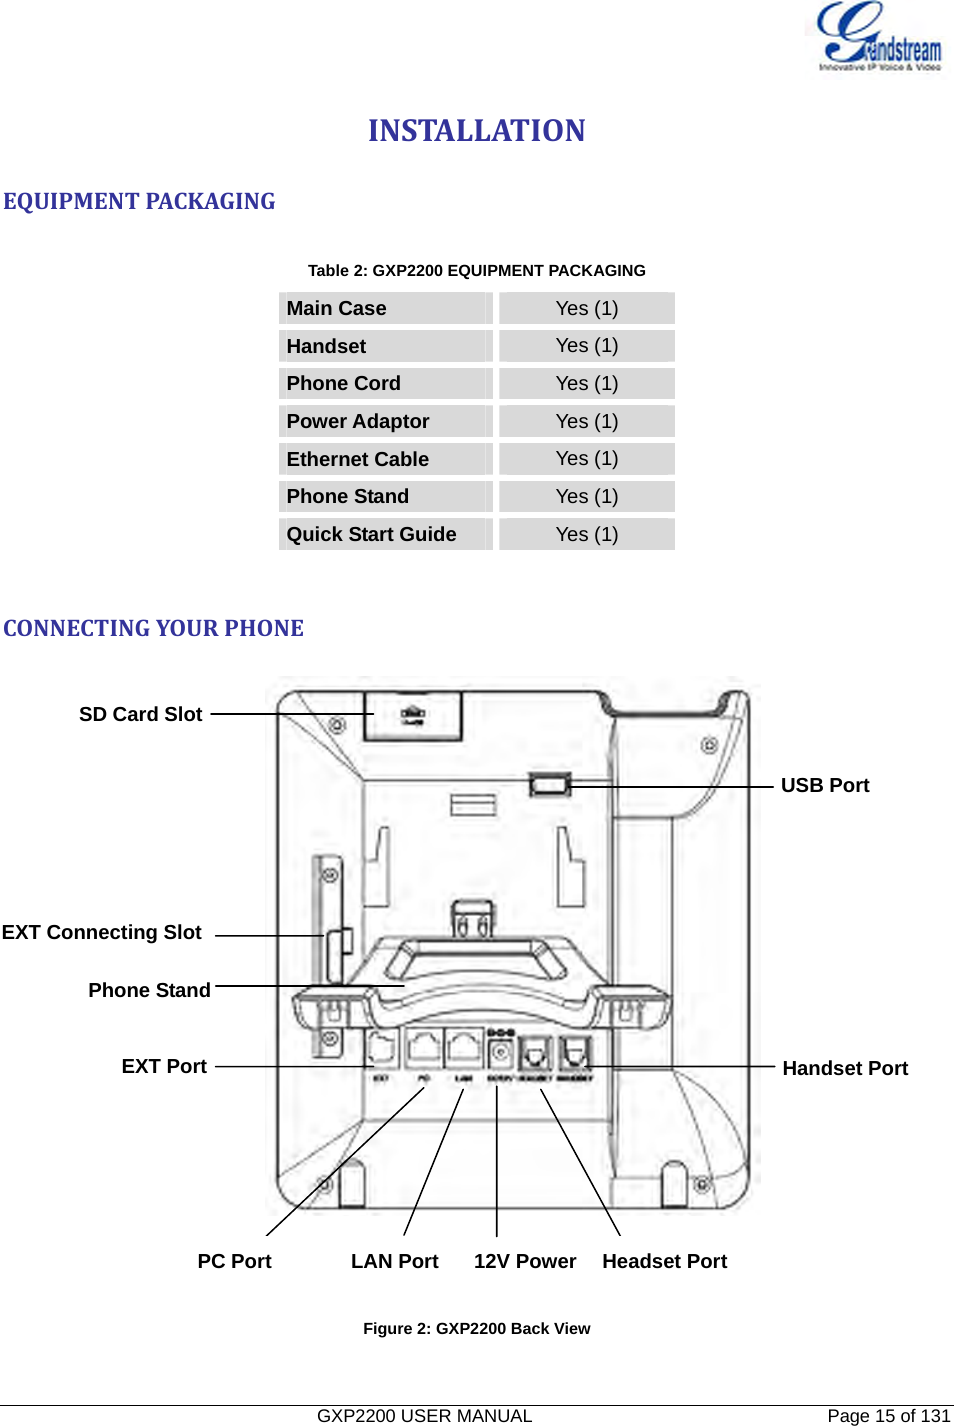
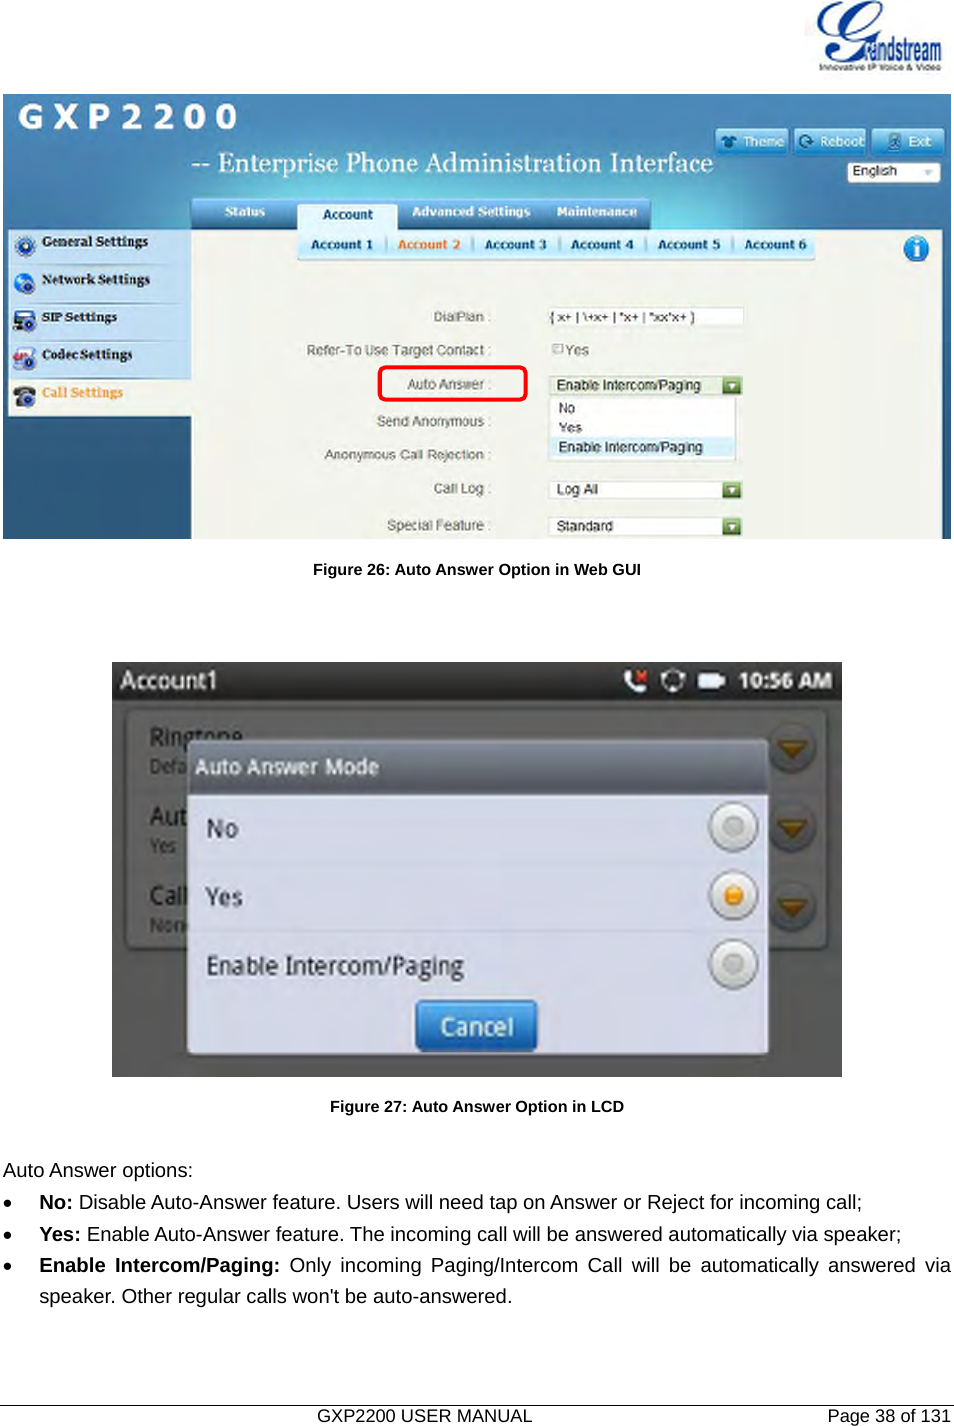
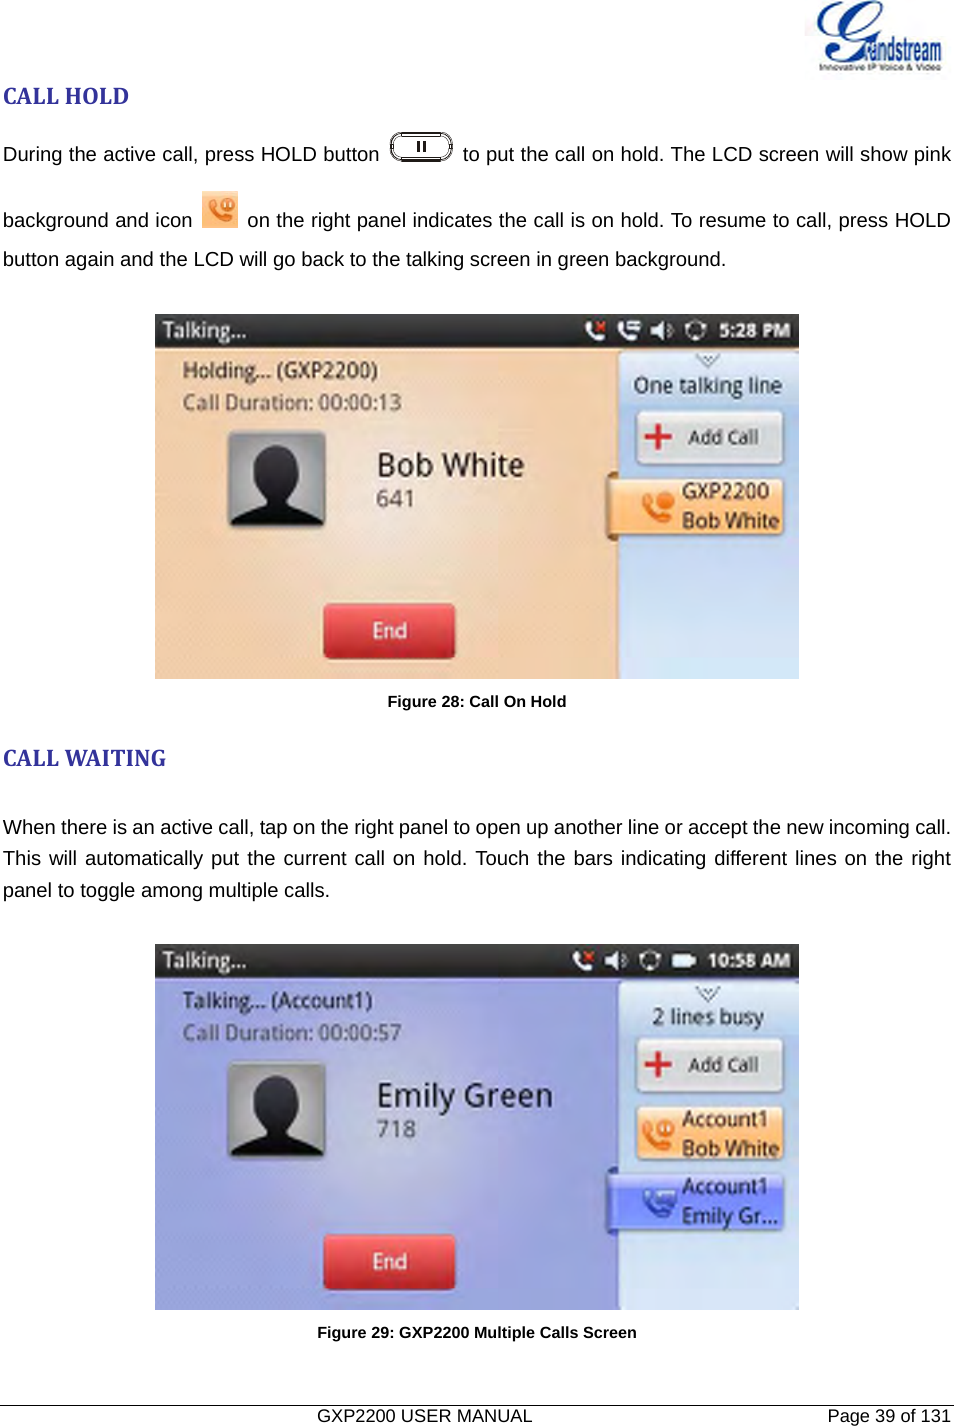
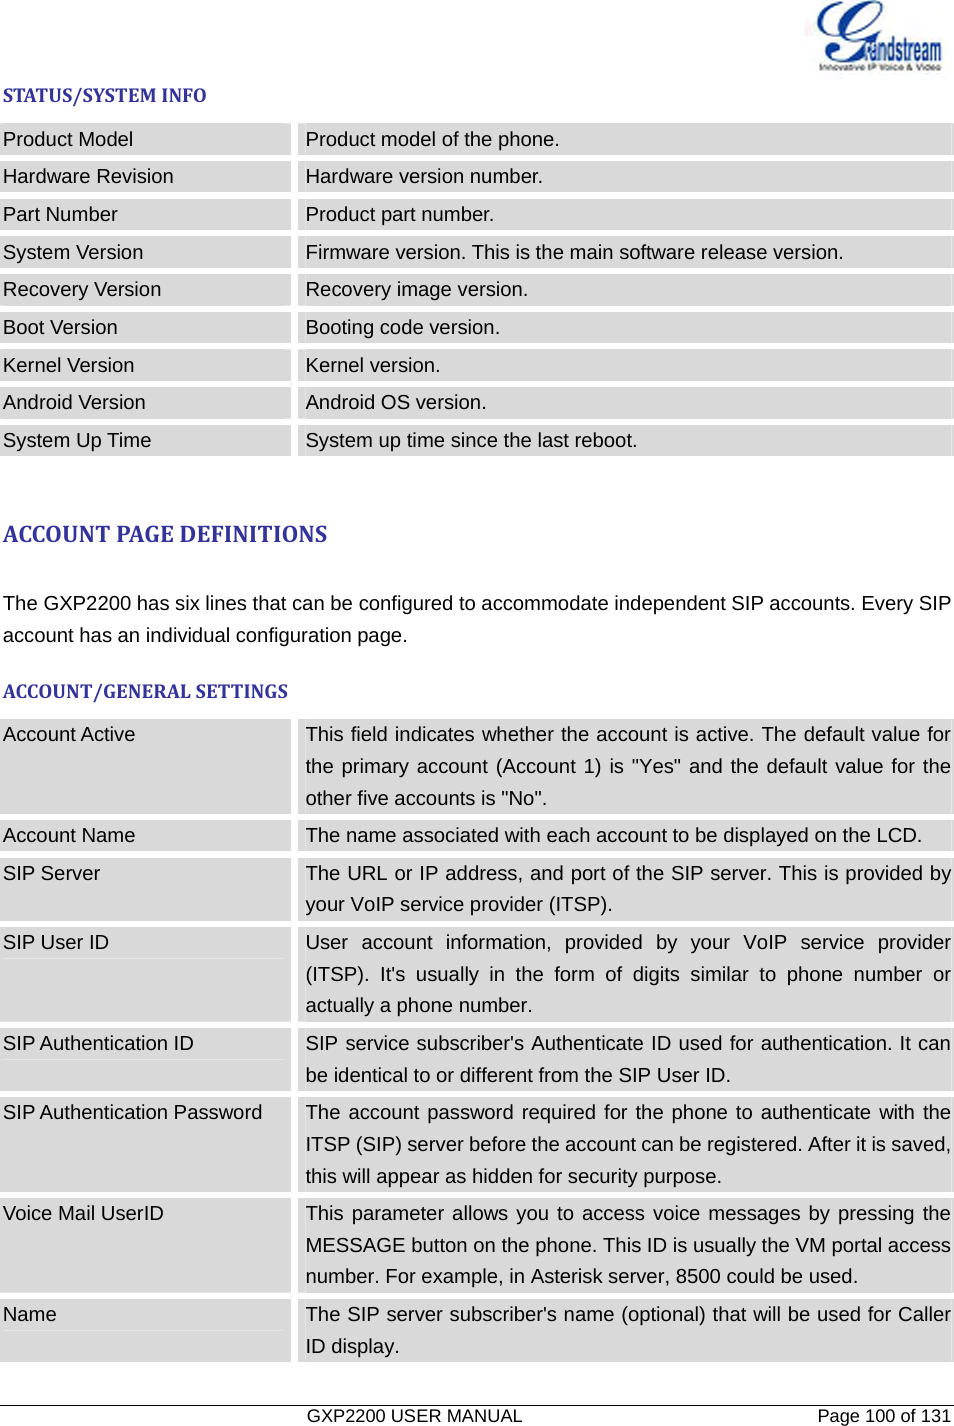
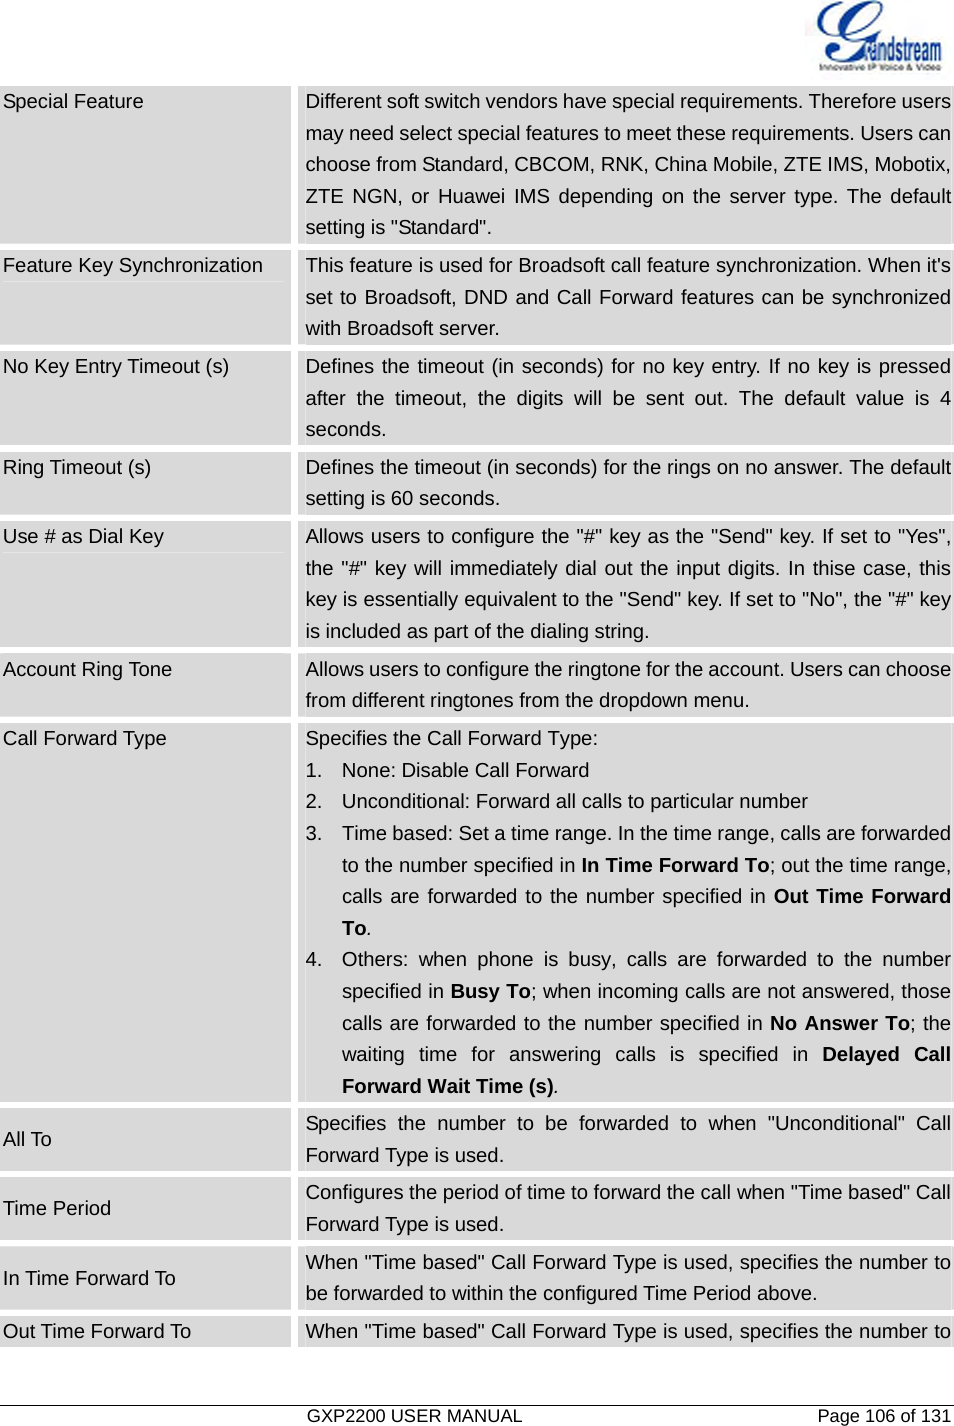
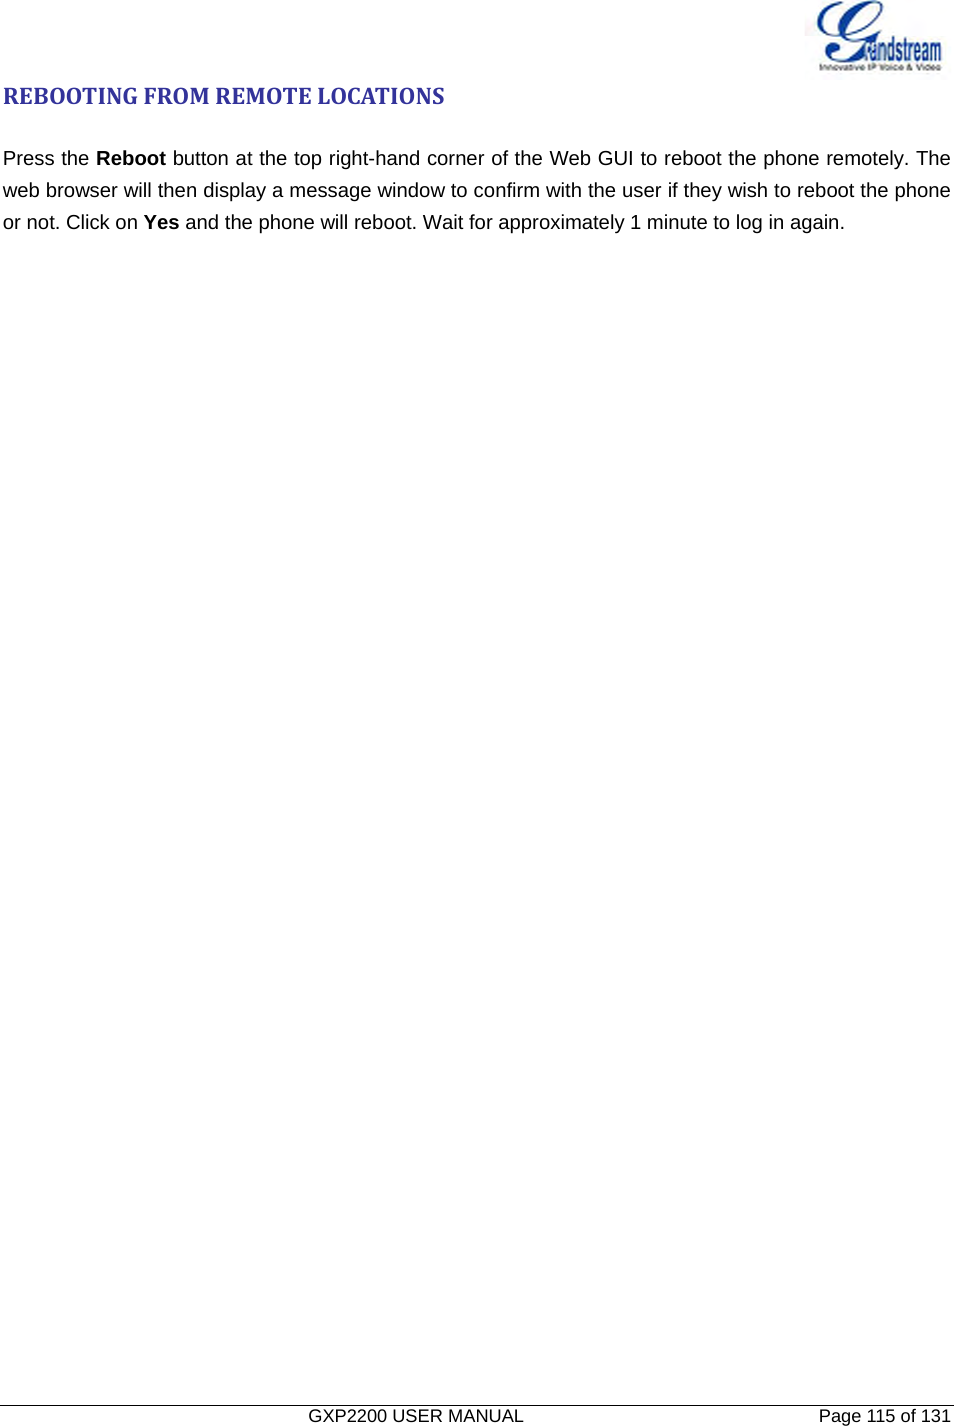
![GXP2200 USER MANUAL Page 105 of 131 Allows any number with leading digit 1 followed by a 3 digit number, followed by any number between 2 and 9, followed by any 7 digit number OR Allows any length of numbers with leading digit 2, replacing the 2 with 011 when dialed. Example of a simple dial plan used in a Home/Office in the US: { ^1900x. | <=1617>[2-9]xxxxxx | 1[2-9]xx[2-9]xxxxxx | 011[2-9]x. | [3469]11 } Explanation of example rule (reading from left to right): • ^1900x. - prevents dialing any number started with 1900; • <=1617>[2-9]xxxxxx - allows dialing to local area code (617) numbers by dialing 7 numbers and 1617 area code will be added automatically; • 1[2-9]xx[2-9]xxxxxx |- allows dialing to any US/Canada Number with 11 digits length; • 011[2-9]x - allows international calls starting with 011; • [3469]11 - allow dialing special and emergency numbers 311, 411, 611 and 911. Note: In some cases where the user wishes to dial strings such as *123 to activate voice mail or other applications provided by their service provider, the * should be predefined inside the dial plan feature. An example dial plan will be: { *x+ } which allows the user to dial * followed by any length of numbers. Refer-To Use Target Contact If set to "Yes", the "Refer-To" header uses the transferred target's Contact header information for attended transfer. The default setting is "No". Auto Answer If set to "Yes", the phone will automatically turn on the speaker phone to answer incoming calls after a short reminding beep. If set to "Enable Intercom/Paging", it will answer the call based on the SIP info header sent from the server/proxy. The default setting is "No". Send Anonymous If set to "Yes", the "From" header in outgoing INVITE messages will be set to anonymous, essentially blocking the Caller ID to be displayed. Anonymous Call Rejection If set to "Yes", anonymous calls will be rejected. The default setting is "No". Call Log Configures Call Log setting on the phone. You can log all calls, only log incoming/outgoing calls or disable call log. The default setting is logging all calls.](https://usermanual.wiki/Grandstream-Networks/GXP2200/User-Guide-1804488-Page-106.png)
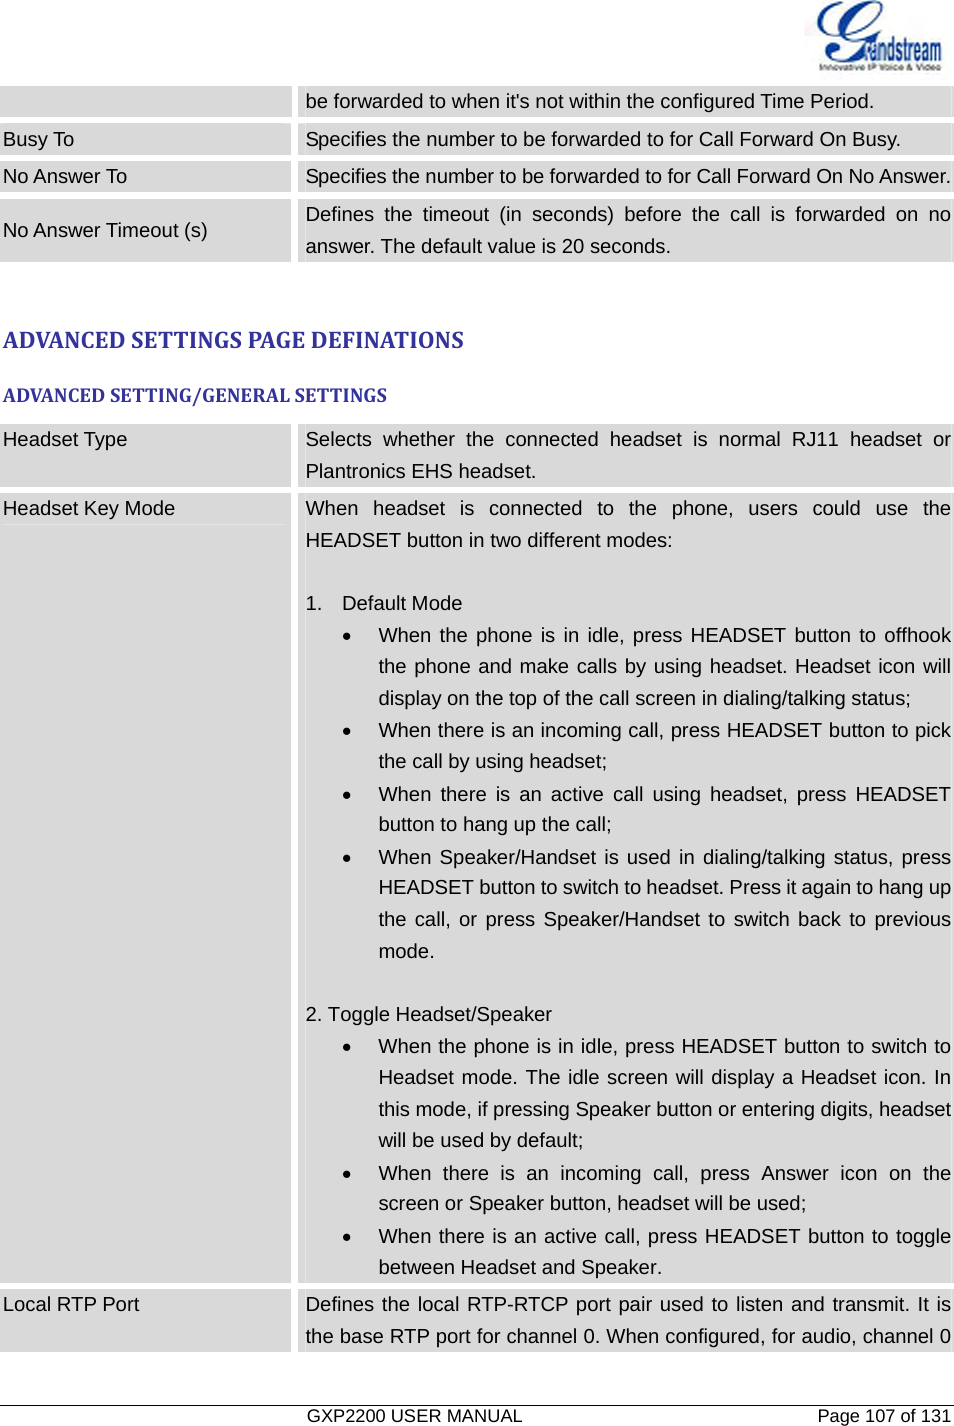
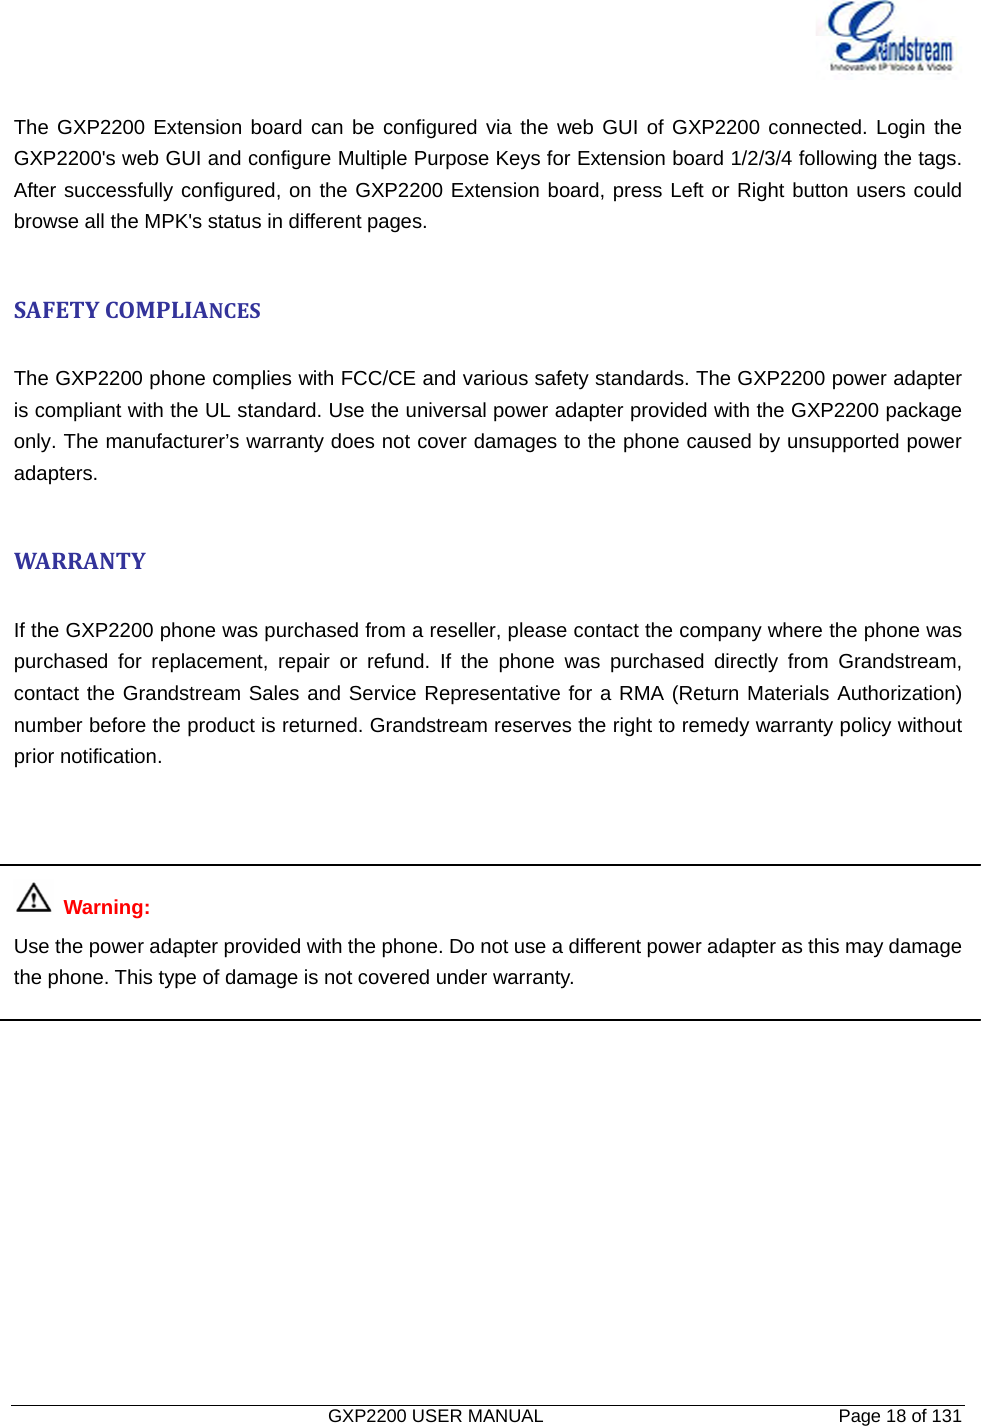
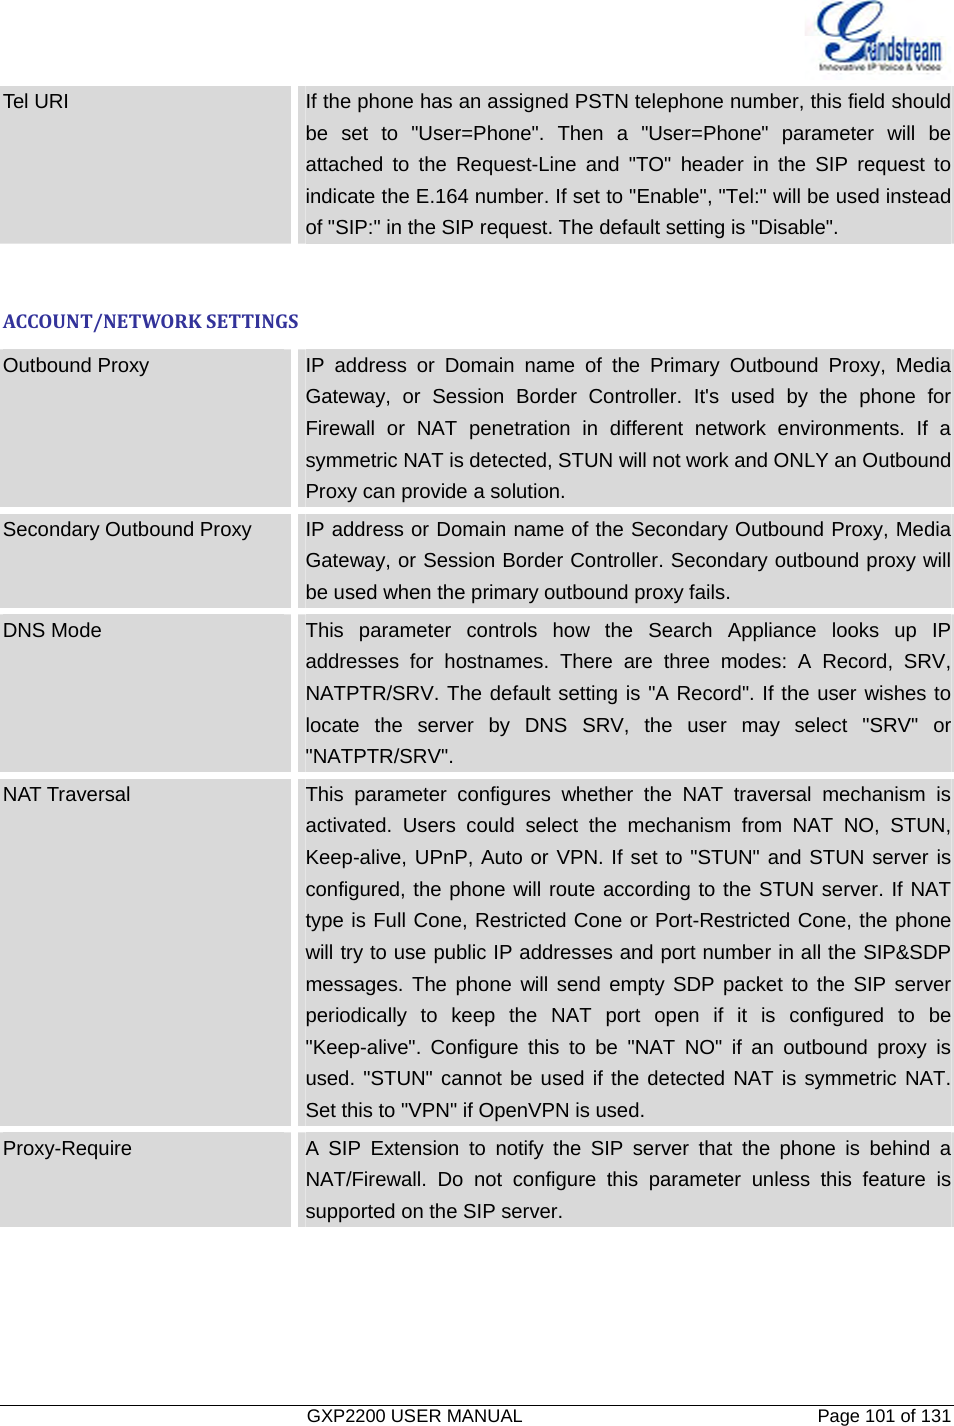
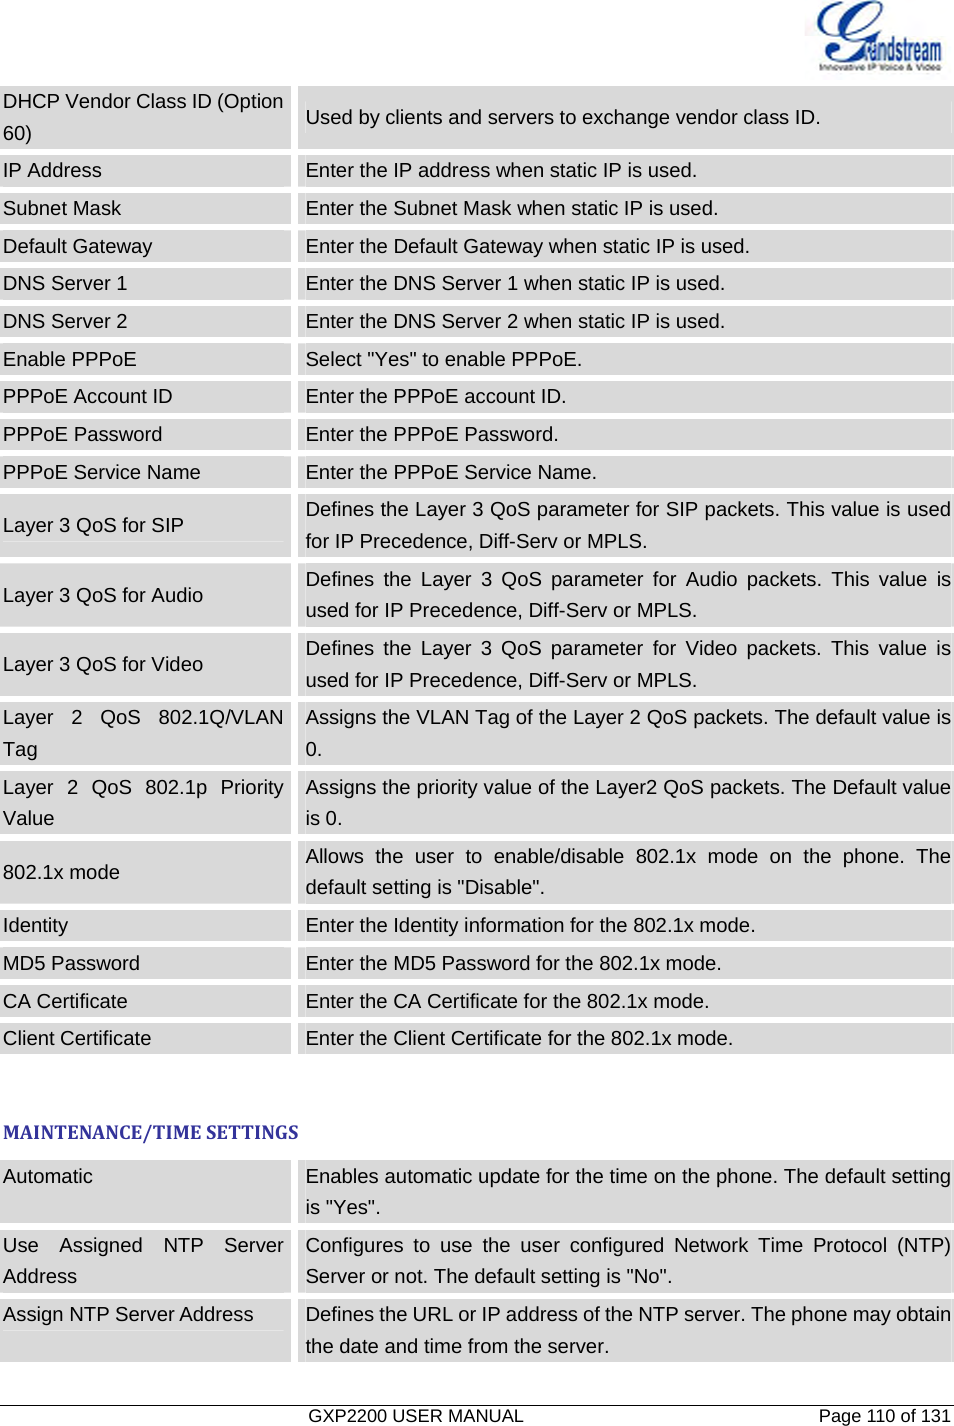
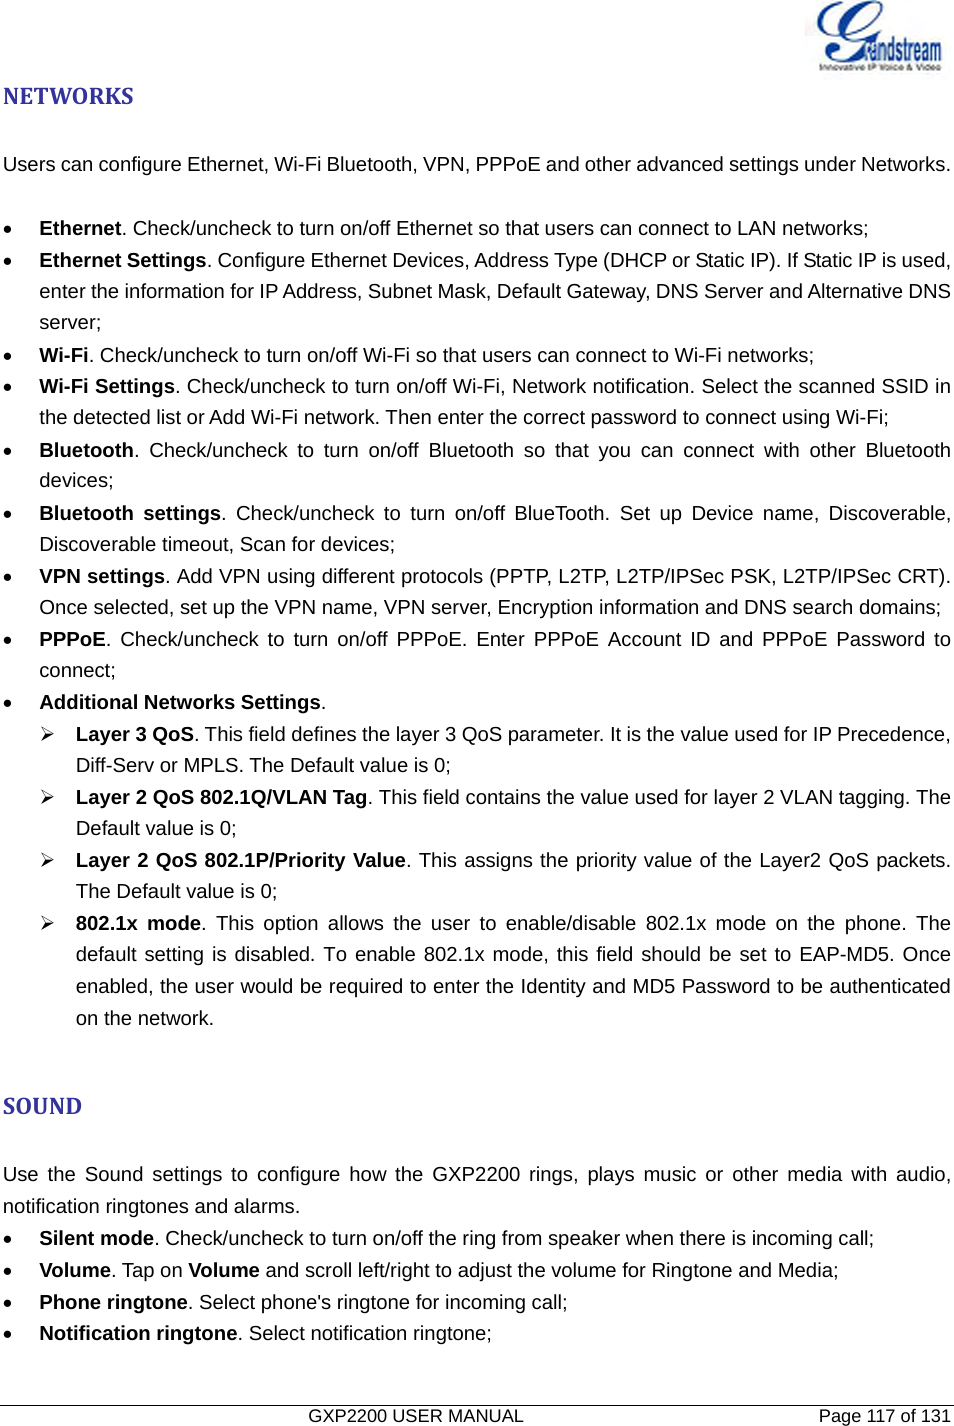
![GXP2200 USER MANUAL Page 109 of 131 SIP server is required to make quick IP call. The default setting is "No". Disable Conference Disables the Conference function. The default setting is "No". Disable Transfer Disables the Transfer function. The default setting is "No". Escape # as %23 in SIP URI Replaces “#” by “%23” for some special situations. The default setting is "Yes". Offhook Auto Dial Configures a User ID/extension to dial automatically when the phone is offhook. The phone will use the first account to dial out. The default setting is "No". ADVANCEDSETTING/TONEGENERATORCall Progress Tones: Dial Tone Ring Back Tone Busy Tone Reorder Tone Confirmation Tone Call-Waiting Tone PSTN Disconnect Tone Using these settings, users can configure ring or tone frequencies based on parameters from the local telecom provider. By default, they are set to the North American standard. Frequencies should be configured with known values to avoid uncomfortable high pitch sounds. Syntax: f1=val,f2=val [,c=on1/off1[-on2/off2[-on3/off3]]]; (Frequencies are in Hz and cadence on and off are in 10ms) ON is the period of ringing (“On time” in ‘ms’) while OFF is the period of silence. In order to set a continuous ring, OFF should be zero. Otherwise it will ring ON ms and a pause of OFF ms and then repeat the pattern. Up to three cadences are supported. Call-Waiting Tone Gain This adjusts the call waiting tone volume. The default setting is "Low". Default Ring Cadence This defines the ring cadence for the phone. The default setting is: c=2000/4000. MAINTENANCEPAGEDEFINATIONMAINTENANCE/NETWORKSETTINGSAddress Type Allows users to configure the appropriate network settings on the phone. Users could select "DHCP", "Static IP" or "PPPoE". By default, it is set to "DHCP". DHCP Host name (Option 12) Specifies the name of the client. This field is optional but may be required by some Internet Service Providers.](https://usermanual.wiki/Grandstream-Networks/GXP2200/User-Guide-1804488-Page-110.png)


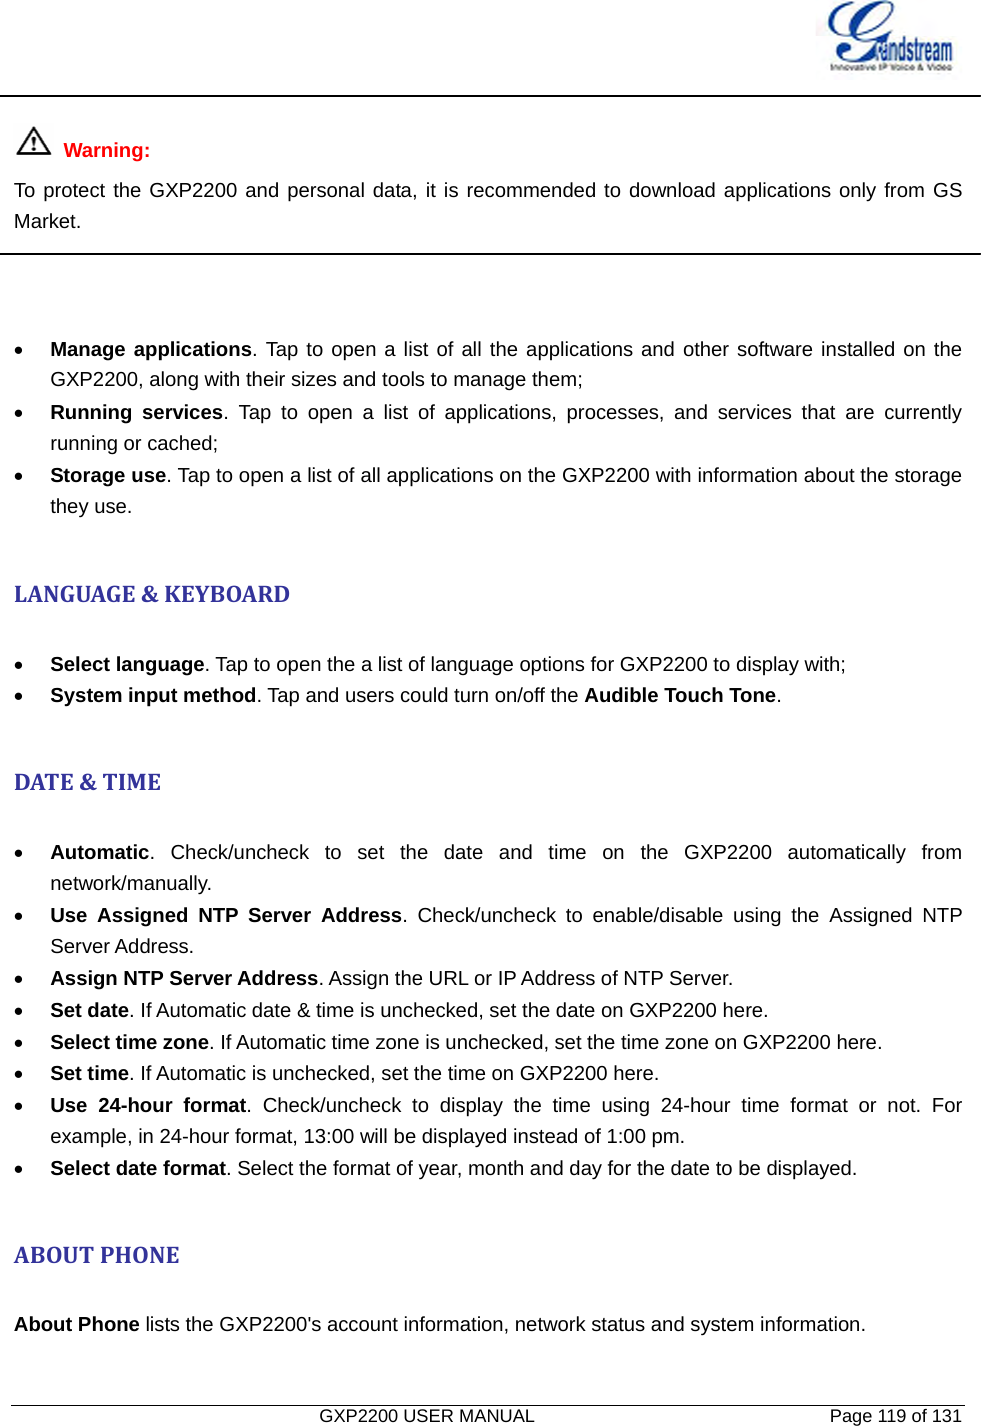

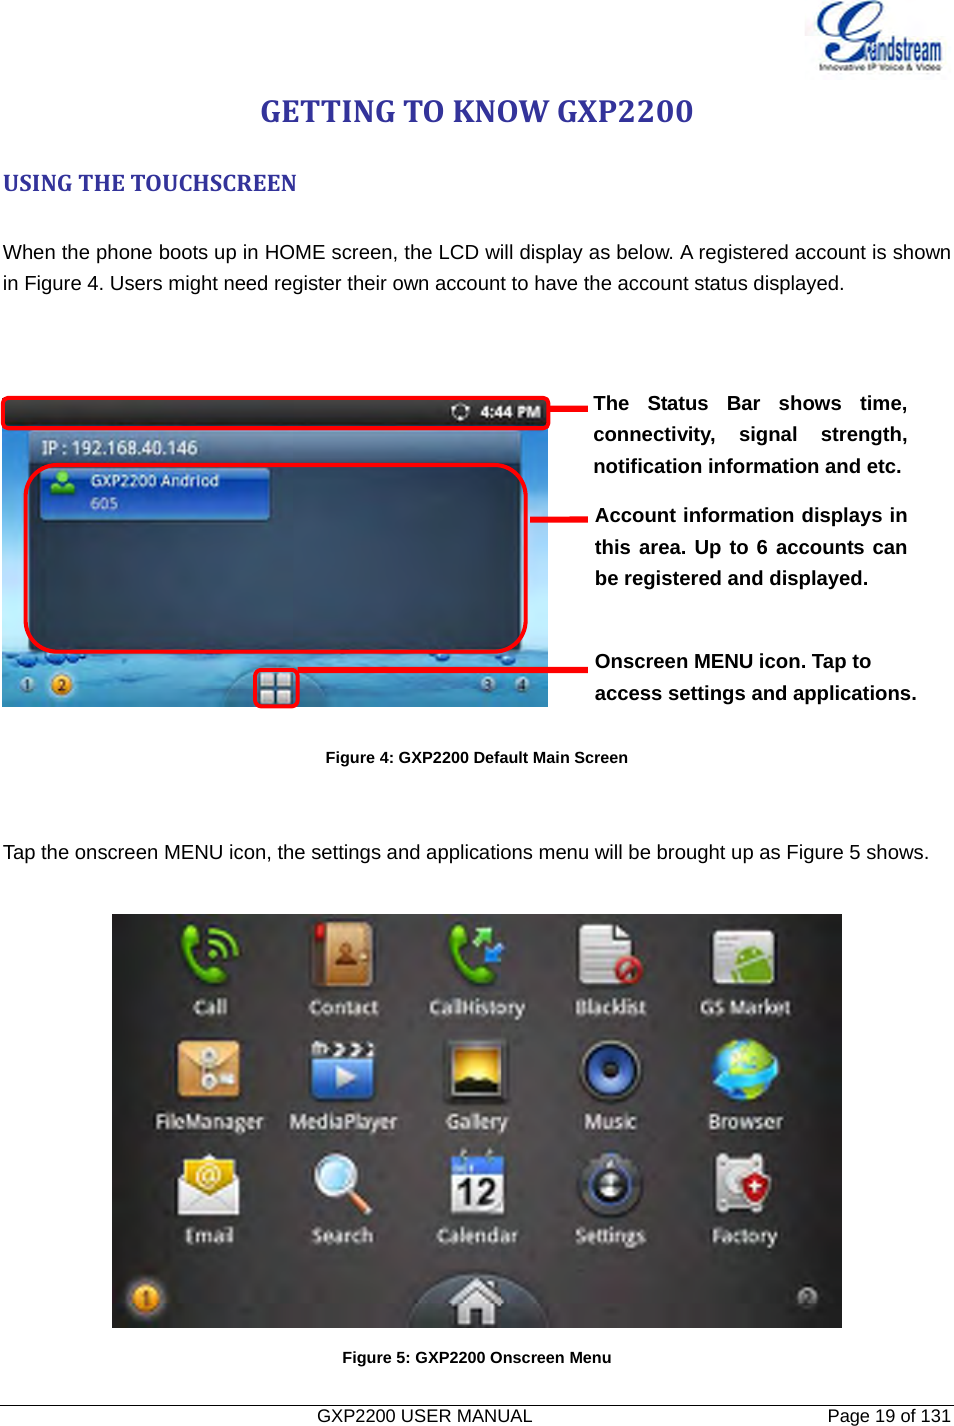
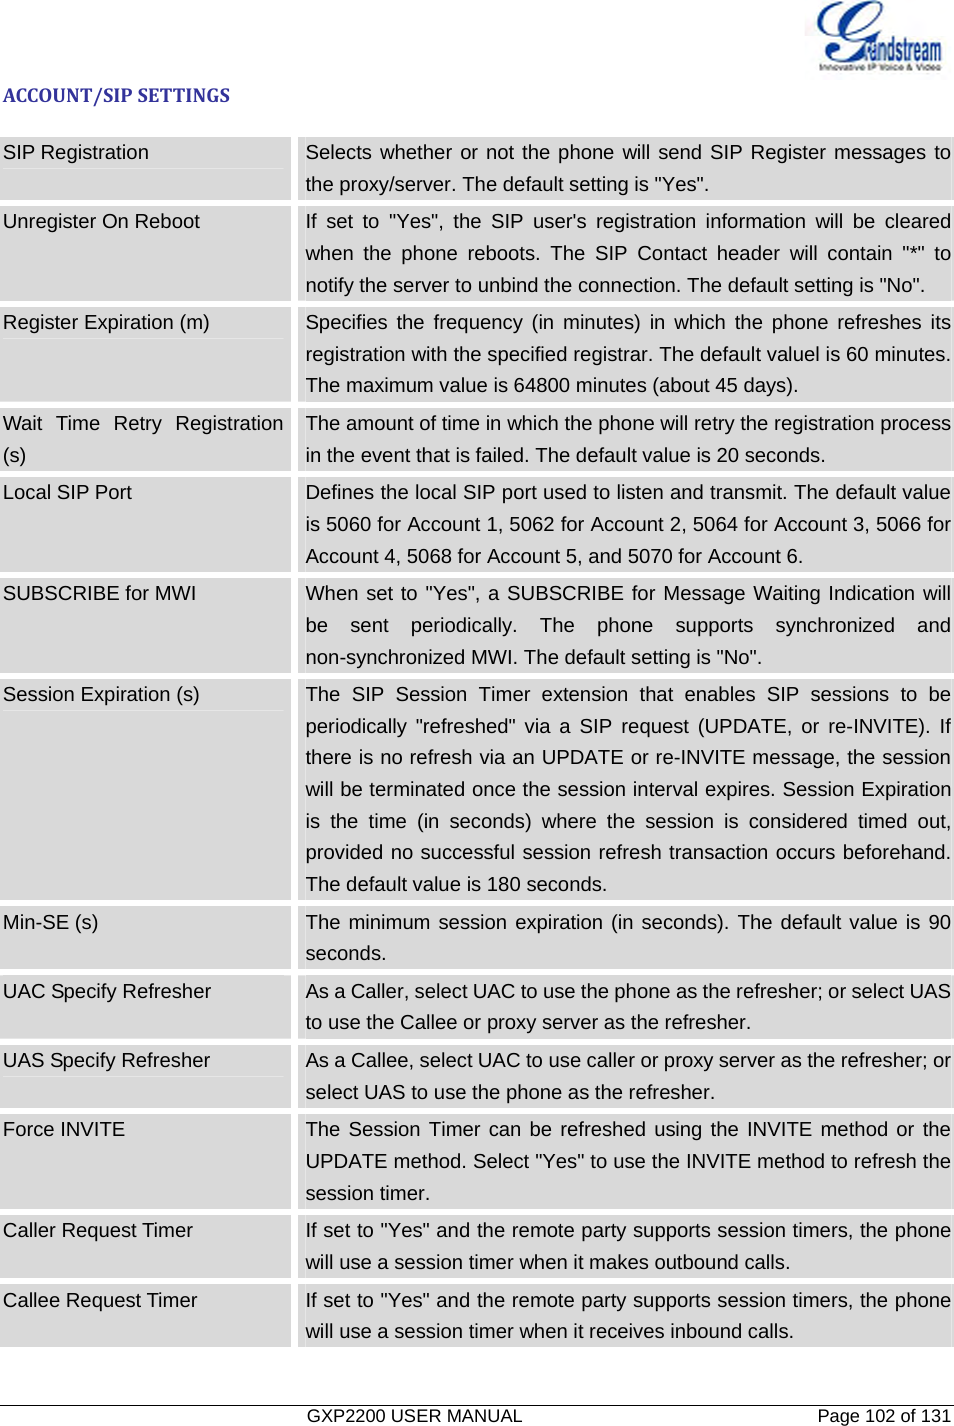
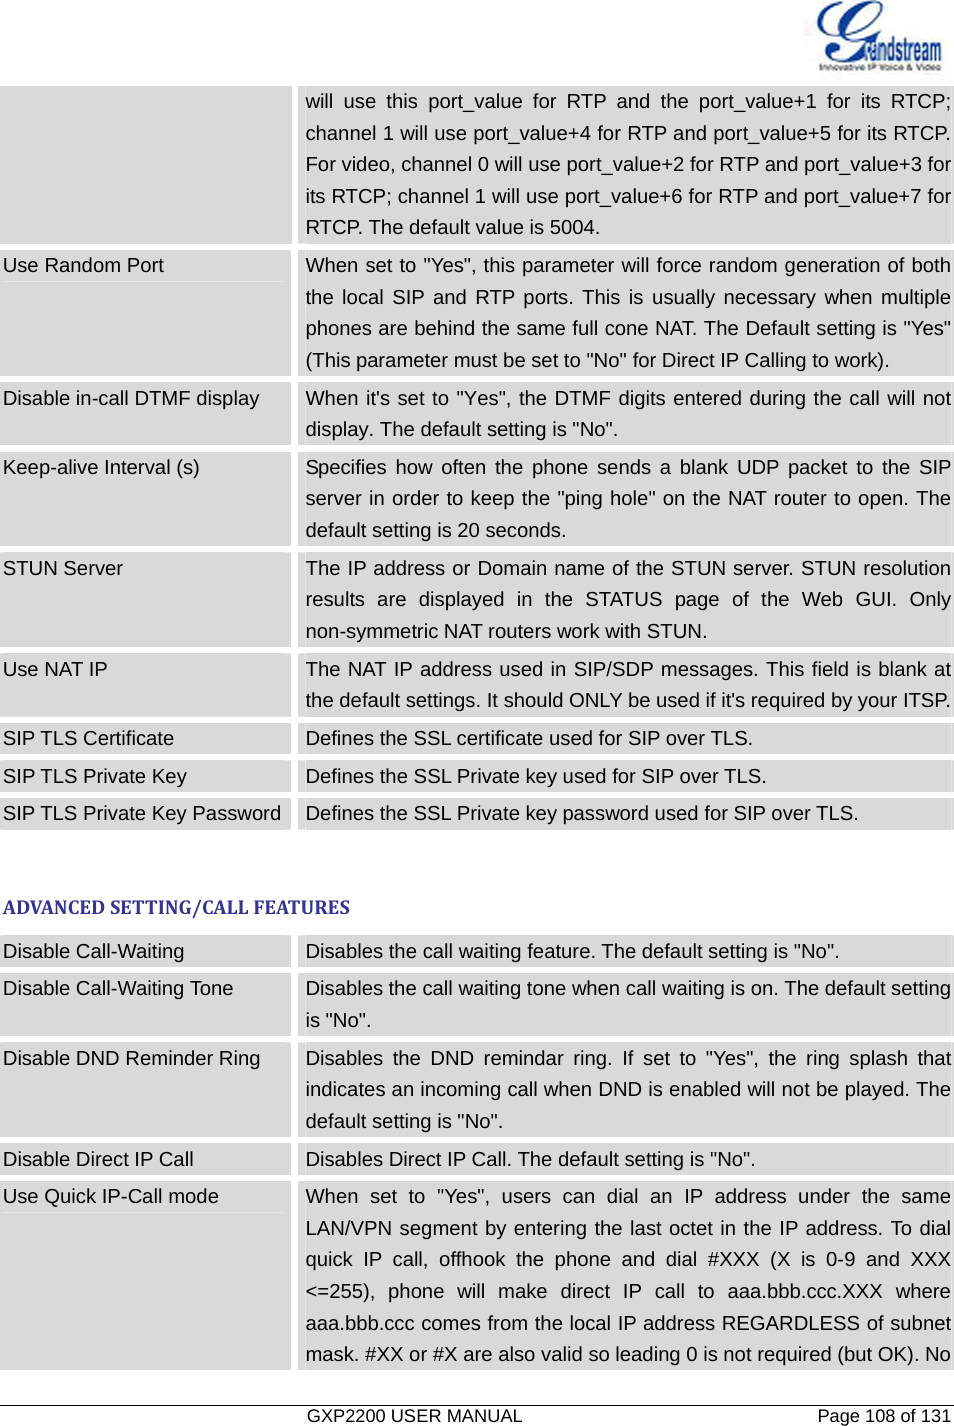
![GXP2200 USER MANUAL Page 125 of 131 NOLOCALFIRMWARESERVERS For users that would like to use remote upgrading without a local TFTP server, Grandstream offers a NAT-friendly HTTP server. This enables users to download the latest software upgrades for their phone via this server. Please refer to the webpage: http://www.grandstream.com/support/firmware. Alternatively, users can download a free TFTP or HTTP server and conduct a local firmware upgrade. A free windows version TFTP server is available for download from : http://support.solarwinds.net/updates/New-customerFree.cfm http://tftpd32.jounin.net/. Instructions for local firmware upgrade via TFTP: 1. Unzip the firmware files and put all of them in the root directory of the TFTP server; 2. Connect the PC running the TFTP server and the GXP2200 device to the same LAN segment; 3. Launch the TFTP server and go to the File menu->Configure->Security to change the TFTP server's default setting from "Receive Only" to "Transmit Only" for the firmware upgrade; 4. Start the TFTP server and configure the TFTP server in the phone’s web configuration interface; 5. Configure the Firmware Server Path to the IP address of the PC; 6. Update the changes and reboot the GXP2200. End users can also choose to download a free HTTP server from http://httpd.apache.org/ or use Microsoft IIS web server. Note: When the GXP2200 boots up, it will send a TFTP or HTTP request to download the configuration file cfgxxxxxxxxxxxx and cfgxxxxxxxxxxxx.xml ("xxxxxxxxxxxx" is the MAC address of the phone). If it is a normal TFTP or HTTP upgrade, the following messages “TFTP Error from [IP ADRESS] requesting cfg000b82023dd4 : File does not exist. Configuration File Download” can be ignored if it shows in the TFTP/HTTP server log. CONFIGURATIONFILEDOWNLOAD Grandstream SIP Devices can be configured via the Web Interface as well as via a Configuration File (binary or XML) through TFTP or HTTP/HTTPS. The “Config Server Path” is the TFTP, HTTP or HTTPS](https://usermanual.wiki/Grandstream-Networks/GXP2200/User-Guide-1804488-Page-126.png)