Grandstream Networks GXV317X IP Multimedia Phone User Manual
Grandstream Networks, Inc. IP Multimedia Phone
UserManual.wiki
>
Grandstream Networks
>
GXV317X User Manual
>
YZZGXV317X_user manual part 2-rev1
Contents
1.
YZZGXV317X_user manual part 1-rev1
2.
YZZGXV317X_user manual part 2-rev1
YZZGXV317X_user manual part 2-rev1
Navigation menu
Upload a User Manual
Namespaces
Wiki Guide
HTML
PDF
Info
Views
User Manual
Discussion / Help
Navigation
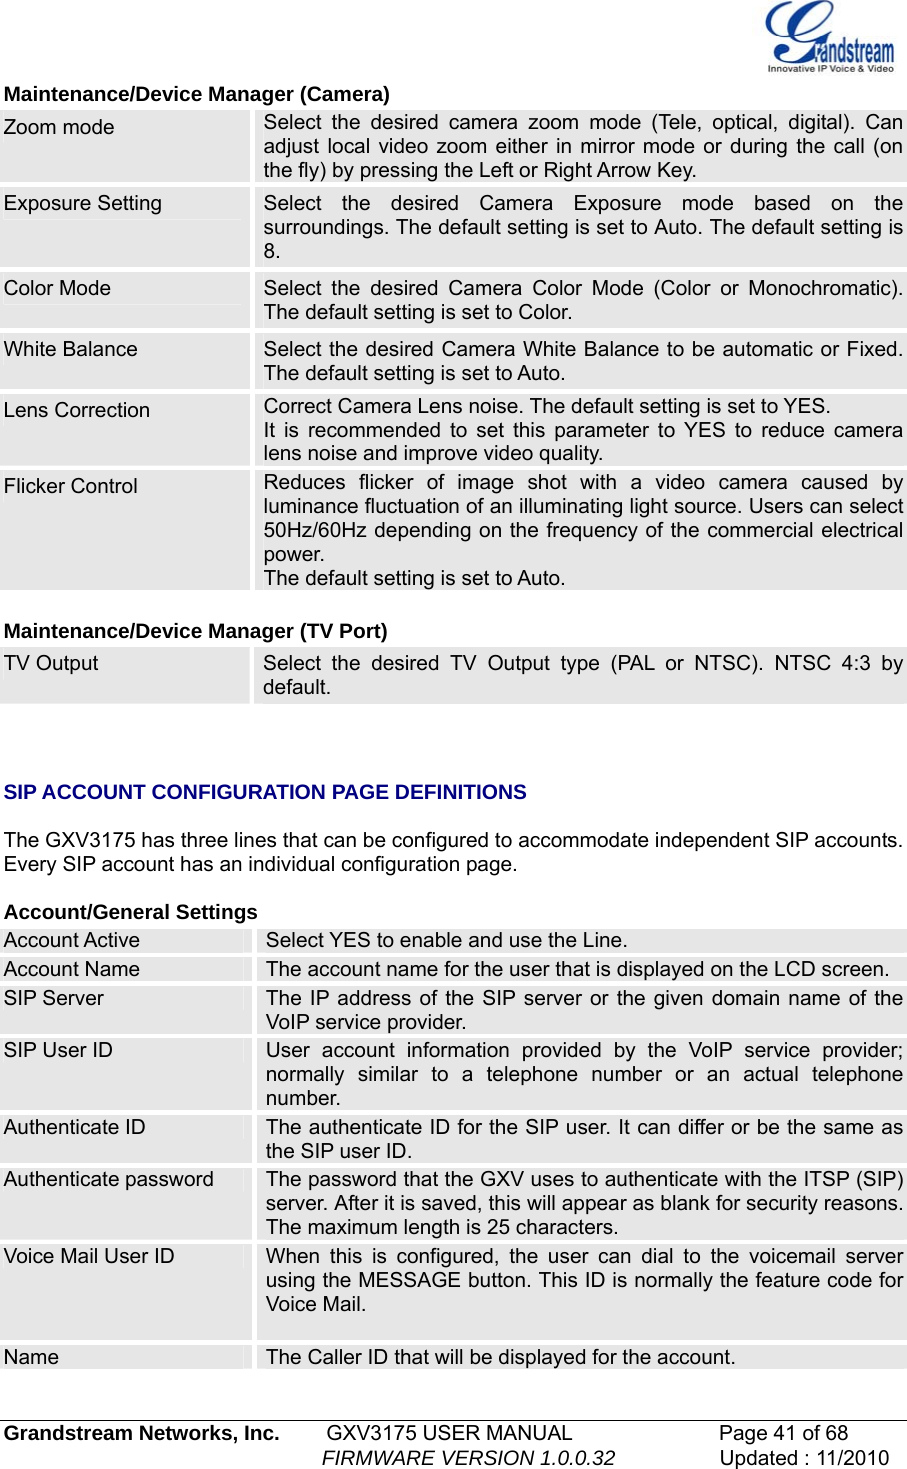
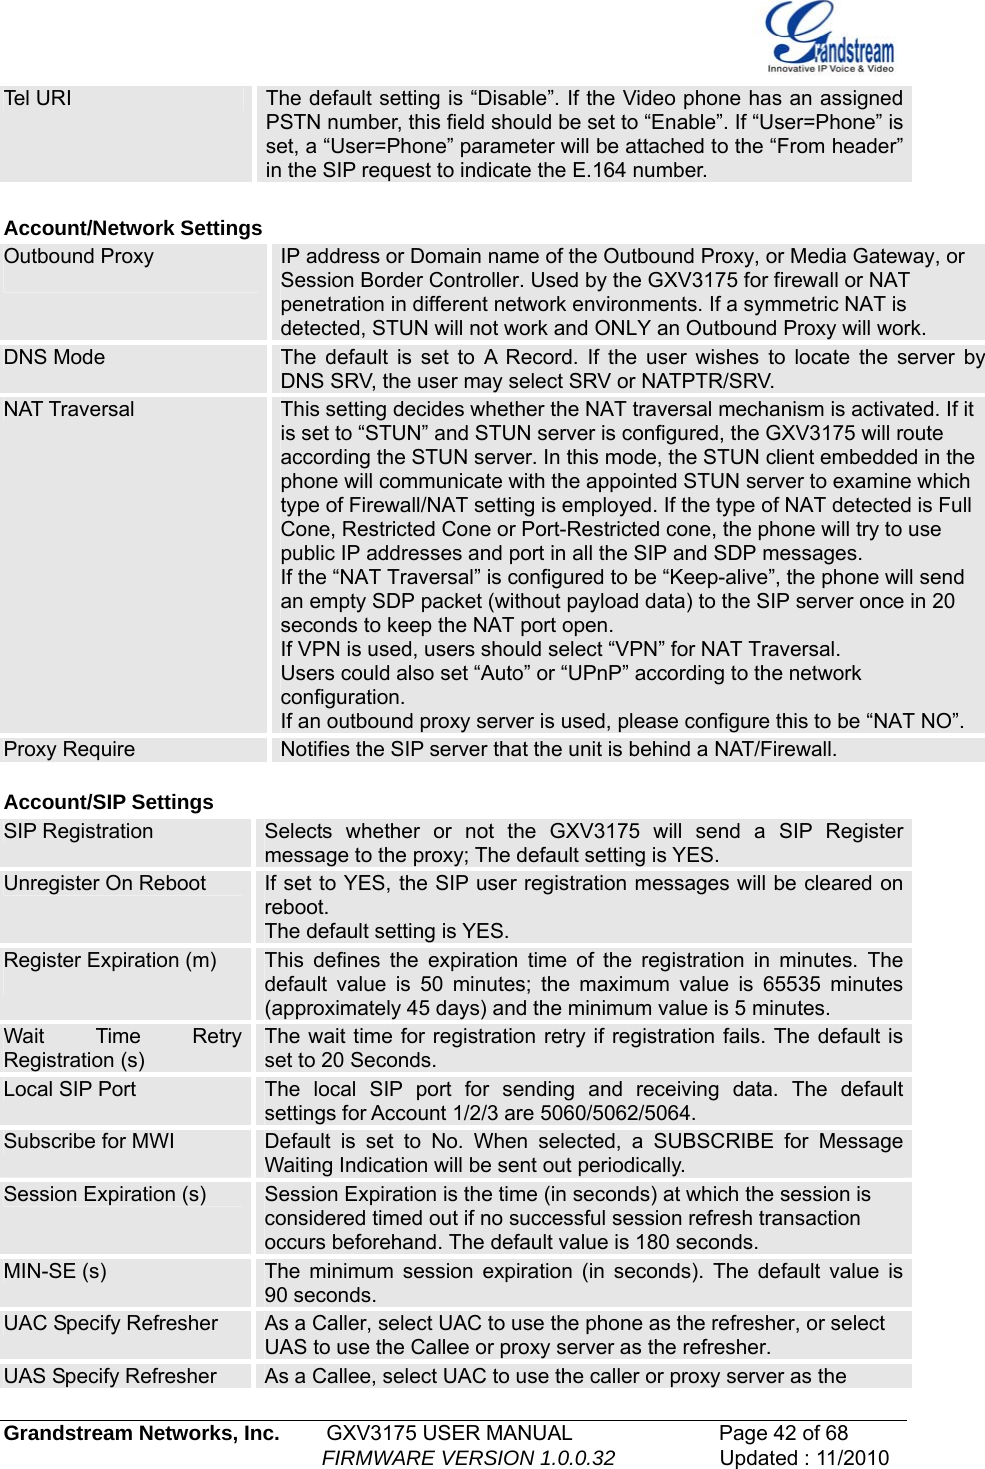
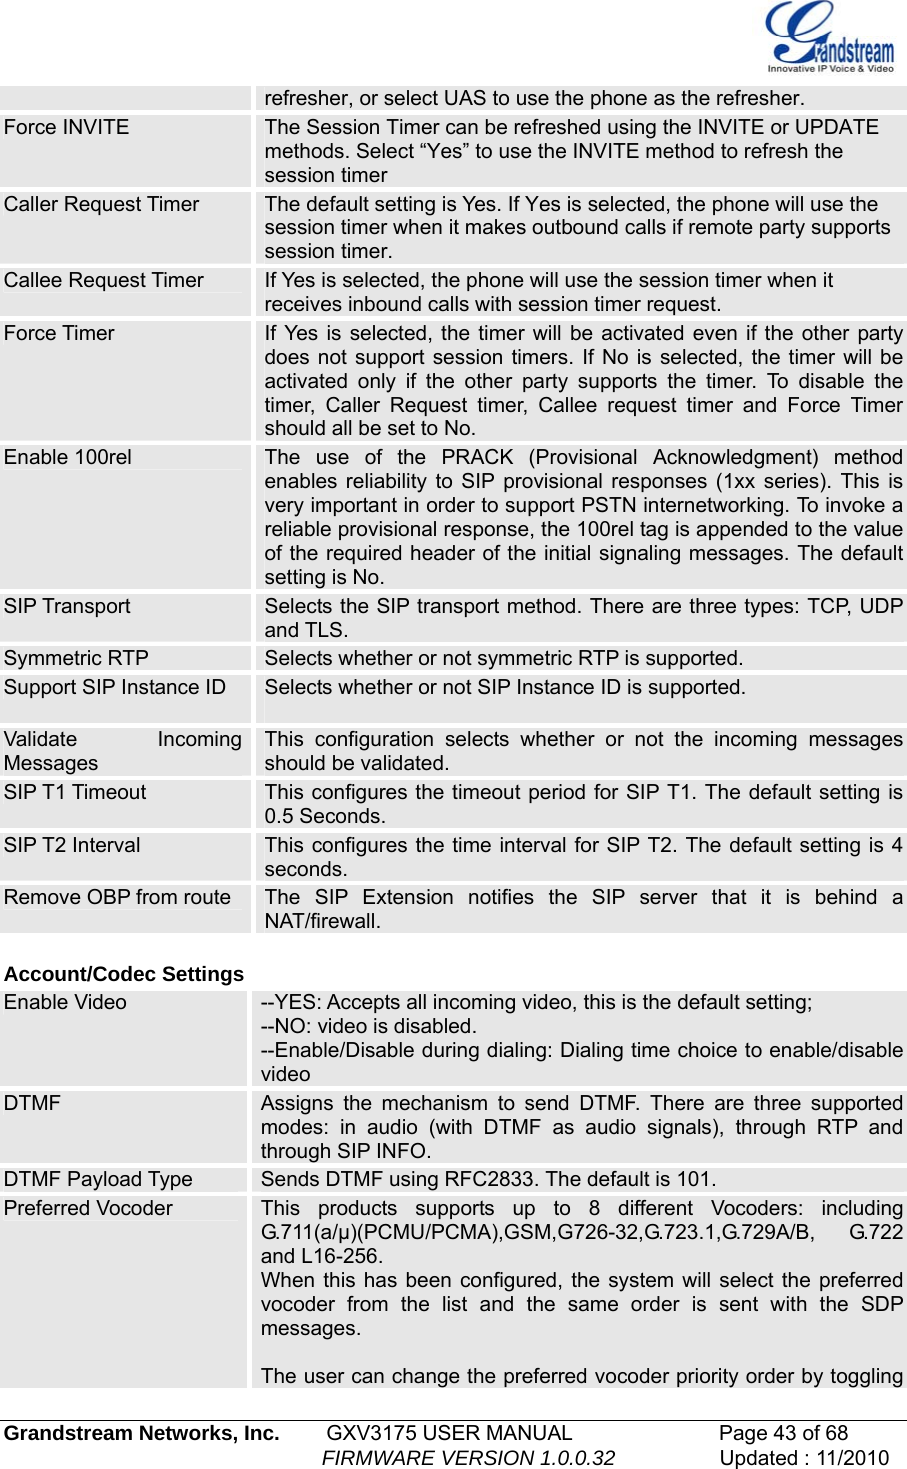
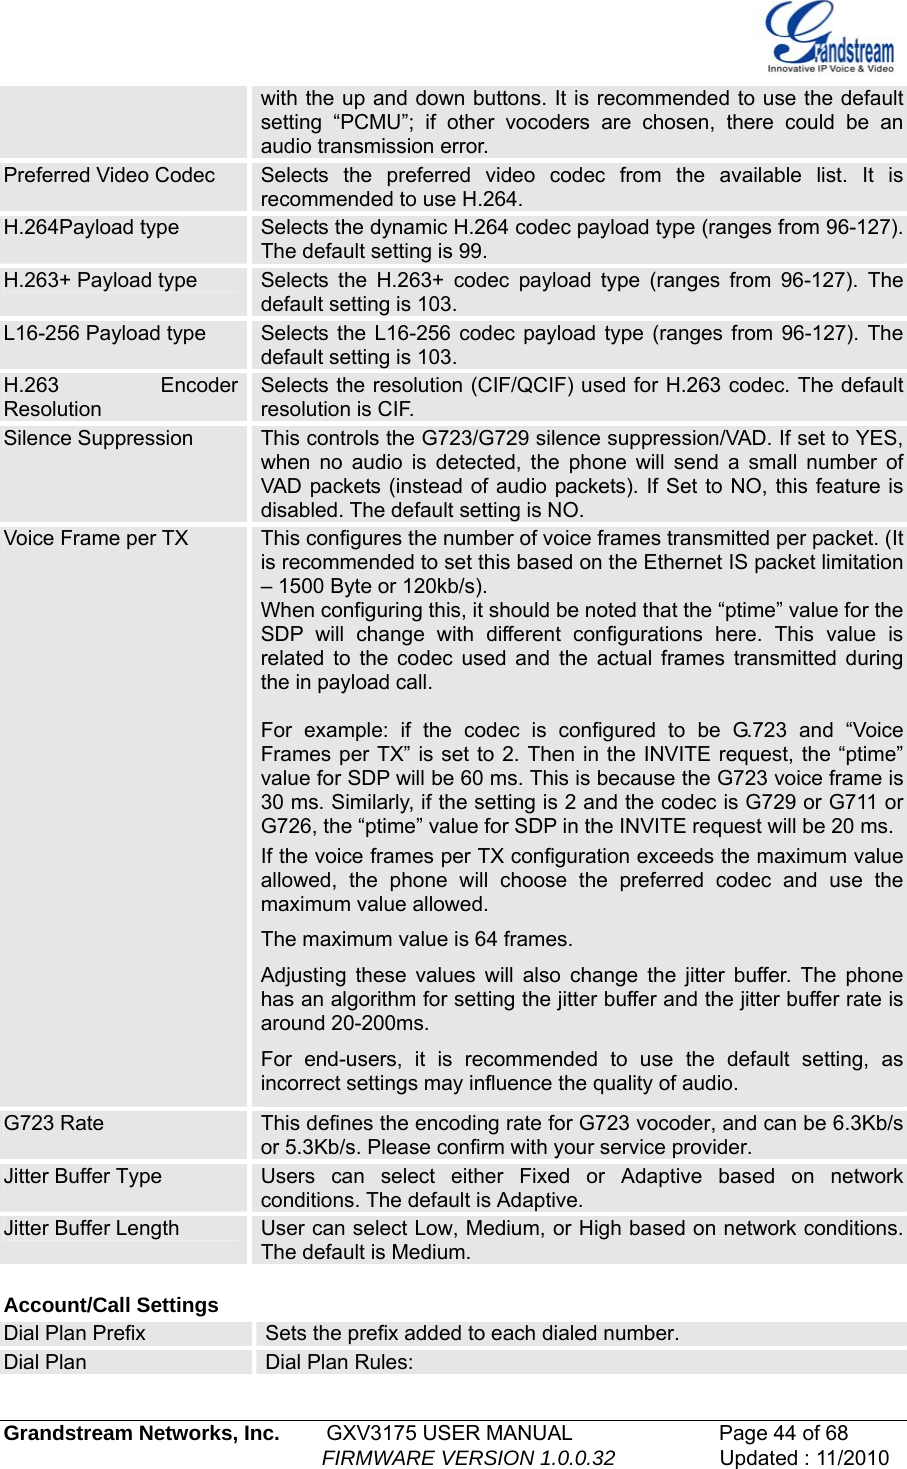
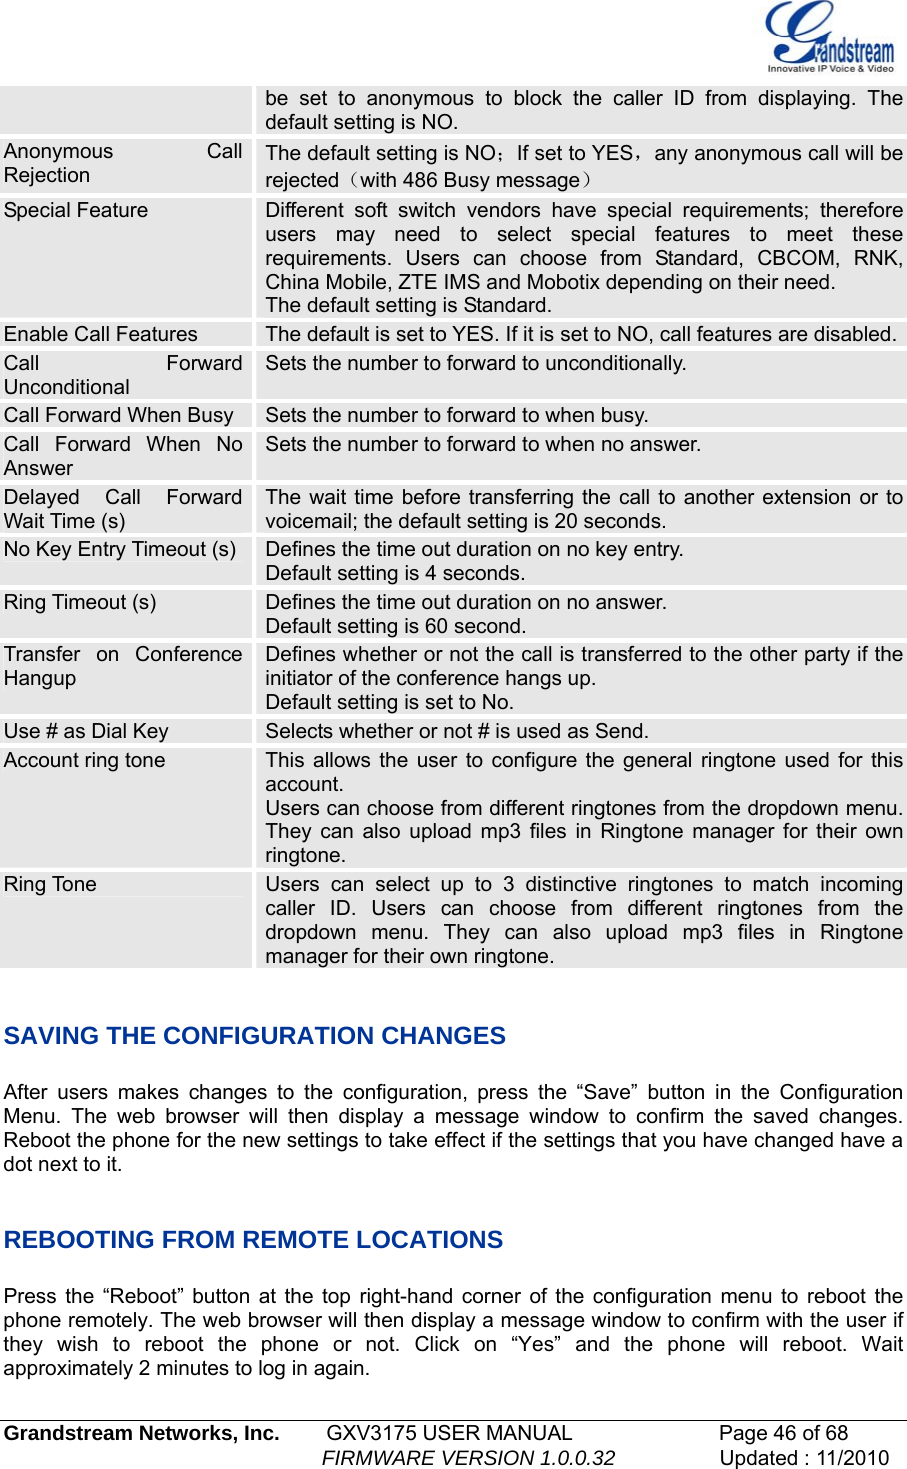
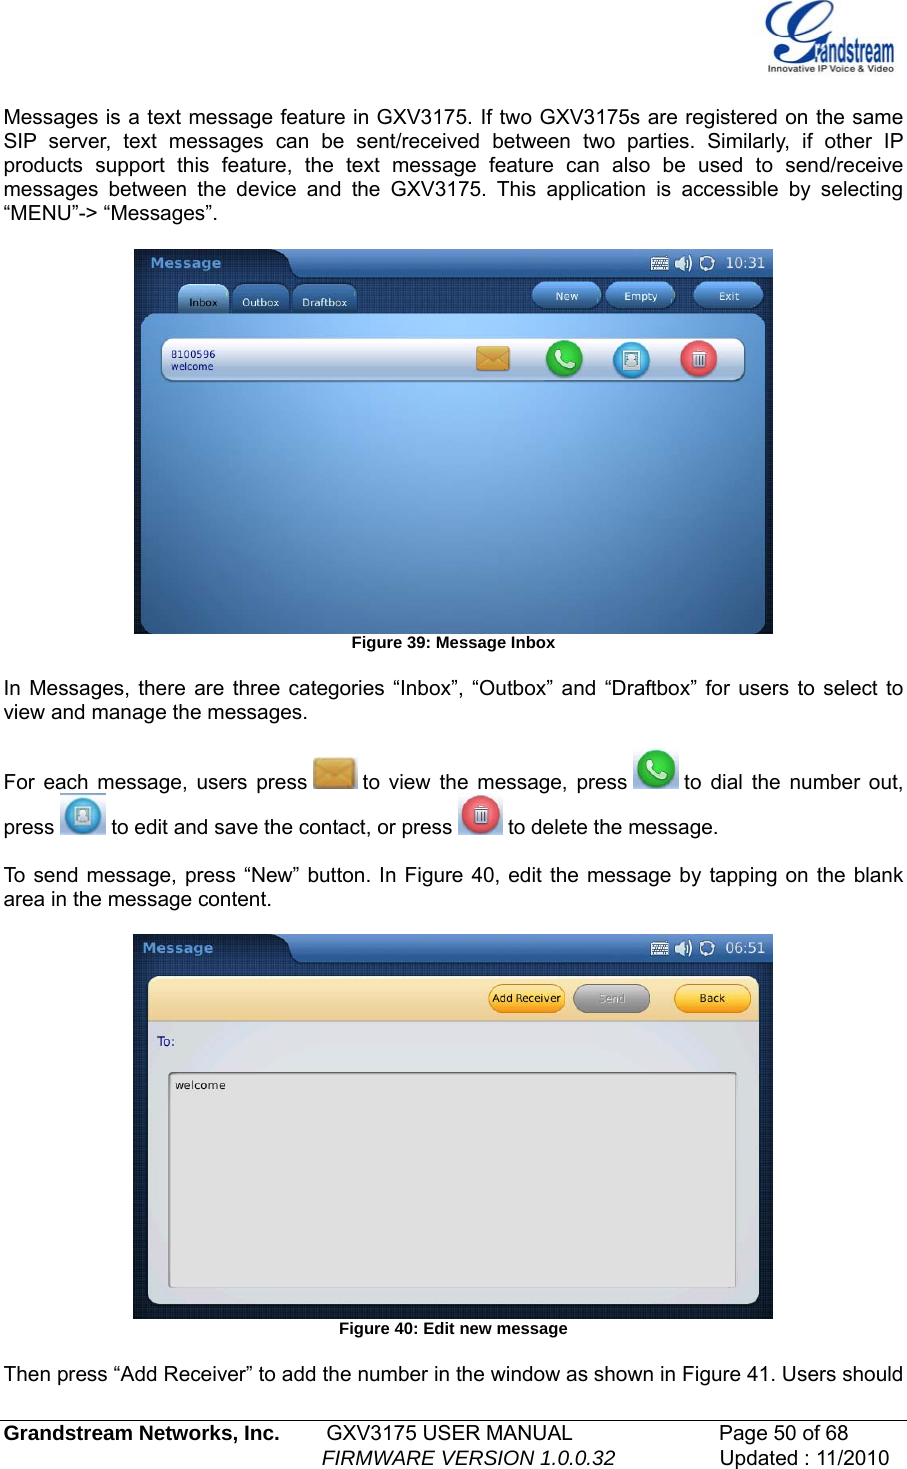
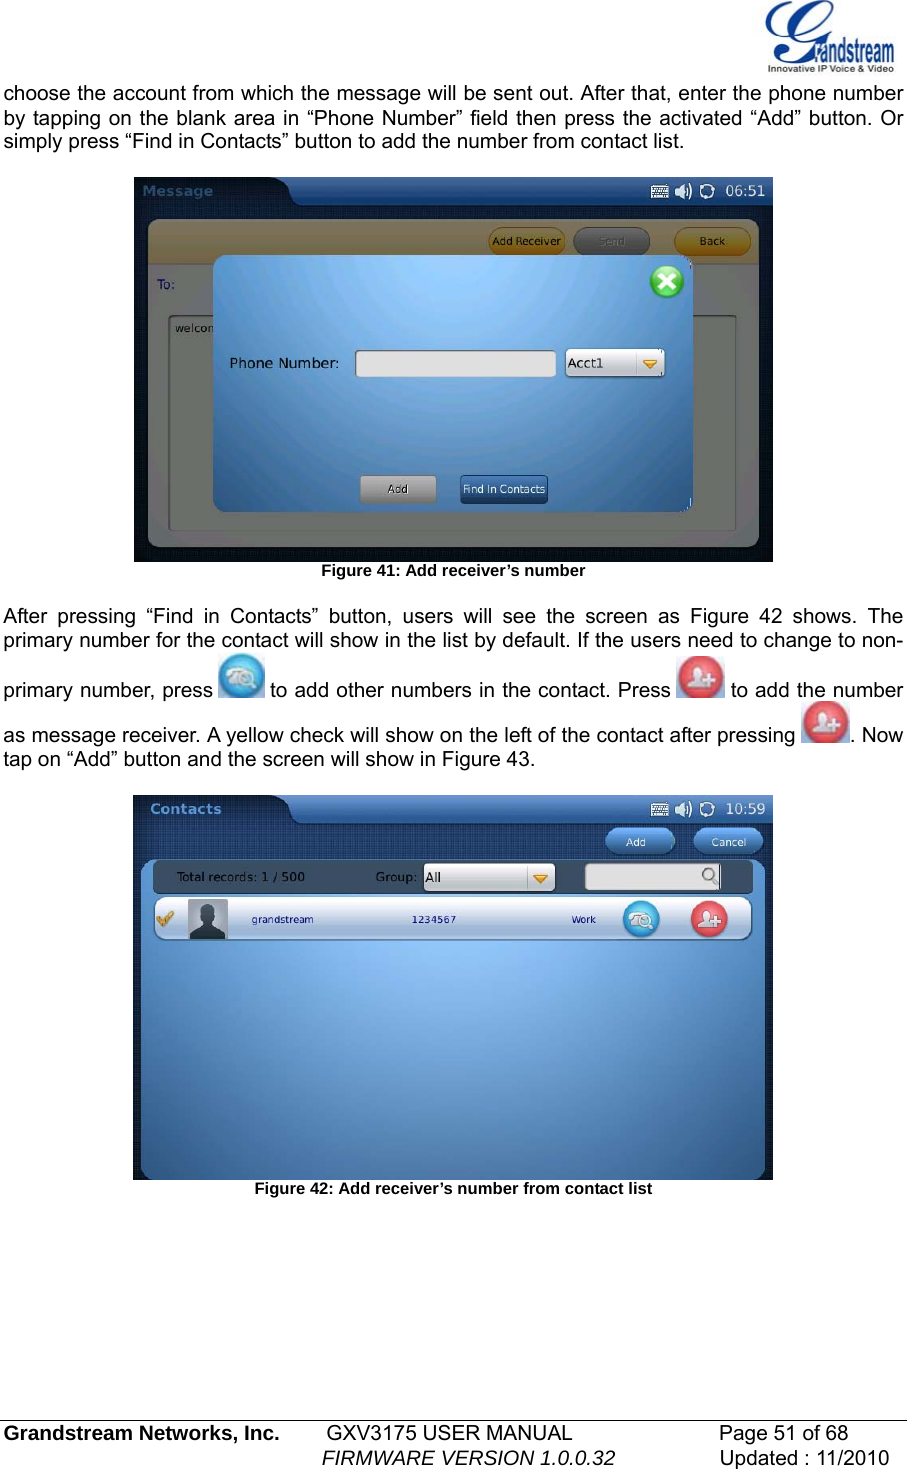
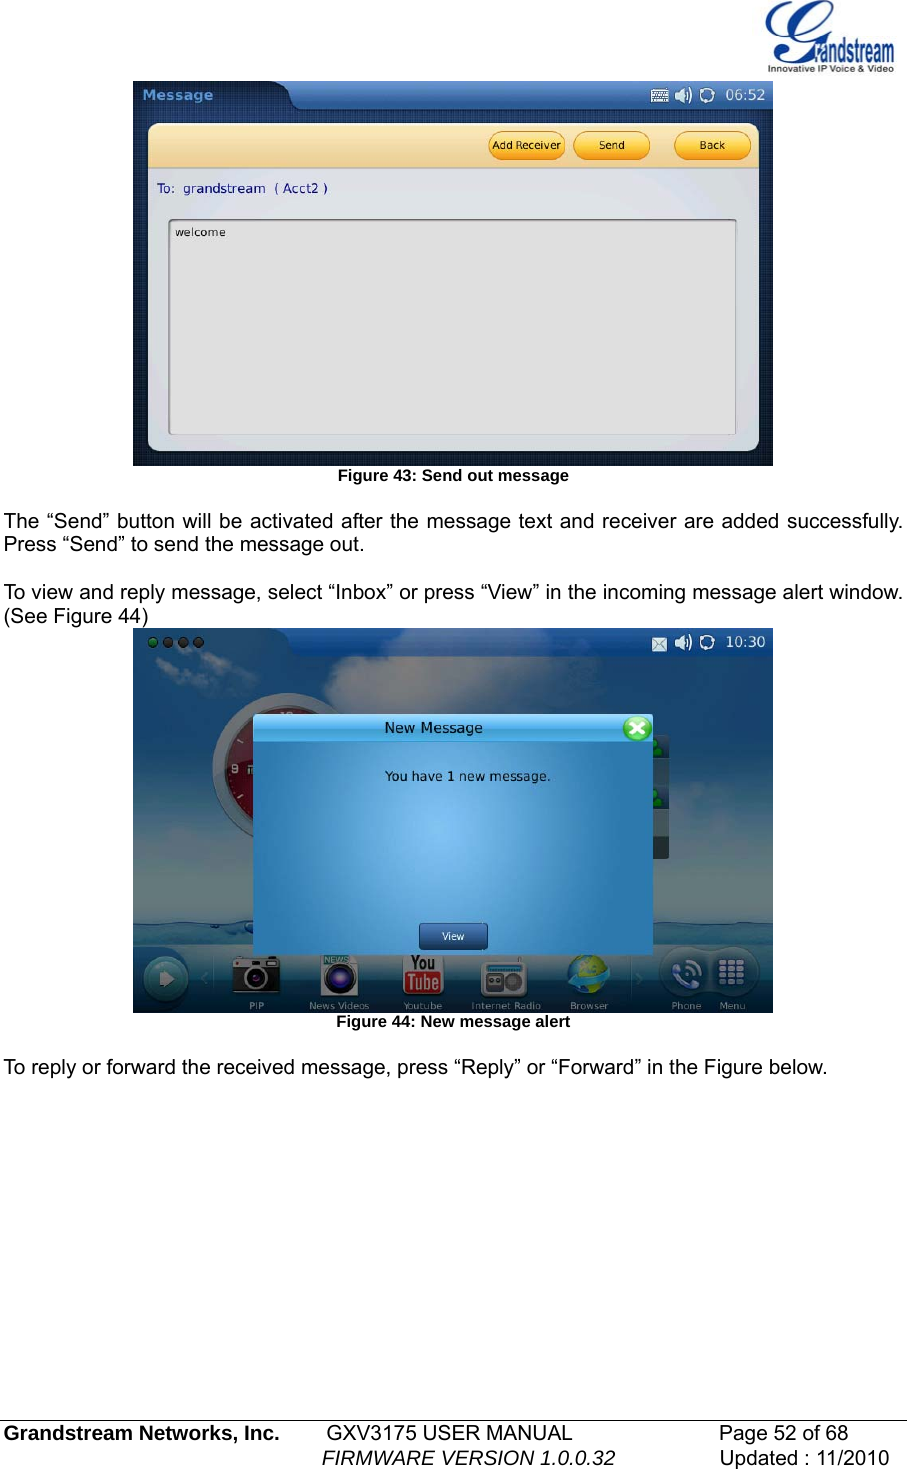
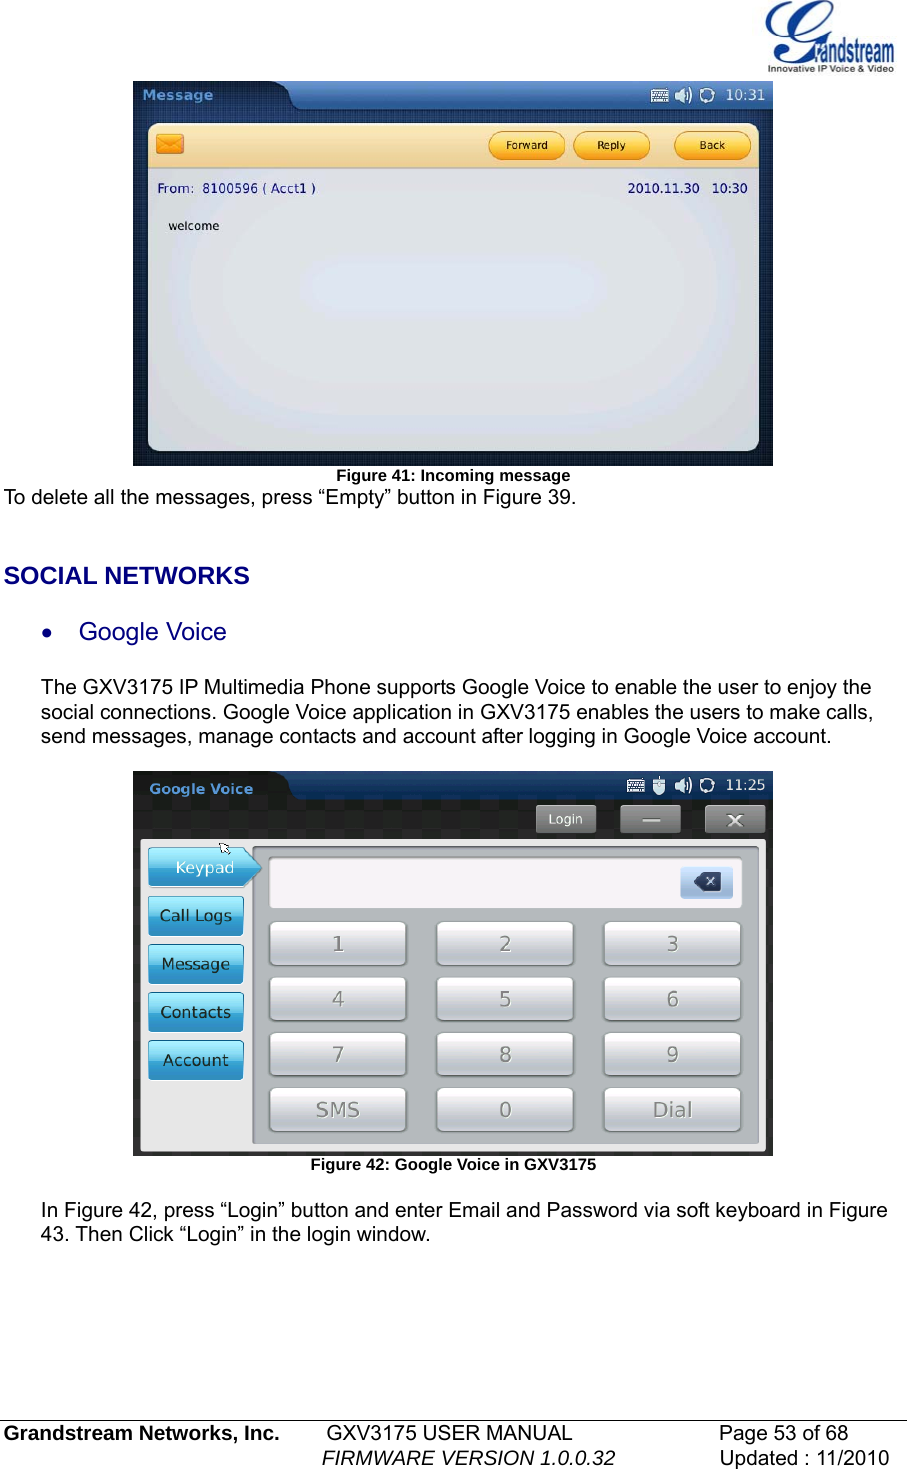
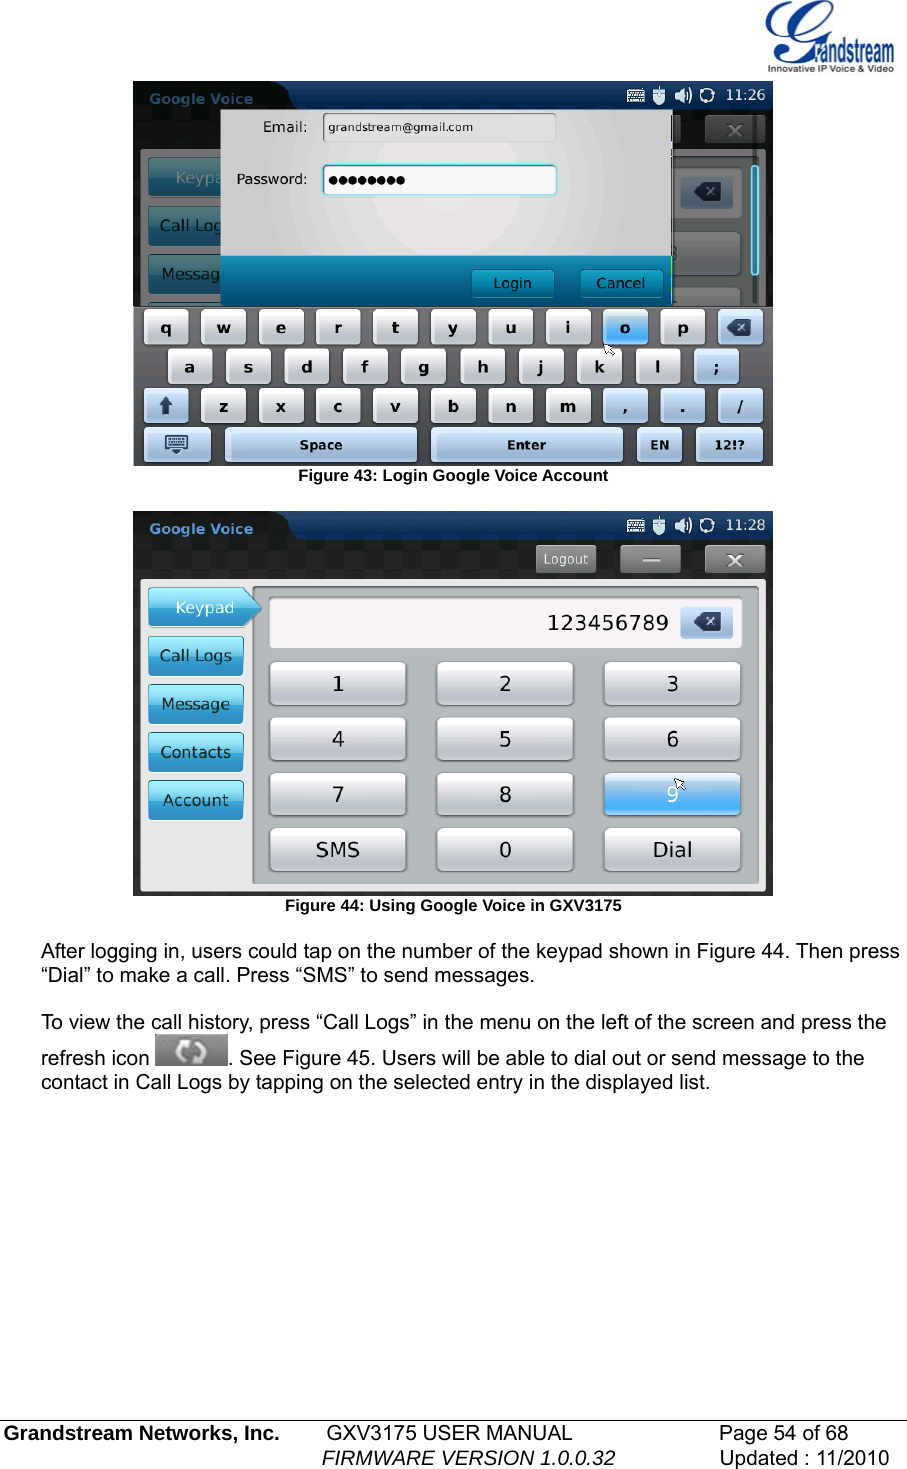
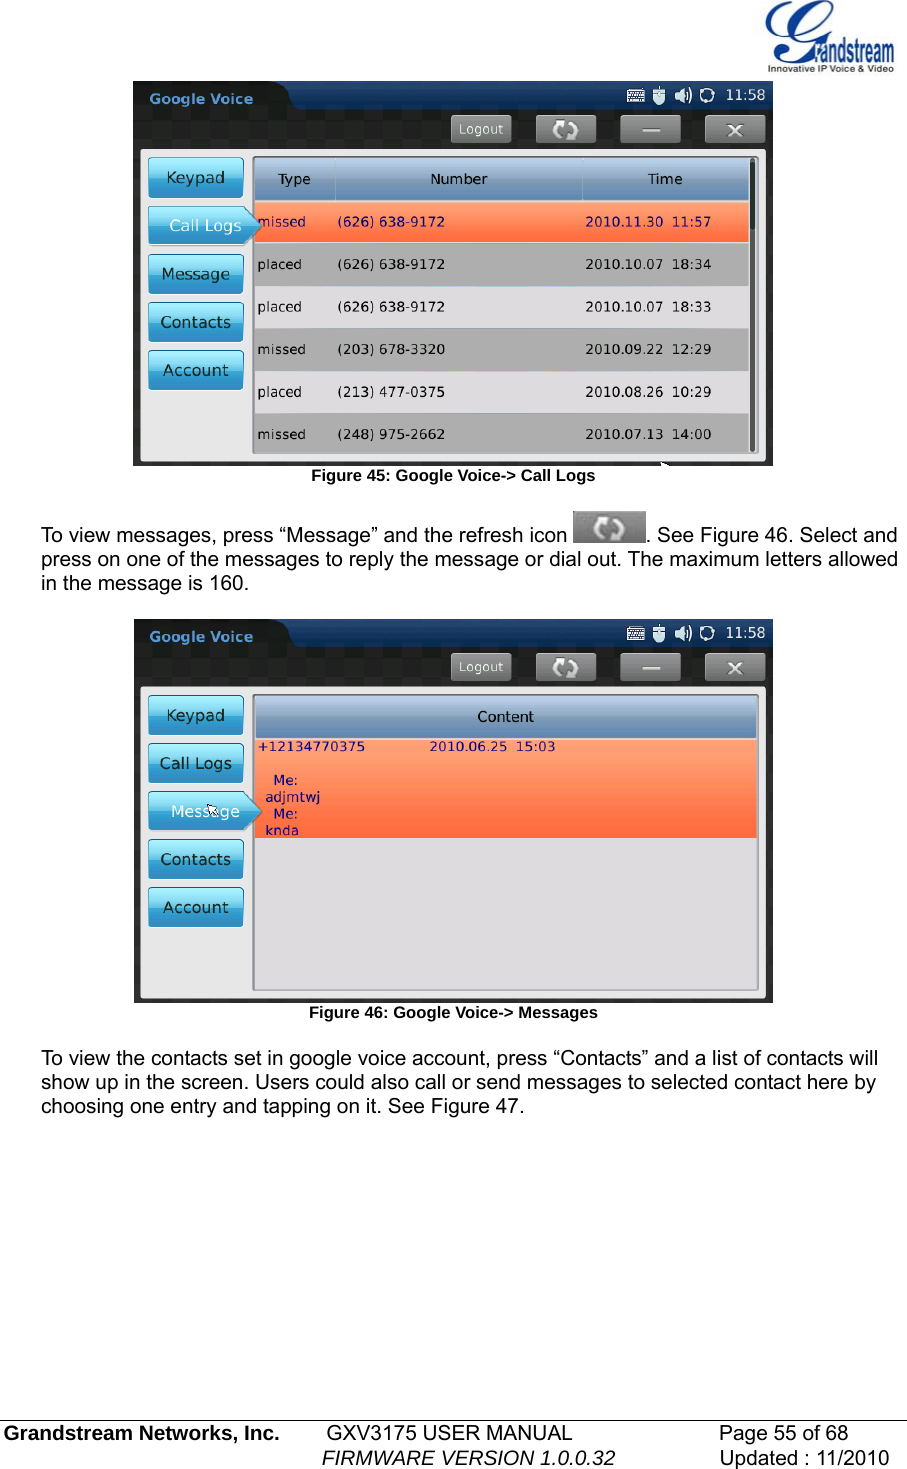
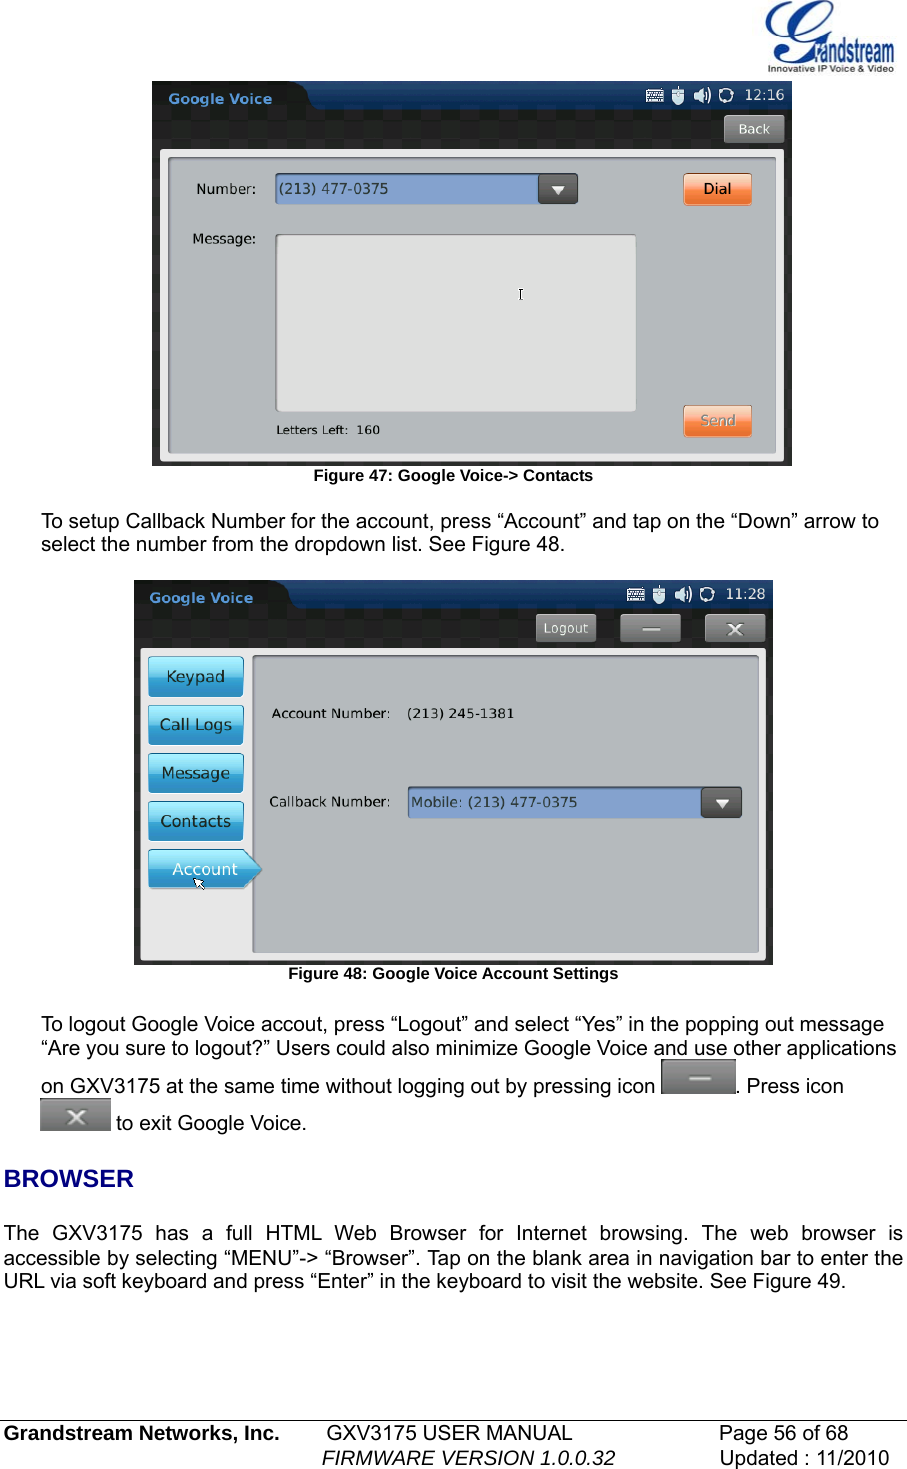
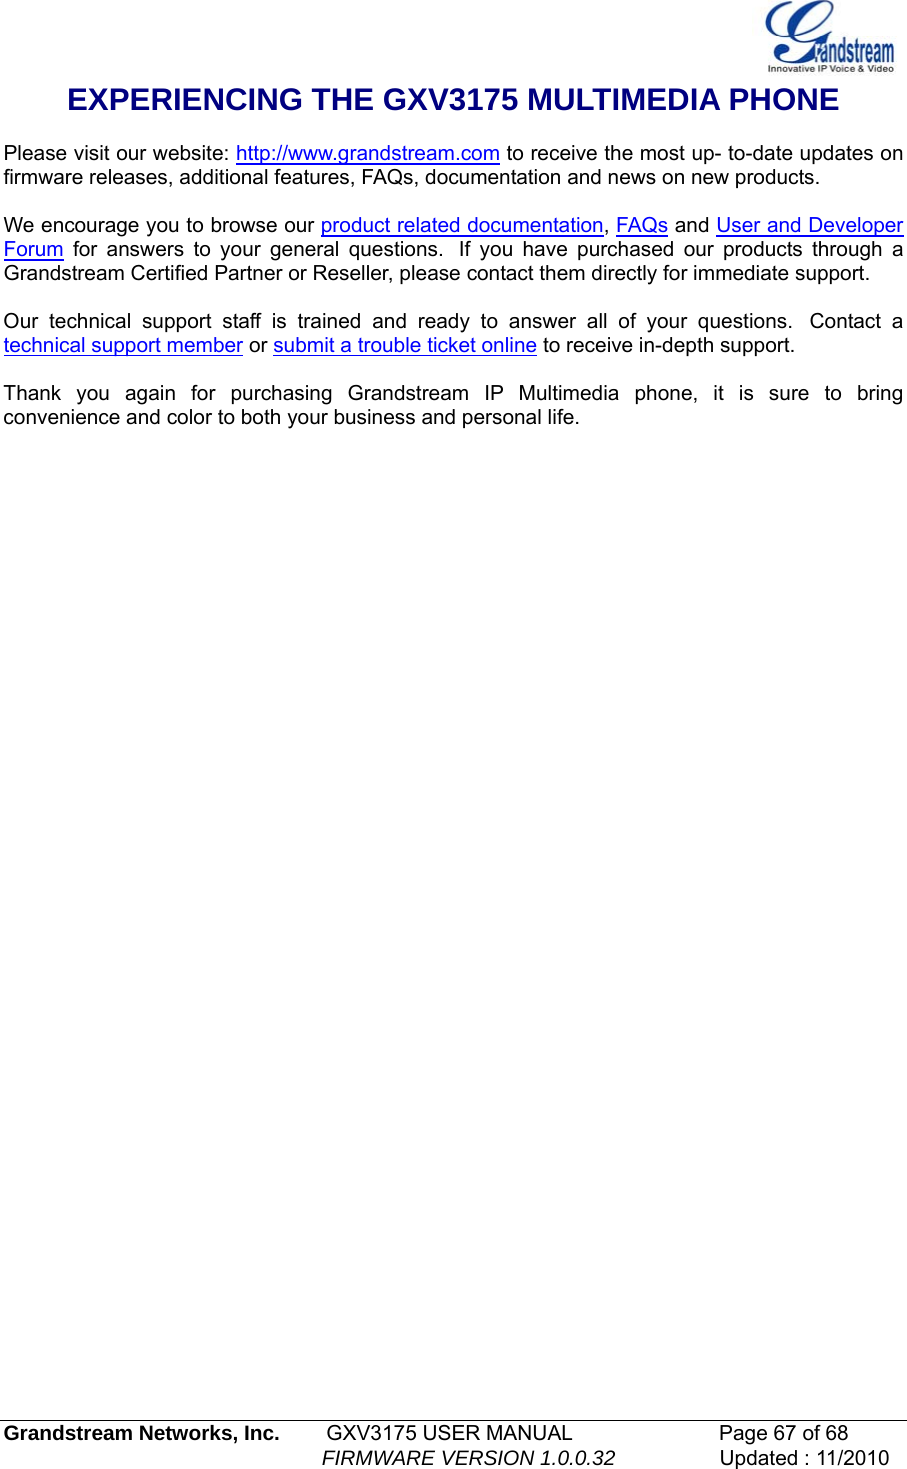
![Grandstream Networks, Inc. GXV3175 USER MANUAL Page 45 of 68 FIRMWARE VERSION 1.0.0.32 Updated : 11/2010 1. Accepted Digits: 1,2,3,4,5,6,7,8,9,0 , *, #, A,a,B,b,C,c,D,d 2. Grammar: x - any digit from 0-9; a) xx+ - at least 2 digit numbers b) xx. - only 2 digit numbers c) ^ - exclude d) [3-5] - any digit of 3, 4, or 5 e) [147] - any digit of 1, 4, or 7 f) <2=011> - replace digit 2 with 011 when dialing g) | - the OR operand • Example 1: {[369]11 | 1617xxxxxxx} Allow 311, 611, and 911 or any 10 digit numbers with leading digits 1617 • Example 2: {^1900x+ | <=1617>xxxxxxx} Block any number of leading digits 1900 or add prefix 1617 for any dialed 7 digit numbers • Example 3: {1xxx[2-9]xxxxxx | <2=011>x+} Allows any number with leading digit 1 followed by a 3 digit number, followed by any number between 2 and 9, followed by any 7 digit number OR Allows any length of numbers with leading digit 2, replacing the 2 with 011 when dialed. 3. Default: Outgoing – {x+} Allow any length of numbers. Example of a simple dial plan used in a Home/Office in the US: { ^1900x. | <=1617>[2-9]xxxxxx | 1[2-9]xx[2-9]xxxxxx | 011[2-9]x. | [3469]11 } Explanation of example rule (reading from left to right): • ^1900x. - prevents dialing any number started with 1900 • <=1617>[2-9]xxxxxx - allows dialing to local area code (617) numbers by dialing 7 numbers and 1617 area code will be added automatically • 1[2-9]xx[2-9]xxxxxx |- allows dialing to any US/Canada Number with 11 digits length • 011[2-9]x. - allows international calls starting with 011 • [3469]11 - allow dialing special and emergency numbers 311, 411, 611 and 911 NOTE: In some cases where the user wishes to dial strings such as *123 to activate voice mail or other applications provided by their service provider, the * should be predefined inside the dial plan feature. An example dial plan will be: { *x+ } which allows the user to dial * followed by any length of numbers. Early Dial The default setting is NO. Use only if the proxy supports 484 response. Refer to Use Target Contact The default is NO. If set to YES, then for Attended Transfer, the “Refer-To” header uses the transferred target’s contact header information. Auto Answer The default setting is NO. If it is set to YES, the GXV3175 will play a “beep” sound and answer the phone automatically on the speaker. Send Anonymous If set to YES, the “From” header in the outgoing SIP messages will](https://usermanual.wiki/Grandstream-Networks/GXV317X.YZZGXV317X-user-manual-part-2-rev1/User-Guide-1387315-Page-7.png)