Grandstream Networks GXV317X IP Multimedia Phone User Manual
Grandstream Networks, Inc. IP Multimedia Phone
UserManual.wiki
>
Grandstream Networks
>
GXV317X User Manual
>
YZZGXV317X_user manual part 1-rev1
Contents
1.
YZZGXV317X_user manual part 1-rev1
2.
YZZGXV317X_user manual part 2-rev1
YZZGXV317X_user manual part 1-rev1
Navigation menu
Upload a User Manual
Namespaces
Wiki Guide
HTML
PDF
Info
Views
User Manual
Discussion / Help
Navigation


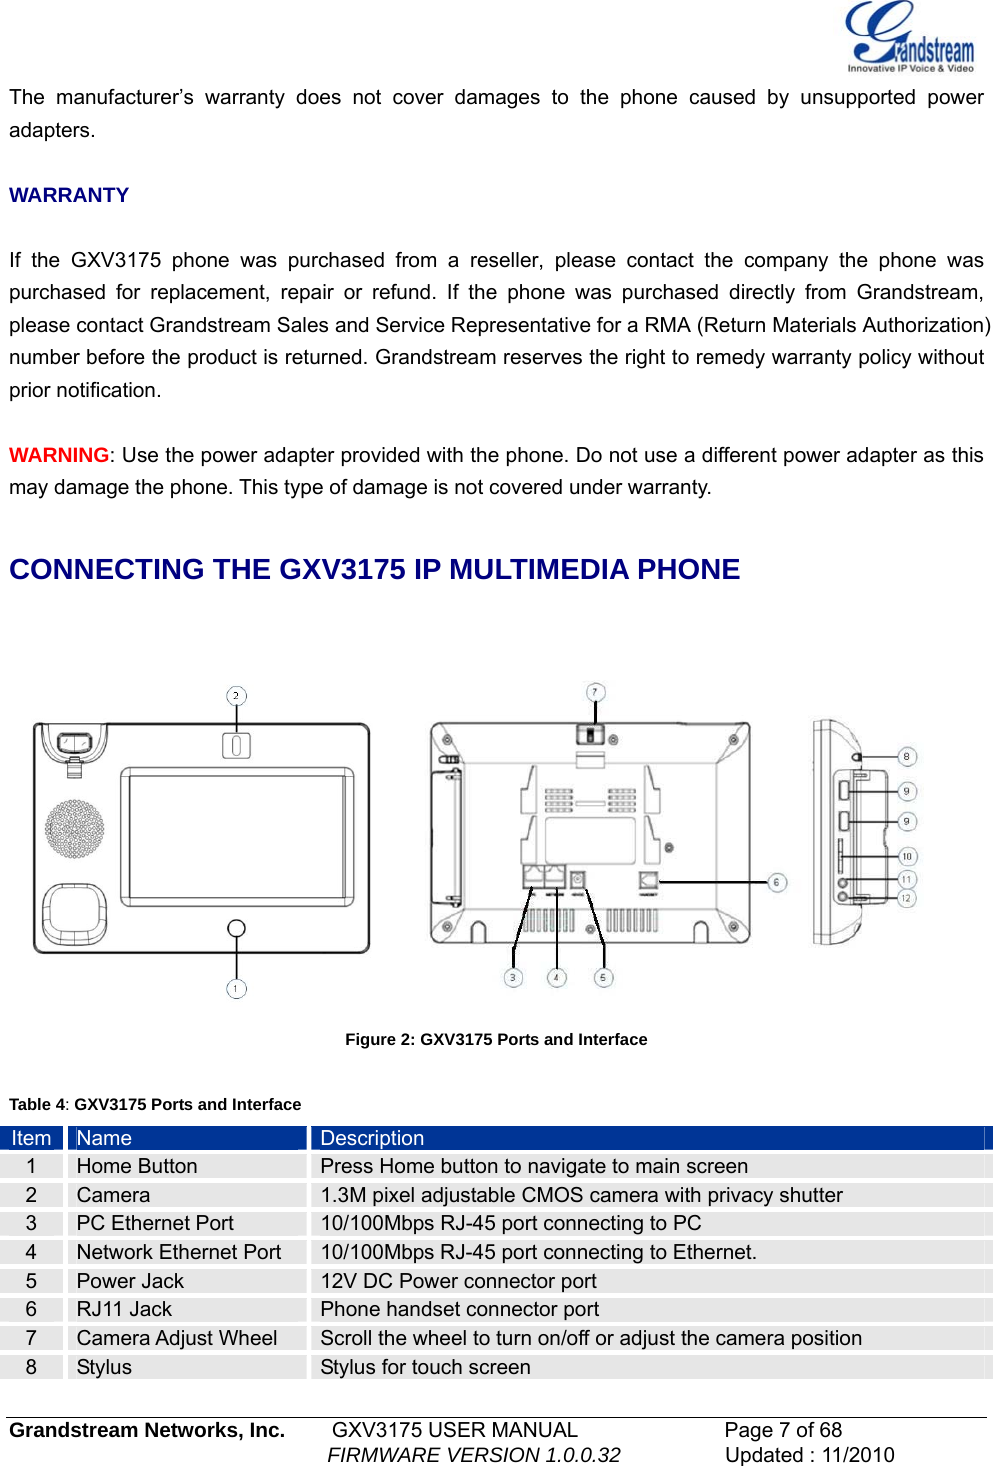
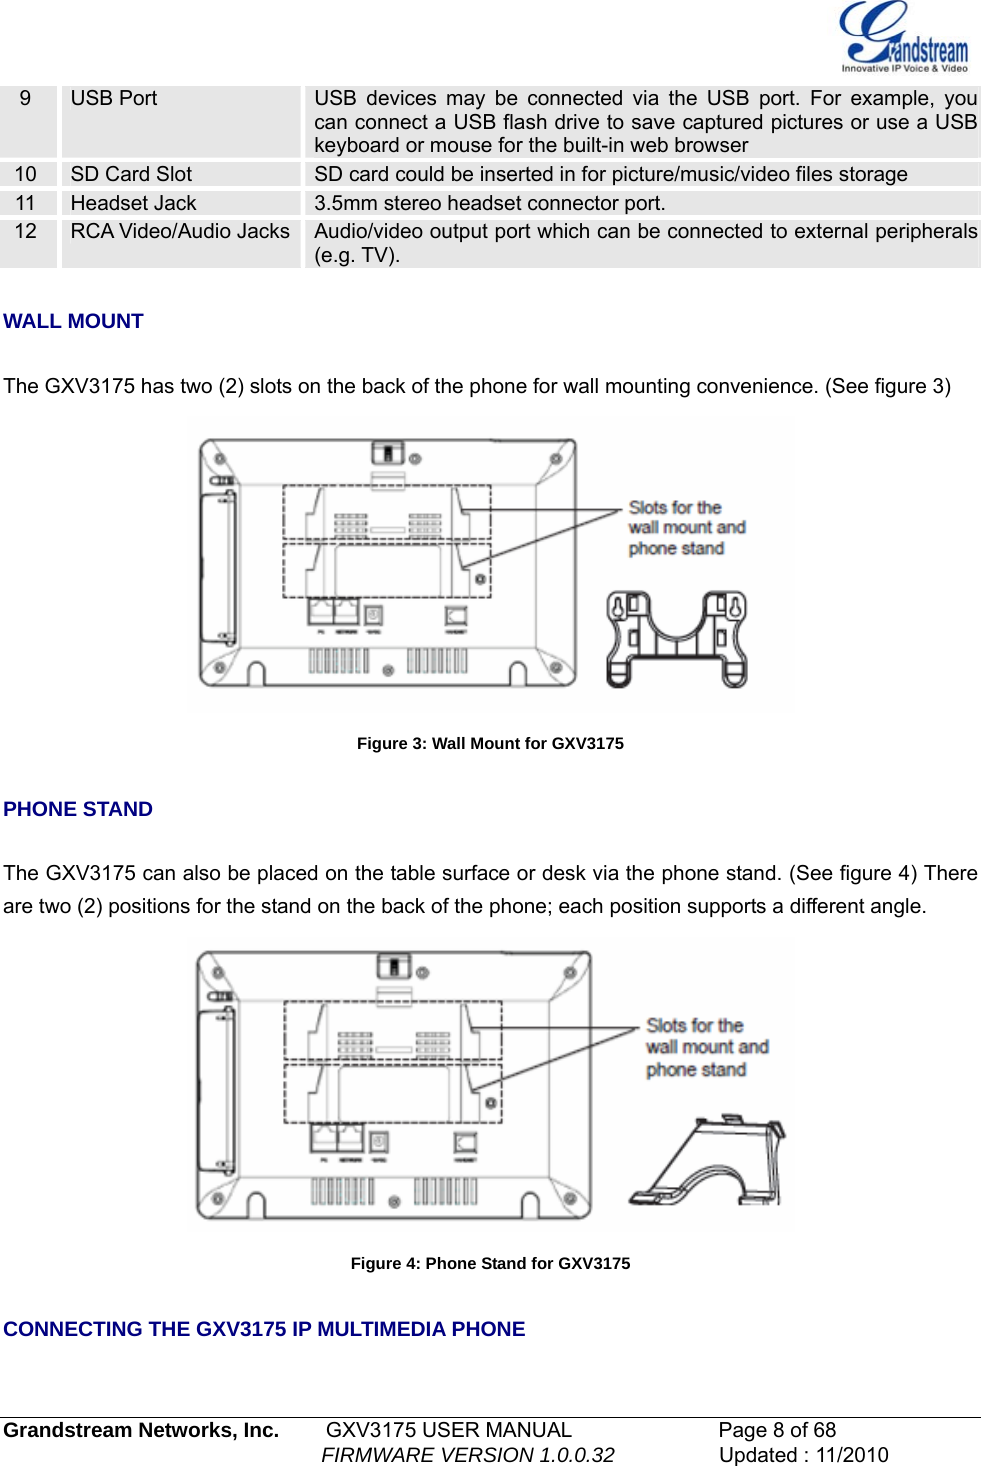
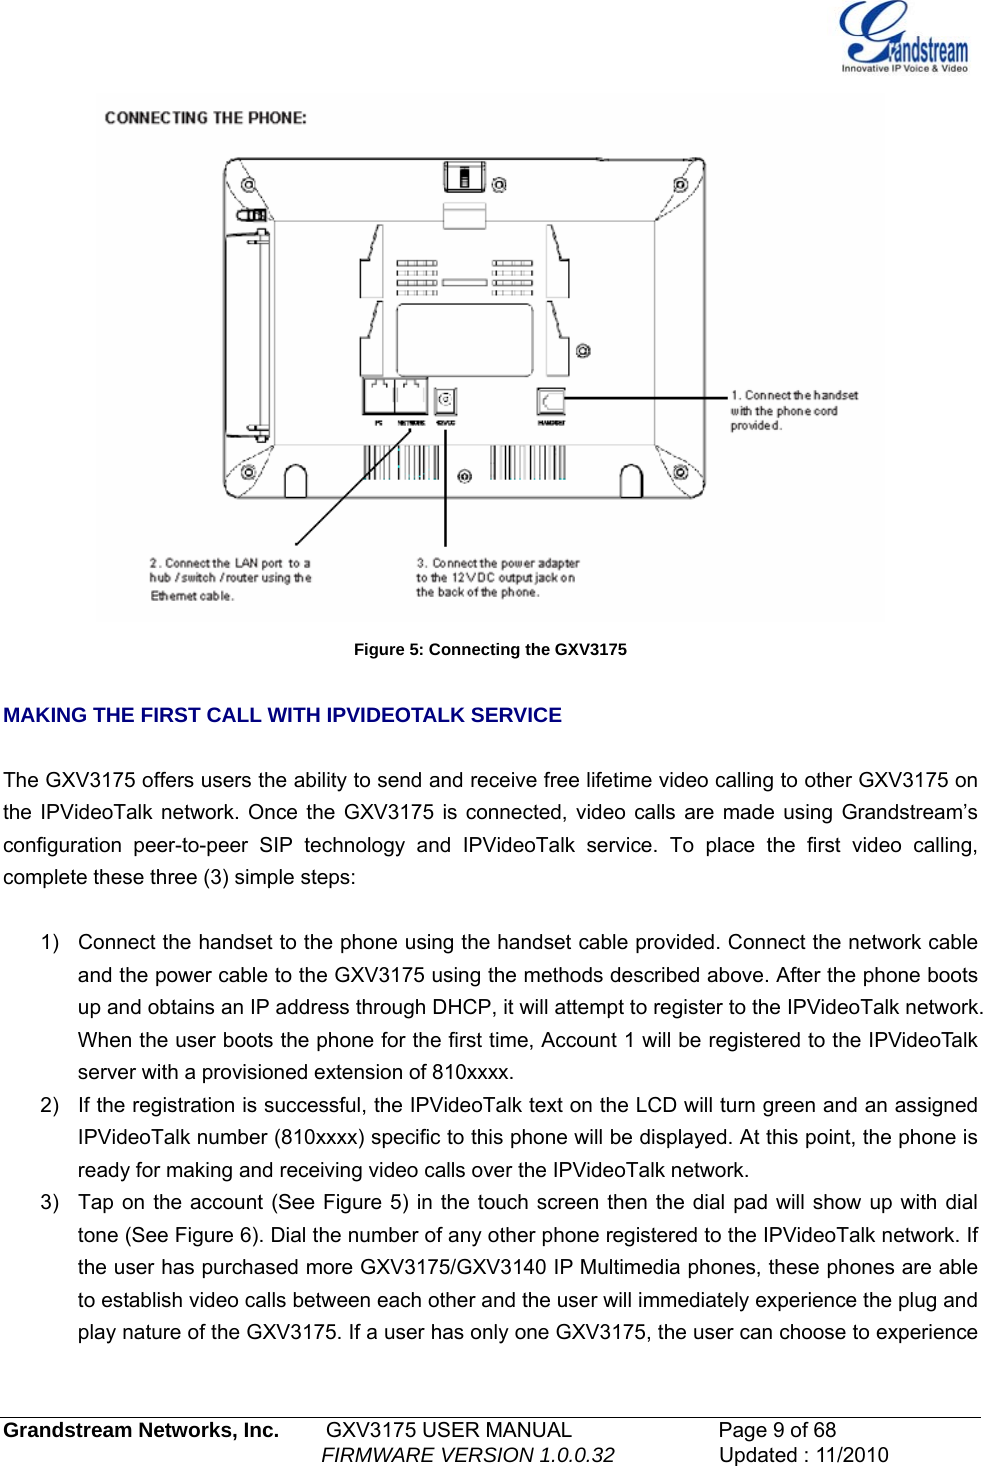
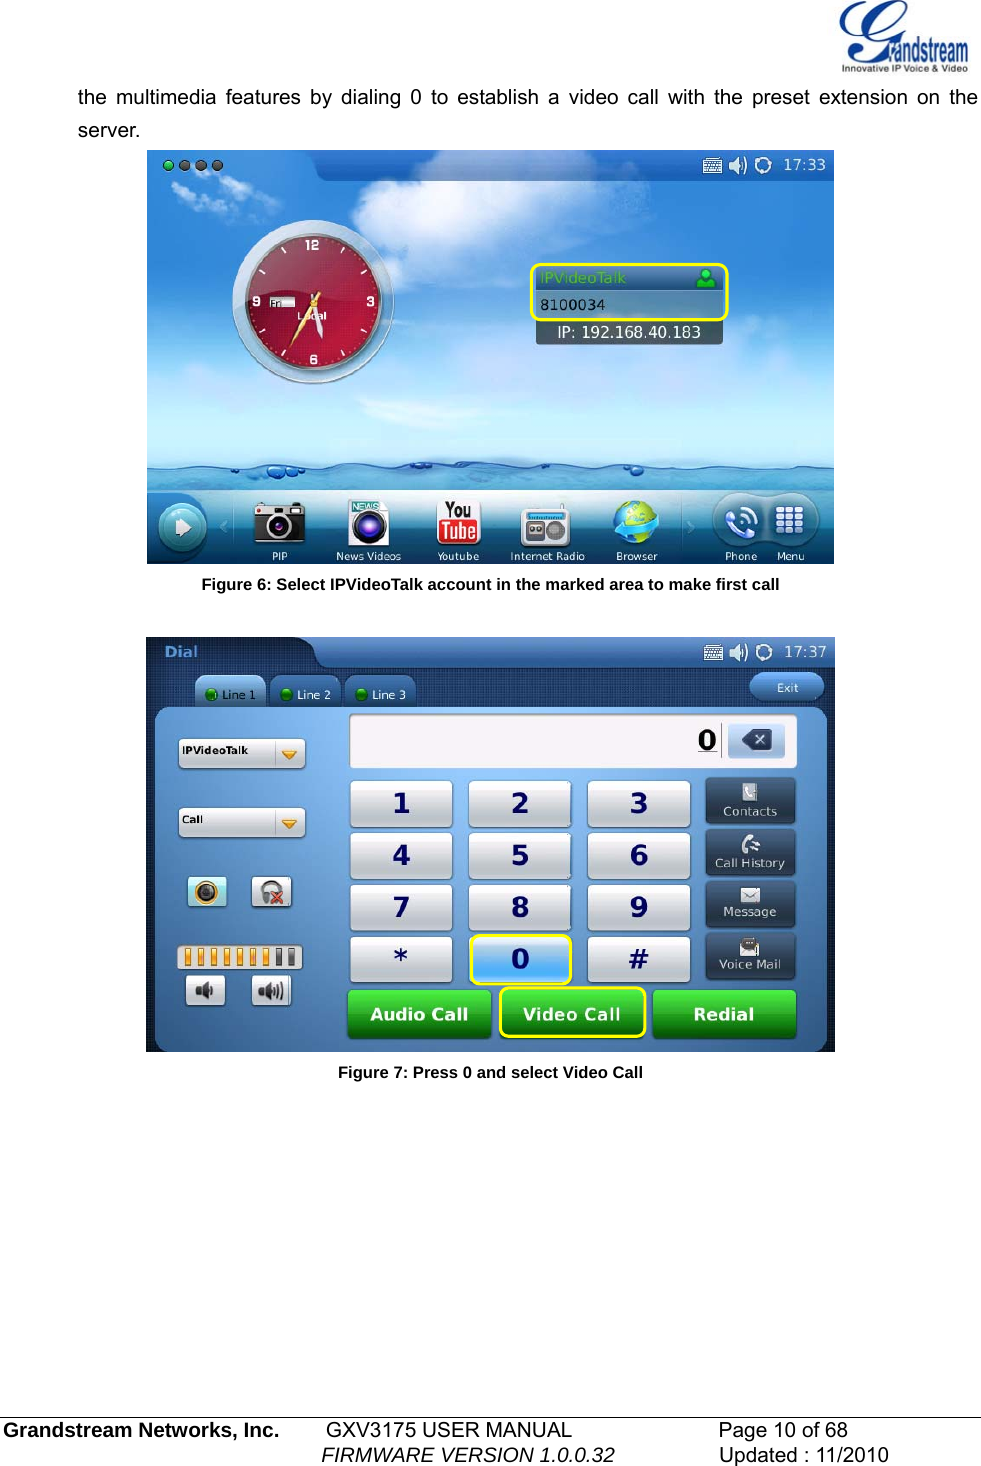

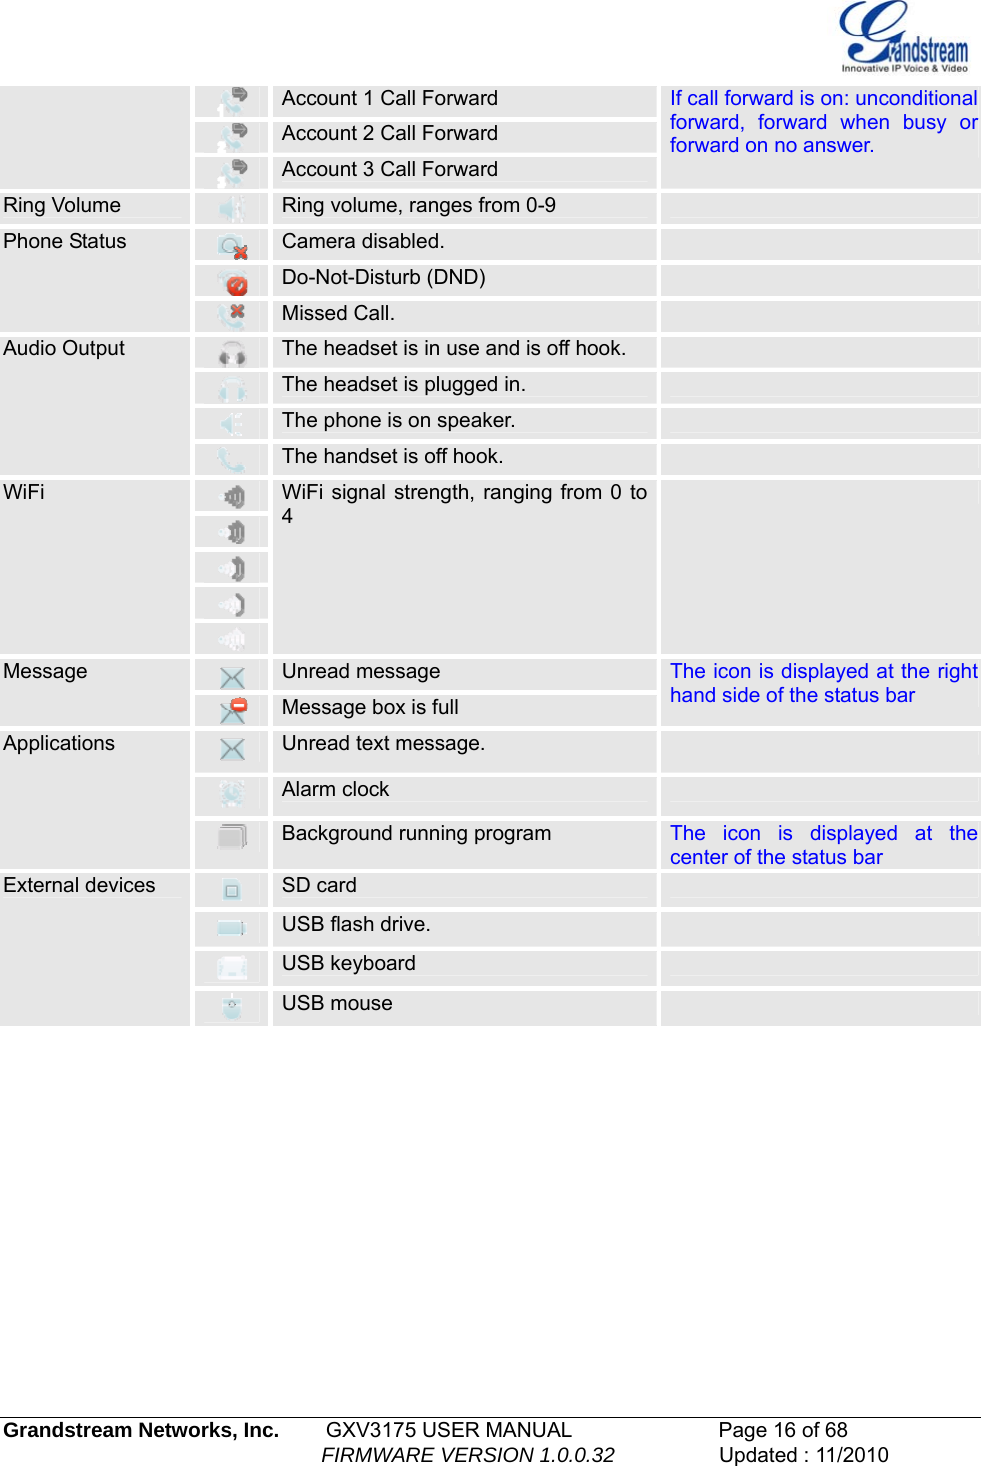
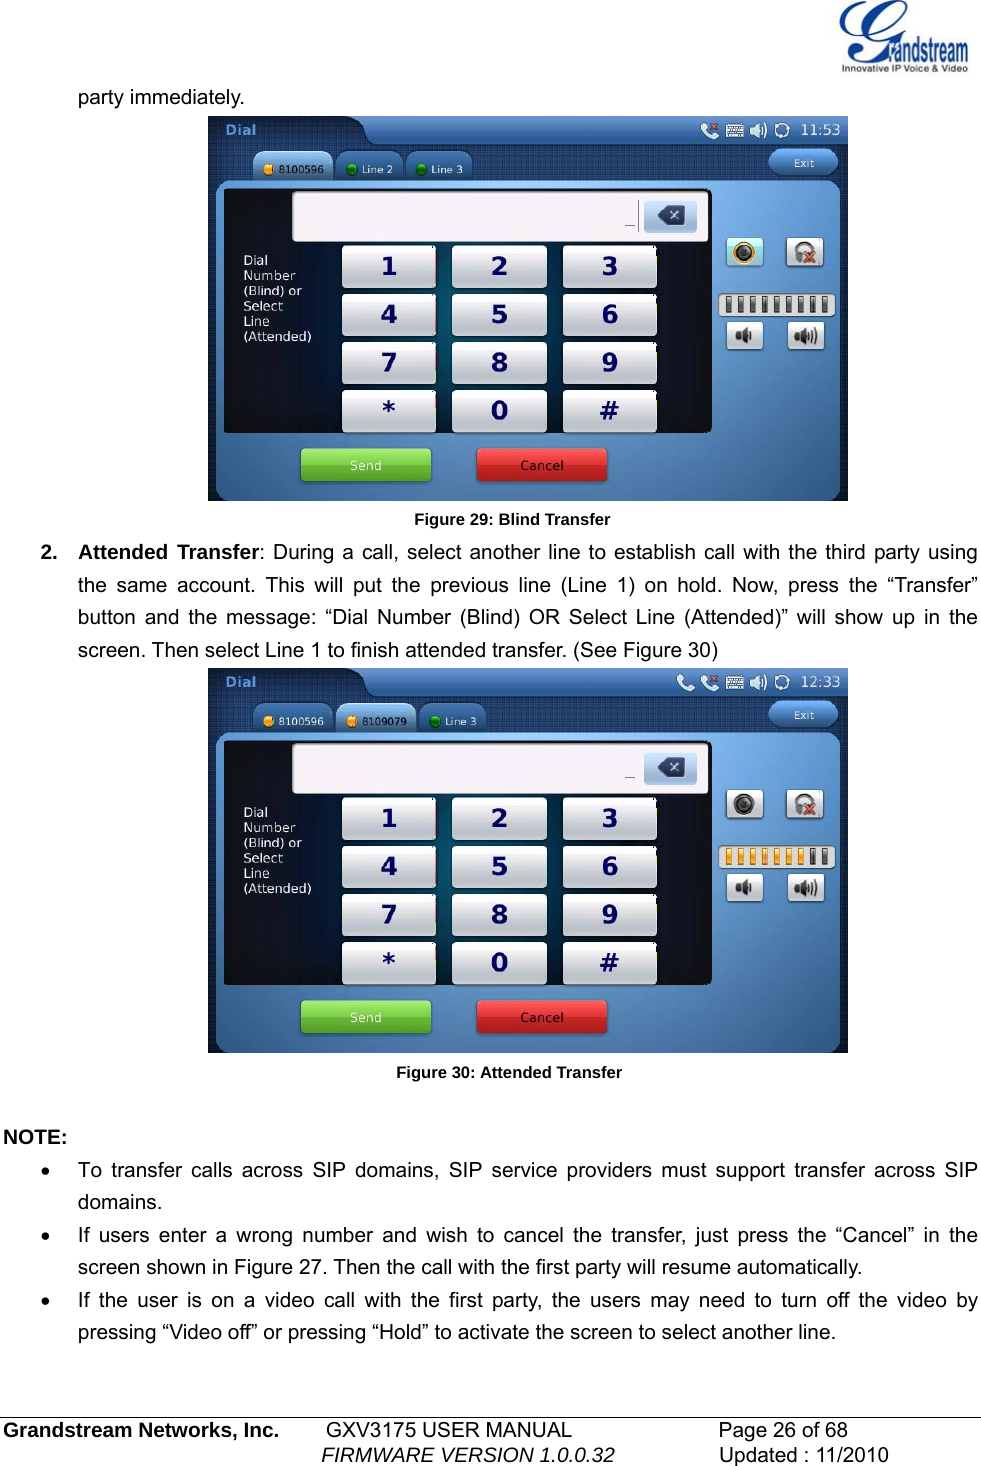
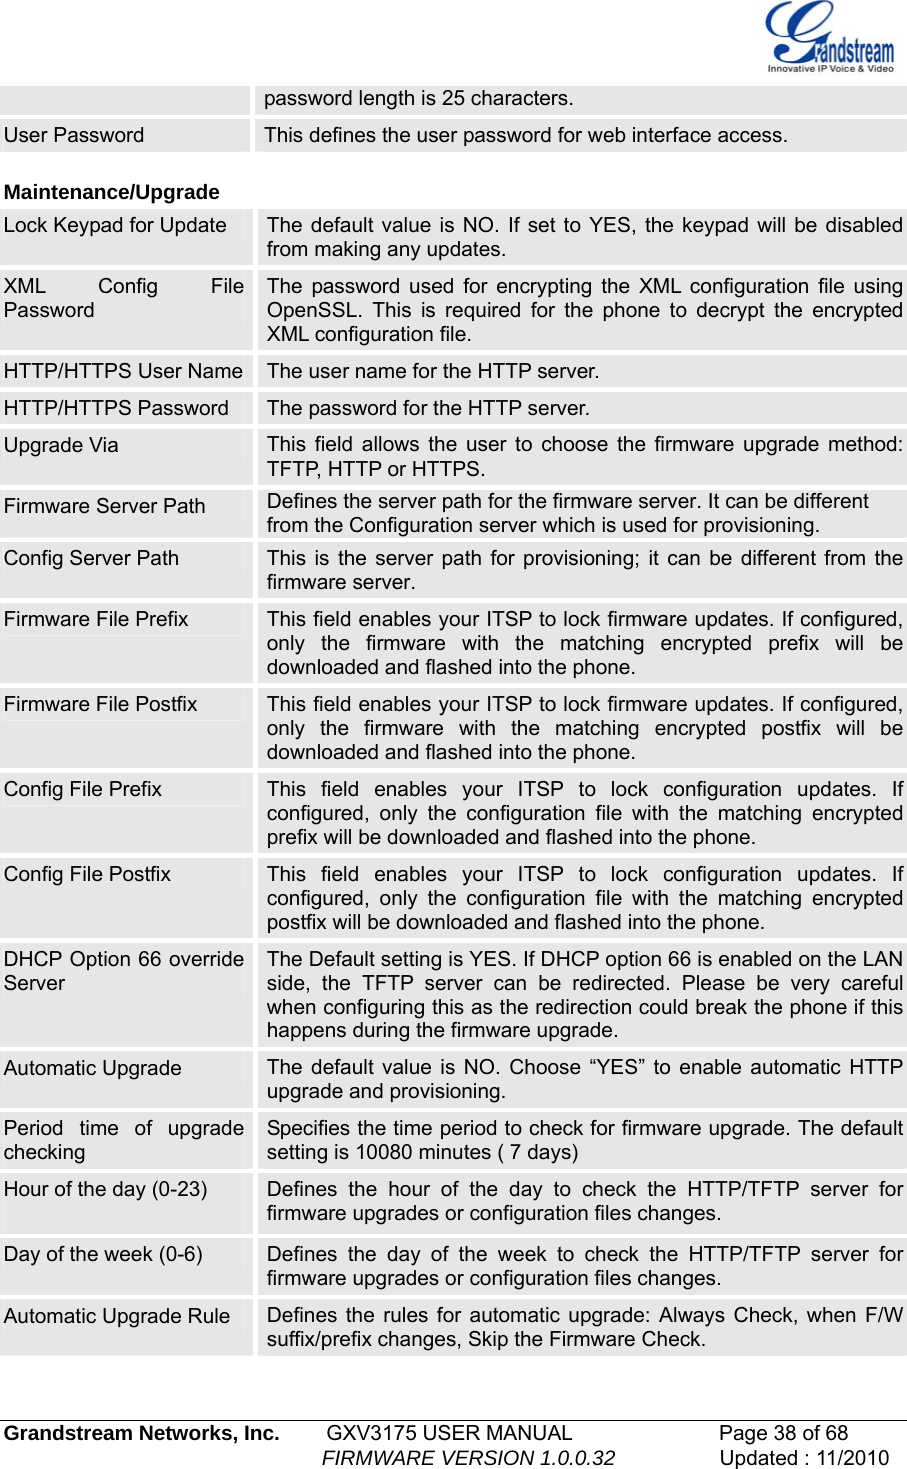
![Grandstream Networks, Inc. GXV3175 USER MANUAL Page 36 of 68 FIRMWARE VERSION 1.0.0.32 Updated : 11/2010 Busy Tone Reorder Tone Confirmation Tone Call-Waiting Tone PSTN disconnect Tone uncomfortable high pitch sounds. Syntax: f1=val,f2=val[,c=on1/off1[-on2/off2[-on3/off3]]]; (Frequencies are in Hz and cadence on and off are in 10ms) ON is the period of ringing (“On time” in ‘ms’) while OFF is the period of silence. In order to set a continuous ring, OFF should be zero. Otherwise it will ring ON ms and a pause of OFF ms and then repeat the pattern. Up to three cadences are supported. Default Ring Cadence This defines the ring cadence for the phone. The default setting is: c=2000/4000; MAINTENANCE PAGE DEFINITIONS Maintenance/Network Settings Address Type This selects the type of IP address assigned: DHCP, PPPoE or Static IP. PPPoE When PPPoE is selected, the user needs to enter the following: PPPoE Account ID, PPPoE Password, PPPoE Service Name. Static IP When Static IP is selected, the user needs to enter IP address, Subnet Mask, Default Gateway, DNS Server 1 and DNS Server 2. Alternate DNS Server This field sets the alternate DNS server for the user. Layer 3 Qos This field defines the layer 3 QoS parameter. It is the value used for IP Precedence, Diff-Serv or MPLS. The Default value is 0. Layer 2 QoS 802.1Q/VLAN Tag This field contains the value used for layer 2 VLAN tagging. The Default value is 0. Layer 2 QoS 802.1p Priority Value This assigns the priority value of the Layer2 QoS packets. The Default value is 0. 802.1x Mode This field sets 802.1x Mode. The default value is disabled. If EAD-MD5 is selected, users will be required to enter Identity and MD5 Password. Proxy This field sets HTTP Proxy, HTTPS Proxy, FTP Proxy or No Proxy. Using HTTP Proxy, other protocols can be applied by checking the box “Apply to Other Protocol”. Maintenance/Wifi Settings WiFi Functions This parameter enables/disables the WiFi function. The default setting is set to “Disable”. Wireless Mode This parameter defines the wireless mode used. The GXV3175 supports 802.11b/g/n Network Type This parameter defines the network type of the wireless network: Ad-hoc or AP/Managed. By default, it is set to “AP or Managed”. Channel This parameter defines the channel (1-10) for the wireless network. The default setting is set to “Auto”. ESSID This parameter sets the ESSID for the Wireless network. Press](https://usermanual.wiki/Grandstream-Networks/GXV317X.YZZGXV317X-user-manual-part-1-rev1/User-Guide-1387313-Page-36.png)
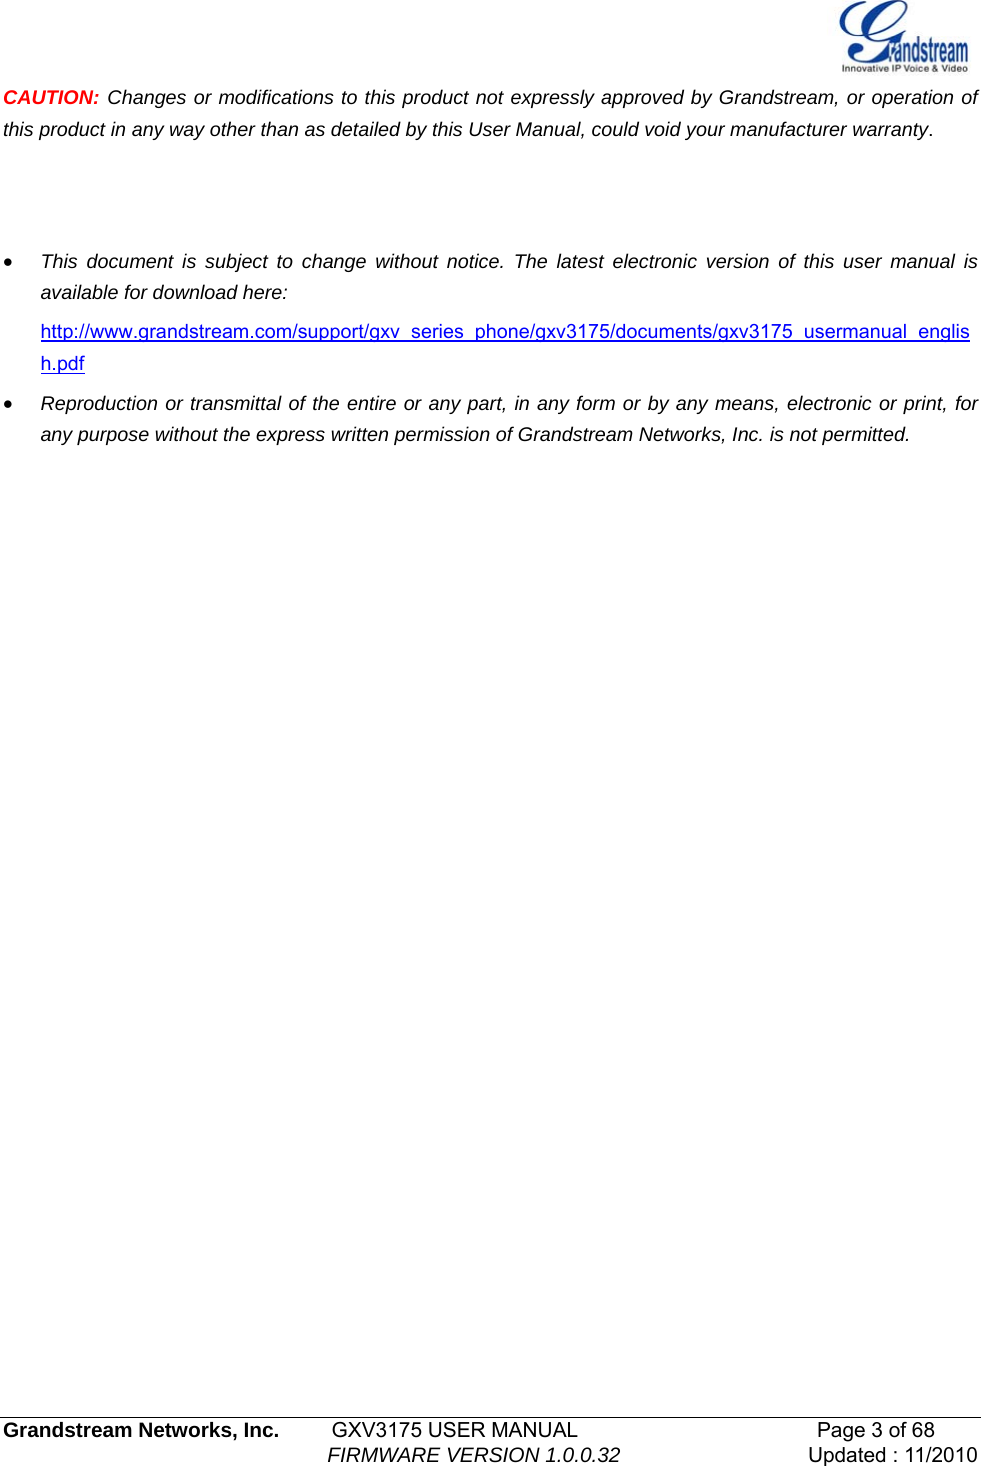
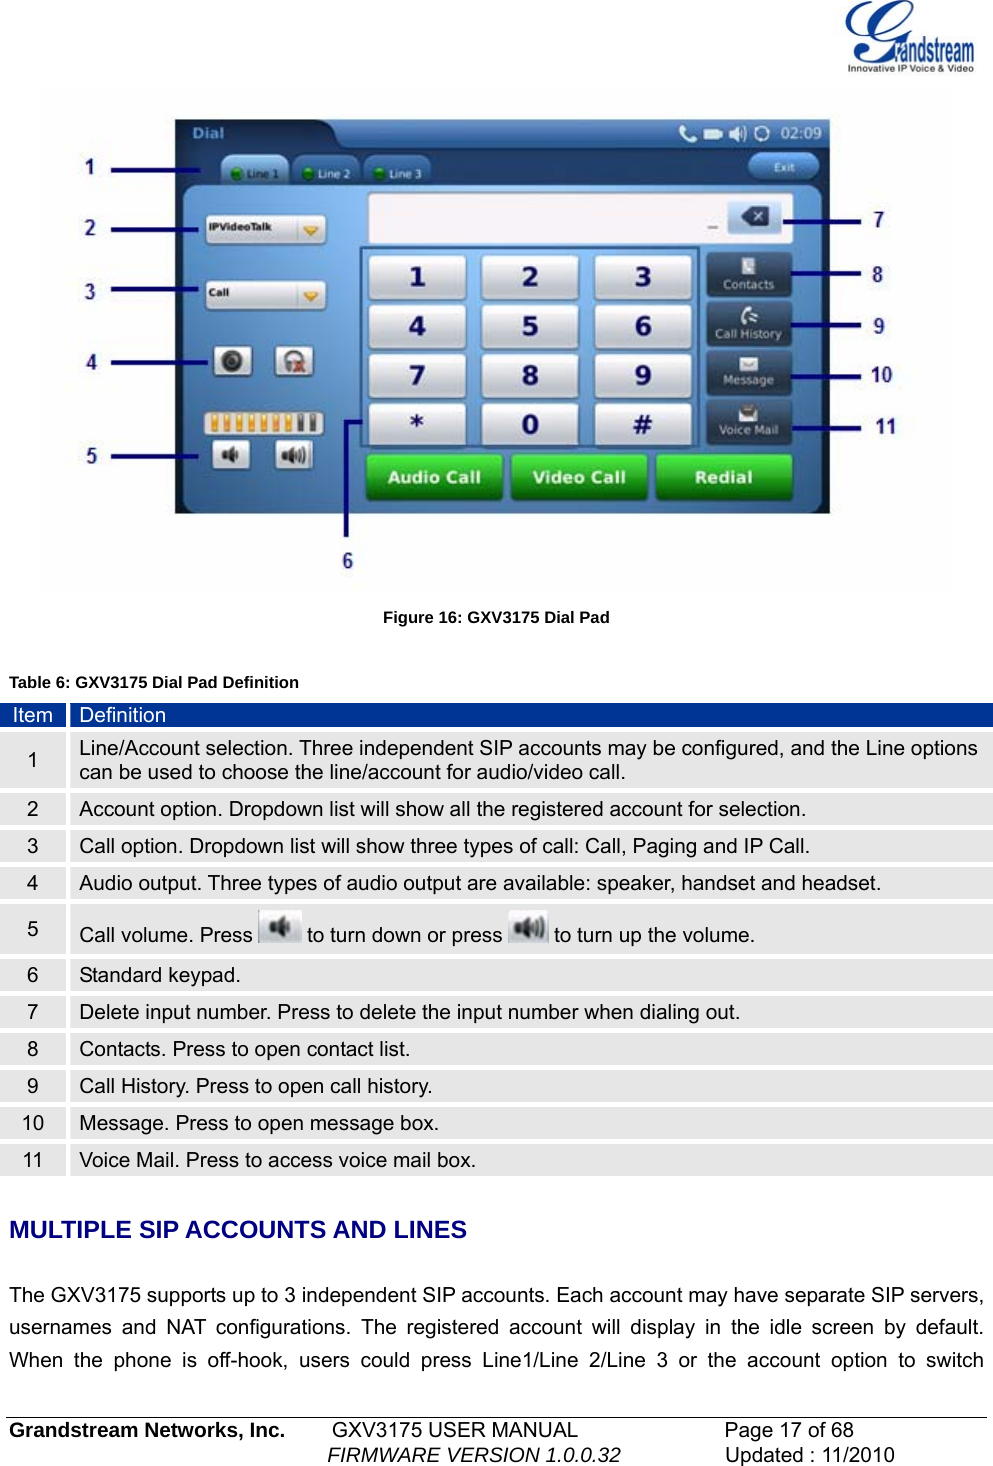
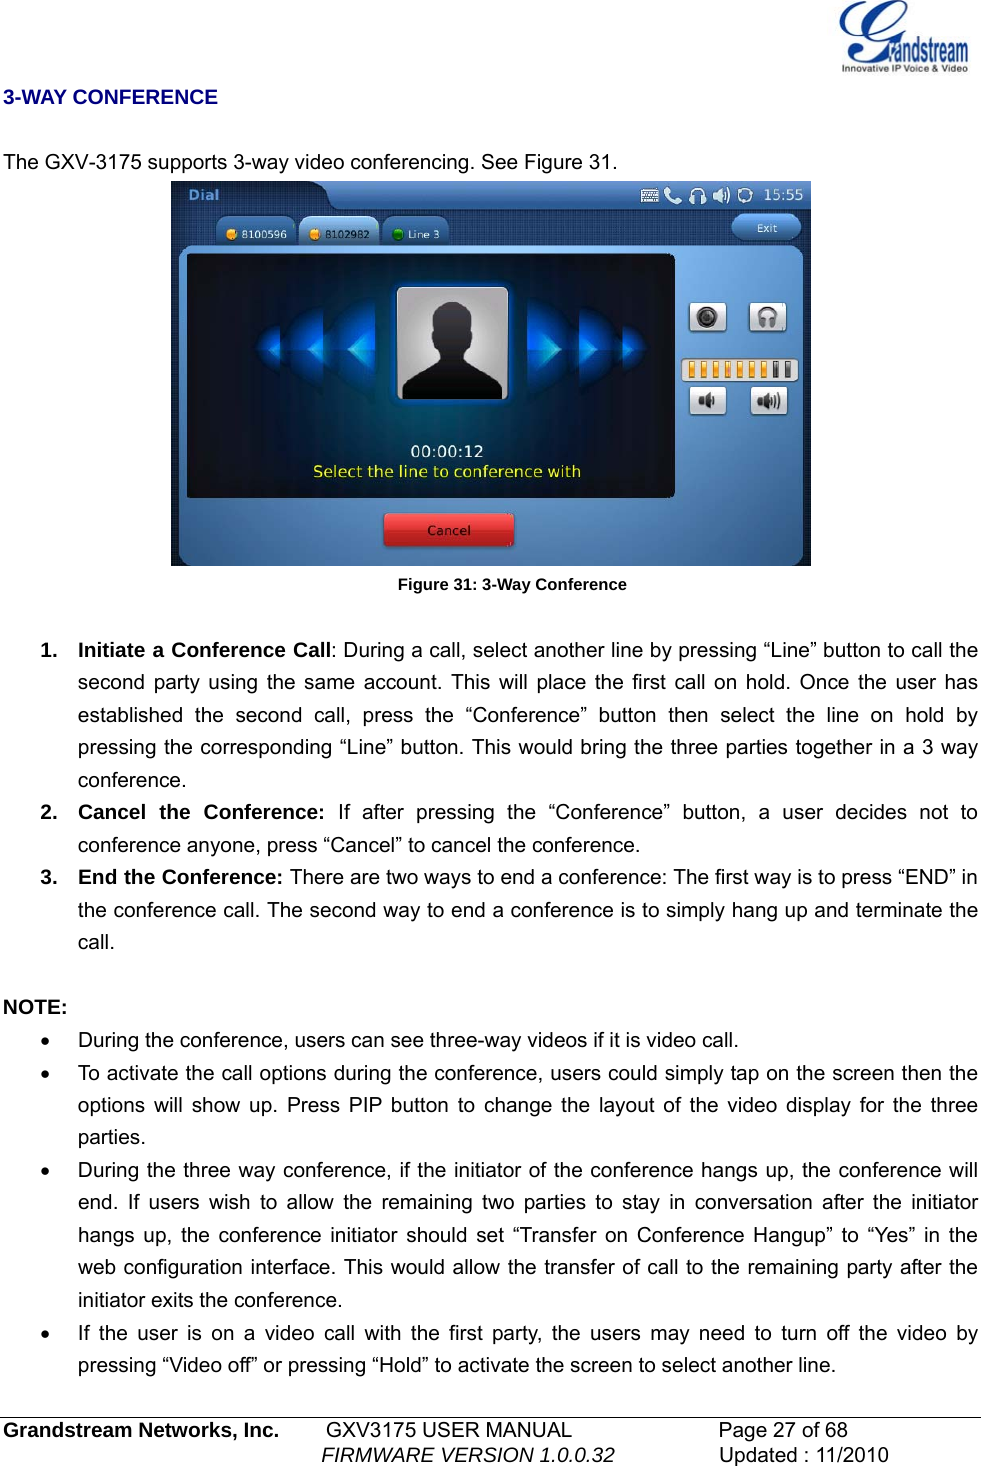
![Grandstream Networks, Inc. GXV3175 USER MANUAL Page 37 of 68 FIRMWARE VERSION 1.0.0.32 Updated : 11/2010 “Scan” to scan for the available wireless network and add it. Users can also press “Add” to add the ESSID directly. Security Mode This parameter defines the security mode used for the wireless network. The following are supported: WEP/Shared, WEP/OPEN, WPA PSK TKIP, WPA PSK AES, WPA2 PSK TKIP, WPA2 PSK AES. The default setting is set to “Disabled”. Users will need to enter the corresponding authentication password for the security mode. Maintenance/Time Settings NTP Server This parameter defines the URL or IP address of the NTP (Network Time Protocol) server. The GXV3175 phone may obtain the date and time from the server. The default setting is ntp.ipvideotalk.com. DHCP Option 42 override NTP server Select Yes for the user to allow DHCP Option 2 to override the NTP server if there is one on the LAN. The default setting is NO. Time Zone This parameter controls the date/time display according to the specified time zone. Time Display Format This parameter sets time display format to 12 Hour or 24 Hour Date Display Format This parameter sets date display format to YY-MM-DD or MM-DD-YY or DD-MM-YY. Self-Defined Time Zone This parameter allows the users to define their own time zone. Syntax: std offset dst [offset], start [/time], end [/time] Default is set to: MTZ+6MDT+5,M3.2.0,M11.1.0, MTZ+6MDT+5 This indicates a time zone with 6 hours offset with 1 hour ahead which is U.S central time. If it is positive (+) if the local time zone is west of the Prime Meridian (A.K.A: International or Greenwich Meridian) and negative (-) if it is east. M3.2.0,M11.1.0 The 1st number indicates Month: 1,2,3.., 12 (for Jan, Feb, .., Dec) The 2nd number indicates the nth iteration of the weekday: (1st Sunday, 3rd Tuesday…) The 3rd number indicates weekday: 0,1,2,..,6( for Sun, Mon, Tues,..,Sat) Therefore, this example is the DST which starts from the second Sunday of March to the 1st Sunday of November. Maintenance/Web and Telnet Access Disable Telnet The default value is No. If set to YES, the GXV3175 will not allow any telnet access to the phone. Access Method This defines the access method for web access: HTTP or secure HTTPS protocol. Port This defines the port for web access. By default, HTTP uses port 80 and HTTPS uses port 443. This field is for customizable web ports. Admin Password This defines the administrator password for web interface access. Only the administrator can configure the “Advanced Settings” and “Account x” pages. The password is case sensitive and the maximum](https://usermanual.wiki/Grandstream-Networks/GXV317X.YZZGXV317X-user-manual-part-1-rev1/User-Guide-1387313-Page-37.png)