Grandstream Networks GXV3240V3 IP Multimedia Phone User Manual
Grandstream Networks, Inc. IP Multimedia Phone Users Manual
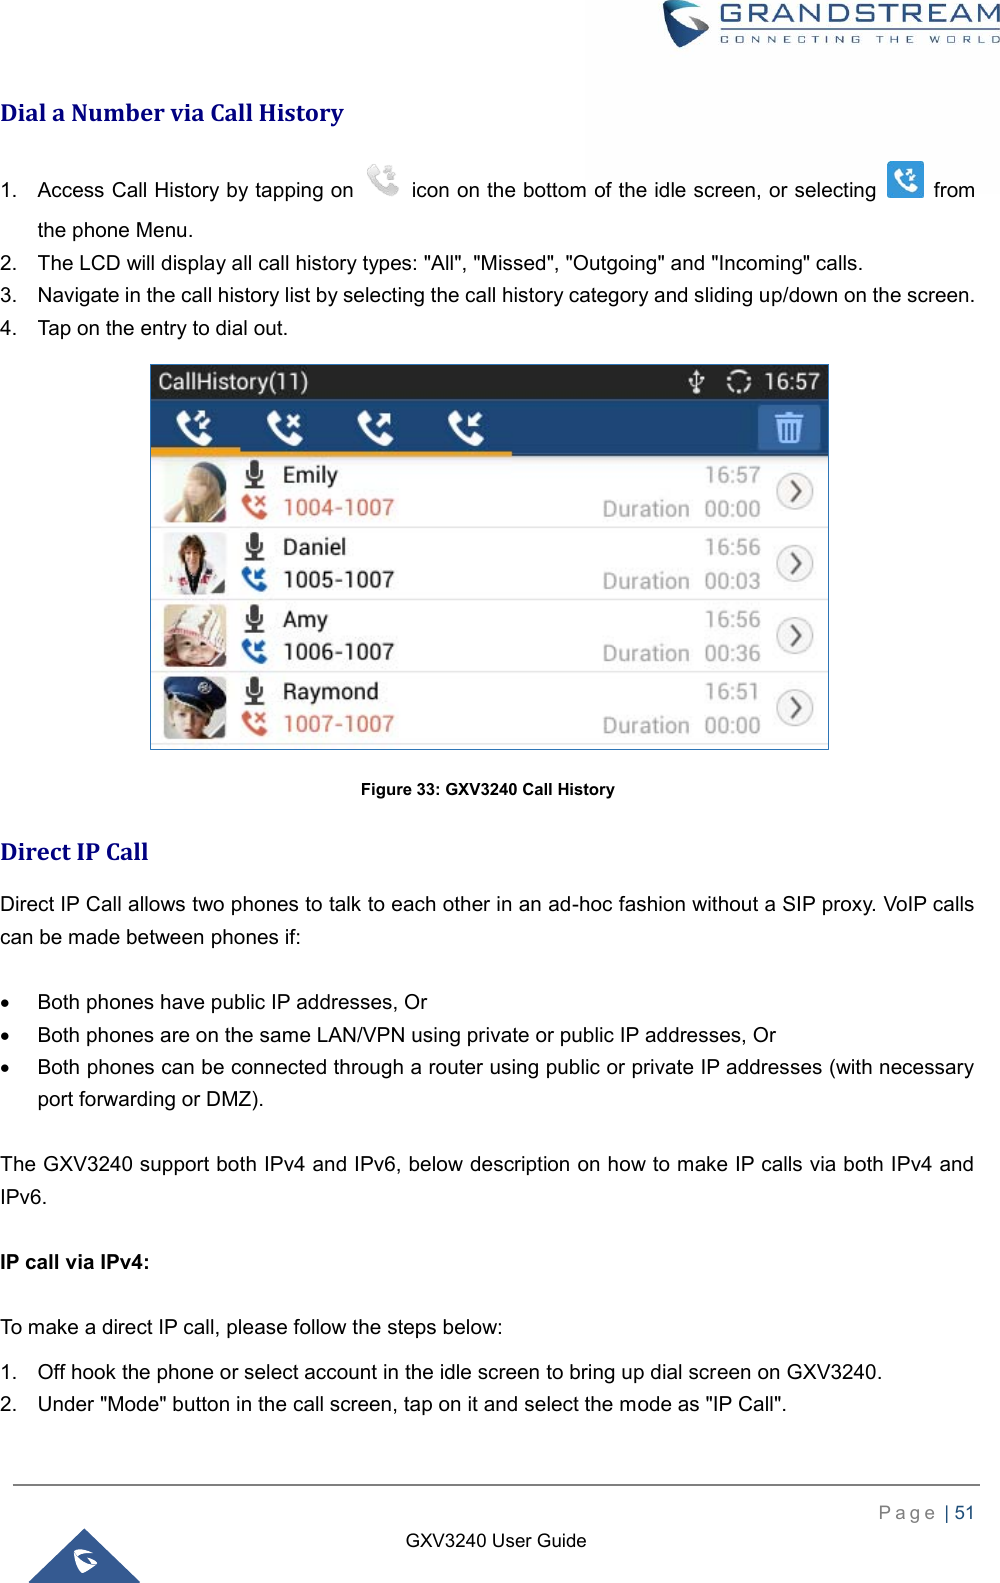
UserManual.wiki
>
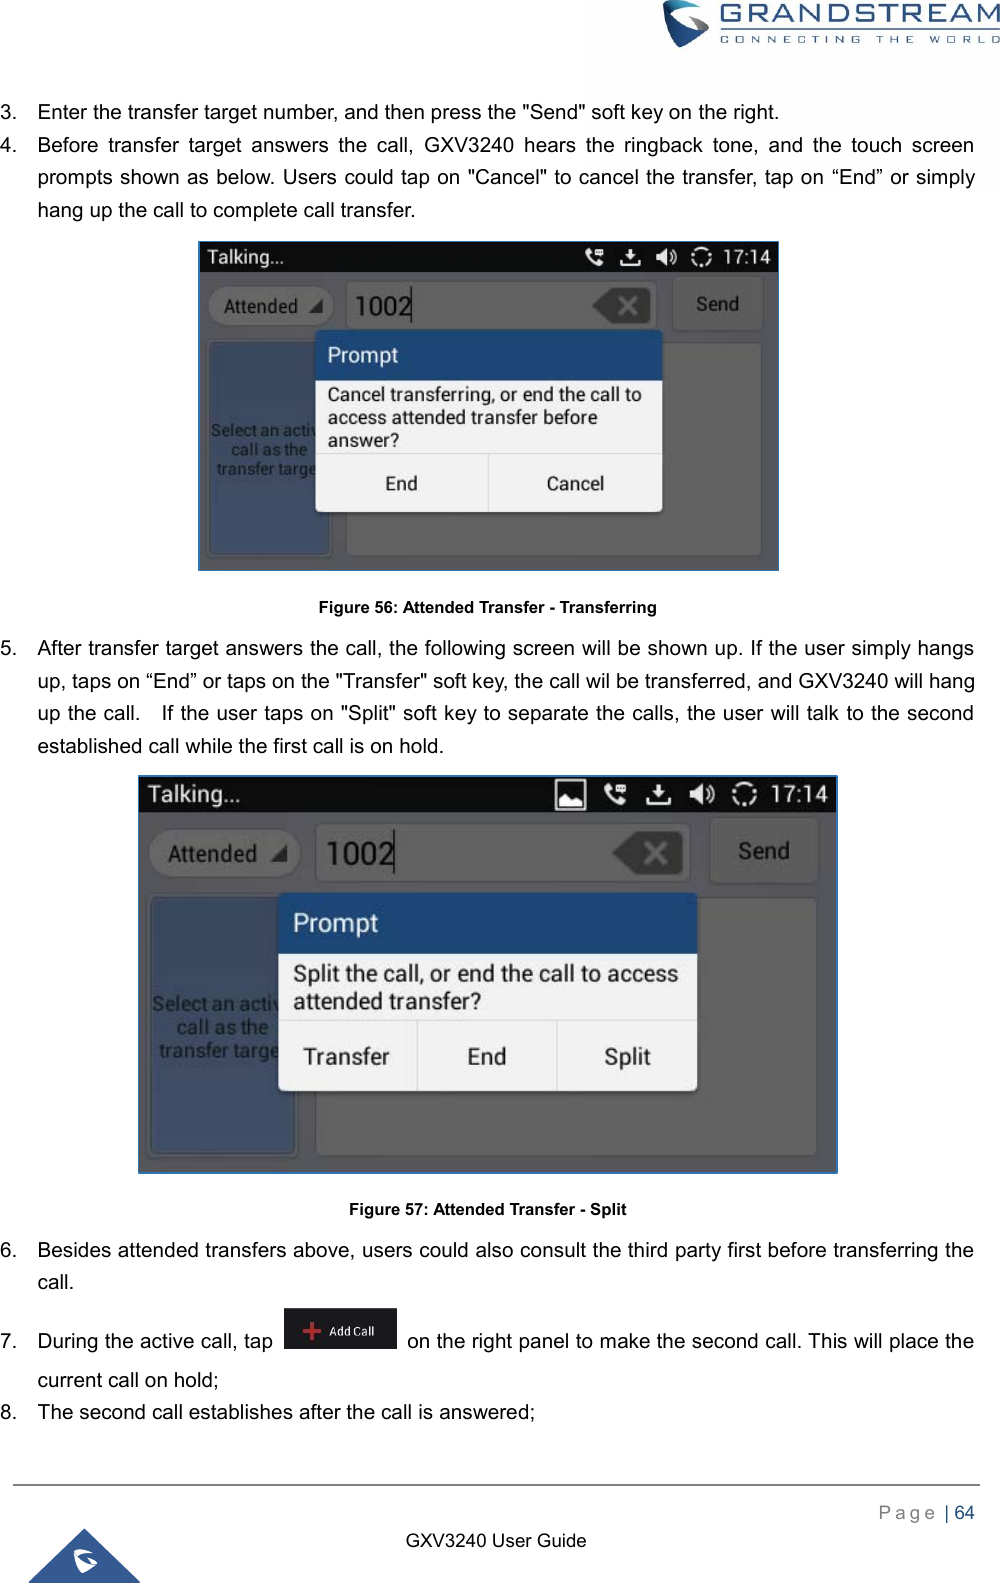
Grandstream Networks
>
GXV3240V3 User Manual
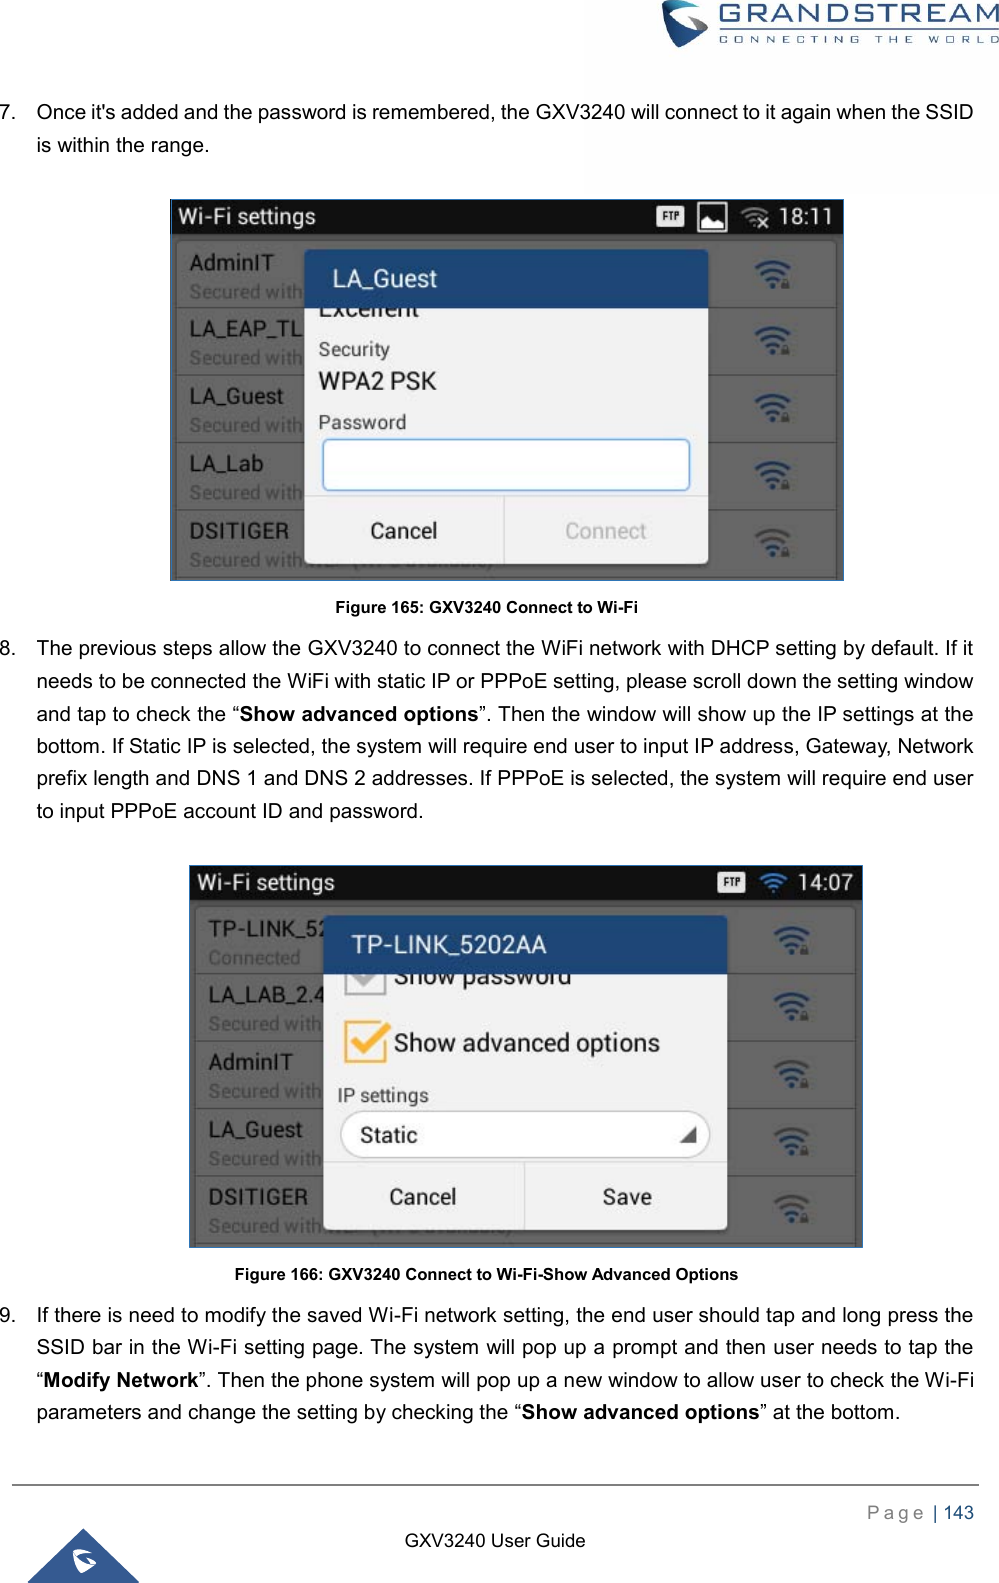
Users Manual
Navigation menu
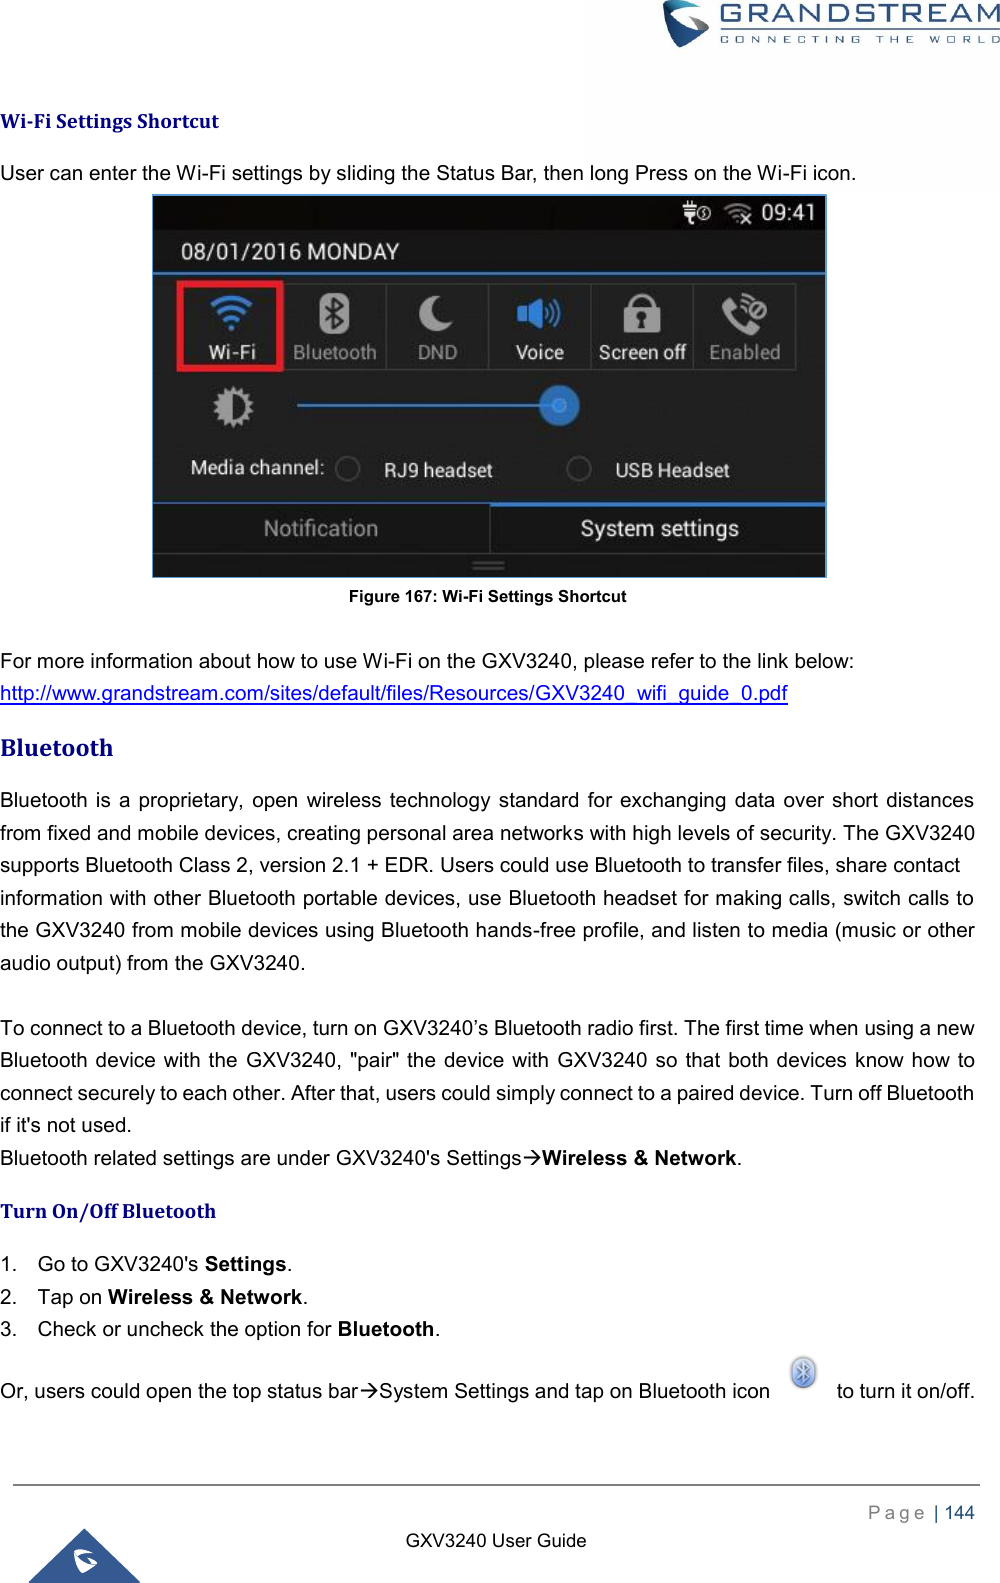
Upload a User Manual
Namespaces
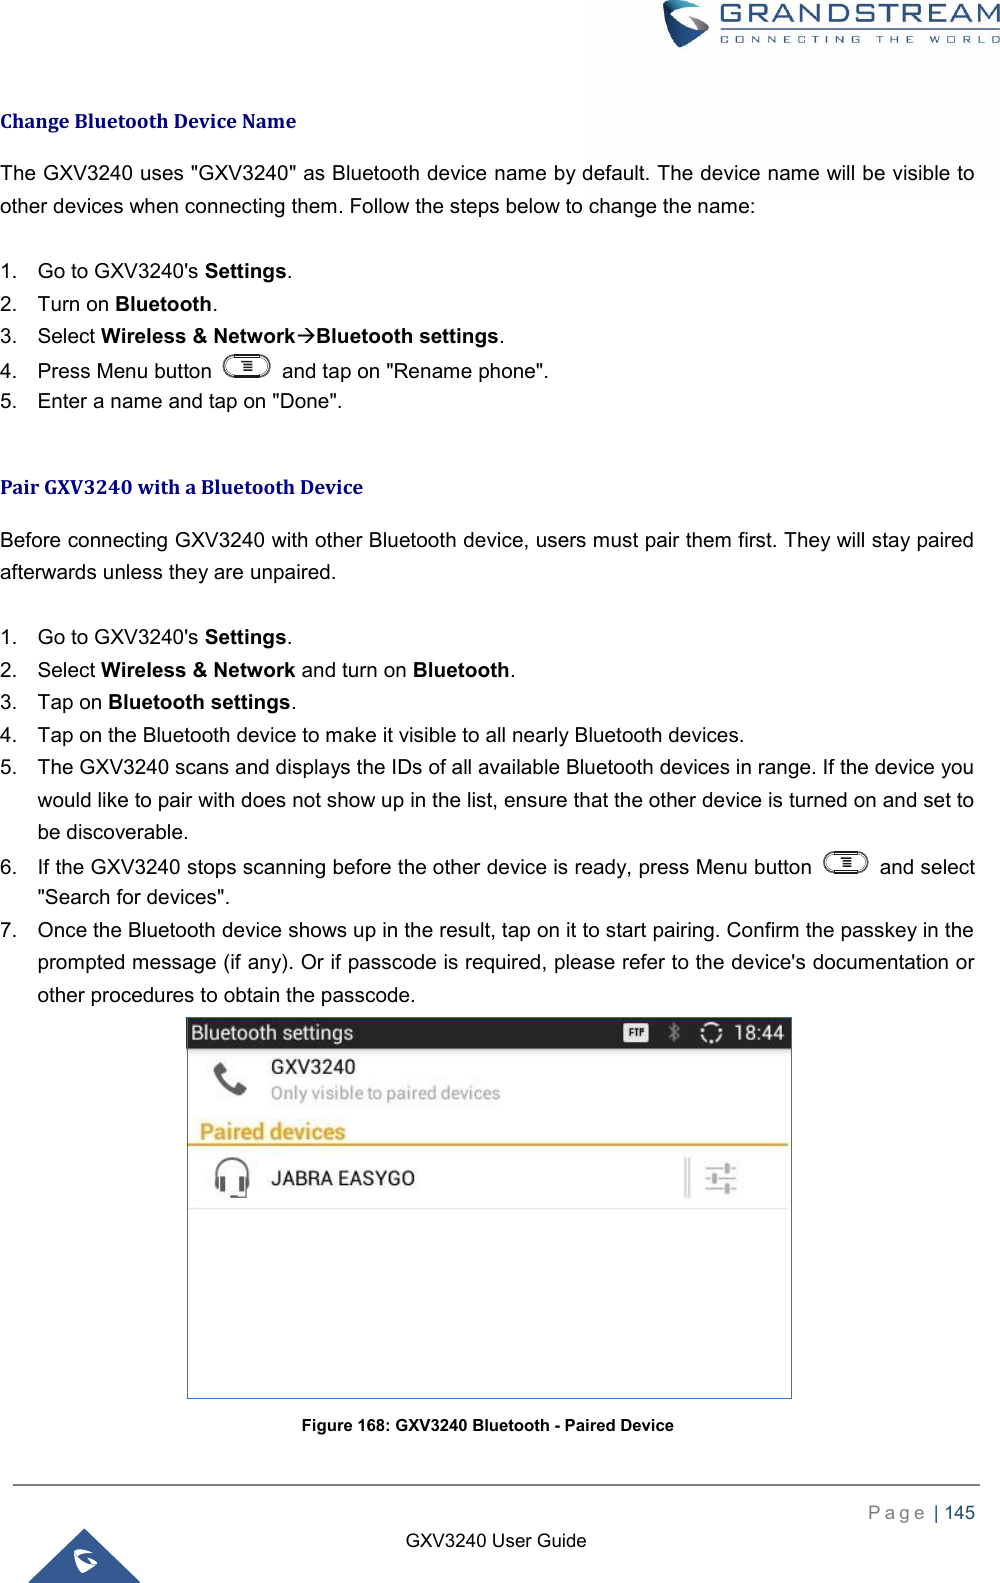
Wiki Guide
HTML
PDF
Info
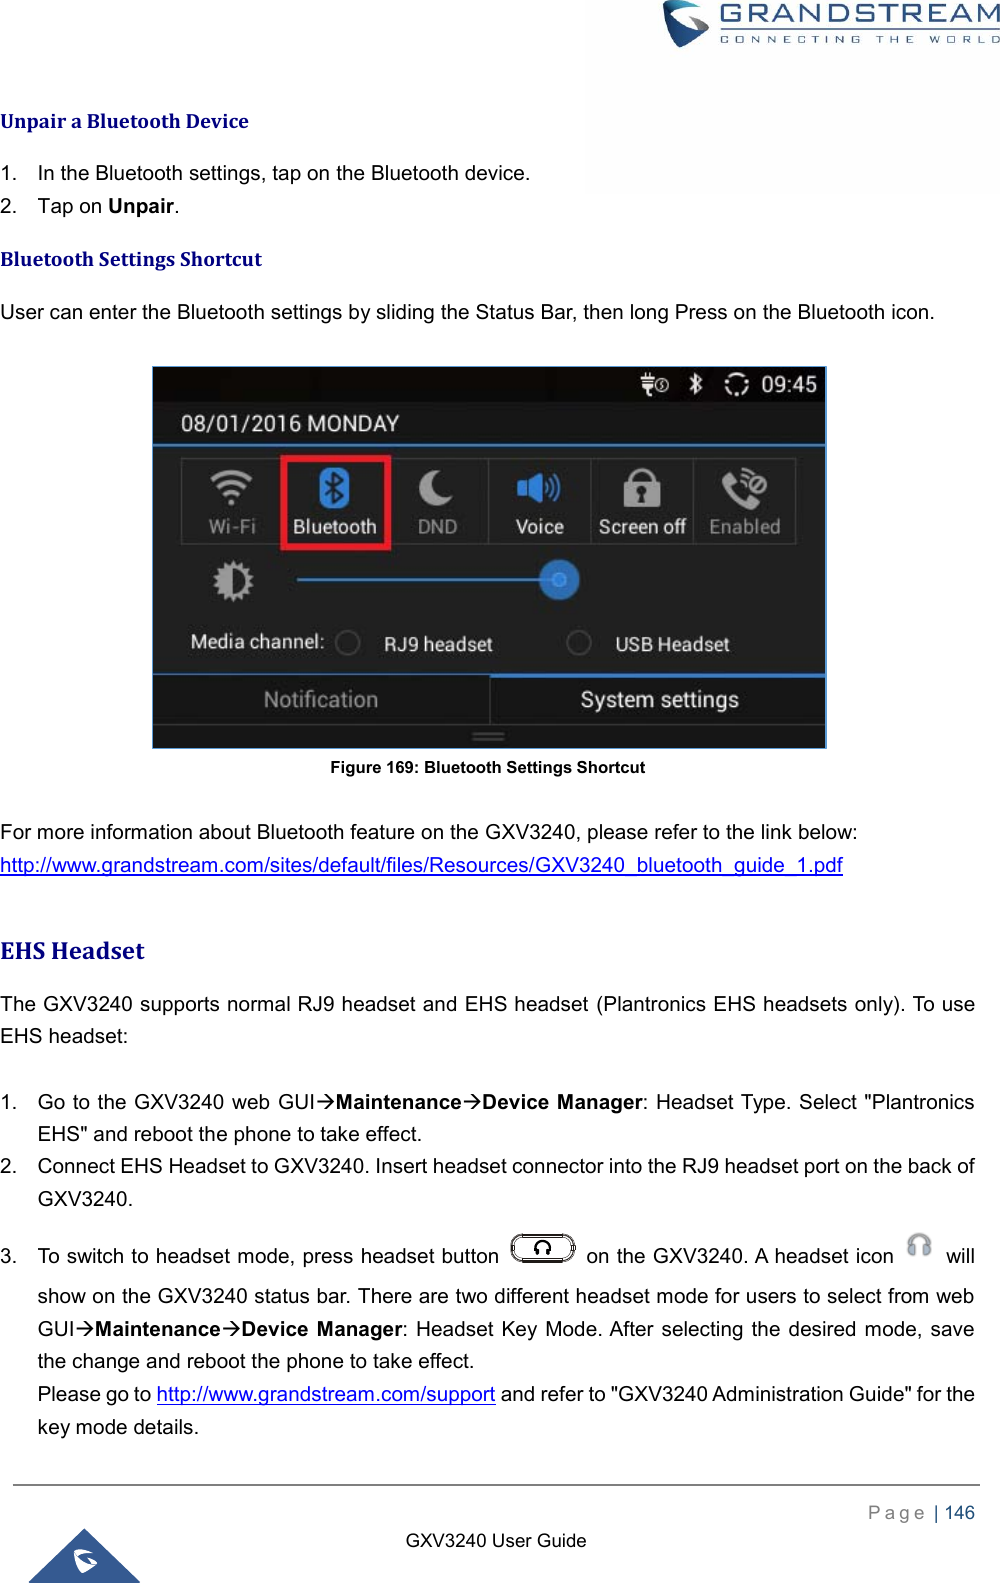
Views
User Manual
Discussion / Help
Navigation


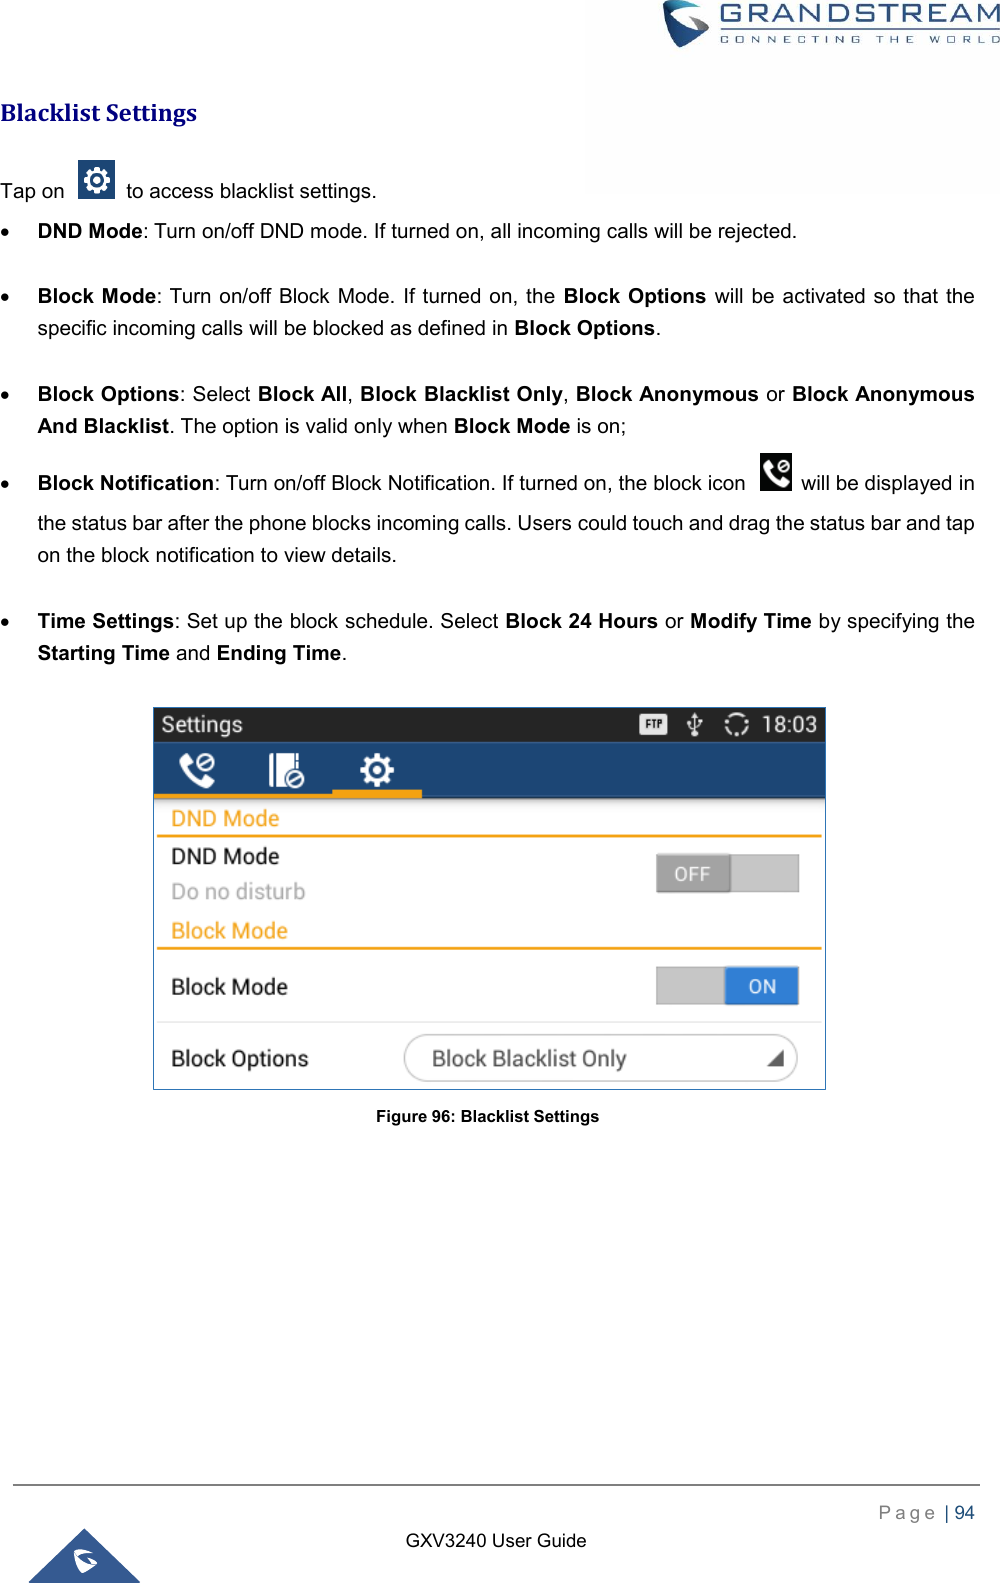
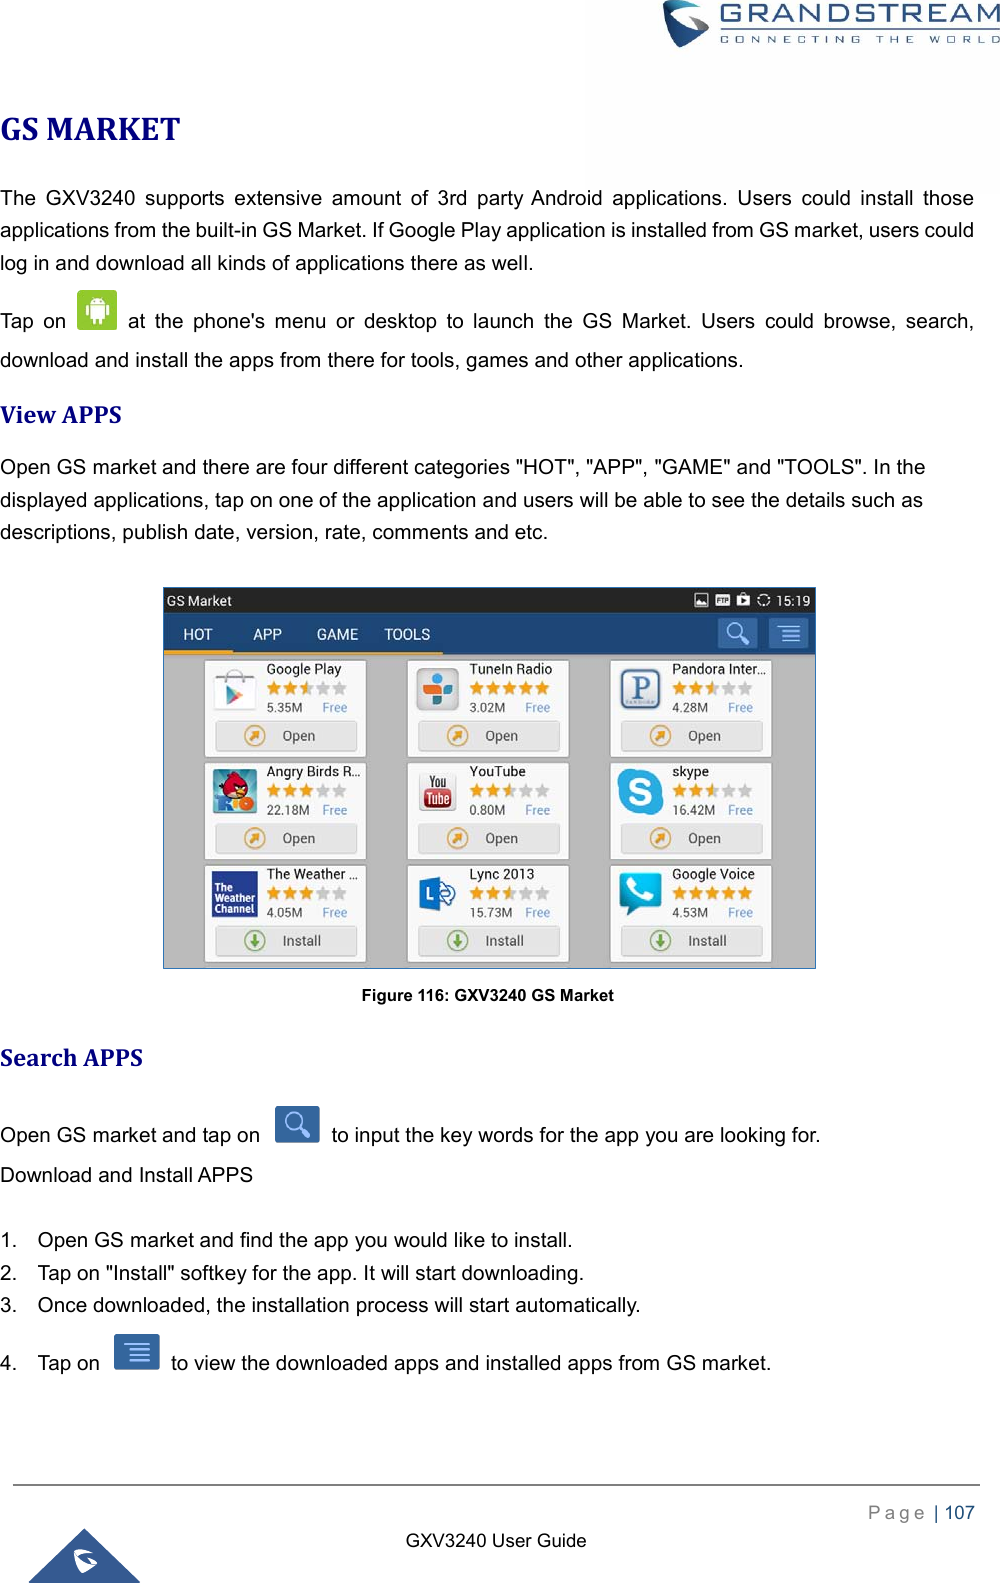
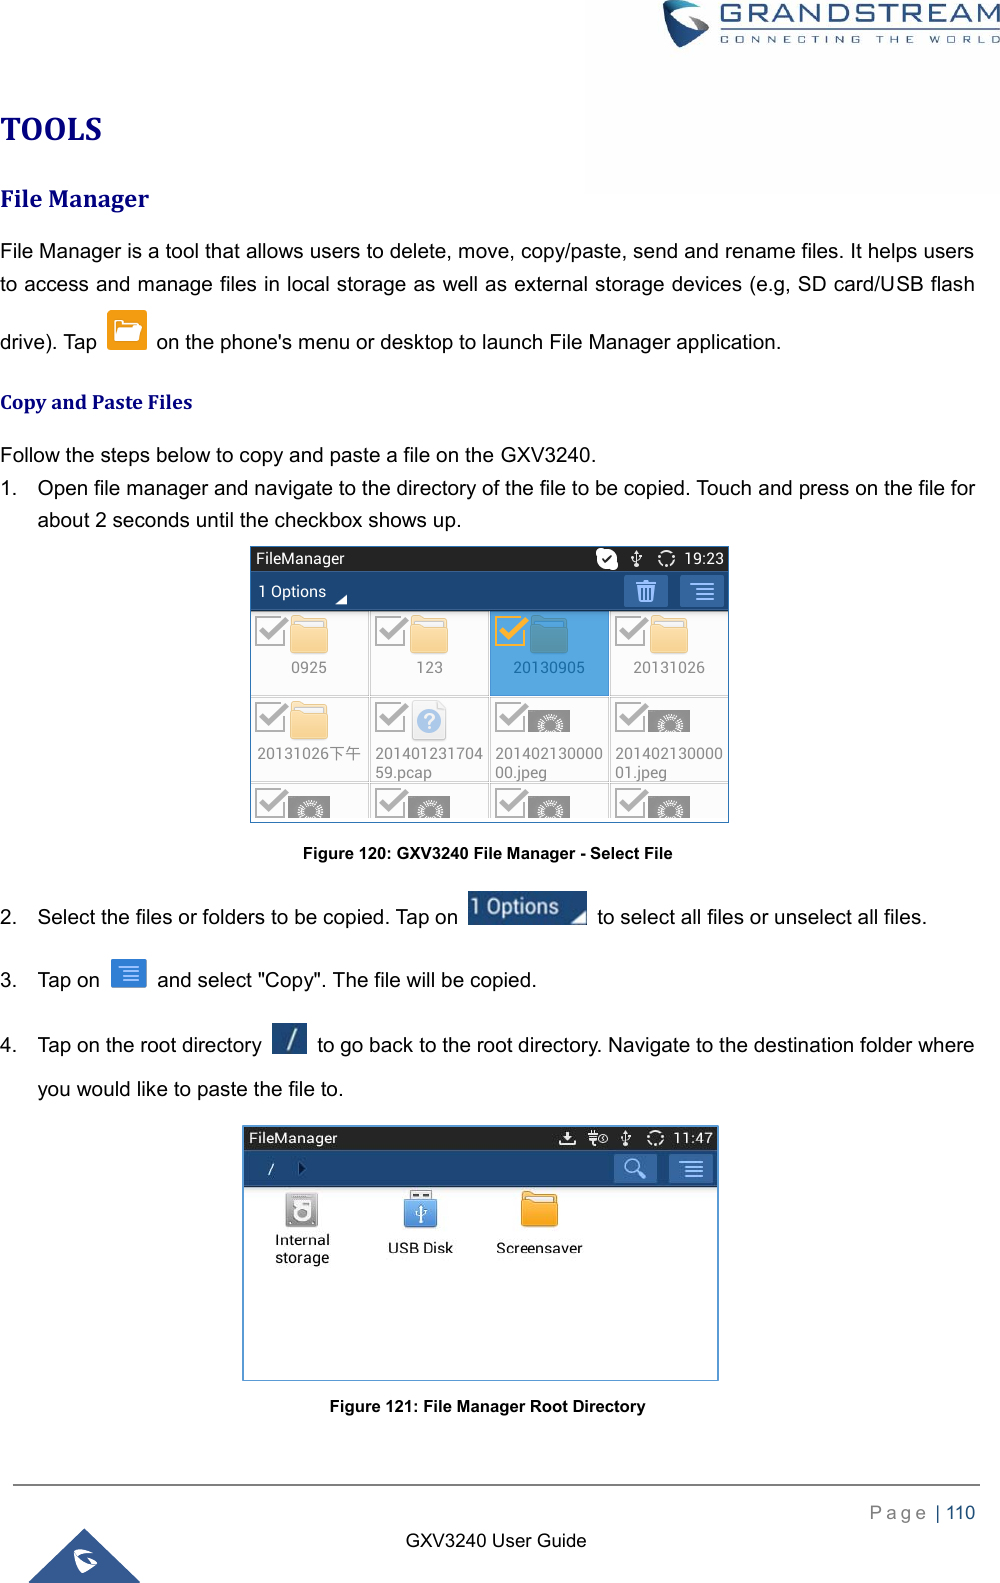
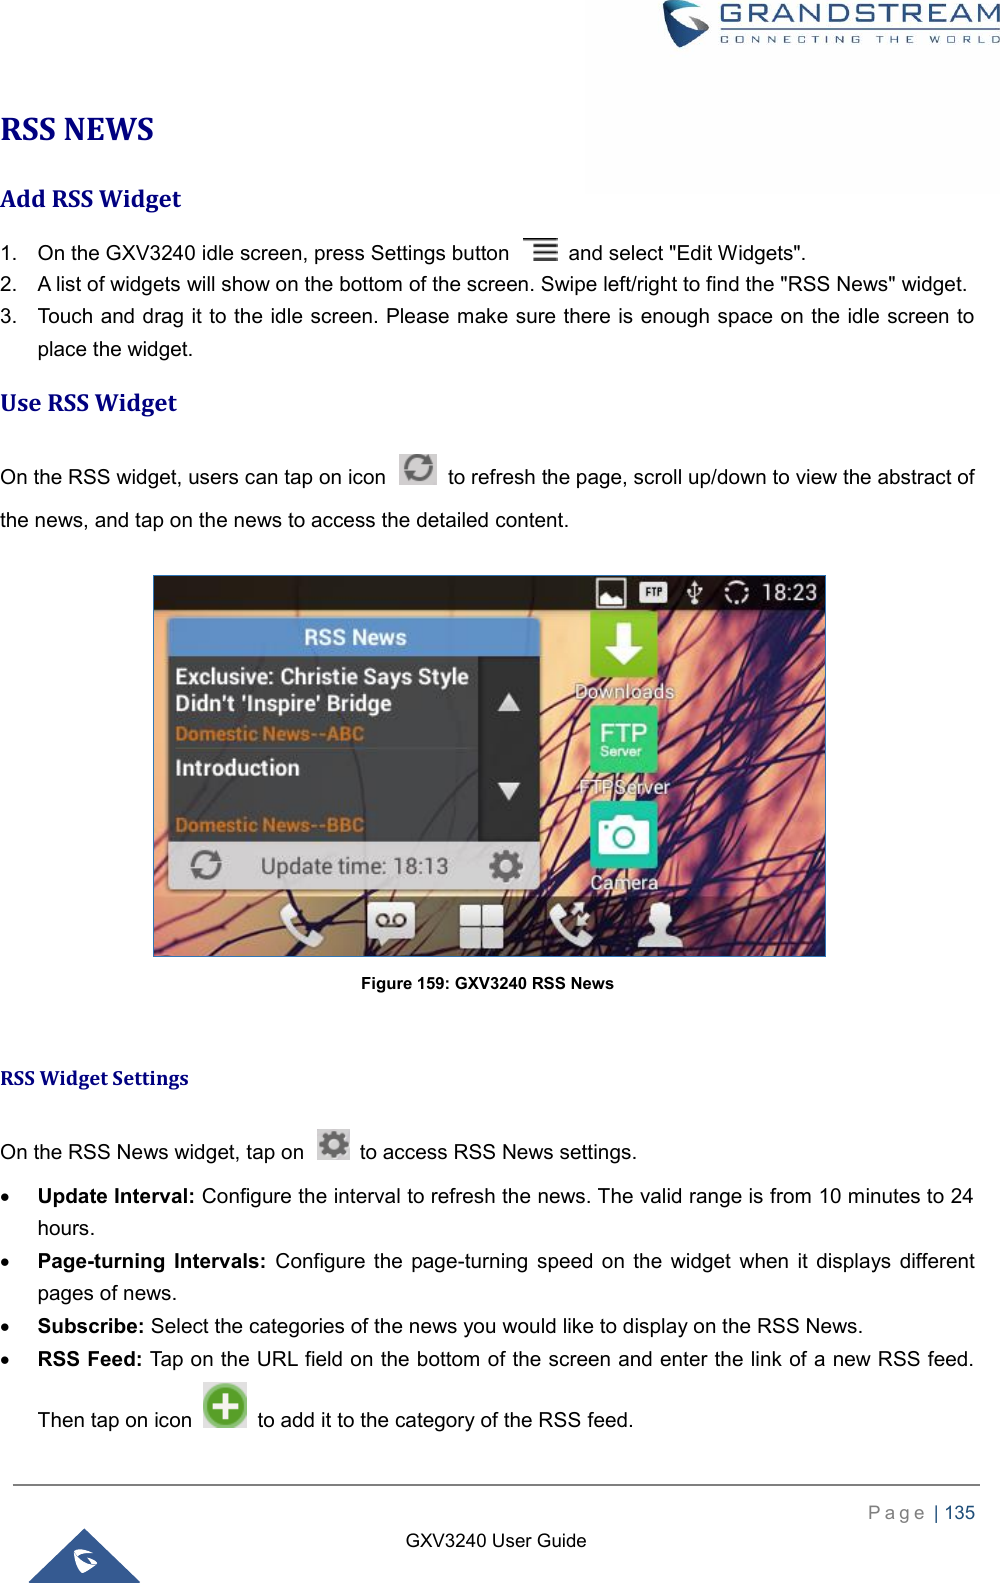
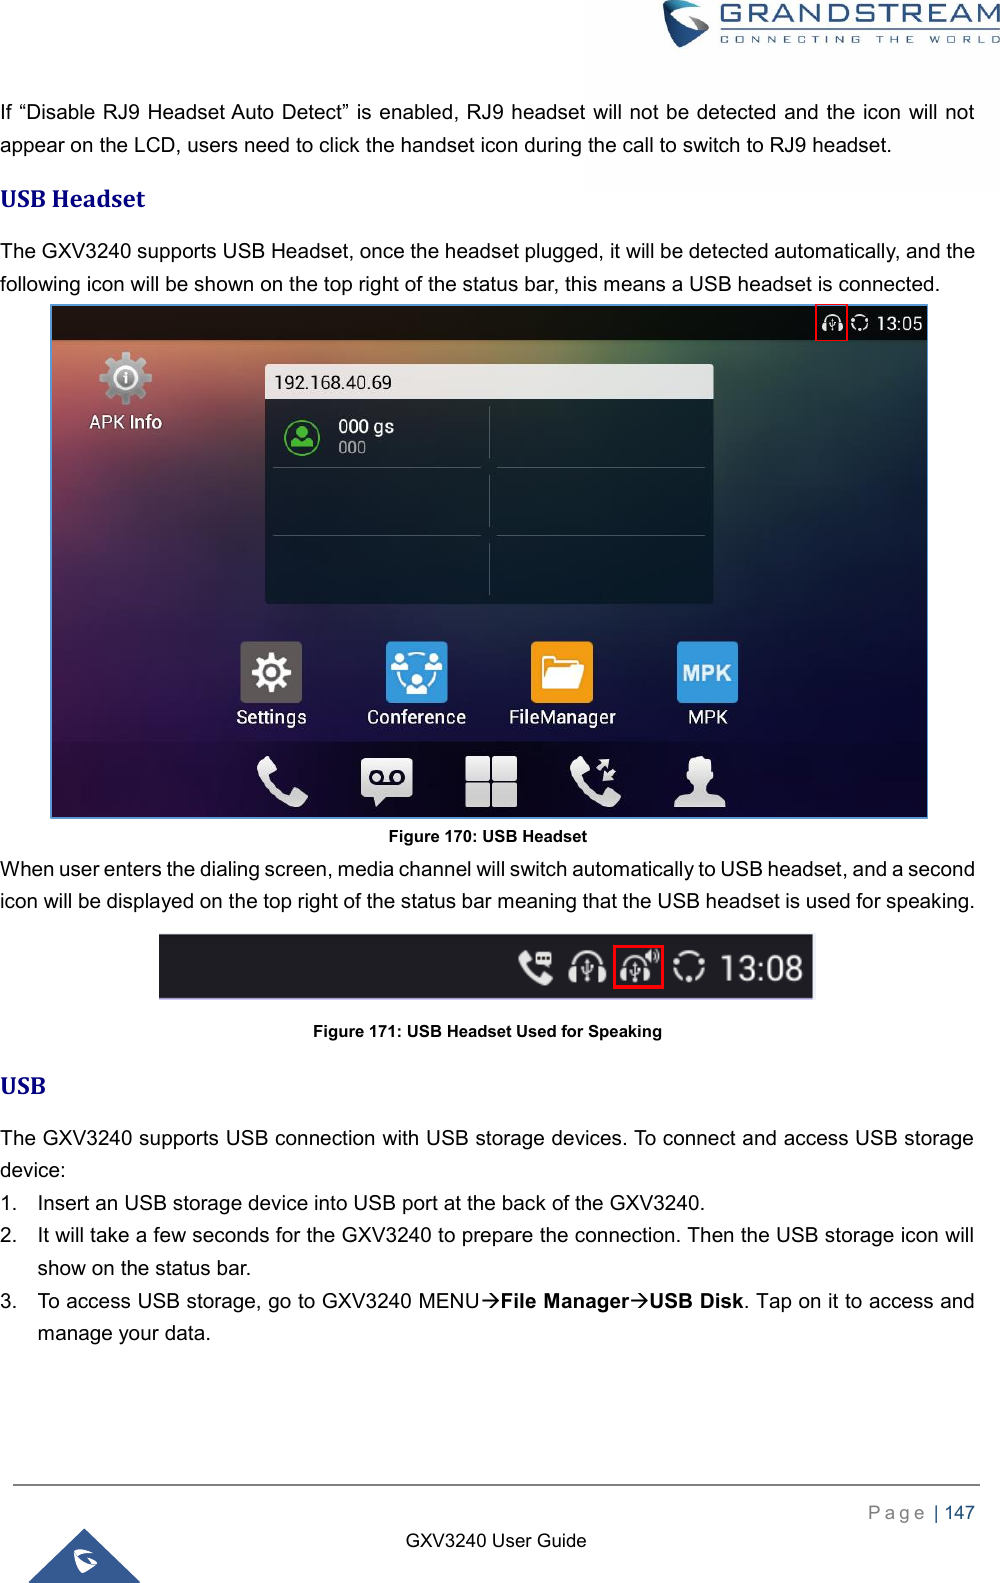
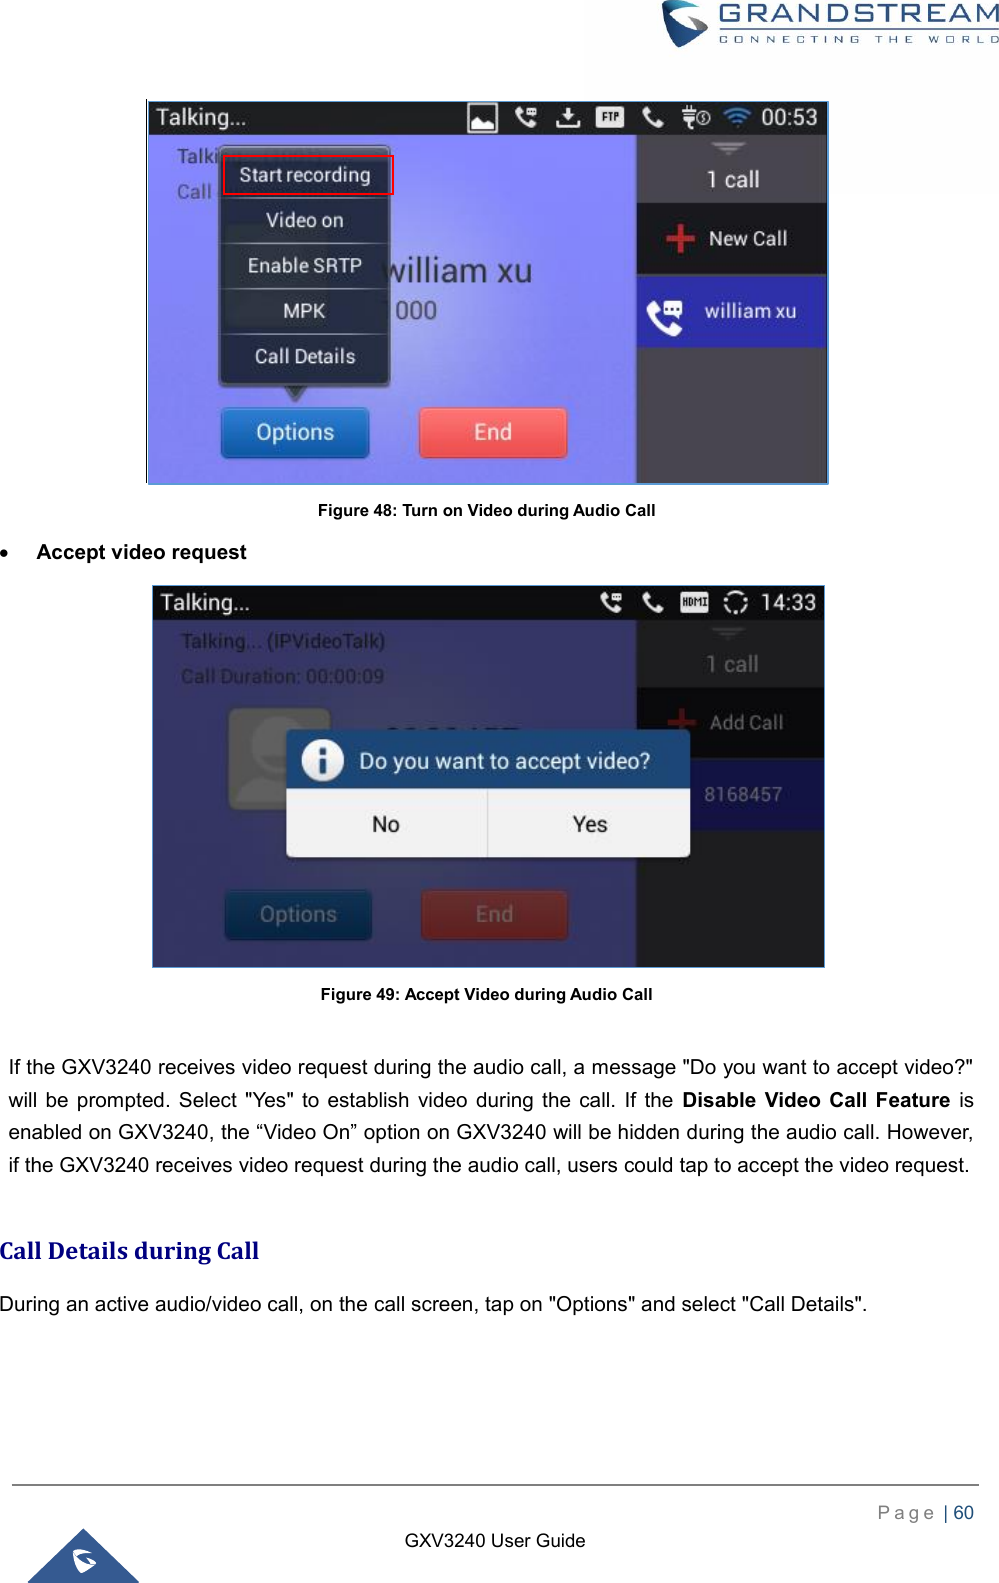
![P a g e | 17 GXV3240 User Guide CHANGE LOG This section documents significant changes from previous versions of user guide for GXV3240. Only major new features or major document updates are listed here. Minor updates for corrections or editing are not documented here. Firmware Version 1.0.3.180 Updated that attended transfer would put the account on hold in the transfer list. Updated DUT will prompt for adding new calls or new incoming calls during preview. Firmware Version 1.0.3.177 Added Support to set call forward when phone is on DND state [Call Forward - Busy/No Answer/DND] Supported that DUT would not show unregistered accounts on SMS app. [Create New SMS] Added Success notification for setting a recording as ring tone. [Set as ringtone] Removed the Setup Wizard which was introduced in 1.0.3.171 after upgrading or factory reset. Added timestamp in the exported call recording file name. [Export] Added account selection for LDAP calls instead of automatically selecting the first active account when the option is “Default”. [LDAP PHONEBOOK] Firmware Version 1.0.3.171 Removed “Click to Return Call” animation on status bar. [Call Progress Status] Updated dialing interface button “End” to “Cancel”. Added sending SIP INFO message with “record” header when record key is pressed. [Call Recording] Added “Record Mode” to specify the location for saving call recording. [Call Recording] Firmware Version 1.0.3.162 Added “Disable RJ9 Headset Auto Detect”. [EHS Headset] Firmware Version 1.0.3.158 Updated phone to automatically answer paging call after a short reminding tone rather than a long one. Added “Add to contacts” button in dial pad if input number does not match any in Contact. [Add to contacts] Updated preview function before answering the call would keep playing ringback on caller side. Firmware Version 1.0.3.144 Changed FileManager Internal storage icon. [File Manager] Supported new feature code "*2016" to start factory function apk. [Diagnosis] Optimized dialer UI response.](https://usermanual.wiki/Grandstream-Networks/GXV3240V3/User-Guide-3699165-Page-18.png)
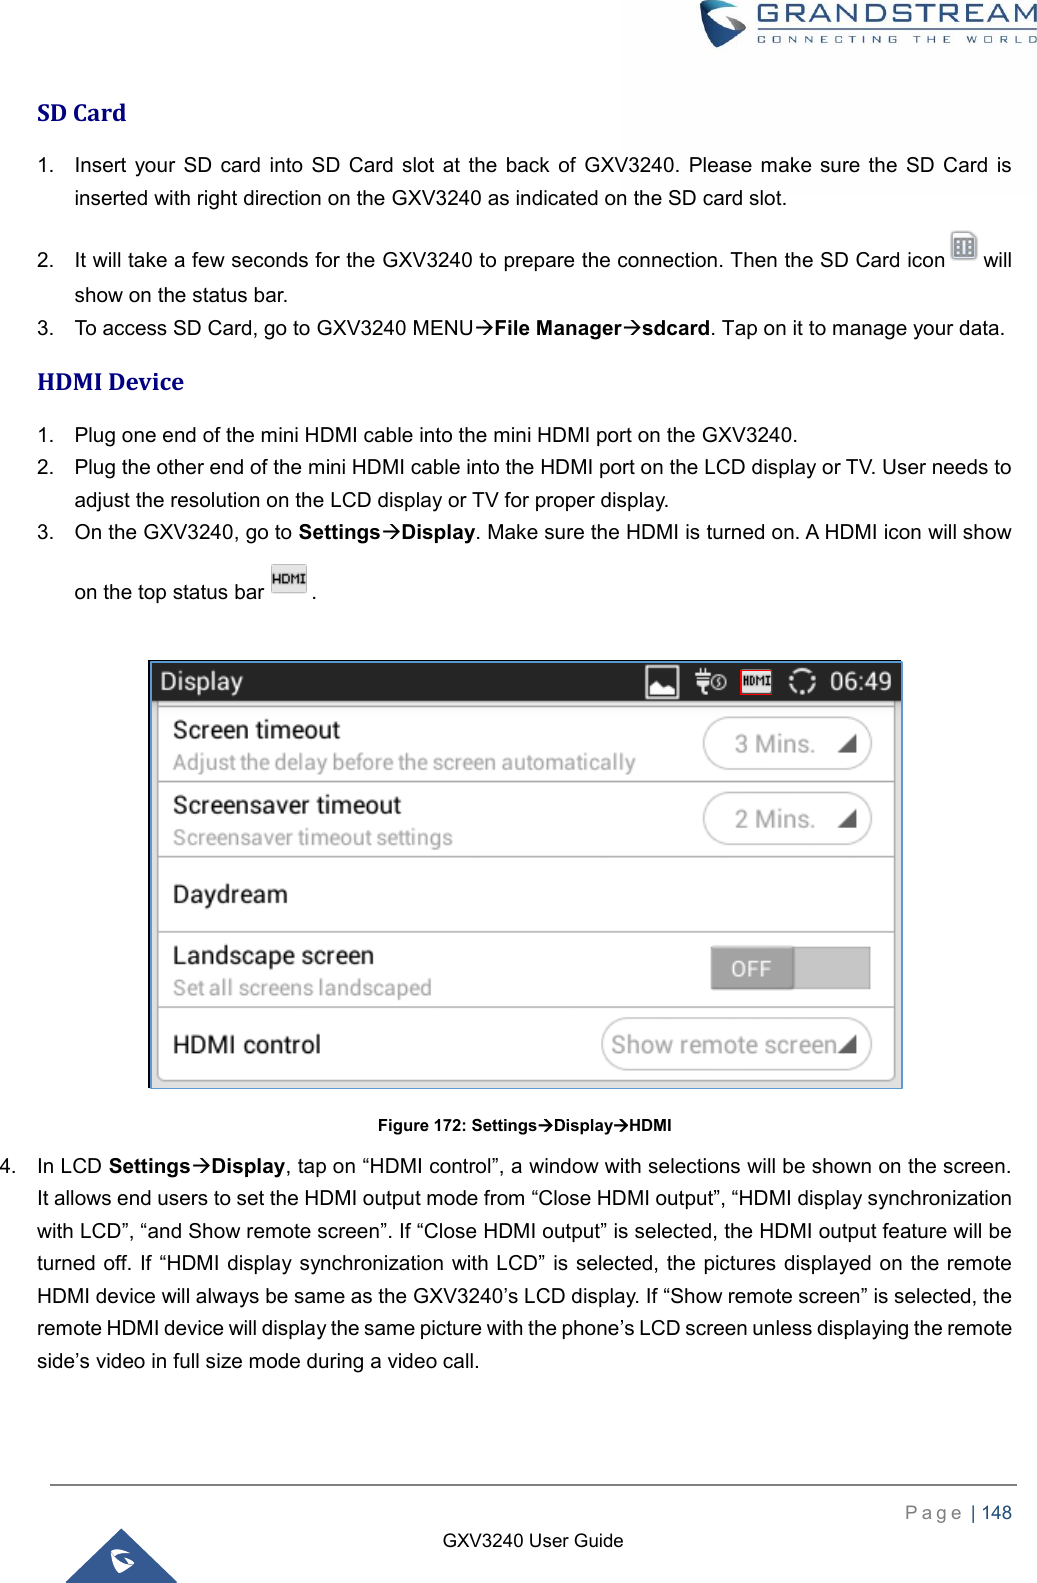
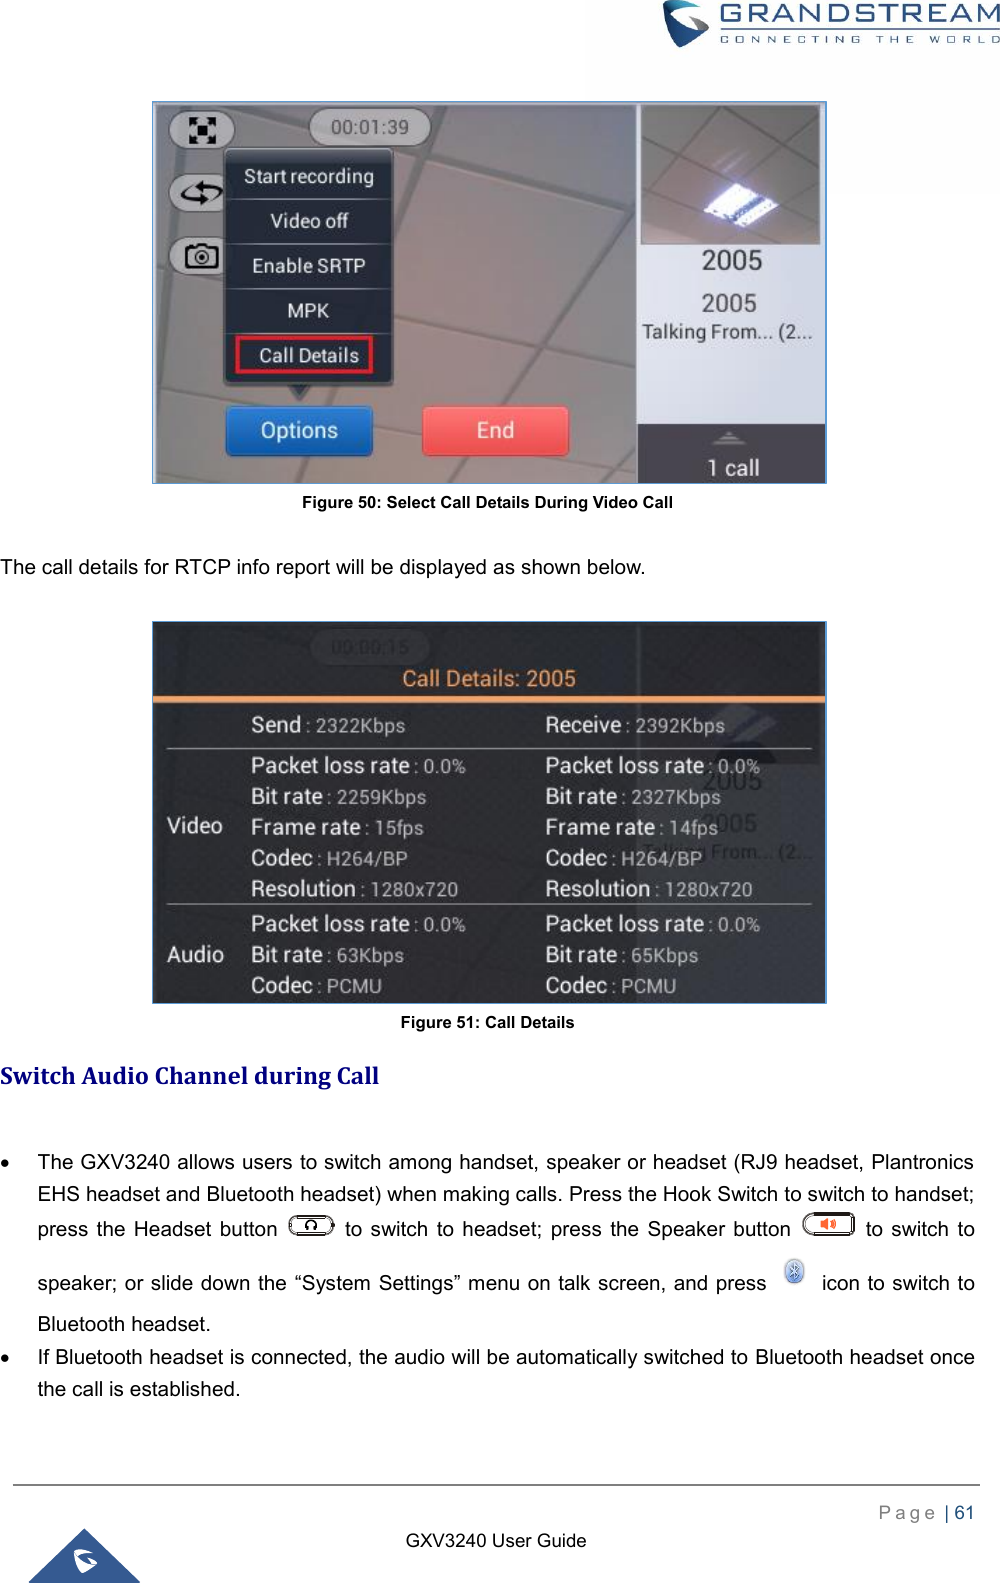
![P a g e | 18 GXV3240 User Guide Broadsoft contacts result can automatically match input letter when searching contact. [Broadworks XSI Contacts] Firmware Version 1.0.3.131 Supported “Call Detail” for RTCP info report. [Call Details during Call] Added prefix MPK Support. [Multi-Purpose Keys] Added support headsets via USB port on GXV32xx. [USB Headset] Added ability to show the call-in-progress status on GXV32xx panel. [Call Progress Status] Added ability to access to the Bluetooth and Wi-Fi Settings menu through quick buttons on taskbar. [Bluetooth Settings Shortcut ] / [Wi-Fi Settings Shortcut] Removed Lync Setup Application. Added ability to launch 3rd party application upon handset off-hook and dialer app. Added storage settings for phone recording. [Recorded Files Settings] Supported adding new participants via Audio/Video call in conference room. [Initiate Conference] Added ability to configure the screensaver network images path as a folder path. [Screensaver] Added support for Direct IP calls via IPv6. [Direct IP Call] Firmware Version 1.0.3.92 Update document layout. Firmware Version 1.0.3.75 Add video display mode explanations for video answer feature. [Make Phone Calls] Add phonebook key function explanations for Phonebook option. [Contacts] Firmware Version 1.0.3.62 Add disable video call feature option explanations and screenshots for making phone calls. [Make Phone Calls] Firmware Version 1.0.3.55 Add authentication type for BroadSoft Directories. [Broadworks XSI Contacts] Firmware Version 1.0.3.46 Add “End” key to complete attended transfer during attended transferring. [Attended Transfer] Firmware Version 1.0.3.37 Add to consult the third party before attended transferring the call. [Attended Transfer] Firmware Version 1.0.3.30 Add call forward option on incoming call page. [Single Incoming Call]](https://usermanual.wiki/Grandstream-Networks/GXV3240V3/User-Guide-3699165-Page-19.png)
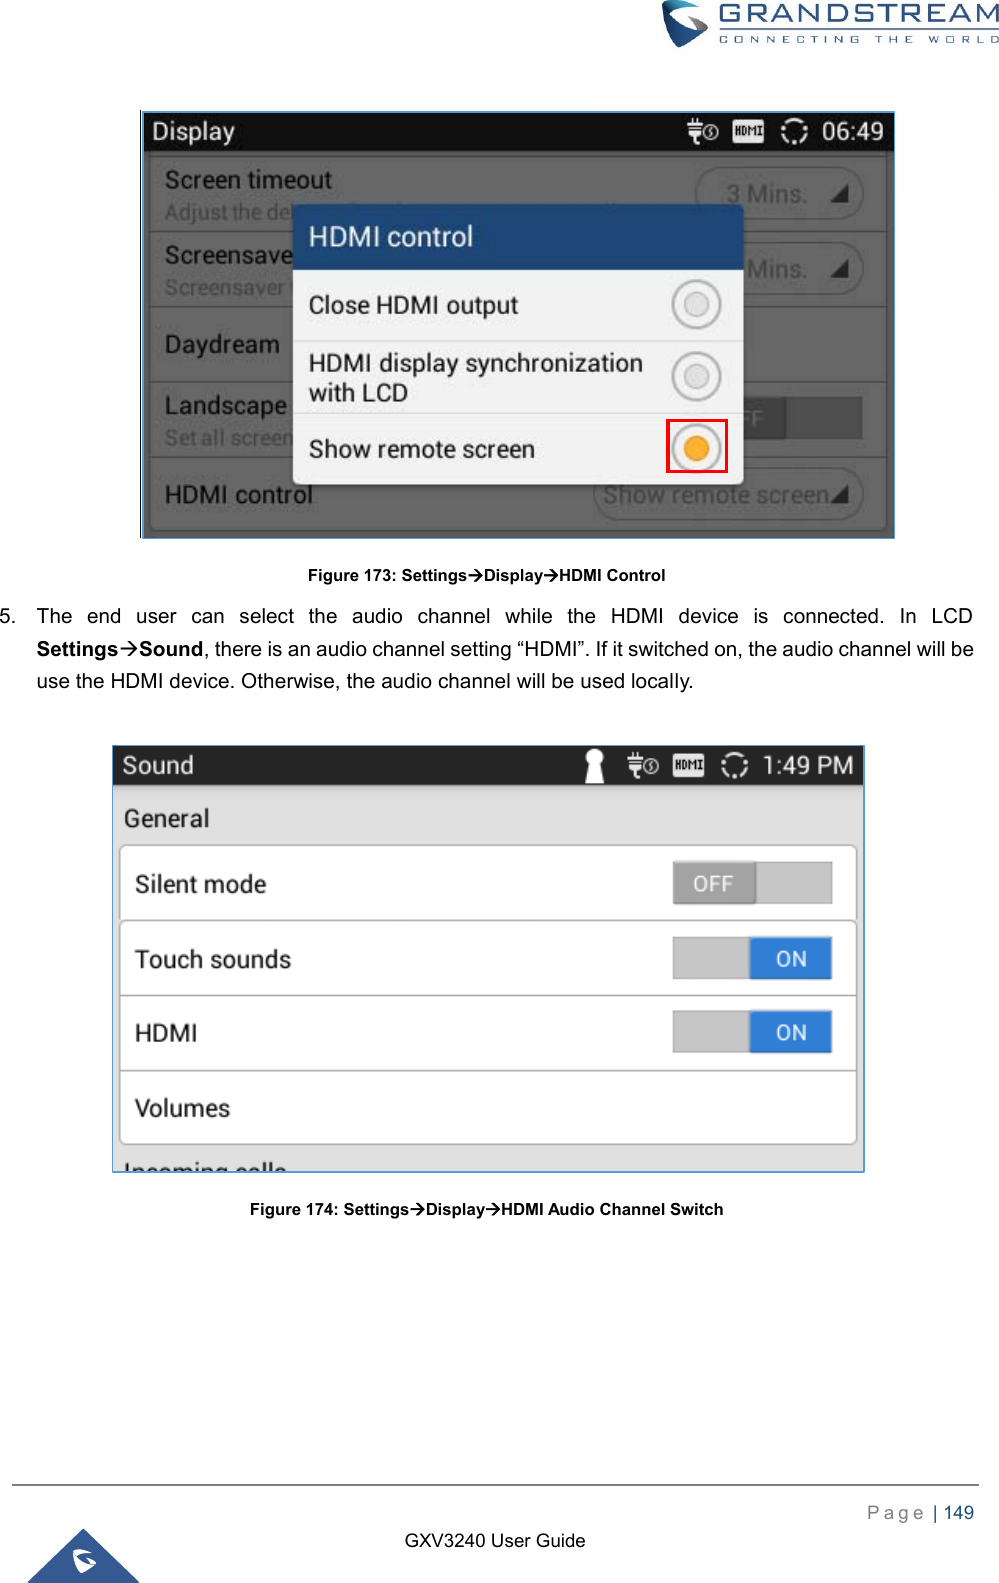
![P a g e | 19 GXV3240 User Guide Add option to dismiss the prompt missed call log on LCD. [Missed Call] Add option to hide IP address on Account Widget. [Account Status] Add event notify feature. [Action URL] Add mute key features While Idle. [Mute] Firmware Version 1.0.3.22 Add BS-IM&P. [BS-IM&P] Add PNP. [PNP] Update HDMI Device. [HDMI Device] Firmware Version 1.0.3.6 Add WiFi Static IP and PPPoE Setting. [Add Wi-Fi Networks] Add Set Programmable Keys on Unregistered Account. [Set Programmable Keys On Unregistered Account] Firmware Version 1.0.1.54 Add BroadWorks Xsi Contacts. [Broadworks XSI Contacts] Add BroadWorks Xsi Call History. [Broadworks XSI Call History] Add Preview for video calls Contacts. [Single Incoming Call] Firmware Version 1.0.1.39 Update screenshots. Firmware Version 1.0.1.29 This is the initial version.](https://usermanual.wiki/Grandstream-Networks/GXV3240V3/User-Guide-3699165-Page-20.png)


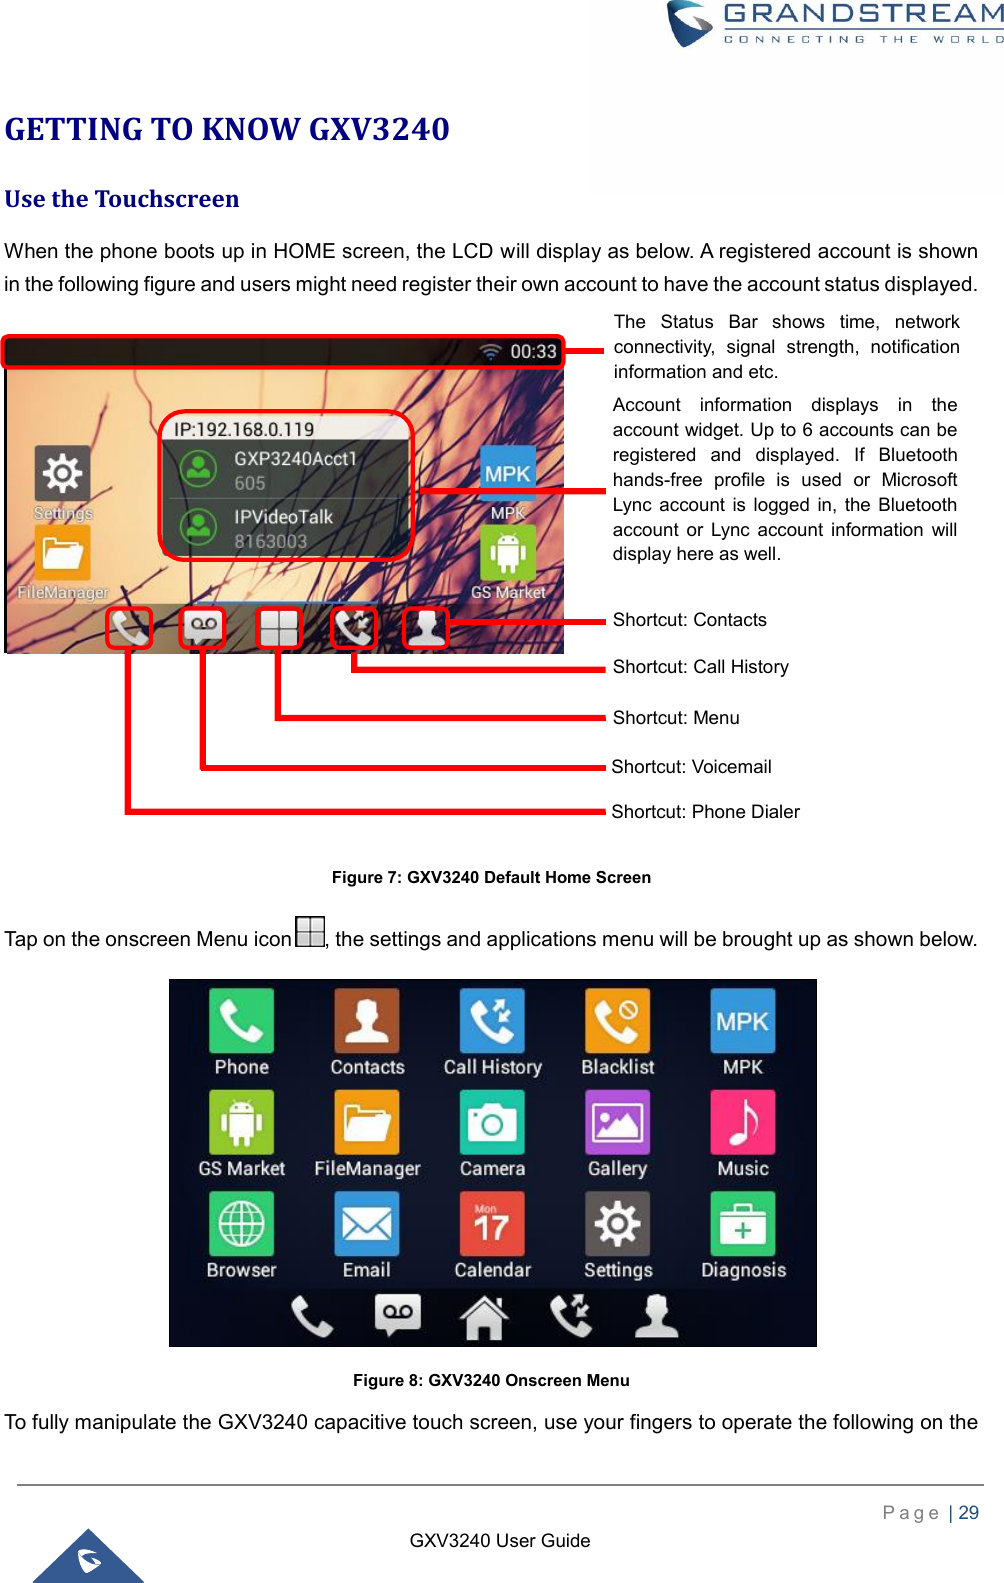
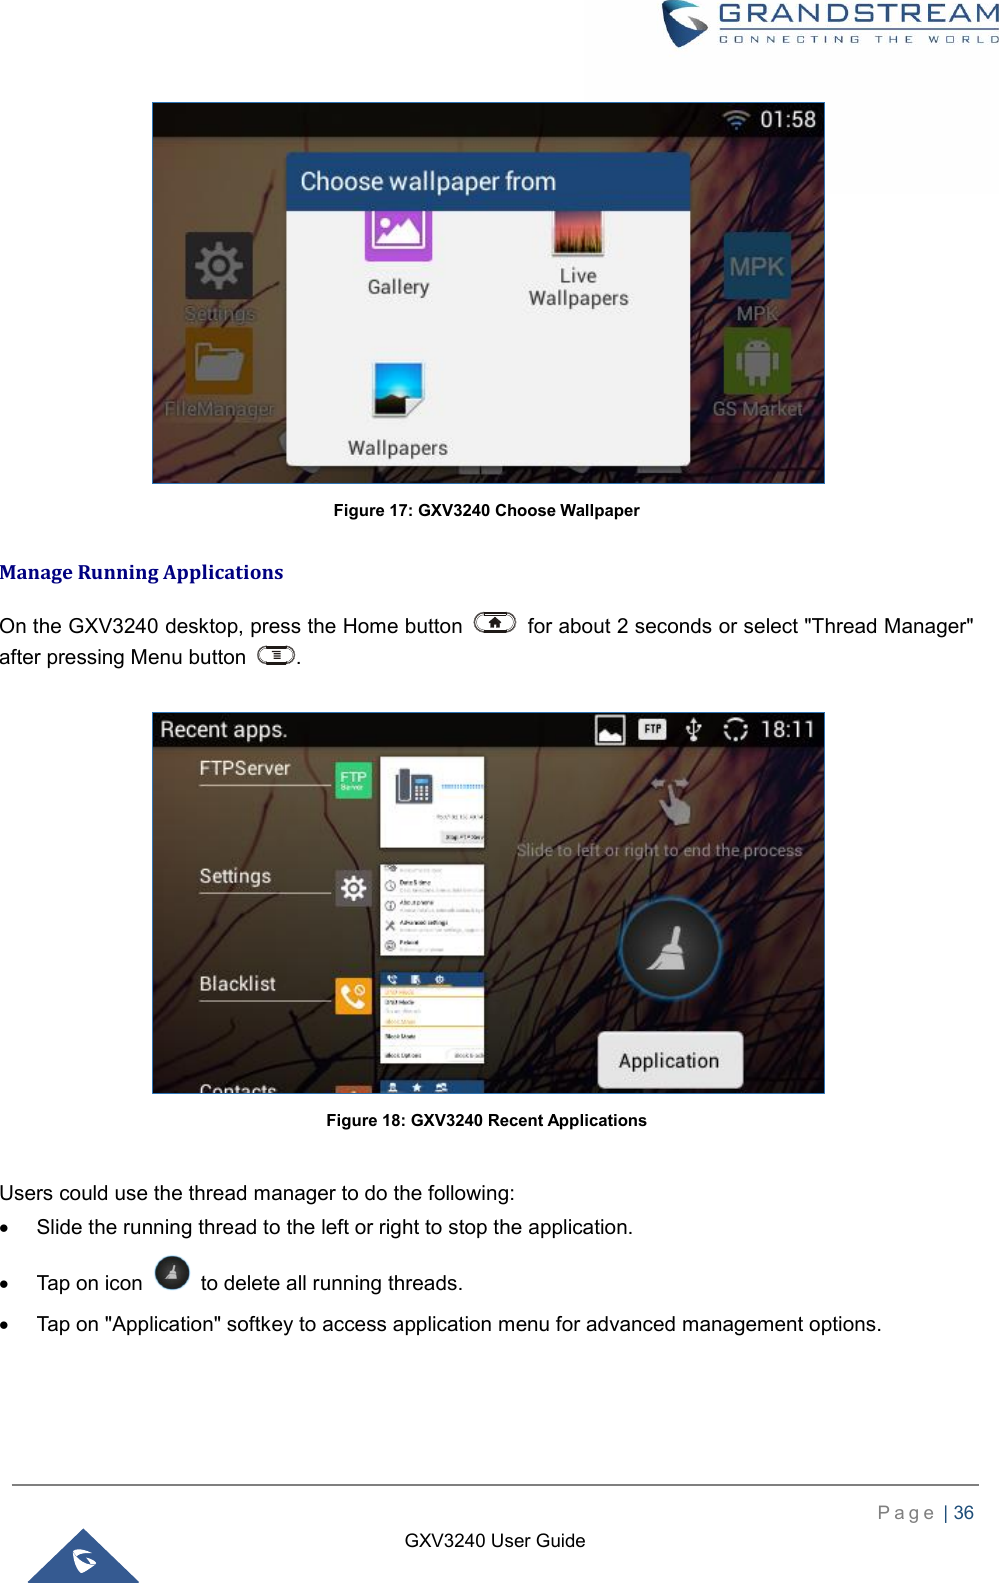
![P a g e | 31 GXV3240 User Guide Double Tap Quickly touch the screen twice with fingertip to switch between default display and zoomed-in display. This is usually used when viewing photos or web pages. Use the Desktop Desktop Menu When the GXV3240 is on idle screen, press the MENU key to bring up phone's menu. Users can access the following in the desktop menu: Figure 10: GXV3240 Desktop Menu Wallpaper Select wallpaper from Gallery, Wallpapers or Live Wallpapers. Preview Add, delete or edit desktop. Edit Widget Add widgets to the desktop by dragging the widget from the bottom menu to the desktop. Folder Add folder on the desktop and users can place desktop shortcuts into the folder. Thread Manager Manage running applications on the GXV3240. For more details, please refer to section [Manage Running Applications]. System settings Access phone's settings such as "Personalized Account", "Wireless & Network", "Sound", "Display", "Storage", "Application" and etc.](https://usermanual.wiki/Grandstream-Networks/GXV3240V3/User-Guide-3699165-Page-32.png)
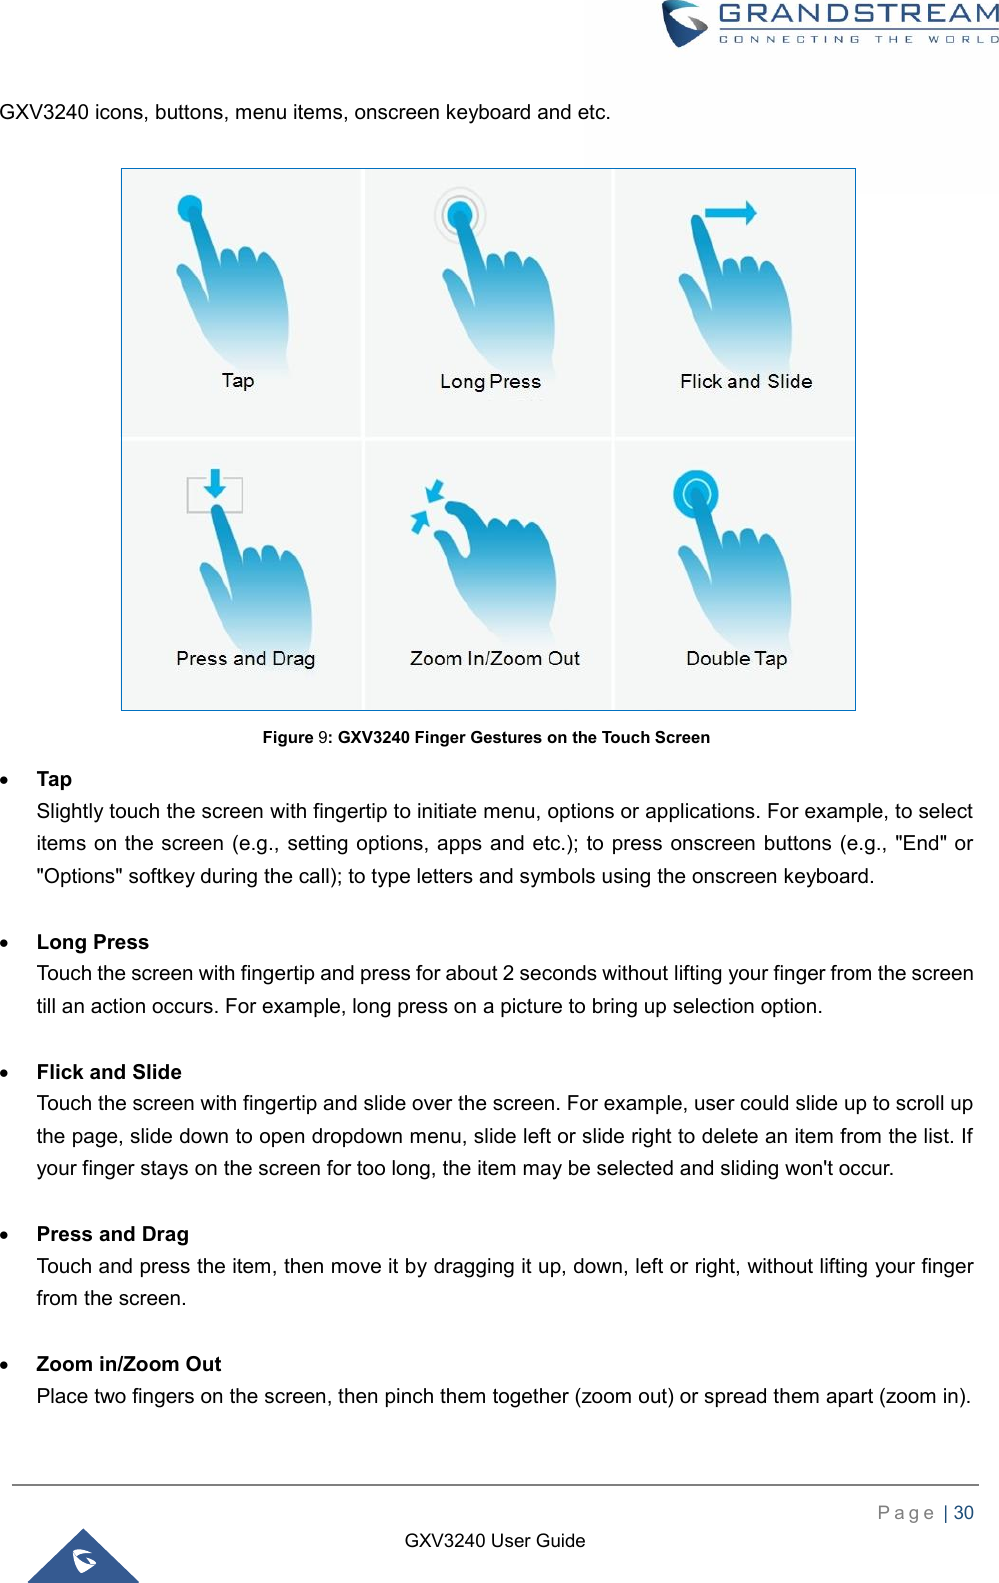
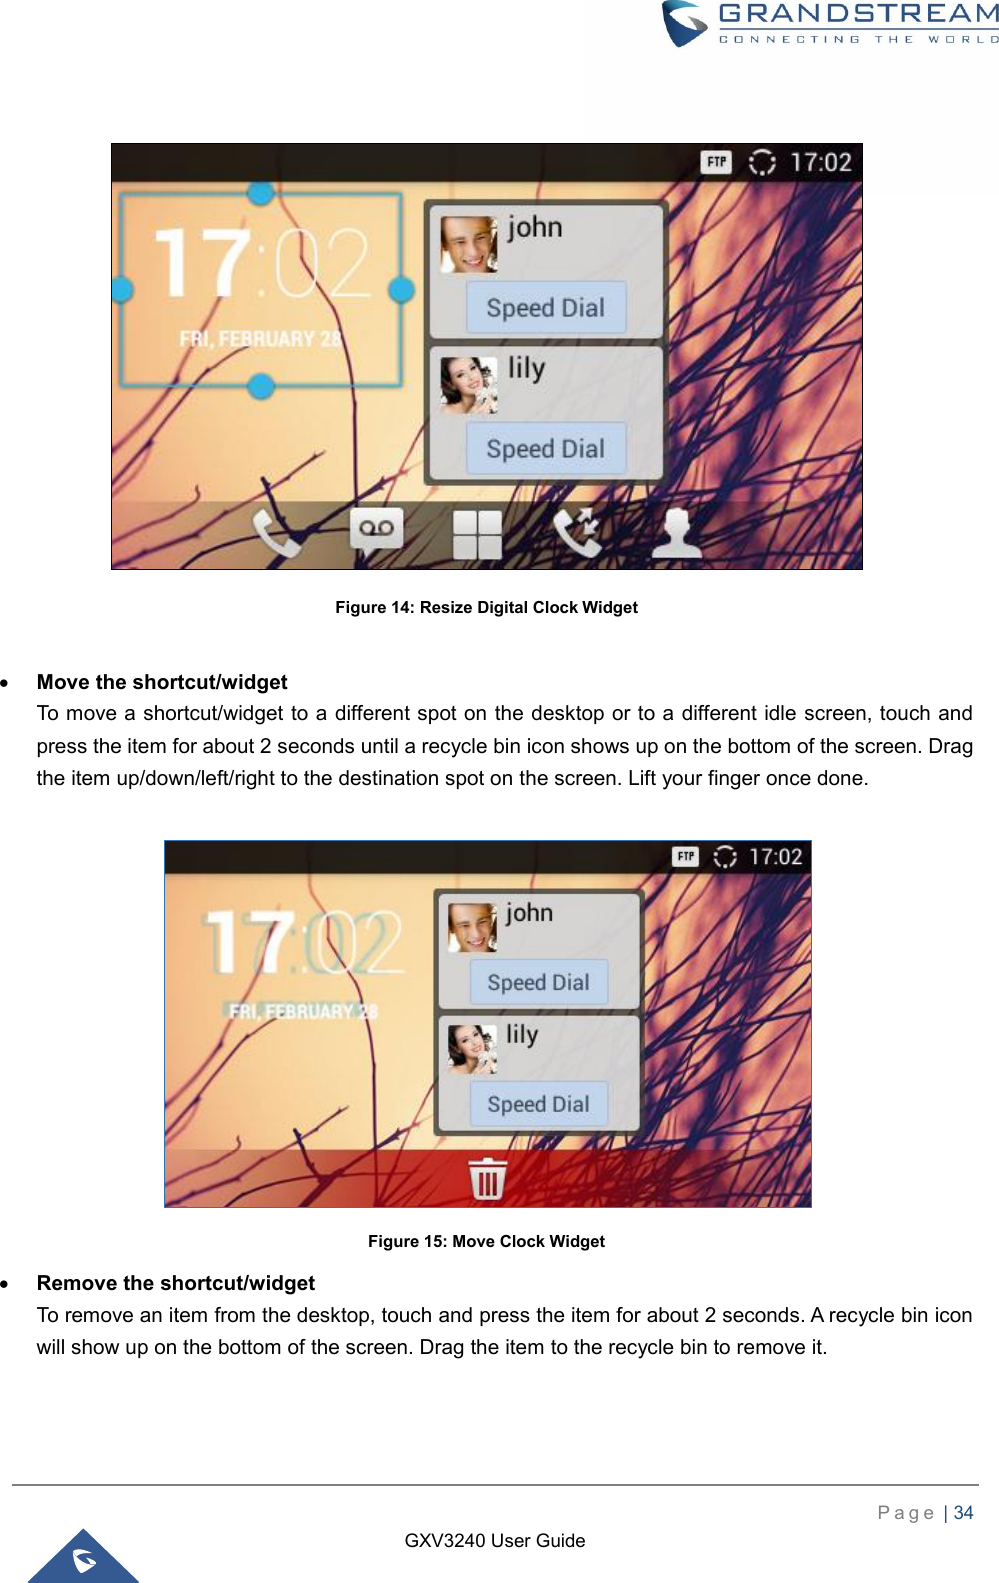
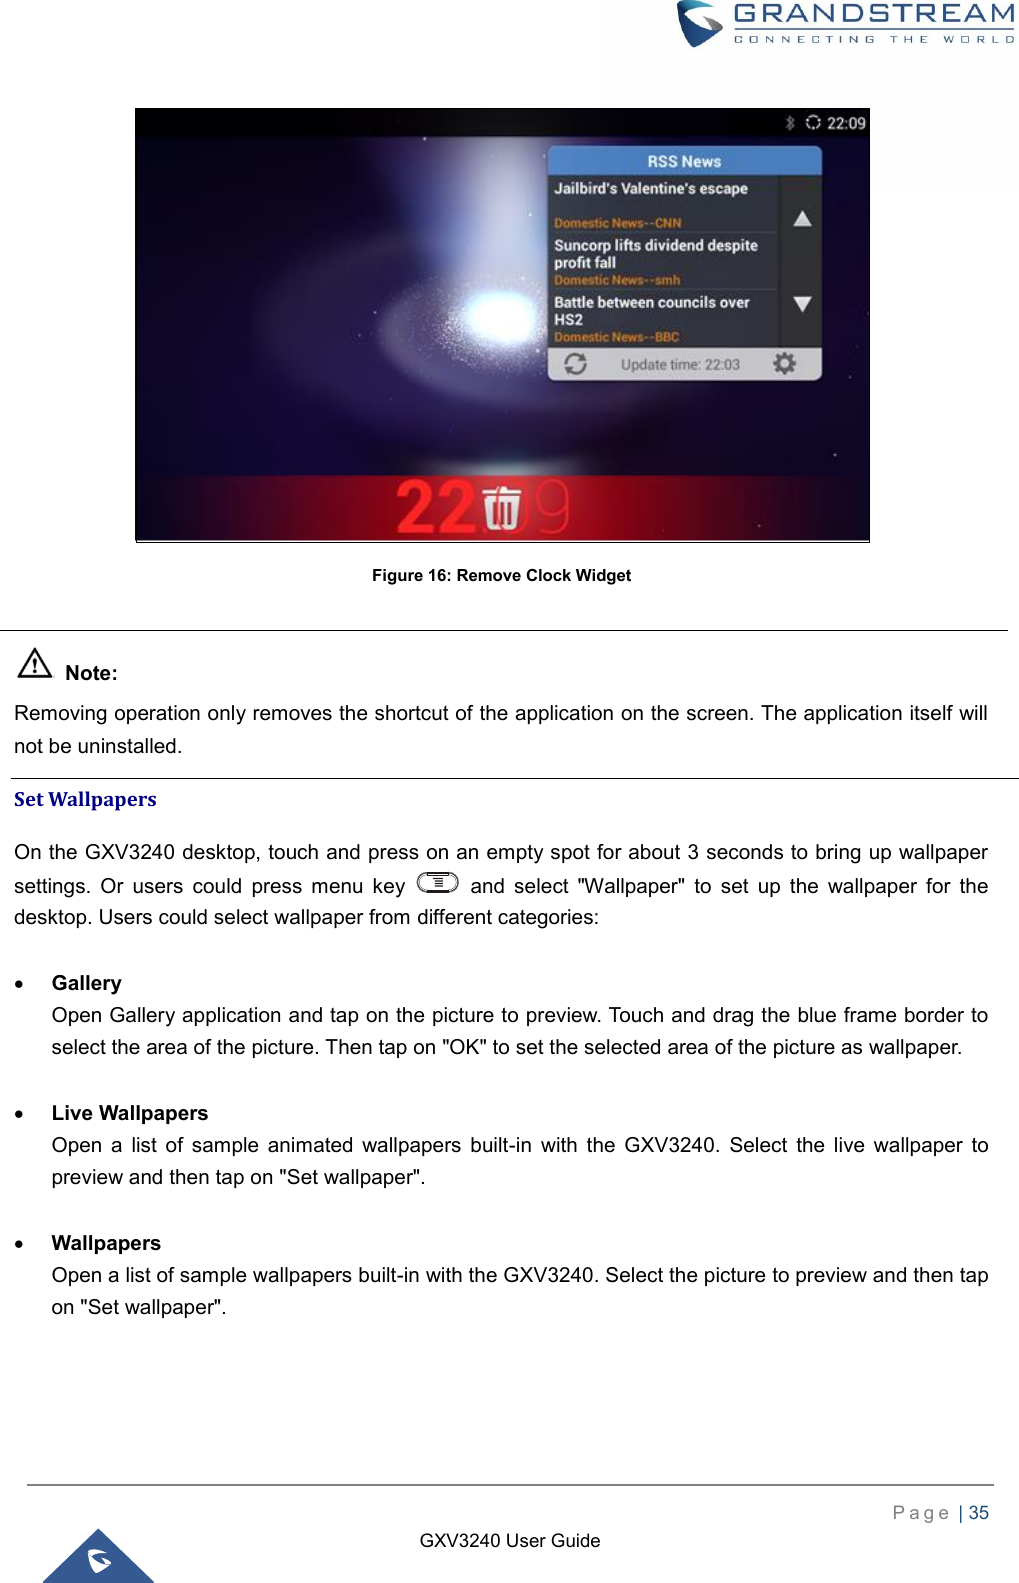
![P a g e | 33 GXV3240 User Guide Figure 12: Add Widget to the Desktop Manage Desktop Items On the GXV3240 desktop, users could tap on the desktop items to manage shortcuts and widgets. The following operations can be done: Tap on the shortcut icon to open the application. For example, tap on "FileManager" icon to access file manager application. Tap on the widget to open and edit it. For example, tap on the digital clock on the desktop. The clock settings will be brought up for users to set up timer, stop watch or alarm. Figure 13: Open Clock Widget Certain widgets such as Calendar, Clock and Bookmark can be resized on the desktop. To resize a widget, touch and press the widget for about 2 seconds. Then lift your finger from the screen. This will bring up the blue frame as shown in [Figure 14: Resize Digital Clock Widget]. Touch and drag the border of the frame to adjust the size.](https://usermanual.wiki/Grandstream-Networks/GXV3240V3/User-Guide-3699165-Page-34.png)
![P a g e | 37 GXV3240 User Guide Idle Screen Switch Idle Screens The GXV3240 supports multiple idle screens by sliding the screen horizontally. On the GXV3240 screen, slightly touch an empty area and slide to the left or right using your finger to switch between different idle screens. Set Up Idle Screen Set home screen Follow the steps below to set up the HOME screen. 1. GXV3240 is up and running on idle screen. 2. Press the MENU button and tap on "Preview" option. This will zoom out all the screens as shown in [Figure 19: Set up Home Idle Screen]. 3. The screen with displayed is the HOME screen. Others are shown with icon . Tap on the icon to select the corresponding screen as the new HOME screen. Figure 19: Set up Home Idle Screen Add/Delete idle screen As shown in [Figure 19: Set up Home Idle Screen], the screen with the blue frame highlighted is the current idle screen on the LCD. Users could add or delete idle screen. Add idle screen. Tap on to add a new idle screen. Users could add up to 9 idle screens. Delete idle screen. Tap on on the top right of the idle screen to delete the idle screen.](https://usermanual.wiki/Grandstream-Networks/GXV3240V3/User-Guide-3699165-Page-38.png)


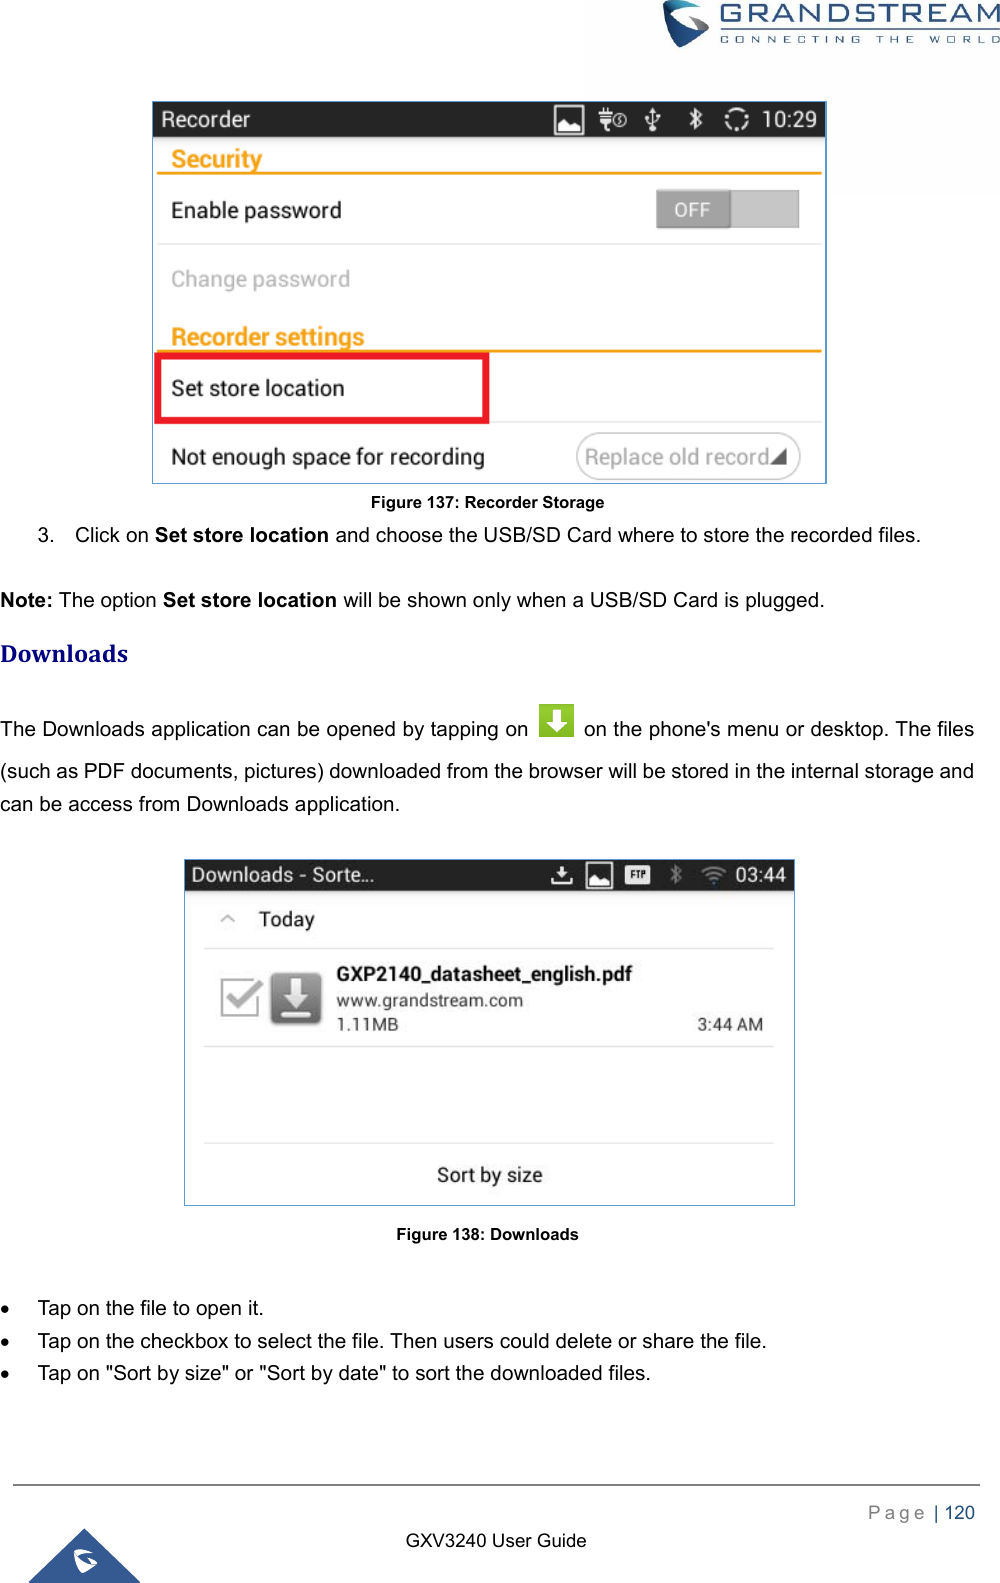
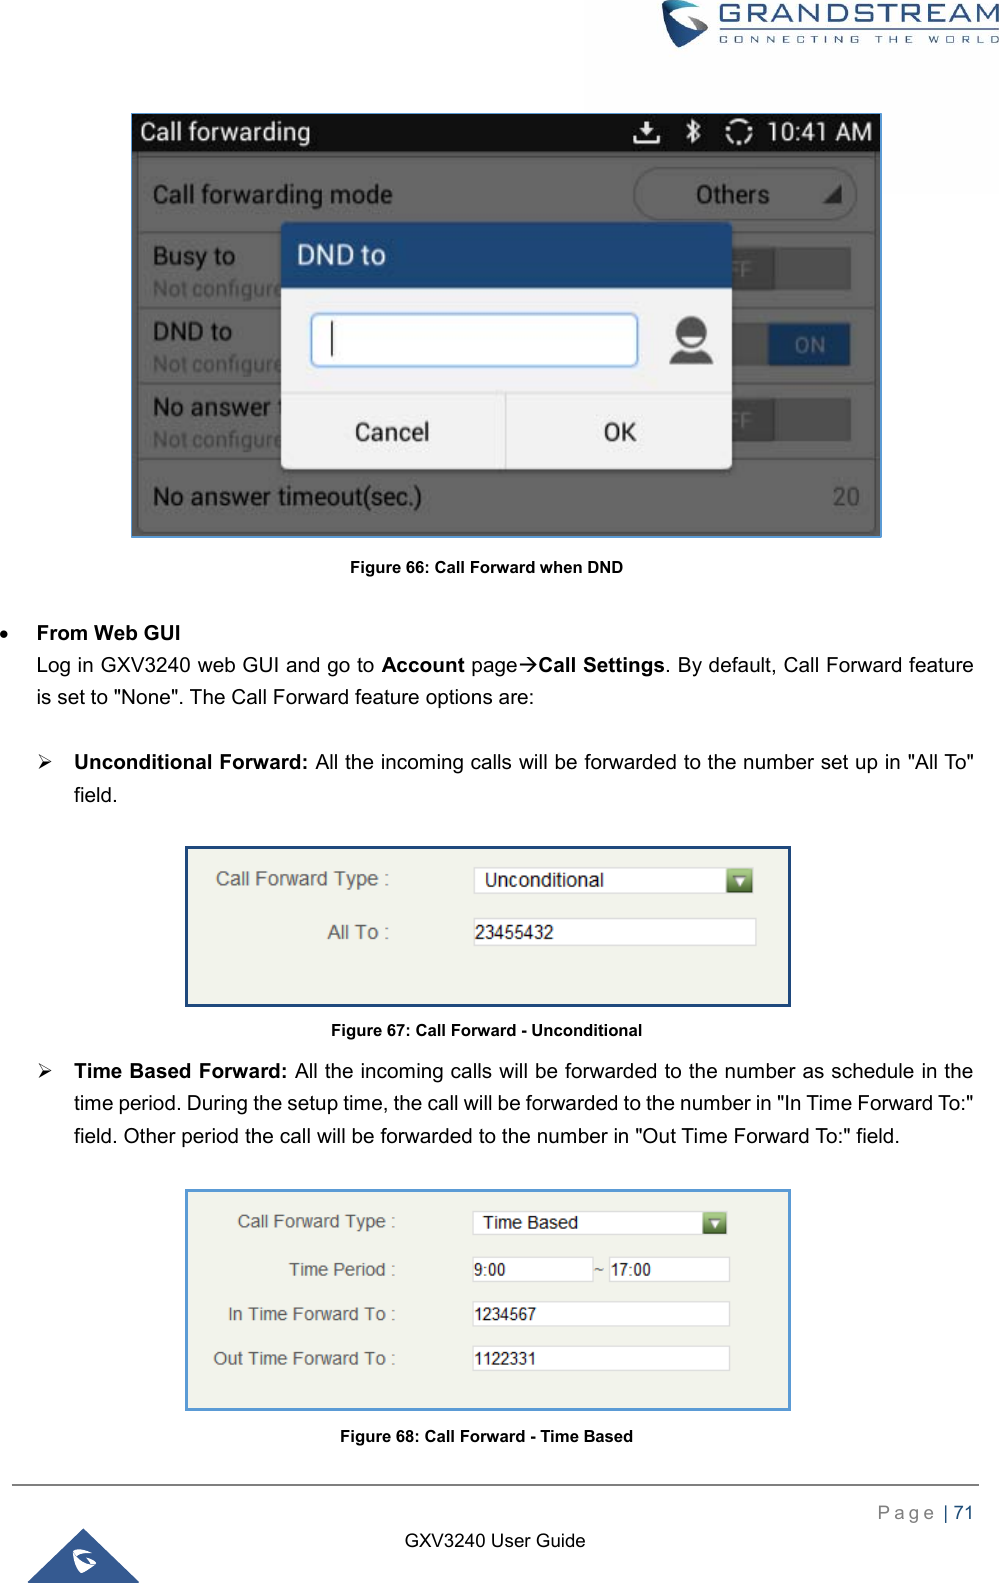
![P a g e | 49 GXV3240 User Guide Set Programmable Keys on Unregistered Account GXV3240 allows end users to setup shortcut keys on the phone app. The shortcut keys only allow to take place the unregistered accounts. From example, if the phone enables the Account 1 and registers it with a SIP server, end users have to place the shortcut keys on Account 2 to 6. From Web UI, users can set the shortcut keys under the setting of Account XCall SettingsProgrammable keys. After setting, the programmable keys can be showed on the account bar in the phone app. The following screenshot is a speed dial key which takes place the Account 2 position. End user can tap the key to user Account 1 to dial the number 1001. Figure 31: GXV3240 Programmable Keys Dial a Number Directly 1. Use the methods mentioned above to open dial screen [Figure 29: GXV3240 Dial Screen]. 2. Select the account to dial out on the left panel of the dial screen. The selected account will be highlighted in grey background. 3. Enter the digits to be dialed out using the keypad. If the digit matches call history, a dropdown list of numbers will be displayed for users to select. 4. Tap on (audio call only) or (video call), or (audio call only) to send the number. If no key is pressed, the call will be automatically dialed out after 4 seconds timeout. Note: By default, the "No Key Entry Timeout" is 4 seconds, meaning if no key is pressed after starting entering number, the call will be automatically sent out after the timeout. The timeout interval can be configured under web GUIAccountCall Settings.](https://usermanual.wiki/Grandstream-Networks/GXV3240V3/User-Guide-3699165-Page-50.png)
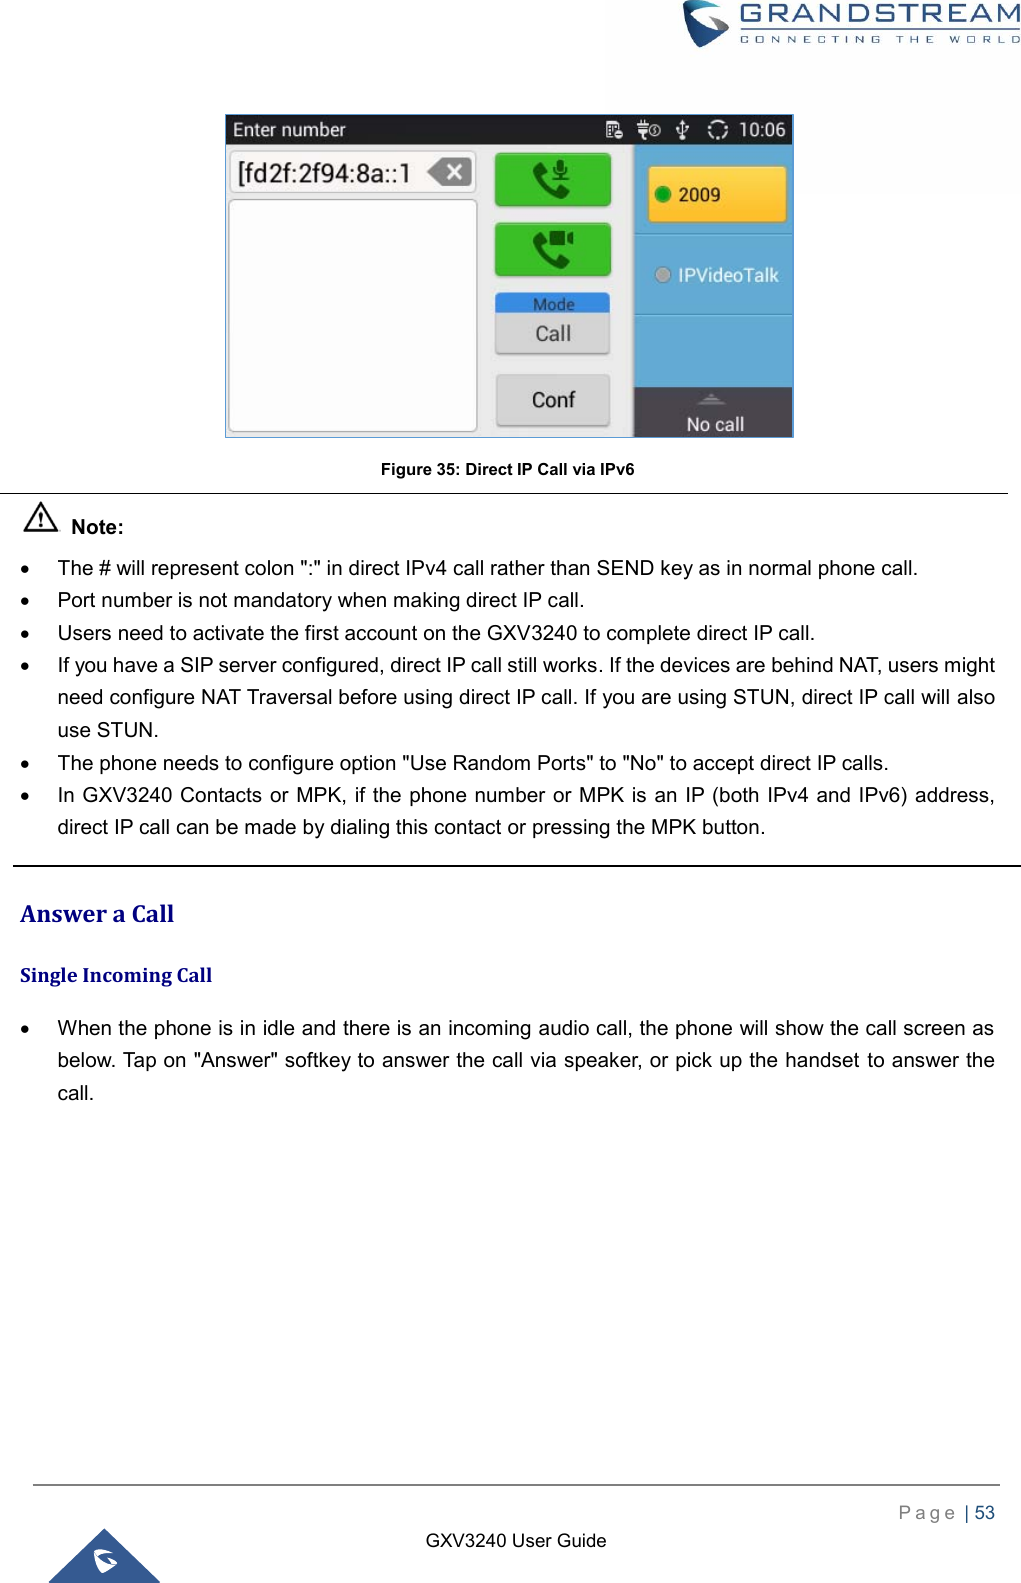
![P a g e | 52 GXV3240 User Guide 3. Input the target IP address. For example, if the target IP address is 192.168.0.116 and the port is 5062 (i.e., 192.168.0.116:5062), input the following: 192*168*0*116#5062. The * key represents the dot (.) and the # key represents the colon (:). 4. Press "SEND" key or tap on (audio call only) / (video call) button to dial out. Figure 34: Direct IP Call IP call via IPv6: To make a direct IP call via IPv6, please follow the steps below: 1. On the phone web GUI under “Advanced Settings > Call Features” set Display Soft Keyboard to Yes. Once activated, users could click on the dialing box the soft keyboard will appear to enter the IPv6. 2. Off hook the phone or select account in the idle screen to bring up dial screen on GXV3240. 3. Tap on “Mode” in the call screen, and set it to “IP Call”. 4. Input the target IPv6 address. For example, if the target IPv6 address is fd2f:2f94:8a::1 and the port is 5062, input the following: [fd2f:2f94:8a::1]:5062 5. Press "SEND" key or tap on (audio call only) / (video call) button to dial out.](https://usermanual.wiki/Grandstream-Networks/GXV3240V3/User-Guide-3699165-Page-53.png)


![P a g e | 79 GXV3240 User Guide Figure 76: GXV3240 Local Contacts On the upper left of the Contacts screen, users can tap on the icon to access three different categories in the contacts: All contacts. Favorite Contacts Groups Add Single Contacts 1. Tap on to access all contacts. 2. Tap on to bring up "New Contact" dialog to manually add a new contact. See [Figure 77: GXV3240 Contacts - Add New Contact]. 3. Enter First name, Last name, Phone number and other information for the new contact. Please make sure the account number field is selected so the GXV3240 will use this account to dial out the new contact. The account number field is located on the left of the "Phone" filed as highlighted below. Figure 77: GXV3240 Contacts - Add New Contact](https://usermanual.wiki/Grandstream-Networks/GXV3240V3/User-Guide-3699165-Page-80.png)
![P a g e | 83 GXV3240 User Guide 2. Touching and pressing on the contact for about 2 seconds until the checkbox shows up. 3. Tap on the checkbox for the contacts to be selected. indicates the contact is selected. Figure 82: GXV3240 Contacts - Select Contacts Add Contacts to Favorites 1. Select the contact to be added as described in [Select Contacts]. 2. Tap on and select "Add to favourites". Figure 83: GXV3240 Contacts - Contacts Options There are another 2 methods to add contacts to favorites. When adding or editing single contact, tap on to add the contact to favorite, or Tap on to navigate to favorite category. Then tap on to select the contacts to be added to favorites.](https://usermanual.wiki/Grandstream-Networks/GXV3240V3/User-Guide-3699165-Page-84.png)
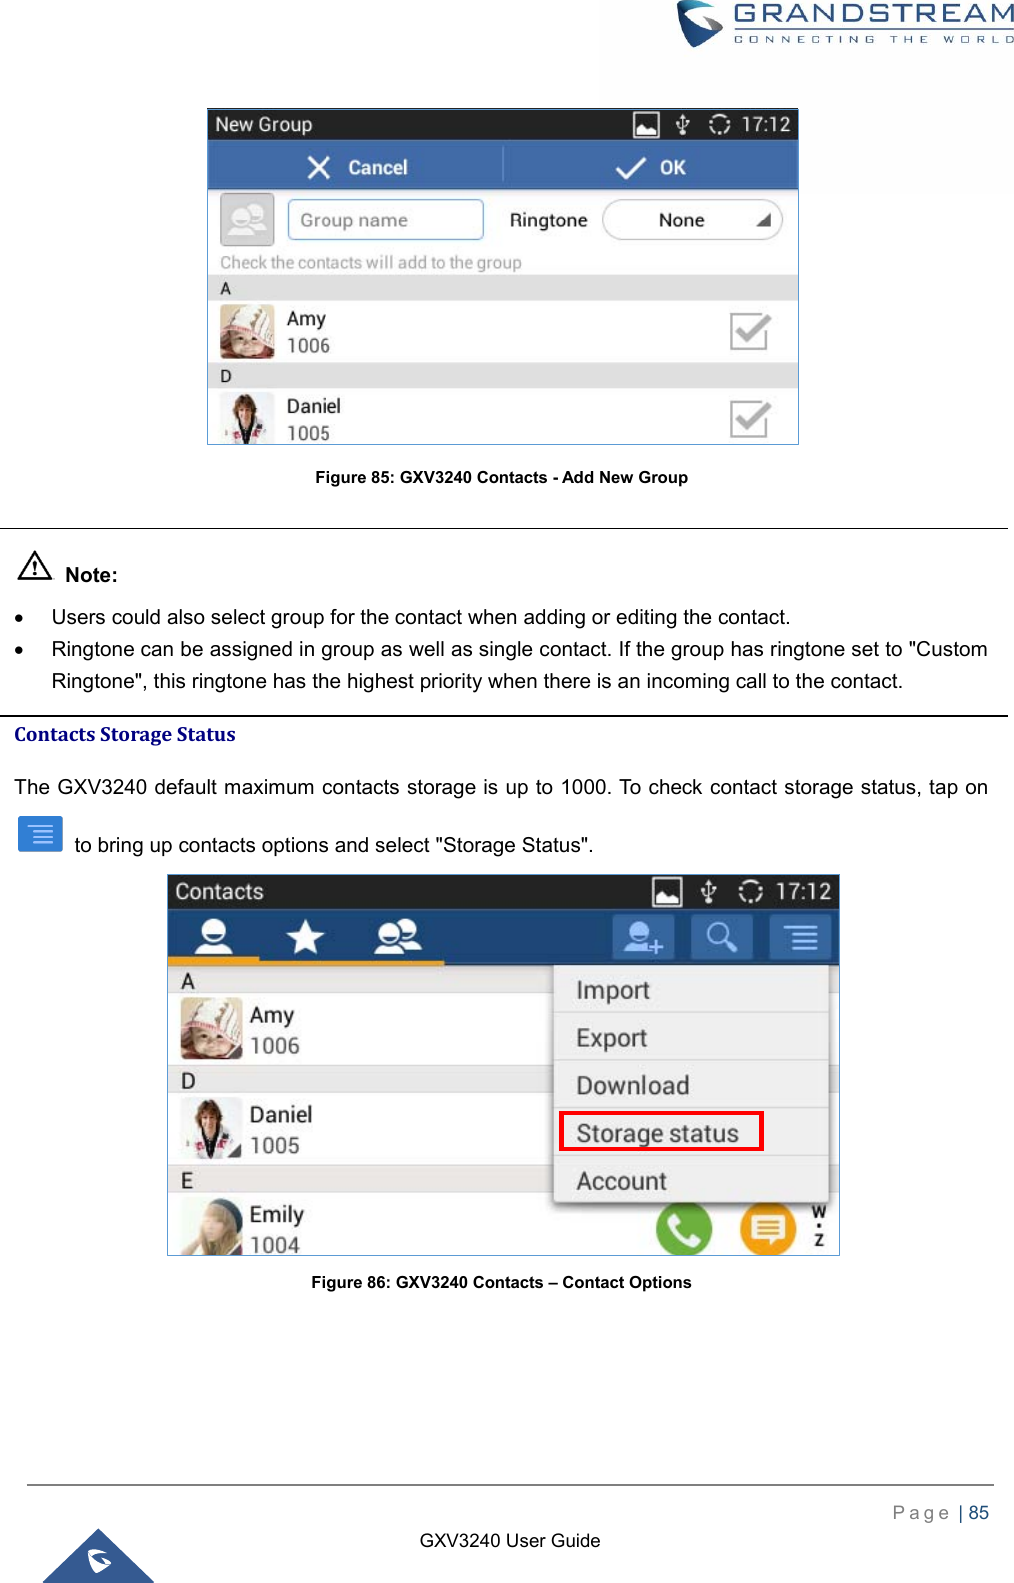
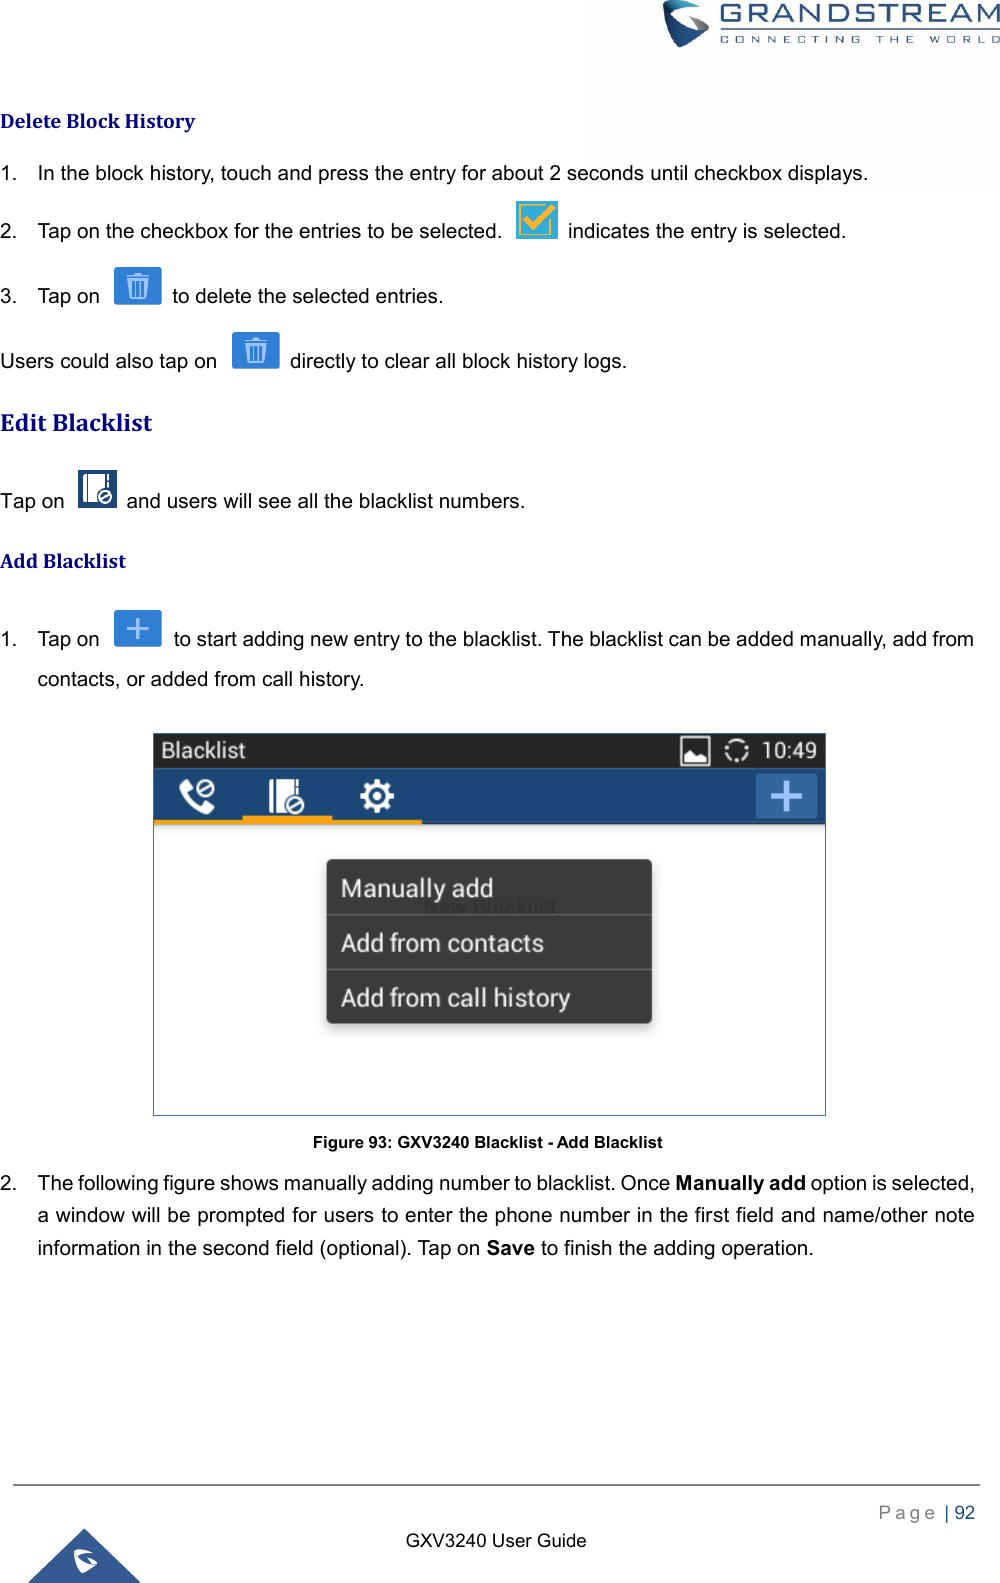
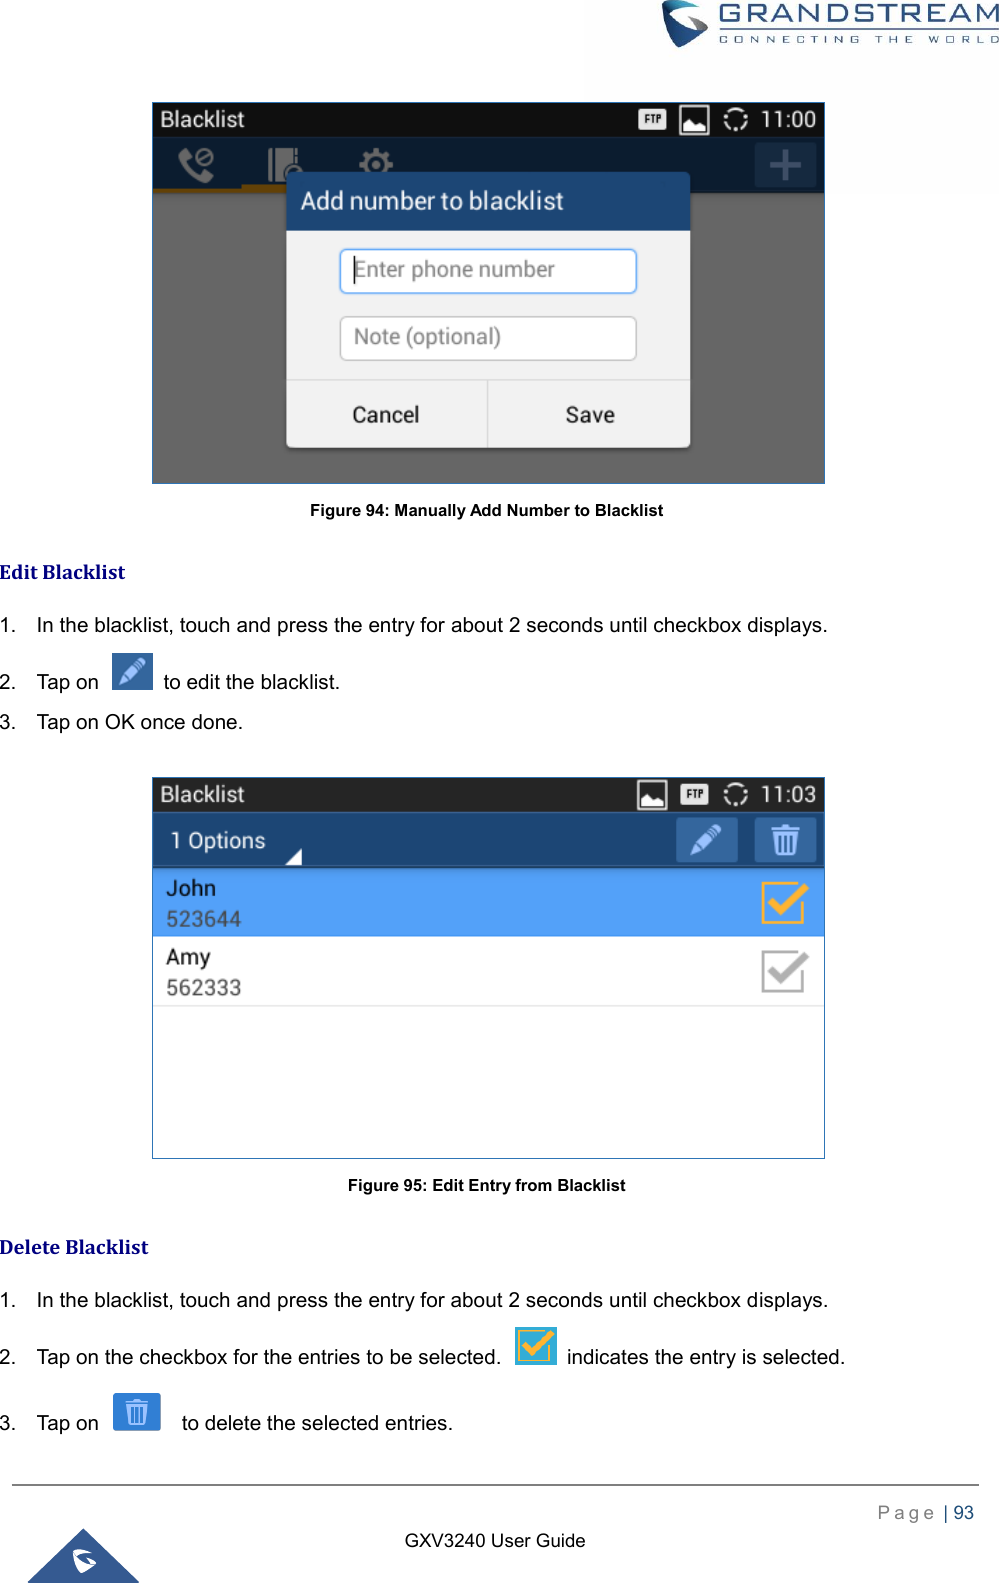
![P a g e | 84 GXV3240 User Guide Figure 84: Add Contacts to Favorites Edit Contacts 1. Select the contact as described in [Select Contacts]. 2. Tap on to edit the contacts. Send Contacts to Desktop Shortcut 1. Select the contact as described in [Select Contacts]. 2. Tap on and select "Send to desktop". A shortcut for this contact will be created on the idle screen for the users to access. Share Contacts via Bluetooth 1. Select the contact as described in [Select Contacts]. 2. Tap on and select "Send". Users will be able to send this contact to the connected Bluetooth device with the GXV3240. Add Contacts to Blacklist 1. Select the contact as described in [Select Contacts]. 2. Tap on and select "Add to Blacklist". Add Group Open Contacts and tap on to access group. To add a new group, tap on and select the existing contacts to the group.](https://usermanual.wiki/Grandstream-Networks/GXV3240V3/User-Guide-3699165-Page-85.png)