Guilin Zhishen Information Technology ZYSL Digital Camera Stabilizer User Manual 1 4 0
Guilin Zhishen Information Technology Co.,Ltd. Digital Camera Stabilizer 1 4 0
UserManual.wiki
>
Guilin Zhishen Information Technology
>
ZYSL User Manual
User Manual
Navigation menu
Upload a User Manual
Namespaces
Wiki Guide
HTML
PDF
Info
Views
User Manual
Discussion / Help
Navigation
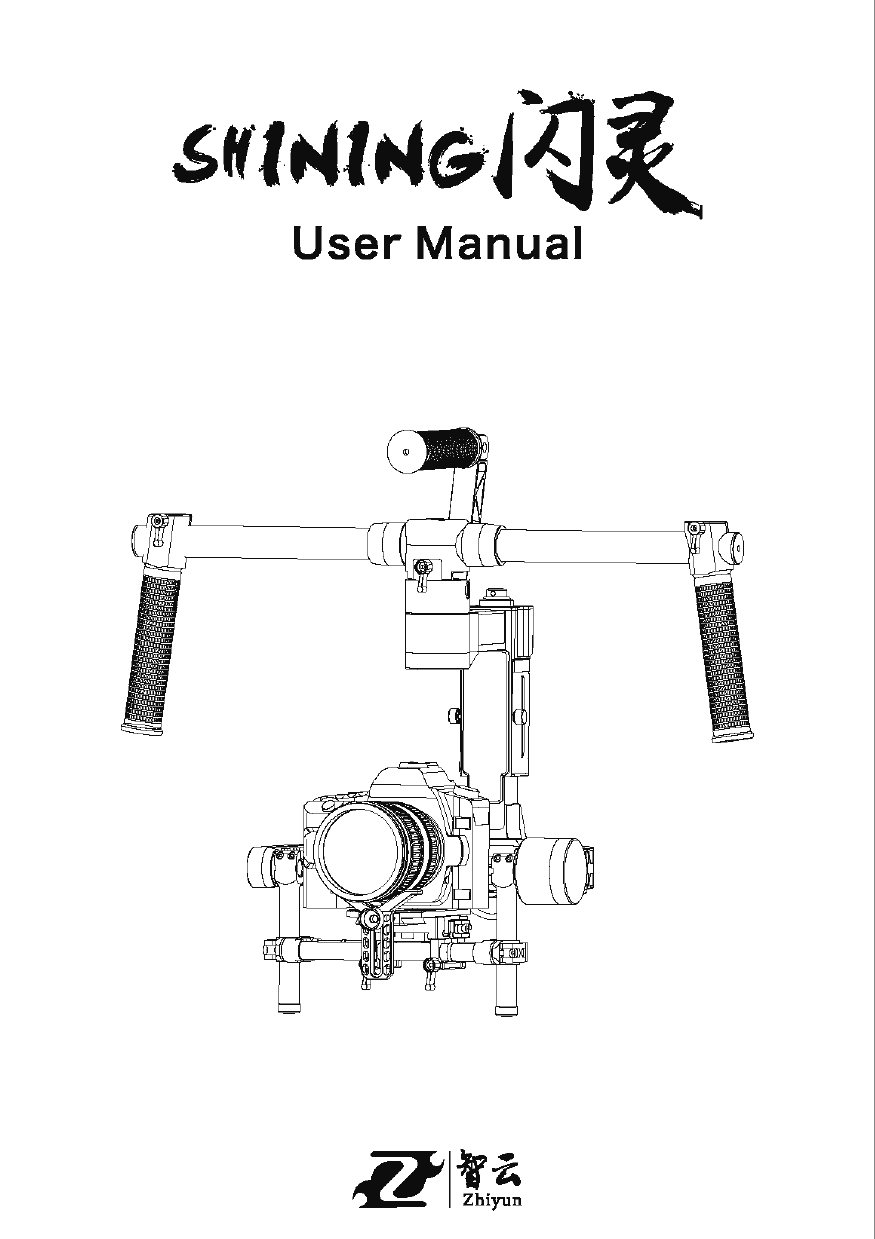
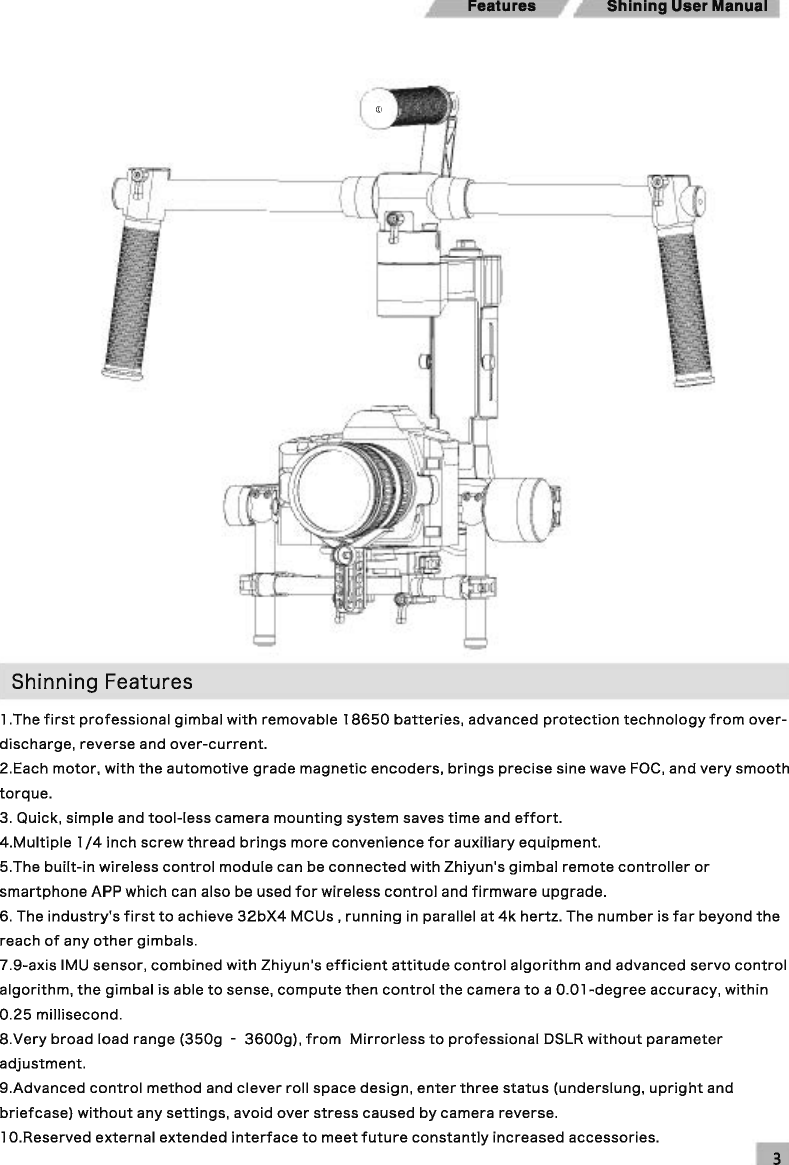
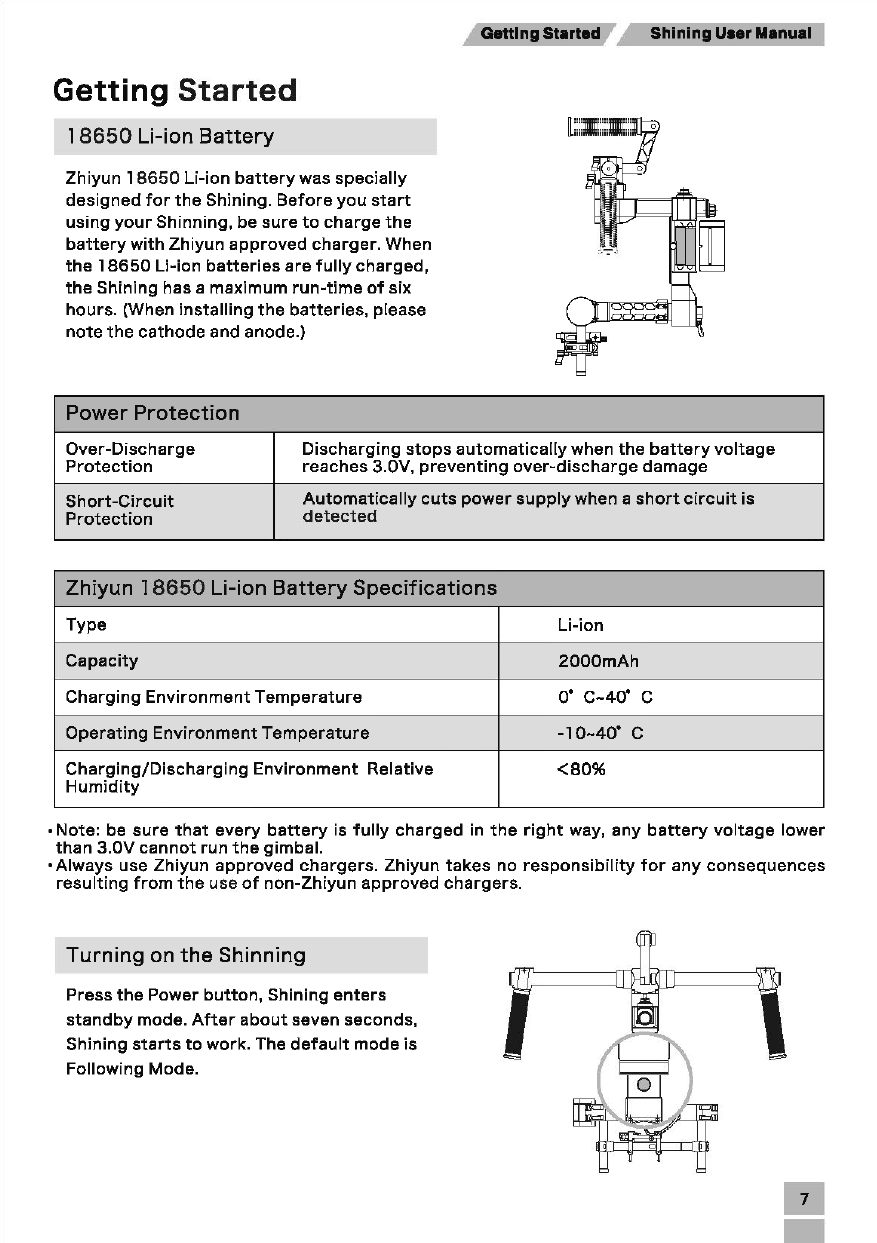
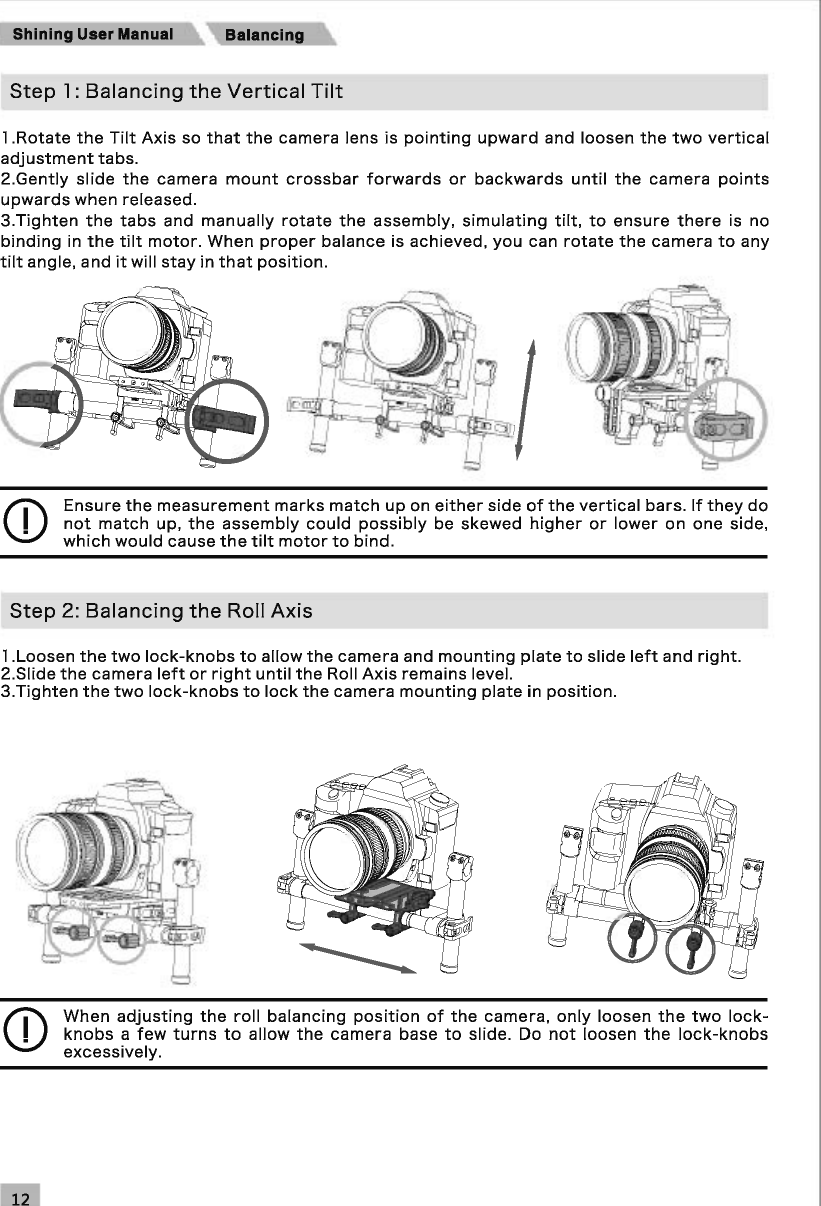
![Shining UMr llenuel Dlegrem Shining Diagram [16] 1.1/4 Screw thread 2.3/8 Screw thread 3. Top Handle Bar 4.Side Handle 5.Quick Release Mount 6.Pan Motor 7.Pan Aqjustment Slider 8.USB Port 9.Power Button 1 O.Batteries compartment 11.Roll Motor 12.TIIt Motor 13.Fore and Aft Adjustment 14.Tilt Vertical Adjustment 15.Roll Adjustment 16.Extended Function Interface [15)](https://usermanual.wiki/Guilin-Zhishen-Information-Technology/ZYSL/User-Guide-3082685-Page-7.png)