Guo Wei Electronics DECT49B94TAMBS Digital Cordless Telephone with Answering Machine (Base) User Manual SunCorp Generic GAP Specification
Shenzhen Guo Wei Electronics (H.K.) Co. Ltd. Digital Cordless Telephone with Answering Machine (Base) SunCorp Generic GAP Specification
User Manual
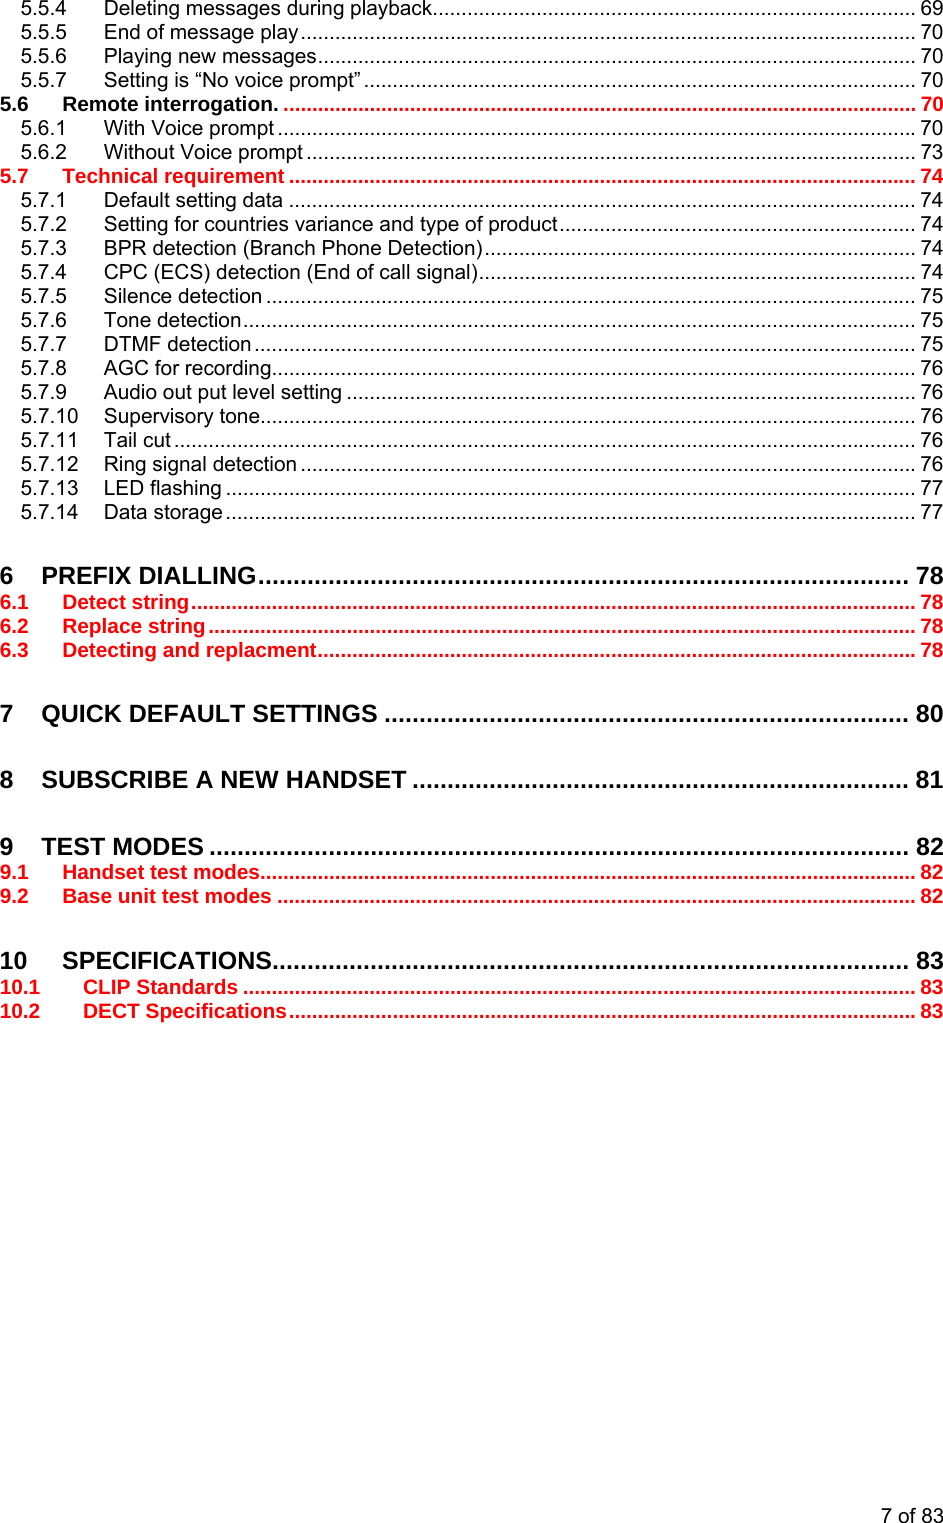
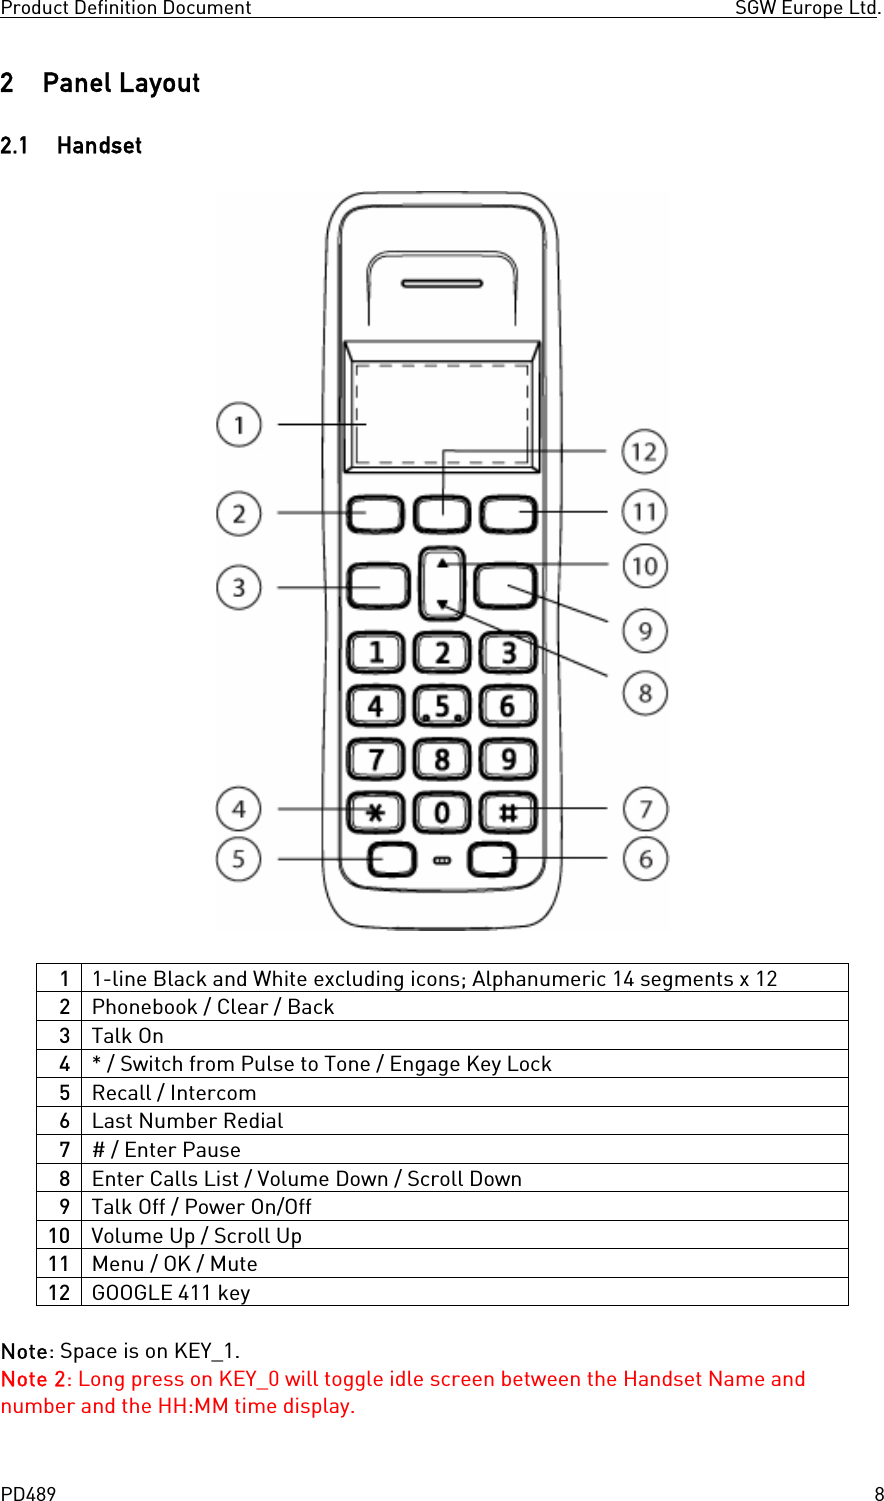
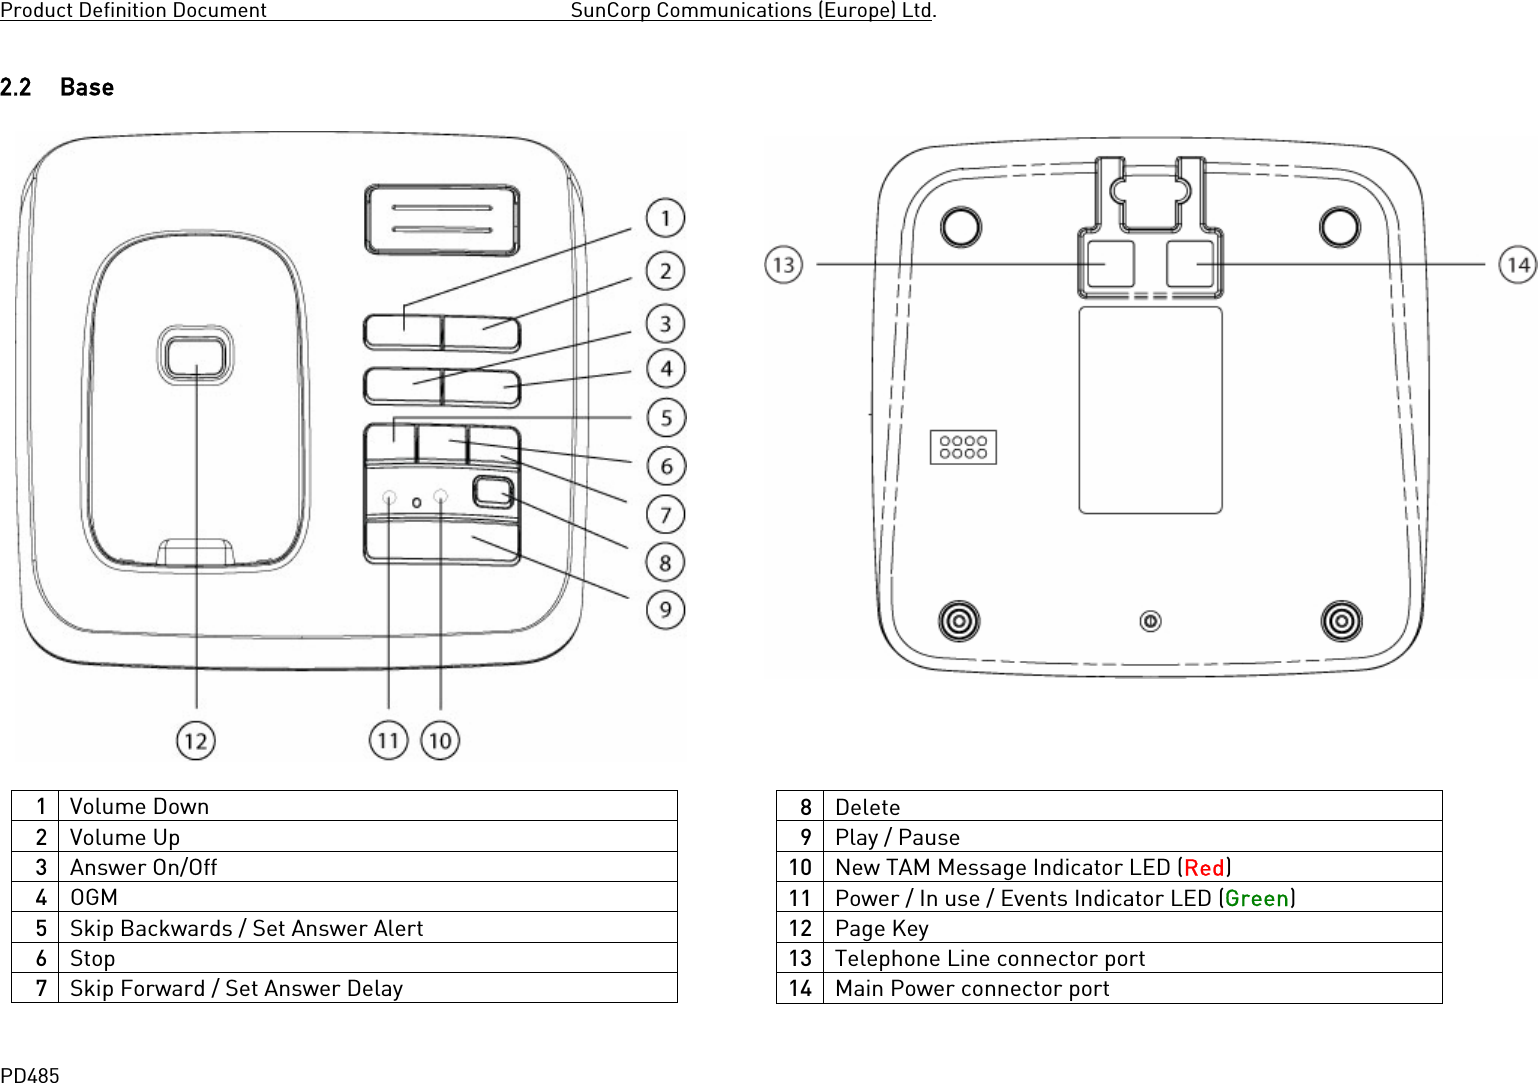
![Feature List DECTStudio Display and Aesthetics 1 Primary Liquid Crystal Display Handset : 2-line Black and White including icons; Alphanumeric 14 segments x 12 2 Secondary Display 3 Icon set 4 Key count Handset : CCITT keys (12), Talk (1), SMS [option] (1), Flash (1), INT (1), Phonebook/Back (1), Up (1), down (1), Menu (1), Redial (1), Clear (1); Base : Page (1), up (1), down (1), play (1), stop (1), delete (1), skip back/forwards (2), answer (1), OGM (1) 5 Animations 6 LEDs / Indicators Handset: in use (1 LED) (presence subject to Industrial design) ; Base : Power/in use/events (1 LED), charging (1 LED), Messages (1x 7-segment LED) 7 Display Backlight Industrial design and cost Dependent 8 Backlit keypad Options Industrial design and cost Dependent 9 Set Menu Background Colour 10 Screensaver in Primary LCD in power save 11 Idle Display Handset Name / Clock (user selectable), Date Character Sets / Text 1 Font Description 2 Predictive Text 3 Word wrap YES 4 Character type(s) supported Phonebook : alpha-numeric; proprietary character set; SMS : alpha-numeric; proprietary character set ID General Features 1 GAP Compatibility YES 2 Multi-base / Handset 4 Base / 5 Handsets 3 Base Station / Handset System Security (PIN code) 4 DIGIT 4 Dialling Mode Tone / Standard Pulse. Pulse menu option can be hidden by EEPROM setting 5 Paging From base to handset(s) YES 6 3 way conferencing (2 internal with 1 external) YES 7 3 way conferencing plus simultaneous intercom YES 8 Auto-talk / Standby Yes, user can disable Auto-talk 9 Recall / Flash Timed Break (Flash) only; Flash time user switchable 10 Dialling Pause YES 11 Pre-dialling Facility YES 8 of 83](https://usermanual.wiki/Guo-Wei-Electronics/DECT49B94TAMBS/User-Guide-1039848-Page-8.png)
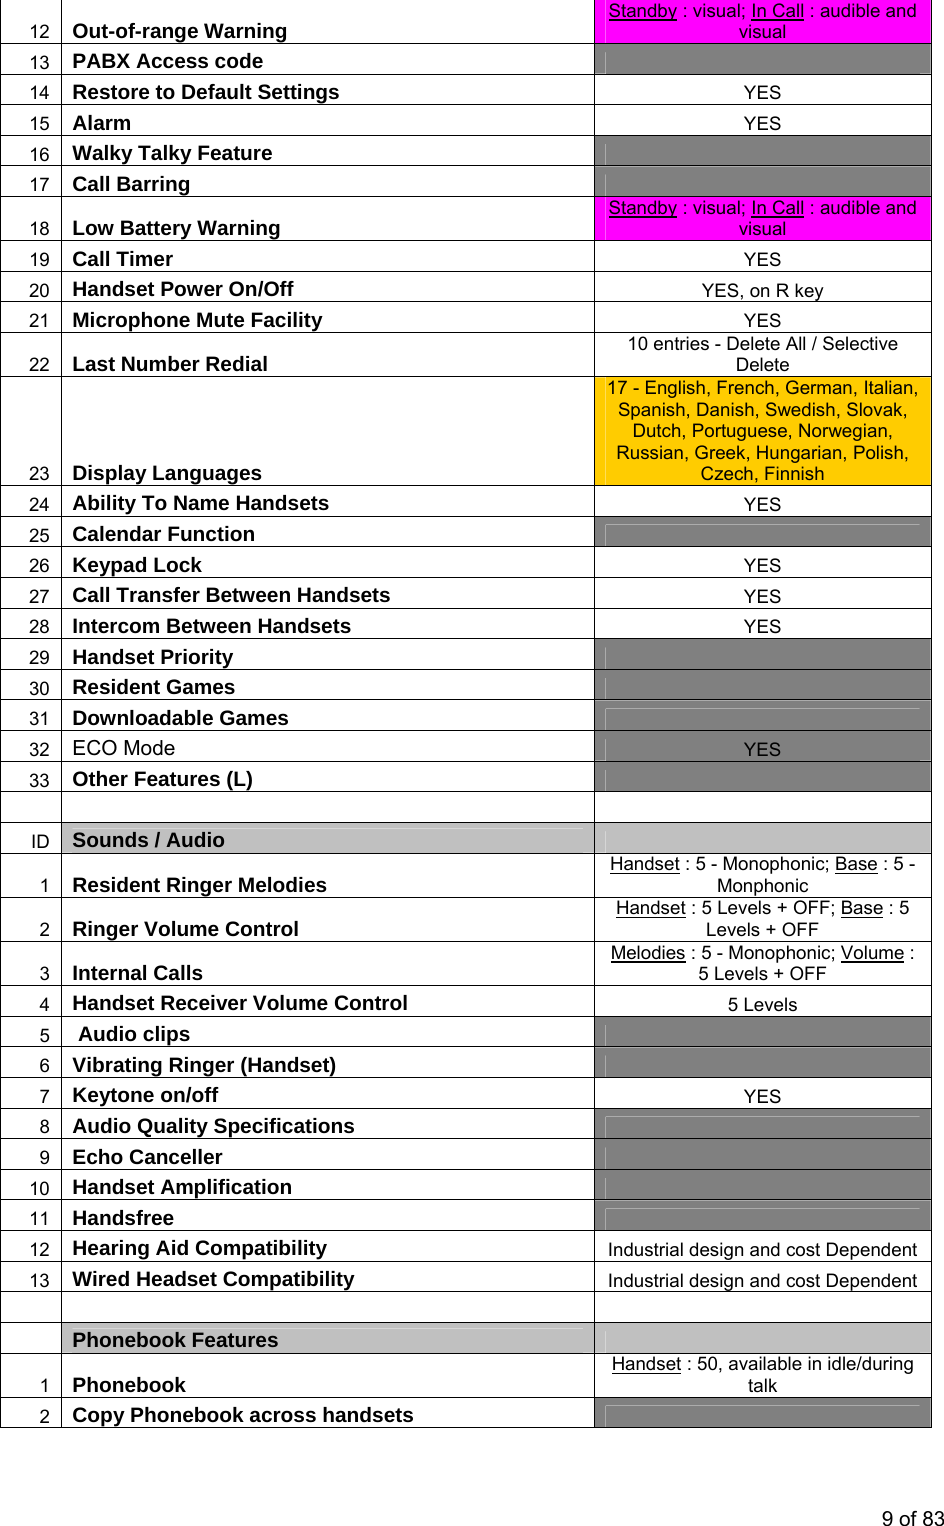


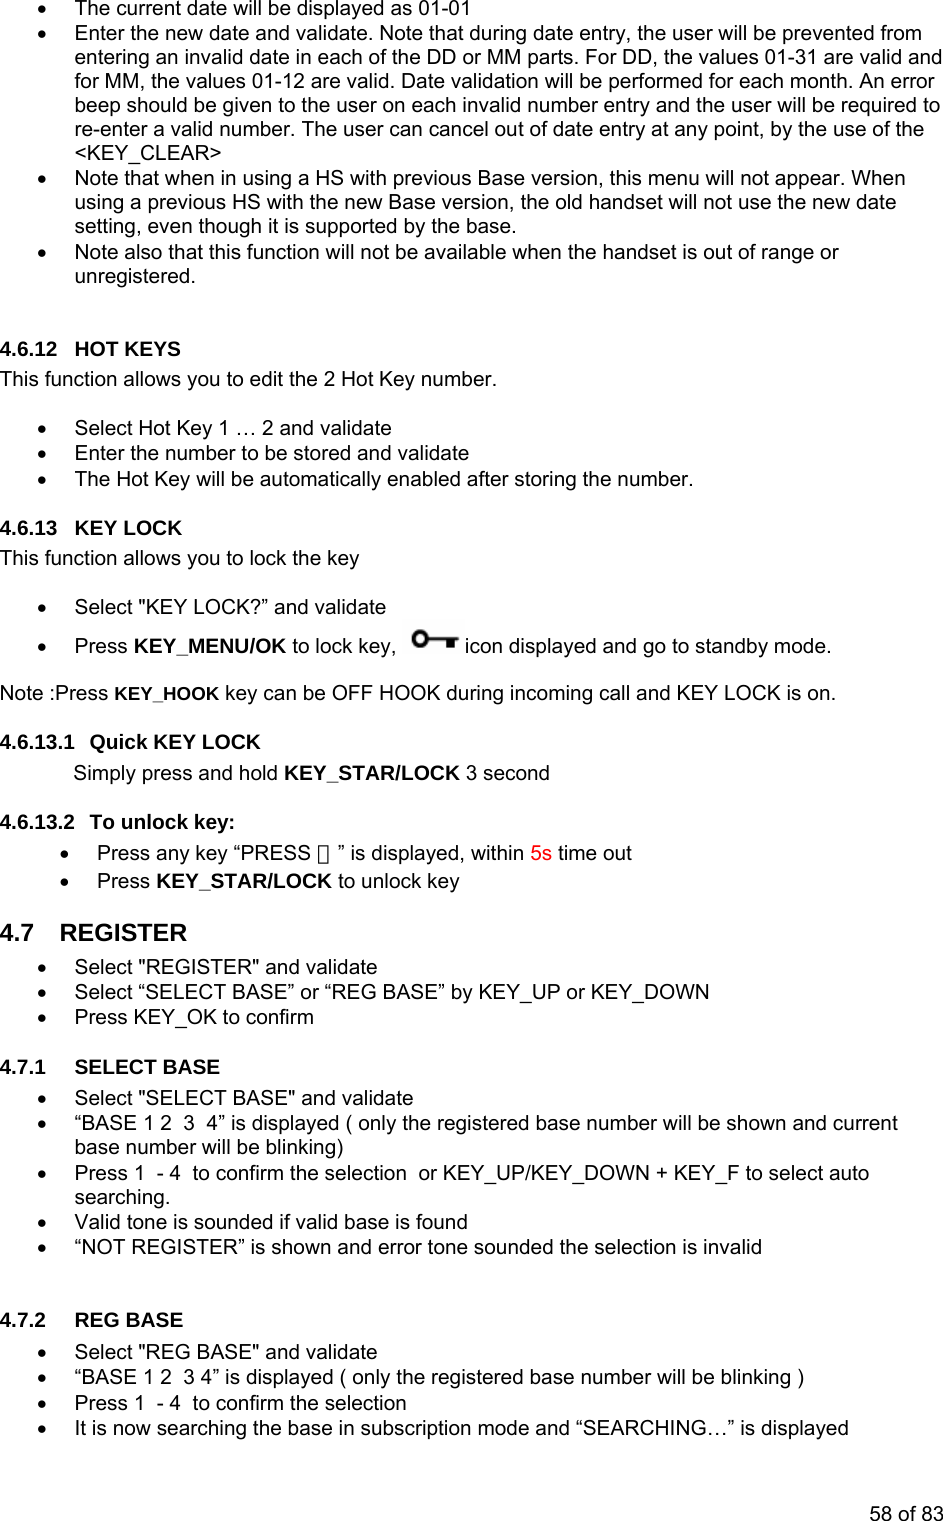
![4.5.7 Default settings nction will not be available when t is out of range of the base or unregistered. s you to reset both han se with default settings. , e and va, press KE o confirm By quick default, “DEFAULT” appears, then Th ter settings and make a software RESET. Default parThis fu he handset This menu enable dset and ba By SET UP menu• Select "DEFAULT" • Enter the base PIN cod lidate • "CONFIRM ?" appears Y_OK t• Press and hold * key when insert the battery for 5 seconds,“CONFIRM?”, press KEY_OK to confirm en e handset and base will apply default parame thameter Value et me TBD ON Hands naLow battery indicator Out of range indicator ON Key click uto answer ON A ON INT melody 1 INT volume 3 EXT melody 1 EXT volume 3 ear volume 3 Language English Phonebook Empty CLID list Empty Redial list Empty PIN CODE 0000 PAUSE 3 s dial m ode DTMF(Tone) OFF 00 :00 Key lock CLOCK ALARM OFF RECEIVE 1 tbd RECE 2IVE tbd tbd tbd VICE SEND 1 SEND 2 SEND SER SEND 1 MSG RALE T ON NO 0 ODE 3 (Dial SMS-C number + senders SA digit + DMI mode 0) MODE 0 TERMINALSENDING MRECEIVING Defau alu for each co The fo win M parameters, see also CID S Timing Default values. fault par lt v es in handset and base are defined by EEPROM settings [1]. So they can be adjusteduntry. llo g table contains the default values to be used for new EEPROparameter defaults and SM De ameter Value RECEIVE 1 Network Type 0 RECEIVE 2 Network Type 0 SEND 1 Network Type 0 53 of 83](https://usermanual.wiki/Guo-Wei-Electronics/DECT49B94TAMBS/User-Guide-1039848-Page-53.png)