HAN Networks AP27X HAN Access Point User Manual
HAN Networks Co., Ltd. HAN Access Point
UserManual.wiki
>
HAN Networks
>
AP27X User Manual
>
User Manual
Contents
1.
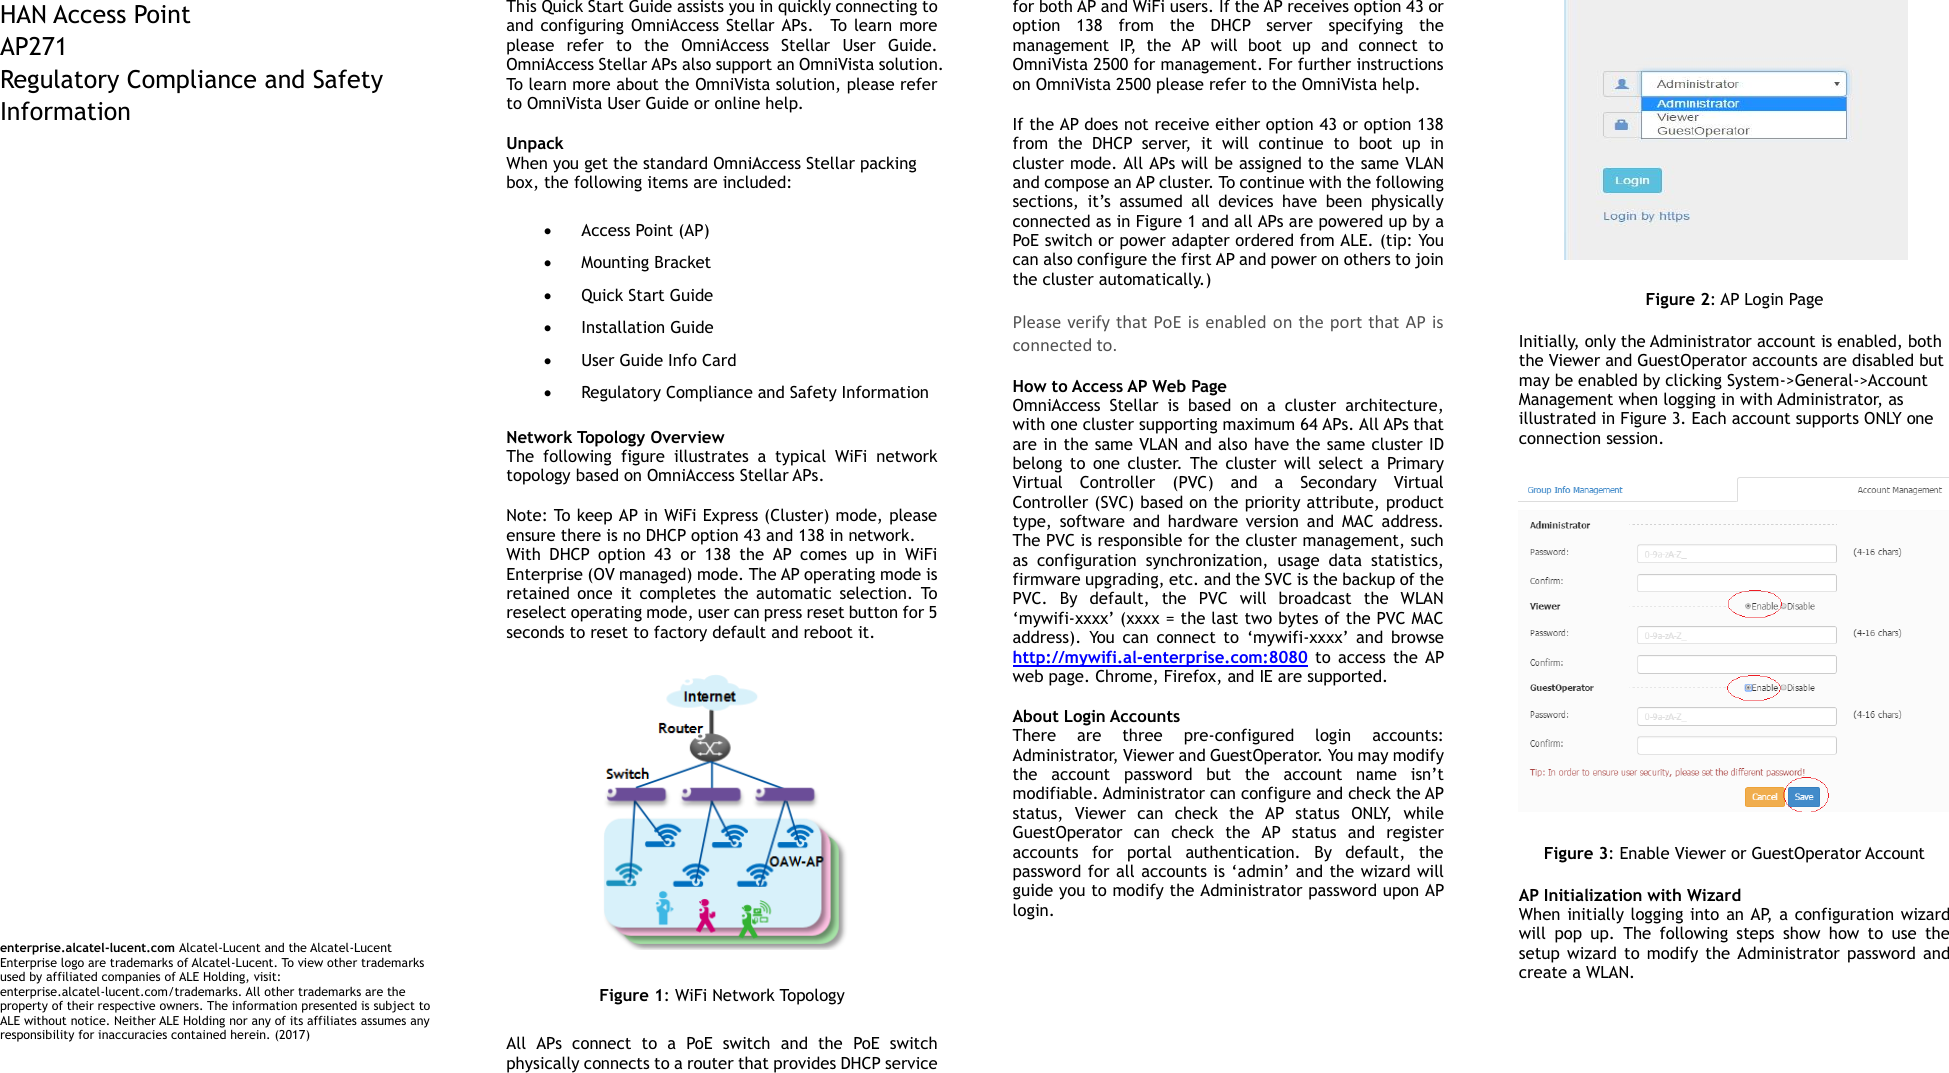
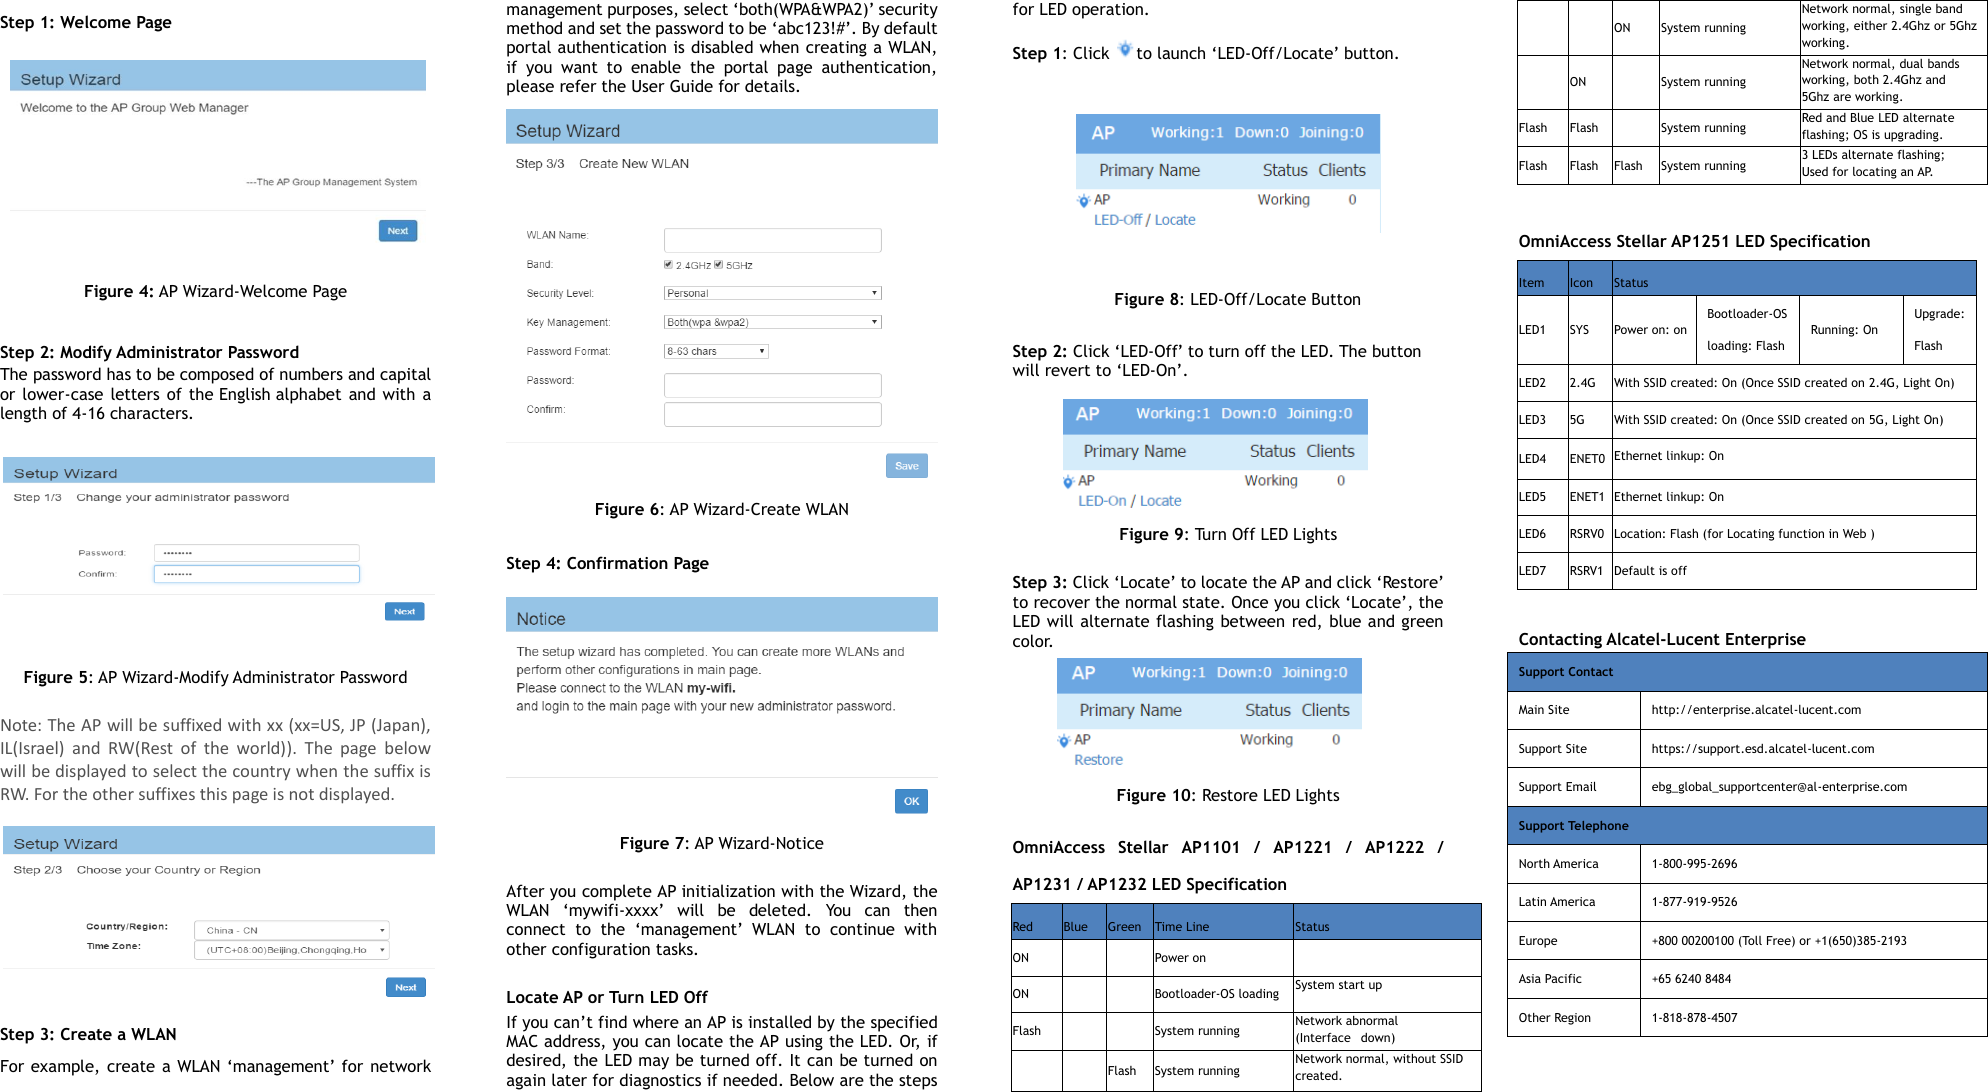
User manual
2.
User Manual( statement)
3.
User Manual(Installation Guide)
4.
User Manual
5.
User Manual (Statement)
User Manual
Navigation menu
Upload a User Manual
Namespaces
Wiki Guide
HTML
PDF
Info
Views
User Manual
Discussion / Help
Navigation