HARRIS TR-414-A2 GSM portable cell phone User Manual R380World
HARRIS CORPORATION GSM portable cell phone R380World
HARRIS >
Contents
Exhibit 8

Contents 1
Contents
Contents 1
General Information 3
Phone Information ............. 3
Documentation................... 5
Information and
Communications Suite CD 6
Preparing for Use 7
Checklist............................. 7
Operational Modes ............. 7
SIM Card ........................... 8
Battery ................................ 9
Turning on the Phone ...... 12
Initial Settings................... 13
Flip Closed Display........... 20
Flip Open Display ............ 21
Interface and Navigation 25
Flip Closed ....................... 25
Flip Open ......................... 31
Voice Memo ..................... 36
Making and Receiving Calls
37
Making Calls .................... 37
Receiving Calls.................. 44
When a Call is in Progress 45
Fax and Data Calls............ 51
Conference Calls............... 52
After Calls......................... 57
Entering Information 59
On-screen Keyboards........ 59
Handwriting Recognition . 62
Security 69
Keypad Lock..................... 69
SIM Card Lock................. 69
Phone Lock....................... 71
Settings 73
Customizing Settings ........73
Phone................................ 74
Settings ............................. 77
System .............................. 88
Phone 105
Phone Menu ................... 105
Flip Open Functionality.. 107
Office Handsfree............. 112
Contacts 115
Personal Details............... 116
Contents List .................. 117
New Contact................... 124
Find ................................ 124
Messaging 127
Inbox .............................. 129
New E-mail..................... 144
New SMS........................ 148
Find ................................ 150
Generate Password.......... 151
Calendar 155
Month View.................... 156
Week View...................... 157
Day View........................ 158
New Calendar Events...... 159
WAP Services 165
Browser........................... 166
Bookmarks...................... 169

2 Contents
Open Location................ 171
History ........................... 171
Getting started with
E-mail and WAP 173
E-mail Set Up................. 173
Sending an E-mail for the First
Time............................... 180
WAP............................... 182
Using WAP for the First Time
185
Locating Settings in Windows
95 or 98.......................... 187
Extras 189
Notepad.......................... 189
Clock.............................. 191
Calculator ....................... 198
Game.............................. 199
System ............................ 200
R380 Communications Suite
205
Synchronization.............. 205
Connecting your R380 to
your Computer ............... 206
Future Synchronizations . 210
Backing up your R380 .... 211
Restoring your R380....... 212
Changing the Language in
your R380....................... 212
Getting Help .................. 213
Troubleshooting 215
Important Information 219
Safe and Efficient Use ..... 219
FDA Consumer Update.. 227
Technical Data ............... 234
Limited Warranty ........... 235
Copyright ....................... 237
License Agreement.......... 239
Regulatory Information... 242
Declaration of Conformity....
243

General Information 3
General Information
Congratulations and thank you for buying the Ericsson R380
Smartphone, the ultimate mobile phone and personal digital
assistant. This is an advanced, yet easy to use, product with a
wide range of features, designed to make everyday life much
easier.
Your R380 gives you the freedom to communicate wherever you
are and whenever you want. Along with a host of mobile phone
functions, your R380 can send and receive e-mail and SMS
messages, browse the Internet via a WAP services browser and
much, much more.
The advanced software in your R380 introduces a new era in
mobile communications. Welcome to our wireless world!
Operators and Subscription
To be able to use your phone, you need to have a subscription to
a network. This is obtained from the network operator.
The services included in your subscription depend on your
choice of operator and/ or subscription. Therefore, some of the
services and functions described in this manual may not be
accessible to you. If you want a complete list of the services
included in your subscription, please contact your network
operator.
Phone Information

4 General Information
GSM 900/1900 Dual Band
The Ericsson R380 is a dual band phone, which means that you
can use your phone in two different kinds of networks - the
GSM 900 and GSM 1900 systems.
The GSM 1900 system is used primarily in the US and other
parts of the Americas, and the GSM 900 system is used primarily
in Europe, the Asia/Pacific region and in some parts of Africa.
This means that you can used your R380 on six continents.
Switching between the two systems is done automatically, which
means that you can use your phone without ever having to
consider which system is being used. This is taken care of by the
networks. However, you should note that the functions offered
and the network coverage differ depending on your choice of
operator and/or subscription.
SIM and PIN
You will obtain a SIM (Subscriber Identity Module) card with
your subscription. The SIM card contains a computer chip that
keeps track of your phone number, the services you have ordered
from your network operator and your Phone Book information,
among other things.
Your SIM card is supplied with a security code or PIN (Personal
Identity Number), which you need in order to gain access to the
network. Your PIN may also be required when you want to
change settings in your phone. Furthermore, some operators
may have services that require a second PIN, your PIN2. You
will find your PIN (and PIN2) in the information from your
operator.
If you have set certain security options in your phone, when you
turn on your phone, it prompts you to enter your PIN. If the
PIN is entered incorrectly three times in a row, the SIM card will
be blocked. If this happens you can unlock it by using your PUK
(Personal Un-blocking Key code), which you also get from your
operator. You should be careful with your PIN, since it is your
protection against unauthorized use of your phone and
subscription.

General Information 5
Mobile Internet
When you are on the move and in need of communication and
information, Mobile Internet is the answer. Mobile Internet is a
service supplied by Ericsson to facilitate easy communications
and rapid information retrieval, wherever you are. It gives you
access to on-line customer services, on-line user manuals, and
useful information when you are out travelling. It allows you to
download various communication software which will ensure
you achieve optimum results from your Ericsson products. If you
run into any problems, there are help texts connected to the
different Mobile Internet pages. The Internet address to Mobile
Internet is
http://mobile.ericsson.com/mobileinternet
To get access to the service you also need a user id and a
password. The first time you log on, please use the following:
User Id: mobile
Password: internet
Note that you must change user your id and password the first
time you log on to Mobile Internet.
Documentation is designed to enhance your understanding of
the capabilities of the R380 by providing you with both a quick
reference and a more comprehensive description of the many
functions within your R380.
Descriptions follow the two main operational functions which
are flip closed and flip open .
The term phone is equivalent to mobile or cellular phone.
Quick Guide
The Quick Guide is a printed document providing a quick
reference on how to get started with your R380. Technical
instructions are kept to a minimum.
Documentation

6 General Information
User’s Guide
The User’s Guide is a printed document containing a
comprehensive description of all the functions in your R380.
Note: The information contained in this document can also be
found in the User’s Manual, which is an electronic document on the
enclosed CD as well as on the Mobile Internet.
Insert the CD into your PC’s CD-ROM drive and the main
menu should appear automatically.
From the main menu you can start:
•A multimedia presentation, R380 Product Information,
which is an on-screen description of the functions of the
R380.
•The installation of the Ericsson R380 Communications
Suite, for PC synchronization, backup and restore of R380
data.
Note: See “R380 Communications Suite” on page 211 or
the CD sleeve for more information if the CD-browser does
not appear when the CD is inserted into your PC’s CD-ROM.
•Change Language in R380, when synchronized.
•The R380 User’s Manual, which is an electronic document
containing a comprehensive description of all your R380
functions in portable document format (pdf).
Note: Adobe Acrobat Reader version 4.0 should be installed
on your PC to read the R380 User’s Manual.
•The installation of Adobe Acrobat Reader version 4.0.
Note: R380 User’s Manual information on the CD is
exactly the same as the printed R380 User’s Guide. The names
are different so that the printed document and the electronic
document can easily be recognised.
•The installation of Lotus Organizer version 5.0. See
“Checklist” on page 7 for more information.
Information and Communications Suite CD

Preparing for Use 7
Preparing for Use
The following items should be in the box when you unpack it:
•R380 unit
•R380 battery with touch screen stylus
•Charger with power plug and phone cable
•User’s Guides (**including the Quick Guide leaflets)
•CD-ROM; Ericsson Mobile Communications and
Information Suite which contains a multimedia presentation,
Communications Suite software and the User’s Manual (pdf)
•RS-232 cable for R380 to PC connectivity
•Desk stand
•3 extra touchscreen styluses
•Battery leaflet
•Ericsson Service and Support leaflet
•Accessory leaflet
** The Quick Guide provides an overview on how to get started.
Unlike other mobile phones, the R380 has added features
available with the flip open. Tasks that you can perform with the
phone can be started with the flip closed and, if required,
continued in the more comprehensive flip open mode.
Although the manual covers both modes of operation in detail, it
is very important to remember that many functions described are
dependent on your subscription as well as your operator and
internet service provider. Please consult your network operator
and internet service provider for more information about the
services that are available to you.
Flip open and flip closed modes are illustrated in the following
diagrams:
Checklist
Operational Modes

8 Preparing for Use
Flip closed.
Flip opened.
When you become a subscriber to a mobile network operator,
you are issued a SIM card with a security code or PIN, Personal
Identification Number. The SIM card contains your personal
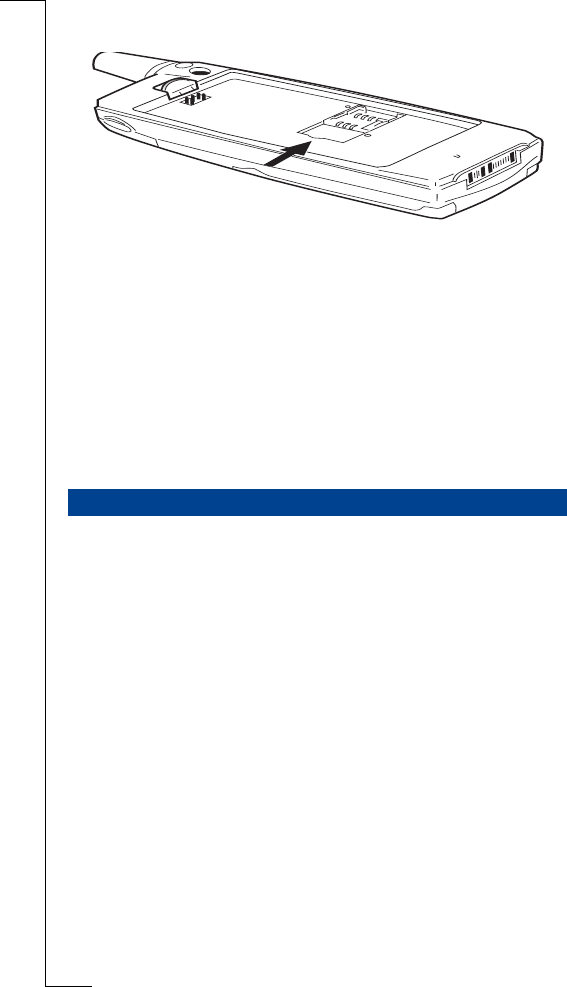
subscriber data and must be inserted into your R380. The holder
for the SIM card is located underneath the battery.
Warning! Always disconnect the charger and other accessories from
your phone before inserting and removing your SIM card.
To ins er t the SI M c a rd:
1. Ensure that your R380 is turned off and the flip is closed.
2. Remove the battery.
SIM Card
NETWORK
18-05-00
12:00
Volume slider key Voice memo key
Power on/off key
Status indicator
Program tabs
Title bar Program icons
Preparing for Use 9
3. Slide the SIM card into the SIM card holder.
4. Replace the battery.
Note: If you already have a SIM card that contains phone
book entries then this information can be imported to your
R380. See “SIM Card Phone Book Import” on page 18.
To re m o ve t h e SI M c a rd:
1. Ensure that the R380 is turned off and the flip is closed.
2. Remove the battery.
3. Slide the SIM card out of the SIM card holder.
The battery that comes with your R380 is a lithium ion (Li-Ion)
battery. The battery is not fully charged when you buy your
phone but there may be enough power to turn it on. We
recommend that you charge the battery for three hours before
you use the R380 for the first time.
The first time you charge a new battery, or a battery that has
been completely discharged, it may take a few minutes before
you get any indication that the battery is being charged (the
Status indicator does not light up and the battery meter does not
display).
Note: You cannot turn on the R380 before the Status indicator
lights up and the battery meter displays.
A battery that has not been used for a long period needs to be
completely discharged and then recharged 2-3 times before
reaching full capacity. Should you need to discharge the battery,
simply use your R380 as usual until the battery runs low.
Battery

10 Preparing for Use
When to Charge the Battery
Charging is indicated by:
•Battery meter on the display pulses continuously.
•Battery low message displays.
•Status indicator on top of the R380 shows a steady red light
(or green, if the R380 is switched on).
The battery can also be charged whenever you wish without
affecting the R380’s performance.
Tip! Normal operation is possible during charging. However, this
lengthens the charging time.
Note: The R380 automatically switches off if the voltage is too
low.
Charging
Charge the battery by using the charger supplied with your
R380. You can use some battery chargers that have been supplied
with other Ericsson mobile phones using the same connector
plug, for example the T28 or the R320s.
Note: For optimal talk and standy time, we recommend that you
only use Ericsson original batteries with your R380. Non-Ericsson
batteries charge slowly for safety reasons.
When the battery is fully charged, the battery meter displays full
and the Status indicator on top of the R380 shows a steady green
light.
For best performance we recommend charging for an extra half
an hour after the battery meter on the display is shown as full.
Note: Always close the flip and turn off your R380 before
removing the battery.
Warning! Do not keep a battery in a sunny or warm place.
Extremely high temperatures reduce the capacity of the battery
permanently. Avoid recharging a full or almost full battery.
Preparing for Use 11
Battery Removal and Insertion
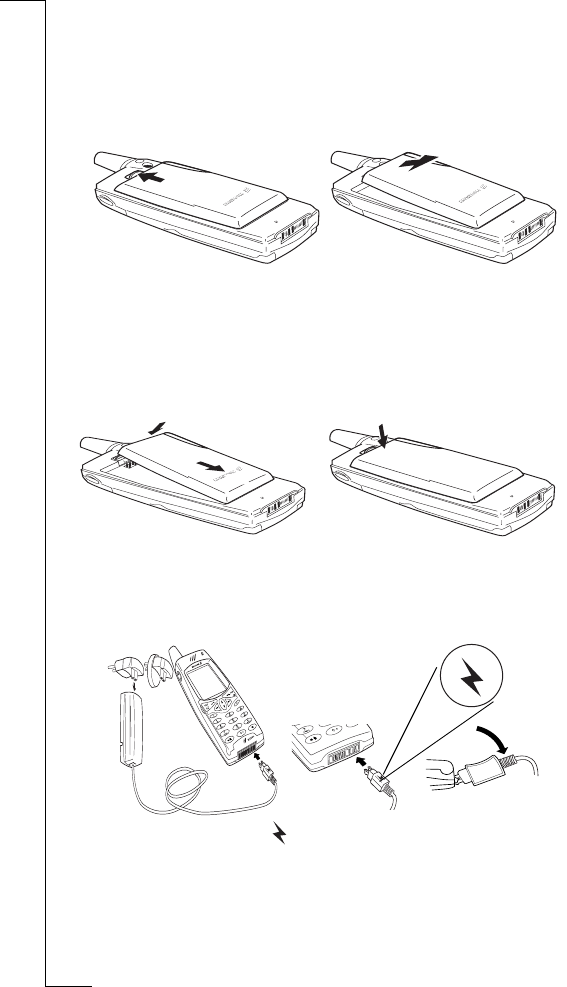
To remove the battery:
1. Ensure that the flip is closed and the R380 is off.
2. Push up the release catch at the top of the battery and lift
the battery away from your R380.
To insert the battery:
1. Ensure that the flip is closed.
2. Place the bottom of the battery into position and then push
down on the upper section of the battery until it clicks into
place.
To charge the battery using the charger:
1. Make sure the battery is attached to your R380.
2. Connect the charger to your R380 as follows:
•The flash symbol on the R380 plug must face
upwardtoward the keyboard.
•Locate the flash symbol by the R380 connector.
•Tilt the R380 plug contacts slightly downward when
inserting into the R380 connector.
➋➊➌
12 Preparing for Use
•Move the R380 plug downward so that it fits securely
with the R380 connector.
3. Plug the charger into the electrical outlet.
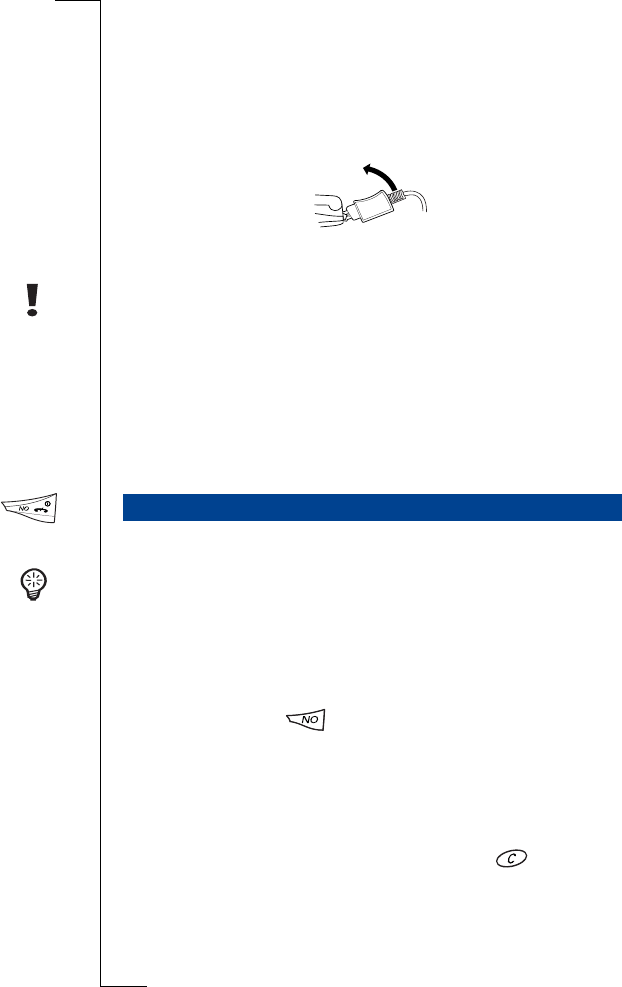
To re m o ve t h e pl ug:
Tilt the plug upward and pull it away from the R380 connector.
Warning! The power supply plug may look different depending on
the electrical socket in your country. Do not connect the AC-plug-in
unit to any other item than your Ericsson Travel Charger CTR-10.
Do not separate it from the charger when plugged into the wall
socket.
Note: See “BATTERY INFORMATION” on page 231 for more
information about battery safety.
The NO button on your keypad turns your R380 on or off.
Tip! The term press and hold is equivalent to a key press time of
approximately 2 seconds.
To turn your R380 on:
1. Ensure that your SIM card is in your R380, the battery is
charged and the flip is closed.
2. Press and hold until you hear a tone and the display
turns on.
The Ericsson logo displays.
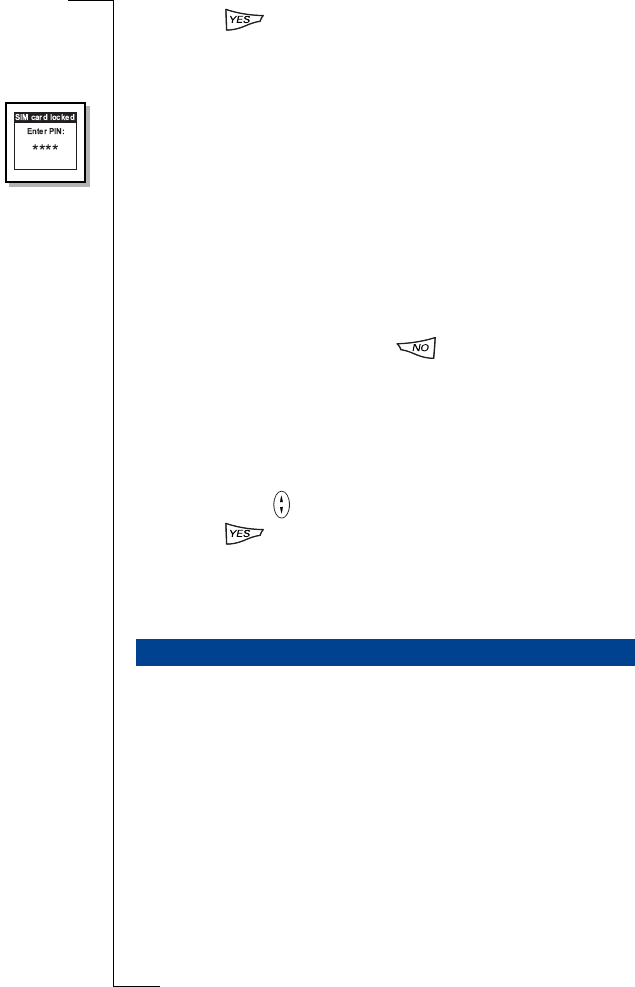
3. If Enter PIN: appears:
Enter your PIN. If you make a mistake while entering your
PIN, erase the wrong number by pressing clear. The
code you enter appears as asterisks (*), unless 1 or 9 is
entered as the first digit. (For example, if you were calling
an emergency number.)
Turning on the Phone
Preparing for Use 13
4. Press YES.
On finding a network, the name given by your network
operator or a supporting associate operator network
appears.
Note: If you enter your PIN incorrectly three times in a row,
the SIM card is blocked. You can unblock it by using your
PIN Unblocking code (PUK). See “Unblocking PUK Code”
on page 74 for more information.
Note: If Enter code appears in the ‘Phone locked’ message
display, enter your phone lock code. See “Security” on page 73
for more information.
To turn your R380 off:
In standby mode, press and hold until you hear a tone.
Setting Display Language
After turning on your R380 for the first time, you are asked to
select your preferred language.
To sele ct a l a n g uag e :
1. Scroll with to find and highlight your choice.
2. Press to confirm your selection.
3. Turn your R380 off, wait for the phone to completely
power down, and then turn back on again to activate the
language.
For effective use of your R380, some initial settings and
preferences need to be set up. In general, most settings can only
be set up with the flip open. This includes and covers most flip
closed functions.
Time and Date
Messaging and Calendar programs are dependent on correct
time and date settings, which can be set using the Clock
program.
Initial Settings

14 Preparing for Use
Timezones
To select the current and destination time zone:
1. From the Extras tab, tap the Clock icon
The time and date displays.
2. Tap an d sele ct Timezones.
The Timezones view displays.
3. Enter the desired settings by clicking on the field. The
following is a description of the various settings.
•Auto timezone Allows you to specify whether or not the
destination clock is to use network time.
A pop-up menu allows you to select On or Off. If it is set
to On, a network time update is received and the
following message appears “Time has been updated”.
Select OK.
Note: Network time is not supported by all networks.
•Timezone Display: Allows you to select UTC+offset or
Zone name.
For example: UTC+offset: Coordinated Universal Time
(UTC) + number of hours of offset.
93
12
6
Notepad Clock Calculator Game System
Extras
Timezones
Auto timezone:
Timezone display:
Home zone:
Daylight saving:
Destination zone:
Daylight saving:
<On>
<UTC + Offset>
<Off>
<Off>
UTC+0
UTC+0

Preparing for Use 15
Zone name: CETCentral European Time (+1 (number of
hours of offset from UTC)).
•Home zone: Use the left and right scroll arrows to select
the required time zone.
•Destination zone: Use the left and right scroll arrows to
select the required time zone.
•Daylight saving: Select either Home or Destination, and
select On or Off.
4. Tap to accept and save any changes you have made to
the time zones. The display returns to the Clock view.
Note: If at any time during the above operation you decide
to cancel, select . The display returns to Clock view.
Setting the time
To set time:
1. From the Extras tab, tap the Clock icon.
The time and date displays.
2. Tap and se le ct Set time. The Set time view appears.
3. Use the up and down scroll arrows to set the time or tap
the clock face and move the Hour and Minute hands to set
the time.
4. Tap to accept the new time. The display returns to the
Clock view.
Note: If at any time during the above operation you decide
to cancel, select the Cancel button. The display returns to
Clock view.
Setting the date
To set the date:
1. From the Extras tab, tap the Clock icon
2. Tap an d sele ct Set date.
The Set date view displays.
3. Use the left and right scroll arrows to select the month and
year and select the day by tapping the respective day on the
calendar.
4. Tap to accept the new date.
16 Preparing for Use
The Clock view appears.
Note: If at any time during the above operation you decide
to cancel, select the Cancel button. The display returns to
Clock view. See “Global Settings” on page 93 for more
information.
Personal Details
Owner information is essential for the safe return of your R380
if it is misplaced, lost or stolen. You can also send your personal
details through infrared to another device or attach them to an e-
mail when establishing new contacts.
Warning! The information stored within your R380 may cause a
security risk if lost or stolen with items such as keys or credit cards.
Therefore, you are advised to keep these items separate.
To enter your personal details:
1. From the desktop, tap the Contacts tab.
2. Tap Personal details.
The Personal Details view appears.
3. Tap a n d Edit to enter your personal details.
To enter the details for a particular field, tap the area
beside the field name. For example: to enter your first
name tap <Enter first name>. An edit view displays
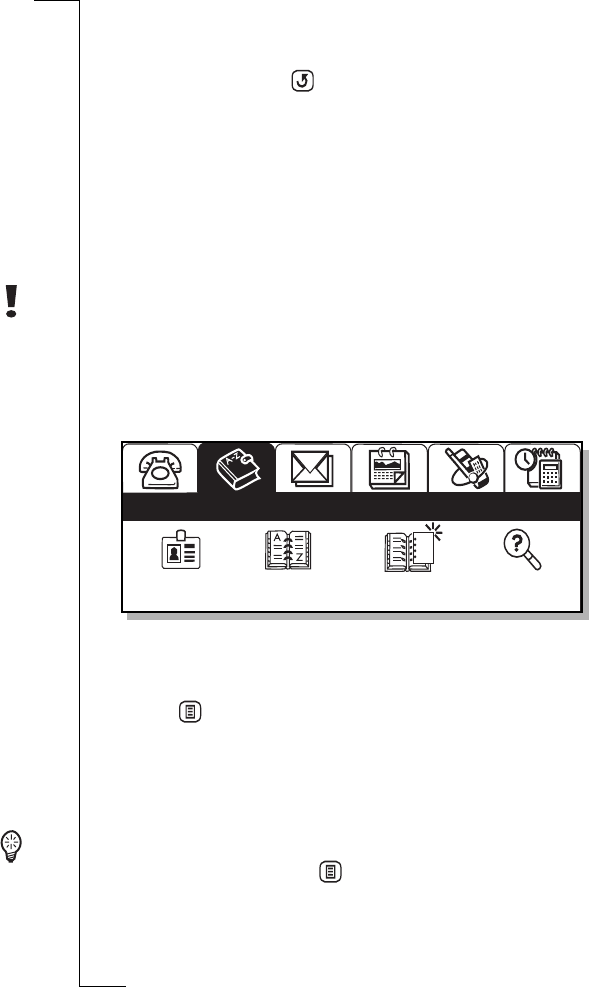
allowing you to type the appropriate information.
Tip! You can also use the handwriting recognition feature to
enter information. Tap and select Write. The handwriting
recognition screen appears. See “Using Handwriting
Recognition” on page 70.
Personal
details
Contents
list
New
contact
Find
Contacts

Preparing for Use 17
4. Continue entering by tapping the next field icon . A
previous field icon appears if you wish to go back.
Note: If you select the type of phone number and then
Other, this displays the label as a blank space and not the
word Other.
5. Tap to display all your entered personal details.
6. Do one of the following:
•Tap to save the information and return to the
Personal Details display.
or
•Tap .
Cancel view displays. Tap Yes to cancel without saving
or No if you want to return to the Personal Details view.
or
•Tap .
Save view displays before returning to the main Personal
Details display. Tap Yes to save the information or No
to exit without saving.
Note: At least one name field, <Enter first name>, <Enter
last name> or <Enter company name>, must contain text
before you can save the new entry in the database.Otherwise, a
Warning message appears in the display.
Touch screen Calibration
The screen is calibrated to factory settings. However, this may
not agree with how you use the stylus. For example, you may
tend to tap quickly and slightly off-center to the right.
To re - c a l i b r a t e t h e s t y l u s :
1. With the flip open, select the Extras tab.
2. Tap System.
3. Tap Touchscreen calibration. The screen setting displays.

18 Preparing for Use
4. Tap once at the centre of each of the three calibration
points in numerical order.
5. After touching the third calibration point, a ‘Calibration
complete’ message appears. Tap Yes to accept and save the
new settings. The display now reacts accordingly. You are
also returned automatically to the system functions display.
6. Tap to return to the desktop.
SIM Card Phone Book Import
If you have names and numbers stored in a phone book on a
SIM card, then these phone book entries can be imported from
the SIM card to your R380.
To import SIM card phone book entries:
1. With the flip open, select the Contacts tab.
2. Tap Contents List.
3. Tap an d sele ct Import from SIM card.
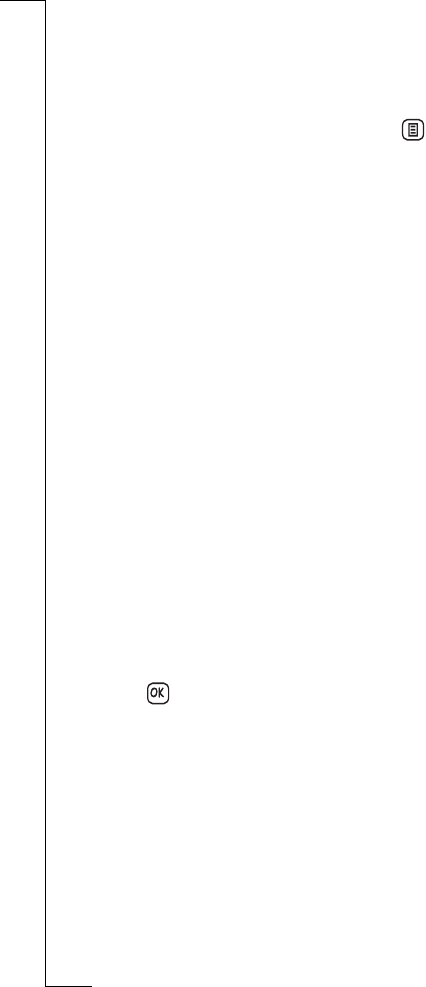
The Import from SIM card view displays.
4. Do one of the following:
•To import one phone number, scroll to the entry you
want to import and select it. A pop-up menu displays
Import from SIM card
Anderson Alex
Bernard Fernando
Dahlberg Suzie
Hasan Nasrin
Hinde Martin
Olsson Niki
+46 33 555 2525
+55 51 555 8900
+1 514 555 0234
+1 514 555 2324
0161 555 3490
+358 9 555 9001
1.
2.
3.
4.
5.
6.
Preparing for Use 19
providing you with the following options: Import as first
name, Import as last name, Import as company name.
Select the option you want.
or
•To import all phone numbers, tap and select on
Import all as first name, Import all as last name or Import
all as company name.
The selection is then imported into your Contacts database
and an information view displays confirming that the
import has been successful.
Note: The newly created record(s) have the imported phone
number from the SIM card phone list entered as a Mobile
phone number as default. You will need to re-assign the phone
number to its correct label, for instance, work, home, etc. If
you try to send an SMS message to an imported number that is
not a mobile number, your message will not be sent.
Voice Mail Number
You can easily call a predefined voicemail number and listen to
your voicemail messages.
To enter or edit a voicemail number:
1. With the flip open, in the Phone program tab, tap Settings.
2. Scroll to and tap Voicemail in the Settings directory. The
Voicemail view appears.
3. To enter or edit a voice-mail number, select the Voicemail
number: field and enter or edit the number.
4. Tap to implement and save the new settings.
The Settings list view displays.
Note: The number to your Voicemail service may be
different if you are calling from a network that is not your
home network. For more information about your Voicemail
service, please refer to the information provided by your
network operator.

20 Preparing for Use
Standby Mode
After you have turned on the R380 (and entered your PIN), the
R380 searches for a network.
When a network is found, the R380 beeps three times, Status
indicator light on top of the R380 flashes green once every
second, and your network operator’s name (in most cases
abbreviated) appears.
Note: See “Troubleshooting” on page 221 if you do not reach
standby mode.
When in the ‘Standby mode’ you can make and receive calls, use
the Phone book to make a call, view e-mail and SMS messages,
view the current day’s events, appointments and to-dos and
activate/deactivate a limited number of settings.
Other Modes
If the name of a network does not display it may be due to one of
the following reasons:
Emergency calls only
If ‘Emergency calls only’ displays, you are within coverage of a
network but you are not allowed to use that network. However,
in an emergency, you can call the international emergency
number used in that country . Furthermore, the light Status
indicator on top of the R380 does not flash.
Note: This service is network dependent, not all networks allow
you to make an emergency call.
No network
If ‘No network’ displays, there is no network coverage within
range, or the received signal is too weak, in which case you will
have to move to obtain a sufficiently strong signal. Notice that
the network strength indicator, at the bottom to the left of the
display, becomes a dashed line. Furthermore the light Status
indicator on top of the R380 does not flash.
Flip Closed Display
NETWORK
18-05-2000
12:00
Emergency
calls only
12:00
No network
18-05-2000
12:00

Preparing for Use 21
On opening the flip, the desktop displays. It contains program
tabs, icons and functions. Use the stylus provided to operate the
software by gently tapping the touch sensitive screen for
selection.
Using the Stylus
The stylus is located in the holder on the battery, at the back.
Gently press down on the stylus as you slide it up. To replace it,
push it back in until it clicks into place.
Note: The stylus is only used with the flip open touchscreen.
Selection using the stylus
To make your selection, tap the icon on the screen lightly with
the stylus. You can also use your fingers to tap the screen, though
it is best to use the stylus to avoid fingerprints or smudges on the
screen and to make precise selections.
Warning! Do not allow children to play with your R380 as they
could hurt themselves or damage the unit. Always make sure the
stylus is in the holder when the flip is closed.
Flip Open Display
Locating and removing the stylus from the holder
22 Preparing for Use
Dragging the stylus
You can highlight some of the lists that display in your R380 by
dragging the stylus across the entries. For example, deleting a
number of messages within the your Inbox.
If, while an entry is highlighted, you drag the stylus (without
lifting it) over another entry (or entries), the previous entry
remains highlighted and the newly selected entries also become
highlighted.
If you then drag the stylus back toward the line at which you
started, the lines that have just become highlighted, now
becomes un-highlighted as the stylus moves past them.
Any lines, that were highlighted from a previous tap and drag
movement stay highlighted.
The Desktop
On opening the flip, your R380 shows the equivalent or nearest
function that was active with the flip closed. For example, if a
contact within the Phone book is displayed and the flip is
opened, the contact’s full record within Contacts displays.
Note: A desktop view is shown for functions that have no nearest
equivalent between flip closed and flip opened.
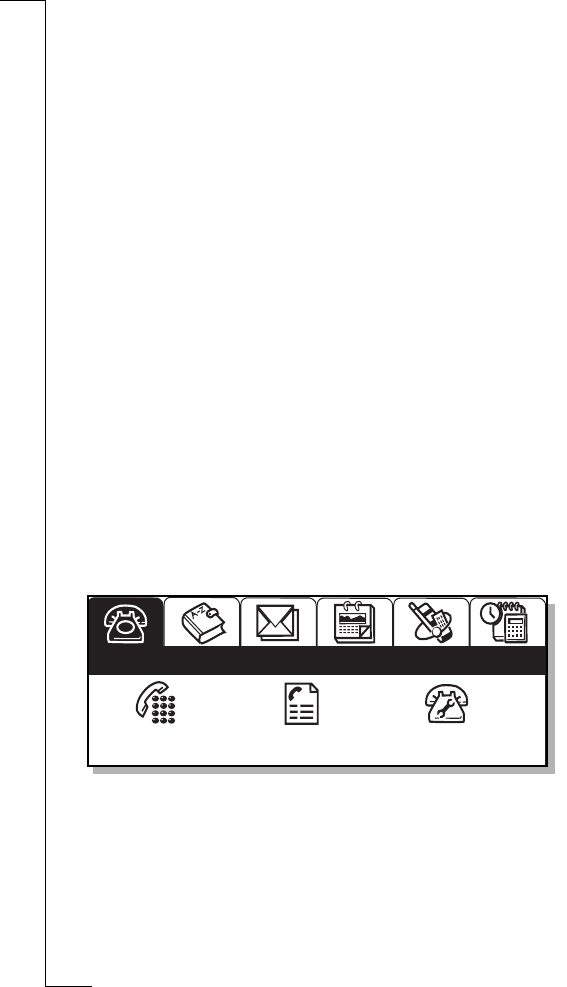
The desktop can be divided into three graphical areas:
•Program tabs: Represent the six program or
application groups. It is located in the upper section of
the screen.
•Title bar: Indicates the active program. It is located
directly under the tab.
Call Call log Settings
Phone
Program tabs
Title bar
Program icons

Preparing for Use 23
•Program icons: Start the different functions available
within each program tab. These are located in the lower
section of the screen. Each Program tab only contains
the Program icons relating to that specific program.
Selection Guidelines
This is a general guideline about how to work with flip open
tasks.
To select a specific function:
1. Remove the stylus from the holder on the battery.
2. Open the flip.
3. Tap the desired program tab on the desktop.
4. Tap the desired program icon.
The selected program or function displays.
5. Tap the program function and carry out your task.
6. Tap the desktop icon to return to the desktop.
Note: When returning to the desktop from a particular
program, its title bar and icons display along with all the other
tabs.
Entering Information
With the flip open there are two different input methods which
can be used when entering information. These methods are:
•An on-screen keyboard which can be used to type
information, which is then displayed in the relevant entry
section.
•Character recognition, which can be used to write on the
screen with the stylus. The information is then recognized
and displayed in the relevant entry section.
123
456
789
0#
+
C
NETWORK
18-05-2000
12:00
D
es
k
top
I
con

24 Preparing for Use
See “Entering Information” on page 63 for more
information.
Interface and Navigation 25
Interface and Navigation
This chapter describes the different interface features for both
the flip closed and flip open operating modes.
This section of the manual describes what functions and settings
are available with the flip closed. Operation of the various menus
is achieved by directly pressing key combinations. Menu
selections show in the display.
Tip! It is recommended that you familiarize yourself with the flip
closed functions and settings, as you would with any other mobile
phone. Most general settings, which cover both the flip closed and flip
open modes, are managed with the flip open. See the respective flip
open program chapters, Phone, Contacts, Messaging, Calendar,
WAP services and Extras for more information.
See “Turning on the Phone” on page 12 for information on how to
start your R380.
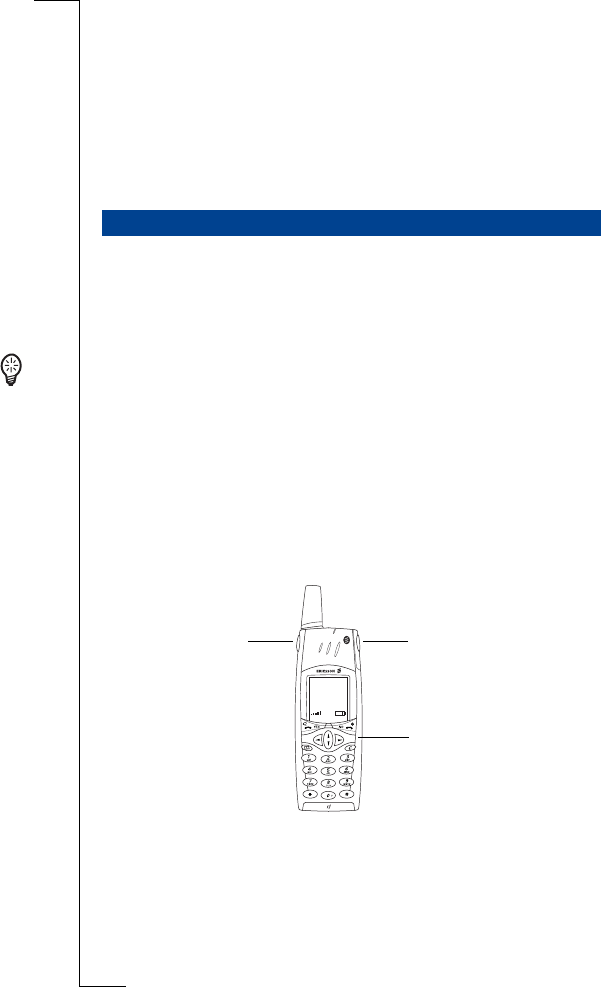
Phone Keys
Keys on the upper section of your R380 are the volume slider
and voice memo keys. They each have one or more distinctive
functions associated with them.
Flip Closed
NETWORK
18-05-00
12:00
Volume slider Voice memo
Keypad

26 Interface and Navigation
Use the volume slider key to:
•Increase or decrease the volume of the earpiece. Move
upward to increase or downward to decrease the
volume.
•Start voice activation, when dialing, by sliding and
holding the key.
•Switch on, confirm and switch off the office handsfree
mode. See “Office Handsfree” on page 116 for more
information.
•Turn on the backlight. Slide the button up and then
down key, or vice versa.
Note: For more information on changing volume during a
call, see “Changing the Volume” on page 45.
Use the voice memo key to:
•Start recording a voice memo, press and hold
(approximately 2 seconds until you hear a beep).
•Stop the memo.
•Play the recorded memo.
Note: For more information on how to use the voice memo
feature, see “Voice Memo” on page 36.
Keypad Functions
The following is a description of the functions that the keys on
the keypad have.
Tip! The term press and hold is equivalent to a key press time of
approximately 2 seconds.
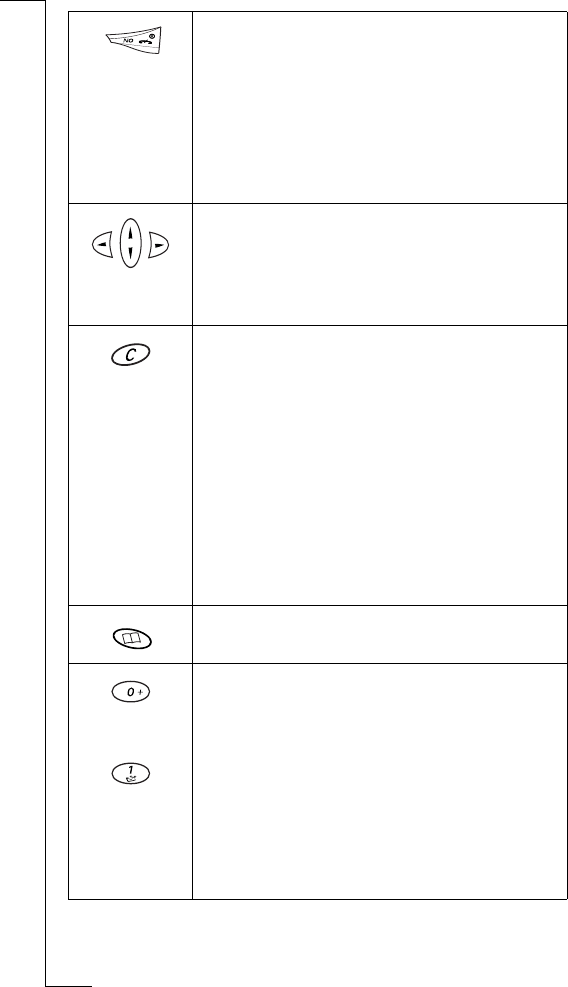
YES
• Make a call.
• Answer an incoming call.
• Select a highlighted item in a menu, sub-menu or
setting.
• Display the last dialed number list.
• Put the active call on hold.
• Activate voice dialing by pressing and holding
down the button.
• Retrieve held calls.
Interface and Navigation 27
NO
• Press and hold to turn your R380 on and off.
• End the active call.
• Reject an incoming call and send a busy tone.
• Press and hold to return to standby mode from a
menu.
• Go back one level in the menus, exit a setting or
leave a setting unchanged.
LEFT and RIGHT arrow keys
• Select the top-level menus.
• Move between the menu tabs.
UP and DOWN arrow keys
• Scroll within a menu or list.
CLEAR
• Erase entered characters/digits from the display
one by one.
• Press and hold to erase an entire row of entered
characters/digits.
• Disconnect the microphone (mute function)
when a call is in progress, press and hold.
• Mute the ring signal during an incoming call.
• Press and hold to put the R380 into silent mode,
when in the standby mode.
• Press during an active call to mute. Mute is active
as long as button is being pressed.
• Enter the phone book directly.
• Enter the digits 0 to 9.
• Enter associated characters or perform an
associated function, for example:
• Press and hold the 0 key to enter the
international character '+'
• Press and hold the 1 key to dial your voice mail.
(The numbered dialed must be entered in the
Telephony Settings dialog.)
• Enter a short-cut to a Phone book entry, press
and hold.

28 Interface and Navigation
Display Indicators
When you successfully connect the R380 to your network
operator, the ‘Standby’ display is shown. On the display a
number of different indicators can be shown if activated.
The Standby display has the following sections:
•Status indicators in the upper and middle sections of the
display.
•Text and digit indicators in the middle section.
•Connection signal strength and battery power indicators
in the lower section.
Indicators
asterisk (*)
• Enter the character *.
•Enter a p (pause) character if held down.
Hash or Pound (3.)
• Enter the character #.
• Terminate the input of pin and security codes.
• Recall a phone number from the SIM card phone
book (enter the number of the memory position
and then press #).
•Ring volume set to 0. The ringing volume is turned
off.
•Silent mode. All audible signals are turned off.
•Text me ss ag e rec eive d. A message has been
received.
•Divert calls. All incoming calls (unconditional) are
diverted to a defined number.
•Mute. The microphone is muted.
NETWORK
18-05-2000
12:00
!

Interface and Navigation 29
Tex t an d di g it s
•Deciphering. The present call is no longer being
encrypted and may not be private. This function is
accompanied by an alarm warning. The indicator
appears in the display until ciphering resumes, or the
call ends (whichever is first).
Note: Ciphering is a network feature that scrambles
your calls and messages to provide additional privacy.
•Voice mail. An incoming voice mail notification has
been received.
•Infrared. The infrared port is activated.
•Voice control active. Voice dialling appears in the
display, if active, when dialling or answering a call.
•Alarm. The clock alarm is set and activated.
•Keylock. The keypad is locked to prevent accidental
operation.
•Network. The current network is displayed.
•Date. Displays the current date in local-specific
format.
•Time. Displays the current time in local-specific
format.
!
NETWORK
18-05-2000
12:00

30 Interface and Navigation
Signal and power
Other indicators
Menu Navigation
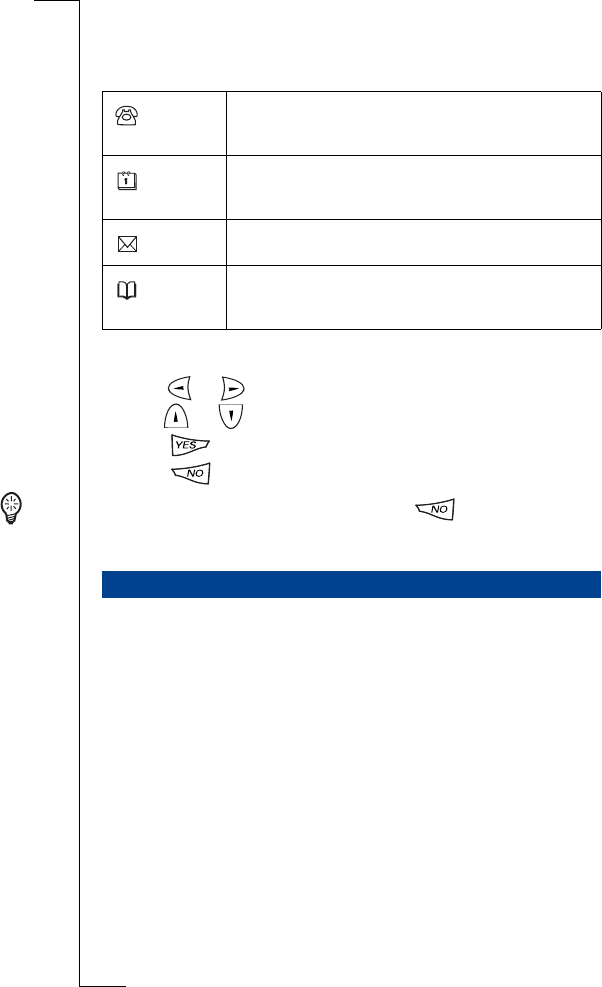
When the flip is closed a limited number of functions are made
available to you through a main menu. Press or from the
standby screen to display the main menu options.
•Network signal strength meter. The more
bars shown, the stronger the signal strength, 0-5
units.
•Battery meter. The fuller the icon, the more
charge the battery holds, 0-4 units.
•SMS memory overflow. R380 message
memory is full and no SMS messages can
be received. See “Delete messages” on page
141 for information on how to delete
stored SMS messages from your R380.
•Call timer. Total call time information from
start to finish.
•Conference. Indicates a multi-party call is in
progress.
•Connection number. The number of the
active connection, either an incoming or
outgoing call.
Note: It is not always possible to show an
incoming call number due to restrictions where
unknown or withheld display instead.
•Connection name. The name of the of the
person you are speaking to displays if there is a
number tag associated with it in the Phone book
or SIM card Phone book.
•Connection progress. Call status information
of the active call, for example Calling,
Connecting or User busy.
00:01
+4355545678
Ericsson John
Calling
Interface and Navigation 31
Four options are available through the tabs at the top of the
screen.
The main menus are:
Select and move through the menus by using the following:
•The or for scrolling across the menu tabs.
•The or for scrolling menu options of a selected tab.
•Press to make a selection.
•Press to return you to the previous display.
Tip! When accessing menus you can press to return to the
Standby.
Operation of the various programs with the flip open is achieved
by directly tapping the touch screen with the stylus. The stylus is
located in the holder on the battery. For information on how to
start your R380, see “Turning on the Phone” on page 12.
The stylus selection technique is generally described with the use
of the word ‘tap’. Select is also used when there are a number of
choices, for example in a list. For an introduction on how to use
the flip open programs, see “Flip Open Display” on page 21.
R380 Flip Open Set Up
See “Initial Settings” on page 13 for basic setup.
See “System” on page 206 for general and program setup.
See “Security” on page 73 for phone security setup.
Phone menu - activating and deactivating
settings.
Calendar - viewing appointments, to-dos and
events.
Inbox - viewing messages you have received.
Phone book - viewing and making calls to
your contacts.
Flip Open
32 Interface and Navigation
The Desktop
When you open the flip, the the desktop most closely related to
the action you were performing with the flip closed displays. For
instance, if you were in the Calendar menu, when opening the
flip, the Calendar desktop displays.
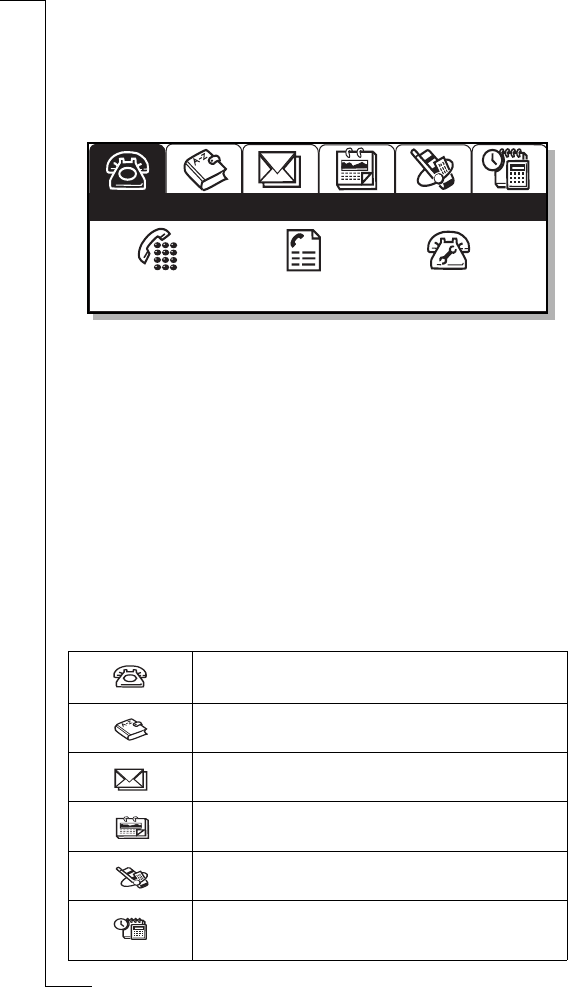
The desktop has three sections:
•Program tabs in the upper section.
•The title bar directly under the tabs.
•Program icons in the lower section.
Program tabs
Program tabs contain six functions and settings grouped in an
indexed card format. When you tap the individual index tabs the
display changes to the selected desktop.
The program tabs are:
•Phone - telephone functions and settings.
•Contacts - address book functions.
•Messaging - e-mail and text message functions.
•Calendar - agenda functions.
•WAP Services - Internet functions.
•Extras - additional tool functions, settings and a
game.
Call Call log Settings
Phone
P
rogram ta
b
s
Program icons
Title bar

Interface and Navigation 33
Title bar
The title bar displays directly under the program tabs and
indicates which program tab is currently selected.
Program icons
Program icons start functions or enter settings that are shown in
the lower section under the program tabs and title bar. Once a
program icon has been tapped and started, a new display usually
appears where toolbar icons are used to manage the program and
navigation.
The toolbar
When a program icon is selected a toolbar appears to the right of
the display. The toolbar can consist of up to five icons depending
on the program you are in. Some toolbar icons are common to
all programs, while others will only appear in specific programs.
Tip! Tapping and holding a button, displays a popup containing the
button’s name.
Common toolbar icons in most programs are:
Other useful toolbar icons:
Desktop - returns the display to the desktop.
Ta sk - displays a tasks pop-up menu. This allows you to
perform a number of tasks on selection.
View - displays a view pop-up menu. This allows you to
go to other views within the program.
Find - displays a view to enter and search information.
Save - saves and returns to the previously displayed level.

34 Interface and Navigation
Some useful program specific icons:
Cancel - returns to the previously displayed level. A cancel
view displays when you choose to cancel or return to the
previous screen. It gives you the option to cancel and
return to the previous view.
Back - returns to the previous view.
Next - tabs down or forward to the following input field.
Previous - tabs up or back to a preceding input field.
To d a y - displays the view around the current date in
Calendar.
New - displays a view for creating a new entry.
abc - displays the text entry keyboard.
123 - displays the number entry keyboard.
àëó - displays the special characters entry keyboard.
Call Waiting - appears when you have chosen Ignore
from the Call Offering/Waiting view (flip open). The
button returns you to the Call Offering/Waiting view.
Voice Dialin g - appears if voice activated dialing is on.
The button initiates speech recognition and prompts you
to speak a voice command.
Back - returns you to the previous WAP services page
(only available when more than one page has been visited).
Stop - allows you to stop downloading a WAP services
page (only available when downloading).
±12 - adds or removes 12 hours to change the clock
function to a 12 hour or 24 hour clock.
Alarm on - switches the alarm on.
abc
123
aeo
Interface and Navigation 35
Note: The list of program icons shown is not a complete list, but
only a representation of icons that you may find useful. Other icons
that appear in the toolbar are mainly program specific icons and are
described in the relevant sections within this manual.
Navigation
When moving between different desktop program tabs, the title
bar and program icons change according to the respective
program tab that is selected.
When working with different programs by tapping their icons,
lower level menu functions or settings display. To return to the
highest desktop level, tap the desktop icon from within the
program. Sometimes a combination of tapping (save) or
(cancel) or (back) and then (desktop) may be required in
order to return to the desktop. This is depends on the current
menu level.
Warnings
With the flip open, warnings display slightly different than with
the flip closed.
Low battery warning
The warning displays if the battery is running low and a ‘Low
Battery. Please replace your battery or connect a charger’
message appears. Tap OK to accept and dismiss the warning.
Insufficient storage space warning
This warning displays if there is insufficient storage space.
‘Insufficient storage space to store new data. Please remove
unwanted messages and clean up your calendar entries.’ message
appears. The current store operation is cancelled. Tap OK to
accept and dismiss the warning.
Alarm off - switches the alarm off.
Play - plays ring signal melodies.
36 Interface and Navigation
The R380 has a Voice Memo feature allowing you to record
short audio messages. You can use voice memos to temporarily
store phone numbers, addresses, reminders or other into
temporarily store phone numbers. Voice Memo can be accessed
with the flip open or closed. You may also record or replay an
voice memo using Ericsson handsfree equipment.
Warning! When a call is initiated or there is an incoming call, the
recording or replay action terminates.
To record a voice memo:
1. Press and hold (approximately 2 seconds) until a beep
sounds then release the button.
The short tone indicates the start of the recording.
2. Speak into the phone microphone.
3. To stop the recording, press then release the Voice Memo
button.
A short tone indicates the end of the recording.
Tip! The length of a voice memo is limited to the available
memory in your R380.
Note: A new recording always replaces an existing voice
memo held in memory.
To replay a voice memo:
•Press then release the Voice Memo button.
•The voice memo replays. There is no alert that the play
has started or stopped.
Voice Memo

Making and Receiving Calls 37
Making and Receiving
Calls
This chapter describes all of the phone calling functionality.
Functionality that can be accessed when the flip is open or closed
is noted.
Tip! Where the activity can be completed in either flip open or flip
closed modes, both sets of instructions are provided. They are marked
with graphical representations of the mode for easy recognition.
Flip Open
Flip Closed
See “Turning on the Phone” on page 12 for information on how to
start your R380.
When making and receiving calls, the instructions in this section
assume that your R380 is in the standby mode.
To obtain standby mode requires the following:
•your R380 is turned on
•your R380 is within coverage of a network
•your SIM card is inserted and PIN entry has been successful
Note: When abroad, other networks may be used on the condition
that your home network operator has entered into agreements
allowing you to use other operator networks. Some operators also
require that you specifically request international service. See your
network operator for more information.
Emergency Calls
Provided a network is within range, the international emergency
number of the country you are calling from can normally be
called even if there is no SIM card in your R380.
Making Calls
NETWORK
18-05-2000
12:00
Emergency
calls only
12:00

38 Making and Receiving Calls
Note: Some networks may require that a SIM card is inserted, the
PIN be entered and/or you are in an authorized network. Contact
your operator for more information.
To make an emergency call:
1. Enter the international emergency number.
2. Press to make the call.
3. To end the call, press .
To make an emergency call:
1. Tap the C all icon
The Call interface displays.
2. Tap out the international emergency number on the
keypad.
3. Tap to make the call.
4. To end the call, tap .
Domestic Calls
To make a domestic call:
1. Enter the area code and the phone number on the keypad.
The network, time and date disappear and the number
dialed displays.
2. Press
Calling displays (outgoing call initiated), followed by
Connecting (a line has been allocated). When the call is
answered it is deemed as active. A call time meter starts,
showing the elapsed time in minutes and seconds.
3. To end the call, press .
To make a domestic call:
1. Enter the area code and the phone number using the stylus.
The network, time and date disappear and the number
dialed displays.
Note: To erase a single digit, press . To erase all digits,
press and hold until the digits disappear.
2. Tap .
Calling displays (outgoing call initiated), followed by
Connecting (a line has been allocated). When the call is
+4355545678
Making and Receiving Calls 39
answered it is deemed as active. A call time meter starts,
showing the elapsed time in minutes and seconds.
3. To end the call, tap .
If the call is unanswered, the number is busy or no
connection is available, press . The number is stored
in a short term memory buffer so that it can be easily
recalled.
Note: If the number dialed is busy, User busy - Retry
messages displays allowing you to retry the number. See
“Automatic re-dialed function” on page 42.
Tip! When entering numbers into the phone book, enter the
country code, area code (excluding the leading zero) and the
phone number when saving. The numbers can then be easily
used when home or abroad.
Note: The timer shows the elapsed time of the call in
hours:minutes:seconds. The hour section does not appear until
you have been connected for more than an hour.
Calling from the Phone Book and Contacts
With the flip open, you can access advanced Phone book
functions in your R380 allowing you to easily access and
communicate with business contacts and friends.
The entries in your Phone book (accessed through the Phone
book menu) are the same as those stored in Contacts with the
flip open. When viewing entries in the Phone book you can only
access and initiate a call to the phone and mobile numbers or
send DTMF numbers that are stored in the contacts record. See
“Contacts” on page 119 for more information on how to create
entries and manage your phone book with the flip open by using
the Contacts program.
Note: To see the entries stored on your SIM card, you have to first
transfer the information stored on your SIM to your R380. See “SIM
Card” on page 126.
To make a call using the phone book:
1. Press to enter the Phone book.
The first name in the Phone book is highlighted. If there is

40 Making and Receiving Calls
more than one name in the Phone book, scroll to
highlight a name in the list.
Note: If there are no entries in the Phone book this view
cannot be selected.
2. Press to select the name. The contact’s details
display.
3. Scroll to highlight a number in the list.
4. Press to make the call.
To end the call, press .
Tip! Pressing and holding a digit key displays the Phone book
view allowing you to scroll to other contact names.
Tip! Opening the flip when accessing the Phone book provides
you with a more detailed view.
To make a call using Contacts:
1. From the desktop, select the Contacts program tab.
2. Tap Contents list.
3. Tap the divider tab corresponding to the first letter of the
name of the person you are trying to call.
4. Scroll to the required name and select it.
5. Select the Contact method by tapping one of the phone
numbers. The Phone view appears providing you with
information regarding the phone number and contact’s
name, whether or not the connection has been successful
and an indication of the length of time you have been
connected.
6. To end the call, tap .
Speed Dial
You can call the phone numbers that you store in the positions
1-9 in the SIM card memory. For instance, you may want to
store your work voicemail number in position 2. To call your
voicemail you would press the 2 button.

Making and Receiving Calls 41
Note: The Speed Dial feature only applies to the SIM phonebook
entries and not those in the Contacts application.
You should save the numbers you call most frequently in these
positions.
Making a call using speed dial:
1. Press the number corresponding to the position of the
contact you want to call.
2. Press to initiate the call.
Making a call using speed dial:
1. Tap the number corresponding to the position of the
contact you want to call. The contact stored in that
position displays.
2. Tap to initiate the call.
Tip!
Re-dialed Numbers
To re-dial the last number or a previous number you called:
1. Press or and .
The display shows the last dialed numbers list with the last
dialed number highlighted. Use the up and down
scroll arrows to scroll and select a number from the list.
2. Press again to call the highlighted number.
3. To end the call, press .
To re-dial the last number or a previous number you called:
1. Do one of the following:
•Tap
or
• and
or
•tap and select Last dialed numbers.
The display shows the last dialed numbers list with the last
dialed number highlighted. Use the up and down scroll
arrows to scroll and select a number from the list.
42 Making and Receiving Calls
2. Tap the entry in the last dialed numbers list to initiate the
call.
You can also scroll down the list, using the scroll bar, to
any other number and then tap to call that number.
3. Tap to end the call.
Automatic re-dialed function
If the connection of a call fails or is busy and the receiver's
network acknowledges this, Retry? displays for 20 seconds or
until any other function is selected.
When Retry? appears in the display:
Press if you want to re-dial the number, or if you do
not.
If you press , the number is re-dialed automatically at
frequent intervals until the call is answered or the maximum
number of retry attempts have been reached. The type of
connection failure (such as, user busy, no answer) determines
the number of retry attempts.
If you press any key, or receive a call while the Retry? function is
active, then the automatic re-dialing stops.
If the re-dial is successful, the R380 sounds a single ring tone.
Missed Calls
The calls that you have missed are stored in the phone’s memory.
You can display this list from the Phone menu (flip closed) or by
tapping the Task icon (flip open). The list appears in
chronological order with the last missed call in the first position.
To dial a missed call:
1. Press to access the Phone menu then scroll to
highlight Missed calls and press .
2. Scroll to a missed call in the list and then press . The
number dials automatically.
3. When you have finished the call, press . The R380
returns to the standby mode.
If you have pressed without initiating a call, the
R380 remains in Phone menu standby mode with ‘Missed
User busy
Retry?
+465551234578
Ericsson John
Phone menu
Lock keypad
Missed calls
Silent mode
Ring volume

Making and Receiving Calls 43
calls’ highlighted.
To dial a missed call:
Accessing the Missed Calls list when the flip is open, provides
access to the complete Call Log feature. See “Call Log” on page
113.
1. From the Phone tab, tap the Call icon.
2. Tap .
The Call Log displays.
3. Tap on the desired date category to expand.
4. Tap the number you want to dial.
Details of the missed call display.
5. Tap and select Call.
The number is dialed.
International Calls
When making an international call, the international dialed
prefix is required followed by the destination area code and
number.
Note: Do not include the leading zero for European and some
other area codes when making an international call.
To make an international call:
1. Press and hold the 0 key until the international character +
appears in the display. It is automatically replaced by the
international dialing prefix for the country you are calling
from.
2. Enter the country code, the area code (excluding the
leading zero) and the phone number.
3. Press to make the call.
To make an international call:
1. Tap and hold until the international character +
appears in the display. It is automatically replaced by the
international dialing prefix for the country you are calling
from.
2. Enter the country code, the area code (excluding the
leading zero) and the phone number.

44 Making and Receiving Calls
3. Tap to make the call.
Note: As a security measure, some network operators do not
allow international dialing unless you specifically request it. If
you are experiencing trouble dialing international numbers,
consult your network operator to ensure it is available on your
subscription.
Service Numbers
If a list of service numbers is stored on your SIM card, you can
initiate calls to these numbers. You may not edit or add to the
list.
To make a call to a service number:
1. Press to access the Phone menu then scroll to
the Service numbers option.
2. Press to make the call.
To make a call to a service number:
1. Tap a n d s e l e c t Service numbers. The Service numbers
view appears.
2. Select the service you want to call.
Answering a Call
When you receive a call, the R380 rings, the indicator light on
the top blinks green rapidly, and/or the phone vibrates and
Answer? displays. Incoming call notification depends on how
you have set the Ring control settings.
To answer a call:
1. Press to answer the call.
2. When the call is finished, press .
To a n swer t he c all :
1. Tap Yes to answer the call.
2. When the call is finished, tap .
Rejecting a Call
There are several actions you can take if you do not want to
accept an incoming call.
Receiving Calls
Incoming call
Answer?
+465554567890
Ericsson John
Making and Receiving Calls 45
•Reject - this option is available in both the flip open and flip
closed modes. The caller hears a busy tone if this is supported
by the caller’s subscription. If Forward when Busy is on, the
call diverts to the number you have specified. See “Call
Forward” on page 87.
•Ignore - this option is only available in the flip open mode.
The call notification continues and the telephone button
displays in the toolbar until the call times-out.
To rej e ct a ca l l:
Press when the R380 rings. The call is rejected and a busy
tone is sent to the caller. All calls can be rejected in this way.
Busy tone sent displays.
To rej e ct the call :
•Tap No.
•The call is rejected and a busy tone is sent to the caller.
To i g nore t he c all :
1. When there is an incoming call, the Incoming call dialog
displays.
2. Select Ignore.
Changing the Volume
During a call the volume can be adjusted with the slider on the
side of the R380. Slide up to increase the volume and down to
decrease the volume.
Muting the Microphone
To disconnect the microphone during a call:
•Press and hold down .
•Release to resume the conversation.
To disconnect the microphone during a call:
•Do one of the following:
Tap and hold to mute the microphone. When
released the microphone is re-connected.
or
Tap a n d select Mute microphone appears.
When a Call is in Progress

46 Making and Receiving Calls
•To reconnect to the call, tap and select Turn off
mute to resume the conversation.
Using the Display Notepad
To use the Notepad feature:
Enter a phone number or DTMF tone in the display using the
keypad. When you have finished the call, the number remains in
the display. To call the number press .
To note a number during a call:
1. Tap in the number on the keypad.
The number displays.
2. Use , which appears below as you make a note on
the keypad, to toggle between the active call and the note.
This note can be used after the call.
Using DTMF Tones
You can use your R380 to send DTMF (Dual Tone Multi
Frequency) tones. This feature may be used for a variety of
purposes, such as telephone banking or controlling an answering
machine.
Sending DTMF tones
To send a DTMF number during a call:
During a call enter your DTMF code with the keypad. The
characters 0 to 9, * and # are used as DTMF tones by pressing
the corresponding keys.
You can send codes using the pause function. For example when
using your personal access number for your voicemail, it is
necessary to use the pause function.
To send a code when making a call:
1. Enter the desired phone number.
2. Press and hold . The letter p appears in the display.
3. Enter the code you want to send. The code can be any
combination of the digits 0 to 9 and the characters * for
pause.
4. Press to make the call.
123
Making and Receiving Calls 47
When the call has been connected, the phone number
disappears from the display. After a delay of 3 seconds, the
code is sent, character by character. While the code is
being sent, the message ‘Sending’ displays.
Tip! You can enter a number of pauses, for example:
PHONE NO p CODE1 p CODE2 p CODE3
Note: During a pause you can press to send the
DTMF tones immediately.
It is also possible to access DTMF numbers stored in the Phone
book (flip closed) or Contacts (flip open) and to send the digits
as DTMF tones during a call. See “New Contact” on page 128 for
how to store a number.
Switching DTMF tones on and off
During a call, DTMF tones can be turned off in the Phone
menu for the benefit of the remote party during a call.
To turn DTMF tones on or off:
1. While on a call, scroll to DTMF tones in the Phone menu
using or , then press . The current setting is
highlighted.
2. Scroll to the desired setting and press .
Note: Some Phone menu options, such as DTMF tones, are
only available during an active call.
To turn DTMF tones on or off:
1. While on a call, in the Call application, tap and select
DTMF tones.
2. Select On or Off.
Call Holding
An active call is indicated in the display with the phone handset
symbol tilted up next to the connected name or number.
An active call can be placed on hold before setting up another
call or when answering a waiting call.
Ericsson John
00:01
48 Making and Receiving Calls
To put the active call on hold:
•Press .
or
•Scroll to Hold in the Phone menu using or , then press
.
The active call is now greyed out in the display and the
telephone handset icon faces downwards.
To resume a call on hold:
Press .
To put a call on hold:
•Tap the number of the call that is in progress, and tap
and select Hold call.
or
•Tap to put the active call on hold. The On hold
icon appears.
To resume a call:
•Tap the number of the call that is on hold, tap and
select Retrieve.
or
•Tap to retrieve the held call.
Note: If you tap to end an active call when there is a call on
hold a ‘Call on hold’ message appears asking ‘Retrieve held call?’. If
you do not select Yes or No within five seconds the call is
automatically ended.
Call Waiting
If supported by your network, this feature allows you to receive a
second call while another call is in progress. When Call waiting
displays, there are a number of ways in which you can manage
the incoming call.
Note: You must first activate the Call Waiting service. See “Call
Waitin g” on page 86.
To place the active call on hold and answer an incoming
call:
Press .
Making and Receiving Calls 49
To end the active call and answer an incoming call:
Press and then .
To end the active call and send a busy tone to an incoming call:
Press and then .
To end the active call and answer an incoming call:
Press and then .
To manage an incoming call with one active and one on hold:
1. Press to answer the incoming call and terminate the
active call.
2. Press to send a busy tone to the incoming call. If call
forward is enabled, then the call will be forwarded to the
designated phone.
See “When a Call is in Progress” on page 45 for how to
manage ongoing calls with menu options.
To place the active call on hold and answer an incoming
call:
Ta p Yes in the “Incoming call:” view that appears.
To send a busy tone to the incoming call:
Ta p No in the “Incoming call:” view that appears.
To ignore the incoming call
Ta p Ignore in the “Incoming call:” view that appears in the
display. The call notification continues and the telephone
button appears in the toolbar until the call is timed-out.
Note: The Answer message may be redisplayed by tapping the
Telephone button on the toolbar.
Call Switching
You can switch between an active call and a call on hold.
Incoming call
Release &
answer?
Ericsson John

50 Making and Receiving Calls
To switch between an active and a held call:
From the Phone menu, scroll to highlight Switch calls and
press . The active call is put on hold and the held call is
made active.
or
Using or .
You can switch between calls when you have two calls displayed
in the view.
The split screen displays the active call on the top screen and
the on hold call on the lower screen.
Note: The active call always displays in the top section of the split
screen.
To switch between an active and held call:
•Tap the number of the active call and select Switch call
from the pop-up menu. The active call is put on hold
and the held call is made active.
or
•Tap the number of the held call and select Switch call
from the pop-up menu. The held call is made active and
the active call is put on hold.
Call Transfer
You can transfer an active call to a call that is on hold, while
disconnecting yourself from both calls.
123
456
789
0#
+
C
NETWORK
+46 555 1234
Ericsson John
+1 555 3456
Gonzalez Pamela
123
Making and Receiving Calls 51
To transfer an active call to a held call:
1. With an active call in progress and a call on hold, scroll
to highlight Transfer calls in the Phone menu.
2. Press .
The active call is transferred to the held call and you are
released from both calls.
To transfer an active call to a held call:
1. With an active call in progress, and one call on hold, tap
the call on hold.
2. Select Transfer calls from the options.
The active call is transfered to the held call and you are
disconnected.
Note: Call transfer is not supported by all networks. Check
your subscription or contact your network operator to see if it
is available in your area.
Call Forward
Incoming calls can be diverted to another number. See “Call
Forward” on page 87 for more information.
Fax Calls
Fax and Data calls are not received in the same way that a voice
call is. Fax calls are not supported, however they can be
forwarded to another number such as the office fax number, so it
is important that you set the fax divert calls setting. See “Call
Forward” on page 87 for more information.
Data Calls
A data call cannot be answered as a voice call. Data information
must be downloaded to a data compatible machine or service.
The “Incoming call:” view reflects this and displays data in the
message and asks you if you want to “Send busy tone?”.
Fax and Data Calls

52 Making and Receiving Calls
A conference occurs whenever you join two or more calls
together so that individuals can communicate with each other at
the same time, such as join an active call to a held call. An
individual call can be ‘joined’ into a conference and ‘extracted’
from a conference. You can join up to five separate calls to form
a conference.
Note: Not all networks support the Conference call feature. See
your network operator for more information.
Starting a Conference Call
To start a conference:
1. Using the instructions on making a call, place a call to the
first party.
2. Press .
The active call is put on hold (greyed out in the display
and the telephone handset icon faces downwards.)
3. Place a call to another party.
4. With an active call in progress and a call on hold, press
to enter the phone menu then scroll to highlight Join
calls and press .
Note: Conference shows in the display. You can now use
to enter the Phone menu for more call handling
options.
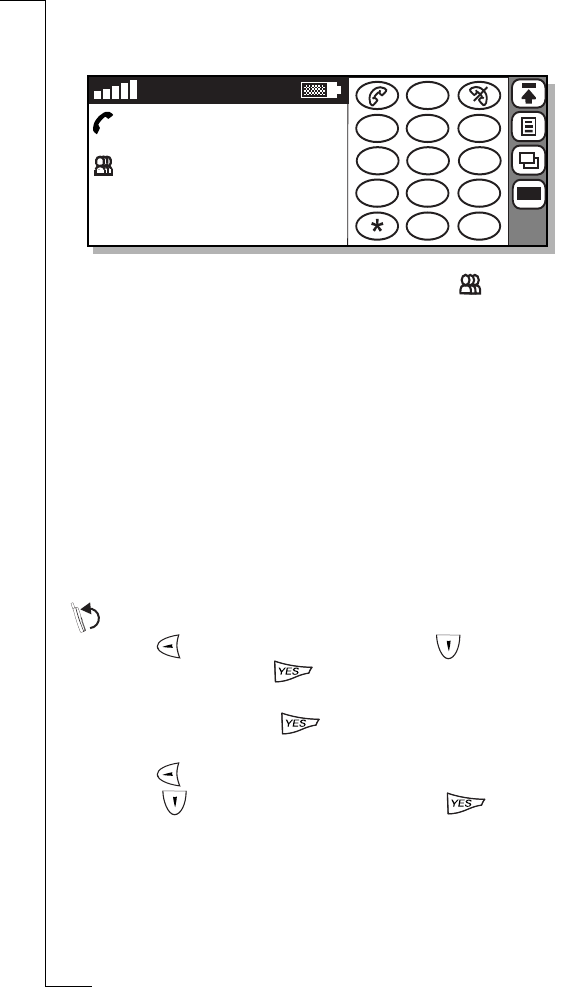
To start a conference:
1. With the flip open, using the instructions on making a call,
place a call to the first party.
2. Place the active call on hold by tapping . The active
call is greyed out and the telephone handset faces
downward.
3. Place a call to another party.
4. Do one of the following things:
Conference Calls
Making and Receiving Calls 53
•Tap the number of the active call and select Join calls
from the pop-up menu.
The view changes to display the Conference icon and
conference members are prefixed by a single digit. The
conference members are identified as follows:
•By name if there is a matching entry in the contacts
database.
•By telephone number (if known).
•By call ID number.
Note: Tapping a conference member displays options specific
to that member. For example: Release, Extract, etc. Tapping
anywhere else in the area displays options which affect the call
as a whole, for instance Release, Hold call, Retrieve.
Adding Participants
To add a participant to a conference:
1. Press to enter the Phone menu, scroll to highlight
Hold calls and press to put the conference on hold.
2. Enter the number of the person you want to include in the
conference and press . The active call now displays
above the held conference call.
3. Press to return to the Phone menu.
4. Scroll to highlight Join calls and press .
The conference is once again active with the new
participant added to it.
123
456
789
0#
+
C
03:46
1. John Ericsson
2. Pamela Gonzalez
3. Steven Mutelezi
4. Hank Cheong
5. Jose Blanco
123

54 Making and Receiving Calls
To add a new participant to the conference:
1. Tap the conference and select Hold call from the pop-up
menu.
2. Enter the number of the person you want to include in the
conference and tap . The split screen displays the
active call on the top screen and the conference call
on the lower screen.
3. Tap the number of the active call or tap the conference and
select Join calls from the pop-up menu.
The conference is once again active and the new
participant is shown in the conference display.
Extracting or Releasing a Call
You can extract or release a participant during a conference
without doing so to other participants. The other participants
are placed on hold.
•Extract - To pull one participant out of the conference to talk
to them privately. The participant can be joined back into the
conference call when you choose to.
•Release - To terminate a connection to a participant without
ending the entire conference call.
To extract or release a participant from the conference:
1. Press to enter the Phone menu, scroll to highlight:
•Extract x: Extracts a participant from the conference
where X is the number of the party in the conference.
•Release x: Releases a participant from the conference
where X is the number of the party in the conference.
•Parties in conference: Lists the parties in the conference.
2. Highlight the desired option and press .
123
456
789
0#
+
C
NETWORK
+46 555 1234
Ericsson John
3.+1 555 3456
123
1. Steven Mutelezi
2. Hank Cheong

Making and Receiving Calls 55
•If you selected Extract x or Release x the parties in the
conference are listed. Select the party you want to
Extract or Release and press .
The selected party is extracted or released from the
conference so that you can hold a private conversation
with the remain party.
If you extracted the call you may rejoin the conference
from the Phone menu by selecting Join calls.
•If you selected Partis in conference, a list of all the
parties in the conference displays.
To extract or release a participant from the conference:
1. With the flip open, tap that call that you want to release
from the Conference.
A pop up menu displays providing you two options;
Extract and Release.
2. Tap the des ired opt io n.
The call is extracted or released from the conference. To
rejoin the extracted call to the conference, select the
participant to rejoin and select Join calls from the pop-up
menu.
Managing a Conference Call
Switching between calls
To put the conference on hold and make a new call:
1. From the Phone menu, scroll to highlight Hold call and
press . The conference is put on hold.
2. Enter the number of the person you want to call and press
. The display shows the active call with the on hold
conference call below it.
123
456
789
0#
+
C
03:46
1. John Ericsson
2. Pamela Gonzalez
3. Steven Mutelezi
4. Hank Cheong
5. Jose Blanco
123
Release
Extract
56 Making and Receiving Calls
To switch between the new call and the conference:
From the Phone menu, scroll to highlight Switch calls and
press . The new call is put on hold and the conference is
made active.
To switch back to the new call from the conference:
From the Phone menu, scroll to highlight Switch calls and
press . The conference is put on hold and the new call is
made active.
Switch between the new call and the conference:
•Tap the number of the new call and select Hold call from
the pop-up menu. The new call is put on hold and the
conference is made active.
or
•Tap the conference and from the pop-up menu select
Retrieve. The conference is made active and the new call
is put on hold.
To make a new call during a conference:
1. Tap the conference and select Hold call from the pop-up
menu to put the conference on hold.
The split screen displays the active call on the top
screen and the conference call on the lower screen.
2. Enter the number of the person you want to call and tap
.
Ending a call
To end the new call and return to the conference:
•Make sure the new call is the active call and press
to disconnect the new call.
or
•Make sure the new call is the active call, scroll to
highlight Release active in the Phone menu and press
. The call is ended.
00:01
Conference
Making and Receiving Calls 57
To end a call and return to the conference:
1. From the Phone menu, scroll to highlight the release
option and press . A list of all parties engaged in the
conference appears in the display.
2. Select the party to be released and press . The call is
ended.
To end the new call and return to the conference:
Tap the number of the new call and select Release from the pop-
up menu. The new call is ended.
To end a conference:
From the Phone menu, scroll to highlight Release active and
press . The conference call is ended.
To end a conference:
Select the conference by tapping the display anywhere in the
surrounding area of the individual members (not the members)
and select Release from the pop-up menu. The conference is
ended.
Last Call Information
When all calls are ended, a call summary appears in the display
for three seconds before returning to the default standby mode.
Using Area Information
Area information is an impersonal text message that is sent
simultaneously to all subscribers in a certain cell of a network.
The information may be a local road report or a local taxi phone
number, depending on your network area and your list of
predefined channels. The information appears in the display
automatically when broadcast.
To activate area information or edit your list of predefined
channels, see “Area info” on page 97.
Note: Area information is dependent on your subscription.
After Calls
Last call
01:00

58 Making and Receiving Calls
Voice Mail
If you subscribe to a Voice mail service, callers can leave a voice
message when you cannot answer your calls. Depending on your
network operator, you are informed that you have received a
voice message in different ways (for instance, SMS message or an
audible notification).
When a voice mail number has been configured in your R380,
you can make a call to your voice mail service. See “Voicemail” on
page 86 for more information on storing a voice mail number.
To make a call to your voice mail number:
Press and hold .
or
To make a call to your voice mail number:
Ta p and h o l d
A call initiates to your voice mail number. If no voice mail
number is stored, a ‘No Voicemail number stored’ message
displays.
Note: This service depends on your subscription and network
operator. Further information about your Voice mail service can be
found in the operating instructions supplied by your network
operator.
Entering Information 59
Entering Information
There are two different ways to enter information with the flip
open:
•On-screen keyboards for text characters and digits, which can
be used to tap out information which is then displayed.
•Handwriting recognition, which is used to write in the display
with the stylus and the information is then displayed.
The on-screen keyboard consists of a text, numeric, and special
characters keyboards, as well as a phone number, security access
and a number entry keypad. These work in a similar way to
traditional hardware keyboards.
The entry keypads cover the lower part of the screen and editing
functions are available in the tasks pop-up menu on the
toolbar. Information entered appears on the top half of the
screen directly under the entry section label.
Tip! Remember to first tap the Shift key to capitalize one letter or
the Caps key to capitalize all letters.
On-screen Keyboards
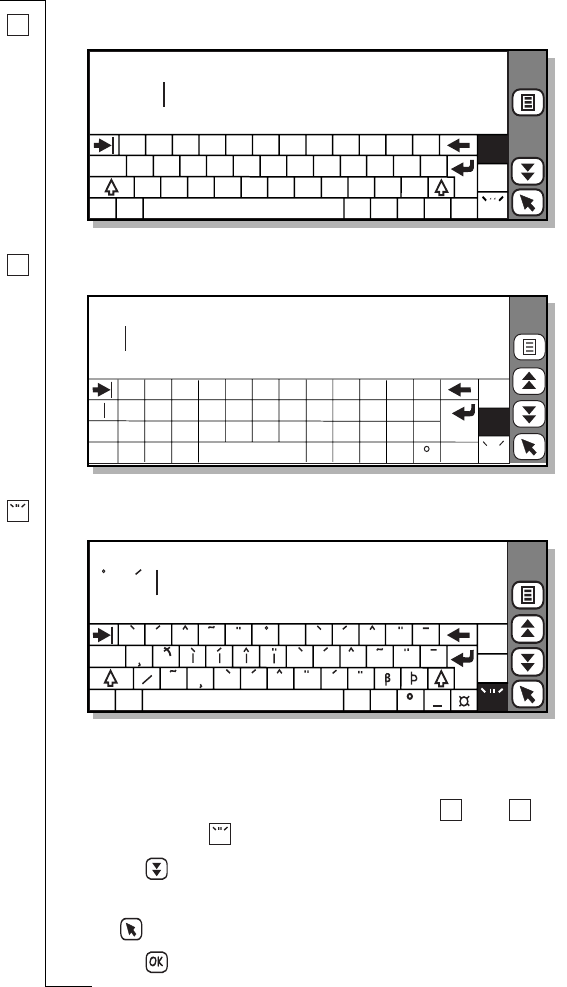
60 Entering Information
Text Keyboard
Numeric Keyboard
Special Characters Keyboard
To ente r i n f o r m a t i o n :
1. Tap out the required information with the stylus.
Switch between keyboards by tapping the text,
numbers or special characters icons.
2. Tap to enter more information in the next field
or
back to view all entered information.
3. Tap to save the information.
abc
q w e t y u
r i p - =
o
a f g h j
s d k l ; : ’
z c v , . ?
x b n
m
" \
/
( ) &!
@
caps
abc
123
aeo
Enter first name:
Emma
123
‹ ‘
[ ]
<
>
abc
123
aeo
Enter street:
59
1 2 3 4 5 6 7 8 9 0
! " £ $ % ^ &
*
( )
@’\, . ; : /#~
- =
_ +
x:
_
{ }
+
_
?..
aeo
caps
abc
123
aeo
Enter last name:
Agren
a a a a e e e ea a a e e
c o o o o
o n u u u y
nu
y
oo
o
?
!
+
<
<
<
<
abc 123
aeo

Entering Information 61
Phone Number Keyboard
To enter a phone number:
1. Use the scroll bar to display the required country then tap
it.
The international dialing code for the country
automatically displays.
2. Tap out the required phone number with the stylus.
3. Tap to enter more information in the next field
or
back to view all entered information.
4. Tap to save the information.
Number Keypads
This keyboard is used for real numbers and IP address numbers.
The integer keyboard is very similar, the only exception being
that there is no decimal point key.
Security Access Keyboard
Security access uses the standard keyboards as shown. However,
when the data is entered it is shown as asterisks (*).
1 2 3
4 5 6
7 8 9
0 #
+
space
P
UK
Uruguay
USA
+44
+598
+1
Enter work phone number:
+44 555 1234
7 8 9
4 5 6
1 2 3
0
Enter number:
7890
.
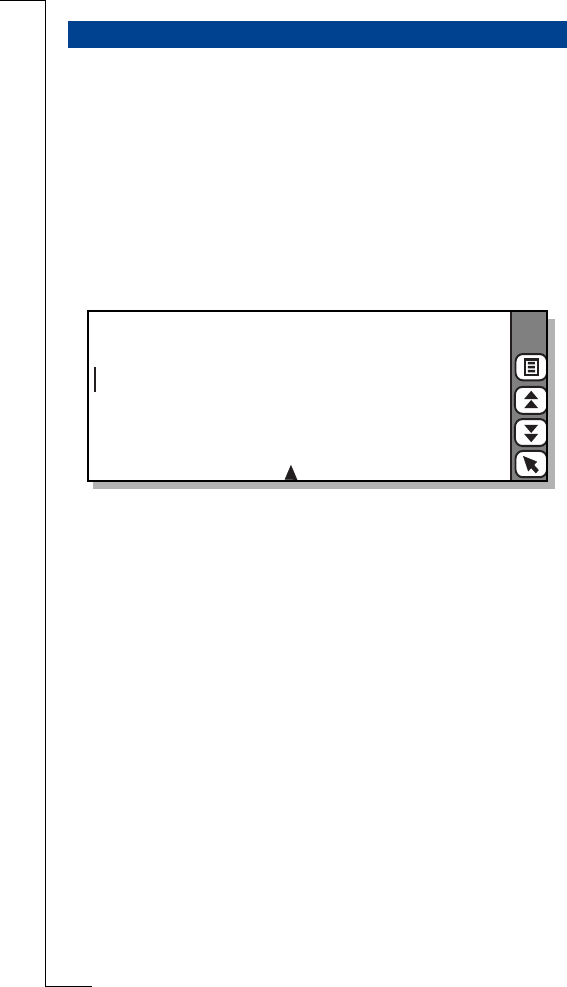
62 Entering Information
Handwriting recognition is a unique user interface allowing
convenient and natural handwritten input using the stylus.
By writing in certain areas of the screen, handwriting recognition
software turns the stylus strokes into characters or numbers.
Recognition of characters - uppercase letters, lowercase letters,
numbers, symbols, gestures and extended characters - occur
according to where you write them. The mode mark at the
bottom center of the display divides the screen into the different
writing areas.
•Stylus strokes written in the left of the display are recognized
as lowercase.
•Stylus strokes written in the center of the display are
recognized as uppercase.
•Stylus strokes written in the right of the display are recognized
as numbers.
Note: Handwriting recognition accepts parentheses, slashes, and
dashes in the number writing area allowing you to write birthdays,
social security numbers, and telephone numbers on the right side of
the display.
•Most characters are written with a single stroke.
•Write accented (Western European) letters by writing an
upper or lowercase letter, then writing the accent mark to the
right of the display.
You can enter the same character shape to write an upper and a
lowercase letter, depending on where you write on the screen.
Handwriting Recognition
ABC
abc 123
Enter last name:

Entering Information 63
Natural Character Set
The character set in handwriting recognition is a “natural”
combination of upper- and lowercase letters in addition to
numbers, symbols, gestures and extended characters.
The following tables illustrate how to write upper and lowercase
letters.
Note: Where necessary, a dot indicates where to begin a stroke and
numbers indicate the order of the strokes.
Note: Tapping the display repositions the cursor at the point of
contact. Tapping and holding momentarily, establishes text selection
by dragging the stylus.
a
b
c
d
e
f
g
h
i
j
k
l
m
n
o
p
q
r
s
t
u
v
w
x
y
z
period
comma
apostrophe
question
double quote
at
ampersand
exclamation
carriage return
tab
space
backspace
1
1
1
1
2
2
2
2
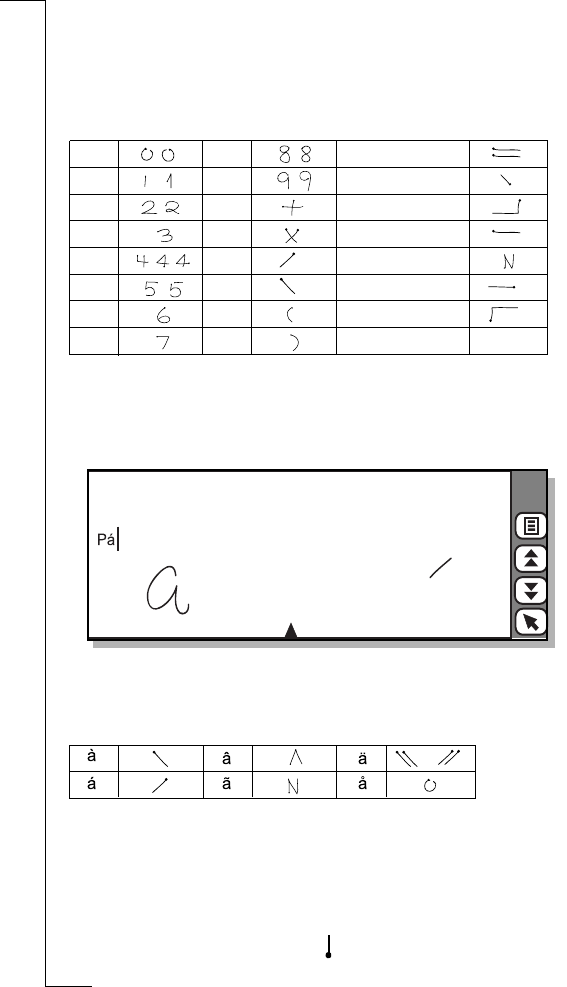
64 Entering Information
Note: Periods are not entered by a sigle tap, they are entered by a
single stroke as shown in the previous table.
Write numbers and the following symbols to the right of the
display, as shown.
Write accent marks to the right of the display after writing an
upper- or lowercase letter.
Handwriting recognition allows you to enter any of the
following accent marks.
Extended Character Set
The extended character set consists of characters that require
additional time to write before recognition occurs. For example,
the hash mark or pound sign (#) and the percent symbol (%).
The extended character gesture, (a stylus stroke from bottom
0
1
2
3
4
5
6
7
8
9
+
*
/
\
(
)
=
period
comma
dash
tilde
tab
backspace
1
1
1
2
2
2
ABC
abc 123
Enter last name:

Entering Information 65
to top) must be written to enter extended mode, signified by the
disappearance of the letterws at the top of the display and the
mode marker. You can then write an extended character
anywhere on the display.
To leave extended mode, write the extended character gesture
or wait until the mode mark reappears.
ABC
abc
#
123
New note:

66 Entering Information
Using Handwriting Recognition
As an alternative to tap typing with the on-screen keyboard,
handwriting recognition with the stylus can be chosen from
the tasks menu on the toolbar.
To select handwriting recognition:
1. When entering information, tap tasks on the toolbar.
2. Select Write to activate handwriting recognition.
3. The display changes to the handwriting recognition screen.
Note: After selecting Write, the alternative Type now
appears in the tasks menu allowing you to change back to
keyboard entry.
4. Write the information in the required section of the screen,
one character or number at a time.
Note: Make sure to write in the correct screen area;
lowercase letters to the left, uppercase letters in the middle and
numbers or digits to the right. Once the character is written it
disappears from the screen and the software’s interpretation
appears.
Tip! If you have difficulty in writing a particular letter, try
writing it in the alternate case area. For example: to write an
uppercase D, write a lowercase d in the uppercase area.

Entering Information 67
Tip! To select a complete line of interpreted text, tap and drag
the stylus down at the far right of the input display (opposite
the line of text). The text becomes highlighted.
5. Tap to enter more information in the next field
or
back to view all entered information.
6. Tap to save the information.
Note: You can select handwriting recognition as the default
method of entering information into your R380. See “Input
settings” on page 94 for more information.
Handwriting Recognition Editing Tasks
While in the write mode, there are several tasks that become
available to you:
•Cut: Allows you to remove selected text.
•Copy: Allows you to copy selected text.
•Paste: Allows you to place cut or copied text in a
specified location.
•Select all: Allows you to select all of the text in a field
or dialog.
•Clear all: Allows you to erase all text in a field or dialog.
To use select text for cutting or copying:
1. Highlight the text by dragging the stylus across it.
2. Tap the tasks button then select Cut or Copy.
The selected text is stored in clipboard memory. It can
now be pasted into another location.
To paste cut or copied text:
1. Using the stylus, tap the screen where you want to insert
the text.
2. Tap the tasks button then select Paste.
3. The text is placed in the specified location.

68 Entering Information

Security 69
Security
There are several features on your R380 that protect against
unauthorized or accidental use of your phone as well as your
information. There are two methods in which you can protect
your phone:
•Keypad lock
•SIM card lock
•Phone lock
To protect your R380 from accidental key presses you can lock
your keypad. This is especially useful when carrying the R380
when it is on.
To lock t h e k e y p a d :
1. Press .
A list of phone menu options displays.
2. Scroll to highlight Lock keypad and press .
The keypad lock icon displays.
To unloc k t h e k e y p a d :
Pressing any key on the keypad when it is locked, displays
prompts instructing you how to deactivate the lock.
Press followed by .
The SIM card lock only protects your subscription from
unauthorized use. The phone is not protected. The PIN
provided to you by your operator unlocks the SIM card for use.
Keypad Lock
SIM Card Lock

70 Security
Personal Identification Number (PIN)
The Personal Identification Number (PIN) is used authenticate
the user of your R380. The PIN is usually requested when you
turn on your R380. To change your PIN, see “Locks” on page 90
for more information.
Tip! You should be careful with your PIN since it is your protection
against unauthorized use.
To unblock t h e S I M card :
1. Enter the unblocking key, usually eight to sixteen digits,
and press .
Note: The digits are not displayed and are shown as asterisks
(*) for security protection. A maximum of three attempts are
usually allowed. Contact your network operator if
unsuccessful. Emergency calls are still available in this state.
2. If the unblocking key is accepted, a new PIN entry display
is shown. Enter your PIN and then press .
Unblocking PUK Code
After three unsuccessful PIN entry attempts, the SIM card
becomes blocked. The SIM card can only be unblocked by
entering a Personal Unblocking Key (PUK), which is provided in
your network operator subscription information.
Warning! After 10 unsuccessful attempts of entering the PUK, the
SIM will not be usable. Contact your network operator if this
happens.

Security 71
PIN 2
Some operators may have services that require a second PIN,
your PIN2. See the information you received from your operator
to see if you have a PIN2.
The Phone lock activates an identification number to
authenticate and protect the usage of your R380 if it is stolen
and the SIM card is exchanged. It is not activated when you buy
the phone. You can change the phone lock code (default is 0000)
to any three to eight-digit personal code. The Phone lock has
three possible settings:
•Off, no Phone lock is activated.
•Automatic, the Phone lock is activated when the SIM card is
changed.
•On, the Phone lock is activated and entry is required when
turning the phone on.
See “Locks” on page 90 for information about changing the
Phone lock settings.
Phone Lock

72 Security

Settings 73
Settings
The R380 has a number of different settings that you can adjust
to customize the unit to your specific needs and uses. Depending
on what setting you want to adjust, you will go to one of three
places:
•Phone menu (flip closed)
•Settings program icon in the Phone tab (flip open)
•System icon in the Extras tab (flip open).
Note: The Settings and System icons display different
configuration options. For a list of what customizing options you can
find in Phone:Settings see “Settings” on page 77. For a list of what
customizing options you can find in Extras: System see “System” on
page 88.
The steps for changing a setting are the same no matter what you
are changing. The following are general guidelines illustrating
the steps to take when changing a setting during flip closed and
flip open use.
Note: Differences in the instructions are noted with their
descriptions.
To change a setting with the flip closed:
1. Press .
A list of phone menu options displays.
2. Press to scroll to the setting that you want to change.
3. Press to enter the setting.
Depending on what setting you choose a different list of
options display.
4. Use to scroll to the desired option.
5. Press to confirm.
The Phone menu list displays.
Customizing Settings
74 Settings
Tip! When accessing the phone menus press to return to
the main menus or press and hold (2 seconds) to return
to the standby mode.
To change a setting with the flip open:
1. Enter one of the Setting views.
•Tap the Phone program tab, then tap the Settings icon.
or
•Tap the Extras program tab, then tap the System icon.
2. Tap the function that you want to change.
Tip! Use the scroll bar to move up and down the list to see
settings that might not be visible.
3. Tap the setting (inside the brackets < >).
Depending on the field, a method for entering the
required option appears.
4. Enter the setting you want to apply.
The setting becomes active and displays between the
brackets < >.
5. Tap to accept the settings.
The main settings view displays. To return to the desktop,
tap .
This section defines all of the settings that can be customized
from the Phone menu (flip closed). It provides you with a
number of functions that can be selected, for instance, Lock
keypad, Forward calls, and more; different sets of functions
become available when the first digit of a phone number is
entered or if an active call is in progress.
Lock Keypad
Selecting this option activates the keylock and returns you to the
standby screen with the keylock icon displayed. This is useful
when carrying or transporting your activated R380 so that
accidental key presses do not start a function or a call.
Phone
Note: Some
settings are
network and
operator
dependent.

Settings 75
To lock t h e k e y p a d :
From the Phone menu, scroll to highlight Lock keypad and
press .
To unloc k t h e k e y p a d :
Pressing any key on the keypad when it is locked, displays
prompts instructing you how to deactivate the lock.
Press followed by .
Note: To see more information on security settings see, “Security”
on page 73.
Missed Calls
A list of calls that you have missed displays in chronological
order with the last missed call in first position. To make a call
using the missed calls feature see “Missed Calls” on page 42.
Silent Mode
All sounds can be silenced without changing individual settings.
When you have the Silent mode activated, you can choose to
activate the vibrating alert feature to be notified of incoming
calls. See “Ring controls” on page 78.
Tip! You can also activate and deactivate Silent mode by pressing
and holding (2 seconds) . The (Silent Mode Indicator)
displays.
Ring Volume
Ring volume is represented as a six-level sliding scale. The arrow
keys are used for adjustment; or to increase the volume
and or to decrease the volume. When using or
the ring volume is adjusted silently. When using or the
ring volume is heard when increasing and decreasing the volume.
Note: The ring volume is represented as a six-level sliding scale,
with the lowest value O being equivalent to turning the ringer off.
Note: When receiving an incoming call the ring volume setting
can be adjusted silently using the volume slider key.
Phone menu
Lock keypad
Missed calls
Silent mode
Ring volume
Ring volume
Tip! For
general
instructions on
changing
settings, see
“Customizing
Settings” on
page 73.

76 Settings
Increasing Ring
The increasing ring consists of two ring sequences at each ring
volume level, starting at level 1 (two clicks) and going up to the
maximum level (6). When turned off, the ring volume returns to
the level that was set before the increasing ring function was
activated.
Call Forwarding
Call Forwarding for all calls can be switched on or off. The
current status is initially highlighted when selected. The number
to which calls are diverted will depend on the call diversion
criteria set with the flip opened. See “Call Forward” on page 83.
Infrared Port
The infrared port is used for data communication by infrared
with compatible devices such as a PC or another R380. When
selecting infrared port, a message displays indicating its status.
Note: Maximum recommended distance between infrared ports is
20 centimeters or 8 inches and they must also be at an angle of 30
degrees or less.
Next Incoming
If you have different numbers for voice and data calls, this is
referred to as multi numbering and means that you can have
two phone numbers in your network subscription. If you only
have one number for all call types, this is referred to as single
numbering and means that your SIM card does not support
separate voice and data numbers, (your R380 does not recognize
what kind of a call you are receiving).
Next incoming allows you to change the setting so that you can
receive a voice or data call. When you have set your phone for a
specific incoming call, it stays like this until you change it. The
normal setting is Voice. When expecting a data incoming call
you must therefore select data.
Service Numbers
If selected a list of network service numbers appear in the display,
as provided by your network operator. Calls can be made to these
numbers but you cannot edit or add numbers to the list.
Note: Some
settings are
network and
operator
dependent.

Settings 77
Hide and Show Identity
Your number identity can be hidden or shown for the next call,
depending on your subscription. Phone menu options only
become available a phone number has been entered.
Note: By default, your number is shown to the party you are
calling.
To hide number identity:
1. Enter the phone number you want to call.
2. From the Phone menu, scroll to highlight Hide my
number and press .
The R380 returns to the standby mode and initiates the
call to the previously entered number.
To show number identity:
1. Enter the phone number you want to call.
2. From the Phone menu, scroll to highlight Show my
number and press .
The R380 returns to the standby mode and initiates the
call to the previously entered number.
The majority of the phone feature settings can be found in the
Settings program icon in the Phone tab (flip open).
•Sounds and Alerts
•Voice Control
•Networks
•User Greeting
•My Numbers
•Locks
•Handsfree Equipment
•Last Dialed Numbers List
To access the Settings program:
1. With the flip open, tap on the Phone tab.
The Phone desktop appears.
2. Tap the Settings icon.
Settings
Tip! For
general
instructions on
changing
settings, see
“Customizing
Settings” on
page 73.

78 Settings
The Settings list displays.
Sounds and Alerts
This settings allows you to customize how your R380 notifies
you of incoming calls. The following list describes what can be
modified in the Sounds and Alerts section.
Ring controls
•Ring Volume - Determines the volume at which the phone
rings when there is an incoming call. The settings range from
OFF to 6. Use the arrow keys to set the volume.
•Increasing ring - When On, the ring volume increases after
two ring sequences at each level, starting at the lowest level (1)
and going up to the maximum level (6).The settings is either
On or Off.
•Vibrating alert - If On when silent is selected and the Ring
volume is set to Off or the R380 is in Silent mode, then the
R380 will vibrate on all incoming calls or messages
•Silent mode - All sounds can be silenced without changing
individual settings. You can set Silent mode to On of Off.
Ring signals
This setting lets you change what melody is used to signal you of
incoming voice and data calls. There are several different
melodies to chose from including four melodies that you can
create yourself.
Minute minder
The Minute minder is an audible signal notifying of you that a
minute has passed since you connected to the active call. This is a
convenient way to be reminded of how long you have been on a
call. The options for this settings are either On or Off.
Edit melodies
There are four melody positions that you can edit. When you
select which melody to edit a keyboard displays. The following is
a description of how the keys are used to create your melody.
•The P key allows you to add a short pause in the melody.
Note: Some
settings are
network and
operator
dependent.
Settings 79
•Use the left arrow key to delete the last note in the
melody, or all notes in the melody by pressing and
holding the key.
•Press and hold a melody key to produce a long note.
•To listen to the melody you have edited, tap the Play
button on the toolbar.
Note: If Silent mode is activated you will not be able to hear the
melody. Furthermore, if no melody exists the Play button is not
active.
Voice Control
Voice control allows you to answer and dial using your own voice
commands. You can configure a maximum of ten voice
commands and two answering commands (busy and answer).
Options
This options turns the Voice Controls on or off.
Voice commands
The setting allows you to edit and create voice commands.
Voice control options
Voice answering:
Voice dialing:
<On>
<On>
Tip! For
general
instructions on
changing
settings, see
“Customizing
Settings” on
page 73.
80 Settings
To create a voice command for Answer and Busy:
1. Tap Voice commands in the Telephony - Settings directory.
The Voice commands view displays.
2. To record a voice command for answering a call, or for
when you are busy, select Answer or Busy. You are asked to
“Speak after beep”.
3. Speak the command that you want to use.
If speech is detected, your recording is played back in the
earpiece and you are asked “Is voice command OK?”.
4. Select Yes to save the command.
Note: It is not possible to have only one of the Answer or
Busy commands stored and the other undefined. If the phone
has neither of the commands stored and you initiate the
recording sequence for one of them, then after successful
completion of the first command, the second recording
sequence is initiated.
Note: If a recording sequence is canceled during the
recording of one of the Answer or Busy commands, this will
cause the deletion of both Answer and Busy commands.
To create or edit a voice command:
1. Tap Voice commands in the Telephony - Settings directory.
The Voice commands view displays.
2. To record a new voice command, tap and select New.
The New voice command view displays.
Note: Alternatively, you can edit an existing voice
command, scroll and select the voice command you want to
edit. The Edit voice command view displays.
Voice commands
Answer
Busy
Note: Some
settings are
network and
operator
dependent.

Settings 81
3. Enter the name of the command and number by tapping
<Enter name> and <Enter number>
Tip! Another way to enter the phone number is to tap
and select Lookup from contacts. The Select contact view
appears in the display. Use the left and right Alphabet scroll
arrows and the up and down scroll arrows to select a contact
and tap .
4. Tap then tap Yes to record a voice command.
Note: If you have chosen to edit a voice command, you are
warned that a voice command already exists and you are asked
the question “Overwrite?”. Select Yes to proceed with
recording a new voice command.
You are asked to “Speak after beep”.
5. Speak the command that you want to use for the contact.
If speech is detected, your recording is played back in the
earpiece and you are asked “Is voice command OK?”.
6. Select Yes to save the command.
If no speech is detected, a “Speech not detected” message
displays asking you to try again. Select OK.
7. Tap to implement and save the new settings.
•If no phone number has been entered, you are prompted
to enter a phone number. Select OK and enter a phone
number.
•If no voice command has been recorded, a message
displays stating “Voice command not recorded” and
asking “Record now?”. Select Yes and repeat step 5 to
record a voice command. If No is selected or all fields
contain an entry, the display returns to the Voice
commands view.
Note: New voice command entries cannot be saved until a
telephone number has been entered.
Tip! For
general
instructions on
changing
settings, see
“Customizing
Settings” on
page 73.

82 Settings
To play a voice command:
1. Tap Voice commands in the Telephony - Settings directory.
The Voice commands view displays.
2. Select the voice command you want to play, tap and
select Play
3. When finished, tap to return to the Voice commands
view.
To delete a voice command:
1. Tap Voice commands in the Telephony - Settings directory.
The Voice commands view displays.
2. Select the voice command you want to delete, tap and
select Delete whole entry. The display returns to the Voice
commands view.
Note: To delete only the voice command, scroll and select the
voice command you want to delete, tap and select Delete
voice command.
3. Tap to implement and save the new settings. The
display returns to the Voice commands view.
Voicemail
You can easily call a predefined voicemail number and listen to
your voicemail messages.
Note: The number to your Voicemail service may be different if
you are calling from a network that is not your home network. For
more information about your Voicemail service, please refer to the
information provided by your network operator.
Call Waiting
Call waiting allows you to receive a second call during an active
call.
Note: Call waiting is a network setting that requires access to your
network. It is operator dependent.
Restrict Calls
Restrict calls allows you to bar different types of outgoing and
incoming calls. You might find this useful to protect your phone
against unauthorized long distance calls which in turns help save
you money on your long distance bill.
Note: Some
settings are
network and
operator
dependent.

Settings 83
•All outgoing- restricts all outgoing calls.
•Outgoing international - bars all outgoing international calls
•Outgoing international roaming - bars all outgoing
international calls that would utilize roaming
•All incoming - bars all incoming calls
•Incoming when roaming - bars all incoming calls when you are
roaming
You can also change the password that is used to protect these
settings. Simply tap , select Change password and follow the
screen prompts.
Note: Restrict calls is a network setting that requires access to your
network.
Call Forward
When you are unable to answer calls, you can use the Call
Forward settings to specify a number to have your incoming calls
forwarded to. You can specify to have your voice, data, and fax
calls diverted.
Note: The R380 does not support fax calls. They must be diverted
to another number such as an office fax number.
•All Calls -Allows you to specify a single telephone number for
each of the voice, data and fax calls.
•Conditional - Allows you to specify a number to divert voice
calls in different conditions:
•When busy: If you are on the phone.
•No reply: If you do not answer within a specified time
(operator dependent).
•Unreachable: If your R380 is turned off or if you are
unable to be reached.
Note: Divert calls is a network setting that requires access to
your network.
Networks
These function allows you to adjust different network settings.
Tip! For
general
instructions on
changing
settings, see
“Customizing
Settings” on
page 73.

84 Settings
Select network
Allows you to choose from a list of available networks within
range.
•Current - The currently registered network
(highlighted).
•Home - The default network specified by your SIM.
•Preferred - Networks that are available and are included
in a preferred list on your SIM.
•Available - Networks that are available but are not
included in the preferred list on your SIM.
•Forbidden - Networks that are available but you are not
permitted to use them.
Search mode
Allows you to specify how your phone searches for a network.
You can select either Automatic or Manual for the search mode.
•Automatic - your R380, when switched on, searches for
the last network you accessed. If this is not available, it
automatically starts searching for a network according to
the preferred list of networks stored on your SIM card.
•Manual - your R380, when switched on, searches for the
last accessed network. If this is not available, you are
then presented with a message asking ‘Perform new
search?’. Tap Yes to display a list of networks, tap the
network you want to use.
Note: Forbidden networks are stored on your SIM card. If such a
forbidden network is within range it is omitted when the phone
searches for a network. If your home network and a forbidden
network come to an agreement that allows you to use the forbidden
network, you can select this network even though Forbidden
displays.
Edit preferred list
Allows you to create or edit a list that defines in which order your
phone selects a network during automatic network selection
when your home network is not within range.
Note: Some
settings are
network and
operator
dependent.

Settings 85
•Add network by name. An Add network by name view
displays a list of known networks which are not
currently in the list.
•Add network using codes. An Add network using codes
view displays. Select Mobile country code: and Mobile
network code: and enter the relevant codes.
Note: You can get additional codes from your network
operator.
To change the position of a network in the list:
1. Select the network.
A view with the network name as its title displays.
2. Select Position: and use the left and right scroll arrows to
select a new position for the network to appear in the list.
3. Tap .
The Edit preferred list view displays with the network in its
new position on the list.
To delete a network from the list:
1. Select the network.
The network view displays.
2. Tap and se le ct Delete.
The network is deleted and the Edit preferred list view
displays with an updated network list.
User Greeting
User greetings allows you to select whether a default or
personalized greeting displays when you turn on your phone.
•Greeting - you can select Standard (ERICSSON logo
displays), Off (No greeting displays) or Custom text (the Text
defined in the Custom text: field displays).
•Custom Text: enter text to display when phone is turned on. A
maximum of 24 characters can be entered.
Keypad Position
Keypad position allows you to select the orientation in which the
keypad in the Phone: Call application appears when the flip is
open.
Tip! For
general
instructions on
changing
settings, see
“Customizing
Settings” on
page 73.

86 Settings
My Numbers
My numbers allows you to read/store your own voice, data and
fax numbers on your SIM card. If this is not possible, then the
numbers are read/stored in your R380.
Locks
Locks provides you with access to functions allowing you to
protect your R380 from unauthorized use. For more information
on phone security see the chapter titled “Security” on page 73.
SIM card lock
The SIM card lock only protects your subscription from
unauthorized use. The phone is not protected. This option
allows you to turn the SIM card lock on or off.
Phone lock
The Phone lock protects the phone against unauthorized use if it
is stolen or lost. It is not on when you buy the phone. This
option allows you to set the Phone lock to:
•Off, no Phone lock is activated.
•Automatic, the Phone lock is activated when the SIM card is
changed.
•On, the Phone lock is activated and entry is required when
turning the phone on.
Change phone lock code
Allows you to change the Phone lock code. Follow the screen
prompts to change the code.
Change PIN
This PIN provides access to your locked SIM card. This option
allows you to change your PIN (Personal Identification
Number). You will find your PIN in the information from your
operator. Follow the screen prompts to change the code.
Change PIN 2
Some operators may have services that require a second PIN,
your PIN2. This options allows you to change your PIN2.
Follow the screen prompts to change the code.
Note: Some
settings are
network and
operator
dependent.

Settings 87
Warning! Remember your different security codes. After three
unsuccessful PIN entry attempts, the SIM card becomes blocked. The
SIM card can only be unblocked by entering a Personal Unblocking
Key (PUK), which is provided in your network operator subscription
information. See “Security” on page 73.
Handsfree Equipment
Handsfree equipment settings allow you to select the way in
which your R380 handles handsfree speech (calls utilizing
handsfree equipment such as the HPB-10, HCA-10, or the
onboard office handsfree) and the mode in which the R380
answers when handsfree equipment is attached. You can select
one of the following answering modes:
•Normal - you have to answer calls with the Yes button or key.
•Any key - you can answer an incoming call by pressing any
key, except the key.
•Automatic - an incoming call is answered automatically after
one ring signal.
To change the way in which your R380 can handle handsfree
speech, select Handsfree type and select Basic or Full.
Basic
The R380 handles the call in semi-duplex mode. This means you
cannot speak at the same time as the person at the other end of
the line. Use this alternative only if Full handsfree does not work
properly.
Full
The R380 handles the call in full-duplex mode. This means the
quality of speech is increased considerably and is much clearer,
since you do not have to wait until it is your turn to speak.
For Full handsfree to work properly, your phone adapts to the
sound environment around the handsfree equipment. This
adaptation might take a few calls. During this learning phase, the
person you are talking to might hear an echo of his or her own
voice (because the sound goes from the speaker into the
microphone again). However, this disappears as the other person
speaks. If the echo lasts longer than the first few calls, try Basic
handsfree instead.
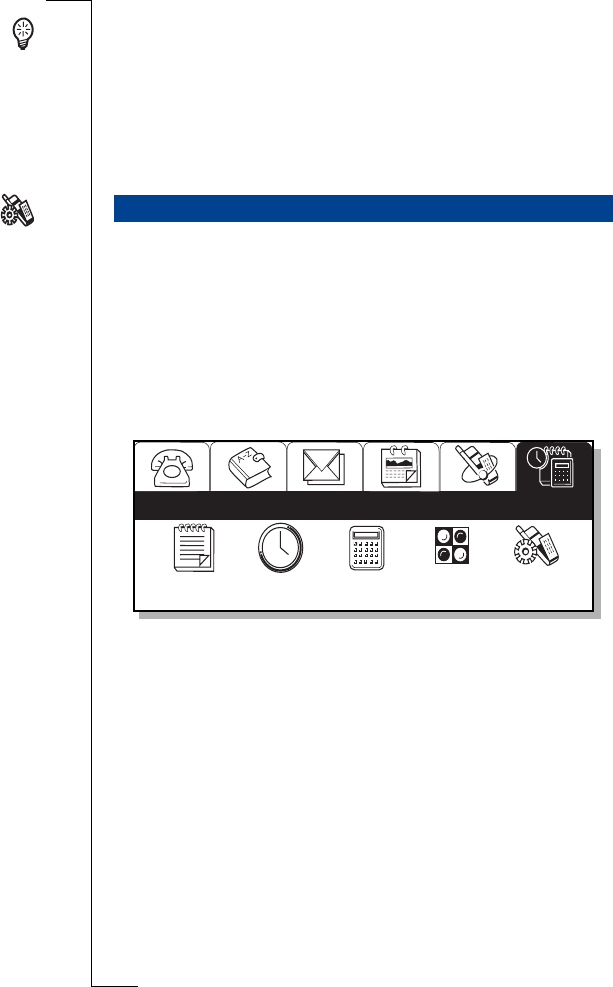
88 Settings
Tip! Set the handsfree type to ‘Full’ first. If speech quality is poor, set
to ‘Basic’ type instead.
Last Dialed Numbers List
Last dialed numbers list allows you to turn the storing of
previously dialed numbers on or off. When the list is turned off,
the contents are deleted.
The System allows you to change the settings having to do with
the phone’s functionality. It is here you can also learn about the
memory you have used as well as the phone and software
versions you are using.
To enter the System program:
1. With the flip open, tap the Extras tab.
The Extras desktop appears.
2. Tap the System icon.
The System view appears.
System
93
12
6
Notepad Clock Calculator Game System
Extras
Note: Some
settings are
network and
operator
dependent.

Settings 89
Preferences
This view provides you with a scrolling list of features whose
settings can be changed to customize the R380 to meet your
requirements.
You can change the following settings:
•Global
•Contacts
•Calendar
•Messaging
•WAP services
•Service providers
•Port
•Calculator
•Reset language
•Master reset
Global Settings
Backlight settings
This option allows you to configure when the phone’s backlight
comes on. There are three different settings:
•On
•Off
Preferences
Global
Contacts
Calendar
Messaging
WAP services
Service providers
Global
Backlight settings
Display settings
Input settings
Local settings
Data connection settings
Miscellaneous settings
Tip! For
general
instructions on
changing
settings, see
“Customizing
Settings” on
page 73.

90 Settings
•Automatic - back light is illuminated in an event (for instance,
an alert sound, message to be acknowledged, etc.), a key
pressed, at power on or the volume slider is pressed up and
down or vice versa. The illumination is turned off after 10
seconds of inactivity or 1 minute if the volume slider was
used.
Display settings
This option allows you to configure the settings related to the
screen on your R380.
•Contrast - allows you to set the contrast of the LCD. Use the
left and right scroll arrows to select the required contrast level;
1 corresponds to the lightest contrast and 9 to the darkest.
The default level is 5.
•Screen orientation - allows you to specify the orientation of
the screen when you open the flip.
•Screen saver hand held - allows you to configure whether the
screen saver comes on when using as a hand held. If set to
Automatic, the LCD and backlight (if on) turns off after two
minutes of inactivity.
•Screen saver hands free - allows you to configure whether the
screen saver comes on when using in conjunction with
handsfree equipment. If set to Automatic, the LCD and
backlight (if on) turns off after two minutes of inactivity.
Input settings
This options allows you to configure settings having to do with
the input methods on your R380.
•Default input method - set which input method you would like
to use as default. The options are either the on-screen
keyboards or handwriting recognition. The factory setting is
the Soft-keyboard. See “Entering Information” on page 63 for
more information on the input methods.
•Keypad lock - allows you to set whether you lock the keypad
manually or if it locks automatically after 25 seconds.
•Key sound - allows you to configure the type of sound the
keys make when you press them. There are three options: Off,
Click, and Tone.
Note: Some
settings are
network and
operator
dependent.

Settings 91
•Touch screen sound - allows you to set whether or not the
touch screen makes a sound when you tap it.
Note: When the R380 is in Silent mode, Key and Touchscreen
sound settings are overridden.
Local settings
This option allows you to configure settings having to do with
your location.
•Language - set the default system language.
•Time formats - set the format in which the time displays.
•Date formats - set the format in which the date displays.
Note: After changing the local settings, restart your R380 in order
to implement the changes.
Data connection settings
These settings allow you to configure the idle time before
disconnecting you from your data connection. The time is
specified in minutes.
Miscellaneous settings
This options allows you to configure:
•Cancel confirmation - set whether or not you are presented
with a confirmation view when cancelling an operation.
•Save on exit confirmation - set whether or not you are
presented with a confirmation view asking you to confirm
that you want to save the current data before exiting the
program.
•Delete confirmation - set whether or not you are presented
with a confirmation view when deleting data.
Contacts Settings
These settings have to do with how contact information displays
in your Contacts program.
Default view
Set the default view of the Contacts list to be either a Summary
or Detail.
Tip! For
general
instructions on
changing
settings, see
“Customizing
Settings” on
page 73.

92 Settings
Default sorting entries
Set how the contacts list is sorted (either by First name or Last
name).
Calendar
These settings have to do with how the Calendar displays.
Default to do view
Set whether the default To Do view is Summary or Detail.
Default Day view
Set whether the default Day view is Summary or Detail.
Week start
Set the day that you want your Calendar to start on (either
Sunday or Monday).
Note: The Detail view displays more information than that of the
Summary view. By choosing to view the items in the Summary view,
more items display on the screen at one time.
Messaging
This option allows you to configure settings regarding messaging
functions. You can adjust settings in the following areas:
View
Change the default views of the Inbox, Outbox, Drafts, Sent
items, and Remote email views. The options are Summary or
Detail.
E-mail
Here you can change whether or not original text is quoted in a
reply message, which character set is used, and which email
account you want to be default. The following are the available
character sets:
•US ASCII - a character set covering the English alphabet:
A to Z without accents.
•ISO8859-x - a number of character sets (10) for different
areas of the world, where x relates to the local version of
the character set, such as ISO8859-5 for Cyrillic.
•UTF-8 - a character set that covers all world characters.
Note: Some
settings are
network and
operator
dependent.
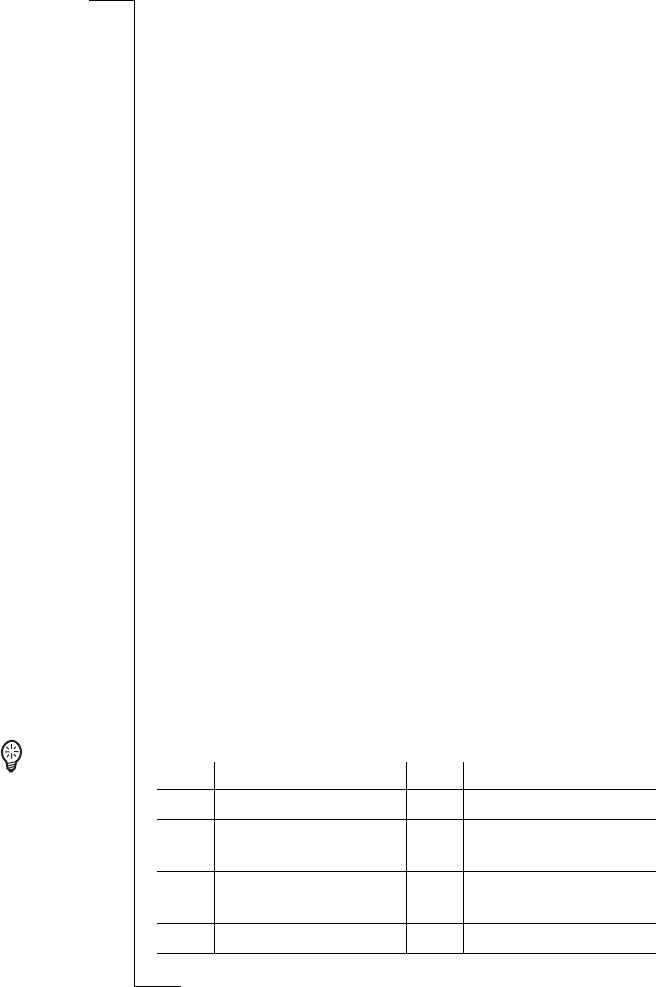
Settings 93
SMS
Here you can change the settings having to do with your SMS
service.
•SMS center no: The access number of the SMS Service
Center.
•Email via SMS no: This is the number used to receive your
email through SMS. This number is provided by your
network operator.
•Request reply: Turn on or off the Request reply feature. If Yes
is selected the Request reply field in your SMS message will
show Yes (the recipient is requested to reply to your SMS
message) as the default.
•Validity period: Set the validity period for each SMS message.
Options are: 1 hour, 12 hours, 1 day, 1 week, or Maximum.
•Concatenate SMS: Turn on or off the linking of SMS
messages. If Concatenate SMS is turned on, you are able to
send longer SMS messages (sent as multiple messages).
•Message alert: Turn on or off the alert that sounds when you
receive an SMS message.
Area info
Area Information is a type of text message which is sent to all
subscribers in a certain network area. The information may be a
local road report or a phone number to a local taxi. If off (No)
then no cell broadcasts are accepted.
Area info channels
Each type of Area Information message is identified by a three-
digit code. The list below shows examples of the Area
information codes that exist today.
Code: AI Message Type: Code: AI Message Type:
000 Index 054 Operator services
010 Newsflashes 056 Directory enquiries
(national)
020 Hospitals 057 Directory enquiries
(international)
022 Doctors 058 Customer care (national)
Tip! For
general
instructions on
changing
settings, see
“Customizing
Settings” on
page 73.

94 Settings
Note: These codes are operator dependent. For information about
the area information services that you can use, please refer to the
information supplied by your network operator. This feature may not
be available on all networks.
To edit an area information channel setting:
1. From within the Extras tab, tap Preferences.
2. Tap Messaging then select Area info channels.
3. Scroll and select the channel.
The Edit channel view appears.
4. Do one of the following:
•To edit the three digit channel code, select Channel
code: and edit the code.
•To turn the channel code on or off, select Subscription:
and then select Inactive, Active or Auto-store.
5. Tap to implement and save the new settings. The Area
info channels view displays.
To create a new area info channel:
1. From within the Extras tab, tap Preferences.
2. Tap Messaging then select Area info channels.
3. Tap an d sele ct New channel.
The New channel view displays.
4. Do one of the following:
•Select Channel code: and enter the three digit channel
code.
or
•Select Subscription: and then select Inactive, Active or
Auto-store.
5. Tap to implement and save the new settings.
024 Pharmacies 059 Customer care
(international)
030 Long-distance road reports 040 Weather
032 Local road reports 050 District cell information
034 Taxis 052 Network information
Code: AI Message Type: Code: AI Message Type:
Note: Some
settings are
network and
operator
dependent.
Settings 95
The Area info channels view displays.
To delete an area info channel:
1. From within the Extras tab, tap System and choose
Preferences.
2. Tap Messaging then select Area info channels.
3. Scroll and select the channel.
The Edit channel view appears.
4. Tap an d sele ct Delete.
5. Tap to implement and save the new settings.
The Messaging view displays.
Access passwords
These settings have to do with, security functions with RSA
SecurID or Safeword. To utilize this feature you need to first
contact your IT department.
Security access settings allow you to initialize authentication
software from RSA Security (RSA SecurID) and Secure
Computing (Safeword). However, both cannot be initialized at
the same time, for example, you must only initialize either RSA
SecurID or Safeword.
To change the access security settings:
1. Select One-time passcode
s
from the list displayed in the
Messaging view.
The Access passwords view displays.
If RSA SecurID or Safeword have previously been
initialized, then Get serial number also displays.
One-time passcodes
Initialise RSA SecurID
Initialise SafeWord
Change SafeWord PIN
Get serial number

96 Settings
Note: The initialization information you receive from RSA
Security (RSA SecurID) and Secure Computing (Safeword) is
confidential and must be destroyed once you have entered the
information into your R380.
To initialize or re-initialize the RSA SecurID:
Select Initialize RSA SecurID from the list displayed in the Access
Passwords view. One of the following occurs:
•If no previous initialization has been performed, the
Initialise RSA SecurID view displays.
Select the User ID: and Activation licence: sections and
enter your user identification and the seed data in their
respective sections, then tap .
If any of the entered values cannot be validated a
warning message appears stating which value was
incorrect. Otherwise, an information view appears
informing you that “RSA SecurID has been successfully
initialized”. Select OK to return to the Access passwords
view.
or
•If initialization has already been performed, a Re-
Initialize confirmation message appears stating that the
“Current initialization data will be lost” and asking “Are
you sure?”. Select No if you want to retain the previous
initialization and return to the Access passwords view.
Otherwise, select Yes. The Initialize RSA SecurID view
displays. Change the initialization data as described
above.
To initialize or re-initialize Safeword:
1. Select Initialise Safeword from the list displayed in the
Access passwords view.
The Initialize Safeword view displays.
2. Select Serial number: and Authorisation code:
,
enter the
required data and then tap . If there is an incorrect
value in any of the sections a warning view appears stating
which value is incorrect. Otherwise, a second Initialize
safeword view displays.
Note: Some
settings are
network and
operator
dependent.

Settings 97
3. Select Key phrase:, enter the key phrase and then tap . If
the key phrase is incorrect a warning message displays.
Otherwise, a third Initialize Safeword view displays.
4. Select User ID: and enter your user identification.
5. Select Choose PIN: and enter a PIN.
6. Select Confirm PIN:, then enter the PIN that was entered in
the previous step and then tap .
7. One of the following occurs:
•If the PIN’s do not match or the user ID is incorrect a
warning message displays.
or
•A message confirming that the Safeword has been
successfully initialized displays. Select
OK
to return to the
Access Passwords view. Change Safeword PIN displays.
To chang e th e S a f e w ord P I N :
1. Select Change Safeword PIN: from the list displayed in the
Access Passwords view.
The Change Safeword PIN view displays.
2. Select Old PIN: and then enter your PIN.
3. Select New PIN: and then enter a new PIN.
4. Select Confirm PIN:, then enter the PIN number that was
chosen in the previous step and then tap .
If any of the PINs are incorrect a warning message displays.
Otherwise, you see a message telling you that the Safeword
PIN has been successfully initialized. Select OK to return to
the Access passwords view.
To view y o u r serial nu m b e r :
Select Get serial number from the list displayed in the Access
Passwords view. The serial number view displays providing you
with the serial number of the initialised authentication token
(SecurID or SafeWord).
Tip! For
general
instructions on
changing
settings, see
“Customizing
Settings” on
page 73.
98 Settings
Email account
A number of e-mail accounts can be set up in your R380. If
more than one account exists, you can select which account is to
be used when composing an e-mail message. See “E-mail Set Up”
on page 177 for more detailed information on setting up your e-
mail.
To create or change an e-mail accounts settings:
1. From within the Extras tab, tap System and choose
Preferences.
2. Tap Messaging, then tap E-mail accounts: The E-mail
accounts view displays.
3. Do one of the following:
If you want to create a new account:
•Tap and selec t New e-mail account:.
The New e-mail account view displays.
If you want to edit an existing account:
•Tap on an account you want to change. A view with the
name of the account displays.
4. Enter or change the required information by tapping on
the corresponding field. Depending on the field type, you
will either be provided with a text input method or a
selection list.
Tip! If you are entering text information (for example your
name and email address) use the (next) or (previous)
buttons to proceed to the next information field or back up.
Note: You cannot change the protocol setting for an account
that already exists.
New e-mail account
Name:
E-mail address:
Protocol:
Username:
Password:
Confirm password:
<Enter name>
<Enter e-mail address>
<Enter username>
<Enter password>
<Enter password>
<POP3>
Note: Some
settings are
network and
operator
dependent.

Settings 99
5. Tap to implement and save the new settings.
The Messaging settings view displays.
To delete an e-mail account:
1. From within the Extras tab, tap System and choose
Preferences.
2. Tap Messaging, then tap E-mail accounts.
The E-mail accounts view displays.
3. Select the account you want to delete.
The Account (Name of account) view displays.
4. Tap an d sele ct Delete from the pop-up menu.The
following may occur when deleting an e-mail account from
the device:
•When attempting to delete a PC mail account, you are
informed that the selected account is a PC mail account
and asked if you would like to delete this account. Select
Yes to delete the account or No to return to the E-mail
accounts view.
If you selected Yes you are informed that deleting the
selected account deletes all associated messages held on
your R380. Select Yes to delete the account and all
associated messages or No to cancel deleting the account.
•When attempting to delete a normal, non-PC mail
account, the messaging application will ensure that there
are no associated messages on your R380. If no
associated messages are found then the account will be
deleted. If there are associated messages, then you are
informed that the account has associated messages and
can not be deleted.
Tip! For
general
instructions on
changing
settings, see
“Customizing
Settings” on
page 73.

100 Settings
WAP Services Settings
These settings have to do with setting up your R380 to utilize
WAP technology. See “WAP” on page 186 for more detailed
information on seetnig up WAP.
Appearance
These settings deal with how information displays. You can
change whether or not images are loaded, hyperlinks are
contained within a frame or whether or not the sequence of titles
is shown in the title bar.
Cache
The cache stores previously visited pages in your phone. This is
where you set the size of your cache.
Gateway
This is the place that you configure your R380 to use the WAP
services. It is a gateway/proxy server in the WAP infrastructure
that connects the wireless domain with the internet domain.
To create a new gateway:
1. From within the Extras tab, tap System and choose
Preferences.
2. Select WAP Services from the list.
3. Select Gateway from the list in the WAP services settings
view. The Gateway Settings view displays.
4. Tap an d sele ct New gateway. The New gateway view
displays.
5. Enter the required information.
•Name: Enter a name for the gateway.
•IP No.: Enter an IP address.
WAP services
Appearance
Cache
Gateway
History
Note: Some
settings are
network and
operator
dependent.

Settings 101
•User Id.: Enter a name to identify you.
•Password: Enter a password.
•To set the gateway as the current (default) gateway, tap
and select Set as current.
6. Tap to implement and save the new settings. The
display returns to the Gateway Settings view.
Note: Although supported, the User Id. and Password are
not always necessary and can be left empty.
To change or delete a gateway’s settings:
1. Select Gateway from the list displayed in the WAP services
settings view.
The WAP - Gateway settings view displays.
2. Select a gateway from the list displayed in the WAP -
Gateway settings view.
An Edit view appears containing the name of the gateway
in the title bar.
3. Edit the information that you want to change.
•Name
•IP No.
•User Id.
•Password
•To delete all entries in the currently selected gateway, tap
and select Delete gateway.
4. Tap to implement and save the new settings.
The Gateway Settings view.
To set the current gateway:
1. Select Gateway from the list displayed in the WAP services
settings view. The WAP - Gateway settings view displays.
2. Select a gateway from the list displayed in the WAP -
Gateway settings view.
An Edit view appears containing the name of the gateway
in the title bar.
3. To set the selected gateway as the current (default) gateway,
tap and select Set as current.
Tip! For
general
instructions on
changing
settings, see
“Customizing
Settings” on
page 73.

102 Settings
History
As you visit WAP sites, they are logged into you History. This
allows you to visit previously visited sites more easily. This setting
allows you to configure the functionality of the History feature.
To change the history settings:
1. Select History from the list in the WAP services settings
view.
The WAP - History settings view displays.
2. Change the desired settings.
•Number of items to keep: Changes the number of history
items stored (links to pages you have visited). Use the
left and right scroll arrows to select the required number.
•To clear the currently stored history list, tap and
select Clear history list.
3. Tap to implement and save the new settings.
The WAP services settings view displays.
Service Providers
A number of service providers can be set up in your R380. If
there is only one service provider available, then it is used as the
default. If there is more than one Service provider available, then
you are asked which service provider to connect to upon
connection.
To create or edit an existing service providers settings:
1. From within the Extras tab, tap System and choose
Preferences.
2. Select Service providers from the list displayed in the
Preferences view. The Service providers view displays.
3. Depending on whether you are creating a new service
provider or editing an existing one, do one of the
following:
•Tap and selec t New service provider. The New
service provider view displays.
or
•Select the service provider to be changed. A view with
the name of the service provider appears.

Settings 103
4. Enter or change the required information by tapping on
the corresponding field. Depending on the field type, you
will either be provided with a text input method or a
selection list.
Tip! If you are entering text information (for example the
providers name and telephone number) use the (next) or
(previous) buttons to proceed to the next information field
or back up. When finished tap (back). The information
you entered displays. Any information that must be provided
by selecting from a dropdown can now be added. Simply tap
on the corresponding field and select the desired option from
the drop down list.
5. Tap to implement and save the new settings.
The Services providers settings view displays.
Port
These settings allow you to change different aspects of your port
configuration.
Baud rate
This allows you to change the baud rate of the serial port. The
options are: 2400, 4800, 9600, 19200, 38400, 57600 or 115200.
Parity
This allows you to change the parity checking for the serial port
communication. The options are: None, Odd, Even, Mark or
Space.
Stop bits
This allows you to change the number of stop-bits for the serial
port communication. The options are: 1 or 2.
Character length
This allows you to change the number of bits per character for
the serial port communication. The options are: 5, 6, 7 or 8.
Flow control
This allows you to change the flow control protocol for the serial
port communication. The options are: CTS/RTS or XON/XOFF.
Note: You cannot change the port setting while the port is in use.

104 Settings
Calculator
These settings allow you to configure the functionality of the
Calculator application.
Number of decimal places
You can select the number of decimal places that the calculator
displays. The options are: Auto or a number between 0 to 9.
Keypad position
You can select where the keypad displays on the screen. The
options are: Right or Left.
Reset Language
This setting allows you to reset the interface language to the
factory default which is English. This resets the language,
keyboard layout, time and date format, decimal symbol and
sorting order of the local settings. After selecting the Reset
language option a confirmation messgage displays. Tap Yes to
continue with the reset or No to cancel.
Note: The R380 automatically powers down after confirming the
reset. After it has completely been shut down, you may turn it back
on.
Master Reset
You can reset the R380’s settings to the way they were when you
bought your R380: all data you have entered is erased. It is
therefore recommended that you back-up all data to your PC
before carrying out a Master reset, as some of the erased data may
need to be re-entered into your R380 (for instance, your Internet
service provider settings, etc).
Note: The R380 automatically powers down after confirming the
reset. After it has completely been shut down, you may turn it back
on.

Phone 105
Phone
The Phone application can be accessed from either flip open or
closed. When the flip is closed, the functionality is limited.
With the flip closed you can access the Phone menu. This menu
provides you with a limted number of settings and calling
options. These options vary depening on whether or not there is
an active call and what type of call it is.
Settings
With the flip closed there are a limited number of settings that
you can configure. To learn more about configuring your R380
see the chapter titled “Settings” on page 77.
•Lock keypad
•Missed calls
•Silent mode
•Ring volume
•Increasing ring
•Forward calls
•Infrared port
•Next incoming
•Service numbers
To change a setting:
1. Press .
The Phone menu options displays.
2. Press to scroll to the setting that you want to change.
3. Press to enter the setting.
Depending on what setting you choose, a different list of
options display.
4. Use to scroll to the desired option.
Phone Menu

106 Phone
5. Press to confirm.
The Phone menu list displays.
Call Handling Options
When a call is active, and depending on the type of call in
progress, there are a number of Phone menu options that
become available. For example, with a conference call, more
menu options become available with regards to conference call
handling requirements. The following is a list of options that can
be accessed through the Phone menu. For more information on
how to use the options see “When a Call is in Progress” on page
45..
Menu Option Function
Release all Terminates all calls.
Extract Select a party in the conference to have a
private conversation with.
Release Select a party to be released from the
conference.
Parties in conf Displays the conference parties, by name or
number if there is a matching entry in the
contacts database and call line ID number.
Switch calls Places an active call on hold and retrieves a
held call.
Transfer calls Connects two remote parties together,
active and held calls, while disconnecting
yourself. This is not available if a conference
call is active.
Join calls Joins an existing call to a conference, up to a
maximum of 5 parties.
Release active Terminates the active call.
Release held Releases a held call.
Hold call Places the current active call on hold.
DTMF tones Allows DTMF tones to be muted while
making a notepad entry during a call to
prevent them from being audible to the
other party.

Phone 107
Accessing options while flip is closed:
1. Press to reach the Phone menu.
2. Press to enter the menu.
The available options display.
3. Scroll to reach the desired option.
4. Press .
The option activates.
The Phone application provides all of the features of the phone
with the flip closed in addition to more advanced functionality.
You can make, receive and manage calls, check the call log and
manipulate settings.
On selecting the Phone program tab, the desktop displays phone
functions and settings icons.
Call
The Call application provides an interface similar to that of the
keypad when the flip is closed. It allows you to dial and send
DTMF tones as you would with the flip closed. Furthermore,
your R380 can be used in an office handsfree mode. See “Office
Handsfree” on page 112 for more information.
Copy number Copies the contents of the number entry
window to the clipboard.
Paste number Copies the contents of the clipboard to the
number entry window.
Flip Open Functionality
Menu Option Function
Call Call log Settings
Phone
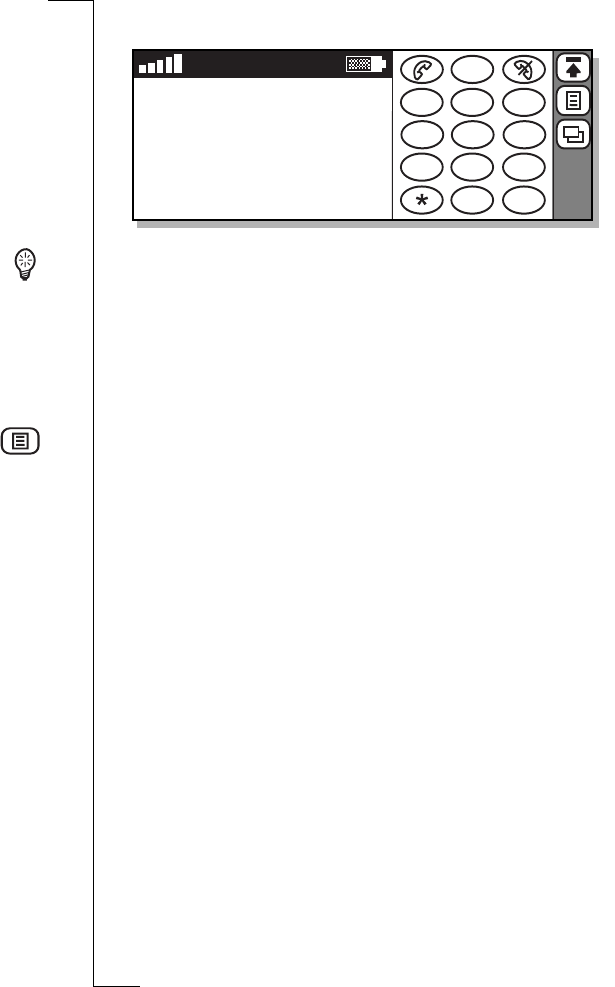
108 Phone
Call display
Tip! The keypad (default on the right) can be set to display on the
left rather than the right through a control in the Settings menu. See
“Keypad position” on page 112 for more information.
See “Flip Closed Display” on page 20 for a description of display
indicators and keypad functions. See “The Desktop” on page 22
for a description of the desktop, tasks and view icons.
Task s
In the standby mode the following tasks are available by tapping
the Tasks icon:
•Last dialed numbers. Displays the last dialed numbers list and
activate a call from the list.
•Missed calls. Displays unanswered incoming calls.
•Service numbers. Displays a list of network service numbers.
Calls can be made to these numbers but you cannot edit or
add numbers to the list.
•Show/Hide my number Displays or hides your phone number
identity to the receiver when dialing out (only available when
the phone number to be dialed is entered).
•Lookup details. This option only appears when a single call is
active and the other party’s telephone number is present in
the Contacts database. Selecting this option displays the detail
view of the person’s record in Contacts. If there is more than
one entry with the same telephone number, then only the first
entry displays.
123
456
789
0#
+
C
NETWORK
18-05-2000
12:00
T
oo
lb
ar
i
cons

Phone 109
View
This icon allow you to toggle the active view on the display.
When the keypad is active, the view can be changed to either Call
log or Settings.
Making and receiving calls
For complete instructions on how to make and receive calls with
your R380 see, “Making and Receiving Calls” on page 37
Call Log
The Call Log function details all incoming and outgoing calls
and also provides a summary of total calls. Each call activity
results in an entry in the call log, providing relevant information
relating to the call.
The call log allows you to choose how you want the information
to display. You can choose whether you want to view All calls,
Incoming calls, Outgoing calls or Missed calls. Furthermore, a
directory allows you to access calls made Today, This week,
This month or Before this month.
Note: Only one directory can be open at a time. For instance, if
Today is open and you select This week then Today closes.
To view information relating to a call:
1. Tap Call log on the Phone desktop.
The Call log view displays.
2. Use the left and right scroll arrows at the top of the display
to select the desired view.
•All calls
•Incoming calls
•Outgoing calls
Call log
Today
12:40 to John Ericsson
11:33 to Hank Cheong
This week
This month
Before this month
All calls

110 Phone
•Missed calls.
3. Tap Today, This week, This month or Before this month to
locate the call information you want to view.
4. Select the call. The following detailed information relating
to the call displays:
•Number: The calling or called number and the
corresponding name tag (if previously defined in the
Contacts database or in the SIM card Phone Book).
•Time/Date: The start time and date of the call.
•Status: Incoming call (Answered, Missed or Busy tone
sent). Outgoing call (Answered, Busy or No reply).
•Call type: Incoming call and Outgoing calls (Speech or
Data).
•Duration: The total connection time of the call.
Note: If the call is a Missed call, its duration is not displayed.
To view a summary of total calls:
1. Tap Call log on the Phone desktop.
The Call log view displays.
2. Tap and se le ct Summarize.
The Call log - Summary view displays providing the
following information:
•All calls: The total duration of all calls held in the log.
•Outgoing: The total duration of all outgoing calls.
•Incoming: The total duration of all incoming calls.
To reset all counters when in the Summary view:
Ta p a n d select Reset all counters, Reset incoming counters
or Reset outgoing counters.
Settings
Settings lists a menu of all the items that you can customize to
meet your particular needs with the Phone. For more
information on changing the settings on your R380 see, “Phone”
on page 78 in the Settings chapter.

Phone 111
To access settings:
•Tap Settings on the Phone desktop
or
•If you are in the Telephone standby or Call log view, tap
and select Settings.
The Telephony - Settings view displays providing you with
a scrolling directory of settings that you can change to suit
your own personal requirements.
Sounds and alerts
Allows you to customize how your R380 notifies you of an
incoming call.
•Ring controls
•Ring signals
•Minute minder
•My melodies
Voice control
Allows you to dial and answer using your voice. You can
configure a maximum of ten voice commands for outgoing calls
and two answering commands: busy and answer.
Call waiting
Allows you to receive a second call during an active call.
Restrict calls
Allows you to bar different types of outgoing and incoming calls.
Call forwarding
Allows you to change the settings of your conditional and all call
diverts. The all calls settings allow you to specify a single
telephone number for each of the voice, data and fax calls you
receive. The conditional settings (voice only) let you specify a
number to divert calls to depending on certain situations: When
busy: No reply: or Not reachable:.
Networks
Networks allows you to search and select a network and to edit
your preferred list of networks.

112 Phone
User greeting
User greetings allows you to select whether a default or
personalized greeting appears in the display when you turn on
the R380.
Keypad position
Keypad position allows you to select the orientation in which the
keypad appears in the display with the flip open.
My numbers
My numbers allows you to read/store your own voice, data and
fax numbers on your SIM card. If this is not possible, then the
numbers are read/stored in your R380.
Locks
Locks provides you with access to the functions which allow you
protect your R380 from unauthorized use.
Handsfree equipment
Handsfree equipment settings allow you to select the way in
which your R380 handles handsfree speech and the mode in
which the R380 is answered when handsfree equipment is fitted.
Last dialed numbers list
Last dialed numbers list allows you to turn the storing of
previously dialed numbers on or off. The numbers in the list are
erased when you turn off this feature.
For more information on how to change these settings, See
“Settings” on page 81.
Office Handsfree is a speaker phone feature built into your
R380. It can only be started during an active call or when you are
playing a voice memo. Once activated during a call, you can
proceed with a call without holding the phone to your ear.
Warning! Office handsfree volume is a level above the maximum
phone volume and should not be used within an arm’s length of your
ears. See “Safe and Efficient Use” on page 225 for more information.
Office Handsfree

Phone 113
To start the office handsfree mode:
1. Make sure the R380 is away from your ear, at arm’s length.
2. Slide the volume slider upward to the maximum volume
setting.
3. Slide the volume slider upward once more from its
maximum setting to start the office handsfree mode. A
short beep indicates that the handsfree mode is activating.
4. Slide the volume slider upward once again to confirm your
request.
The R380 can now function at arm’s length.
To stop the office handsfree mode:
Slide the volume slider downward to stop office handsfree mode
and return to normal maximum volume level.
Note: Office handsfree automatically deactivates at the end of the
current call.

114 Phone

Contacts 115
Contacts
The Contacts program in your R380 allows you to access and
communicate with business contacts and friends. You can create,
edit and store entries in the Contacts database, scroll and select
contacts from a contents list, or search for a specific name.
The Phone book functions, flip closed functionality, in your
R380 allow you to easily access and communicate with business
contacts and friends. You can scroll and select a contact you want
to call.
When viewing contact entries with the flip closed you are limited
in the number of functions that you can perform. You can only
access and initiate a call to the phone and mobile numbers or
send DTMF (Dual Tone Multi Frequency tones) numbers that
are stored in the contacts record. See “New Contact” on page 124
for more information on how to create entries and manage
contact entries.
Note: Before you can view and access the SIM card phone book
entries that you previously saved with another phone, Import from
SIM card must be carried out from within Contacts (Flip open).
To access the phone book:
•Press the Phone book key on your phone,
or
•Press until Phone book is highlighted.
Note: When accessing contacts with the flip closed (phone book)
you can only scroll to a contact, select a phone number and initiate a
call.
To access Contacts:
1. With the flip open, tap the Contacts tab.
Four task-specific icons are designated in the Contacts
desktop to enable you to perform these tasks:
•Personal details
Phone Book
Alex Adams
Dimitris Alavikia
Ellis Anderson
Robin Barwen

116 Contacts
•Contents list
•New contact
•Find
2. Select the task you want.
The first time you use your R380, you are advised to enter your
personal details. This information not only provides owner
identification, but also allows you to send your personal details
in the form of a Business card using infrared to another device.
You can also attach your personal details when carrying out
messaging routines, such as sending e-mail, etc. See “New E-
mail” on page 149.
To enter your personal details:
See “Personal Details” on page 16.
Sending Personal Details
To send your personal details using infrared to another R380:
1. Make sure your R380’s infrared port faces the infrared port
of your target device.
Tip! Maximum recommended distance between infrared
ports is 20 centimeters or 8 inches and they must also be at an
angle of 30 degrees or less.
2. With the flip open, tap Contacts tab.
3. Tap Personal details.
Your personal details entry displays.
4. Tap an d sele ct Infrared send.
Personal Details
Personal
details
Contents
list
New
contact
Find
Contacts

Contacts 117
5. The Infrared send progress view displays. If, during
transmission, you want to stop sending your personal
details, select Cancel.
On completion, you are returned to your personal details
view.
The Contents list provides you with the means by which you can
access all entries held in the Contacts database. However, when
you select the Contents list on the Contacts desktop for the first
time, an empty list displays.
To access the contents list:
1. With the flip open, tap Contacts tab.
2. Tap Contents list on the Contacts desktop.
Entries in Contacts are listed in alphabetical order and may
be sorted according to the following predefined options:
•Sort by first name
•Sort by last name
•Sort by company
To change the sort order of the information displayed:
Tap and select the sort order option you want to apply to the
Contents list.
Note: The current setting will not appear as an option when is
selected.
Similarly, when viewing Contacts entries, the amount of
information displayed can be changed using the following
options:
Contents List
DEF GHI JKL MN OPQ RST UVW XYZ #
ABC
Adams Alex (Adams Interiors Ltd)
Alavikia Dimitris (B. and K. Ltd)
Anderson Ellis (Electronic Supplies)
Barwen Robin (Component Sales Ltd)
Blaize Carl (Galbraith and Son)
Brien Harriette (Cranfield Finance)

118 Contacts
•Summary - displays one line of information, consisting
of the contacts name.
•Detail - displays more information, consisting of the last
contact method used for that entry. (By default, this is
the first contact method entered for that entry). If there
are no contact methods available then No contact
methods available displays. The appropriate line from
the Entry view displays, for example, for a mobile
number, the icon, the alias, the phone number and an
SMS icon displays. For e-mail, the e-mail address is
listed with an e-mail icon.
To change the amount of information displayed:
Tap and select the option that displays the amount of
information you want displayed.
Note: The current setting will not appear as an option when is
selected.
Entering Contact Information
The Contents list provides two methods of entering a new entry
into the Contacts database.
To create a new entry in the contents list:
1. Do one of the following:
•If you are on the Contacts desktop, tap and select
New contact
or
•If you are in in the Contents List tap and select New
entry.
2. Complete and save the New entry as described in “New
Contact” on page 124.
Accessing entries from within the Contents list allows you
to perform a number of specific tasks in your Contacts
database.
•You can make a phone call by tapping a phone number
within an entry.
•Access Messaging by selecting the e-mail address; create,
edit and delete entries.

Contacts 119
•Send contact information using infrared to, and receive
entries using infrared from, another device.
•Import and export data to a SIM card.
Making a Call from the Contents List
To make a phone call from an entry in the contents list:
1. From within the Contents List, select the relevant divider
tab at the top of the display.
2. Scroll to the required name and select it.
3. Select the Contact method by tapping one of the phone
numbers entered in the entry.
The Telephony view displays providing you with
information regarding the phone number and contact’s
name, whether or not the connection has been successful
and an indication of the length of time you have been
connected.
4. To end the call, tap .
Sending Messages from the Contents List
To send an e-mail, SMS or fax using SMS message from an entry
in the contents list:
1. From within the Contents List, select the relevant divider
tab at the top of the display.
2. Scroll to the required name and select it.
3. To send an e-mail, select the e-mail address.
The New message view displays allowing you to compose a
message before sending it.
See “Messaging” on page 131 for more information on
sending e-mails.
4. To send an SMS message, select <“mobile number”>
SMS.
The Create SMS view in the Messaging program displays
allowing you to compose an SMS message before sending
it.
See “Messaging” on page 131 for more information on
sending SMS messages.
5. To send a Fax via SMS, select the fax number.

120 Contacts
The Create fax by SMS view within the Messaging
program displays allowing you to compose an SMS
message before sending it.
See “Messaging” on page 131 for more information on
sending a Fax via SMS.
Wap Addresses in the Content List
To access a WAP Internet address from an entry in the contents
list:
1. From within the Contents List, select the relevant divider
tab at the top of the display.
2. Scroll to the required name and select it.
3. Select the WAP Internet address.
If an Internet Service Provider (ISP) connection is already
established, the WAP services browser opens displaying the
page linked to that particular address.
Otherwise, an ISP connection automatically establishes as
the WAP services browser opens and the page linked to
that particular address displays.
See “Browser” on page 170 for more information on using
the WAP services browser.
Note: There can only be one Internet address. If at any
point there are two, one is deleted.
Editing Entries in the Content List
To edit an entry in the contacts database:
1. From within the Contents List, select the relevant divider
tab at the top of the display.
2. Scroll to the required name and select it.
3. Tap the Title bar, or tap and select Edit.
4. Scroll to a field that you want to edit and select it. Change
or enter any new information.
5. Continue to select and edit. When finished, tap to save
your changes in the Contacts database.

Contacts 121
To delete an entry in the contacts database:
1. From within the Contents List, select the relevant divider
tab at the top of the display.
2. Scroll to the required name and select it.
3. Tap an d sele ct Delete.
The Delete Confirmation view displays.
4. Do one of the following:
•Tap the Yes button to confirm deletion.
or
•Tap the No button to cancel the deletion.
Note: If the Global Delete Preference is set to "Do not
confirm deletions" then this confirmation view does not
display and the entry is deleted.
Electronic Business Cards
The Contents list provides a means by which you can send, using
infrared, a specific entry to another device and also receive an
entry that has been sent via infrared to you. The entry is inserted
into the Contacts database.
To send an entry in the contacts database using infrared to
another device:
1. Make sure your R380 infrared port faces the infrared port
of the target device.
Tip! Maximum recommended distance between infrared
ports is 20 centimeters or 8 inches and they must also be at an
angle of 30 degrees or less.
2. From within the Contents List, select the relevant divider
tab at the top of the display.
3. Scroll to the required name and select it.
4. Tap an d sele ct Infrared send.
5. The Infrared send progress view displays. If during
transmission you want to stop sending the entry, select
Cancel.
6. On completion, you will be returned to the entry you
selected.
122 Contacts
To receive an entry via infrared from another device:
1. Make sure your R380 infrared port faces the infrared port
of the target device.
Tip! Maximum recommended distance between infrared
ports is 20 centimeters or 8 inches and they must also be at an
angle of 30 degrees or less.
2. From the within the Contents list application, tap and
select Infrared receive.
The Infrared receive progress view displays. On
completion, you are returned to an appropriate view
displaying the latest received entry.
Note: If during receipt, you want to stop receiving the entry,
select Cancel.
SIM Card
The Contents list within your R380 provides you with access to
a secondary phone book located within your SIM card. Although
the SIM card has limited function/storage, it allows you to
export a list of phone numbers to the card, which you can then
physically remove from the R380.
To import phone numbers from a SIM card into Contacts:
1. From within the Contents List application, tap and
select Import from SIM card.
The Import from SIM card view displays.
2. Do one of the following:
•To import a phone number, scroll to the entry you want
to import and select it. Select one of the following
options: Import as first name, Import as last name, or
Import as company name.
Import from SIM card
Anderson Alex
Bernard Fernando
Dahlberg Suzie
Hasan Nasrin
Hinde Martin
Olsson Niki
+46 33 555 2525
+55 51 555 8900
+1 514 555 0234
+1 514 555 2324
0161 555 3490
+358 9 555 9001
1.
2.
3.
4.
5.
6.

Contacts 123
•To import all phone numbers, tap and select Import
all as first name, Import all as last name or Import all as
company name.
3. The selection is then imported into your Contacts database
and a message displays confirming that import has been
successful.
Note: The newly created record(s) have the imported phone
number from the SIM card phone list entered as a Mobile
phone number as default. You will need to re-assign the phone
number to its correct label, for instance, work, home, etc. If
you try to send an SMS message to an imported number that is
not a mobile number, your message will not be sent.
To export a number from the contacts database to a SIM card:
1. From within the Contents List, select the relevant divider
tab at the top of the display.
2. Scroll to the required name and select it.
3. Tap an d sele ct Export to SIM card.
The Select number to export view displays containing a list
of all phone numbers associated with the selected entry.
4. Select a phone number to be exported.
The Select SIM card position view showing the first empty
SIM card location displays (if any are available).
Otherwise, a list displays beginning with the first entry on
the SIM card.
5. Select the empty SIM card location, or if you want to over
write an existing entry, tap that line.
One of the following occurs:
•If you are replacing an existing entry, a Warning message
displays asking for confirmation that you want to
overwrite this entry. Select the Yes button to over write
and replace the selected entry with the exported entry.
•If you have selected an empty SIM card location, then
the entry is exported from the local Contacts database
and a message displays stating that the entry has been
successfully exported.
124 Contacts
New contact allows you to create and store a new entry in the
Contacts database.
To create a new entry in Contacts:
1. From the Contacts desktop, tap New contact.
2. Tap <Enter first name> in the New entry view. Enter the
first name tap next to continue entering the
information you want to store.
Note: If required, you can specify additional phone numbers
by tapping <Add number>. From the pop-up menus that
display, you can select the type of phone and its location before
entering the phone number. The type of phone can be DTMF,
allowing you to store associated DTMF numbers that can be
sent from within the Phone book or Contacts.
3. Tap to store the new entry in the Contacts database
and return to the Contacts desktop.
Note: At least one name field, <Enter first name>, <Enter
last name> or <Enter company name>, must contain text
before you can save the new entry in the database.Otherwise, a
Warning message displays.
Find allows you to search the Contacts database for an entry
containing a specific text.
To search for an entry containing a specific text in the database:
1. From the Contacts desktop, tap Find.
2. Enter a name (or part of a name) and tap to start the
search.
A Progress Message view displays. If required, a
button allows you to interrupt the search and display the
entries found up to the point of interruption. Otherwise,
all results display when the search is complete.
New Contact
Find
Stop

Contacts 125
Tip! allows you to sort the search results by First Name,
Last Name or Company. It also allows you to change between
detailed or summarized information.
3. Scroll to the entry you are looking for and select it. The
database entry displays.
Note: If the entry you are looking for does not appear in the
search results, you can carry out a further search by tapping
and entering new search criteria.
4. You can now do one of the following:
•To edit the entry you were looking for, tap and select
Edit. See “To edit an entry in the contacts database:” on
page 120.
•To call the number of the entry you were looking for,
select the Contact Method.
•To send an e-mail to the entry you were looking for,
select the e-mail address.
The New Message view displays allowing you to compose a
message before sending it. See “New E-mail” on page 149”
for more information on sending e-mails.

126 Contacts

Messaging 127
Messaging
The Messaging program in your R380 allows you to send and
receive a number of different types of message from your
business contacts and friends.
With the flip closed you can view incoming messages. The Inbox
displays a list of text messages received through SMS or e-mail.
See “Inbox” on page 129 for more information on how to manage
your Inbox with the flip open and for more information on
Notification logs. Whenever one or more e-mail and voice mail
notifications exist, a Notification Log message appears in the
Inbox.
To access the Messaging application with the flip open:
1. Tap the Messaging tab on the desktop.
Five task-specific icons are designated in the Messaging
desktop to help you to perform these tasks.
2. Select task you want by tapping on the icon.
•Inbox
•New e-mail
•New SMS
•Find
•Generate password
Inbox New
e-mail
New
SMS
Find Generate
passcode
Messaging

128 Messaging
General
If you select when in the Inbox, Outbox, Drafts or Sent
items views, a menu displays not only allowing you to select
alternate views, but also to change the way in which the
information displays.
Sorting messages
Messages can be sorted according to the following predefined
options:
•Sort by name - sorted in alphabetical order.
•Sort by date - sorted in chronological order.
Displaying messages
The amount of information that displays can be changed using
the following options:
•Summary - less detail.
•Detail - more detail.
Note: The currently selected setting, Summary or Detail, does not
appear as an option when the View menu is selected.
Filtering messages
You can filter messages to display only specific types using the
following options:
•E-mail (& E-mail via SMS)
•SMS
•Fax via SMS (not Inbox)
•Auto configuration (Inbox only)
•Area Information (Inbox only)
•Notifications (Inbox only)
•Synchronised e-mail
Note: When the Filter by type command is chosen, the default
setting of the Filter by type view shows all options as selected (filtered
in). To remove an option that is not required, tap the item to
deselect it (filter out).
Reading Messages
To read a message:
1. Press until Inbox is highlighted.
2. Press and scroll to the message you want to view.
3. Press to select the message. The message displays.
Inbox
Ericsson John
+43155567890
Cheong Hank
E
SMS
E

Messaging 129
4. When the full message does not display, use to scroll to
the end of the message.
5. To close the message, press .
Tip! If the message you select contains an embedded phone
number, use or to view and highlight the full
telephone number, then press .
Your R380 initiates a call to the number.
Tip! Press to return to the main menus or press
and hold to return to the standby mode.
Tip! Opening the flip when accessing the Inbox provide you
with a more detailed view.
With the flip open, Messaging provides access to various
functions enabling you to create and send or receive and view e-
mail or SMS messages. You can also perform a search for specific
messages and generate a secure access password.
Note: Before you start using the send and receive functions within
Messaging, you must configure your R380 to use this service. See
“Messaging” on page 96 and “Service Providers” on page 106 for
further information.
The Inbox contains messages you receive. Messages can be e-mail
or SMS. The contents of the Inbox appear when you tap the
Inbox icon. You can scroll through the contents of the Inbox
using the scroll bar to the right of the display.
The Header Bar displays the number of messages in the Inbox
and how many of them are unread. When displayed, each
message contains the sender’s name or phone number and the
date it was sent. Image icons are used to indicate the type of
message content and the status of the message. The following is a
list of image icons used in the Messaging program.
Inbox

130 Messaging
Notification and message content indicators:
Message status indicators:
Note: Your R380 is configured to support either IMAP4 or POP3
protocol. As a result, the behaviour of your attachments will vary. If
IMAP4 protocol is supported, attachments are not automatically
downloaded. If POP3 protocol is supported, attachments are
automatically downloaded.
E-mail with no attachments.
E-mail with attachments.
Notification log (e-mail & voicemail
notifications).
Multiple message type notification.
E-mail synchronization message.
E-mail synchronization message with attachments.
SMS messages.
SMS messages saved on a SIM card.
Area information.
E-mail using SMS messages.
Fax using SMS messages.
Voice mail notification.
Auto configuration message.
Unread.
Read.
Messaging 131
Notification Log
Whenever you have one or more e-mail or voice mail
notifications, a Notification log message appears in the Inbox.
Whenever a new notification is received, the inbox notification
log updates to reflect the date of the most recent e-mail or voice
mail notification. SMS messages, however, are not listed in the
notification log displays in the Inbox.
If the notification log is selected, you are presented with a list of
the most recent notifications. New notifications automatically
update the display date and the notification log message is
marked as unread. The most recent notification message icon (e-
mail or voice mail) appears at the top of the list.
Note: allows you to delete a selected notification log or
notification log message that you no longer require.
If you select a voice mail notification from the log, the
notification message displays.
To initiate a call to the voice mail service:
With Dial? shown in the display, press . The Telephony
view displays and a call to the voice mail service initiates.
Note: The Dial button only appears if the voice mail number
has been configured on your R380.
To initiate a call to the voice mail service:
•Tap the Dial button on the toolbar.
•The Telephony view displays and a call to the voice mail
service initiates.
Note: The button only functions if the voice mail number
has been configured on your R380.
Get Mail
The Message program in your R380 allows you to connect to a
remote e-mail server. You can copy or move messages you receive
from the Remote inbox on the server to the Local inbox in your
R380. You can also delete messages stored in the Remote inbox
that you no longer want.
To copy or move new messages from the remote inbox to your
132 Messaging
local inbox:
1. Tap Inbox on the Messaging desktop. Alternatively, you
can perform the remainder of the procedure if you are
already in the Inbox, Outbox, Sent items or Drafts view.
2. Tap an d sele ct Connect.
3. Depending on how many accounts and service provideres
you have set up, the following occurs:
•If you have more than one e-mail account, you are
presented with a "Select e-mail account" view. Select an
e-mail account and tap .
•If you have more than one internet service provider, you
are presented with a Select service provider view. Select
the service provider to be used and tap .
A Progress Message view displays informing you of the
current status of the connection: Initializing, Dialing....;
Authenticating (if required)...; Connecting....; Getting
header....
Note: If authentication is required, see “Authentication in
Dial-up Access” on page 143 for more information.
4. Select the message or messages you want to copy, or tap
and select Select all.
5. Tap an d sele ct Copy to inbox (a copy of the original
message is retained on the server) or Move to inbox
(original message is removed from the server).
Wait until all of the mails you have selected are either
copied or moved to the Inbox.
6. Tap an d sele ct Disconnect.
The remote server connection is severed and the messages
appear in your Inbox. The connection is severed if no
activity is detected over a period of time.
To delete messages in the Remote Inbox:
1. Tap Inbox on the Messaging desktop.
2. Tap and select Connect.
3. Depending on how many accounts and service provideres
you have set up, the following occurs:
Messaging 133
•If you have more than one e-mail accounts, you are
presented with a Select e-mail account view. Select an e-
mail account and tap .
•If you have more than one internet service provider, you
are presented with a Select service provider view. Select
the service provider to be used and tap .
A Progress Message view displays informing you of the
current status of the connection: Initializing, Dialing....;
Authenticating (if required)...; Connecting....; Getting
header....
If authentication is required, see “Authentication in Dial-up
Access” on page 143 for more information.
4. The Remote inbox displays containing a list of all messages.
Select the message or messages you want to delete or tap
and select Select all.
5. Tap an d sele ct Delete.
The Delete confirmation view displays.
Note: Whether or not the Delete confirmation view appears
depends on the Global settings for this feature. See
“Miscellaneous settings” on page 95.
6. Do one of the following:
•Tap Yes to confirm the deletion.
or
•Tap No to cancel the deletion.
7. On completion, tap and select Disconnect.
The remote server connection is severed and the Local
Inbox displays. The connection is also severed if there is
no activity over a period of time.
Viewing a message
To view the contents of a message:
1. From the Messaging desktop, tap the Inbox icon.
The Inbox view appears.
2. With the stylus, tap the message you want to view.
The message opens.

134 Messaging
Note: Phone numbers, URLs and e-mail addresses are
supported within a message as hyperlinks.
3. To hide/show the complete To: and Cc: of the message, tap
and select Show detail or Hide detail (the option is
dependent on what is currently selected).
Having selected a message, you may find that there is a file
attachment. An image icon is used to indicate the type of
attachment and a file name is enclosed within <> brackets
The type of attachments supported by your R380 are:
- <vCard (personal details) attachment file>
downloaded.
- <vCard (personal details) attachment file> not
downloaded.
- <vCalendar attachment file> downloaded.
- <vCalendar attachment file> not downloaded.
- <text attachment file> downloaded.
- <text attachment file> not downloaded.
- <other attachment file> downloaded.
- <other attachment file> not downloaded.
Note: If the message contains multiple attachments, a
separate attachment icon indicates each attachment and its
appropriate file name.
Working with attachments
To download an attachment:
1. Select the attachment.
2. Tap a n d s e l e c t Download attachment.
If the attachment is not held on your R380, a progress
message displays during the retrieval process and a further
message on completion. Once downloaded, the icon
changes.

Messaging 135
To add a Card attachment to the contacts database:
1. With the vCard attachment downloaded and selected, tap
and select Add to contacts.
The attached vCard appears in the Record view.
2. Do one of the following:
•Tap to accept the record for creation as an entry in
the Contents list.
or
•Tap to cancel adding the record into the Contacts
database and return to the message.
To add a vCalendar attachment as an entry in the calendar:
1. With the vCalendar attachment downloaded and selected,
tap and select
Add to calendar.
The attached vCalendar appears in the Appointment entry
view.
2. Do one of the following:
•Tap to accept the record for creation as an entry in
the Calendar.
or
•Tap to cancel adding the appointment as an entry in
the Calendar and return to the message.
To view a text attachment:
1. Select the attachment.
2. Tap a n d s e l e c t View attachment.
The attachment opens and its content displays.
To delete an attachment from your R380:
1. With the attachment downloaded and selected, tap and
select Delete attachment.
2. A message displays stating “The attachment has been
deleted from the device” and the attachment icon changes
to indicate that the attachment is no longer on the device.
Adding a sender to contacts
You can add the sender of an email to your contacts list directly
from their message.
136 Messaging
To add a sender to the contacts database:
1. With the e-mail or SMS message’s contents displayed in
the Inbox view, tap and select Add sender to contacts.
The display switches to the New entry view in Contacts
and the name, address and phone number fields display. If
the alias is present it is placed in the name field, otherwise
the field remains blank. The sender’s e-mail address is
inserted into the e-mail address field.
2. Continue to enter information for all other relevant fields
as described in “Entering Contact Information” on page 122.
On completion, the e-mail/SMS message displays.
Reply
When in the Inbox view you can choose to reply to a message.
To reply to an e-mail or SMS message:
1. With the e-mail or SMS message’s contents displayed in
the Inbox view, tap and select Reply (reply to the
sender) or if the message is an e-mail you can select Reply
to all (reply to sender and recipients).
The New message view displays.
2. Tap <Enter message> and enter your message.
3. If you want to send an attachment with the reply, tap
and select the type of attachment. See “New E-mail” on
page 144 for more information on the type of attachments
that can be sent.
4. Tap . If the message being sent is an e-mail, the Send
confirmation view displays. Tap Yes to connect and send
the message immediately or tap No to send the message
later.
If the message is not sent immediately, it is placed in the
Outbox.
Forward
When in the Inbox view you can choose to forward a message.
To forward an e-mail or SMS message:
1. With the e-mail or SMS message’s contents displayed in
the Inbox view, tap and select Forward.
The New Message view displays.
Messaging 137
2. Enter the recipients for the message.
•Tap <Enter recipients> and use the left and right
Alphabet scroll arrows and the up and down scroll
arrows to the right of the screen to locate and select the
recipient from the list of contacts.
or
•If the intended recipient is not stored within your
Contacts database, tap and enter the contact details
for the recipient: an SMS phone number or an e-mail
address.
3. To send the message, tap .
If the message being sent is an e-mail, the Send
confirmation view displays.
4. Do one of the following:
•Tap Yes to connect and send the message immediately.
or
•Tap No to send the message later.
If the message is not sent immediately, it is placed in the
Outbox.
Delete messages
When in the Inbox view you can choose to delete a message or all
messages.
To delete a message from the inbox:
1. With the e-mail or SMS message’s contents displayed in
the Inbox view, tap and select Delete.
The Delete confirmation view displays.
Note: If the Global delete preference is set to "Do not
confirm deletions" then this confirmation view will not be
displayed and the record will be deleted. See “Miscellaneous
settings” on page 95.
2. Do one of the following:
•Tap Yes to confirm the deletion.
or
•Tap No to cancel the deletion.
123

138 Messaging
To delete multiple messages from the inbox:
1. With all e-mail and SMS messages displayed in the Inbox
view, tap and select Delete messages.
The Delete inbox messages view displays.
2. Select the messages to be deleted or tap and select
Select all.
3. Tap to initiate the deletion process.
4. The Delete confirmation displays.
Note: If the Global delete preference is set to Do not confirm
deletions then this confirmation view will not be displayed
and the record will be deleted. See “Miscellaneous settings” on
page 95.
5. Do one of the following:
•Tap Yes to confirm the deletion.
or
•Tap No to cancel the deletion.
Edit message
When in the Inbox view you can edit a message.
To edit a message:
1. With the e-mail or SMS message’s contents displayed in
the Inbox view, tap and select Edit.
The Message edit view displays.
2. Select the required fields for editing:
•Subject
•Message body
•Text attachments - select Edit or Delete from the pop-up
menu. If your selection is edit then the text editor
displays.
Note: All remaining fields cannot be edited.
3. To attach a file, tap and select the type of file to be
attached. See “New E-mail” on page 144 for more
information on the type of attachments that can be sent.
4. When you have finished editing the message, tap .
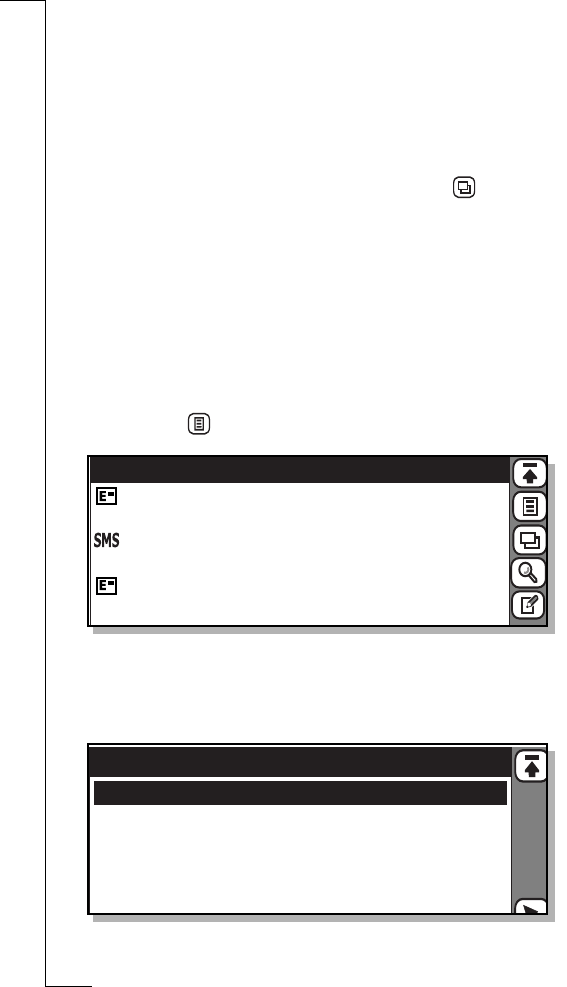
Messaging 139
Outbox
The Outbox contains email that you have created but not yet
sent. SMS messages that you have created or edited are normally
sent immediately. However, if a message fails to be sent at all or
is only delivered to limited recipients, then the message is placed
in the Outbox containing a list of failed recipients in the To
recipients field. When in the Inbox, Drafts or Sent items view,
the contents of the Outbox display when you tap and select
Outbox.
Select a message with the stylus to view its contents.
Send messages
When in the Outbox view you can choose to send a single
message or all messages you elected to send later.
To send messages held in the outbox:
1. With the e-mail or SMS messages displayed in the Outbox
view, tap and select Send messages.
The Send messages view displays a list of the different
types, and the number of each type, of messages being held
in the Outbox.
2. Tap the type of message to be sent.
John Ericsson
Outbox: 3 messages
18/05/2000
Steven Mutelezi 18/05/2000
Regional Order
Quarterly Report
Pamela Gonzalez 17/05/2000
Latest Advertisement
11.2kb
3.0kb
9.4kb
Send messages
Ericsson
Compuserve e-mail (5)
SMS (1)
E-mail via SMS (2)
Fax via SMS (1)
Work e-mail (3)

140 Messaging
A Send messages view displays a list of all messages of this
type.
3. Tap the messages to be sent or tap and select Select all.
4. Tap to initiate the sending of the selected messages.
If you have more than one internet service provider, then
the Select service provider view displays allowing you to
select a provider.
5. Select a service provider from the list and tap .
6. A Progress message view displays informing you of the
current status of the connection: Dialing....; Initializing...
Authenticating...; Connecting....; Sending....
Send messages - Ericsson e-mail (3)
Ericsson
Compuserve
Anderson Jan
Project guidelines
Adams Bella
Lunch appointment details
Smith John
Minutes of meeting (12/05)
18 May 2000
11.2kb
18 May 2000
13.2kb
17 May 2000
9.4kb
Select service provider
Ericsson
EricNet

Messaging 141
Note: If authentication is required, see “Authentication in
Dial-up Access” on page 143 for more information.
On completion of the messages being sent you are
returned to the Send messages view.
To send a message you are viewing in outbox:
1. With the e-mail or SMS message’s contents displayed in
the Outbox view, tap and select Send.
2. Depending on what type of message is being sent, do one
of the following:
•If the message being sent is an e-mail, the Send
confirmation view displays. Tap Yes to connect and
send the message immediately.
or
Tap No to send the message later. If the message is not
forwarded immediately, it remains in the Outbox.
•If the message is an SMS message it is sent immediately.
•The remainder of the procedure is the same as that
described in steps 3 to 5 for sending messages.
Edit message
When in the Outbox view you can edit a message.
To edit a message:
1. With the e-mail or SMS message selected and the contents
displayed in the Outbox view, tap and select Edit. The
Message edit view appears in the display.
2. Select the required fields for editing.
3. If you want to attach a file, tap and select the type of
file to be attached. See “New E-mail” on page 144 for more
information on the type of attachments that can be sent.
4. When you have finished editing the message, tap . You
are returned to the Outbox record view.
Forward messages
When in the Outbox view you can choose to forward a message.
See “Inbox” on page 129 for more information on forwarding
messages.
142 Messaging
Delete message
When in the Outbox view you can choose to delete a message or
all messages. See “Inbox” on page 129 for more information on
deleting messages.
Note: If the Global delete preference is set to Do not confirm
deletions then this confirmation view will not be displayed and the
record will be deleted. See “Miscellaneous settings” on page 95.
Sent Items
Sent items contains e-mail and SMS messages that have been
sent. When in the Inbox or Outbox view, the contents of the
Sent items appear in the display when you tap and select
Sent items.
To view the contents of a sent message:
1. Select the message you want to view with the stylus. The
message opens and appears in the view.
2. To hide/show the complete To and Cc of the message, tap
and select Show detail or Hide detail (the option is
dependent on what is currently selected).
Edit message
When in the Sent items view you can choose to edit a message
for re-sending. See Inbox “Edit message” on page 138 for more
information on editing messages. To send a message that has
been edited, tap and select Forward.
Delete messages
When in the Sent items view you can choose to delete a message
or all messages. See “Inbox” on page 129 for more information on
deleting messages.
Forward message
When in the Sent items view you can choose to forward a
message. See “Inbox” on page 129 for more information on
forwarding messages.
Drafts
The Drafts folder allows you to store messages which are not
complete. You can also move a message from the Outbox folder
to the Drafts folder.

Messaging 143
To move a message from the outbox folder:
Select the message to be moved, tap and select Move to
drafts. The message is moved and the Drafts view displays.
To view a message for editing:
1. Select the message to be edited.
The message opens in the Message edit view.
2. Select and edit the message fields as required.
3. To add an attachment, tap and select Attach personal
details, Attach contact, Attach calendar entry and Attach to
do.
4. To send the message, tap . If the message being sent
is an e-mail.
The Send confirmation view displays.
5. Do one of the following:
•Select Yes to connect and send the message
immediately.
Or
•Select No to send the message later. If the message is not
sent immediately, it is placed in the Outbox
To delete a message from drafts:
1. With the e-mail or SMS message selected and the contents
displayed in the Drafts view, tap and select Delete.
The Delete confirmation view displays.
Note: If the Global delete preference is set to Do not confirm
deletions then this confirmation view does not display and the
record is deleted.
2. Tap Yes to confirm that the record deletion or tap No to
cancel the deletion.
Authentication in Dial-up Access
Static password
If a ‘Static password’ has been defined in the ISP settings, then
authentication will be performed using the stored User name and
Password.

144 Messaging
Access security “strong authentication”
Your R380 has built in one-time password generators, enabling
secure automatic connection to a corporate network for e-mail
and WAP services.
Your R380 supports authentication software from RSA Security
(Product name: RSA SecurID) and from Secure Computing
(Product name: SafeWord).
When you need access to a network requiring “strong
authentication”, an authentication PIN view is presented and
you are prompted to enter your PIN number.
Note: RSA SecurID uses UTC as a time reference when generating
one-time passwords. The R380 uses the concept of home and
destination time. The home time is always set to the time zone where
you “live” and the destination time is should be set to the time zone
where you currently are. The R380 has one internal clock, which is
always on UTC and the home and destination times are stored as
time zone offsets. See “Clock” on page 197 for more information on
time zones. The consequences of not being correctly synchronized
with your network server are that you will not have access to
corporate services such as access ing your email, etc.
Manual login
Your R380 also supports manual login, which means that a User
name view and a Password view are presented and you are
prompted to enter your User name and Password.
New e-mail allows you to create and send new e-mail messages.
Creating E-mails
To create and send a new e-mail message:
1. Do one of the following:
•Tap New e-mail on the Messaging desktop.
•If you are in the Inbox, Outbox, Drafts or Sent items
view tap and select New e-mail.
or
New E-mail
Messaging 145
•Tap the New entry icon .
The Message edit view displays.
2. Enter the recipients for the message:
•Tap the <Enter recipients> field and use the left and
right Alphabet scroll arrows and the up and down scroll
arrows to the right of the screen to locate and select the
recipient.
or
•If the intended recipient is not stored within your
Contacts database, select and enter the recipients e-
mail address.
Note: You can send an e-mail to more than one recipient by
selecting more than one recipient as long as each recipient’s
name is separated by a semi-colon(;).
3. If you want to copy the message to another recipient, enter
the recipients in this field: <Enter Cc recipients>
4. Tap an d sele ct <Enter subject> or tap . Enter your
message.
5. If you want to send the e-mail through an account that is
different from that shown as the default (the last account
used), tap and select Account: or tap . The pop-up
menu displays a list of accounts that you defined in the e-
mail settings. Select an account.
6. Tap an d sele ct <Enter message> or tap . Enter your
message.
Adding Attachments
1. Create an e-mail using the "Creating E-mail" instructions.
See “Creating E-mails” on page 144.
2. Before sending, tap and select the type of file to be
attached.
The pop-up menu has four alternatives which you can
choose from:
•Attach personal details - initiates the attaching of your
personal details in vCard format.
•Attach contact - allows you to select a Contacts record
from the Select contacts attachment list that displays.
abc

146 Messaging
•Attach calendar entry- allows you to select an
Appointment or All day event from the Select entry
attachment list that displays. Use the left and right Date
scroll arrows and the up and down scroll arrows to the
right of the screen to locate the calendar entry and select
it.
If the entry is a recurring event, then an “Attach which
occurrences” message appears in the display. Select All to
attach all occurrences or This one only to attach the
specific entry you selected.
•Attach to do - allows you to select a Calendar to do from
the Select to do attachment list that appears in the
display. Use the up and down scroll arrows to the right
of the screen to locate the To do and select it.
3. To send the e-mail, tap .
The Send confirmation view displays.
4. Do one of the following:
•Select Yes to connect and send the message
immediately.
Or
•Select No to send the message later. If the message is not
sent immediately, it is placed in the Outbox.
Note: If a connection to an Internet Service Provider (ISP)
is currently open and is different than your preferred ISP, a
confirmation message is displays “A connection to ‘Current
ISP’ is currently active. Do you want to disconnect from
‘Current ISP’ and connect to ‘Preferred ISP’?”.
Selecting the Yes button disconnects the current ISP and
reconnects to the preferred ISP then sends the message.
Selecting the No button maintains the connection to the
current ISP and places the message in the Outbox. If no
selection is made, the confirmation message times-out after a
few seconds and the e-mail is placed in the Outbox.
Mail Accounts

Messaging 147
PC mail accounts and e-mail accounts
When you enter a name in the PC mail account text box on your
computer, an account with the same name is created in your
R380 the first time you synchronize. All e-mails in your
computer synchronize with the e-mails marked with that specific
account in your R380. See “Future Synchronizations” on page 216
for more information on synchronizing.
If you have access to more than one computer, you must specify
different accounts (called PC mail accounts) for each computer.
When you synchronize, the e-mails marked with that specific
account synchronize. This ensures that e-mails associated with
different computers are not mixed up when synchronizing.
E-mail accounts
Different accounts can also be created in your R380 (called e-
mail accounts). These accounts contain the logon details to your
ISP (Internet Service Provider). See “Email account” on page
102 for more information on creating new accounts.
When you create a new e-mail in your R380, you have to choose
an account name from a list containing all the accounts created
on different computers (PC mail accounts) as well as the ones
created in you R380 (e-mail accounts).
Sending Mail from a PC Mail Account
If you choose a PC mail account, the e-mail is placed in the
Outbox folder of your R380. The next time you synchronize
with the computer that has the same account, the e-mail
transfers to the Outbox folder of your computer. If the computer
is connected to a network or mail server, the e-mail is
automatically sent and placed in the Sent folder.
Forwarding or replying to a PC mail message
When forwarding or replying to a pC mail it will normall be sent
as previously described. Should you want to forware or reply to
the message before you next synchronize with your PC, you may
do so by selecting a non-PC mail account.
Note: If you synchronize with your work e-mail and then reply
using Internet e-mail, your message will be transmitted over teh
148 Messaging
internet and will be less secure. It may be possible to access te same
account as your PC sync mail with dial-up networking.
To immediately forward or send a reply to a PC mail message
from you R380:
1. From the Inbox view, tap the required PC sync e-mail
message.
The message displays.
2. Tap and se le ct Forward, Reply, or Reply to all.
The New message view displays.
3. Select Account and change the account to one that is not a
PC mail account.
4. Change the To:\CC: to an e-mail address that can be used
with the selected account.
Tip! PC mail uses a different addressing scheme, such as, My
Colleague (Sales) </O=MyCompany/CN=ColleagueCode>,
and must be change to teh MyColleague@MyCompany.com
style of addressing.
5. Scroll to the subject header and message text, tand and edit
as required.
Note: The cursor is placed at the end of the text.
6. To send the message, tap .
The Send confirmation view displays.
7. Do one of the following:
•Select Yes to connect and sent the message immediately.
or
•Select No to forward the message at a more convenient
time. The message is placed in the Outbox and is sent
the next time you send messages from that account.
New SMS allows you to create new SMS messages.
New SMS

Messaging 149
To create and send a new SMS:
1. Tap New SMS in the Messaging tab or if you are in the
Inbox, Outbox, Drafts or Sent items view tap and
select New SMS.
The Message Edit view displays.
2. Enter the recipients of the message:
•Tap <Enter recipients> and use the left and right
Alphabet scroll arrows and the up and down scroll
arrows to the right of the screen to locate and select the
recipient.
or
•If the intended recipient is not stored within your
Contacts database, select and enter the recipient’s
mobile number.
Note: You can send an SMS to more than one recipient by
selecting more than one recipient as long as each recipient’s
name is separated by a semi-colon(;).
3. Tap an d sele ct <Request reply>. Select Yes or No from
the pop-up menu that displays.
If Yes is selected the recipient is requested to reply to your
SMS message.
4. Tap <Validity period > field. Select the period in which the
message is to remain valid from the pop-up menu that
displays.
5. Select <Enter message> field and enter your message.
6. To send the SMS message, tap . If the message is not
sent or is only delivered to some of the recipients, then an
appropriate warning message displays and the message is
placed in the Outbox folder. You can also see a list of
recipients who failed to receive the message.
Note: The number of characters allowed in an SMS is
limited. If the limit of your SMS is exceeded and the message
is then sent, a message appears asking if you want to send the
message concatenated (sent as multiple messages). Selecting
Yes temporarily changes the concatenation setting allowing
the message to be sent concatenated. After the message is sent,
123

150 Messaging
the setting reverts to its original setting. See “SMS” on page 97
for more information on concatenation settings.
If you select No, then you return to the New SMS view to
modify the message.
New E-mail or Fax Using SMS
To create a new e-mail or fax and send it via SMS:
1. When in the Inbox, Outbox, Drafts or Sent items view, tap
and select New e-mail via SMS or New fax via SMS.
The Message edit view displays.
2. Enter the recipients of the message:
•Tap <Enter recipients> and use the left and right
Alphabet scroll arrows and the up and down scroll
arrows to the right of the screen to locate and select the
recipient.
or
•If the intended recipient is not stored within your
Contacts database, select and enter the recipient’s
mobile number.
Note: You can send an e-mail/fax using SMS to more than
one recipient by selecting more than one recipient as long as
each recipient’s name is separated by a semi-colon(;).
3. Select <Enter message> field and enter your message.
4. To send the e-mail or fax via SMS, tap . If the message
is not sent or is only delivered to some of the recipients,
then an appropriate warning message displays and the
message is placed in the Outbox folder. You can also see a
list of recipients who failed to receive the message.
The Find feature allows you to search for a specific message in all
folders within the messaging application. A search can also be
initiated locally within a folder by selecting . This starts the
search in that folder only.
Note: Attachments are not searched.
Find
123
Messaging 151
To search for a specific entry in Messaging:
1. Tap Find on the Messaging desktop.
2. Enter a name (or part of a name) and tap to initiate the
search. The search is not case sensitive.
A search is then performed on the following fields of all
messages: To:, From:, Cc:, Subject: and the message body.
The Progress Message view displays. If required, a
button allows you to interrupt the search and display the
entries found up to the point of interruption. Otherwise,
all results display when the search is complete.
Tip! allows you to sort the search results by Date/Name
and to filter the search by specifying type. It also allows you to
change between detailed or summarized information.
3. Scroll to the message you want and select it.
The message appears in its appropriate view. (For example,
if the message is stored in the Sent items folder, it displays
in the Sent items view.
Note: If the entry you are looking for does not appear in the
search results you can carry out a further search by tapping
and entering a new search criteria.
Generate password allows you to initiate the generation of an
access password (one-time password). Generate password is only
valid if the setup for secure access has been performed. If secure
access setup has not been performed, then you will see the
message “To generate a password you must first enter the Access
Password settings”. Select OK. See the Secure Access chapter in the
Configuration Guide.
To generate an access password:
1. Tap Generate password on the Messaging desktop.
The Generate access password view displays.
2. Enter a Soft Token PIN code and tap on the toolbar.
The password displays.
Generate Password
Stop
152 Messaging
Area Information or SMS Message Notification
If you receive area information or a SMS message notification
when either the flip is opened or closed, the message
immediately appears in that view. If you then close the flip or
open the flip (depending on the current status), the area
information or a SMS message notification continues to display
until you have read the message.
To read messages:
1. When the message appears read.
2. When you have read the message, dismiss the message
using one of the following methods:
•With the Flip open, tap OK.
•With the Flip closed, press or .
If the message contains embedded links and is available in
the Inbox (if configured to be saved), then you can re-open
the message in the Flip open view and initiate a link by
tapping the link with the stylus.
Note: SMS message notifications appear in a similar format
to area information messages, except the message header is
‘Message’.
Tip! If the message text exceeds the display, use (Flip
closed) or and (Flip open) to view the remaining text.
Note: Short SMS messages are stored in the Inbox. If area
information has been configured to be stored, then it is also
stored in the Inbox.
Auto Configuration
Auto Configuration is a feature that allows your service provider
to remotely configure your phone with additional services or
changes to your account. Whenever you receive new auto
configuration settings, an auto configuration icon along with
the text “Auto configuration” appears in your Inbox.

Messaging 153
To auto configure your R380:
1. Select the auto configuration message in the Inbox.
The Auto configuration message view providies you with a
brief text message and operator identification.
The text message displays the type of setting to be
configured, ISP settings, Script settings, E-mail settings,
SMS settings, Voicemail settings, WAP settings or WAP
bookmarks and also the text “Configure now?”.
2. Do one of the following:
•Select Yes to initiate the auto configuration.
or
•Select No to perform the auto configuration later.
Inbox: 7 messages - 1 unread
18-05-2000
13.2kb
15-05-2000
2.0kb
12-05-2000
10.0kb
Ericsson John
Agenda for Friday’s meeting
+43155567890
How are you?
Auto configuration
Europolitan
Yes No
Auto Configuration
New ISP settings have been
received from Europolitan
Configure now?

154 Messaging
Calendar 155
Calendar
The Calendar application consists of an appointment book and a
to-do list. With the flip closed you can scroll to view an event
(untimed commitment), appointment (timed commitment) or
to-do. You can also use the scroll buttons to see all of the
description and, if a location is present, it is enclosed in brackets.
With the flip open there are five views (month, week, day, to-do
and a new appointment view). You can create, edit and delete
appointments, to-do items and all day events and also create
recurring appointments. You can also be reminded of upcoming
events or to-dos by setting a reminder to activate.
To access calendar:
1. Press until the date is highlighted.
2. Press and scroll to the event you want to view.
3. Press to scroll horizontally to view all the description
and location text associated with the event.
Tip! While accessing the Calendar press to return to
the main menus or press and hold to return to standby
mode.
Tip! Viewing the Calendar with the flip open, provides you
with a more detailed view.
To access calendar:
1. With the flip open, tap the Calendar tab.
2. Select the view you want: Month, Week, Day, To do or
New appointment.
18-05-2000
Emma’s birthday
10:30 Meeting wit
13:00 Lunch with
Month
Week
Day To Do New
appointment
Calendar
156 Calendar
When you select Month from the desktop, you are presented with
the view for the current month with the current date
highlighted..
A. Title Bar: The year and month appear in the title bar at the
top of the display. To display/choose from a list of years, tap the
year. You can move to the previous and future months by using
the left and right arrows.
B. Week Number: The week numbers are displayed down the
left-hand side. If you select a week number, then the week’s view
displays.
C. Day Section: The current day is shown in inverse video and
days that are not part of the current month are shown in grey. If
you select any day, then the view for that day displays, except for
those dates which are shown in grey and are outside the calendar
date range.
Days on which there are appointments are shown with a box
next to the date.
Days that have all day events are shown with a diamond next to
the date.
See “The toolbar” on page 33 for information on toolbar icons
and their functions.
Month View
May2000
M T W T F S S
01 02 03 04 05 06 07
08 09 10 11 12 13 14
15 16 17 18 19 20 21
22 23 24 25 26 27 28
29 30 31 01 02 03 04
05 06 07 08 09 10 11
Wk
18
19
20
21
22
23
A
B
C

Calendar 157
When you select Week from the top level menu, you are
presented with the view for the current week.
A. Title Bar: The month and week number show at the top of
the display. You can move to the previous and future weeks by
using the left and right arrows. Selecting the month takes you to
the month view.
B. Days: The days of the week (one-letter abbreviation for each
day of the week) and date appear below the title bar. Selecting a
day/date causes the day view for that date to display.
C. Time of Day: The time of day is shown on the left-hand
side of the display in two-hour increments.
D. Events/Appointments: Appointment areas are shown in
black. Selecting a black area causes the appointment to appear in
the display. Selecting an area that is not black causes the "Create
appointment" view to display, allowing you to create a new
appointment.
A small black diamond shaped marker at the top of a particular
day denotes an All day event.
A small arrow at the top of the week appointment area indicates
that an appointment starts before the time shown at the top of
that particular day. A small arrow at the bottom indicates that an
appointment ends after the last shown time for that day. You can
scroll to these areas using the scroll bar to the adjecent to the
toolbar.
Week View
Week 20 2000May
M T W T F S S
15 16 17 18 19 20 21
Wk
08:00
10:00
12:00
14:00
16:00
18:00
A
B
C
D
158 Calendar
The icons on the toolbar have similar functions to those
described previously.
When you select Day from the Calendar desktop, you are
presented with the view for the current day. Also, when you tap
and select Day view from the pop-up menu, when in the
Month or Week view, the first day of the currently viewed
month or week displays.
The day, date, and week number display in the title bar at the
top. You can move to the previous and future days by selecting
the left and right arrows. Selecting/tapping the week in teh title
bar displays the Week view corresponding to the day being
viewed.
The display can be viewed in summary view, shown above, or
detail view, shown below.
You can choose either of these views by tapping and then
selecting your preference from the menu, for instance, detail or
summary.
Day View
Emma’s birthday
10:30-12:30 Meeting with John Ericsson
13:00-14:00 Lunch with Pamela. Le Bistro, 21 King
Thursday 18-05-2000Wk 20
Emma’s birthday
(59 South Street)
10:30-12:30 Meeting with John Ericsson
(Conference room 2)
13:00-14:00 Lunch with Pamela. Le Bistro, 21 King
(Le Bistro, 21 King Street, )
Thursday 18-05-2000Wk 20

Calendar 159
Note: The current setting does not appear as an option when is
selected.
To Do
When you select To do from the top level menu, depending on
your settings, you are presented with the To do list in either
Summary view or Detail view.
To dos are listed by those not completed first, in chronological
order, followed by completed To dos.
Uncompleted To dos are shown with an empty box next to
them. Completed To dos have a tick in the box.
When you have completed a To do, select the empty box and a
checkmark is entered automatically. Clicking the box again
removes the checkmark.
Ta p pi n g New appointment in the Calendar tab displays the
dialog allowing you to create a new appointment or All day event
in your calendar. It can also be displayed from the Month,
Week, Today and To Do views by selecting the New button
or by selecting and then selecting New appointment.
Creating a New Appointment
To create a new appointment:
1. Tap New appointment in the Calendar tab.
The New appointment view displays.
2. Tap the <Type> field and select Appointment or All day
event.
•Appointment - this sets a timed appointment. It will
have beginning and ending times.
•All day event - this sets an appointment or event that
occurs all day. There are not any start or ending times.
3. Enter the appointment information. Once you have begun
to enter information, tap to move to the next
information field.
New Calendar Events

160 Calendar
•<Enter description> Subject description of the
appointment.
•<Location> Where the event or appointment takes
place.
•Start: / End: A calendar displays allowing you to select
the start date of the appointment.
•Notes Enter a brief description about any other
information you may need for the appointment.
4. Tap .
The New appointment view displays showing the details
you have selected.
5. To add a reminder, tap the Reminder: field and select On
from the pop-up menu.
The Time Before: field now displays.
6. Select the time period that you want to be reminded before
the appointment.
7. To make the appointment repeat, tap <None> and select
Daily, Weekly, Monthly by date, Monthly by week day or
Yearly.
The Interval: and Until: fields now display.
8. Select the interval and the end date of the repeat.
9. When you are finished making your selections for the
appointment, tap .
The appointment information displays. You can tap to
go back to the Calendar tab.
Creating a To Do
To dos can be created from a number of different views making
it convenient to add to the list wherever you like.
To c re a t e a new to do:
1. Access the New to do view in one of the following ways:
•From within one of the Calendar views (Month, Week,
etc), tap and then select New to do.
or
•Tap on the To do icon in the Calendar tab. Tap the
New button.
Calendar 161
2. Enter the To do information by tapping the appropriate
fields. Once you have begun to enter information, tap
to move to the next information field.
•Description <Enter description> A subject description of
the To do.
•Due: Select the due date of the To do.
•Reminder: Allows you to se a reminder for the To do.
•Notes: Notes pertaining to the To do.
3. Tap . The New to do view displays showing the details
you have selected.
4. To be reminded of the to do, tap the Reminder: field and
select On from the pop-up menu. The default is Off.
5. Tap th e Remind At: date and time fields and use the up and
down scroll arrows to select the date and time of the
reminder.
6. Select Notes: and enter a brief description about any other
information you may need for the To do entry.
7. When you are finished entering information for the To do,
tap .
The To do list displays.
Editing Calendar Entries
To edit a calendar entry:
1. From one of the Calendar views, tap the entry you want to
edit.
The details of the entry displays.
2. Tap and select the type of editing you require:
•Edit - only available if the Appointment or All day event
is not recurring.
•Edit this occurrence - only available if the Appointment
or All day event is recurring. Resets the Repeat: field to
None and any changes are applied to this occurrence
only.
•Edit all occurrences - only available if the Appointment
or All day event is recurring. Changes are applied to all
occurrences.
The Edit view displays.

162 Calendar
Tip! You can also tap the title bar. If the entry is not
recurring the Edit view displays. If the entry is recurring a
‘Repeating appointment’ message appears asking ‘Change
which occurrences?’. Select All to apply changes to all
occurrences or This one to apply changes to this occurrence
only.
3. Edit the entry as required then tap .
Deleting Calendar Entries
To delete a calendar entry:
1. From one of the Calendar views, tap the entry you want to
delete.
The details of the entry displays.
2. Tap and select the type of delete you want:
•Delete - only available if the Appointment or All day
event is not recurring.
•Delete this occurrence - only available if the
Appointment or All day event is recurring.
•Delete all occurrences - only available if the
Appointment or All day event is recurring.
The Confirm delete view displays.
Note: If the Global delete preference is set to Do not confirm
deletions then this confirmation view will not be displayed
and the record will be deleted.
3. Do one of the following:
•Tap the Yes button to confirm the deletion.
or
•Tap the No button to cancel deletion.
Cleaning up the Calendar
The Cleanup view allows you to delete entries older than a
specified date and can be performed from either the Month,
We e k, Tod a y and To Do views.
Calendar 163
To clean up the calendar:
1. From the Month, Week, Today or To Do view, tap
and select Cleanup.
The Clean up Calendar Entries view displays.
2. Select how old the entries are to be before they are deleted
and the type(s) of entry to be deleted.
3. Tap OK to initiate the cleanup process.
The Confirm delete view displays.
4. Do one of the following:
•Tap the Yes button to confirm the clean up.
•Tap the No button to cancel the deletion.
Sending and Receiving Calendar Items
You can send a specific Calendar event through infrared to
another device and also receive an event that has been sent by
infrared to you. You can either accept the event into the
Calendar or discard it.
To send an appointment or to do through infrared:
1. From one of the Calendar views, tap the Appointment, All
day event or To do you want to send.
2. Tap and select the type of send you require:
•Infrared send - only available if the Appointment or All
day event is not recurring.
•Infrared send this occurrence - only available if the
Appointment or All day event is recurring. Initiates the
sending of this occurrence only.
•Infrared send all occurrences - only available if the
Appointment or All day event is recurring. Initiates the
sending of all occurrences of this entry.
3. The Send through infrared progress view displays.
If, during transmission, you want to stop sending the
event, tap Cancel.
4. On completion, you go back to the event you selected.

164 Calendar
To receive an entry through infrared from another device:
1. Tap an d sele ct Infrared receive.
2. The Receive through infrared progress view displays. If,
during receipt, you want to stop receiving the entry, select
Cancel.
3. On completion, you go back to an appropriate view
displaying the latest received record.
Calendar Alarm
When the alarm activates at the set time, an audible alarm is
heard and a message displays indicating the time and the message
you entered for the calendar appointment or to do. The alarm
duration is two minutes and repeates after one minute, if not
switched off.
To switch off Calendar alarm:
Ta p OK to accept and switch off the alarm.
Switching off a calendar alarm:
Press to accept and switch off the alarm.
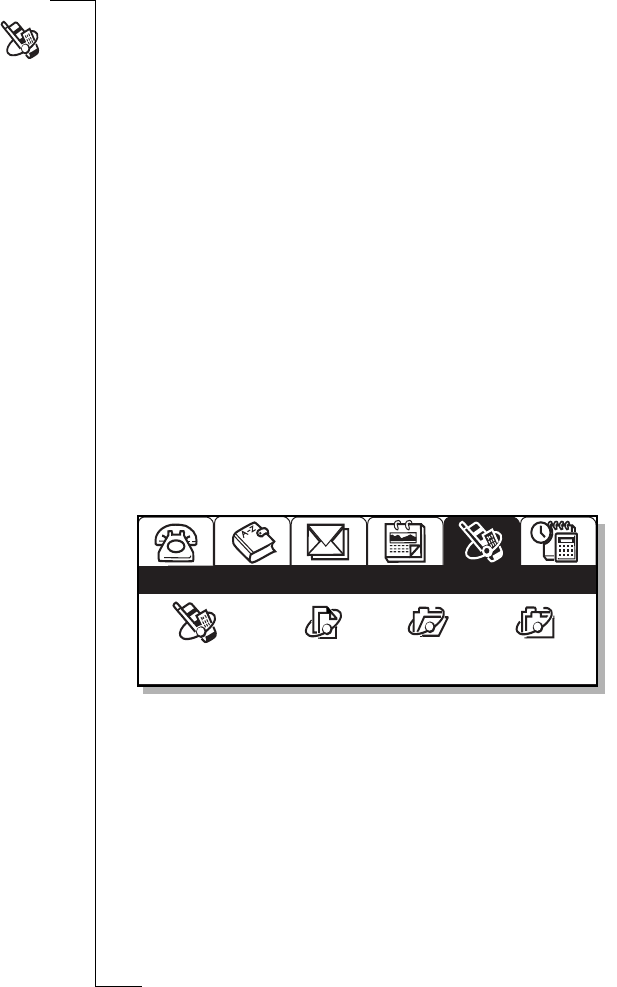
WAP Services 165
WAP Services
WAP Services is a program providing the functionality required
to browse the Internet. It consists of an Internet browser using a
standard called Wireless Application Protocol (WAP) and a
language called Wireless Mark-up Language (WML). This
standard was specially created for wireless communication
through mobile phones, such as your R380. The WAP services
browser is suitable for interaction with services such as ticket and
hotel reservations, or on-line banking and electronic commerce.
It can also be useful for accessing information such as weather
reports, timetables, share prices and exchange rates.
Note: The WAP services browser cannot read HTML web pages.
Using the WAP Services browser is similar to the way you use a
traditional web browser. Therefore this chapter concentrates on
actions that are specific to the WAP Services browser.
Note: Before you can start using the WAP browser, you must
configure your R380 to use this service. See “WAP Services Settings”
on page 104 and “Service Providers” on page 106 for more
information.
When viewing Bookmarks or History the amount of
information that displays can be changed by selecting one of the
following options from the View menu:
•Summary - displays one line of information consisting of the
page name.
WAP Services
Browser Bookmarks Open History
location

166 WAP Services
•Detail - displays a second line of information, consisting of the
location address.
The WAP services browser allows you to:
•Connect to the Internet and interact with specially-designed
WAP services.
•View pages on the Internet designed for WAP services.
WAP Services Page
A WAP services page is self-explanatory, where guidance to the
available information is through typical controls. A WAP
services page consists of the following components:
•a title bar with page titles, decks and cards
•a connection status icon:
Not connected
Connected
Loading in progress
•a scrollbar for scrolling up or down a page
•the actual contents of the page including text, images,
command buttons, hyperlinks, mailto links, phone call links,
choice lists, check boxes or text and number fields
•five toolbar buttons which perform the following functions:
Desktop returns the display to the main menus
Tasks displays a tasks pop-up file menu. This allows
you to perform a number of tasks
View displays a view pop-up menu. This allows you to
go to other views within the program
Back returns you to the previous WAP services page
(only available when more than one page has been visited)
Stop allows you to stop downloading (only available
when downloading)
Note: See “The toolbar” on page 33 for more information
on toolbar icons.
Browser
WAP Services 167
To open a location and view a page:
1. Tap Browser on the WAP services desktop.
The WAP services browser page displays.
2. Tap and se le ct Open location.
An Open location view displays.
3. Do one of the following:
•Enter a URL address. Tap to open the WAP services
page.
Or
•If you have previously visited one or more WAP services
pages, the location you require may be listed in the
history list. Tap and select History or see “History” on
page 171 for more information on loading previously
visited pages.
or
•If you have bookmarked WAP services pages, tap
and select Bookmarks or see “Bookmarks” on page 169
for more information on loading bookmarked pages.
4. Depending on whether or not authentication is required by
the web server or gateway, the following occurs:
•If authentication is required by the web server, the Enter
web server password view appears displaying the web
address in the Resource: field. Select the User name: and
Password: fields and enter your username and password.
Tap to initiate the authentication.
•If authentication is required by the gateway, the Enter
gateway password view appears displaying the gateway
address in the Resource: field. Select the User name: and
Password: fields and enter your username and password.
If you want the password to be used with the current
gateway in the future, select Save password: and select
Yes from the pop-up menu. Tap to initiate the
authentication.
Note: While you are browsing you may find that
authentication is required by some of the locations you visit.

168 WAP Services
To copy all or selected text:
Ta p a n d sele c t
Copy all text or Copy selected text (having
first selected the text to be copied).
To reload the currently viewed page:
Ta p a n d sele c t
Reload page.
To disconnect from the Internet:
Ta p a n d sel e c t Disconnect. When you see the message “Are
you sure you want to disconnect from the service provider?”,
select Yes to disconnect. The connection status symbol changes
to show you are disconnected.
Note: See “WAP Services Settings” on page 104 for information
on changing the settings.
Ericsson’s WAP services portal
A great starting point for exploring WAP services is Ericsson’s
WAP services portal at http://mobileinternet.ericsson.se. It
provides you with easy access to a multitude of information, and
is handy when you are on the move. The following example
shows how you can get train timetable information:
1. Tap Browser on the WAP services desktop.
The WAP services browser page displays.
2. Tap a n d s elec t Open location.
An Open location view is displays.
3. Enter Ericsson’s WAP services address
(http://mobileinternet.ericsson.se).
Note: If you have more than one internet service provider,
then the Select service provider view displays so that you can
choose a provider. Select a service provider from the list and
tap .
4. Tap to open the WAP services page.
This starts the connection to the Internet and loads the
page and the connection status symbol changes to show
you are connected.

WAP Services 169
5. The first page displays, containing links to different types
of services. Tap the Information link.
6. A second page displays with links to such things as news,
financial, weather and rail services
7. Tap the links that interest you.
Ending the browsing session
To end the session:
Ta p a n d sele c t
Disconnect. When you see the message “You
will be disconnected from Internet”, select Yes to disconnect. The
connection status symbol changes to show you are disconnected.
A quick way of accessing a WAP services page that you have
previously visited, is to bookmark it. A bookmark is a “place
holder” you assign to a page. By doing this, you can quickly find
your way to that page without having to type its web address.
To open a bookmarked WAP services page:
1. Do one of the following:
•Tap Bookmarks on the WAP services desktop.
or
•Tap and sel ect Bookmarks.
The Bookmarks view appears displaying a list of all saved
bookmarks.
2. Scroll and select the bookmark you want to load.
The chosen WAP services page opens.
To bookmark a WAP services page you are currently viewing:
1. With the page you want to bookmark displayed, tap
and select Add current to bookmarks.
The Add Current to Bookmarks view displays.
2. Select the Name: field and enter a name for the bookmark,
or keep the default name.
3. The Location: field displays the URL address. Do not
change the address as it is required by the bookmark for
connection.
4. Tap to save the bookmark.
Bookmarks

170 WAP Services
The bookmark is now stored and you can easily open the
bookmarked page the next time you want to access it.
To add a new bookmark:
1. Tap Bookmarks on the WAP services desktop.
The Bookmarks view displays.
2. Tap and se le ct New bookmark.
The New bookmark view displays.
Note: You can also tap and select New bookmark when
in the Edit bookmarks view.
3. Select the Name: field and enter a name for the bookmark.
4. Select the Location: field and enter a URL address for the
bookmark.
5. Tap to save the bookmark.
The bookmark is now stored.
To edit a bookmark:
1. Tap Bookmarks on the WAP services desktop.
The Bookmarks view displays.
2. Tap and se le ct Edit bookmarks.
The Edit bookmarks view displays a list of all bookmarks.
3. Select the bookmark to be edited or deleted.
The Edit ‘Bookmark name’ view displays.
4. To edit the bookmark, select the Name: and/or Location:
field and edit as required.
5. Tap to save the changes to the bookmark.
The edited bookmark is now stored and the Edit
bookmarks view displays.
To delete a bookmark:
1. Tap Bookmarks on the WAP services desktop.
The Bookmarks view displays.
2. Tap and se le ct Delete.
The bookmark is deleted and the Edit bookmarks view
displays.
WAP Services 171
To return to the WAP services browser:
Ta p a n d sele c t
Browser. The WAP services browser page
displays.
Open location provides you with a short cut to opening and
viewing a page.
To open a location and view a page:
1. Tap Open location on the WAP services desktop.
An Open location view displays.
2. Select the Go to location: field and enter a URL address.
3. Tap to open the WAP services page.
4. Depending on whether or not authentication is needed, the
following occurs:
•If authentication is required by the web server, the Enter
web server password view appears displaying the web
address in the Resource: field. Select the User Name:
and Password: fields and enter your username and
password. Tap to initiate the authentication.
•If authentication is required by the gateway, the Enter
gateway password view appears displaying the gateway
address in the Resource: field. Select the User Name:
and Password: fields and enter your username and
password. If you want the password to be used with the
current gateway in the future, select Save Password: and
select Yes from the pop-up menu. Tap to initiate
the authentication.
History allows you to connect quickly to a WAP services page
that you have previously visited. The history contains a list of the
last few pages you have viewed. You can set the number of pages
that are saved in the list. See “History” on page 106.
Open Location
History

172 WAP Services
Using History
To open a WAP services page from the History list:
1. With the flip open, tap History on the WAP services
desktop.
or
If browsing, tap and select History.
The History view appears displaying a list of previously
visited pages.
Note: If a previously visited page is a bookmark, then the
bookmark name is displayed instead of the URL.
2. Scroll and select the URL or bookmark you want to load.
The chosen WAP services page opens.
To clear history contents:
1. With the flip open, tap History on the WAP services
desktop.
2. Tap and select Clear history.
3. If the Delete confirmation is active, you are asked if you
want to continue. Do one of the following:
•Tap Yes to continue and delete all of your history items.
or
•Tap No to return to the History view.
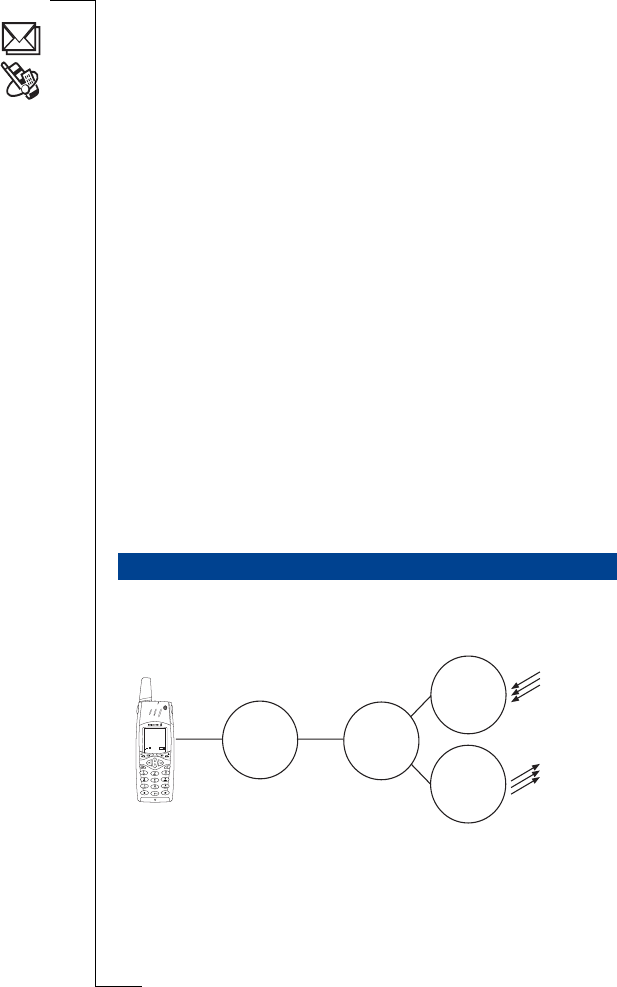
Getting started with E-mail and WAP 173
Getting started with
E-mail and WAP
Before the R380 can access e-mail and WAP you must enter
specific user related details. When you are ready to start using e-
mail and WAP you will need a service provider to connect your
R380 to the network.
The service provider could be:
•an internet service provider which connects you to the
internet.
•an access point provided by your network operator.
•a private service provider such as your company or your bank.
You need to enter specific service provider details into the R380.
The R380 can hold the details of multiple service providers, for
example, you may have separate internet and corporate accounts.
Your network operator or retailer may have pre-installed e-mail
and/or WAP services, check with them.
When you are using e-mail, your R380 has to follow the steps
outlined below:
For e-mail connection you will need:
•a network operator subscription with GSM data connection.
•a service provider.
•details of the incoming and outgoing servers.
E-mail Set Up
GSM Data Service
ProviderConnection
Incoming
Mail
Server
Mail
Server
Outgoing
Incoming
Mail
Outgoing
Mail
NETWORK
18-05-00
12:00
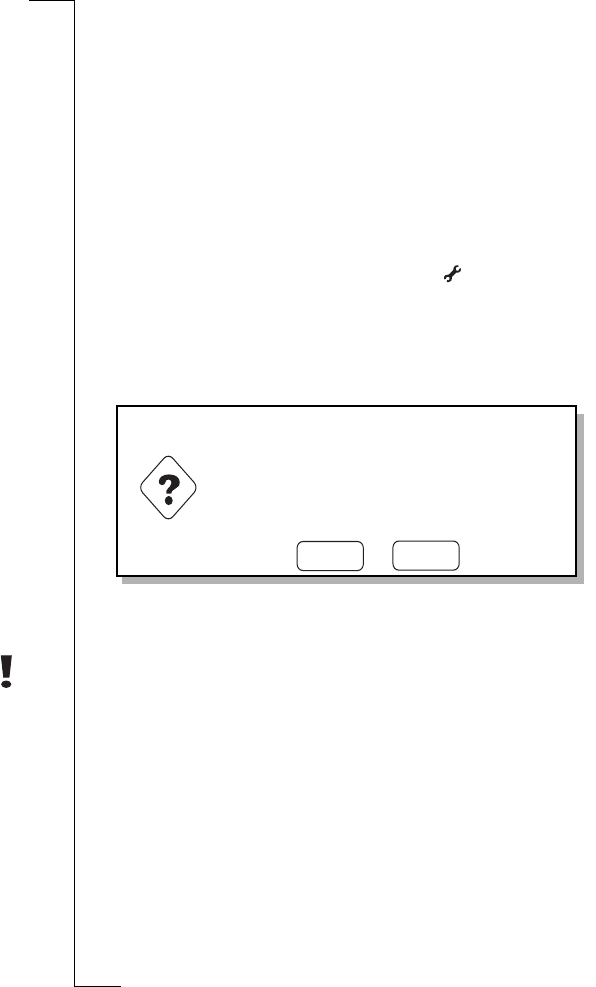
174 Getting started with E-mail and WAP
Automatically set up Service Provider and E-mail
The easiest way to set up the R380 is automatically, through
your service provider. Check your service provider’s web site for
information or telephone/e-mail their support desk and ask
about automatic remote configuration.
If remote configuration is possible, tell your service provider that
you require internet service provider and e-mail settings, they
will send you an auto configuration message for these by SMS.
To automatically set up service provider and e-mail:
1. When the auto configuration messages appear in the
R380 inbox, select it.
2. A brief text and operator message displays with the message
Configure now?. To initiate the auto configuration, select
Yes. To perform the auto configuration later, select No.
3. Send an e-mail to test the new settings, see “Sending an E-
mail for the First Time” on page 180 for more details.
Warning! Never accept remote configuration messages if you are
not expecting them or are unsure where they have come from.
Manually set up Service Provider and E-mail
Alternatively you can enter the service provider and e-mail
settings yourself.
First collect all the information you will need. You can obtain
this information from one of the following sources:
•If your mobile operator offers an e-mail service you can get
the necessary details from them.
•Your internet service provider.
Yes No
Auto Configuration
New ISP settings have been
received from Europolitan
Configure now?

Getting started with E-mail and WAP 175
•Your IT Manager in the case of connecting to the corporate
network to access your work e-mail account.
•Your current PCs internet service provider settings (allows
your R380 to access the same e-mail accounts as your PC).
Note: Some PC based e-mail services use proprietary standards
that will not work on the R380.
You will need to collect all the data listed below before you can
set up your e-mail.

176 Getting started with E-mail and WAP
Needed information
Required Actual Useful information
Telephone
number
Number you need to dial to reach
your service provider. Use the full
number including country code and
area code, for example: +46 33 555
2525
Bearer
capability
ISDN or
Analogue?
If your network operator and service
provider offer ISDN, select ISDN,
otherwise select Analogue. ISDN
offers faster connect time
Username The username your service provider
gave you when the account was set up
Password Password associated with the
username, given to you by the service
provider. (If you are accessing a
corporate site, this may be generated
by a card, see your IT Manager to be
set up to use the R380 password
generation facility)
IP
assignment
Server /
Static
An 'address' that the service provider
knows you by and uses to route
information to and from you. Your
IP address will either be:
Server - assigned by the service
provider when you connect.
Static - assigned once by the service
provider or the IT Manager.
If your IP address is Static you must
enter it into Own IP address, which
appears when you select Static

Getting started with E-mail and WAP 177
DNS
assignment
Server /
Static
This tells the R380 where to find the
service provider’s 'named server'.
R380 needs this in order to find
services like WAP sites on the
network.
The DNS can be static or allocated
by the service provider when you
connect, server. If static is selected
additional fields need to be
completed containing the static
information
Own IP
address
Only required if the IP assignment is
static.
Format example: 123.9.45. 3. Do not
enter any leading 0s when typing in
IP address
Primary
DNS
Only required if the DNS assignment
is static.
Format example: 123.9.45. 2
Secondary
DNS
Only required if the DNS assignment
is static.
Format example: 123.9.45. 1
Required Actual Useful information
e-mail
address
Use your normal e-mail address,
for example:
fred@myserviceprovider.com or
me@acmeservices.com. Any
e-mails that you send are shown
as ‘from’ this address when the e-
mail is opened by the recipient
Protocol
POP3 /
IMAP4
POP3 is commonly used by
internet service providers

178 Getting started with E-mail and WAP
Note: In the above table the white area refers to service provider set
up and the shaded area refers to e-mail set up.
Username The username your service
provider gave you when the
account was set up.
It may be your e-mail address or
the part before the @. This could
be the same as the username for
service provider access, as above
Password Password associated with the
username, given to you by the
service provider. This could be
the same as the password for
service provider access, as above
Outgoing
(mail)
server
Your service provider’s mail server
for sending outgoing mail
(SMTP server),
e.g.mail.acmeservices.com or
stmp.myserviceprovider.com
Incoming
(mail)
server
Your service provider’s mail server
where you inbox is located
(POP), e.g.
mail.acmeservices.com or
pop3.myserviceprovider.com
Reply to R380 copies your e-mail address
into here by default. If you
require replies to your e-mails to
go to a different address enter it
here

Getting started with E-mail and WAP 179
Manually Set up a Service Provider
To manually set up a service provider:
1. With the flip open, tap Extras, System, Preferences and
Service Providers.
2. Tap an d sele ct New service provider.
3. Use the information from the previous table, see “Needed
information” on page 176, to complete the form. Use the
scroll bar to see all the items.
Additional fields you need to fill in are:
Name: A name which identifies the service provider when
you connect to e-mail or WAP, you can enter anything, e.g.
Acme Internet, WAP SP, BigCorp
Confirm Password: A check to make sure that you have
entered the password correctly
4. Once all the details are entered, tap .
You have successfully set up your service provider, the next
step is to set up an e-mail account.
Manually Set up E-mail
1. With the flip open, tap Extras, System, Preferences and
Messaging. From the messaging display select e-mail
accounts (you need to scroll down to find it).
2. Tap the and se le ct new e-mail account.
New service provider
Name:
Tel. number:
Bearer capability:
Username:
Password:
Confirm password:
<Enter name>
<Enter phone number>
<Enter password>
<Enter password>
<Analogue>
<Enter username>
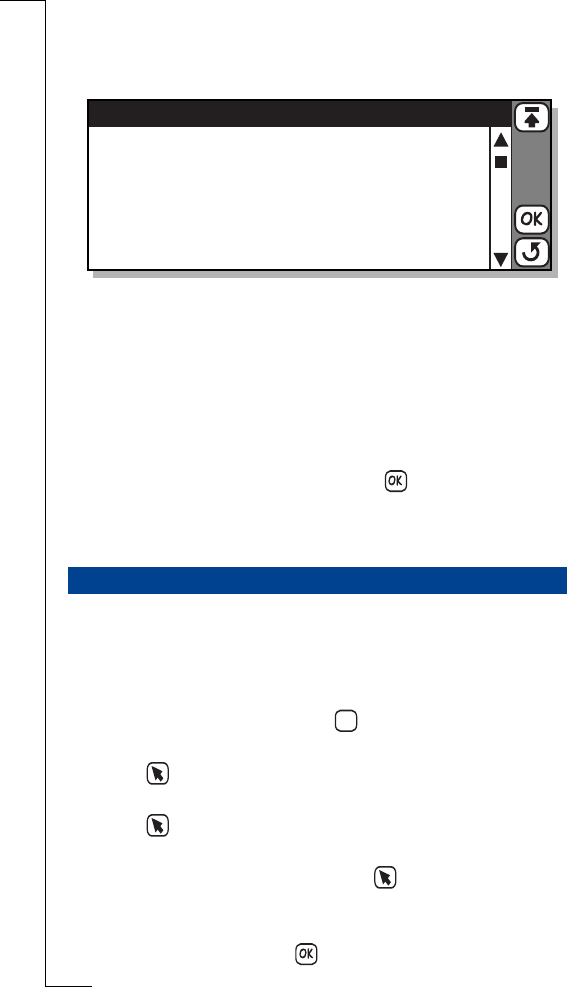
180 Getting started with E-mail and WAP
3. Use the information from the previous table, see “Needed
information” on page 176, to complete the form. Use the
scroll bar to see all the items.
An additional field you need to fill in is:
Name: A name which identifies the e-mail account, you
can enter anything, e.g. fred’s mail
4. If you need any help contact your service provider or
Ericsson Mobile Internet at
http://mobileinternet.ericsson.com.
5. Once all the details are entered tap .
You have successfully set up your e-mail account, the next
step is to send an e-mail to check it is working.
Creating and Sending a New E-mail Message
1. Tap Messaging and select New e-mail on the Messaging
desktop.
The New e-mail message screen displays.
2. Tap <enter recipients> select and enter the recipients e-
mail address.
3. Tap an d sele ct <Enter subject>, type in a subject e.g.
test mail.
4. Tap an d sele ct <Enter message>. Enter your message.
5. You must send the e-mail using your new account. If a
different account is displayed tap and select Account:.
The pop-up menu displays a list of accounts that you
defined in the e-mail settings. Select the new account.
6. To send the e-mail, tap .
Sending an E-mail for the First Time
My service provider
Name:
E-mail address:
Protocol:
Username:
Password:
Confirm password:
<myserviceprovider>
<fred@myserviceprovider.com>
<fred>
<**********>
<**********>
<POP3>
abc

Getting started with E-mail and WAP 181
The Send confirmation view displays.
7. Select Yes, if a list appears select the service provider
associated with the new e-mail account and tap .
The R380 connects and forward the message immediately.
Connecting and Reading the Inbox for the First Time
1. Tap Messaging and select Inbox on the Messaging desktop.
The Inbox screen displays.
2. Tap an d sele ct Connect.
3. One of the following occurs:
•If you have more than one e-mail account, you are
presented with a Select e-mail account view. Select your
new e-mail account and tap .
•If you have more than one internet service provider, you
are presented with a Select service provider view. Select
the service provider associated with your new account
and tap .
A Progress Message view displays informing you of the
current status of the connection: Dialing....;
Authenticating...; Connecting....; Sending....Getting
Headers.
4. Select the message or messages you want to read, or tap
and select Select all.
5. Tap an d sele ct Copy to inbox (a copy of the original
message is retained on the server) or Move to inbox
(original message is removed from the server). If you want
to read mail from the e-mail account on a PC as well as the
R380 copying allows the e-mail to be collected later by the
PC.
6. On completion, tap and select Disconnect. The remote
server connection is severed and the messages appear in
your Inbox. Alternatively, the connection is severed if no
activity is detected over a period of time.
The message is now displayed in your Inbox.
7. Tap to read.

182 Getting started with E-mail and WAP
Using E-mail with Several Configurations Installed
Your R380 can read mail from several e-mail accounts. When
you select an e-mail account to connect to, see above, it is
important that you select the service provider associated with
that account. Otherwise the send mail operation may fail and
you will be unable to access the remote inbox. Try to set the
names of the internet service provider and the e-mail accounts so
that you will easily remember which one to use, e.g. SP Acme
Internet, Mail at Acme.
To contact a WAP site from the R380 you must have set up:
•a network operator subscription with GSM data connection.
•a Service provider.
•a WAP gateway.
GSM Data Service
Your network operator needs to give you access to GSM data
service which allows you to make a data call to the service
provider. If you are unsure contact your network operator and
enquire whether your phone will accept data calls.
Service Provider
Your service provider could be any of the following:
•an access point provided by your network operator.
•your internet service provider.
•a private service provider, e.g. your company or bank.
You need to enter specific service provider details into the R380.
The R380 can hold the details of multiple service providers, this
is because you may have separate internet and corporate
accounts. For more details see “Manually Set up a Service
Provider” on page 179.
WAP
WAP
Site
WAP
Gateway
Service
Provider
Network
Provider
NETWORK
18-05-00
12:00

Getting started with E-mail and WAP 183
WAP Gateway
The WAP gateway sits between the R380 and the WAP site
coding and decoding information. You can set up details of more
than one gateway if necessary, e.g. one to access corporate data
over WAP, another to access your bank's WAP service.
Automatically set up WAP
The easiest way to set up the R380 is automatically, through
your service provider. Check your service providers web site for
information or telephone/e-mail their support desk and ask
about automatic remote configuration.
If remote configuration is possible, tell your service provider that
you require WAP settings, they will send you an auto
configuration message by SMS. Confirm that your GSM
subscription is data enabled at the same time.
To automatically set up WAP:
1. The service provider will send a special SMS message to
your R380.
2. When the auto configuration message appears in the
R380 inbox, select it.
3. A brief text and operator message appears on the display
with the message Configure now?. To initiate the auto
configuration, select Yes. To perform the auto
configuration later, select No.
4. Access a WAP site to test the new settings.
Warning! Never accept remote configuration messages if you are
not expecting them or are unsure where they have come from.
Manually set up WAP
Alternatively you may enter the information yourself.
Note: You need to set up your internet service provider before you
can set up WAP, see “Manually Set up a Service Provider” on page
179 before continuing.
First collect all the information you will need. The service
provider you need to contact for details will be one of the
following:

184 Getting started with E-mail and WAP
•Your network operator.
•Your internet service provider.
•Your IT Manager in the case of connecting to the corporate
network to get work e-mail.
•The organization offering the service e.g. bank. You will need
to collect all the data listed below before you can set up your
WAP.
Note: You will need to obtain the items marked in bold from your
service provider.
Set up a New Gateway
To set up a new gateway:
1. Tap Extras, select System, Preference, WAP services,
Gateway from the display.
The Gateway Settings view displays.
2. Tap an d sele ct New gateway.
The New gateway view displays.
Required Useful Information
Name A name which identifies the gateway account,
make it memorable, e.g. network operator
services
IP number Tells the R380 where to find the gateway on the
network. The format is 4 numbers separated by
dots, e.g. 123.456.3.124
User ID Some gateways have additional security
precautions which require a username and a
password to access WAP services. This is
optional leave blank if not required.
Password Some gateways have additional security
precautions which require a username and a
password to access WAP services. This is
optional leave blank if not required.
Connection Set this to Connectionless unless your service
provider has advised you to select the alternative
setting of Connection oriented.

Getting started with E-mail and WAP 185
3. Use the information you collected above to complete the
form.
4. To set the gateway as the current (default) gateway, tap
and select Set as current.
5. Tap to implement and save the new settings.
The display returns to the Gateway Settings view.
Note: Although supported, the User Id. and Password are
not always necessary and can be left empty.
To use WAP for the first time:
1. Tap Browser on the WAP services desktop.
The WAP services browser page displays.
2. Tap and se le ct Open location.
An Open location view displays.
3. Do one of the following:
•Enter a URL address, e.g. the home page for the service
provider you are setting up or try
http://mobileinternet.ericsson.com if the service
provider gives access to WAP sites on the internet. Tap
to open the WAP services page.
or
•If authentication is required by the web server, the Enter
web server password view appears displaying the web
address in the Resource: field. Select the User name: and
Password: fields and enter your username and password.
Tap to initiate the authentication.
Using WAP for the First Time
186 Getting started with E-mail and WAP
•If authentication is required by the gateway, the Enter
gateway password view appears displaying the gateway
address in the Resource: field. Select the User name: and
Password: fields and enter your username and password.
If you want the password to be used with the current
gateway in the future, select Save password: and select
Yes from the pop-up menu. Tap to initiate the
authentication.
Note: While you are browsing you may find that
authentication is required by some of the locations you visit.
Using WAP with Several Configurations Installed
You can have several WAP configurations set up on your R380,
for example one from your network operator and one from your
company. To access the service you want it is important to select
the correct service provider and gateway when dialling. For
example, a bookmark might only work with the same
combination of service provider and gateway that was in use
when the bookmark was initially saved. If you cannot access a
bookmark you might solve the problem by changing the SP or
Gateway settings.
To select the service provider from the list presented when you
make a connection:
1. Make a connection.
2. Tap the required service provider to highlight it (the last
service provider you used will be highlighted by default).
3. Tap to initiate connection.
If you need to change the gateway, you may do so before
connecting or during a connection:
1. Tap Extras, select System, Preference, WAP services,
Gateway from the display.All of the configured gateways
will be listed with (Current) indicating the one in use.
2. Tap the required gateway to select it.
3. Tap and se le ct Set as current.
4. Tap , the selected gateway will now become the current
gateway.

Getting started with E-mail and WAP 187
If you want to use your R380 with the same internet service
provider as your PC, the following table tells you where you can
find the necessary settings.
1. On the Windows desktop double-click My Computer,
double-click Dial-Up Networking and click on the icon
representing the internet service provider to be set up on
the R380
Locating Settings in Windows 95 or 98
Name The name under the icon in Dial Up
Networking. The name can be changed to
something more memorable.
Tel. Number Right click on the icon and select Properties.
Look in the Area Code and Telephone Number
fields. Enter the number in to the R380
including both area code and telephone
number, preferably in GSM international
format. For example Swedish area code 033 and
telephone number 555 2525 may be entered to
the R380 as 0335552525 (will work in Sweden
only) or +46335552525 (works in Sweden and
other countries)
Bearer
Capability
If your PC uses a regular modem select
Analogue. If your PC uses ISDN and your
network operator supports it, select ISDN.
Username Click Cancel to close the dialog box.
Double click the icon to display the Connect
To d i alog.
See the User Name: field.

188 Getting started with E-mail and WAP
2. Click Cancel to close the windows dialog.
Password The password you normally enter in the
Password box beneath the User Name. If
Windows remembers this for you it will be
shown as **** - entering *** into your R380
will not work!
Contact your internet service provider if you
have forgotten the password
IP
Assignment
Click Cancel to close the Connect To dialog.
Right-click on the icon and then click on
Properties. Select the Server Types tab and
click the TCP/IP Settings button to view the
TCP/IP Settings dialog.
If Server Assigned IP Address is checked
then leave R380s set to <Server>.
If Specify an IP Address is checked then
change to Static and an extra field, Own IP
Address is added to the list of items you need
to fill in.
DNS
assignment
If Server Assigned IP Address is checked
then leave R380s set to <Server>.
If Specify an IP Address is checked then
change to Static, two extra fields are added to
the bottom of the list of items you need to fill
in.
Own IP
Address
Enter the IP address shown in the 'TCP/IP
Settings dialog in to the R380
Primary DNS Copy from the Primary DNS which is shown
in the dialog.
Secondary
DNS
Copy from the Secondary DNS which is
shown in the dialog.

Extras 189
Extras
Your R380 provides you with access to a number of additional
functions, which you will find on the Extras desktop. There are
five functions available in the Extras.
•Notepad
•Clock
•Calculator
•Game
•System
To access the Extras tab:
With the flip open, tap the Extras tab at the top of the screen.
This program allows you to keep notes and other useful
information, such as agendas and minutes of meetings; lists of
training courses and their associated costs; shopping lists; and
Christmas card lists.
Notepad
93
12
6
Notepad Clock Calculator Game System
Extras
190 Extras
To enter the notepad program:
Ta p Notepad on the Extras desktop. The Notepad view displays
listing all existing entries.
Using the Notepad
New entry
To create a new note in the notepad:
1. From the Extras desktop, tap Notepad.
2. Tap an d sele ct New note or tap .
3. Enter a subject header for the note and tap Enter (carriage
return) on the keypad.
4. Enter the body text and tap .
Editing notepad entries
To edit an entry in the notepad:
1. From the Extras desktop, tap Notepad.
2. Select the entry you want to edit from the list that appears
in the Notepad view.
3. Tap an d sele ct Edit or tap the tittle bar.
4. Edit the note and tap .
Deleting notepad entries
To delete an entry from the notepad:
1. Select the required entry from the list that appears in the
Notepad view.
2. Tap an d sele ct Delete.
The Confirm delete view displays.
Notepad
18-05-2000
17-05-2000
17-05-2000
15-05-2000
14-05-2000
12-05-2000
Minutes for meeting (attendees: John
Agenda for meeting (18 May)
Dear John,
Shopping list
Training courses for June
Hi Jose, just a quick note to let you know

Extras 191
Note: If the Global delete preference is set to Do not confirm
deletions this confirmation view does not display and the
record is deleted.
3. Do one of the following:
•Tap the Yes button to confirm the deletion.
Or
•Tap the No button to cancel the deletion.
Find
Find allows you to search for a specific entry in the Notepad.
To search for a specific entry in notepad:
1. Tap on the toolbar or Tap and select Find.
2. Enter a word or part of a sentence relevant to the note that
you want to view and tap to initiate the search.
3. A list of notepad entries containing the search criteria
display when the search is complete.
4. Scroll to the note you were looking for and select it.
The note displays.
Note: If the entry you are looking for does not appear in the
search results you can carry out a further search by tapping
again and entering new search criteria.
The Clock program allows you to set the current time and date
in your current location (Home) as well as in another location
(Destination). You can also set the clock to daylight savings time.
Along with the time and date feature is an Alarm feature. One
way in which it might be used is as your alarm clock to wake you
up.
Clock
93
12
12
6
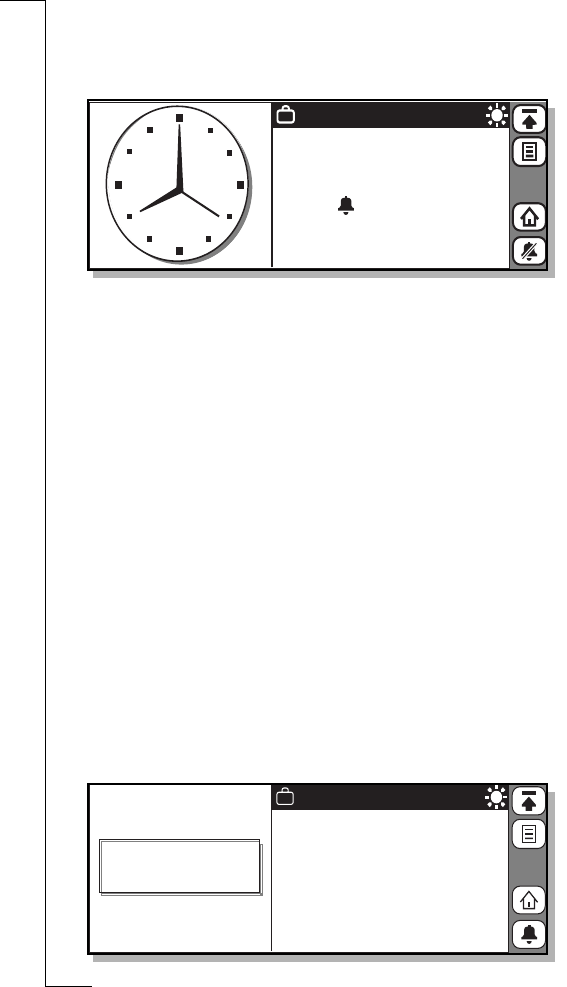
192 Extras
To enter the clock program:
From the Extras desktop, tap Clock. When you first enter the
program you see the Clock view.
The default view of the clock displays a clock on the left of the
screen, which can be either analog or digital.
Changing the Display
You can change the way the clock displays; either digital or
analog.
To change the clock display:
Tap the currently displayed clock to change to the alternative
clock.
Changing the Location
The right section of the screen displays one of the two locations,
your current location (Home) and your destination location
(Destination).
To change the displayed location:
Ta p the Home/Destination toggle button on the toolbar or the
title bar to switch between the two locations. The locations are
selected from a list of pre-defined time zones.
18 May 2000
07:00
Timezone: UTC+0
Destination
18-05-2000
Timezone: UTC+0
Destination
8:00 pm

Extras 193
Setting the Current and Destination Time Zone
To select the current and destination time zone:
1. Tap an d sele ct Timezones.
The Timezones view displays.
2. Select the Auto timezone to specify whether or not the
destination clock is to use network time.
Your options are:
•On - a network time update is received
•Off - Auto timezone is not used and must be manually
set.
Note: Network time is not supported by all networks.
3. To specify how the timezones are displayed, tap the
Timezone Display and select UTC+offset, for instance, Co-
ordinated Universal Time (UTC) + number of hours of
offset, or Zone name, such as CET (+1 (number of hours
of offset from UTC/)).
Note: UTC (Co-ordintated Universal Time) is the same
thing as GMT (Greenwich Mean Time). See “UTC and
timezone table” on page 194.
4. Select Home zone: and use the left and right scroll arrows to
select the required time zone.
5. Select Destination zone: and use the left and right scroll
arrows to select the required time zone.
6. Select the Daylight saving section you want to change, for
example, Home or Destination, and select On or Off.
7. Tap to accept and save any changes you have made to
the time zones.
Timezones
Auto timezone:
Timezone display:
Home zone:
Daylight saving:
Destination zone:
Daylight saving:
<On>
<UTC + Offset>
<Off>
<Off>
UTC+0
UTC+0

194 Extras
The display returns to the Clock view.
Note: If at any time during the above operation you decide
to cancel, select . The display returns to Clock view.
UTC and timezone table
UTC Time Zones
+0:00 GMT - Greenwich Mean (default)
UT or UTC - Universal (Co-ordinated)
WET - Western European
-1:00 WAT - West Africa
-2:00 AT – Azores
-3:00
-3:30
-4:00 AST - Atlantic Standard
-5:00 EST - Eastern Standard
-6:00 CST - Central Standard
-7:00 MST - Mountain Standard
-8:00 PST - Pacific Standard
-8:30
-9:00 YST - Yukon Standard.
-9:30
-10:00 AHST - Alaska-Hawaii Standard
CAT - Central Alaska
HST - Hawaii Standard (default)
-11:00 NT - Nome.
-12:00 IDLW - International Date Line West
+1:00 CET - Central European (default)
FWT - French Winter
MET - Middle European
MEWT - Middle European Winter
SWT - Swedish Winter.
+2:00 EET - Eastern European, Russia Zone 1
+3:00 BT - Baghdad, Russia Zone 2
+3:30
+4:00 ZP4 - Russia Zone 3

Extras 195
Setting the Time
To set the time:
1. With the flip open and on the Extras desktop, tap Clock.
The Clock view appears
2. Tap an d sele ct Set time.
The Set time view displays.
3. Use the up and down scroll arrows to set the time or tap
the clock face and move the Hour and Minute hands to set
the time.
4. If the date format is set to AM/PM, tap to change the
currently displayed time by 12 hours.
5. Tap to accept the new time.
The display returns to the Clock view.
Note: If at any time during the above operation you decide
to cancel, select the . The display returns to Clock view.
+4:30
+5:00 ZP5 - Russia Zone 4
+5:30
+5:45 Local Nepal Time
+6:00 ZP6 - Russia Zone 5
+6:30
+7:00 WAST - West Australian Standard
+8:00 CCT - China Coast, Russia Zone 7
+9:00 JST - Japan Standard, Russia Zone 8
+9:30
+10:00 EAST - East Australian Standard (default)
GST - Guam Standard, Russia Zone 9
+10:30
+11:00
+12:00 IDLE - International Date Line East
NZST - New Zealand Standard
NZT - New Zealand (default)
UTC Time Zones

196 Extras
Setting the date
To set the date:
1. With the flip open and on the Extras desktop, tap Clock.
The Clock view appears
2. Tap an d sele ct Set date.
The Set date view displays.
3. Use the left and right scroll arrows to select the month and
year and select the day by tapping the respective day on the
calendar.
4. Tap to accept the new date.
The display returns to the Clock view.
Note: If at any time during the above operation you decide to
cancel, select . The display returns to Clock view.
To change the way in which the date and time formats are
displayed, see “Local settings” on page 95.
Setting an Alarm
Note: The alarm will operate even when the phone is not on as
long as the battery is connected and charged.
To set an alarm:
1. With the flip open and on the Extras desktop, tap Clock.
The Clock view appears
2. Tap an d sele ct Set alarm.
The Set alarm view displays.
3. Use the up and down scroll arrows to select the time of the
alarm.
12
3
4
5
6
7
8
9
10
11 12
6 : 15
Set alarm

Extras 197
4. If the date format is set to AM/PM, tap to change the
currently displayed time by 12 hours.
5. Tap to confirm the new alarm time.
The display returns to the updated Clock view.
Note: If at any time during the above operation you decide
to cancel, select . The display returns to Clock view.
Selecting returns you to the top level menu screen.
Canceling an alarm
To cancel an alarm:
Ta p the Alarm button on the toolbar or tap and select
Alarm off. The Alarm button changes to .
Note: If at any time during the above operation you decide to
cancel, select . The display returns to Clock view.
Note: Selecting returns you to the top level menu screen.
Switching off an activated alarm
When the alarm activates at the set time, an audible alarm is
heard and a message displays with the options Off and Snooze.
The alarm duration is two minutes and repeates every nine
minutes, if not switched off.
Flip Closed:
•When the alarm sounds you are asked if you want to turn it
off. Press the Yes key to accept the alarm and switch it off.
or
•Press the No key to temporarily switch off the alarm for a
period of nine minutes at which time the alarm is repeated.
Flip Open:
•If you select Off the alarm is accepted and is switched off.
or
•If you select Snooze then the alarm is temporarily switched
off for a period of nine minutes, at which time the alarm is
repeated.
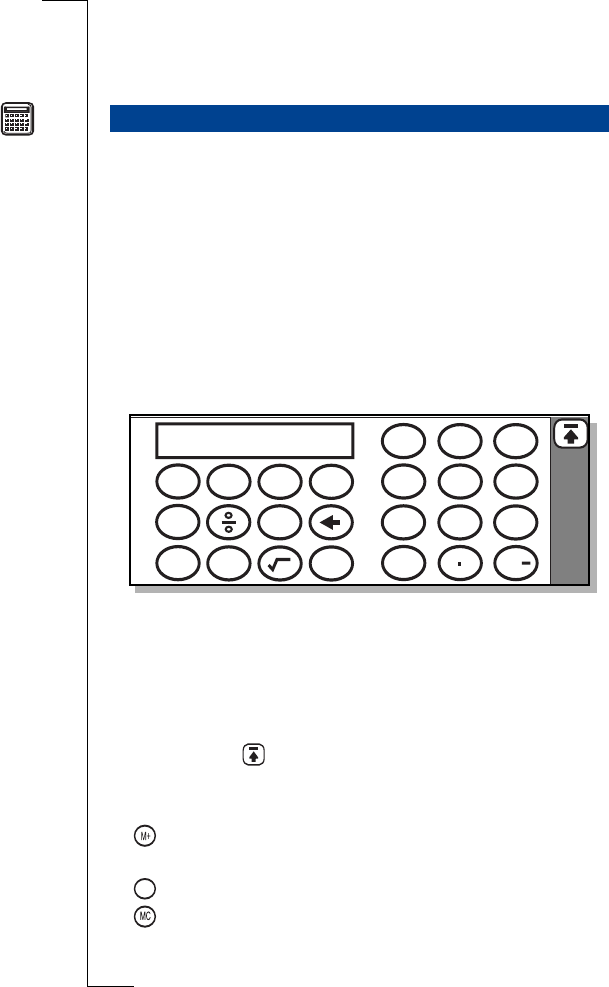
198 Extras
Note: The maximum number of times the alarm can be
repeated is 11 (10 snooze) before the alarm is automatically
set to off.
The Calculator is a standard 10-digit calculator. You can add,
subtract, multiply, divide, calculate square root and percentage.
It also has a memory function.
The calculator program is available in both right-handed and
left-handed modes. You can also set the number of decimal
places that display. See “Calculator” on page 108 for more
information on settings for the calculator.
To enter the calculator program:
Ta p Calculator on the Extras desktop.
To enter calculations:
Enter your calculations by using the stylus on the touchscreen.
All calculations are performed as they are entered, for example,
6+5x3=33 (not 21).
Note: Selecting returns you to the top level menu screen.
Memory functions
The memory functions supported by your calculator are:
• - Enter or Add to memory: Enters or Adds the
displayed value to the value stored in memory.
• - Recall memory: Displays the stored memory value.
• - Clear memory: Sets the contents of the memory to
zero.
Calculator
0789
456
12
0
3
+/
M+ MR MC C
X
%
+_
=
MR
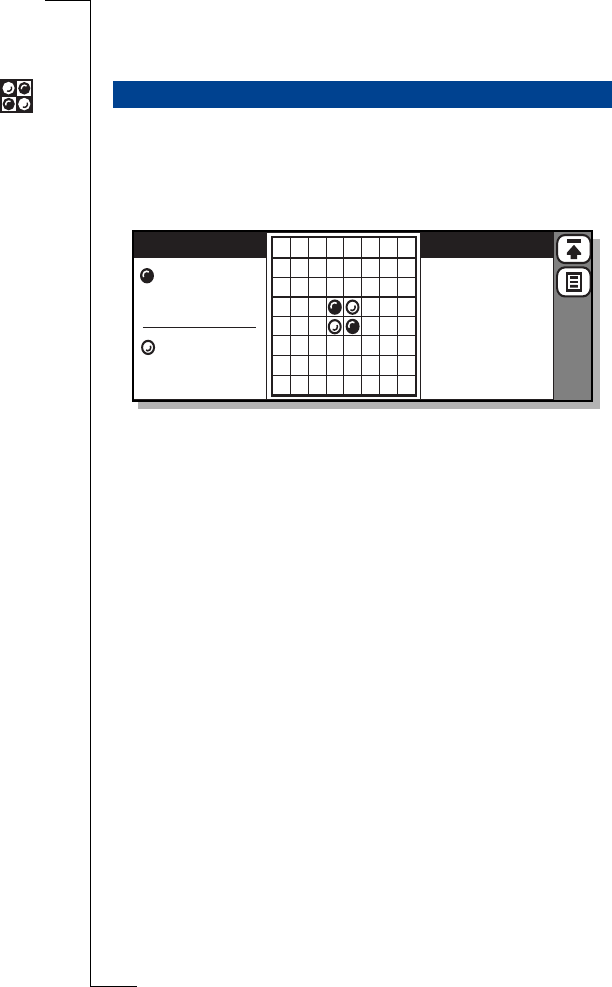
Extras 199
Note: Values stored in memory are retained while accessing other
programs.
The game is a strategy game played by two players: you and your
R380. It is played on an 8x8 (64 squares) board and begins with
two white disks and two black discs on the center of the board as
shown.
Object of the Game
The object of the game is to capture your opponent’s discs. This
is achieved by placing your discs in the empty squares around
your opponent’s. When your opponent’s discs are surrounded by
your own discs, they become yours.
The game ends when neither you nor your opponent can place
any more discs on the board, for instance if 64 discs have been
placed on the board or both you and your opponent cannot
make any further moves. The winner is the player who has the
greater number of discs.
The tasks button provides you with a pop-up menu allowing you
change some of the game settings. You can select:
•New game
•Pass
•Hint
•Game settings
The left of the screen provides you with the current score and the
right of the screen provides a list of highest scores.
Game
High Scores
Scores
Player:
R380:
2
2
R380
Player
Player
Player
R380
Player
48/16
40/22
36/28
35/28
34/30
33/28
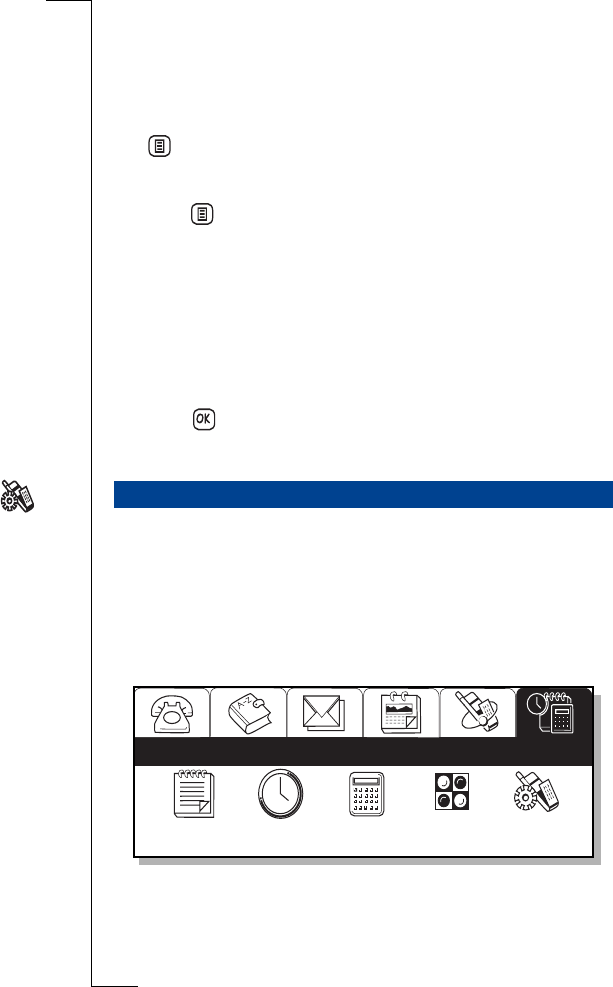
200 Extras
How to Play
To enter the game program:
Ta p Game on the Extras desktop.
To s t ar t a n e w g a m e :
Ta p a n d s ele c t New game.
To change the game settings:
1. Tap an d sele ct Game settings.
The Game settings view displays.
2. Change the desired settings:
•Set play level: Level of difficulty.
The options are Easy, Medium or Hard.
•Player color: Color of your disc’s. The options are White
or Black.
3. Tap to implement and save the new settings.
The display returns to the Game view.
This program provides access to Preferences settings, Storage
and Touchscreen settings.
To enter the System program:
Ta p System on the Extras desktop.
The System view displays.
System
93
12
6
Notepad Clock Calculator Game System
Extras

Extras 201
Preferences
When you select Preferences, the following view appears.
This view provides you with a scrolling list of features whose
settings can be changed to customize the R380 to meet your
requirements. You can change the following settings:
•Global
•Contacts
•Calendar
•Messaging
•WAP services
•Service providers
•Port
•Calculator
•Reset language
•Master reset
For more information on changing these settings, see “System” on
page 92.
Storage
Storage provides you with information relating to the amount of
program memory being used, and the amount of memory that is
currently free.
Preferences
Global
Contacts
Calendar
Messaging
WAP services
Service providers
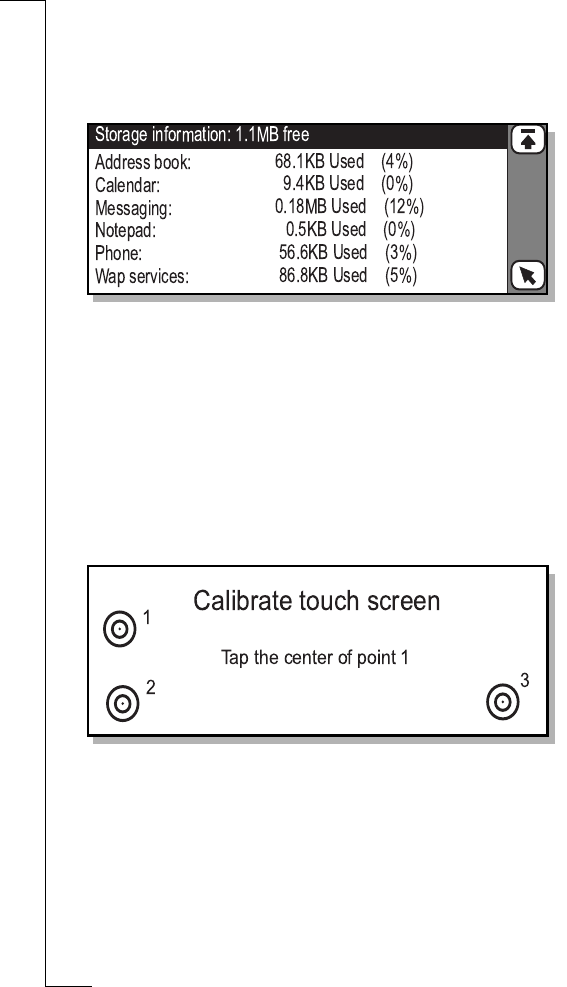
202 Extras
To access memory information:
In the Extras tab, tap the System icon and select Storage from
the list displayed in the System view. The Memory information
view displays.
This view is read only and displays the amount of free memory
(MB - megabytes) in the title bar of the view. For each of the
programs listed the amount of memory being used is converted
and displayed in Kilobytes (KB)/Megabytes (MB), to one
decimal place. You can also see in percentage how much memory
has been used.
Touch Screen
Touch screen allows you to calibrate the screen.
To perform a touchscreen calibration:
1. In the Extras tab, tap the System icon and select
Touchscreen calibration from the list displayed in the
System view.
The Calibrate touch screen view displays.
2. Follow the instructions on the screen.
Upon completion, the Calibration complete message
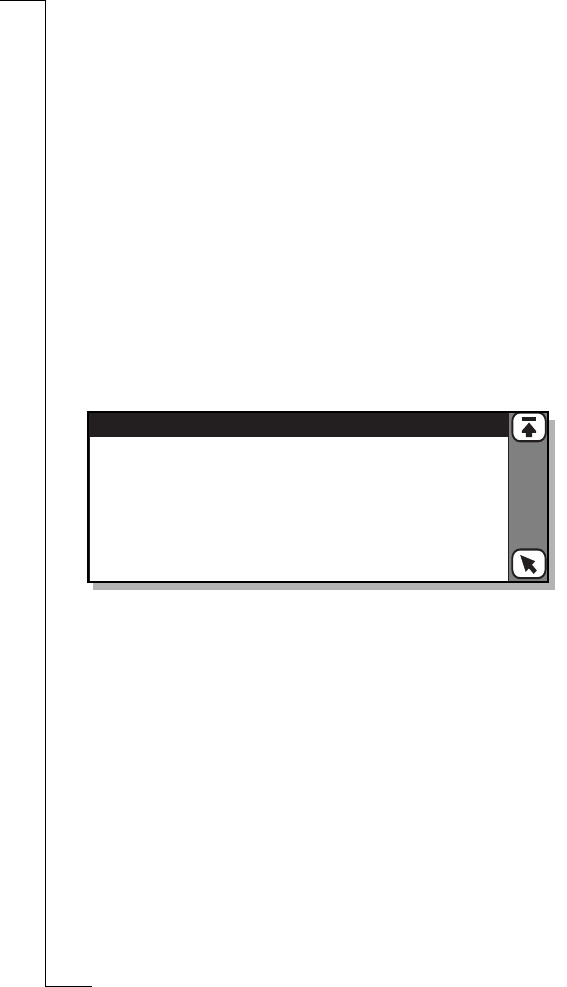
Extras 203
displays.
3. Do one of the following:
•Tap the Yes button to accept the calibration.
or
•Tap the No button to cancel the screen calibration and
keep the previous setting.
Software Version
Software version provides you with information about the
organizer software and identifies the versions of the software that
reside on your R380.
To get information relating to the software versions:
Select Software version from the list displayed in the System
view. The Software version view displays providing you with
information relating to the software versions on your R380.
Software version
Phone: 000119 1059 cxc112146 P1GZ
Organizer: 000302 1610 CXC112159 PA14

204 Extras
R380 Communications Suite 205
R380 Communications
Suite
The R380 Communications Suite allows you to synchronize the
data of your R380 and your computer. You can also make
backups and restore to your R380.
This chapter tells you how to:
•Connect your R380 to your computer
•Synchronize the data between your R380 and your computer
•Store backups from your R380 on your computer
•Restore backups from your computer to your R380
•Find help on a particular subject
Note: R380 Communications Suite’s online help also explains how
to use all program features.
Warning! When synchronizing e-mails, make sure attached files
are not infected with a virus. It is recommended that you run a check
with an anti-virus program on your computer immediately after
synchronizing.
What is Synchronization?
You can use synchronization to manage information which you
want to keep up-to-date on both your computer and R380, such
as calendar appointments, contact information, e-mail messages
or notepad entries. When you synchronize, the Synchronize
program checks the information in your computer scheduler
with the matching file on your R380, and then updates both
your computer and R380 to include the new information. Some
examples of synchronization are:
•If you add a new appointment in your R380 Calendar, the
date, time and notes for the entry will be copied to your
computer scheduler.
Synchronization

206 R380 Communications Suite
•If you change a phone number in your computer scheduler, it
will be amended in the contacts database of your R380.
•You and other colleagues can synchronize your work
Calendars with the same master scheduler on a networked
computer using different account names.
•You may have an e-mail and personal account on your
computer at home or at work. Both can be synchronized with
your R380 using different account names. See the online help
for more information on how to set account names.
Connecting your R380 to your computer allows you to manage
information that you want to keep up-to-date on both your
computer and R380, such as calendar appointments, contact
information, e-mail messages or notepad entries. Also it allows
you to backup the contents of your R380 to the computer and to
restore the information if you should encounter problems with
your R380.
Before you can connect your R380 to a computer, you need to:
1. Make sure your computer meets the requirements
described below.
2. Install the R380 Communications Suite on your computer.
3. Prepare for connection by connecting the serial connection.
4. Connect to your computer using the serial cable.
Note: The term ‘computer’ is equivalent to PC.
System Requirements
Before you can connect your R380, your computer should have:
•Windows 95/98/2000/NT 4.0 (at least service pack 5.0)
installed.
•A Pentium processor, 166 Mhz or above, including 50 MB of
free hard drive space and a CD-ROM drive.
•Serial port capability set up for communication.
Note: Communication speeds should be set up as follows: serial at
115200 baud.
Connecting your R380 to your Computer

R380 Communications Suite 207
R380 Communications Suite Installation
Before you can synchronize or back up the contents of your
R380, you need to install the R380 Communications Suite on
your computer.
To install the R380 Communications Suite:
Note: Choose to install without having your R380 connected.
1. Insert the CD into your computer’s CD-ROM drive.
2. Follow the on-screen instructions to install the R380
Communications Suite and/or additional software from
the CD.
Note: The CD starts automatically. However, if it does not,
run the R380 Communications Suite setup file to install
manually.
To run the Setup manually, if needed:
1. Select Run from the Start menu.
2. Do one of the following:
•Enter ‘D:\Start.exe’ where D: is the letter of your CD-
ROM drive or select Browse and navigate to the
‘Start.exe’ file on the R380 Communications Suite CD-
ROM. Select OK to start the installation.
or
•Open Windows Explorer and select your CD-ROM
drive. Scroll to, and select, the ‘Setup.exe’ file.
Preparing your R380
Once you have installed the R380 Communications Suite you
can now connect your R380 to your computer. Your R380 has a
serial port for communication.
Note: The modem port deactivates automatically when it has not
made contact with another device for a period of one minute.
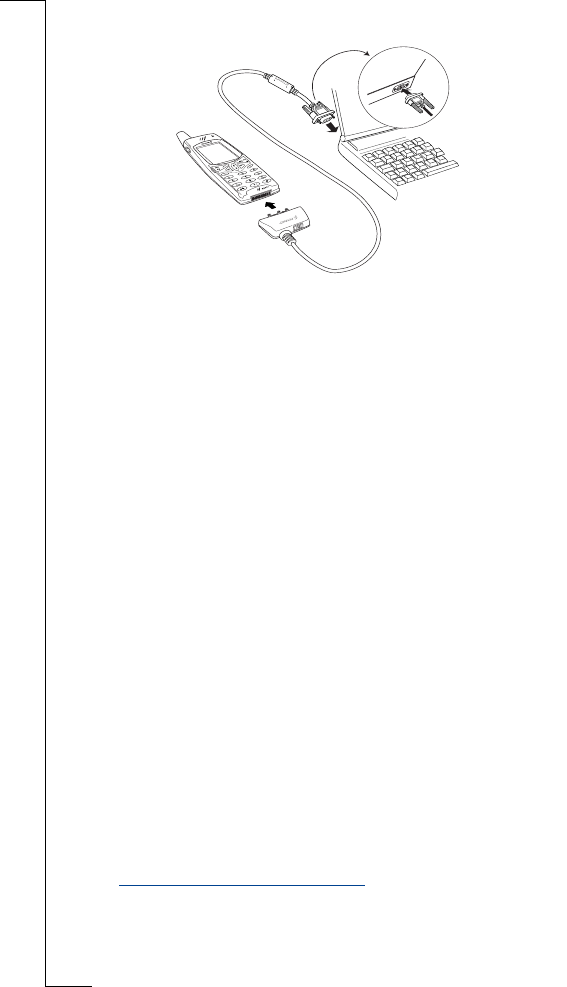
208 R380 Communications Suite
Serial connection
To make a serial port connection:
1. Locate the serial port on your computer, usually found at
the back of your computer.
Note: Usually, it does not matter which serial port you use to
connect to your R380. R380 Communications Suite quickly
checks each port in turn to find a connected R380. If
connection problems arise, see “Troubleshooting” on page 221.
2. Plug the 9-pin connector on the cable into your computer
serial port, and the Ericsson connector, with the logo
facing upward, into the interface at the bottom of your
R380.
Note: You should not have to apply force when inserting the
connector into the port on your R380. If you have difficulty
connecting the cable to your R380, you may be attempting to
insert the connector upside down.
3. Your computer now attempts to establish contact with your
R380.
Note: The Ericsson RS232 cable supports the following five
signals in the RS232 standard: Tx, Rx, CTS, RTS, GND. If
you experience any problem with your connection, please go to
Ericsson Mobile Internet at:
http://mobileinternet.ericsson.com for further information
and support.

R380 Communications Suite 209
Connecting with R380 Communications Suite
R380 Communications Suite automatically establishes a
connection between your computer and R380. You can tell if
your R380 is connected by glancing at the Connection icon on
the taskbar (close to the clock).
Your computer is connected to the R380. When a
connection is made, the icon appears as a telephone on the
taskbar (close to the clock).
Connecting for the First Time
When you connect to your computer for the first time, a
connection wizard tries to identify your R380.
1. Follow the instructions in the wizard.
2. Enter a name to identify your R380 when asked to do so.
Note: You must choose a different name for each R380 you
connect to your computer. R380 Communications Suite uses
the name you enter to identify information and backup files
specific to each R380.
Tip! See the online help for more information about
connecting to your computer when using more than one R380.
Finding the R380 Communications Suite on the Desktop
There are several ways you can reach the Communication Suite.
There are a number of menu items and shortcuts installed in
your Windows environment.
To access Communication Suite programs:
1. Select Start|Programs|Ericsson|R380 Communications
Suite.
Tip! There are further settings that you can change in the
Backup, Restore and Synchronization Settings.
2. Double-click the R380 Synchronize icon on the computer
desktop. This allows you to synchronize your R380 with
computer schedulers such as Microsoft Outlook, Microsoft
Exchange, Microsoft Schedule+, Lotus Notes or Lotus
Organizer. See “Future Synchronizations” on page 210.

210 R380 Communications Suite
•By choosing Backup on the Start menu, you can make
backups of your R380, which you can store in your
computer. See “Backing up your R380” on page 211.
•By choosing Restore on the Start menu, you can restore
a backup if needed. See “Restoring your R380” on page
212.
•The Connection icon placed on the taskbar (close to the
clock) shows when your R380 is connected to the
computer. You can right-click the Connection icon to
display a quick menu.
Note: There is often more than one way to access a
particular feature in the R380 Communications Suite, for
example, using the icon on the computer desktop, the start
menu or the taskbar. This guide describes only the most
straightforward methods of using the R380 Communications
Suite to help you get started. See the online help for more
information about other ways of using the R380
Communications Suite, and setting it up to meet your
requirements.
To start synchronization
1. Connect the serial cable.
2. Double-click the R380 Synchronize icon on the desktop.
Synchronization starts.
3. When the synchronization has successfully been
completed, click Close to exit the dialog box.
To schedule automatic synchronizations
1. Click Start|Programs|Ericsson|R380 Communications Suite
and choose Synchronization Settings.
2. Select the General tab in the dialog box that appears.
3. Select whether you want synchronizations to be manual or
automatic. For instance, you can start the synchronization
manually when you want to synchronize. You can also
choose an automatic synchronization each time/day/week
when you connect. Manual synchronization is the default.
4. Click OK to save and exit the dialog box.
Future Synchronizations
R380 Communications Suite 211
Tip! See the online help for more information on how to
synchronize your R380 with a computer scheduler and how to
choose the synchronization settings.
Performing your First Backup
You can use the Backup program to back up the data stored in
your R380 to your computer. Keeping backups of your R380
contents on your computer means that you have a separate copy
of the contents of the R380, which can be restored.
To make a b a c k u p :
1. Connect the serial cable R380.
2. Click Start|Programs|Ericsson|R380 Communications Suite
and choose Backup.
3. In the R380 Backup dialog box you can add additional
information (name/comment) to your backup in the Label
as text box.
4. Click Start Backup.
A progress window appears showing how long the backup
will take.
5. When the backup has successfully been completed, click
OK to exit the dialog box
Tip! See the online help for more information on how to back
up and restore your R380 contents.
Setting a Backup Reminder
You can set the Backup program to remind you to make
backups at regular intervals.
To s e t a b ackup re m i n d e r :
1. Connect the serial cable.
2. Click Start|Programs|Ericsson|R380 Communications Suite
and choose Backup.
3. In the R380 Backup dialog box, click Options.
4. Select one of the check boxes under Remind me to back up
and adjust how often you want to be reminded. You can
Backing up your R380
212 R380 Communications Suite
choose to be reminded every X days or at every X
synchronization or a combination of these two.
5. Click OK to save the changes.
Tip! See the online help for more information on how to
adjust the backup settings.
If you have lost data or accidentally deleted information in your
R380 you can restore an earlier backup.
To re s t o re a b ackup:
1. Connect the serial cable.
2. Click Start|Programs|Ericsson|R380 Communications Suite
and choose Restore.
3. Select one of the backups in the list of previously saved
backups and click Start Restore.
4. Click Yes to confirm that you want to continue.
Warning! Everything in your R380 will be overwritten by the
chosen backup. Once you have clicked Yes to start the restore, you
cannot cancel the procedure.
5. Follow the prompts on the screen.
6. When the restore has successfully been completed, click OK
to exit the dialog box.
Note: See the online help for more information on how to
restore backups.
Most modern SIM cards automatically set the language in your
smartphone to the language of the country where you bought
your SIM card. If this is not the case, the pre-set language is
English. If you want to change language in your smartphone you
can do this from the Ericsson CD.
Note: English is always available from your R380.
Restoring your R380
Changing the Language in your R380

R380 Communications Suite 213
To change the language:
1. Connect the serial cable.
2. Insert the Ericsson CD and it starts automatically.
3. Select the language to use for the CD and click OK.
4. Click Change Language in R380 under the
Communications heading.
5. In the dialog box which appears, select the language you
want to change to in the drop-down list box and click OK
to proceed.
6. Click Yes to confirm that you want to change to the chosen
language.
7. When the change of language has been successfully
completed you must disconnect your R380, turn it off and
turn it on again.
Note: When changing the language, settings for the
keyboard layout, time format, date format, decimal symbol
and sorting order changes to the default settings for that
country. You can always switch between two different
languages in your R380, for instance English and the language
you choose in the Change language in R380 program.
Where to Find Help
R380 Communications Suite includes comprehensive online
help, which describes all of the program’s features and functions.
Please consult the online help for further information or
guidance on using R380 Communications Suite.
You can display the help topics by:
•Selecting Start|Programs|Ericsson|R380 Communications
Suite|Help.
•Pressing the F1 key or clicking the Help button in a specific
dialog box.
•Right-clicking the phone icon on the taskbar and choosing
Help from the quick menu that appears.
Getting Help

214 R380 Communications Suite
Tips on using the R380 Communications Suite Help
From the Help Topics window, you can find the information
you require as follows:
•From the Contents tab, you can select a topic from a
structured list, for example, how to perform a particular task,
or troubleshooting information about how to solve a
problem. To find the topic you want, double-click the topic
folders to find the general area of interest, and then choose
the topic you want to display.
•From the Index tab, you can find the topic you want by
entering any word linked to the subject, such as ‘backup’ to
find topics containing information about how to back up
your R380.
•From the Search tab, you can search for an exact word or
phrase contained within a topic, such as ‘serial port’ to find all
the topics in the online help containing this phrase.
Tip! To provide further assistance, help topics may also
provide links to other help topics covering similar subjects
under a heading called ‘See also’.

Troubleshooting 215
Troubleshooting
This chapter consists of an alphabetical selection of suggestions
for solving possible problems with your R380.
Blocked Contact Card Provider
The SIM card is permanently blocked after the unblocking code
has been entered incorrectly ten times in a row. Contact your
network operator.
Card Blocked Unblock?
This message appears if the PIN code has been entered
incorrectly three times in a row.
To unblock t h e SI M card :
1. Press YES.
2. Enter your personal unblocking key (PUK) and press #.
Note: Your PUK is provided by your network operator
when you purchase your SIM card.
3. Enter new PIN displays.
4. Enter your PIN code and press #. You can enter either your
current PIN code or a new one. Repeat new PIN displays.
5. Enter your PIN code again for confirmation and press #.
If you entered both your unblocking key and PIN code
correctly, the message New PIN displays.
Alternative method for unblocking the SIM card
To unblock the SIM card, enter the following sequence:
* 0 5 * unblock key * new PIN * new PIN #
Display Limitations
In all cases where numbers or characters exceed the available
display space, truncation or dots are used to compensate for this.
Numbers are truncated at the beginning, for example
...555666777.
Characters are truncated at the end, for example Methusel....

216 Troubleshooting
Emergency Calls Only
A network is within range but you are not allowed to use this
network. You may, however, call the emergency number 112.
Fax Calls
Your R380 does not support fax transmission. Even if your
operator subscription supports fax transmission, fax calls are
rejected. However they can be forwarded to another number
such as the office fax number, see “Call Forward” on page 87 for
more information.
Note: Make sure potential fax callers do not try to send a fax to
your R380 as they can experience a number of retries before the fax
transmission is stopped.
Indicator Light
Blinks red
This indicates that the battery is running low and soon needs
recharging or replacing with a spare.
Note: With Vehicle Hands Free (VHF) equipment, make sure
that the following are inserted or connected: your R380 and its
holder, the fuse in the fuse holder, and/or the external antenna.
Does not blink
If the indicator light at the top of your R380 does not blink and
no network is displayed then there is not a network within range.
See ‘No network’ is displays.
Insert Card
A SIM card has not been inserted into your R380. See “SIM
Card” on page 8 for instructions on inserting the SIM card.
Key Symbol
The keypad is locked to prevent unintentional key action.
Press followed by to unlock the keys.
Memory/Disk Full
Due to memory limitations, your R380 has no more space
available to save or store information.

Troubleshooting 217
Warning! Make sure regular backups are made with
Communications Suite to reduce the risk of lost or corrupted
information.
To free up memory, erase unused or old:
•Call logs.
•Contacts.
•Messages.
•Calendar To-dos or appointments.
•WAP history or bookmarks.
•Notepad notes.
No Network
This indicates that no network is within range. The reason for
this is either:
1. You are in an area that is not covered by a network.
2. The received signal is too weak, possibly because you are
being shielded from the signal. Move to obtain a
sufficiently strong signal. Check your display Signal
strength indicator.
PC Connection
If you have connection problems between your R380 and your
PC despite proper installation, you can start the Setup Assistant.
This is the program that performs an analysis on your PC, and
helps you install any missing components and solve problems.
To start the setup assistant:
1. Double-click the file Setup assistant for R380.bat, which
you can find in the installation directory (where you
choose to store your installation files) on your computer.
The default location is C:\Program files\Ericsson\R380.
2. The Setup assistant then helps you make the correct
settings (and helps you install any missing components if
necessary).

218 Troubleshooting
Phone Locked
Phone locked is displayed followed by the prompt Enter lock
code.
Your R380 is locked to prevent unauthorized use.
To unlock the R380:
Enter your personal security code then press # (or YES).
PIN & Unblocking PUK code
Contact your dealer if you have forgotten your PIN or
unblocking PUK code. The only way to unlock your R380 is by
using your PIN or unblocking PUK code.
Tip! Store PIN and unblocking PUK code information in a safe
place. For security reasons, it may take some time to unlock the R380
if this information is lost or misplaced.
Start Problems
•Hand-held phone: Recharge or replace the battery.
•Vehicle hands free: Check that the R380 is properly inserted
into the holder and check the fuse in the fuse holder: which is
connected to the battery cable.
Wrong PIN
The PIN code has been entered incorrectly. The message is
followed by the prompt Enter PIN.
Enter the PIN code correctly and press # (or YES).
Note: If your PIN is entered incorrectly three consecutive times, the
SIM card is blocked. You can unblock it by using your PUK.

Important Information 219
Important Information
Note: Read this information before using your smartphone.
PRODUCT CARE AND MAINTENANCE
Your smartphone is a highly sophisticated electronic device. To
get the most out of your smartphone read this text about product
care, safe and efficient use.
PRODUCT CARE
•Do not expose your product to liquid or moisture.
•Do not expose your product to extreme temperatures.
•Do not expose your product to lit candles, cigarettes, cigars,
open flames, etc.
•Do not tap the screen with any object that has a sharp tip or
may damage the screen. Do not use any type of ink pen, as the
ink may be impossible to remove. When not in use, keep the
supplied stylus in the storage compartment of the product.
•Do not drop, throw or try to bend the product, or press the
keys with extreme force.
•Do not use any other accessories than Ericsson originals.
Failure to do so may result in loss of performance, damage to
the phone, fire, electric shock or injury, and will void
warranty.
•Do not attempt to disassemble your product. Doing so will
void warranty. The product does not contain consumer
serviceable components. Service should only be performed by
Authorized Service Partners.
•Do not keep the product next to credit cards or transport
tickets; the speaker magnet could corrupt the information on
the magnetic strip.
•Do not keep the product in an area prone to dust and dirt.
These can impair the operation of the moving parts of your
product.
Safe and Efficient Use

220 Important Information
•Do not allow children to play with your product. Children
could hurt themselves or others and also damage the unit.
•When you need to clean the screen, switch off the product
and use a commercial glass screen cleaner sprayed on a soft
cloth. Avoid spraying the screen directly.
•Over time, you may notice rainbow-like rings forming on the
screen. These rings are only cosmetic and will not impede the
functioning of your product.
•Keep the product away from strong magnetic fields (e.g.
loudspeakers) and sources of static electricity.
•If you will not be using the product for a while, store it
in a place that is dry, free from damp, dust and extreme
heat and cold. As a matter of precaution, make a back-
up of your files before you store your product.
Antenna Care and Replacement
To avoid impaired performance please ensure your smartphone's
antenna is not bent or damaged.
Do not remove the antenna yourself. If your phone’s antenna is
damaged please take it to an Authorized Service Partner.
Only use an antenna that has been specifically designed for your
phone. Unauthorized antennas, modifications, or attachments
could damage the phone and may violate the appropriate
regulations causing loss of performance and radio frequency (RF)
energy above the recommended limits.
Efficient Operation
To enjoy optimum performance with minimum power
consumption please:
Hold the phone as you would any other telephone. While
speaking directly into the mouthpiece, angle the antenna
in a direction up and over your shoulder.
Do not hold the antenna when the phone is in use.
Holding the antenna affects call quality, may cause the
phone to operate at a higher power level than needed and
shorten talk and standby times. Never direct the infrared
ray at anyone's eye and make sure that it does not disturb

Important Information 221
any other infrared units.
When using the Office Speaker function, it is
recommended that your smartphone is placed on a
desktop, at a distance of at least an arm´s length away. As
with any loudspeaker, serious ear problems can be caused
by loud noises too close to your ears.
RADIO FREQUENCY ENERGY
Your smartphone is a radio transmitter and receiver. When the
phone is turned on, it receives and transmits radio frequency
(RF) energy. Depending on the type of smartphone you possess,
it operates on different frequency ranges and employs commonly
used modulation techniques. The system that handles your call
when you are using your phone controls the power level at which
your phone transmits.
EXPOSURE TO RADIO FREQUENCY ENERGY
The International Commission on Non-Ionising Radiation
Protection (ICNIRP), supported by the World Health
Organisation (WHO), published during1996 a statement and in
1998 guidelines which set recommended limits for exposure to
RF fields from handheld mobile telephones. According to
ICNIRP statement, which is based on the available body of
research, there is no evidence that mobile terminals meeting the
recommended limits can cause any adverse health effects. All
Ericsson telephones conform to the ICNIRP guidelines and
other international exposure standards, such as:
CENELEC EUROPEAN PRE-STANDARD ENV50166-
2:1995 (EUROPE)
ANSI/IEEE C95.1-1992 (USA, ASIA-PACIFIC)
AS/NZS 2772.1 (INT):1998 (AUSTRALIA, NEW
ZEALAND)
DRIVING
Check the laws and regulations on the use of phones in the areas
where you drive. if you are going to use your phone while
driving, please:

222 Important Information
Give full attention to driving
Use an Ericsson Vehicle Handsfree solution, if available. Law in
many countries requires Vehicle Handsfree solution. Read the
installation instructions carefully before installing a Vehicle
Handsfree solution.
Pull off the road and park before making or answering a call if
driving conditions so require.
RF energy may affect some electronic systems in motor vehicles
such as car stereo, safety equipment etc. In addition, some
vehicle manufacturers do not allow use of phones, unless the
installation is supported by a handsfree kit with an external
antenna, in their vehicles. Check with your vehicle
manufacturer's representative to be sure that your smartphone
will not affect the electronic systems in your vehicle.
Vehicles Equipped with an Air Bag
An air bag inflates with great force. Do not place objects,
including either installed or portable wireless equipment, in the
area over the air bag or in the air bag deployment area. If in-
vehicle wireless equipment is improperly installed and the air bag
inflates, serious injury could result.
ELECTRONIC DEVICES
Most modern electronic equipment, for example equipment in
hospitals and cars, is shielded from RF energy. However, certain
electronic equipment is not, therefore:
Do not use your smartphone near medical equipment without
requesting permission.
Smartphones may affect the operation of some implanted cardiac
pacemakers and other medically implanted equipment.
Pacemaker patients should be aware that the use of a smartphone
very close to a pacemaker might cause the device to malfunction.
Avoid placing the phone over the pacemaker, i.e. in your breast
pocket. When using the phone, place it at your ear opposite the
pacemaker. If a minimum distance of six inches (15 cm) is kept

Important Information 223
between the phone and the pacemaker, the risk of interference is
limited. If you have any reason to suspect that interference is
taking place, immediately turn off your smartphone contact your
cardiologist for more information.
Some hearing aids might be disturbed by smartphones. In the
event of such disturbance, you may want to consult your service
provider, or call the customer services line to discuss alternatives.
Operation of your smartphone close to other electronic
equipment, such as televisions, radios and personal computers
may cause interference.
AIRCRAFT
Turn off your smartphone before boarding any aircraft.
Do not use it on the ground without crew permission.
To prevent interference with communication systems, you must
not use your smartphone while the plane is in the air.
BLASTING AREAS
Turn off your smartphone when in a blasting area or in areas
posted “Tu r n O f f Tw o - w a y R a d i o ” to avoid interfering with
blasting operations. Construction crews often use remote control
RF devices to set off explosives.

224 Important Information
POTENTIALLY EXPLOSIVE ATMOSPHERES
Turn off your smartphone when in any area with a potentially
explosive atmosphere. It is rare, but your smartphone or its
accessories could generate sparks. Sparks in such areas could
cause an explosion or fire resulting in bodily injury or even
death.
Areas with a potentially explosive atmosphere are often, but not
always, clearly marked. They include fueling areas, such as petrol
stations, below deck on boats, fuel or chemical transfer or storage
facilities, and areas where the air contains chemicals or particles,
such as grain, dust, or metal powders.
Do not transport or store flammable gas, liquid, or explosives in
the compartment of your vehicle, which contains your
smartphone and accessories.
POWER SUPPLY
Connect AC (Power supply) only to designated power sources as
marked on the product.
To reduce risk of damage to the electric cord, remove it from the
outlet by holding onto the AC adapter rather than the cord.
Make sure the cord is positioned so that it will not be stepped
on, tripped over or otherwise subjected to damage or stress.
To reduce risk of electric shock, unplug the unit from any power
source before attempting to clean it.
The charger must not be used outdoors or in damp areas.
CHILDREN
Do not allow children to play with your smartphone since it
contains small parts that could become detached and create a
choking hazard.

Important Information 225
EMERGENCY CALLS
IMPORTANT!
This smartphone, like any phone, operates using radio signals,
cellular and landline networks as well as user-programmed
functions, which cannot guarantee connection under all
conditions. Therefore you should never rely solely upon any
smartphone for essential communications (for example: medical
emergencies).
Remember, in order to make or receive calls the phone must be
switched on and in a service area with adequate cellular signal
strength. Emergency calls may not be possible on all cellular
phone networks or when certain network services and/or phone
features are in use. Check with your local service provider.
BATTERY INFORMATION
New batteries
The battery delivered with your smartphone is not fully charged.
We recommend that you fully charge it before you use it for the
first time.
Battery use and care
A rechargeable battery has a long service life if treated properly. A
new battery, or one that has not been used for a long period of
time could have reduced capacity the first few times it is being
used.
The talk and standby times depend on the actual transmission
conditions when using the smartphone. If the smartphone is
used nearby a base station less power is required and talk and
standby times are prolonged. Use only Ericsson original batteries
and chargers. Using non original Ericsson accessories could be
dangerous and the warranty does not cover product failures
which have been caused by use of non-Ericsson original
accessories.
•Do not expose your battery to extreme temperatures,
never above +60°C (+140°F). If the battery is used in
cold temperatures the battery capacity will be reduced.

226 Important Information
•The battery can only be charged when the temperature
is between +5°C (+41°F) and +45°C (+113°F).
•Turn off your smartphone before removing the battery.
•Use only the battery for the intended purpose.
•Do not attempt to take a battery apart.
•Do not let the metal contacts on the battery touch
another metal object. This could short-circuit and
damage the battery.
•Do not expose a battery to open flames. This could
cause the battery to explode.
•Do not expose a battery to liquid.
•Do not mutilate, puncture or dispose of batteries in fire.
The batteries can burst or explode, releasing hazardous
chemicals.
•If a battery should accidentally leak, do not allow the
contents to come into contact with your skin or your
eyes.
RECYCLING YOUR BATTERY
The battery must be disposed of properly and should never be
placed in municipal waste. Check local regulations for proper
disposal instructions.
Electrostatic discharge
Electrostatic discharge can interfere with the normal functioning
of electronic devices. Your product can behave abnormally owing
to such an event, resulting in the possible loss of unsaved data.
To recover, reset your product according to the User's guide.
To avoid losing data due to electrostatic discharges or other types
of events, it is recommended that you regularly save and backup
your data as described in the User's guide.

Important Information 227
The U.S Food and Drug Administration (FDA) has been
receiving inquiries about the safety of mobile phones, including
cellular phones and PCS phones.
The following summarizes what is known – and what remains
unknown – about whether these products can pose a hazard to
health, and what can be done to minimize any potential risk.
This information may be used to respond to questions.
Why the Concern?
Mobile phones emit low levels of radiofrequency energy (i.e.,
radiofrequency radiation) in the microwave range while being
used. They also emit very low levels of radiofrequency energy
(RF), considered non-significant, when in the stand-by mode. It
is well known that high levels of RF can produce biological
damage through heating effects (this is how your microwave
oven is able to cook food). However, it is not known whether, to
what extent, or through what mechanism, lower levels of RF
might cause adverse health effects as well. Although some
research has been done to address these questions, no clear
picture of the biological effects of this type of radiation has
emerged to date. Thus, the available science does not allow us to
conclude that mobile phones are absolutely safe, or that they are
unsafe. However, the available scientific evidence does not
demonstrate any adverse health effects associated with the use of
mobile phones.
What Kinds of Phones are in Question?
Questions have been raised about hand-held mobile phones, the
kind that have a built-in antenna that is positioned close to the
user’s head during normal telephone conversation. These types of
mobile phones are of concern because of the short distance
between the phone’s antenna – the primary source of the RF and
the person’s head. The exposure to RF from mobile phones in
which the antenna is located at greater distances from the user
(on the outside of a car, for example) is drastically lower than
that from hand-held phones, because a person’s RF exposure
FDA Consumer Update

228 Important Information
decreases rapidly with distance from the source. The safety of so-
called “cordless phones,” which have a base unit connected to the
telephone wiring in a house and which operate at far lower
power levels and frequencies, has not been questioned.
How Much Evidence is there that Hand-held Mobile
Phones Might be Harmful?
Briefly, there is not enough evidence to know for sure, either
way; however, research efforts are on-going. The existing
scientific evidence is conflicting and many of the studies that
have been done to date have suffered from flaws in their research
methods. Animal experiments investigating the effects of RF
exposures characteristic of mobile phones have yielded
conflicting results.
A few animal studies, however, have suggested that low levels of
RF could accelerate the development of cancer in laboratory
animals. In one study, mice genetically altered to be predisposed
to developing one type of cancer developed more than twice as
many such cancers when they were exposed to RF energy
compared to controls. There is much uncertainty among
scientists about whether results obtained from animal studies
apply to the use of mobile phones. First, it is uncertain how to
apply the results obtained in rats and mice to humans. Second,
many of the studies that showed increased tumor development
used animals that had already been treated with cancer-causing
chemicals, and other studies exposed the animals to the RF
virtually continuously – up to 22 hours per day.
For the past five years in the United States, the mobile phone
industry has supported research into the safety of mobile phones.
This research has resulted in two findings in particular that merit
additional study:
1. In a hospital-based, case-control study, researchers looked
for an association between mobile phone use and either
glioma (a type of brain cancer) or acoustic neuroma (a
benign tumor of the nerve sheath). No statistically
significant association was found between mobile phone
use and acoustic neuroma. There was also no association
between mobile phone use and gliomas when all types of

Important Information 229
types of gliomas were considered together. It should be
noted that the average length of mobile phone exposure in
this study was less than three years.
When 20 types of glioma were considered separately,
however, an association was found between mobile phone
use and one rare type of glioma, neuroepithelliomatous
tumors. It is possible with multiple comparisons of the
same sample that this association occurred by chance.
Moreover, the risk did not increase with how often the
mobile phone was used, or the length of the calls. In fact,
the risk actually decreased with cumulative hours of mobile
phone use. Most cancer causing agents increase risk with
increased exposure. An ongoing study of brain cancers by
the National Cancer Institute is expected to bear on the
accuracy and repeatability of these results.1
2. Researchers conducted a large battery of laboratory tests to
assess the effects of exposure to mobile phone RF on
genetic material. These included tests for several kinds of
abnormalities, including mutations, chromosomal
aberrations, DNA strand breaks, and structural changes in
the genetic material of blood cells called lymphocytes.
None of the tests showed any effect of the RF except for
the micronucleus assay, which detects structural effects on
the genetic material. The cells in this assay showed changes
after exposure to simulated cell phone radiation, but only
after 24 hours of exposure. It is possible that exposing the
test cells to radiation for this long resulted in heating. Since
this assay is known to be sensitive to heating, heat alone
could have caused the abnormalities to occur. The data
already in the literature on the response of the
micronucleus assay to RF are conflicting. Thus, follow-up
research is necessary.2
FDA is currently working with government, industry, and
academic groups to ensure the proper follow-up to these
industry-funded research findings. Collaboration with the
Cellular Telecommunications Industry Association
(CTIA) in particular is expected to lead to FDA providing
research recommendations and scientific oversight of new

230 Important Information
CTIA-funded research based on such recommendations.
Two other studies of interest have been reported recently in the
literature:
1. Two groups of 18 people were exposed to simulated mobile
phone signals under laboratory conditions while they
performed cognitive function tests. There were no changes
in the subjects’ ability to recall words, numbers, or
pictures, or in their spatial memory, but they were able to
make choices more quickly in one visual test when they
were exposed to simulated mobile phone signals. This was
the only change noted among more than 20 variables
compared.3
2. In a study of 209 brain tumor cases and 425 matched
controls, there was no increased risk of brain tumors
associated with mobile phone use. When tumors did exist
in certain locations, however, they were more likely to be
on the side of the head where the mobile phone was used.
Because this occurred in only a small number of cases, the
increased likelihood was too small to be statistically
significant.4
In summary, we do not have enough information at this point to
assure the public that there are, or are not, any low incident
health problems associated with use of mobile phones. FDA
continues to work with all parties, including other federal
agencies and industry, to assure that research is undertaken to
provide the necessary answers to the outstanding questions about
the safety of mobile phones.
What is Known about Cases of Human Cancer that have
been Reported in Users of Hand-held Mobile Phones?
Some people who have used mobile phones have been diagnosed
with brain cancer. But it is important to understand that this
type of cancer also occurs among people who have not used
mobile phones. In fact, brain cancer occurs in the U.S.
population at a rate of about 6 new cases per 100,000 people
each year. At that rate, assuming 80 million users of mobile
phones (a number increasing at a rate of about 1 million per
month), about 4800 cases of brain cancer would be expected
each year among those 80 million people, whether or not they

Important Information 231
used their phones. Thus it is not possible to tell whether any
individual’s cancer arose because of the phone, or whether it
would have happened anyway. A key question is whether the risk
of getting a particular form of cancer is greater among people
who use mobile phones than among the rest of the population.
One way to answer that question is to compare the usage of
mobile phones among people with brain cancer with the use of
mobile phones among appropriately matched people without
brain cancer. This is called a case-control study.
The current case-control study of brain cancers by the National
Cancer Institute, as well as the follow-up research to be
sponsored by industry, will begin to generate this type of
information.
What is FDA’s Role Concerning the Safety of Mobile
Phones?
Under the law, FDA does not review the safety of radiation-
emitting consumer products such as mobile phones before
marketing, as it does with new drugs or medical devices.
However, the agency has authority to take action if mobile
phones are shown to emit radiation at a level that is hazardous to
the user. In such a case, FDA could require the manufacturers of
mobile phones to notify users of the health hazard and to repair,
replace or recall the phones so that the hazard no longer exists.
Although the existing scientific data do not justify FDA
regulatory actions at this time, FDA has urged the mobile phone
industry to take a number of steps to assure public safety. The
agency has recommended that the industry:
•support needed research into possible biological effects of RF
of the type emitted by mobile phones;
•design mobile phones in a way that minimizes any RF
exposure to the user that is not necessary for device function;
and

232 Important Information
•cooperate in providing mobile phone users with the best
possible information on what is known about possible effects
of mobile phone use on human health.
At the same time, FDA belongs to an interagency working group
of the federal agencies that have responsibility for different
aspects of mobile phone safety to ensure a coordinated effort at
the federal level. These agencies are:
•National Institute for Occupational Safety and Health
•Environmental Protection Agency
•Federal Communications Commission
•Occupational Health and Safety Administration
•National Telecommunications and Information
Administration
The National Institutes of Health also participates in this group.
In the Absence of Conclusive Information about any
Possible Risk, What can Concerned Individuals Do?
If there is a risk from these products – and at this point we do
not know that there is – it is probably very small. But if people
are concerned about avoiding even potential risks, there are
simple steps they can take to do so. For example, time is a key
factor in how much exposure a person receives. Those persons
who spend long periods of time on their hand-held mobile
phones could consider holding lengthy conversations on
conventional phones and reserving the hand-held models for
shorter conversations or for situations when other types of
phones are not available.
People who must conduct extended conversations in their cars
every day could switch to a type of mobile phone that places
more distance between their bodies and the source of the RF,
since the exposure level drops off dramatically with distance. For
example, they could switch to:
•a mobile phone in which the antenna is located outside the
vehicle,

Important Information 233
•a hand-held phone with a built-in antenna connected to a
different antenna mounted on the outside of the car or built
into a separate package, or
•a headset with a remote antenna to a mobile phone carried at
the waist.
Again, the scientific data does not demonstrate that mobile
phones are harmful. But if people are concerned about the
radiofrequency energy from these products, taking the simple
precautions outlined above can reduce any possible risk.
Where can I find additional information?
For additional information, see the following websites:
•Federal Communications Commission (FCC) RF Safety
Program (select “Information on Human Exposure to RF
Fields from Cellular and PCS Radio Transmitters”)
http://www.fcc.gov/oet/rfsafety
•World Health Organization (WHO) International
Commission on Non-Ionizing Radiation Protection (select
Qs & As)
http://www.who.int/emf
•United Kingdom, National Radiological Protection
Board
http://www.nrpb.org.uk
•Cellular Telecommunications Industry Association
(CTIA)
http://www.wow-com.com
•U.S. Food and Drug Administration (FDA) Center for
Devices and Radiological Health
http://www.fda.gov/cdrh/consumer/
Footnotes
1. Muscat et al. Epidemiological Study of Cellular Telephone
Use and Malignant Brain Tumors. In: State of the Science
Symposium;1999 June 20; Long Beach, California.
2. Tice et al. Tests of mobile phone signals for activity in
genotoxicity and other laboratory assays. In: Annual
Meeting of the Environmental Mutagen Society; March
29, 1999, Washington, D.C.; and personal
communication, unpublished results.
234 Important Information
3. Preece, AW, Iwi, G, Davies-Smith, A, Wesnes, K, Butler, S,
Lim, E, and Varey, A. Effect of a 915-MHz simulated
mobile phone signal on cognitive function in man. Int. J.
Radiat. Biol., April 8, 1999.
4. Hardell, L, Nasman, A, Pahlson, A, Hallquist, A and Mild,
KH. Use of cellular telephones and the risk for brain tumors:
a case-control study. Int. J. Oncol., 15: 113-116, 1999.
Tec h ni ca l D a ta
General
System GSM 900/GSM1900.
SIM card Small plug-in card, 3 V or 5 V type.
Dimensions
Size 159 x 51 x 26 mm / 6.3 x 2 x 1 in
Antenna length 30 mm / 1.2 in
Weight with battery 164 g / 5.8 oz
Weight without battery 119 g / 4.2 oz
Display/Screen size
Flip closed LCD 120 x 116 pixels / 28 x 27 mm
Flip open LCD 120 x 360 pixels / 28 x 83 mm
Memory
User data storage :1.2 MB.
Ambient temperatures
Max +55°C / 131°F
Min -10°C / 14°F
Acoustics
Microphone Electret with active gain control
Loudspeaker 250 mW, 32 ohm
Buzzer Piezoelectrical.
Power
Optional mains adapter :5.0V DC, 0.065 A.

Important Information 235
Thank you for purchasing this Ericsson Product. To get
maximum use of the features of your new product we
recommend that you follow a few simple steps:
•Read the Guidelines for safe and efficient use.
•Read all the terms and conditions of your Ericsson
Warranty.
•Save your original receipt. You will need it for warranty
repair claims. Should your Ericsson Product need
warranty service, you should return it to the dealer from
whom it was purchased or contact your local Ericsson
helpdesk to get further information.
Our Warranty
Ericsson warrants this Product to be free from defects in material
and workmanship at the time of its original purchase by a
consumer, and for a subsequent period of one (1) year.
All accessories for the Product are covered by a warranty for a
period of one (1) year from the date of its original purchase by a
consumer.
What We Will Do
If, during the warranty period, this Product fails to operate under
normal use and service, due to improper materials or
workmanship, Ericsson subsidiaries, authorised distributors or
authorised service partners will, at its option, either repair or
replace the Product in accordance with the terms and conditions
stipulated herein.
Keyboard
Touchscreen 4 row 49 key
Layout :QWERTY
Communications
Infrared :IrDA SIR optical link to 115200
baud
Serial :RS232-compatible to 115200 baud
Limited Warranty

236 Important Information
Conditions
1. The warranty is valid only if the original receipt issued to
the original purchaser by the dealer, specifying the date of
purchase and serial number, is presented with the product
to be repaired or replaced. Ericsson reserves the right to
refuse warranty service if this information has been
removed or changed after the original purchase of the
product from the dealer.
2. If Ericsson repairs or replaces the Product, the repaired or
replaced Product shall be warranted for the remaining time
of the original warranty period or for ninety (90) days from
the date of repair, whichever is longer. Repair or
replacement may be via functionally equivalent
reconditioned units. Replaced faulty parts or components
will become the property of Ericsson.
3. This warranty does not cover any failure of the Product due
to normal wear and tear, misuse, including but not limited
to use in other than the normal and customary manner, in
accordance with Ericsson´s instructions for use and
maintenance of the Product, accident, modification or
adjustment, acts of God, improper ventilation and
damages resulting from liquid.
4. This warranty does not cover product failures due to repair
installations, modifications or improper service performed
by a non-Ericsson authorised service workshop or opening
of the product by non-Ericsson authorised persons.
5. The warranty does not cover product failures which have
been caused by use of non-Ericsson original accessories.
6. Tampering with any of the seals on the products will void
the warranty.
7. THERE ARE NO OTHER EXPRESS WARRANTIES,
WHETHER WRITTEN OR ORAL, OTHER THAN
THIS PRINTED LIMITED WARRANTY. ALL
IMPLIED WARRANTIES, INCLUDING WITHOUT
LIMITATION THE IMPLIED WARRANTIES OR
MERCHANTABILITY OR FITNESS FOR A
PARTICULAR PURPOSE, ARE LIMITED TO THE
DURATION OF THIS LIMITED WARRANTY. IN
NO EVENT SHALL ERICSSON BE LIABLE FOR

Important Information 237
INCIDENTAL OR CONSEQUENTIAL DAMAGES
OF ANY NATURE WHATSOEVER, INCLUDING
BUT NOT LIMITED TO LOST PROFITS OR
COMMERCIAL LOSS. TO THE FULL EXTENT
THOSE DAMAGES CAN BE DISCLAIMED BY LAW.
Some countries do not allow the exclusion or limitation of
incidental or consequential damage, or limitation of the
duration of implied warranties, so the preceding
limitations or exclusions may not apply to you. This
warranty gives you specific legal rights, and you may also
have other rights which may vary from country to country.
R380 User Manual
2000 Ericsson Mobile Communications AB.
All rights reserved. This manual is a copyrighted work of
Ericsson Mobile Communications AB, Kista, Sweden and
Ericsson Inc. of U.S.A. The programs referred to herein are
copyrighted and trademarked works of Ericsson Mobile
Communications AB, Kista, Sweden, unless otherwise set out
below. Reproduction in whole or in part, including utilization in
machines capable of reproduction or retrieval, without the
express written permission of the copyright holders is prohibited.
Reverse engineering is also prohibited.
The information in this document is subject to change without
notice.
Ericsson and the Ericsson logo EricssonL are registered
trademarks of Telefonaktiebolaget LM Ericsson. All other
product or service names mentioned in this manual are
trademarks of their respective companies.
Copyright

238 Important Information
Epoc32 Operating System and Related Software
2000 Copyright Symbian Ltd.
All rights reserved. The R380 contains the EPOC32 operating
system and software, and Ericsson EPOC Connect 1.x contains
the EPOC32 CONNECT software that is the copyrighted work
of Symbian Ltd, London, England.
EPOC and the EPOC logo are registered trademarks of Symbian
Ltd.
The IrDA Feature Trademark is owned by the Infrared Data
Association and is used under license there from.
Jot and CIC Handwriting Recognition Software
1997-1998 Communication Intelligence Corporation.
All rights reserved. Protected by U.S. Patent Number 4,531,231,
additional patents may be issued and/ or pending in the United
States of America and non-U.S. countries. Jot and CIC and its
Logo are trademarks or registered trademarks of Communication
Intelligence Corporation.
What PART????
Part of the software in this product is 1998 ANT Ltd. All
rights reserved.
What PART????? Name?
Copyright 1997 Eric Young (eay@cryptsoft.com) All rights
reserved.
Redistribution and use in source and binary forms, with or
without modification, are permitted provided that the following
conditions are met.
1. Redistributions of source code must retain the copyright
notice, this list of conditions and the following disclaimer.
2. Redistributions in binary form must reproduce the above
copyright notice, this list of conditions and the following
disclaimer in the documentation and/or other materials
provided with the distribution.

Important Information 239
3. All advertising materials mentioning features or use of this
software must display the following acknowledgement:
"This product includes cryptographic software written by
Eric Young (eay@cryptsoft.com)"
4. If you include any Windows specific code (or a derivative
thereof) from the apps directory (application code) you
must include an acknowledgement:
"This product includes software written by Tim Hudson
(tjh@cryptsoft.com)".
THIS SOFTWARE IS PROVIDED BY ERIC YOUNG
"AS IS" AND MANY EXPRESS OR IMPLIED
WARRANTIES, INCLUDING, BUT NOT LIMITED
TO, THE IMPLIED WARRANTIES OF
MERCHANTABILITY AND FITNESS FOR A
PARTICULAR PURPOSE ARE DISCLAIMED. IN NO
EVENT SHALL THE AUTHOR OR
CONTRIBUTORS BE LIABLE FOR ANY DIRECT,
INDIRECT, INCIDENTAL, SPECIAL, EXEMPLARY,
OR CONSEQUENTIAL DAMAGES (INCLUDING,
BUT NOT LIMITED TO, PROCUREMENT OF
SUBSTITUTE GOODS OR SERVICES; LOSS OF
USE, DATA, OR PROFITS; OR BUSINESS
INTERRUPTION) HOWEVER CAUSED AND ON
ANY THEORY OF LIABILITY, WHETHER IN
CONTRACT, STRICT LIABILITY, OR TORT
(INCLUDING NEGLIGENCE OR OTHERWISE)
ARISING IN ANY WAY OUT OF THE USE OF THIS
SOFTWARE, EVEN IF ADVISED OF THE
POSSIBILITY OF SUCH DAMAGE.
This is a legal agreement, Agreement, between you Licensee, the
recipient of the enclosed Software on compact disc, diskette or
any other media and any upgrades thereof, and Ericsson Mobile
Communications AB, the Vendor. By opening the sealed
software package and/or using the software you are agreeing to
be bound by the terms of this Agreement.
License Agreement

240 Important Information
License
The Licensee is hereby granted a non-transferable, non-exclusive,
restricted right and licence to use the software included herein,
Software. However, the Software licensed hereunder may be
delivered in an inseparable package also containing other
software programs than the Software.
You may: (a) use the enclosed Software on a single Ericsson
product; (b) make copies of the Software solely for purposes of
backup. The copyright notice must be reproduced and included
on a label on any backup copy.
You may not: subject to when applicable, the EC Council
Directive of May 14, 1991 on the legal protection of computer
programs (91/250/EEG) (“Software Directive” Article 6)
distribute copies of this Software or its documentation to others;
modify, rent, lease or grant your rights to this Software to third
parties (except in the event the Ericsson product containing an
item of Software is transferred to a third party and provided the
transferee agrees in writing to be bound by the terms of this
Licence Agreement; translate, reverse engineer, decompile,
disassemble or otherwise alter the Software or its documentation
or disclose any information designated as confidential or
proprietary at the time of disclosure or, by nature, is confidential
or proprietary.
Term
Your licence remains effective from the date of receipt until
terminated. You can terminate it at any other time by destroying
the Software together with all copies of the Software in any form.
Your licence will also automatically terminate without notice if
you fail to comply with any term or condition of this Agreement.
Upon any termination you must destroy all copies of the
Software in any form.
Limited Warranty
Vendor warrants the media, on which the Software is provided,
to be free of defects in materials and workmanship under normal
use for ninety (90) days after the date of receipt. The Vendor’s
and its suppliers’ entire liability and your exclusive remedy under

Important Information 241
this warranty (which is subject to you returning the Software to
an authorized reseller with a copy of your receipt) will be, at
Vend or’s option, to replace the disc(s)/ diskette(s) or refund the
purchase price for the Software and terminate this Agreement.
Except for the above express limited warranties, Vendor and its
suppliers make and you receive no warranties or conditions
either express, implied, statutory or otherwise and Vendor and its
suppliers specifically disclaim any implied warranties of
merchantability and fitness for a particular purpose. Vendor does
not warrant that the Software will be uninterrupted or error free.
You assume the responsibility for the selection of the program
and hardware to achieve your intended results; and for the
installation, use and results obtained from the Software.
Some jurisdictions do not allow limitations on duration of an
implied warranty, so the above limitation may not apply to you.
Intended Use
The Software shall be used in accordance with the instructions
and for its intended use and purpose only. The software or part
of it is not permitted to be used in for example life support
systems, nuclear facility applications, missile technology,
chemical or biologized industry or of flight navigation or
communication of air, ground support equipment or other
similar business, if failure to perform on behalf of the software in
any way, could result in personal injury, death, damage to
tangibles or environmental damage.
Limitation of Liability
In no event shall Vendor or its suppliers be liable for any indirect
or consequential losses or damages whatsoever including loss of
data, loss of business, loss of profits, business interruption or
personal injury arising out of the use of or inability to use this
Software. Vendor and its suppliers entire liability under this
Agreement shall be limited to the amount actually paid by
Licensee for the Software.
Governing Law
The validity, construction and performance of this Agreement
shall be governed by the laws of Sweden.

242 Important Information
USA
The R380s unit, type numbers 4070003-UK, 4070003-BV,
4070003-PG, 4070003-US, 4070003-DE, 4070003-ES and
4070003-FR, complies with the limits for a class B digital service
as specified in Part 15 of FCC Rules which provide reasonable
protection against harmful interference in a residential area. The
R380 unit generates and uses radio frequency energy and may
interfere with radio or television reception. In the unlikely event
that there is interference to radio or television reception (which
can be determined by turning the R380 off and on), try the
following:
•Re-orienting or relocating the receiving antenna (radio or
television)
•Relocating the R380 unit with respect to the receiver
For more information, consult your dealer or an experienced
radio/television technician.
To maintain compliance with the class B emission limits for
residential use, use properly shielded cables with this device.
Canada
This class B digital apparatus meets all requirements of the
Canadian Interference-Causing equipment regulations.
Cet appareil numérique de Class B respecte toutes les exigences
du Réglement Canadien sur le matériel brouillier.
LED Safety
The infrared port located at the back of the R380 unit is
classified as a Class 1 LED (Light-Emitting Diode) device
according to International Standard IEC 825-1 (EN 60825-1).
This device is not considered harmful, but the following
precautions are recommended:
•If the unit requires service, contact an authorized
Ericsson service center.
•Do not attempt to make any adjustments to this unit.
Regulatory Information
CLASS 1
LED

Important Information 243
•Avoid direct eye exposure to the infrared LED beam. Be
aware that the beam is invisible light and cannot be seen.
•Do not attempt to view the LED beam with any type of
optical device.
We, Ericsson Mobile Communications AB of
Torshamns g a t a n 2 7
SE-164 80 Kista, Sweden
declare under our sole responsibility that our product,
Ericsson type 714 01 01-BV,
to which this declaration relates is in conformity with the
appropriate standards ETS 300 342-1 and EN 60950, following
the provisions of EMC directive 89/336/EEC, and Low voltage
directive 73/23/EEC.
Declaration of Conformity
Stockholm June,
2000

244 Important Information

245
A
Access security settings 95
Alarms 196
All day event 159
Answering calls 44
Appointment 159
Area Information 57
Attachments 134
Automatic re-dialing 42
Automatic service provider and e-mail
set up 174
Automatic WAP set up 183
B
Backing up 211
Battery 9
charge indication 10
charging 10, 11
insertion 11
removal 11
Bookmarks 169
Browser 166
Business cards 121
C
Calculator 198
left-handed mode 198
right-handed mode 198
settings 104
Calendar
day view 158
editing 161
new appointment 159
settings 92
to do 160
to do view 159
week view 157
Calibration 202
Call
answering 44
automatic re-dialing 42
call waiting 111
conference
rejoin 55
conference calls 52
adding participants 53
ending 56
managing 55
releasing 54
starting 52
switching between 55
diverting 51
domestic 38
emergency 37
Fax 45
holding 48
information 57, 109
international 43
last number 41
making 37
missed 75
muting 45
reject 45
service numbers 44
swapping 49
switching 49
transfer 50
waiting 48
Call handling options 106
Call waiting 48, 111
CD
contents 6
User’s Manual 6
changing 192
Charger
connecting 11, 12
disconnecting 12
Clock 191, 192
Communication
infrared port 76
Communications Suite
connecting 206
finding on the PC 209
help 213
infrared connectivity 209
PC backup 211
preparing 207
restore 212
serial connectivity 208
switching connectivity 209
synchronization 210
Conference Calls. See Call

246
Contacts
business cards 121
export to SIM card 123
find 124
import from SIM card 122
infrared receive 122
infrared send 116, 121
new 124
personal details 17
settings 91
SIM card import 18
Copyright information 237
D
Date
setting 15, 196
Declaration of conformity 243
Deleting
messages 137
Desktop 22, 32
program icons 23, 33
program tabs 22, 32
selection guidelines 23
title bar 22, 33
Display
calibration 202
indicators 28
notepad 46
settings 91
display 192
Divert calls 83, 111
Documentation
Quick Guide 6
User’s Guide 6
User’s Manual 6
Domestic calls 38
Draft messages 142
DTMF functions 47
E
Editing
calendar entries 161
messages 138, 141
E-mail
account
settings 98
new 144
E-mail set up 173
Emergency
calls 37
mode 20
Entering information 23
Export to SIM card 123
Extended character set 64
Extras 189
alarms 196
calculator 198
calculator settings 104
calendar settings 92
clock 191
contacts settings 91
date
setting 196
display settings 91
e-mail account settings 98
game 199
global settings 89
input settings 91
locale 91
master reset settings 104
messaging settings 92
notepad 189
port settings 103
reset locale settings 104
service provider settings 102
storage information 201
system 200
system preferences 89, 201
time 195
timezones 193
touchscreen calibration 202
WAP Services settings 100
F
Fax calls 45
Find
contacts 124
messages 150
Flip closed 25
icon 37
Flip open
contents list 117
icon 37
navigation 35
Forbidden networks 84
Forwarding messages 136, 141

247
G
Game 199
Get mail 131
Global settings 89
Greetings 85, 112
H
Handbook
see Documentation
see Manuals
Handsfree equipment 87, 112
Handwriting Recognition
using 66
Handwriting recognition 62
Extended character set 64
Natural character set 63
Hide identity 77
Holding 48
I
Icons
phone 28
program 23
Import from SIM card 122
Inbox 128
Inbox messaging 129
Increasing ring 76, 78
Indicators
alarm active 29
battery meter 30
call timer 30
conference call 30
connection name 30
connection number 30
connection progress 30
current network 29
date 29
decipher warning 29
infrared active 29
keylock 29
ring signal off 28
signal strength 30
SMS memory overflow 30
text message received 29
time 29
voice dialling active 29
voice mail 29
Infrared connectivity 209
Infrared port 76
Input settings 91
International calls 43
Internet 166
K
Keyboard settings 91
Keyboards 59
number 61
numeric 60
phone number 61
security access 61
special characters 60
Keypad
lock 69, 74, 75
Keypad Lock 69
Keypad positioning 85, 112
L
Language
reset 13
selection 13
setting 212
Last Call Information 57
Last dialled numbers list 88, 112
Last number calls 41
Licence agreement 239
Locale settings 91
location 192
Lock 69, 86, 112
keypad 69, 75
M
Mail notification 131
Manual service provider and e-mail set
up 174
Manual WAP set up 183
Manuals
Quick Guide 6
User’s Guide 6
User’s Manual (on CD) 6
Master reset settings 104
Melodies
edit 78
ring 78
Memory information 201

248
Messaging
add a sender to contacts 136
attachments 134
auto configuration 152
deleting 137
drafts 142
editing 138, 141
find 150
forwarding 136, 141
get mail 131
inbox 129
mail notification 131
new e-mail 144
notification 152
password 151
replies 136
sending 139
settings 92
SMS 148
viewing 133
Microphone mute 45
Minute minder 78
Missed calls 75
Modes
emergency 20
no network 20
standby 21
Mute the microphone 45
My numbers 86, 112
N
Natural character set 63
Navigation
flip open 35
Networks 83, 111
forbidden 84
preferred list 84
search mode 84
New appointment 159
New contact 124
No network mode 20
Notepad 46, 189
Notification
messaging 152
O
Office handsfree mode 112
On-screen keyboards 59
Outgoing calls 112
P
Password
messaging 151
PC connectivity 206
PC synchronization 210
Personal details 16, 17
Phone
calendar 155
conference calls.See Call
divert calls 83, 111
handsfree equipment 87, 112
inbox 128
keypad position 85, 112
last dialled numbers list 88, 112
locks 86, 112
my numbers 86, 112
networks 83, 111
office handsfree mode 112
outgoing calls 112
phone book 115
restrict calls 82, 111
service numbers 44
settings 78, 111
sounds and alerts 78, 111
tasks 108
total calls and costs 110
user greetings 85, 112
view 109
voice control 79, 111
voicemail 19, 82
Phone book 115
Phone Display Indicators 28
Phone Icons 28
Phone keys
voice memo 26
volume slider 26
Phone Symbols 28
PIN 70
entry 12
incorrect entry 13
Port settings 103
Preferences 89, 201

249
Problem
card blocked 215
display 216
emergency calls only 216
fax calls 216
inset card displayed 216
memory/disk full 216
no indicator light 216
no network 217
phone locked 218
red indicator light 216
screen 216
security code 216
starting 218
wrong PIN displayed 218
Product Care and Safety 219
Program
icons 23, 33
tabs 22, 32
toolbar 33
PUK code 70
PUK codes 70
Q
Quick Guide 5
R
Receiving via infrared 122
Re-dialing 42
Regulatory information 242
Reject call 45
Replying to messages 136
Reset locale settings 104
Restoring 212
Restrict calls 82, 111
Ring
controls 78
increasing ring 78
signals 78
silent 78
vibrating 78
Ring volume 75
S
Screen calibration 202
Screen settings 91
Security
access password 97
access settings 95
dynamics 96
messaging 151
PIN Codes 70
problems 216
PUK codes 70
secure computing 96
secure computing PIN 97
Sending
messages 139
personal details via infrared 116
Sending an e-mail for the first time
180
Sending via infrared 121
Serial connectivity 208
Service numbers 44, 76
Set up a new gateway 184
Settings
calculator 104
calendar 92
contacts 91
display 91
e-mail account 98
global 89
input 91
keyboard 91
locale 91
master reset 104
messaging 92
port 103
reset locale 104
screen 91, 202
service provider 102
WAP Services 100
Show identity 77
SIM card
import 18
insertion 8
removal 9
SMS
new 148
Sounds and alerts 78, 111
Specification 234
Standby mode 21

250
Stylus
dragging 22
location 21
usage/selecting 21
Symbols
phone 28
Synchronization 205
System preferences 200
T
Technical data 234
Time
setting 15, 195
timezones 193
UTC table 194
Title bar 22, 33
To do 159, 160
Toolbar 33
Touchscreen calibration 17, 202
U
User greetings 85, 112
User’s Guide 6
User’s Manual 6
Using WAP for the first time 185
V
Vibrating alert 78
Viewing messages 133
Voice control 79, 111
commands
create 80
delete 82
edit 80
play 82
Voice memo key 26
Voicemail 19, 58, 82
Volume
adjustment 45
slider key 26
W
WAP 165
bookmarks 169
browser 166
history 171
open location 171
WAP Services
bookmarks 169
browser 166
Ericsson portal 168
history 171
open location 171
settings 100
WAP sites 168
Warranty information 235