HDT H168 Handheld 3-Axis Gimbal Stabilizer User Manual
HDT(SZ)CO., LIMITED Handheld 3-Axis Gimbal Stabilizer
HDT >
User manual
USER MANUAL
Handheld 3 Axis Gimbal Stabilizer
H2
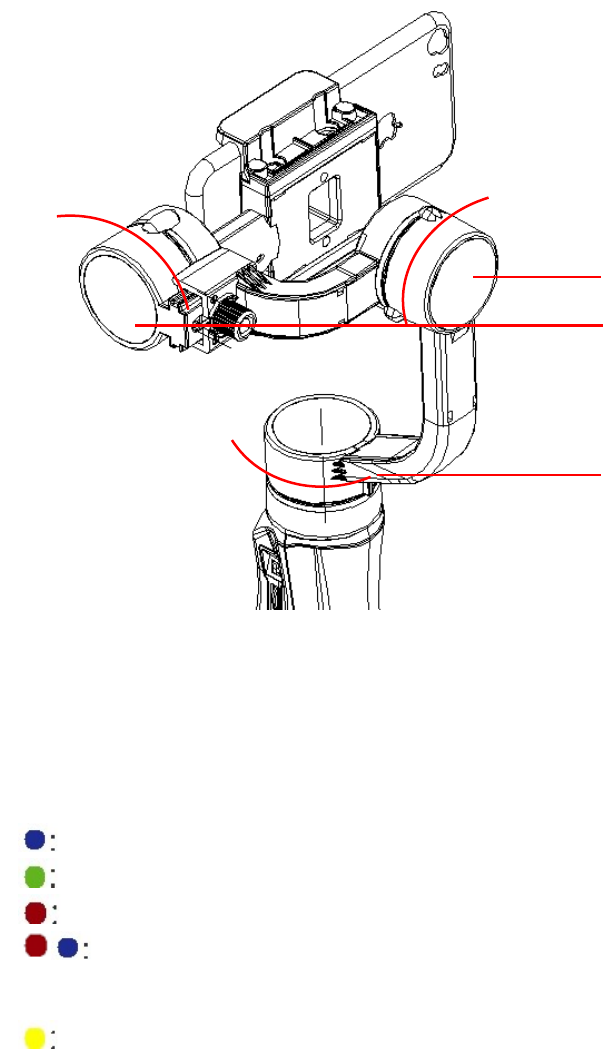
3 Axis Parameter & Indicator Light
Indicator Light:
Instruction is received and executing.
Working well in normal voltage.
Low voltage,flashing is too low to shutdown.
When stabilizer overloaded,red&blue light will flashing, motor will stop output and
try output after 10 seconds. If keeping failed after 5 times, stabilizer enter self protection
(Mainly related to phone weight balance).
System is working abnormally.
2700
1800
3200
NO.2 Motor(Roll)
NO.3 Motor(Tilt)
NO.1 Motor(Pan)
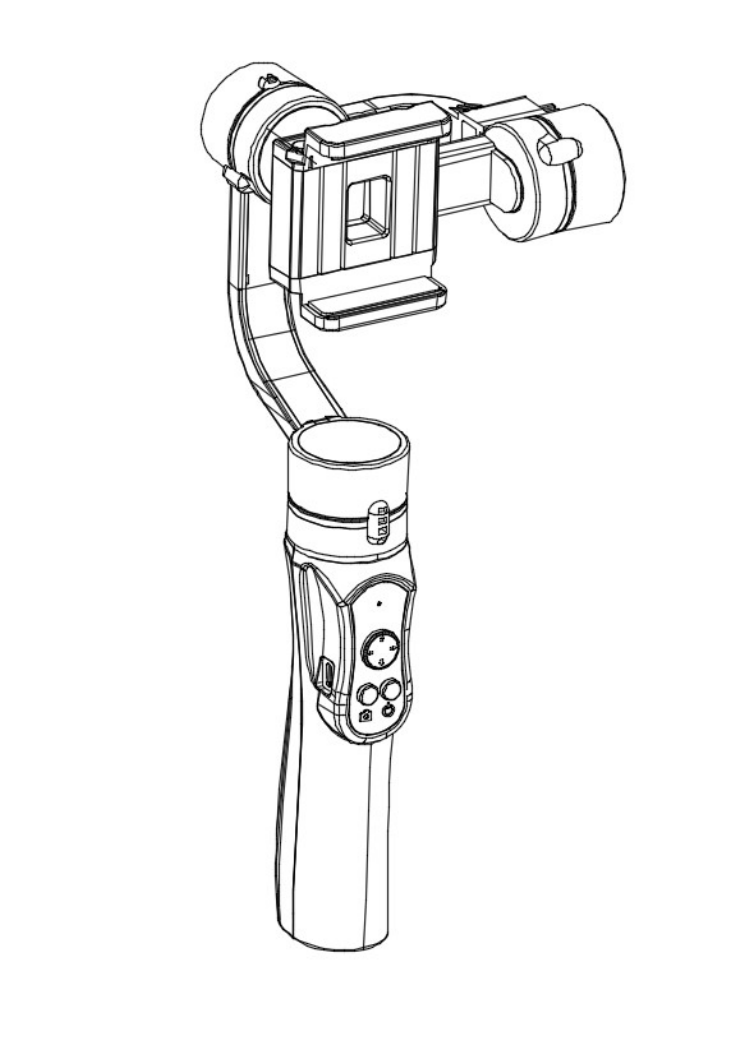
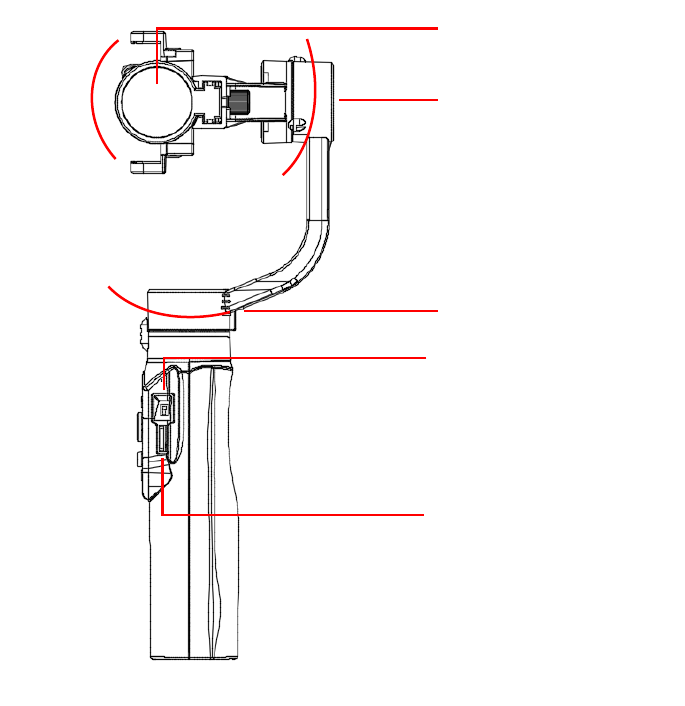
Product Overview:
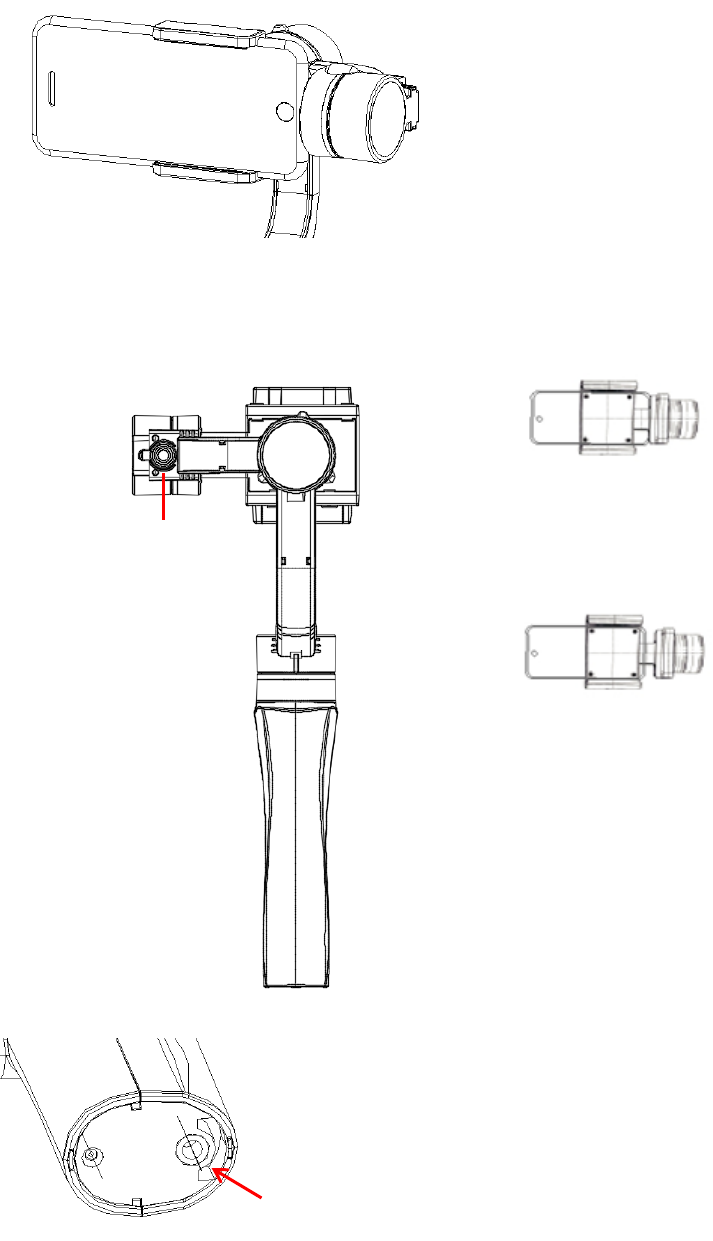
Attention!
Please install smartphone or action camera first
before power on.
When using IPhone6, IPhone7, IPhone8,
pull guide holder to innermost position.
When using IPone6 Plus, IPone7 Plus, pull
guide holder to middle.
Please adjust guide holder position
according to your phone weight.
In the bottom, there is a 1/4 thread inside to connect with
self-stick and other accessories.
Knob:
--tighten when
clockwise rolling.
--loosen when
counter clockwise
rooling
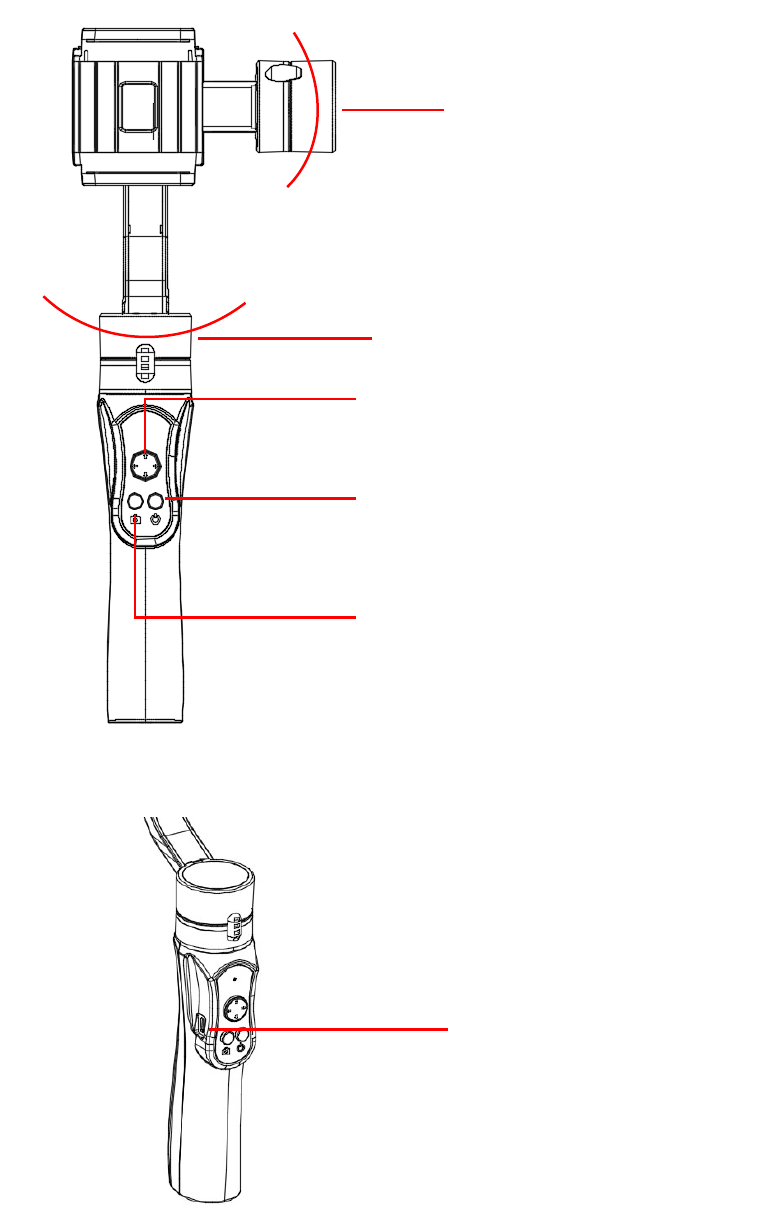
Instruction 1:
No.1 Motor(Pan)
Joystick Button:
Up and Down:Control Tilt Motor to move up and down.
Left and Right:Control Pan Motor to move right and left.
Power Button:
Power off status:Long press until indicator light turn blue
and flash, the stabilizer power on.
Double click:Camera back to middle.
Shooting Button:
Single click:Taking photo.
Double click:Switch front and rear camera of phone.
Triple click:Switch photo and video shooting.
Micro USB Charging Port
No.3 Motor(Tilt)
Instruction 2:
Lock switch:
Pull up:Unlock No.3 Motor (Tilt),enter following
mode.
Pull down:Lock No.3 Motor (Tilt),shutdown
following mode.
Pulley switch:
Pull down:Reduce following speed when pulling
switch down, enter fix shooting when pull down to
bottom (3 motors been fixed).
Pull up:Unlock fix mode when pull switch up
(accelerate following speed when pulling switch
up).
Switch horizontal to vertical shooting:
At horizontal shooting status: keep phone facing to yourself, rotate handle of stabilizer over
70 degrees in counterclockwise, stabilizer enter vertical shooting(phone camera downward)
At horizontal shooting status: keep phone facing to yourself, rotate handle of stabilizer over
70 degrees in clockwise, stabilizer enter vertical shooting(phone camera upward)
Switching vertical to horizontal shooting:
At vertical shooting status: keep phone facing yourself, handle of stabilizer upright, exit
vertical shooting mode.
Hand-adjusting:
Adjusting Pan&Tilt by hands when indicator light at green or red status。
No.3 Motor(Tilt)
No.2 Motor(Roll)
NO.1 Motor(Pan)

Packing List:
No.
Name
Quantity
1
Gimbal Stabilizer
X1
2
USB Charging Cable
X1
Specification:
Name
Specification
Charging voltage
5V
Charging current
1A
Working voltage
3.4V ~ 4.2V
Working current
0.2mA ~ 2A
No.1 Motor(Pan)
-160° ~ 160°
No.2 Motor(Roll)
-90° ~ 90°
No.3 Motor(Tilt)
-180° ~ 90°
Battery duration
About 4H
Working temperature
-10°C ~ 45°C
Net weight(including battery)
About 400g
Product dimension(L/W/H)
320*124*55mm
Federal Communications Commission (FCC) Statement
This device complies with part 15 of the FCC Rules. Operation is subject to the following two
conditions: (1) This device may not cause harmful interference, and (2) this device must
accept any interference received, including interference that may cause undesired operation.
Note: This equipment has been tested and found to comply with the limits for a Class B digital
device, pursuant to part 15 of the FCC Rules. These limits are designed to provide reasonable
protection against harmful interference in a residential installation. This equipment generates,
uses and can radiate radio frequency energy and, if not installed and used in accordance with
the instructions, may cause harmful interference to radio communications. However, there is
no guarantee that interference will not occur in a particular installation. If this equipment does
cause harmful interference to radio or television reception, which can be determined by turning
the equipment off and on, the user is encouraged to try to correct the interference by one or
more of the following measures:
●Reorient or relocate the receiving antenna.
●Increase the separation between the equipment and receiver.
●Connect the equipment into an outlet on a circuit different from that to which the receiver is
connected.
●Consult the dealer or an experienced radio/TV technician for help.
Warning: Changes or modifications made to this device not expressly approved by
HDT(SZ)CO., LIMITED may void the FCC authorization to operate this device.
Note: The manufacturer is not responsible for any radio or TV interference caused by
unauthorized modifications to this equipment. Such modifications could void the user’s
authority to operate the equipment.