HM Electronics HS6100 Headset for wireless intercom system User Manual Operating Instructions Sheet
HM Electronics Inc Headset for wireless intercom system Operating Instructions Sheet
UserManual.wiki
>
HM Electronics
>
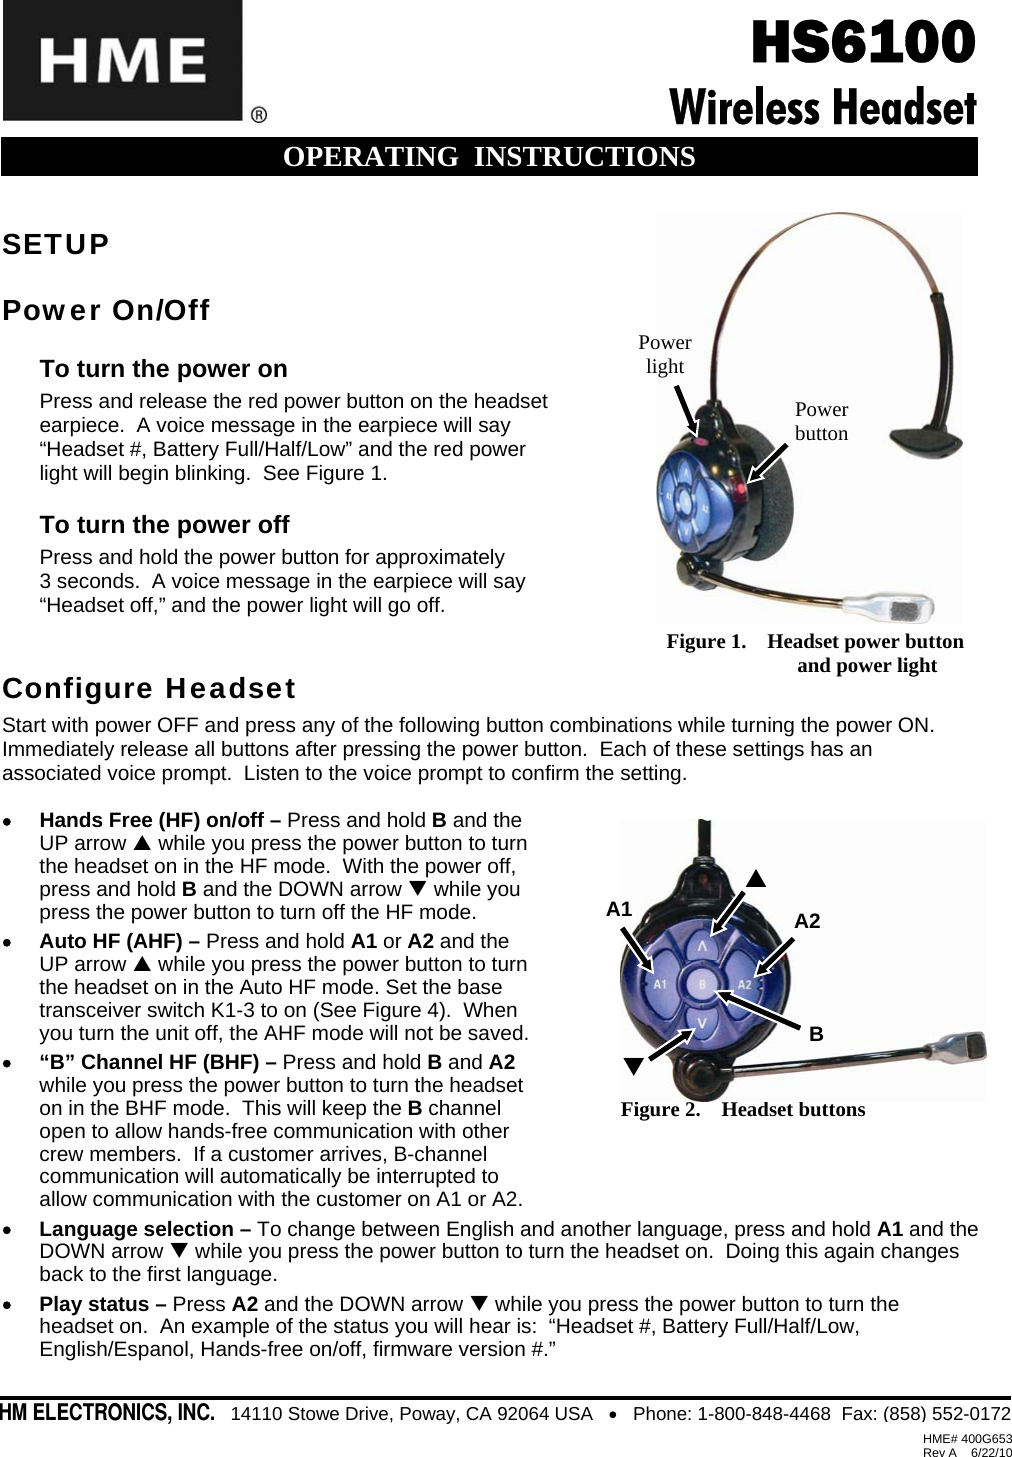
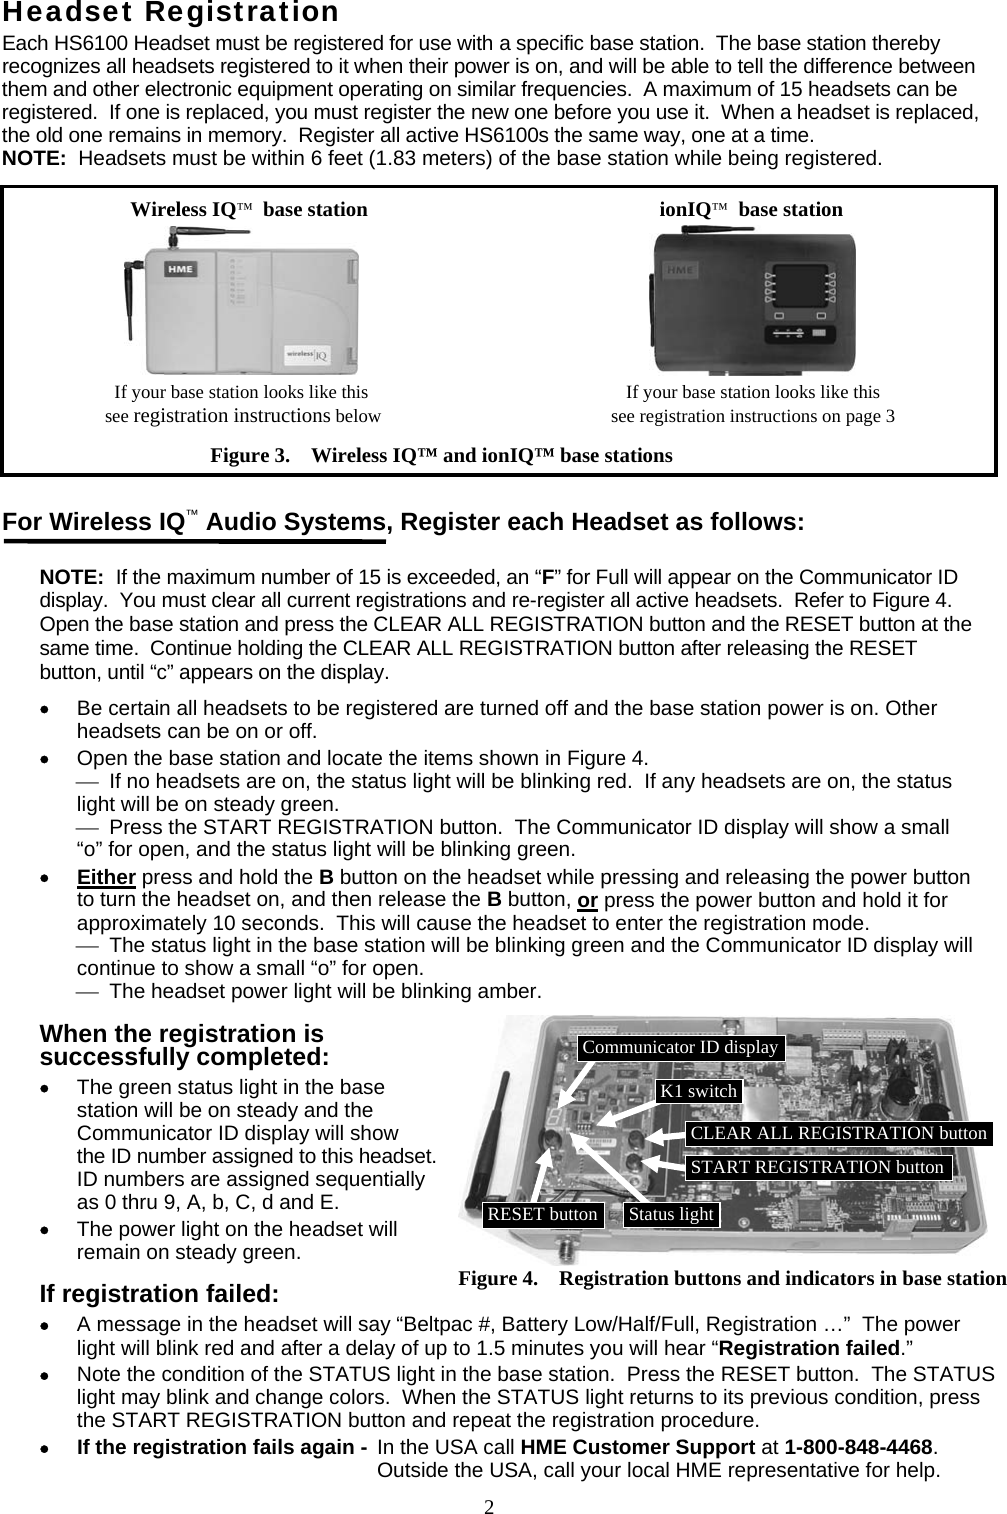
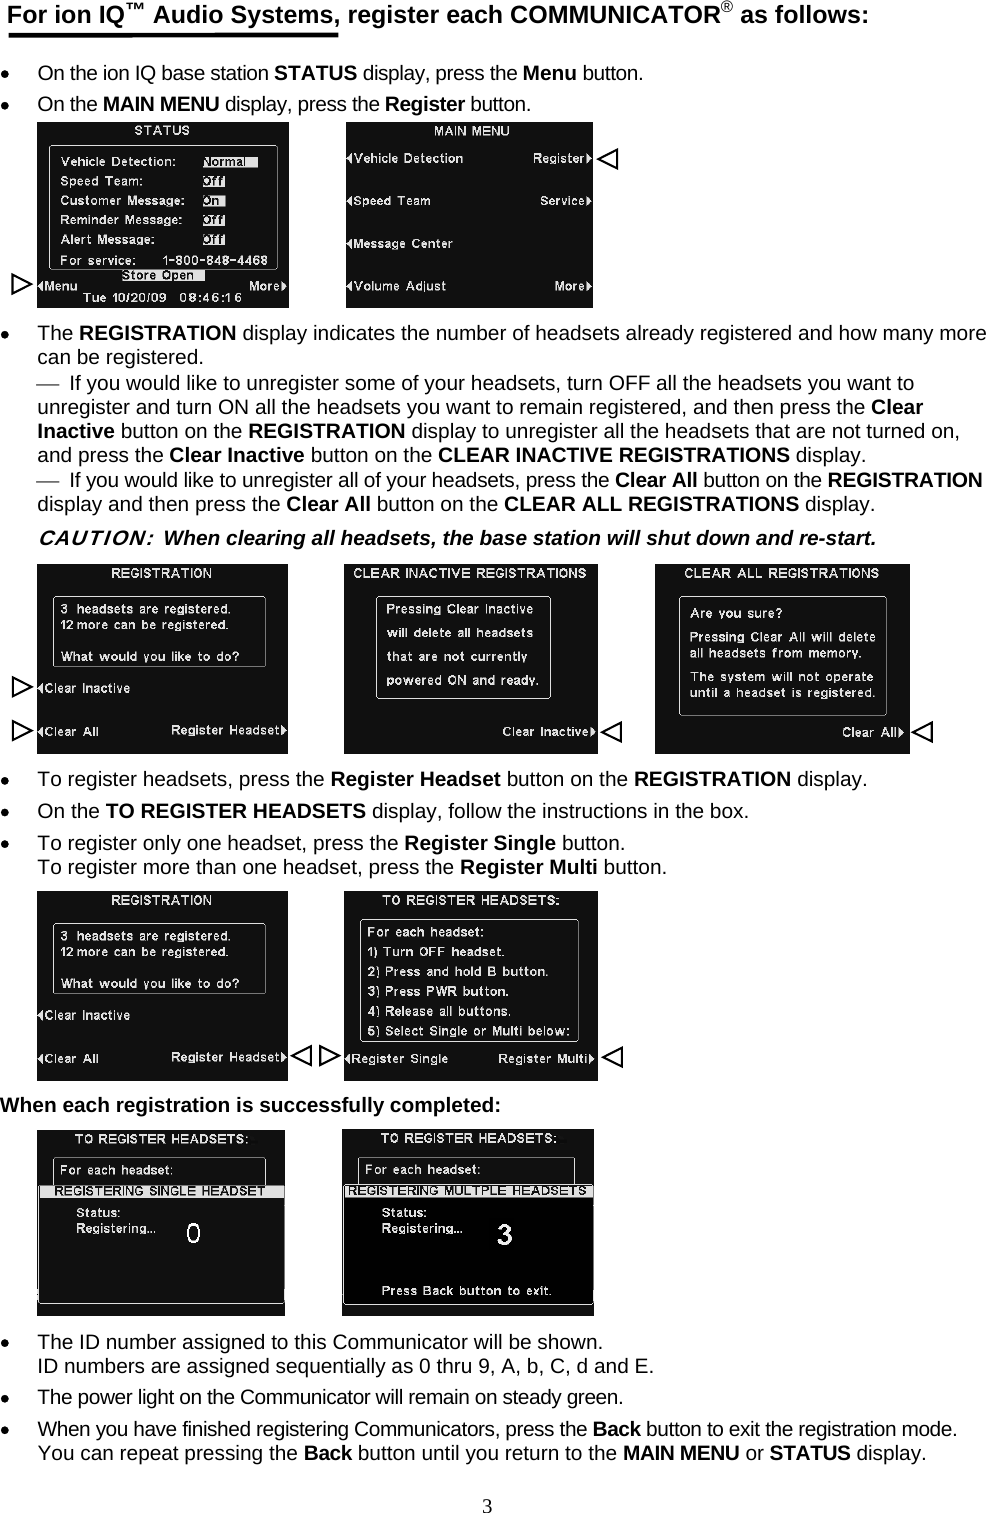
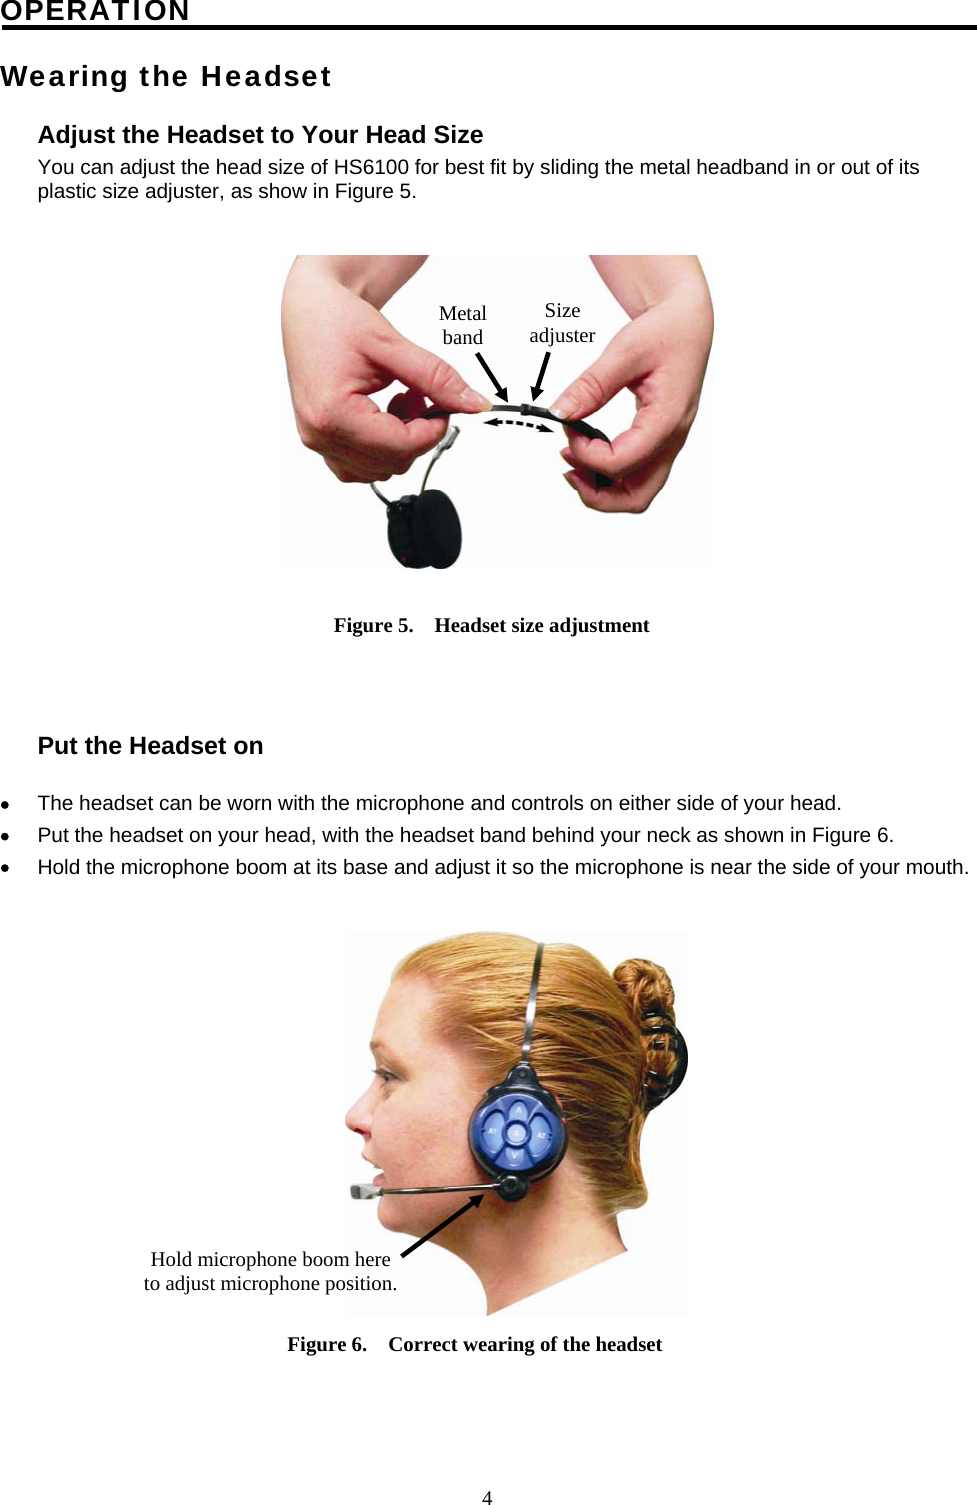
HS6100 User Manual
User Manual
Navigation menu
Upload a User Manual
Namespaces
Wiki Guide
HTML
PDF
Info
Views
User Manual
Discussion / Help
Navigation