HP MFP Analog Fax Accessory 700 Guide ENWW C05791986
User Manual: HP HP MFP Analog Fax Accessory - Fax Guide
Open the PDF directly: View PDF ![]() .
.
Page Count: 36
- Overview
- Install the fax accessory
- Set up fax
- Change fax configurations
- Send a fax
- Improve fax image quality
- Solve fax problems
- Checklist for solving fax problems
- General fax problems
- The fax failed to send
- An Out of Memory status message displays on the printer control panel
- Print quality of a photo is poor or prints as a gray box
- You selected the Stop button to cancel a fax, but the fax was still sent
- No fax address book button displays
- Not able to locate the Fax settings in HP Web Jetadmin
- The header is appended to the top of the page when the overlay option is enabled
- A mix of names and numbers is in the recipients box
- A one-page fax prints as two pages
- A document stops in the document feeder in the middle of faxing
- The volume for sounds coming from the fax accessory is too high or too low
- Specifications
- Index
HP MFP Analog Fax Accessory 700
Fax Guide

HP MFP Analog Fax Accessory 700
Fax Guide
Copyright and License
© Copyright 2018 HP Development Company,
L.P.
Reproduction, adaptation, or translation without
prior written permission is prohibited, except as
allowed under the copyright laws.
The information contained herein is subject to
change without notice.
The only warranties for HP products and
services are set forth in the express warranty
statements accompanying such products and
services. Nothing herein should be construed as
constituting an additional warranty. HP shall not
be liable for technical or editorial errors or
omissions contained herein.
Edition 1, 3/2018
Trademark Credits
Adobe®, Adobe Photoshop®, Acrobat®, and
PostScript® are trademarks of Adobe Systems
Incorporated.
Apple and the Apple logo are trademarks of
Apple Inc., registered in the U.S. and other
countries.
OS X is a trademark of Apple Inc., registered in
the U.S. and other countries.
AirPrint is a trademark of Apple Inc., registered
in the U.S. and other countries.
Google™ is a trademark of Google Inc.
Microsoft®, Windows®, Windows® XP, and
Windows Vista® are U.S. registered trademarks
of Microsoft Corporation.
UNIX® is a registered trademark of The Open
Group.

Table of contents
1 Overview ..................................................................................................................................................................................................... 1
Introduction ............................................................................................................................................................................... 1
HP MFP Analog Fax Accessory 700 features ........................................................................................................................ 2
Parts included with the fax accessory ................................................................................................................................... 2
2 Install the fax accessory .......................................................................................................................................................................... 3
Install the fax accessory .......................................................................................................................................................... 3
Connect the fax accessory to a phone line ........................................................................................................................... 4
Verify fax operation .................................................................................................................................................................. 4
Update rmware ....................................................................................................................................................................... 5
3 Set up fax ................................................................................................................................................................................................... 7
Introduction ............................................................................................................................................................................... 7
Required fax settings ............................................................................................................................................................... 7
Set up fax by using the printer control panel ....................................................................................................................... 7
4 Change fax congurations ...................................................................................................................................................................... 9
Introduction ............................................................................................................................................................................... 9
Fax dialing settings .................................................................................................................................................................. 9
General fax send settings ..................................................................................................................................................... 11
Fax receive settings ............................................................................................................................................................... 13
5 Send a fax ................................................................................................................................................................................................ 15
Send a fax ................................................................................................................................................................................ 15
Additional fax tasks ............................................................................................................................................................... 18
6 Improve fax image quality .................................................................................................................................................................... 19
7 Solve fax problems ................................................................................................................................................................................ 21
Checklist for solving fax problems ...................................................................................................................................... 22
General fax problems ............................................................................................................................................................ 25
ENWW iii
8 Specications .......................................................................................................................................................................................... 26
Fax accessory product specications .................................................................................................................................. 27
Replacement parts and accessories ................................................................................................................................... 28
Index ............................................................................................................................................................................................................. 29
iv ENWW
1 Overview
●Introduction
●HP MFP Analog Fax Accessory 700 features
●Parts included with the fax accessory
Introduction
The HP MFP Analog Fax Accessory 700 enables the HP multifunction product (MFP) to function as a standalone
analog fax machine. For more information, see www.hp.com/support/mfpfaxaccessory700.
Conventions used in this guide
TIP: Tips provide helpful hints or shortcuts.
NOTE: Notes provide important information to explain a concept or to complete a task.
CAUTION: Cautions indicate procedures that you should follow to avoid losing data or damaging the product.
WARNING! Warnings alert you to specic procedures that you should follow to avoid personal injury,
catastrophic loss of data, or extensive damage to the product.
ENWW Introduction 1

HP MFP Analog Fax Accessory 700 features
Send-fax features ●Speed dials
●Fax address book
●Resolution and image-adjustment options
●Billing codes
Receive-fax features ●Stamp received faxes
●Block incoming faxes
●Fax polling
●Adjustable rings-to-answer
Advanced fax features ●Notication of fax status
●JBIG compression
●Error correction
●Fax archive
Remote fax conguration ●Embedded Web server
●HP Web Jetadmin
●HP MFP Digital Sending Software
Security features ●Fax-printing schedule
●PIN for fax printing and fax forwarding
Parts included with the fax accessory
The following components are included with the fax accessory:
●Fax accessory card
●Phone cord(s) (cords vary depending on the country/region)
2 Chapter 1 Overview ENWW
2 Install the fax accessory
●Install the fax accessory
●Connect the fax accessory to a phone line
●Verify fax operation
●Update rmware
Install the fax accessory
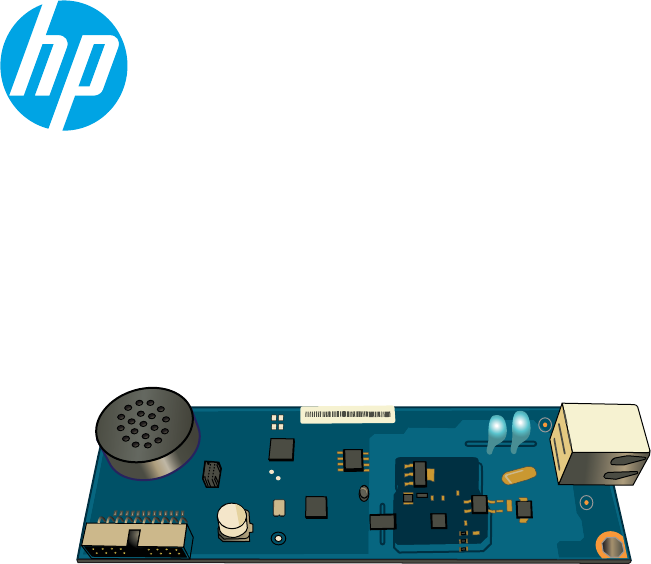
If the fax accessory is not yet installed on your printer, see the installation guide in the box for instructions on
installing it.
CAUTION: Always touch the printer’s chassis (sheet metal) to discharge any ESD charges before touching
the ESD sensitive components during installation.
If the product came with the fax accessory installed, remove the fax connection cover, and then continue on to
the next step to connect the fax accessory to a phone line. The fax connection cover is located on the phone
connector on the formatter rear panel.
NOTE: The following image is shown for illustration purposes only. Formatter location and appearance vary
among printers.
ENWW Install the fax accessory 3

Connect the fax accessory to a phone line
When connecting the fax accessory to a phone line, ensure that the phone line being used for the fax accessory
is a dedicated line that is not used by any other devices. Also, this line should be an analog line because the fax
will not function correctly if it is connected to some digital PBX systems. If you are not sure whether you have an
analog or digital phone line, contact your telecom provider.
NOTE: HP recommends using the phone cord that comes with the fax accessory to ensure that the accessory
functions correctly.
Follow these instructions to connect the fax accessory to a phone jack.
1. Locate the phone cord that is included with the fax accessory kit. Connect one end of the phone cord into
the fax accessory phone jack that is on the fax card. Push the connector until it clicks.
CAUTION: Be sure to connect the phone line to the fax accessory port. Do not connect the phone line to
the LAN port, which is nearer the bottom of the formatter.
2. Connect the other end of the phone cord into the phone jack on the wall. Push the connector until it clicks
or until it is securely seated. Because dierent types of connectors are used in dierent countries/regions,
the connector might not make an audible click.
Verify fax operation
Check the printer control panel to verify fax operation:
●FutureSmart 3: If the fax icon on the control panel is dimmed, the fax accessory is not installed or not
congured. When you select the icon, a message prompts you to contact the administrator.
●FutureSmart 4: The fax icon on the control panel is available (not dimmed). Select the fax icon to check the
status:
4 Chapter 2 Install the fax accessory ENWW

–If the control panel prompts you to congure, the fax accessory is installed but not congured.
–If the control panel will prompts you to set up either LAN or Internet connection, the fax accessory is
not installed.
Continue on through the instructions that follow to update rmware, and then set up and congure the fax
accessory.
Update rmware
It is important to update the printer rmware at this point so the fax accessory will function correctly. Go to
hp.com/support, and in the search box, enter your printer model and the words “update rmware.” Select the
appropriate topic from the results list and follow the instructions that are provided.
NOTE: As a best practice, upgrade to the most current FutureSmart rmware version that is available for your
printer. For earlier printer models, do not select a version earlier than FutureSmart 3.9. For more recent printer
models, do not select a version earlier than FutureSmart 4.6.
ENWW Update rmware 5
6 Chapter 2 Install the fax accessory ENWW
3 Set up fax
Introduction
This information applies to fax and Flow models, or to other printers when the optional analog fax accessory has
been installed. Before continuing, make sure that the accessory is installed and the printer is connected to a
phone line as explained in the previous section.
Required fax settings
After the fax accessory is installed according to the instructions in the previous section, you must congure the
following settings:
●Date and time
●Country/region
●Fax header (phone number and company name)
This information is used in the fax header, which is printed on all outgoing faxes.
NOTE: When rst installed, the fax accessory might read some of these settings from the product; therefore, a
value may already be set. You should check the values to verify that they are set and correct.
NOTE: In the U.S. and many other countries/regions, setting the date, time, country/region, phone number, and
company name is a legal requirement for fax.
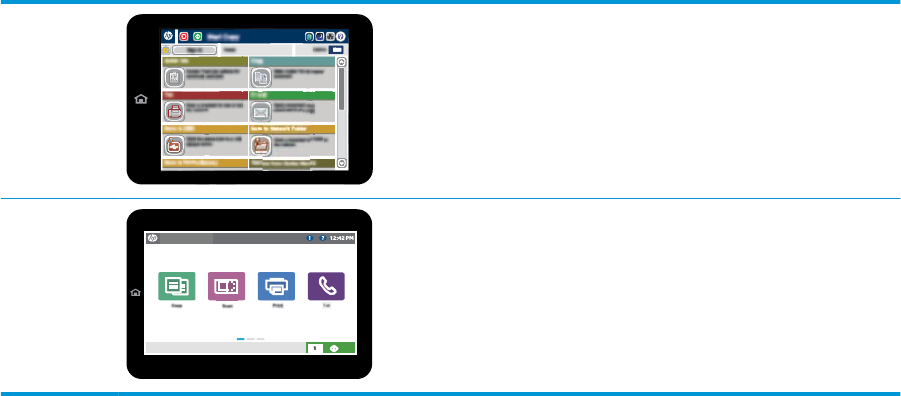
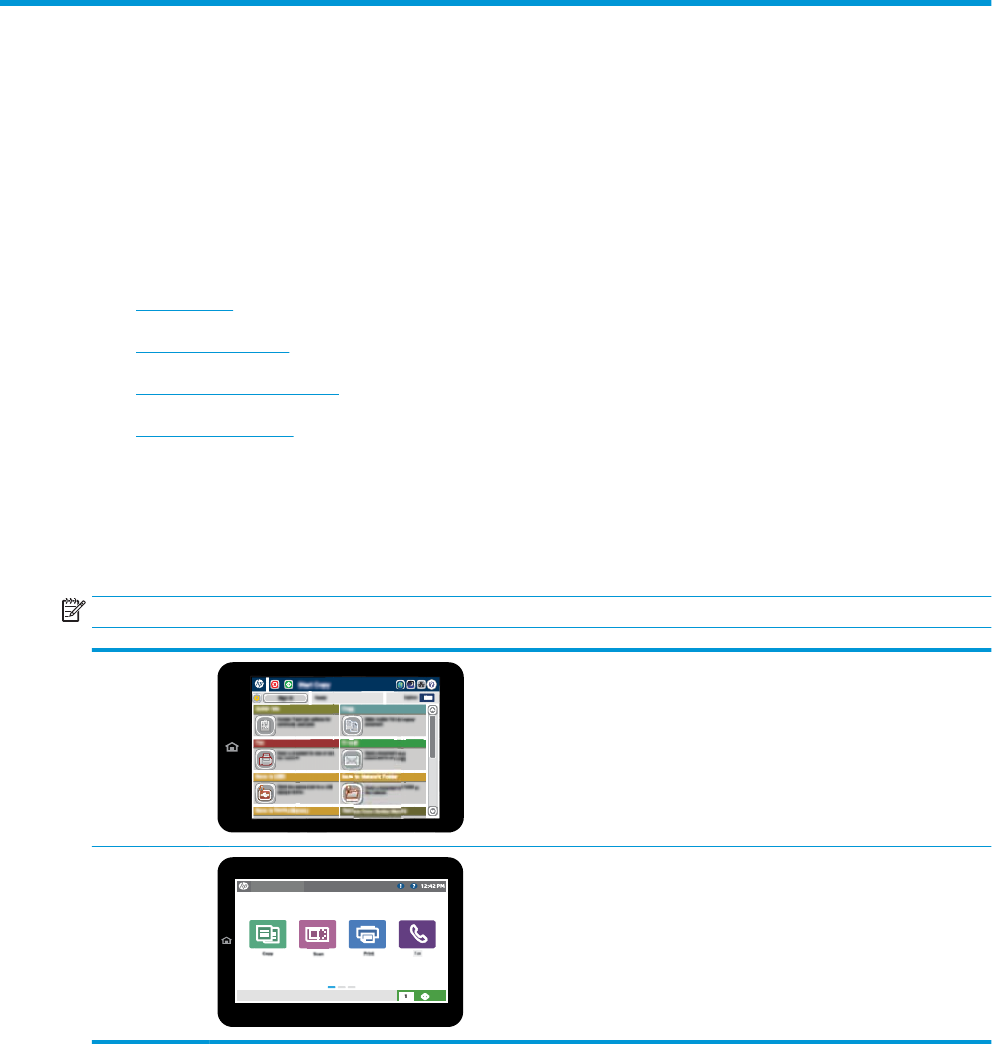
Set up fax by using the printer control panel
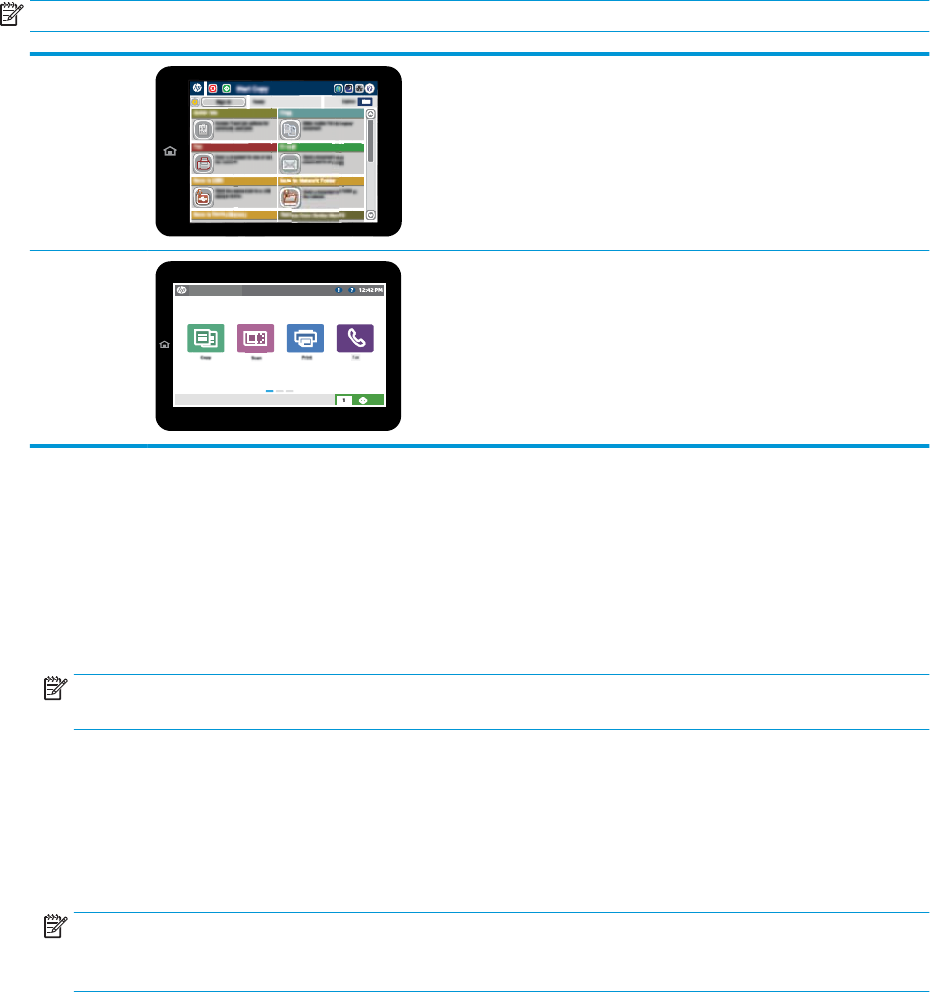
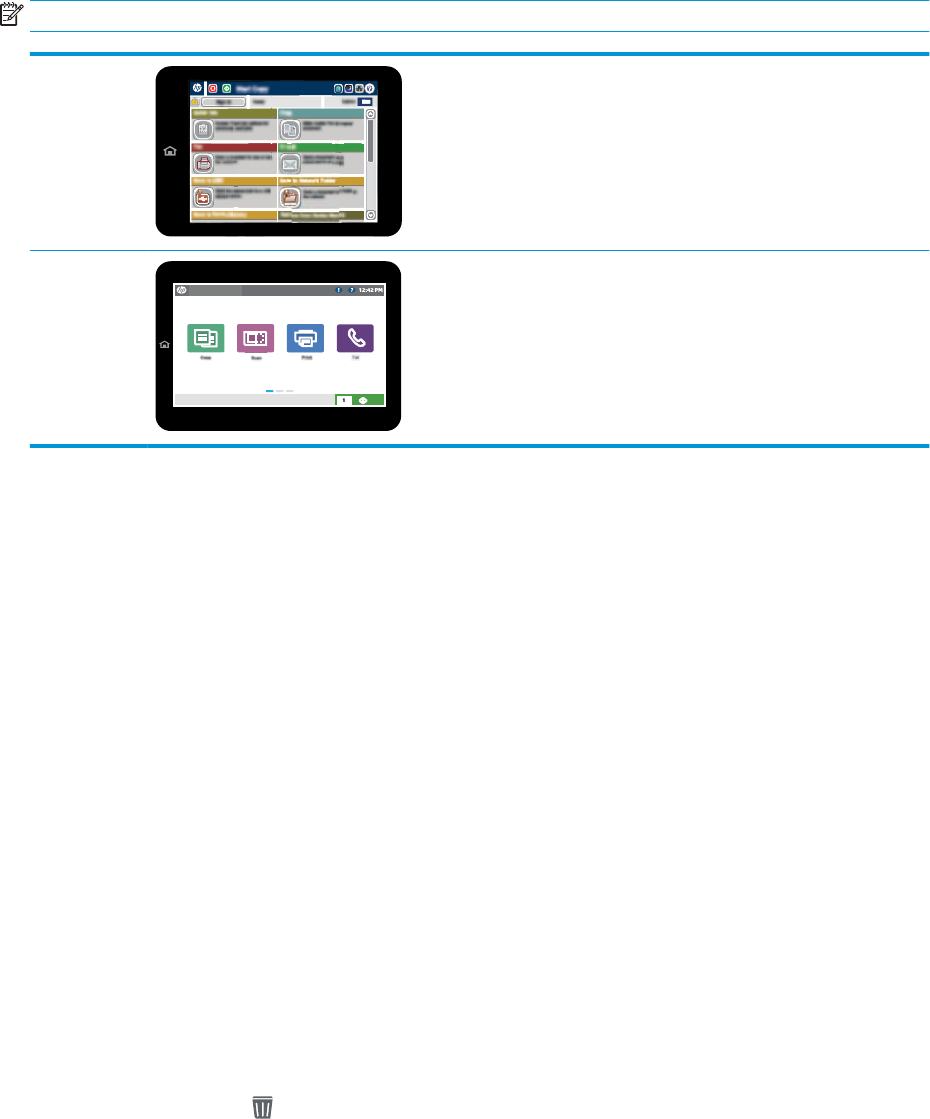
NOTE: The steps vary according to the type of control panel.
ENWW Introduction 7
FutureSmart 3
FutureSmart 4
FutureSmart 3
1. From the Home screen on the printer control panel, scroll to and select Administration.
2. Open the following menus:
●Fax Settings
●Fax Send Settings
●Fax Send Setup
●Fax Setup Wizard
3. Follow the steps in the Fax Setup Wizard to congure the required settings.
FutureSmart 4
1. From the Home screen on the printer control panel, select Settings, and then select Fax.
2. Make sure that the Internal Fax Modem Setup shows that it is congured. If it is not congured, select
Internal Fax Modem Setup now and enter the settings.
3. Select each of the following menu items and complete the settings presented on the right side of the
screen. Select Done for each setting if prompted.
●Fax Send Settings
●Fax Receive Settings
●Fax Forwarding
8 Chapter 3 Set up fax ENWW
4 Change fax congurations
●Introduction
●Fax dialing settings
●General fax send settings
●Fax receive settings
Introduction
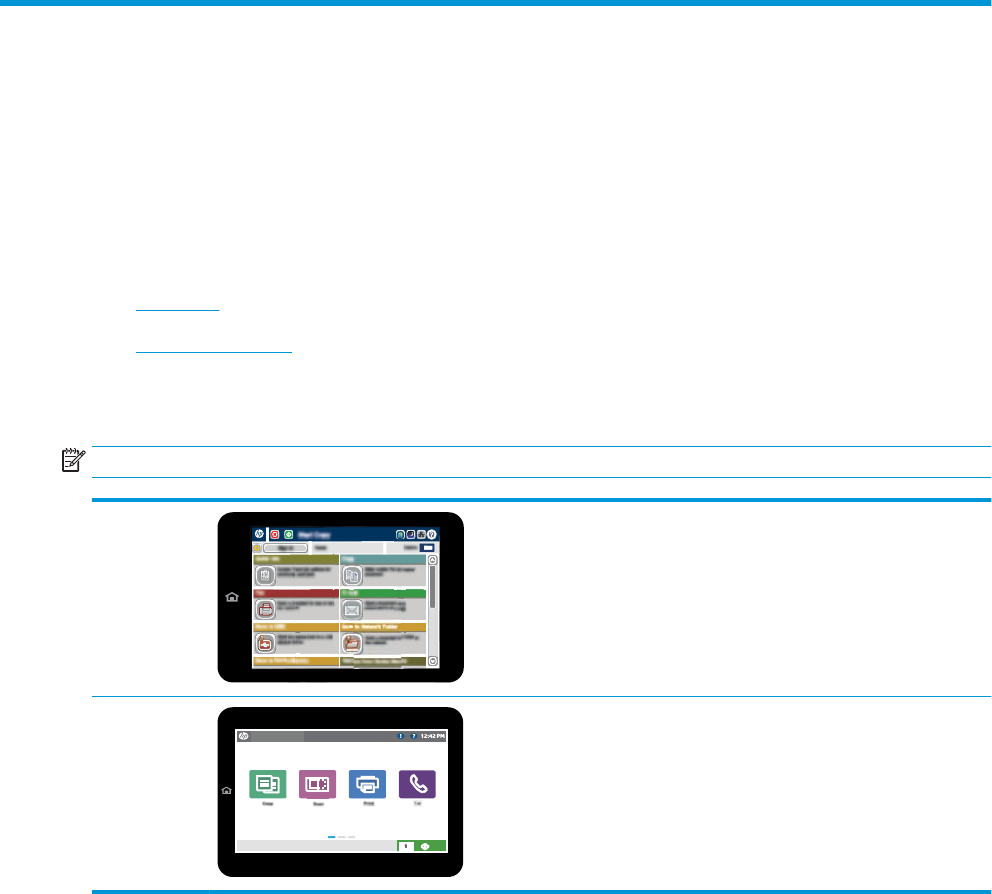
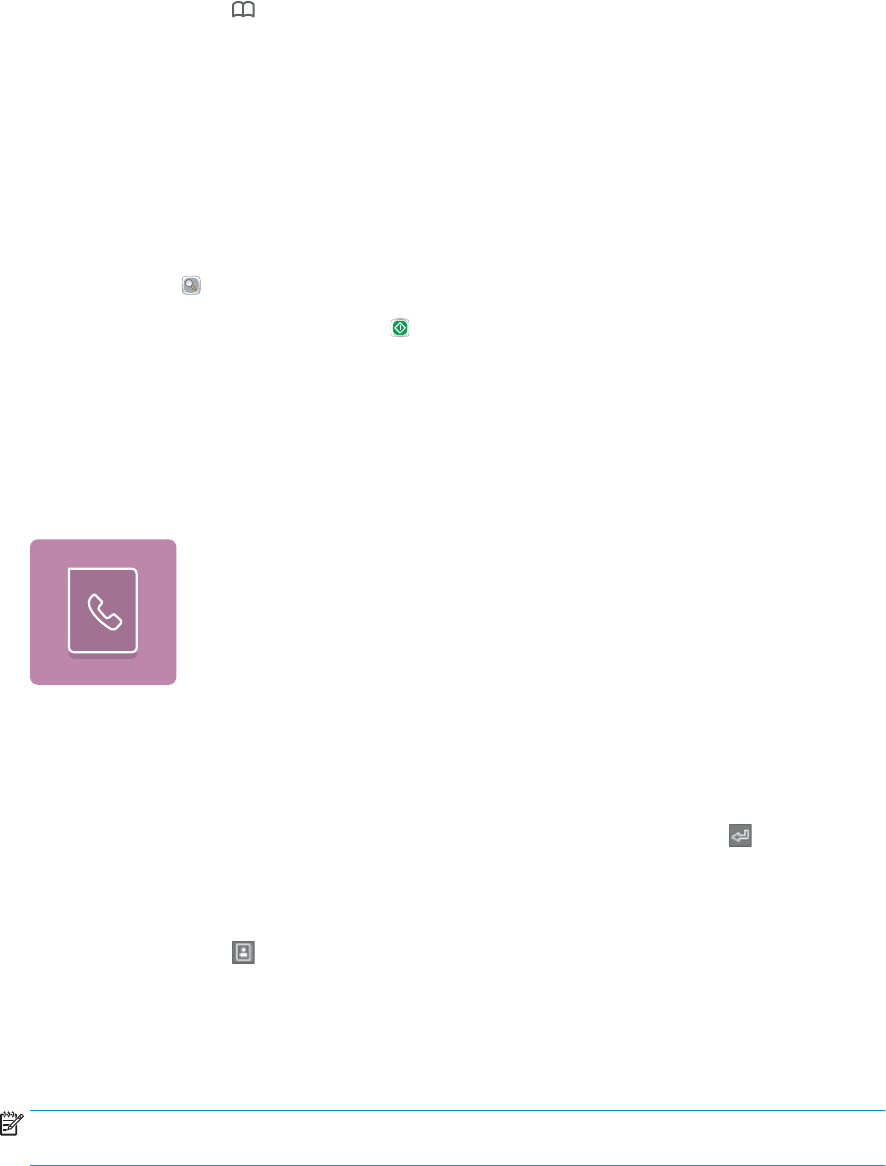
You can congure fax settings on the printer control panel. Settings that are congured on the printer control
panel override any settings made in the HP Embedded Web Server.
NOTE: The steps vary according to the type of control panel.
FutureSmart 3
FutureSmart 4
Fax dialing settings
FutureSmart 3
1. From the Home screen on the printer control panel, scroll to and select the Administration button.
2. Open the following menus:
ENWW Introduction 9

●Fax Settings
●Fax Send Settings
●Fax Send Setup
●Fax Dialing Settings
Congure any of the following settings:
Menu item Description
Line Monitor Volume Use the Line Monitor Volume setting to control the printer's dialing volume level when
sending faxes.
Dialing Mode The Dialing Mode setting sets the type of dialing that is used: either tone (touch-tone
phones) or pulse (rotary-dial phones).
Fax Send Speed The Fax Send Speed setting sets the modem bit rate (measured in bits per second) of the
Analog Fax modem while sending a fax.
●Fast (v.34 – 33.6k)
●Medium (v.17 – 14.4k)
●Slow (v.29 – 9.6k)
NOTE: Medium is the default value.
Redial Interval The Redial Interval setting selects the number of minutes between retries if the number
dialed is busy or not answering, or if an error occurs.
Redial On Error The Redial On Error feature sets the number of times a fax number will be redialed when
an error occurs during a fax transmission.
Redial On Busy The Redial On Busy setting selects the number of times (0 through 9) the fax accessory
redials a number when the number is busy. The interval between retries is set by the Redial
Interval setting.
Redial On No Answer The Redial On No Answer setting selects the number of times the fax accessory redials if
the number dialed does not answer. The number of retries is either 0 to 1 (used in the U.S.)
or 0 to 2, depending on the country/region setting. The interval between retries is set by
the redial interval setting.
Detect Dial Tone The Detect Dial Tone setting determines whether the fax checks for a dial tone before
dialing to send a fax.
Dialing Prex The Dialing Prex setting allows you to enter a prex number (such as a "9" to access an
outside line) when dialing. This prex number is automatically added to all phone numbers
when dialed.
FutureSmart 4
1. From the Home screen on the printer control panel, select Settings.
2. Open the following menus:
●Fax
●Fax Send Settings
●Fax Dialing Settings
10 Chapter 4 Change fax congurations ENWW

Congure any of the following settings. Select Done when you are nished.
Menu item Description
Redial on Error The Redial on Error feature sets the number of times a fax number will be redialed when an
error occurs during a fax transmission.
Redial on No Answer The Redial on No Answer setting selects the number of times the fax accessory redials if
the number dialed does not answer. The number of retries is either 0 to 1 (used in the U.S.)
or 0 to 2, depending on the location setting. The interval between retries is set by the redial
interval setting.
Redial on Busy The Redial on Busy setting selects the number of times (0 through 9) the fax accessory
redials a number when the number is busy. The interval between retries is set by the Redial
Interval setting.
Redial Interval The Redial Interval setting selects the number of minutes between retries if the number
dialed is busy or not answering, or if an error occurs.
Fax Send Speed The Fax Send Speed setting sets the modem bit rate (measured in bits per second) of the
Analog Fax modem while sending a fax.
●Fast (v.34 – 33.6k)
●Medium (v.17 – 14.4k)
●Slow (v.29 – 9.6k)
NOTE: Medium is the default value.
Line Monitor Volume Use the Line Monitor Volume setting to control the printer's dialing volume level when
sending faxes.
Dialing Mode The Dialing Mode setting sets the type of dialing that is used: either tone (touch-tone
phones) or pulse (rotary-dial phones).
Dialing Prex The Dialing Prex setting allows you to enter a prex number (such as a "9" to access an
outside line) when dialing. This prex number is automatically added to all phone numbers
when dialed.
Detect dial tone The Detect dial tone setting determines whether the fax checks for a dial tone before
dialing to send a fax.
General fax send settings
FutureSmart 3
1. From the Home screen on the printer control panel, scroll to and select the Administration button.
2. Open the following menus:
●Fax Settings
●Fax Send Settings
●Fax Send Setup
●General Fax Send Settings
Congure any of the following settings:
ENWW General fax send settings 11

Menu item Description
Fax Number Conrmation When the Fax Number Conrmation feature is enabled, the fax number must be entered
twice to ensure that it was entered correctly. The feature is disabled by default.
PC Fax Send Use the PC Fax Send feature to send faxes from a PC. This feature is enabled by default.
Fax Header Use the Fax Header feature to control whether the header is appended to the top, and
content is shifted down, or if the header is overlaid on top of the previous header.
JBIG Compression Enabling the JBIG Compression feature can reduce phone-call charges by reducing fax
transmission time and might be the preferred setting. However, using the JBIG
Compression feature might cause compatibility problems when communicating with some
older fax machines, in which case you might need to disable it.
NOTE: The JBIG Compression feature works only when both the sending and receiving
machines have this capability.
Error Correction Mode Normally, the fax accessory monitors the data on the telephone line while it is sending or
receiving a fax. If the fax accessory detects an error during the transmission and the Error
Correction Mode setting is on, the fax accessory can request that the error portion of the
fax be sent again.
The Error Correction Mode feature is enabled by default. You should turn it o only if you
are having trouble sending or receiving a fax and if you are willing to accept the errors in
the transmission and a probable quality reduction in the image. Turning o the setting
might be useful when you are trying to send a fax overseas or receive one from overseas,
or if you are using a satellite telephone connection.
NOTE: Some VoIP providers might suggest turning o the Error Correction Mode setting.
However, this is not usually necessary.
Fax Number Speed Dial Matching Enabling the Fax Number Speed Dial Matching can help when dialing faxes.
When you dial a fax number manually, this feature checks the stored speed dial entries for
a number that matches the number you enter. This can speed the dialing process and help
you if you do not remember the speed dial entry number for a given fax number.
If the printer nds a matching speed dial entry for the fax number entered manually, you
can select Yes to send the fax to that number or have the number added to the fax
distribution list.
FutureSmart 4
1. From the Home screen on the printer control panel, select Settings.
2. Open the following menus:
●Fax
●Fax Send Settings
●General Fax Send Settings
Congure any of the following settings. Select Done when you are nished.
Menu item Description
Fax Number Conrmation When the Fax Number Conrmation feature is enabled, the fax number must be entered
twice to ensure that it was entered correctly. The feature is disabled by default.
PC Fax Send Use the PC Fax Send feature to send faxes from a PC. This feature is enabled by default.
12 Chapter 4 Change fax congurations ENWW

Menu item Description
Error Correction Mode Normally, the fax accessory monitors the data on the telephone line while it is sending or
receiving a fax. If the fax accessory detects an error during the transmission and the Error
Correction Mode setting is on, the fax accessory can request that the error portion of the
fax be sent again.
The Error Correction Mode feature is enabled by default. You should turn it o only if you
are having trouble sending or receiving a fax and if you are willing to accept the errors in
the transmission and a probable quality reduction in the image. Turning o the setting
might be useful when you are trying to send a fax overseas or receive one from overseas,
or if you are using a satellite telephone connection.
NOTE: Some VoIP providers might suggest turning o the Error Correction Mode setting.
However, this is not usually necessary.
Fax Header Use the Fax Header feature to control whether the header is appended to the top, and
content is shifted down, or if the header is overlaid on top of the previous header.
Fax receive settings
FutureSmart 3
1. From the Home screen on the printer control panel, scroll to and select the Administration button.
2. Open the following menus:
●Fax Settings
●Fax Receive Settings
●Fax Receive Setup
Congure any of the following settings:
Menu item Description
Ringer Volume Select the Ringer Volume drop-down menu and adjust the ringer volume settings.
Rings To Answer The Rings To Answer setting determines the number of times the phone rings before the
call is answered by the fax accessory.
NOTE: The default range for the available options for the Rings To Answer setting is
specic to the country/region. The range of possible Rings To Answer options is limited by
country/region.
If you experience problems with the fax accessory answering, and the Rings To Answer
setting is 1, try increasing it to 2.
Fax Receive Speed Select the Fax Receive Speed drop-down menu and select one of the following options:
●Fast (v.34 – 33.6k)
●Medium (v.17 – 14.4k)
●Slow (v.29 – 9.6k)
NOTE: Medium is the default value.
Ring Interval1Select the box beneath the Ring Interval heading to open the keypad. Enter a value for the
ring interval on the keypad, and then select the OK button. The default setting for ring
interval is 600 ms.
ENWW Fax receive settings 13

Menu item Description
Ring Frequency2Select the box beneath the Ring Frequency heading to open the keypad. Enter a value for
the ring frequency on the keypad, and then select the OK button. The default setting for
ring frequency is 68 Hz, which detects rings up to 68 Hz.
1Ring Interval is a factory setting. Regulatory and ring-detect performance may be aected by changing this setting.
2Use caution when changing Ring Frequency as some ring-detect features may be disabled when changing the default value.
FutureSmart 4
1. From the Home screen on the printer control panel, select Settings.
2. Open the following menus:
●Fax
●Fax Receive Settings
●Fax Receive Setup
Congure any of the following settings. Select Done when you are nished.
Menu item Description
Rings to Answer The Rings to Answer setting determines the number of times the phone rings before the
call is answered by the fax accessory.
NOTE: The default range for the available options for the Rings to Answer setting is
location specic. The range of possible Rings to Answer options is limited by location.
If the fax accessory is not answering, and the Rings to Answer setting is 1, try increasing it
to 2.
Ring Volume Select the Ring Volume drop-down menu and adjust the ringer volume settings.
Fax Receive Speed Select the Fax Receive Speed drop-down menu and select one of the following options:
●Fast (v.34 – 33.6k)
●Medium (v.17 – 14.4k)
●Slow (v.29 – 9.6k)
NOTE: Medium is the default value.
14 Chapter 4 Change fax congurations ENWW
5 Send a fax
●Send a fax
●Additional fax tasks
Send a fax
NOTE: The steps vary according to the type of control panel.
FutureSmart 3
FutureSmart 4
FutureSmart 3
1. Place the document face-down on the scanner glass, or place it face-up in the document feeder and adjust
the paper guides to t the size of the document.
2. From the Home screen on the printer control panel, select the Fax button.
3. Specify the recipients by using one of these methods:
Enter recipients manually
▲Select the Fax Number eld to open the keypad, enter a fax number, and then select the OK button.
ENWW Send a fax 15
Enter recipients from the Contacts list
a. Select the Contacts button that is next to the Fax Number eld to open the Contacts screen.
b. From the drop-down list, select the appropriate contact list.
c. Select a name from the list of contacts to add the name to the recipients list. Repeat this step for
each recipient, and then select the OK button.
4. To congure settings for the document, select the More Options button. For example:
●Select Resolution to specify the resolution for the fax.
●If the original document is printed on both sides, select Original Sides, and then select 2 Sided.
5. Select the Preview button to preview the document.
6. When the document is ready, touch the Start button to send the fax.
FutureSmart 4
1. Place the document face-down on the scanner glass, or place it face-up in the document feeder and adjust
the paper guides to t the size of the document.
2. From the Home screen on the printer control panel, select Fax. You might be prompted to type a user name
and password.
3. Specify the recipients by using one of these methods:
Enter recipients manually
▲Touch the Fax Recipients text eld, and then use the keypad to enter the fax number. To send to
multiple fax numbers, separate the numbers with a semicolon, or select the Enter button on the
touchscreen keyboard after typing each number.
Enter recipients from the Contacts list
a. Select the Contacts button that is next to the Fax Recipients eld to open the Contacts screen.
b. Select the appropriate contact list.
c. Select a name or names from the list of contacts to add to the recipients list, and then select Add.
4. To load a Quick Set, select Load, select the Quick Set, and then select Load under the Quick Sets list.
NOTE: Quick Sets are predened settings for various types of output, such as Text, Photograph, and High
Quality. You can select a Quick Set to view the description.
5. To congure settings, such as Resolution, Sides, and Content Orientation, select Options in the lower left
corner, and then select the settings from the Options menus. Select Done if prompted.
16 Chapter 5 Send a fax ENWW
6. Optional Preview: Touch the right pane of the screen to preview the document. You can use the Expand and
Collapse buttons on the left side of the preview pane to expand and collapse the preview screen.
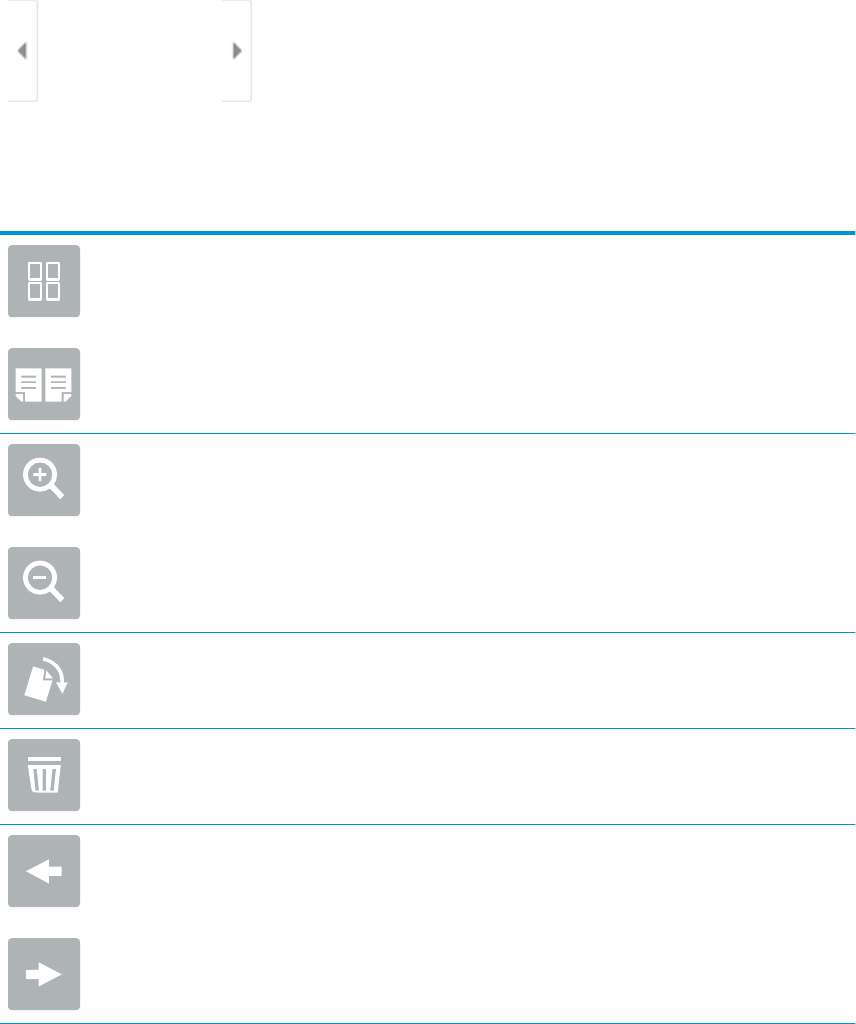
Expand button Collapse button
Use the buttons on the right of the screen to adjust the preview options and to rearrange, rotate, insert, or
remove pages.
Toggle between the two-page view and the thumbnail view. More options are available in the
thumbnail view than in the two-page view.
Zoom in or out on the selected page.
NOTE: Select only one page at a time to use these buttons.
Rotate the page 180 degrees.
NOTE: This button is available only in the thumbnail view.
Delete the selected pages.
NOTE: This button is available only in the thumbnail view.
Rearrange the pages within the document. Select one or more pages and move them to the left
or right.
NOTE: These buttons are available only in the thumbnail view.
ENWW Send a fax 17

Add a page to the document. The printer prompts you to scan additional pages.
Clear the changes made in the preview and start over.
7. When the document is ready, select Send to send the fax.
Additional fax tasks
Go to www.hp.com/support/mfpfaxaccessory700.
Instructions are available for performing specic fax tasks, such as the following:
●Create and manage fax speed dial lists
●Congure fax billing codes
●Use a fax printing schedule
●Block incoming faxes
●Fax archiving and forwarding
18 Chapter 5 Send a fax ENWW

20 Chapter 6 Improve fax image quality ENWW

7 Solve fax problems
●Checklist for solving fax problems
–What type of phone line are you using?
–Are you using a surge-protection device?
–Are you using a phone company voice-messaging service or an answering machine?
–Does your phone line have a call-waiting feature?
–Check fax accessory status
●General fax problems
–The fax failed to send
–An Out of Memory status message displays on the printer control panel
–Print quality of a photo is poor or prints as a gray box
–You selected the Stop button to cancel a fax, but the fax was still sent
–No fax address book button displays
–Not able to locate the Fax settings in HP Web Jetadmin
–The header is appended to the top of the page when the overlay option is enabled
–A mix of names and numbers is in the recipients box
–A one-page fax prints as two pages
–A document stops in the document feeder in the middle of faxing
–The volume for sounds coming from the fax accessory is too high or too low
ENWW 21
Checklist for solving fax problems
Use the following checklist to help identify the cause of any fax-related problems you encounter:
NOTE: The steps vary according to the type of control panel.
FutureSmart 3
FutureSmart 4
●Are you using the fax cable supplied with the fax accessory? This fax accessory has been tested with the
supplied fax cable to meet RJ11 and functional specications. Do not substitute another fax cable for the
supplied fax cable. The analog fax accessory requires an analog fax cable. It also requires an analog phone
connection.
●Is the fax/phone line connector seated in the outlet on the fax accessory? Make sure that the phone jack is
correctly seated in the outlet. Insert the connector into the outlet until it clicks or is rmly seated.
NOTE: Verify that the phone jack is connected to the fax port rather than to the network port. The ports
are similar.
●Is the phone wall jack working properly? Verify that a dial tone exists by attaching a phone to the wall jack.
Can you hear a dial tone, and can you make or receive a phone call?
What type of phone line are you using?
●Dedicated line: A standard analog fax/phone line assigned to receive or send faxes.
NOTE: The phone line should be for printer fax use only and not shared with other types of telephone
devices. Examples include alarm systems that use the phone line for notications to a monitoring
company.
●PBX system: A business-environment phone system. Standard home phones and the fax accessory use an
analog phone signal. Some PBX systems are digital and might not be compatible with the fax accessory.
You might need an interfacing Analog Telephone Adapter (ATA) to connect the fax machine to digital PBX
systems.
●Roll-over lines: A phone system feature where a new call "rolls over" to the next available line when the
rst incoming line is busy. Try attaching the printer to the rst incoming phone line. The fax accessory
answers the phone after it rings the number of times set in the rings-to-answer setting.
22 Chapter 7 Solve fax problems ENWW

Are you using a surge-protection device?
A surge-protection device can be used between the wall jack and the fax accessory to protect the fax accessory
against electrical surges passed through the phone lines. These devices can cause some fax communication
problems by degrading the quality of the phone signal. If you are having problems sending or receiving faxes
and are using one of these devices, connect the printer directly to the phone jack on the wall to determine
whether the problem is with the surge-protection device.
Are you using a phone company voice-messaging service or an answering machine?
If the rings-to-answer setting for the messaging service is lower than the rings-to-answer setting for the fax
accessory, the messaging service answers the call, and the fax accessory cannot receive faxes. If the rings-to-
answer setting for the fax accessory is lower than that of the messaging service, the fax accessory answers all
calls.
Does your phone line have a call-waiting feature?
If the fax telephone line has an activated call-waiting feature, a call-waiting notice can interrupt a fax call in
progress, which causes a communication error. Ensure that a call-waiting feature is not active on the fax
telephone line.
Check fax accessory status
If the analog fax accessory does not appear to be functioning, print a Conguration Page report to check the
status.
1. Access the Reports feature.
●FutureSmart 3: From the Home screen on the printer control panel, scroll to and select
Administration.
●FutureSmart 4: From the Home screen, scroll to and select Reports.
2. Open the following menus:
●Conguration/Status Pages
●Conguration Page
3. Touch the Print button to print the report, or touch the View button to view the report on the screen. The
report consists of several pages.
NOTE: The printer IP address or host name is listed on the Jetdirect Page.
On the Fax Accessory Page of the Conguration Page, under the Hardware Information heading, check the
Modem Status. The following table identies the status conditions and possible solutions.
NOTE: If the Fax Accessory Page does not print, there might be a problem with the analog fax accessory. If you
are using LAN fax or Internet fax, those congurations could be disabling the feature.
Operational / Enabled1The analog fax accessory is installed and ready.
ENWW Checklist for solving fax problems 23

Operational / Disabled1The fax accessory is installed, but you have not congured the
required fax settings yet.
The fax accessory is installed and operational; however, the
HP Digital Sending utility has either disabled the printer fax feature
or has enabled LAN fax. When LAN fax is enabled, the analog fax
feature is disabled. Only one fax feature, either LAN fax or analog
fax, can be enabled at a time.
NOTE: If LAN fax is enabled, the Fax feature is unavailable on the
printer control panel.
Non-Operational / Enabled/Disabled1The printer has detected a rmware failure. Upgrade the rmware.
Damaged / Enabled/Disabled1The fax accessory has failed. Reseat the fax accessory card and
check for bent pins. If the status is still DAMAGED, replace the
analog fax accessory card.
1ENABLED indicates that the analog fax accessory is enabled and turned on; DISABLED indicates that LAN fax is enabled (analog fax is
turned o).
24 Chapter 7 Solve fax problems ENWW
General fax problems
The following are some common fax problems.
NOTE: The steps vary according to the type of control panel.
FutureSmart 3
FutureSmart 4
The fax failed to send
JBIG is enabled, and the receiving fax machine does not have JBIG capability.
Turn o the JBIG setting.
An Out of Memory status message displays on the printer control panel
The printer storage disk is full. Delete some stored jobs from the disk.
FutureSmart 3
1. From the Home screen on the printer control panel, scroll to and select the Retrieve from Device Memory
button.
2. Select the folder in which the document is saved, and then select the document.
3. If the document is private, enter the four-digit PIN in the Password: eld, and then select OK.
4. Select the Delete button.
FutureSmart 4
1. From the Home screen on the printer control panel, select Print, and then select Print from Job Storage.
2. From the Job Folders list, select the folder in which the document is saved, and then select the document.
3. Select the Delete icon .
Print quality of a photo is poor or prints as a gray box
You are using the wrong page-content setting or the wrong resolution setting.
ENWW General fax problems 25
Try setting the Optimize Text/Picture option to Photograph setting.
You selected the Stop button to cancel a fax, but the fax was still sent
If the job is too far along in the sending process, you cannot cancel the job.
This is normal operation.
No fax address book button displays
The fax address book feature has not been enabled.
Use the HP MFP Digital Sending Software Conguration utility to enable the fax address book feature.
Not able to locate the Fax settings in HP Web Jetadmin
Fax settings in HP Web Jetadmin are located under the device's status page drop-down menu.
Select Digital Sending and Fax from the drop-down menu.
The header is appended to the top of the page when the overlay option is enabled
For all forwarded faxes, the printer appends the overlay header to the top of a page.
This is normal operation.
A mix of names and numbers is in the recipients box
Names and numbers can both display, depending on where they are from. The fax address book lists names,
and all other databases list numbers.
This is normal operation.
A one-page fax prints as two pages
The fax header is being appended to the top of the fax, pushing text to a second page.
To print a one page fax on one page, set the overlay header to overlay mode, or adjust the t-to-page setting.
A document stops in the document feeder in the middle of faxing
A jam is in the document feeder.
Clear the jam, and send the fax again.
The volume for sounds coming from the fax accessory is too high or too low
The volume setting needs to be adjusted.
Adjust the volume in the Fax Send Settings menu and the Fax Receive Settings menu.
26 Chapter 8 Specications ENWW

8Specications
●Fax accessory product specications
●Replacement parts and accessories
Fax accessory product specications
Environmental specications
Operating environment ●Temperature: 10 to 32.5° C (50 to 91° F)
●Relative Humidity: 20 to 80 percent (no condensation)
Storage environment ●Temperature: -20° C to 40° C (-4° F to 104° F)
●Relative Humidity: Less than 95 percent (no condensation)
Fax specications
Fax compatibility ●CCITT/ITU Group 3, EIA/TIA Class 1, Class 2.1
Phone connector ●RJ11
Compression methods ●MH, MR, MMR, and JBIG
Transmission speeds and standards supported ●V.17 at 14,400, 12,000, 9,600, 7,200 bps
●V.33 at 14,400, 12,000 bps
●V.29 at 9,600, 7,200 bps
●V.27 at 4,800, 2,400 bps
●V.34 at 33,600, 31,200, 28,800, 26,400, 24,000, 21,600,
19,200, 16,800 bps
Modem speed ●Up to 33.6K bits per second (bps)
Speed dialing ●Yes
Fax resolution, (send and receive) ●Standard - 200 x 100 dots per inch (dpi)
●Fine - 200 x 200 dpi
●Superne - 300 x 300 dpi
●Ultrane - 200 x 400 (receive only)
●Ultrane - 400 x 400 (receive only)
ENWW Fax accessory product specications 27


Index
A
accessories 28
C
cautions 1
conguration
dialing settings 9
fax receive settings 9
general fax send settings 9
conventions, document 1
D
dialing settings 9
document conventions 1
E
environmental specications 27
ESD 3
F
fax
connecting phone line 4
required settings 7
setup 7
fax accessory installation 3
fax operation verication 4
features, description 2
rmware update 5
I
image quality 19
installation 3
M
modem speed 27
N
not congured 7
notes 1
P
parts 2
phone line connection 4
phone line, connecting fax
accessory 4
problems
checklist 22
general 25
solving 21
Q
quality 19
R
receive settings 13
replacement parts 28
required settings
country/region 7
resolution 27
S
send settings 11
sending fax 15
settings
fax dialing 9
fax receive 13
general fax send 11
required 7
specications 27
status, fax accessory page 23
storage, environment 27
T
tips 1
W
warnings 1
ENWW Index 29
30 Index ENWW
