HTC BLUEANGEL PH20B Series User Manual Blue Angel Manual Generic English Book indb
HTC Corporation PH20B Series Blue Angel Manual Generic English Book indb
UserManual.wiki
>
HTC
>
BLUEANGEL User Manual
>
user manual
Contents
1.
user manual
2.
CRN 27382 Q1 and 2 revised user manual
3.
CRN 27383 Q1 and Q2 revised user manual
user manual
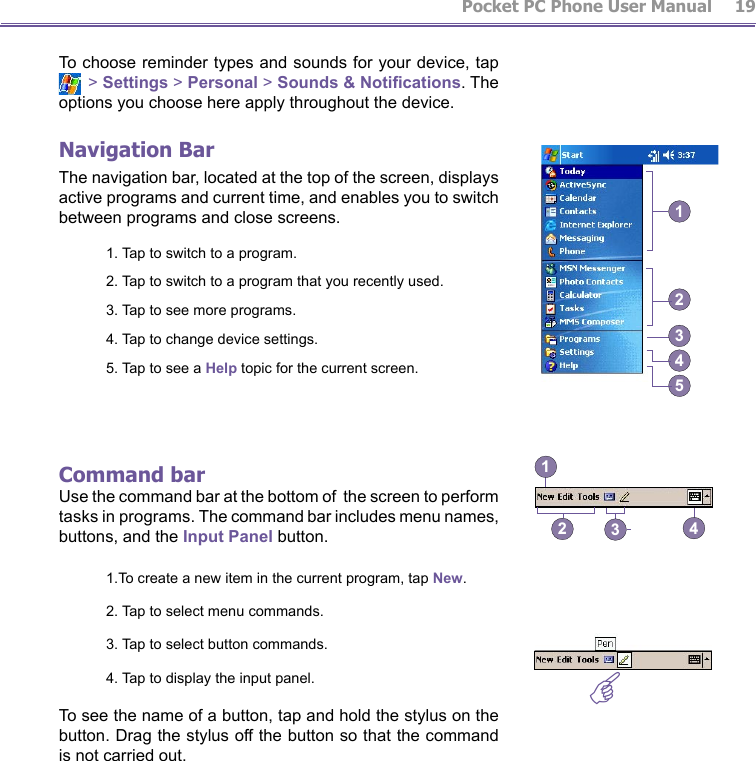
Navigation menu
Upload a User Manual
Namespaces
Wiki Guide
HTML
PDF
Info
Views
User Manual
Discussion / Help
Navigation