HTC CV Smart phone User Manual Book CONVERSE TMOUS Manual indb
HTC Corporation Smart phone Book CONVERSE TMOUS Manual indb
UserManual.wiki
>
HTC
>
CV User Manual
>
User Manual 2
Contents
1.
User Manual 1
2.
User Manual 2
3.
User Manual 3
User Manual 2
Navigation menu
Upload a User Manual
Namespaces
Wiki Guide
HTML
PDF
Info
Views
User Manual
Discussion / Help
Navigation
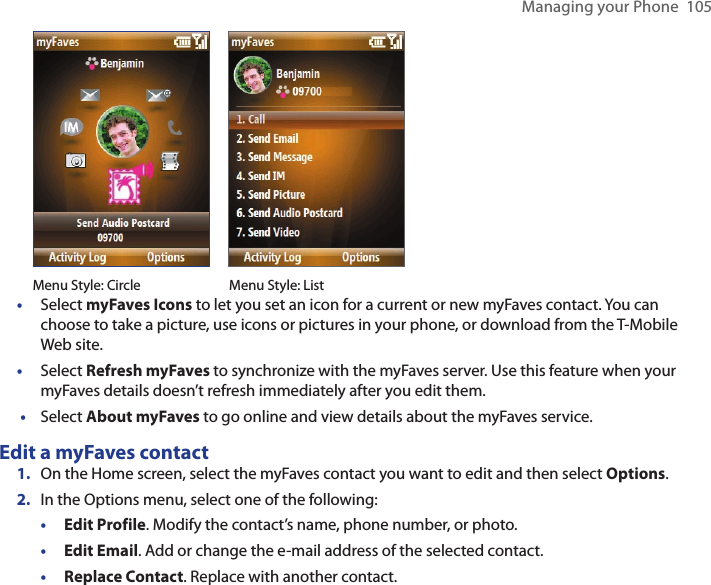

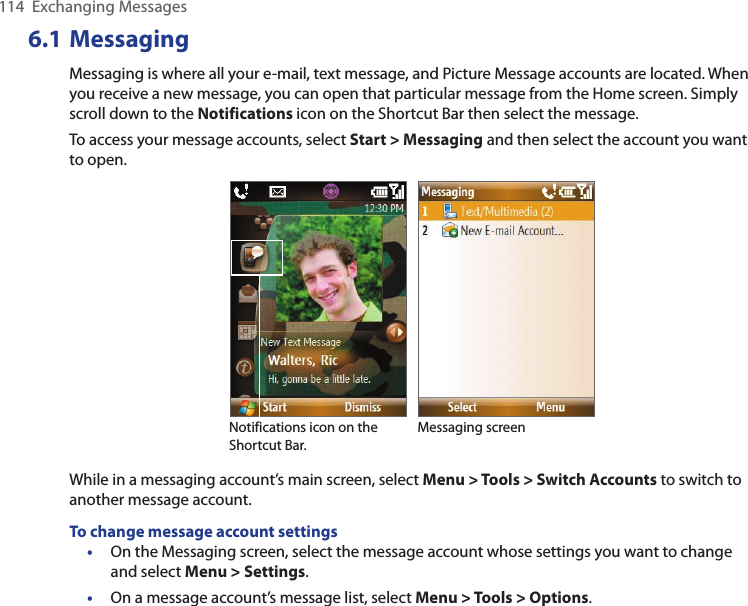


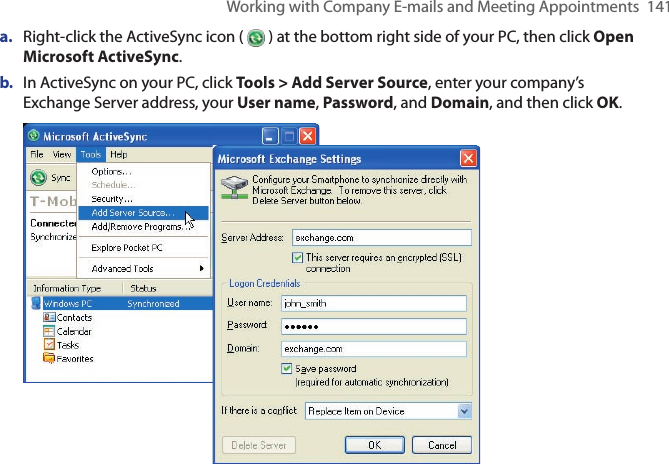
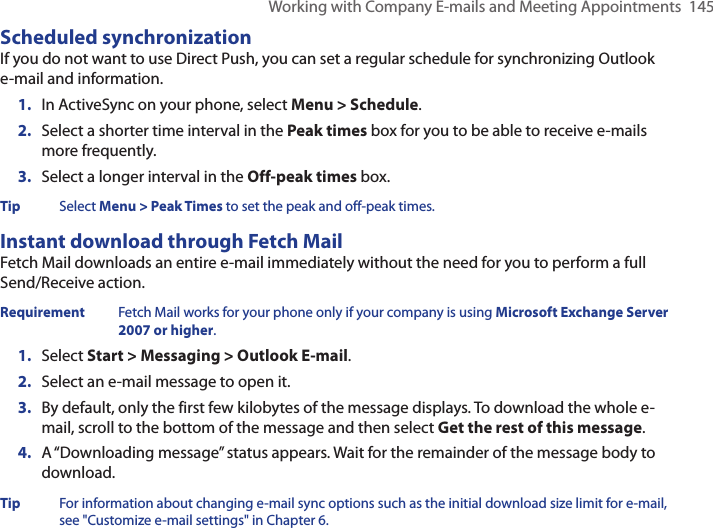

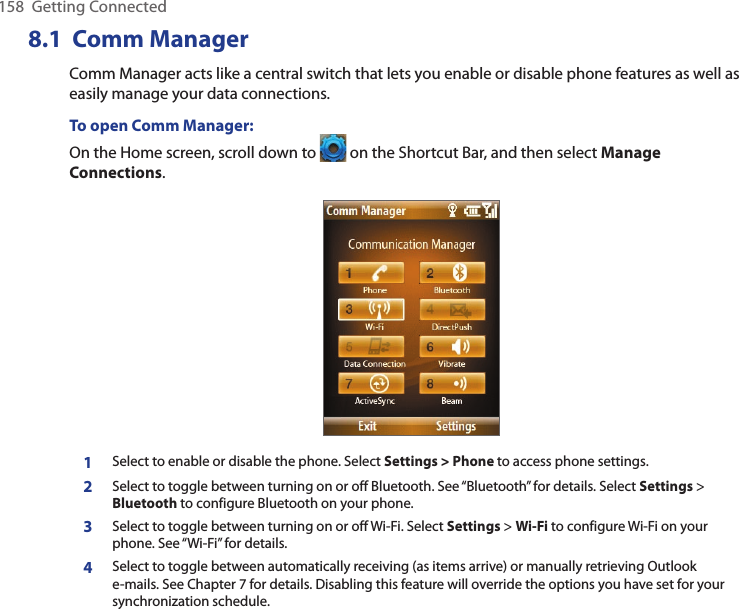

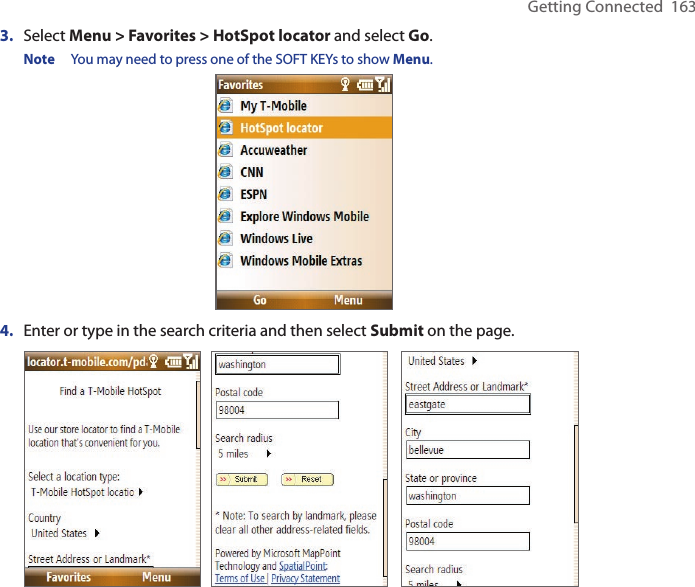
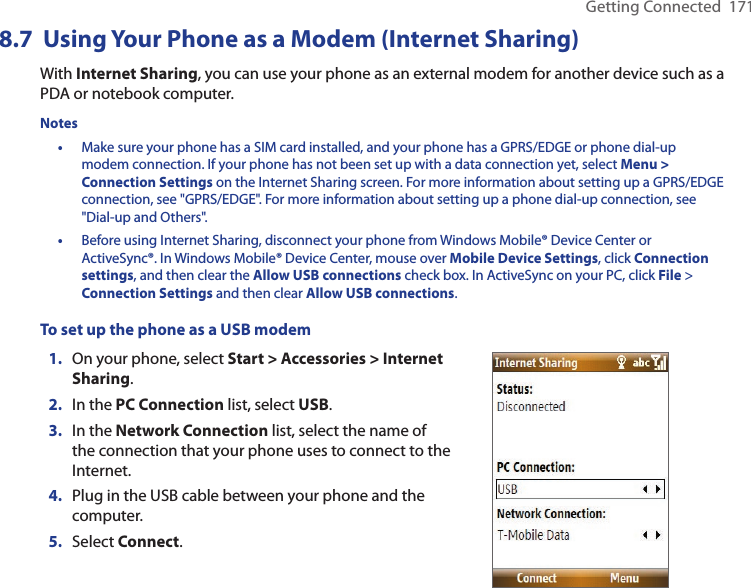
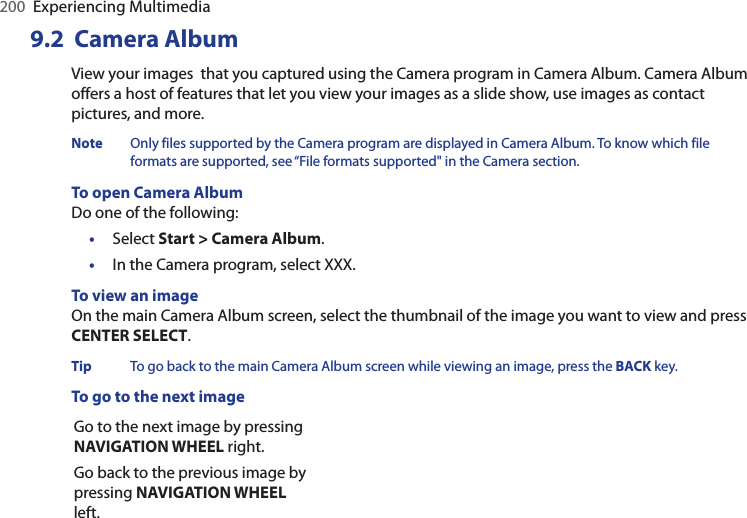
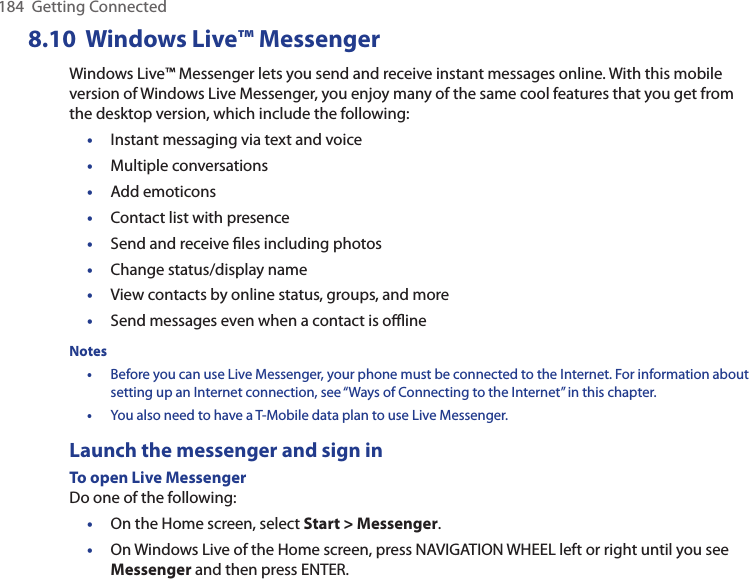
![Getting Connected 179d. In the Options tab of Bluetooth Devices, select Show the Bluetooth icon in the notification area.e. To enable your computer to receive Bluetooth beams, right-click the Bluetooth icon at the bottom-right of your computer screen and then select Receive a File.3. Now you are ready to beam. On your phone, select an item to beam, such as an appointment in your calendar, a task, a contact card, or a file.4. Select Menu > Beam [type of item].5. Select the device name to which you want to beam.6. Select Beam.7. If you beamed a calendar, task, or contact item to your computer and it is not automatically added to Outlook, select File > Import and Export to import it to Microsoft Outlook on your computer.To beam information to a Bluetooth-enabled device such as another phone, create a Bluetooth partnership then do steps 3 through 6 in the above procedure.Tip The default folder on your computer where beamed items are stored may be: Windows XP: C:\Documents and Settings\your_username\My Documents Windows Vista: C:\users\your_username\My Documents. Print files via BluetoothConnect your device to a Bluetooth printer to print contact information, appointment details, messages, and other file types. Note You can print files in the .txt, .jpg, .xhtml, .vcf, and .vcs file formats. Before you start printing, make sure to turn on the Bluetooth printer and to turn on Bluetooth on your phone. To turn on Bluetooth, select Start > Comm Manager and then select the Bluetooth button.](https://usermanual.wiki/HTC/CV.User-Manual-2/User-Guide-929585-Page-79.png)
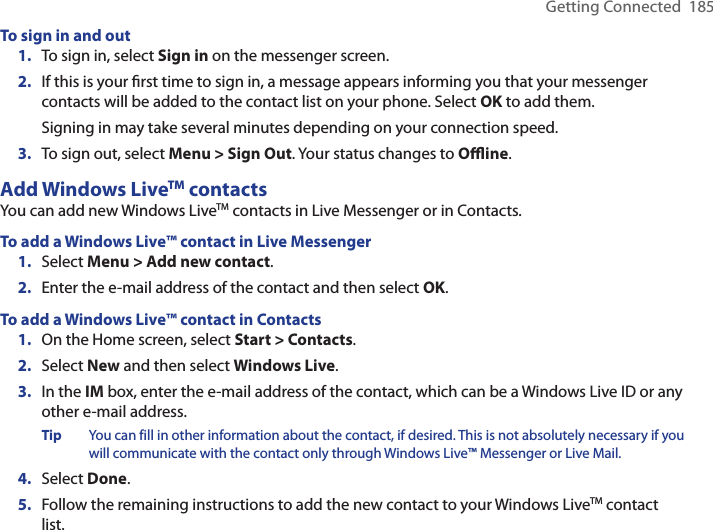
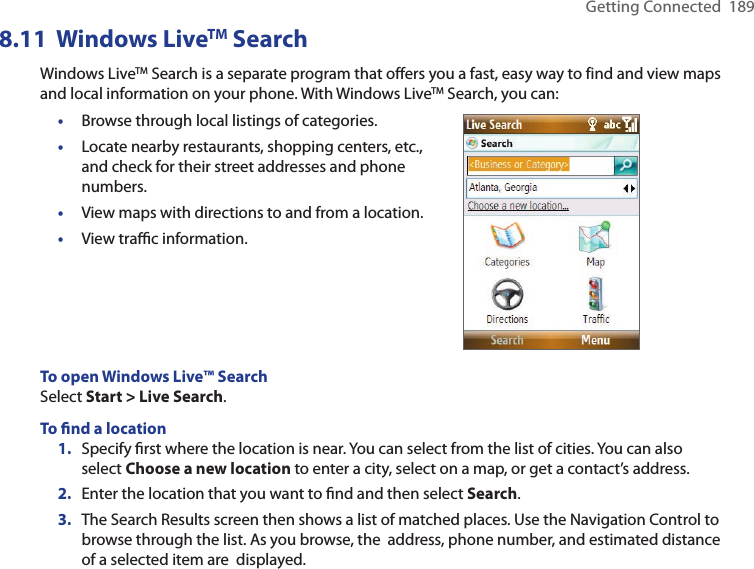
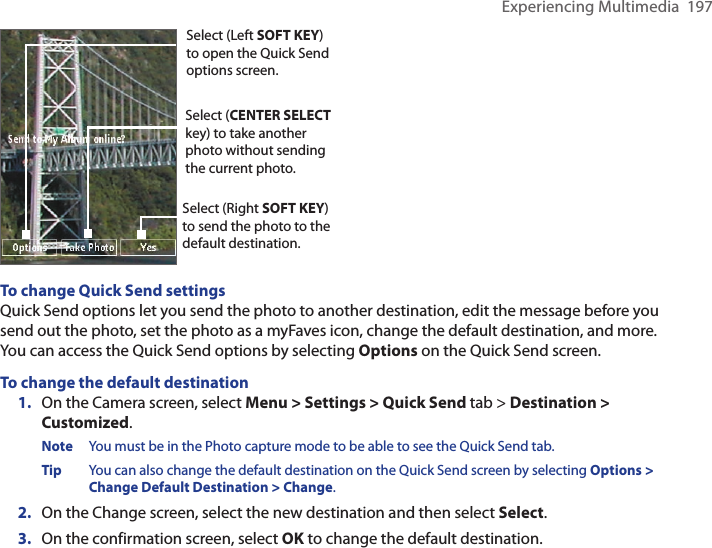
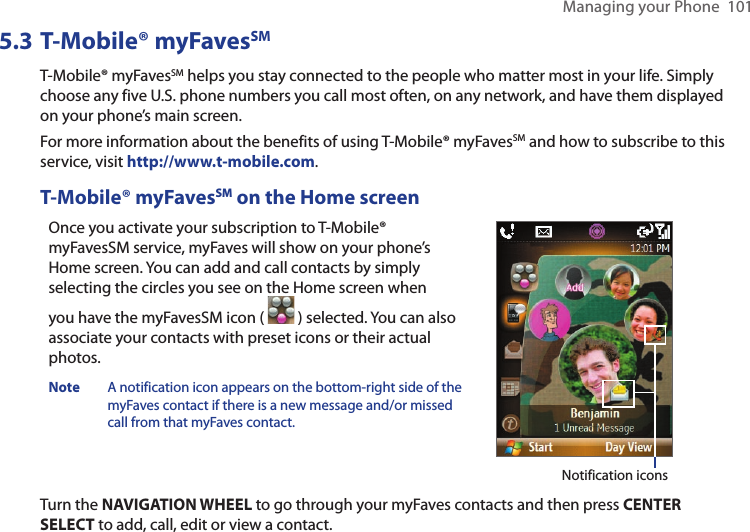
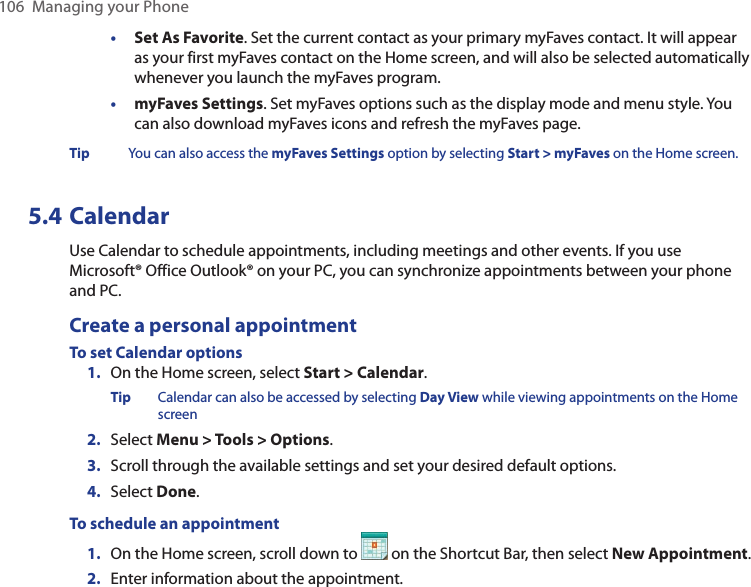
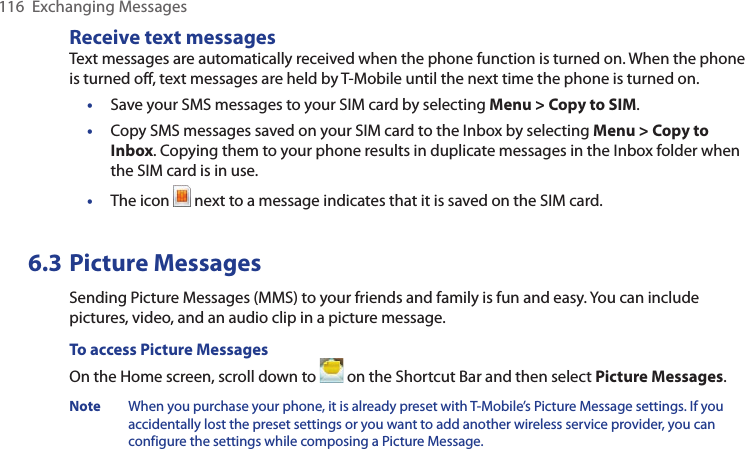
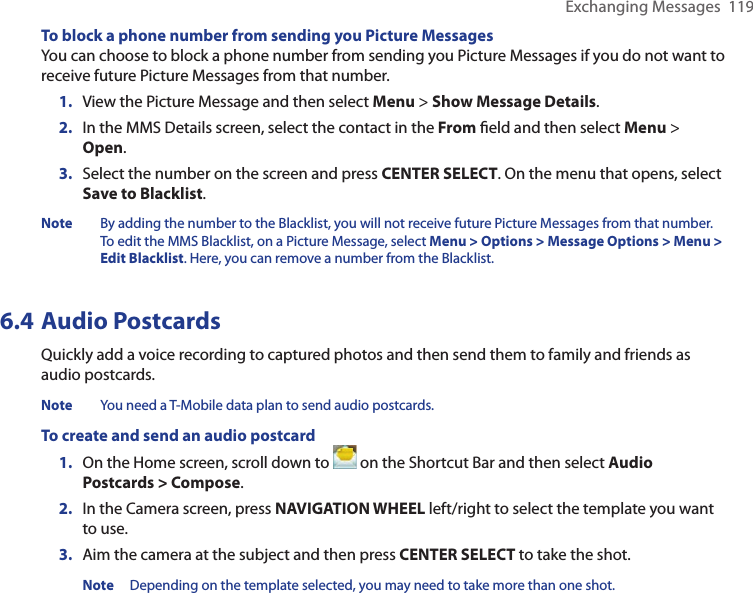
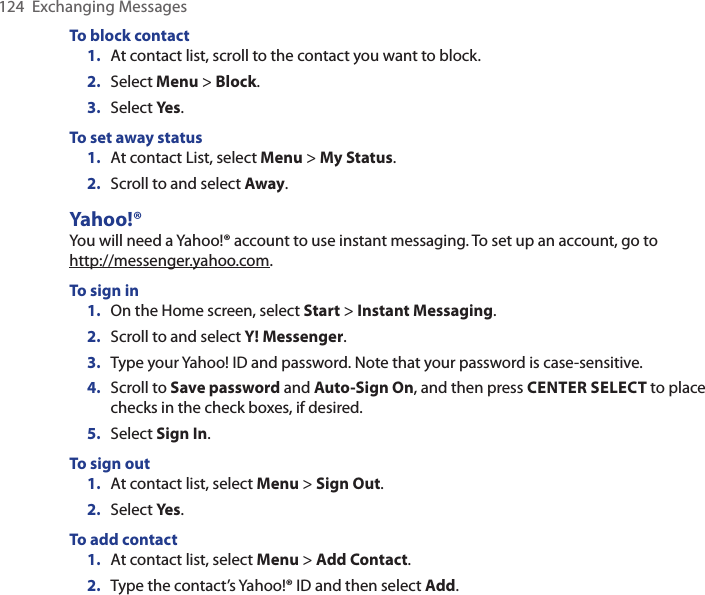
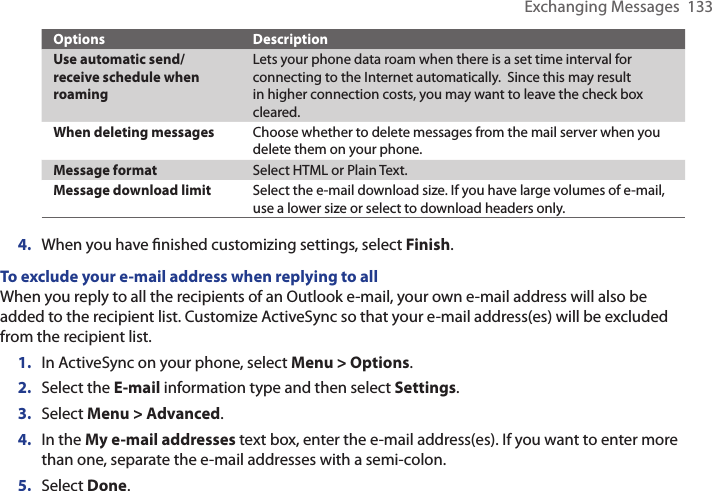
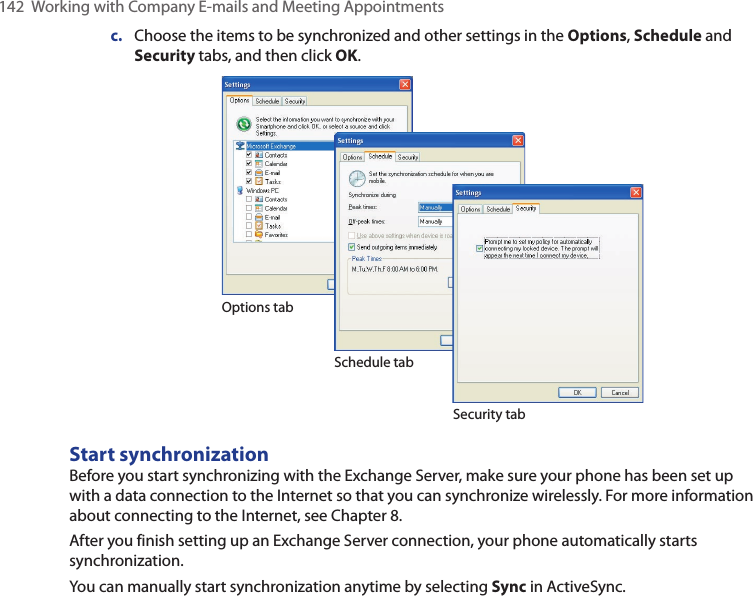
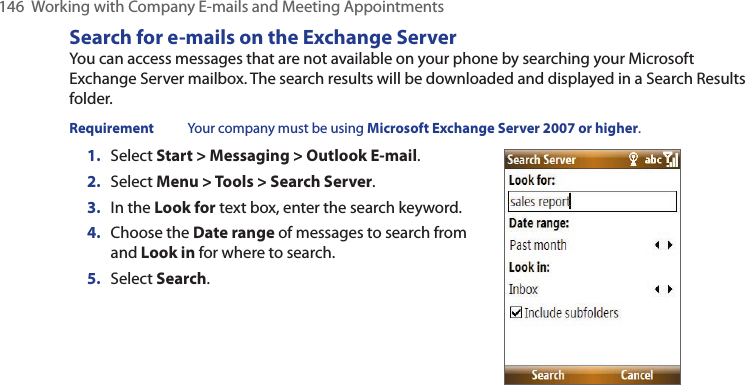
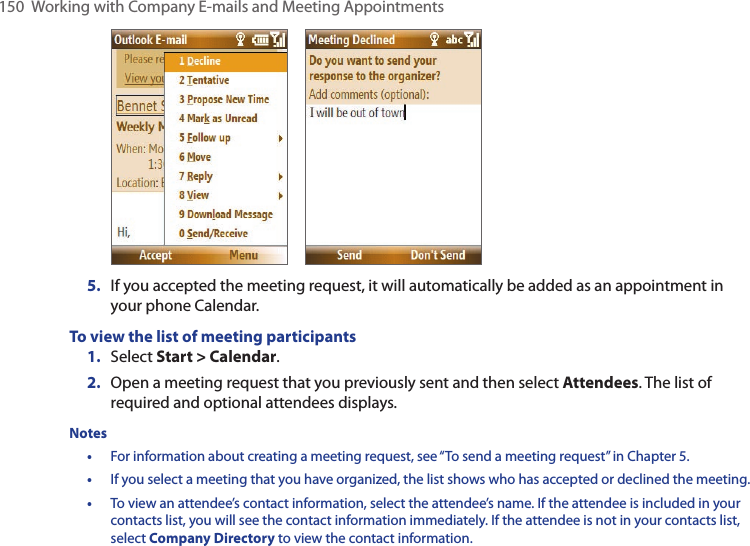
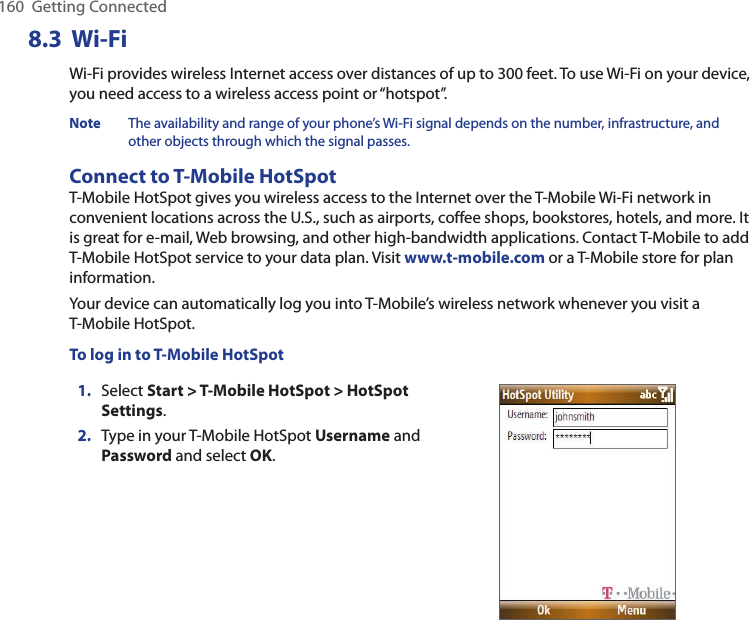
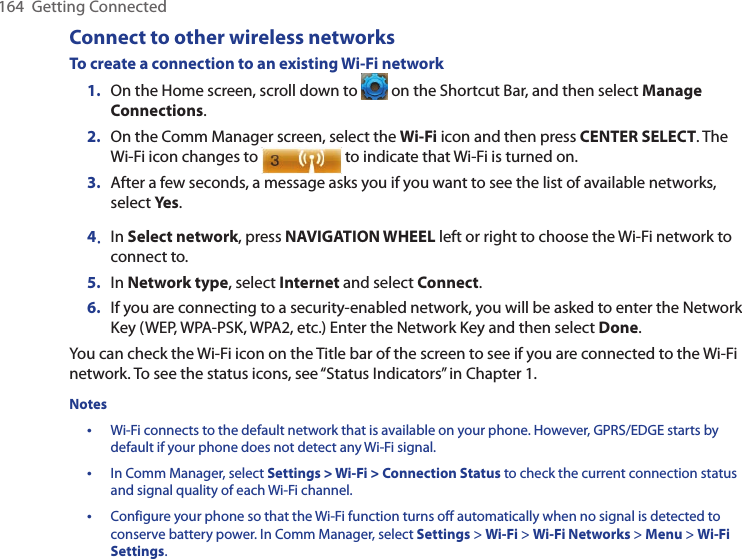
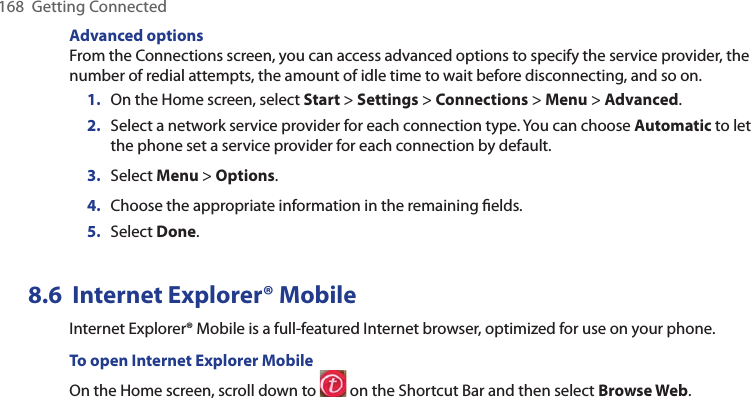
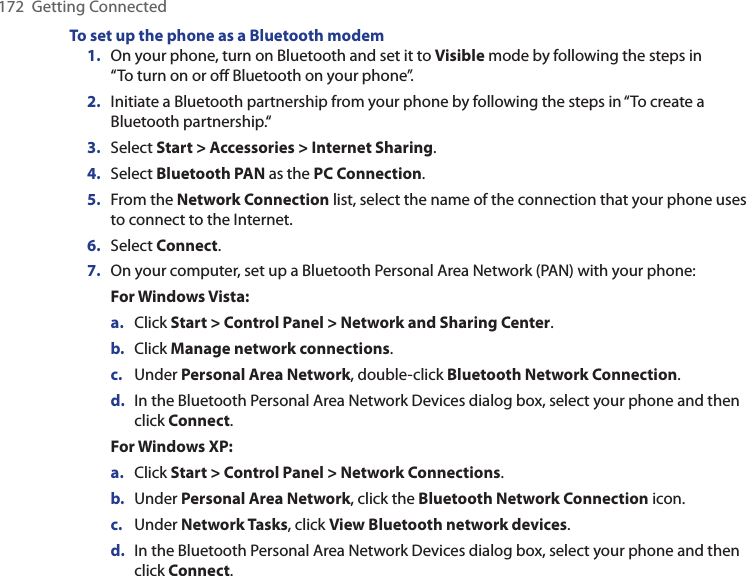
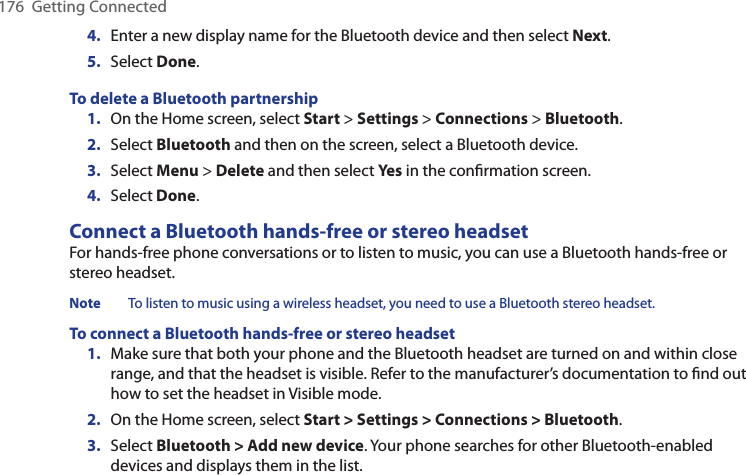
![194 Experiencing MultimediaCamera mode icons and indicatorsThe camera icons and indicators disappear from the screen after 3 seconds. Press one of the SOFT KEYs to make them reappear. The Camera [Photo] screen 214351 Indicates the current capture mode.2 Indicates the current zoom ratio. Press NAVIGATION WHEEL up or down to increase or decrease the zoom level. 3 Select (Left SOFT KEY) to open the Camera Settings screen. 4 Depending on the capture mode, this shows the remaining, available shots of pictures that you can take or remaining duration that can be recorded. While recording video, this shows the recorded duration.5 Select (Right SOFT KEY) to open Pictures & Videos.](https://usermanual.wiki/HTC/CV.User-Manual-2/User-Guide-929585-Page-94.png)
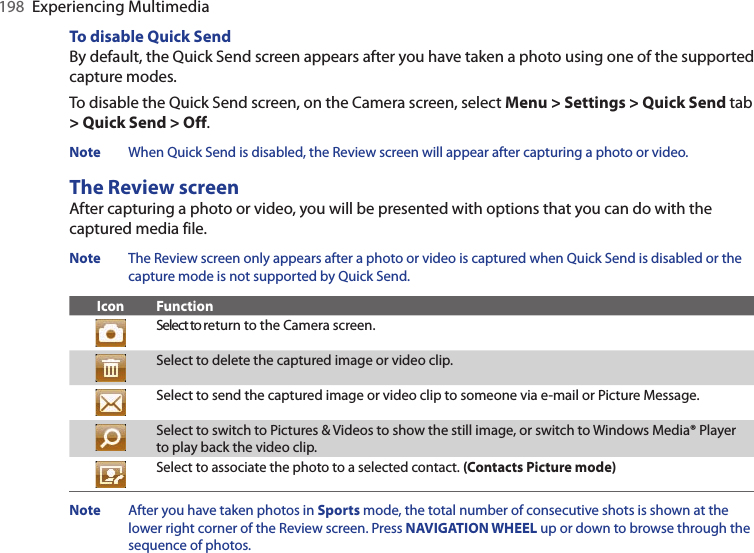
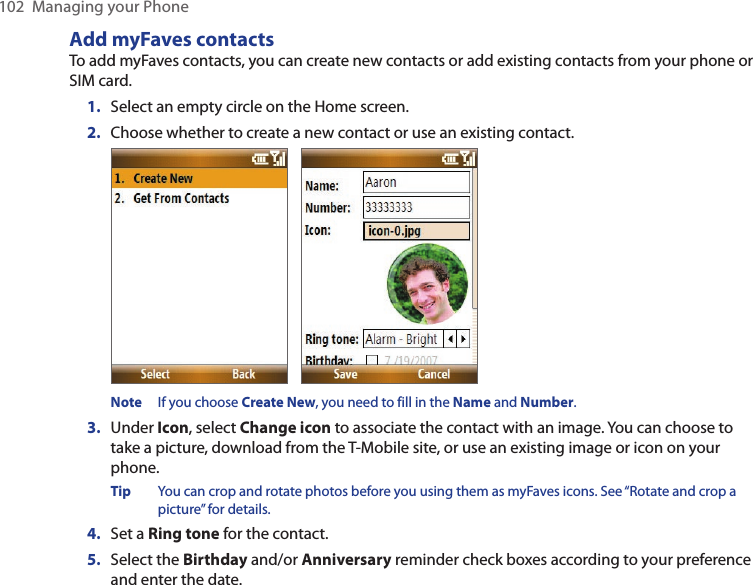
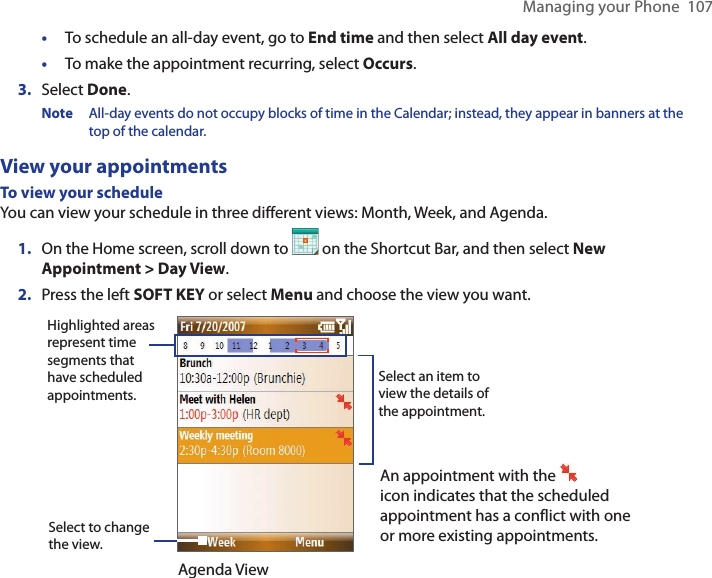
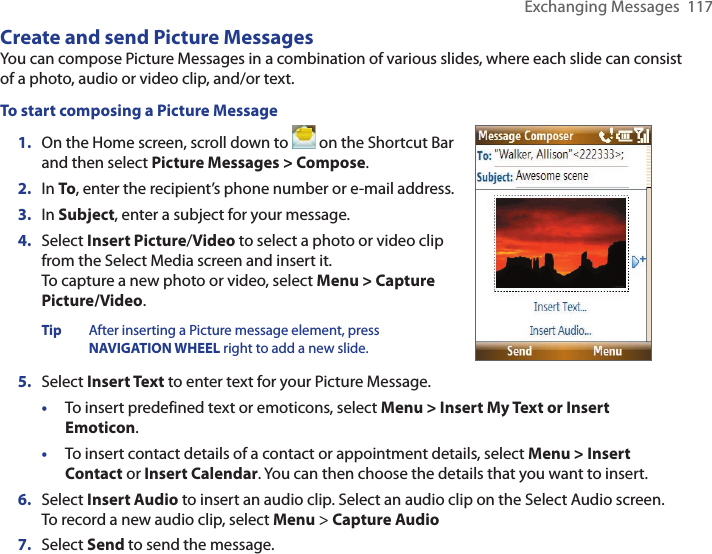
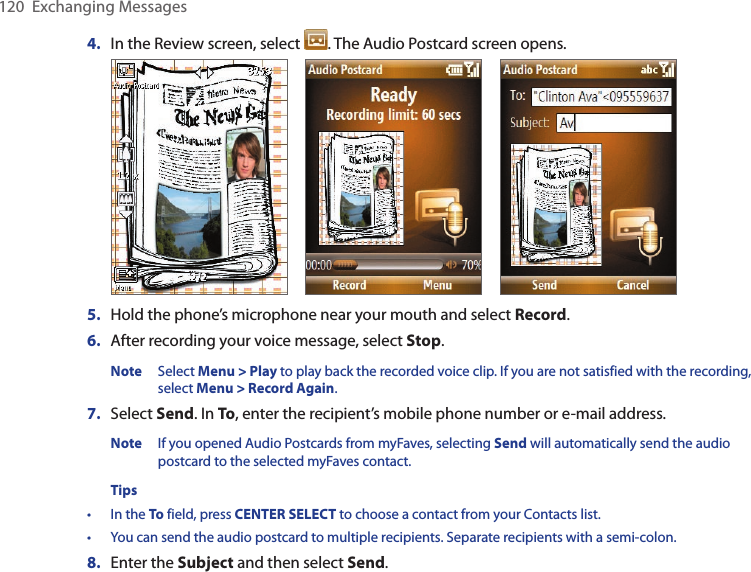
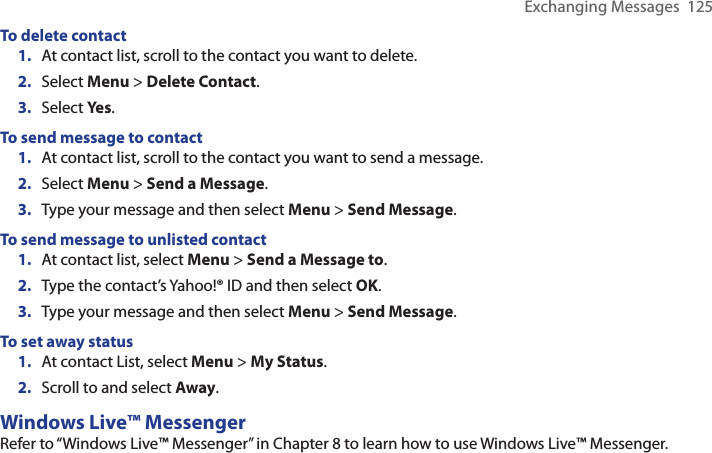
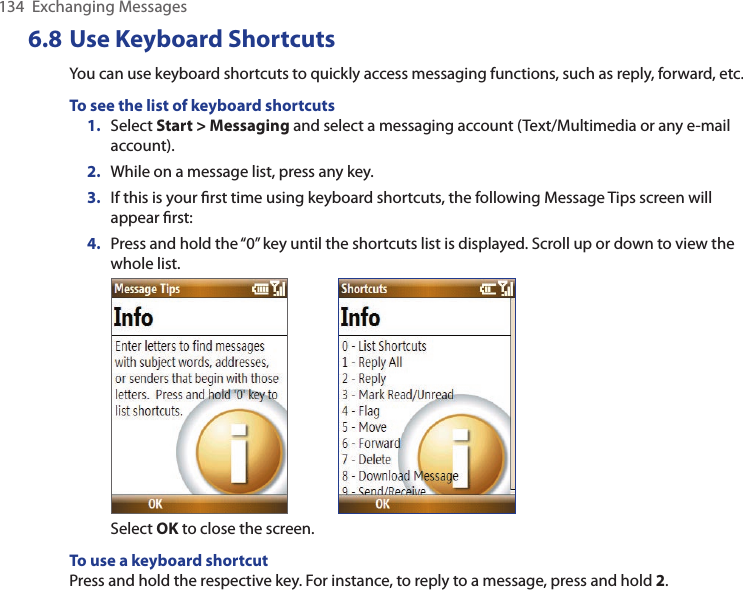
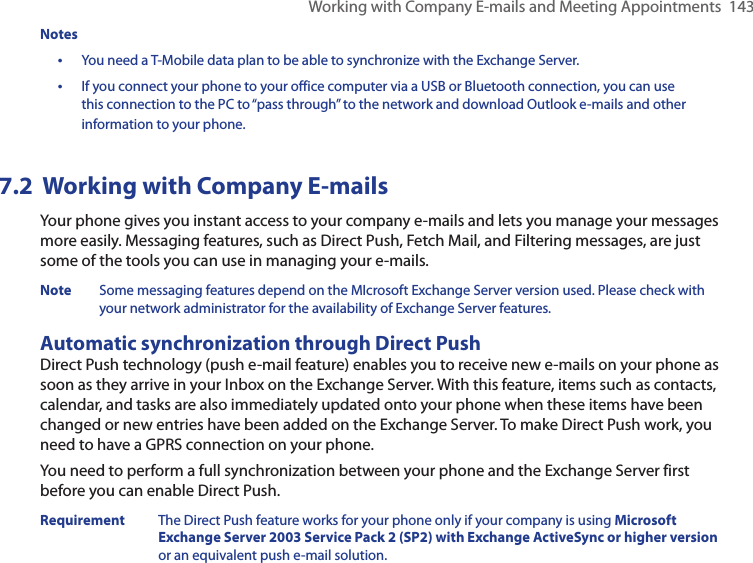
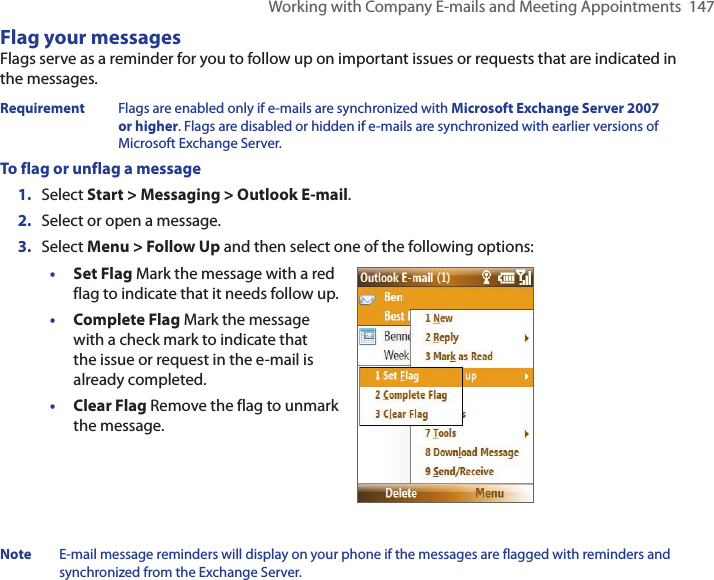
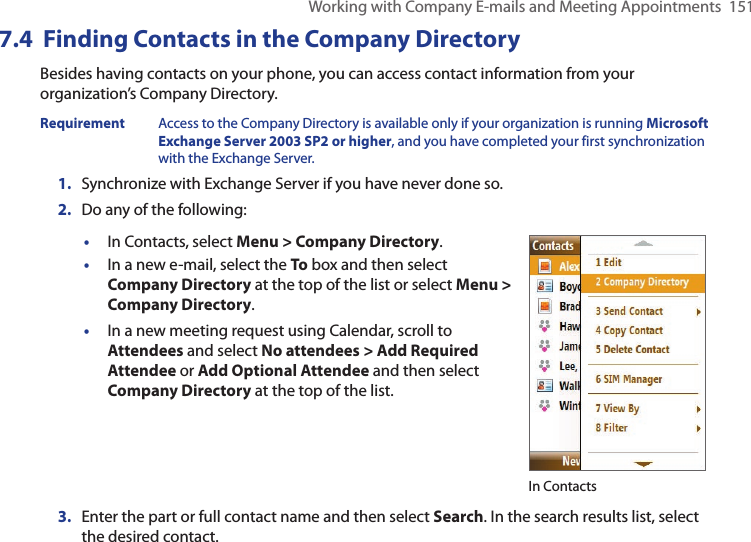
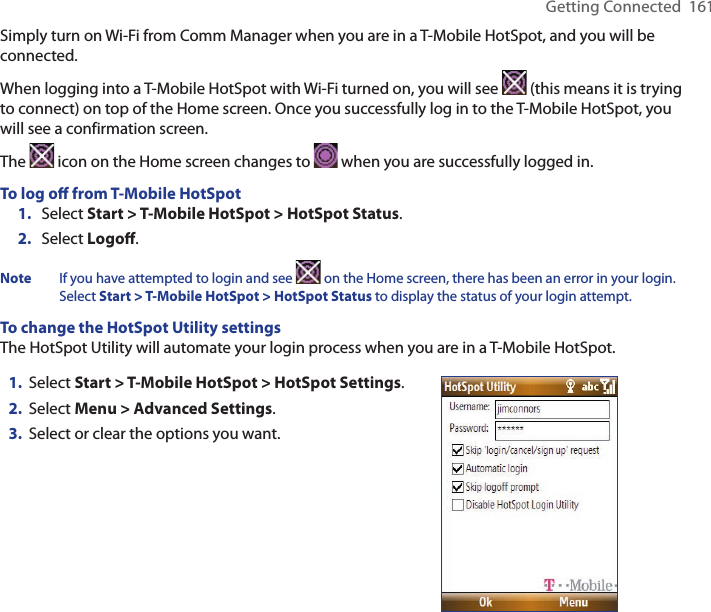
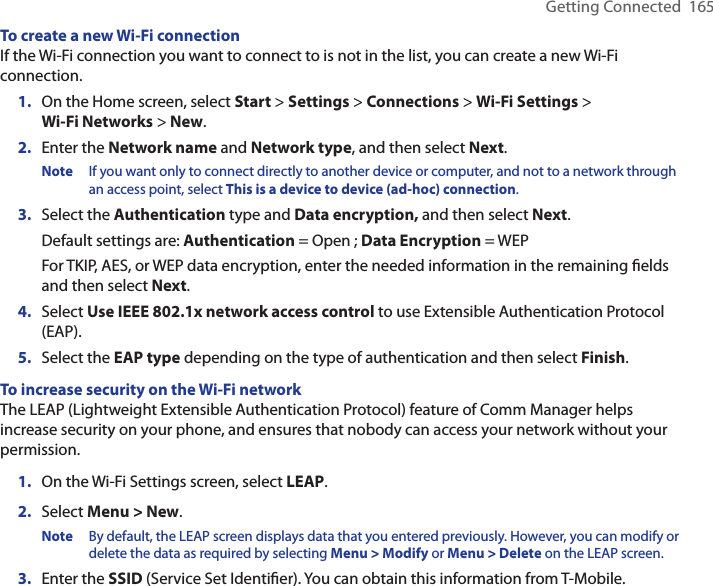
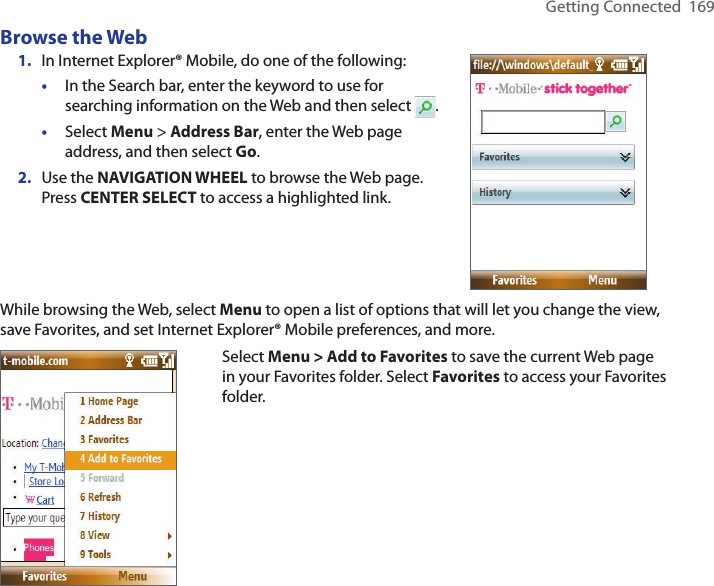
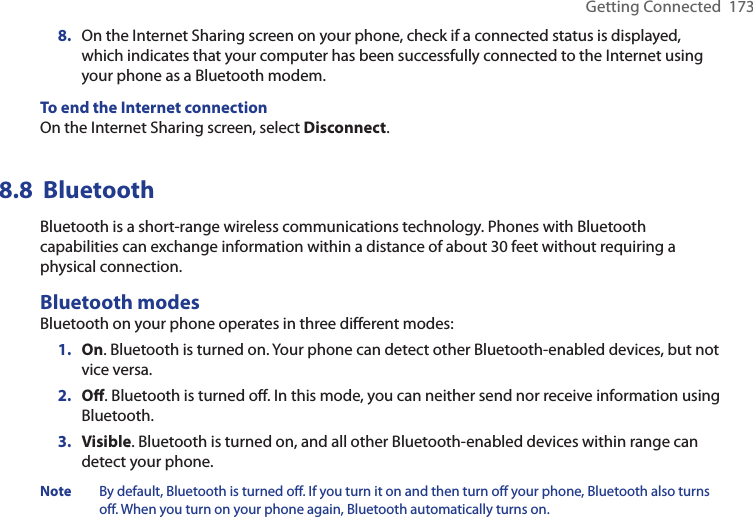
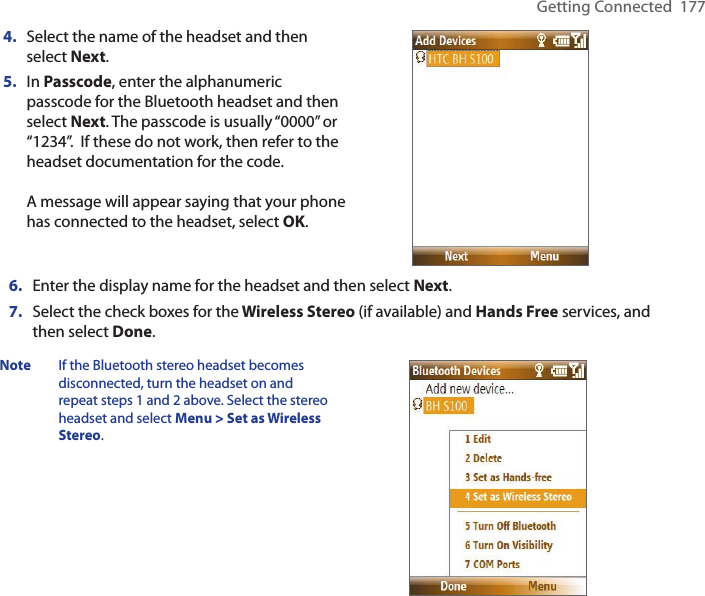
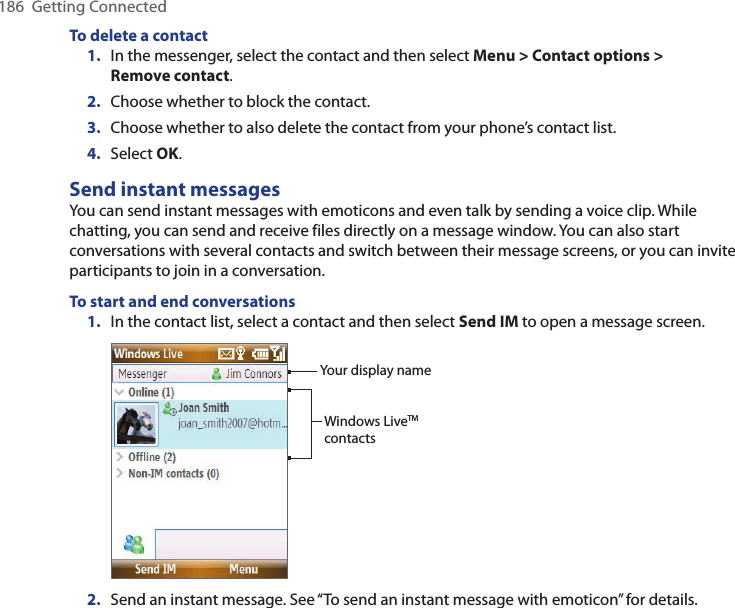
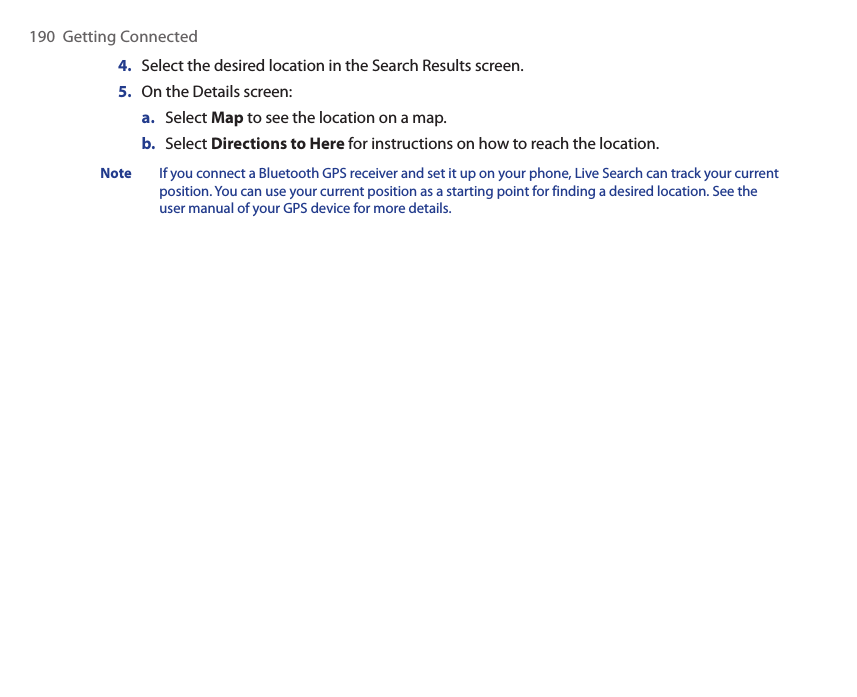
![Experiencing Multimedia 195The Camera [Video] screen The Recording Status indicator blinks while video recording is in progress.Quick Settings MenuThe Quick Settings Menu provides a quick way for adjusting some camera settings. Select on the screen to open the menu.Note The available settings on the menu depend on the selected Capture mode. Press NAVIGATION WHEEL up or down to select the setting you want to change. Press NAVIGATION WHEEL left or right to go through the options per setting and then press CENTER SELECT to choose the option.](https://usermanual.wiki/HTC/CV.User-Manual-2/User-Guide-929585-Page-95.png)