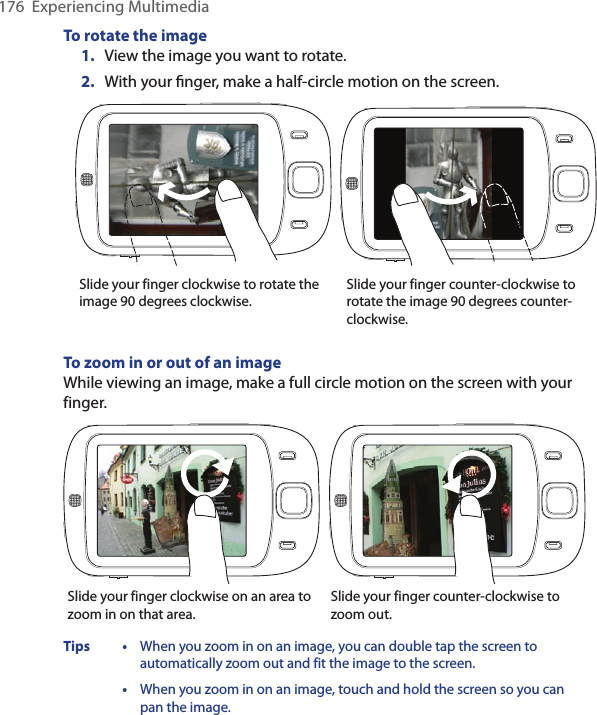
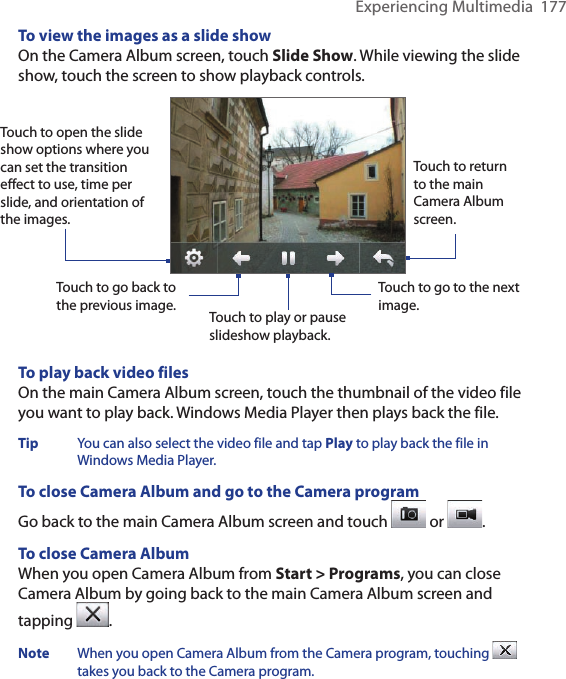
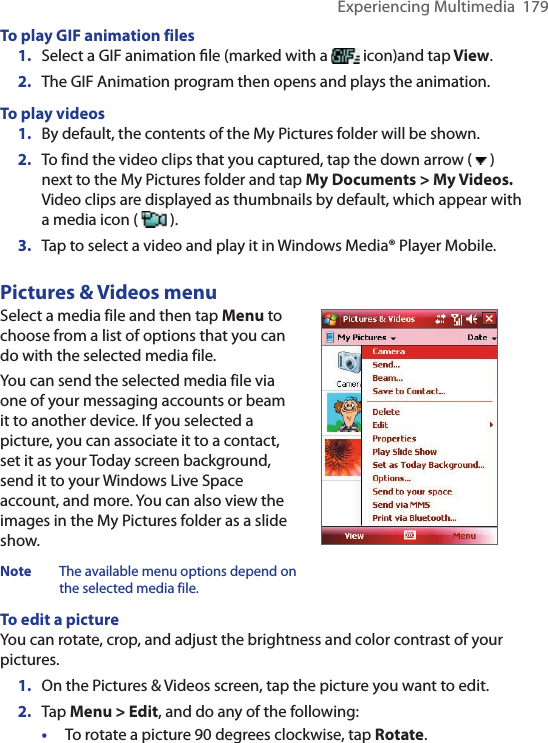
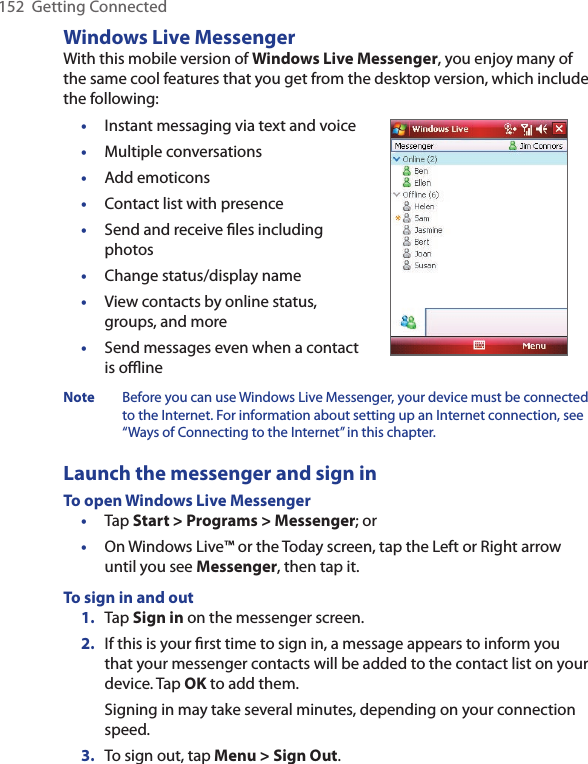
HTC EFN PDA Phone w/BT & WLAN User Manual Book Elfin Rogers English Manual indb
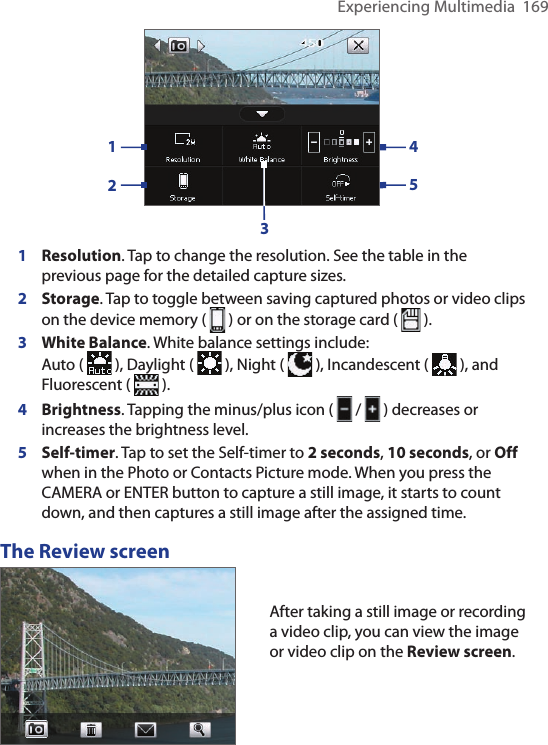
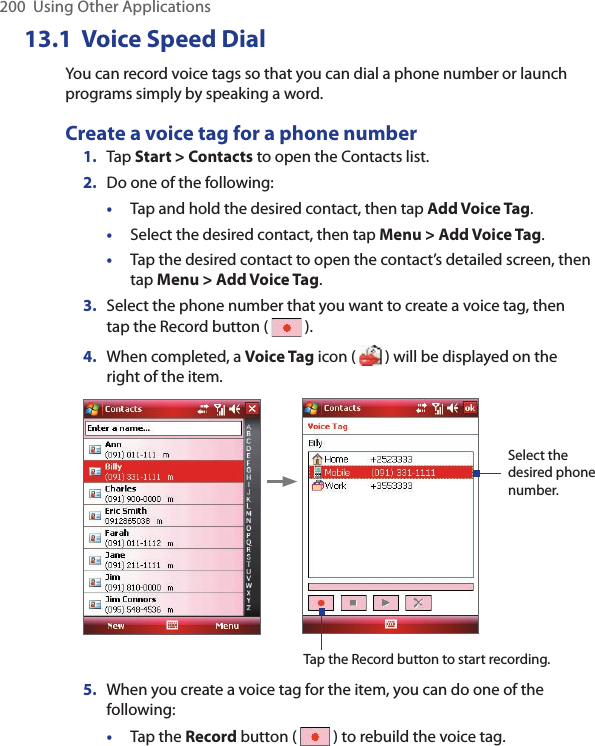
HTC Corporation PDA Phone w/BT & WLAN Book Elfin Rogers English Manual indb
HTC >
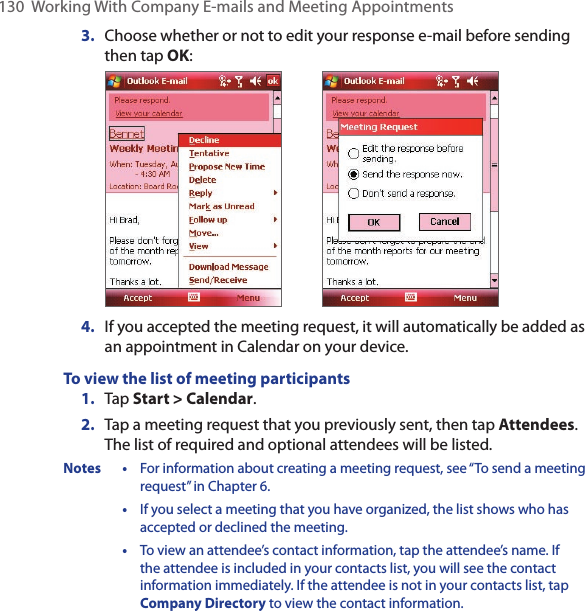
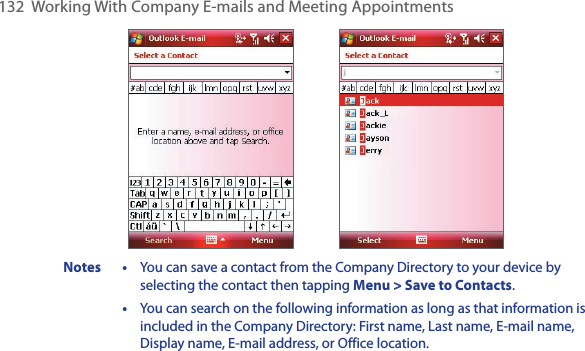
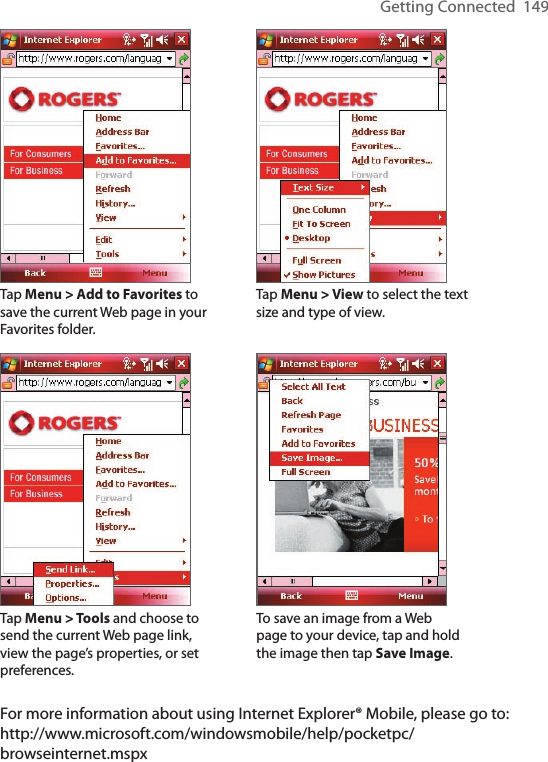
Contents
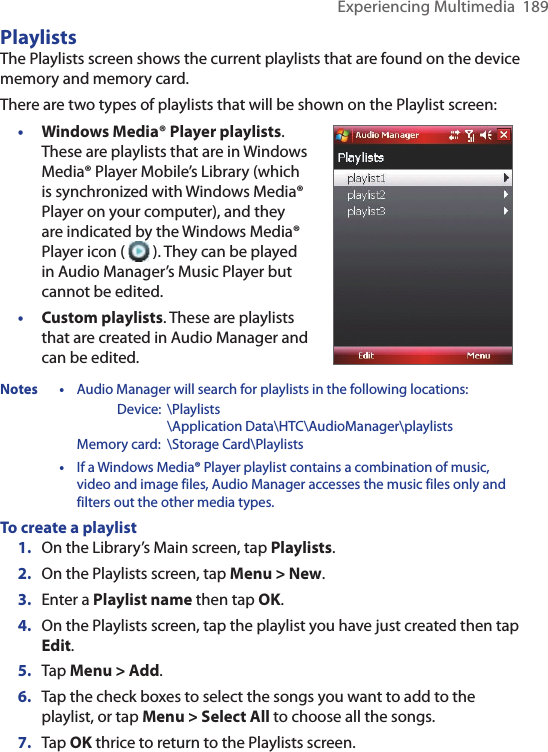
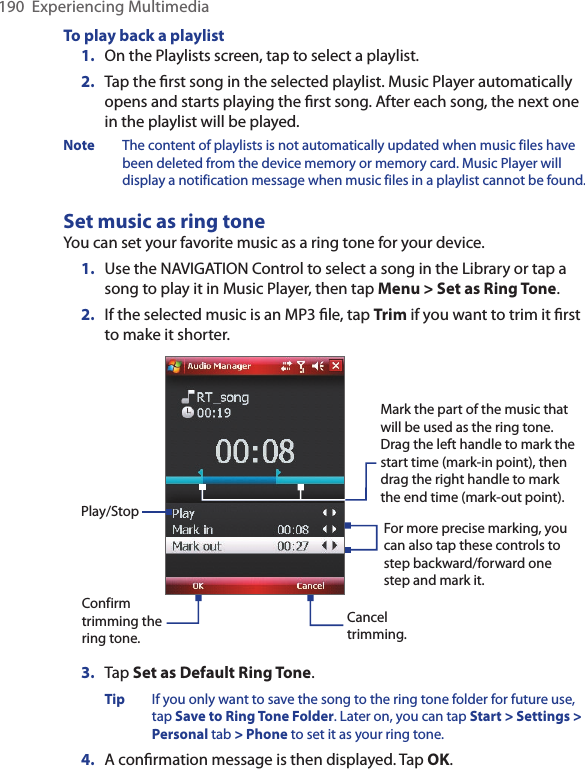
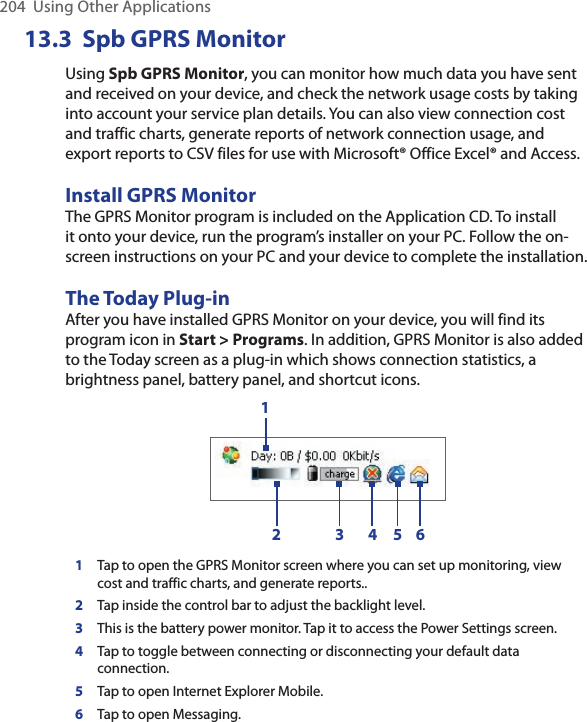
- 1. Users Manual 1
- 2. Users Manual2
- 3. Users Manual 2
Users Manual2


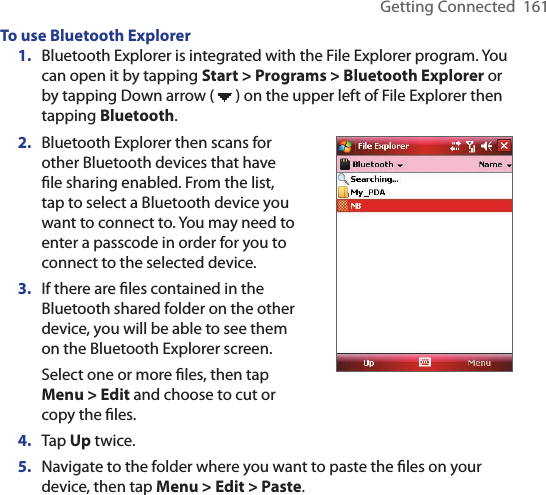
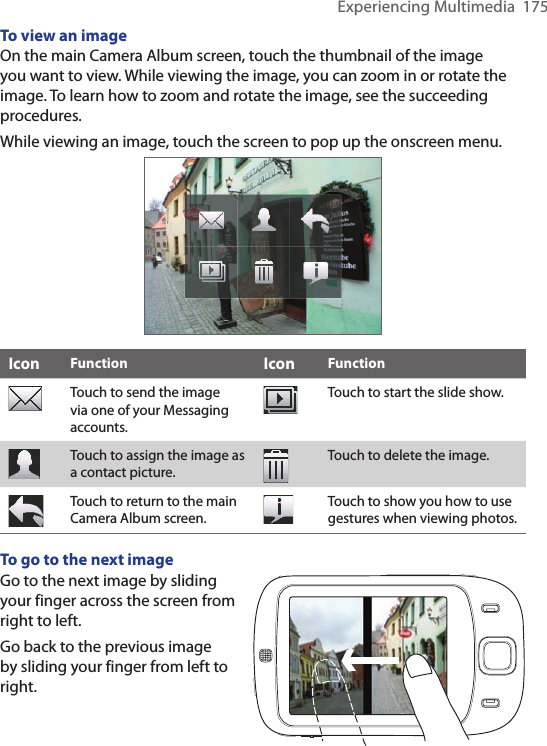
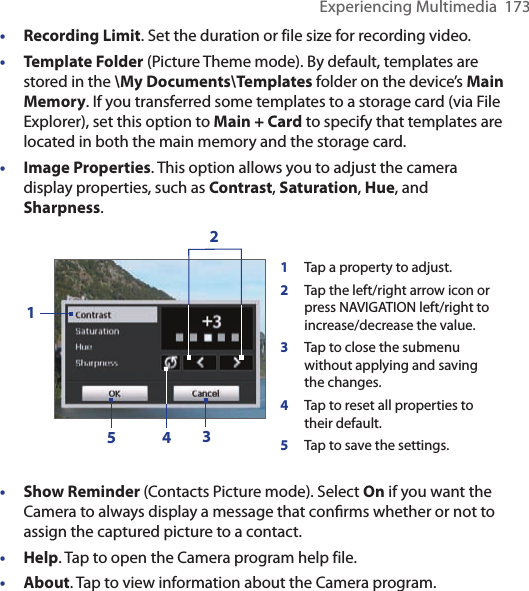
![160 Getting Connected4. To beam a contact, tap Menu > Send Contact > Beam.To beam other types of information, tap Menu > Beam [type of item].5. Tap the device name to which you want to send the beam.6. If you beamed a calendar, task, or contact item to your computer and it is not automatically added to Outlook, select File > Import and Export in Outlook to import it.To beam information to a Bluetooth-enabled device such as another Windows Mobile powered device, follow steps 1 to 5 in the above procedure.Tips • The default folder on your computer where beamed items are stored may be C:\Documents and Settings\your_username\My Documents in Windows XP or C:\Users\your_username\My Documents in Windows Vista. • For your device to receive Bluetooth beams, tap Start > Settings > Connections tab > Beam and make sure the Receive all incoming beams check box is selected.Bluetooth Explorer and Bluetooth file sharingBluetooth Explorer searches for other Bluetooth devices that have file sharing enabled and lets you access their Bluetooth shared folder. You can copy files from and to their shared folder, and create subfolders in it. When you enable Bluetooth file sharing on your device, other Bluetooth-enabled devices will also be able to access your Bluetooth shared folder.To enable Bluetooth Explorer and Bluetooth file sharing on your device1. Tap Start > Settings > Connections tab > Bluetooth > FTP tab.2. Select the Enable Bluetooth Explorer check box. This makes the \Bluetooth device folder visible in the File Explorer.3. Select the Enable File Sharing check box.You can use the default Bluetooth shared folder, or tap Browse to use another folder as your shared folder.](https://usermanual.wiki/HTC/EFN.Users-Manual2/User-Guide-851555-Page-40.png)


Users Manual 2


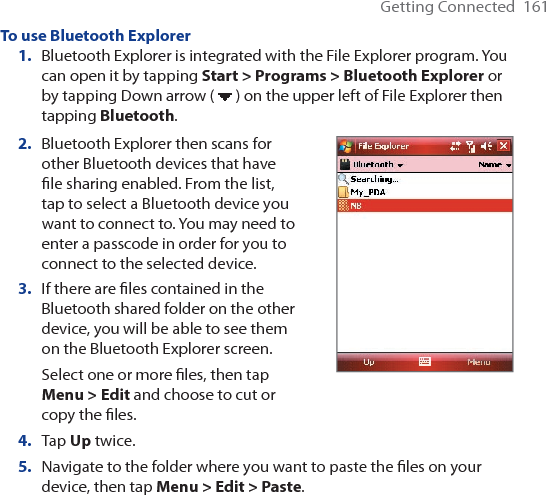
![160 Getting Connected4. To beam a contact, tap Menu > Send Contact > Beam.To beam other types of information, tap Menu > Beam [type of item].5. Tap the device name to which you want to send the beam.6. If you beamed a calendar, task, or contact item to your computer and it is not automatically added to Outlook, select File > Import and Export in Outlook to import it.To beam information to a Bluetooth-enabled device such as another Windows Mobile powered device, follow steps 1 to 5 in the above procedure.Tips • The default folder on your computer where beamed items are stored may be C:\Documents and Settings\your_username\My Documents in Windows XP or C:\Users\your_username\My Documents in Windows Vista. • For your device to receive Bluetooth beams, tap Start > Settings > Connections tab > Beam and make sure the Receive all incoming beams check box is selected.Bluetooth Explorer and Bluetooth file sharingBluetooth Explorer searches for other Bluetooth devices that have file sharing enabled and lets you access their Bluetooth shared folder. You can copy files from and to their shared folder, and create subfolders in it. When you enable Bluetooth file sharing on your device, other Bluetooth-enabled devices will also be able to access your Bluetooth shared folder.To enable Bluetooth Explorer and Bluetooth file sharing on your device1. Tap Start > Settings > Connections tab > Bluetooth > FTP tab.2. Select the Enable Bluetooth Explorer check box. This makes the \Bluetooth device folder visible in the File Explorer.3. Select the Enable File Sharing check box.You can use the default Bluetooth shared folder, or tap Browse to use another folder as your shared folder.](https://usermanual.wiki/HTC/EFN.Users-Manual-2/User-Guide-851600-Page-40.png)