HTC EFN PDA Phone w/BT & WLAN User Manual Book Elfin Rogers English Manual indb
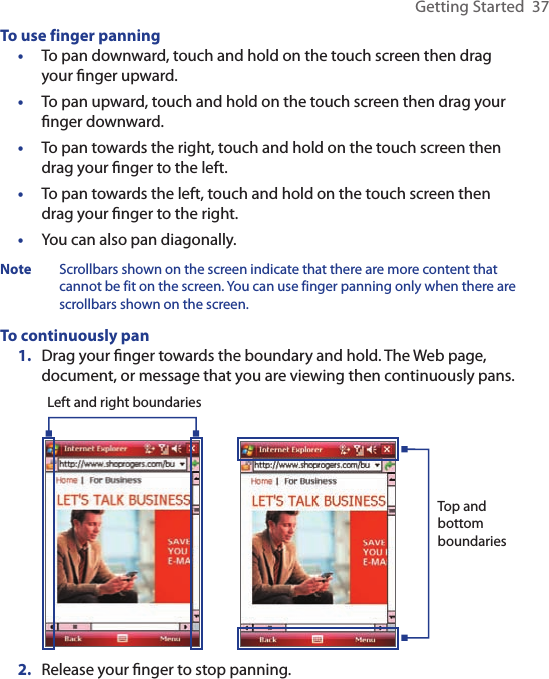
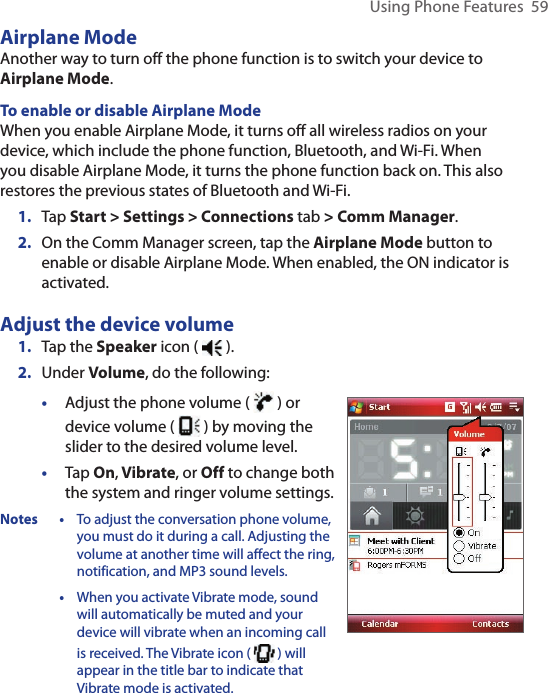
HTC Corporation PDA Phone w/BT & WLAN Book Elfin Rogers English Manual indb
HTC >
Contents
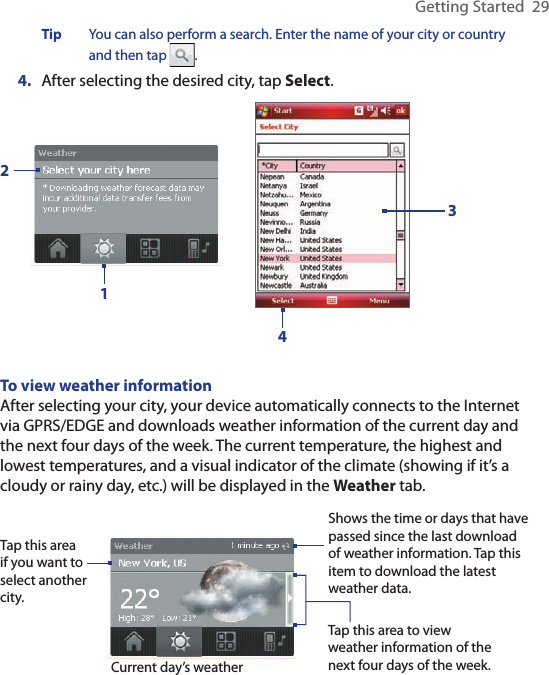
- 1. Users Manual 1
- 2. Users Manual2
- 3. Users Manual 2
Users Manual 1

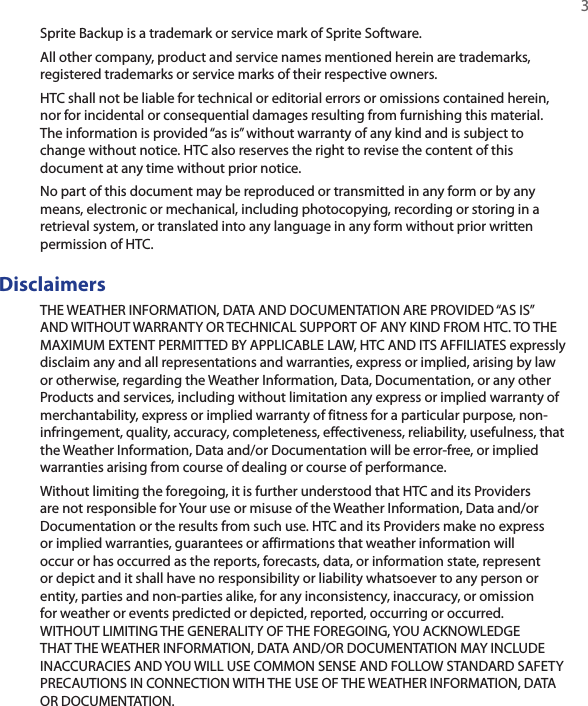

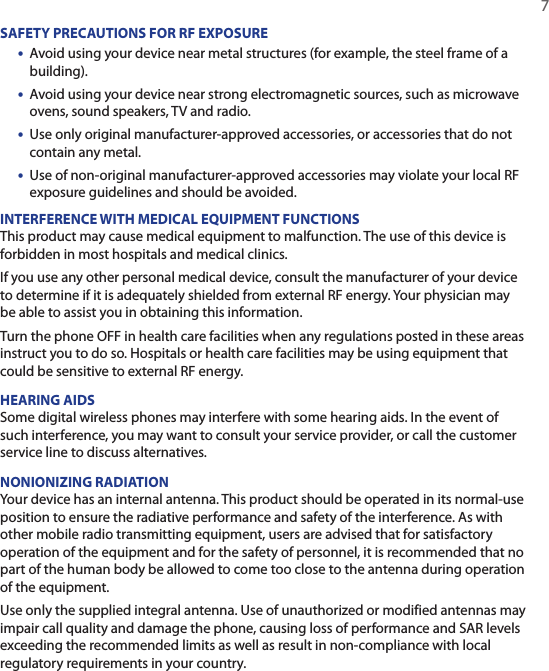


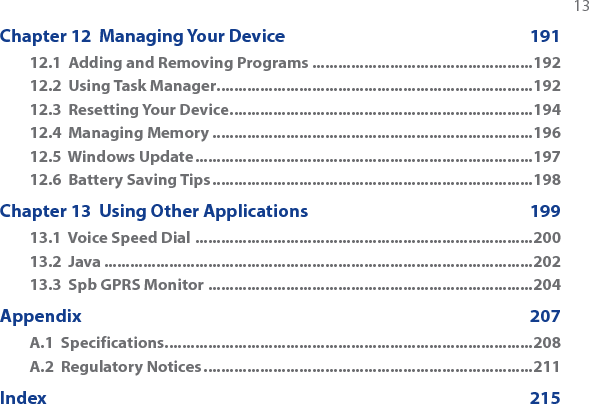

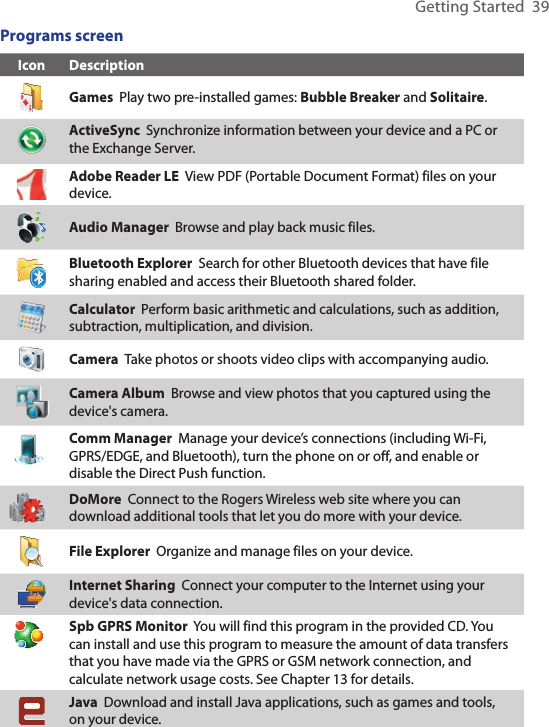

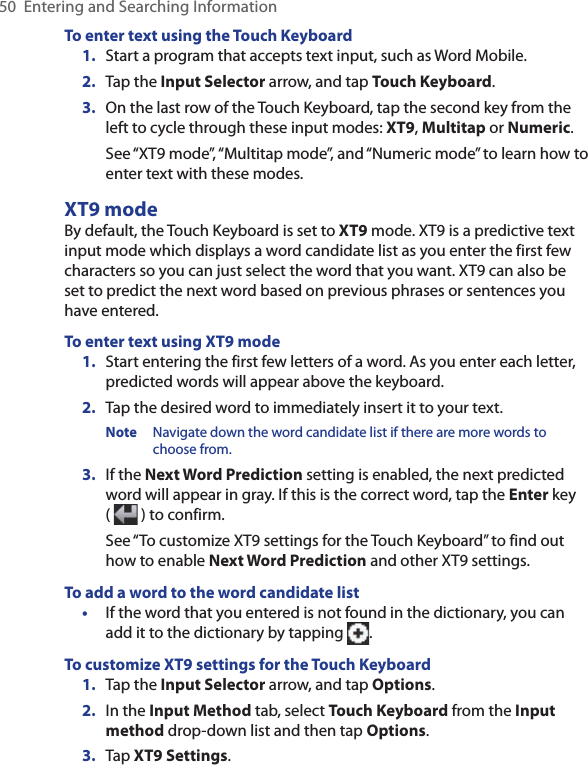


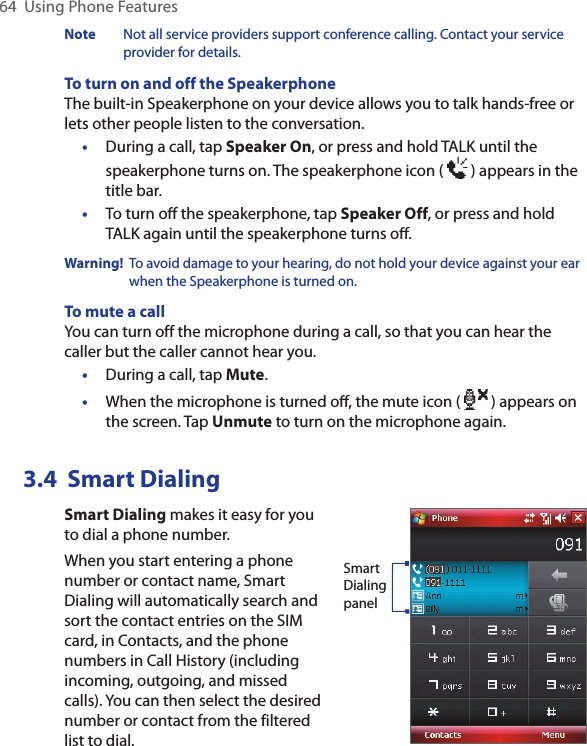
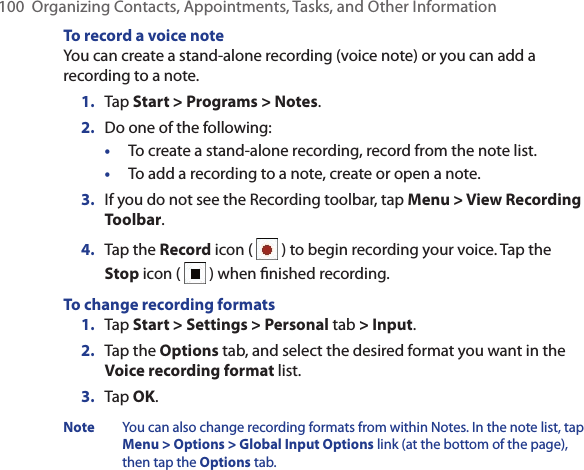
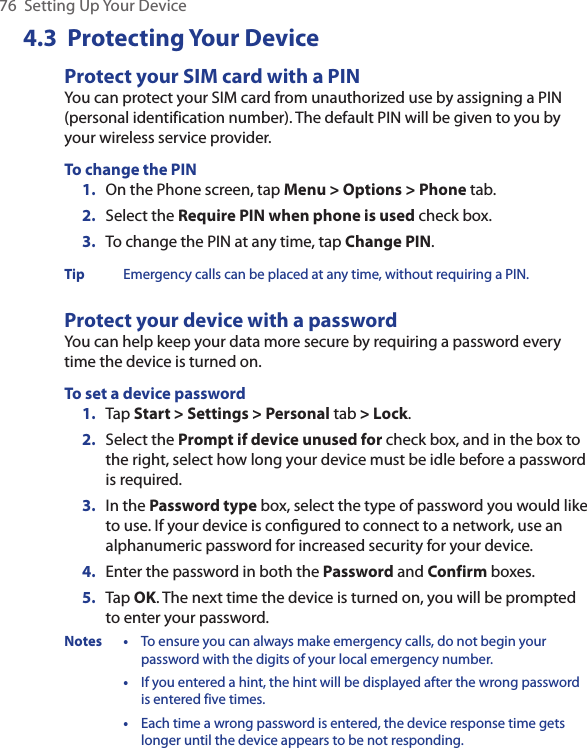
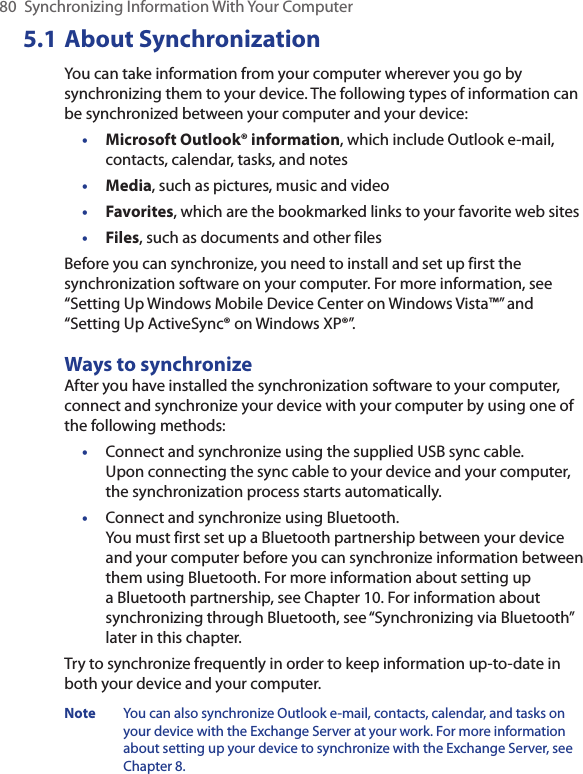
![Using Phone Features 65Tips on using Smart DialingSmart Dialing starts looking for numbers or contacts that match the sequence you have entered. Below are some tips on how to use Smart Dialing to quickly find a desired phone number or contact.To find a phone number• Simply enter the first one or two digits to find a phone number in Call History.• Enter the first three digits or more if you want to find a phone number from the saved contacts on your device and SIM card.To find a contact nameYou can just enter the first letter of a contact’s first name or surname. Smart Dialing will search for the letter starting from the first character of a contact name as well as from the character that appears after a space, dash, or underscore in a contact name. For example, if you tap number “2” which is associated with [a, b, c] on the Phone keypad, contact names such as the following will be considered matches: “Ben Miller”, “George Adams”, “John-Carter”, “Carter, Ellen”, “Dixon, Allan”, “Thomas_Clark”, “JaneCampbell”.If the matching list is long and you want to narrow down the search further, enter another letter. Using the same example above, if you continue to tap “3” which is associated with [d, e, f], the matching list will be narrowed down to the following names: “Ben Miller”, “George Adams”, “Carter, Ellen”, “Dixon, Allan”.Make a call or send a text message using Smart Dialing1. Press the TALK button on your device to open the Phone screen.2. Begin entering the first few numbers or characters.When you start entering a number or letter, the Smart Dialing panel will display matches found.3. In the Smart Dialing panel, browse the list by sliding your finger or the stylus up or down or by pressing NAVIGATION up or down.4. You can do one of the following:• When the desired contact is selected, press the TALK button to place a call.](https://usermanual.wiki/HTC/EFN.Users-Manual-1/User-Guide-851554-Page-65.png)


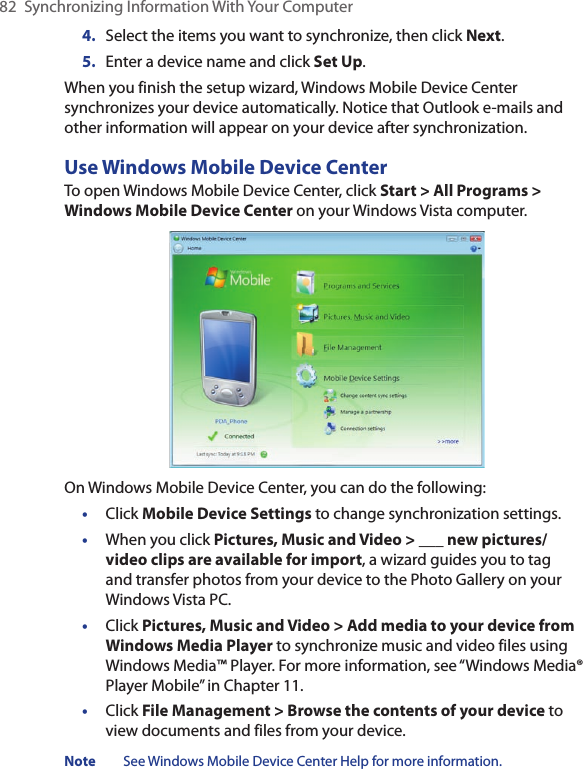

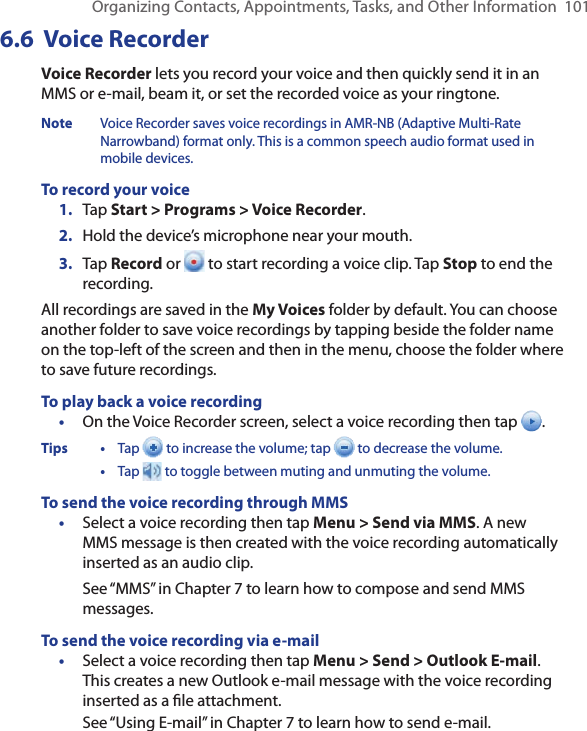
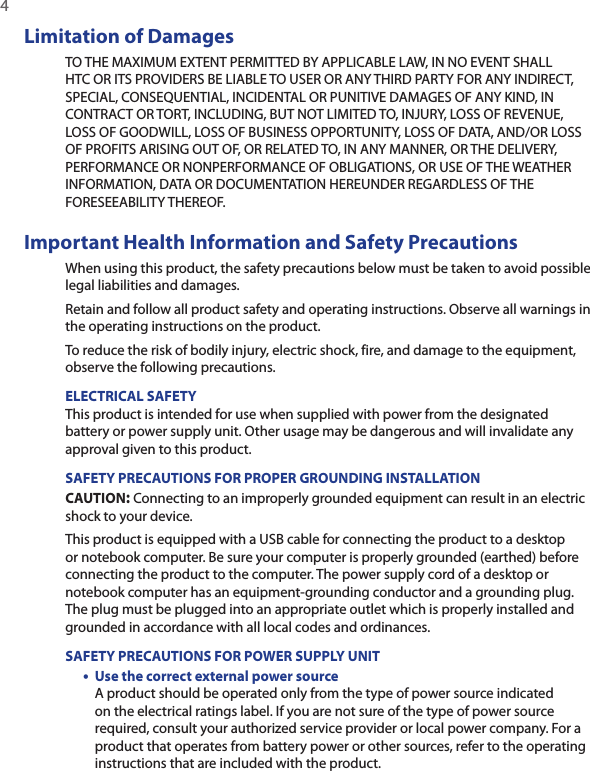
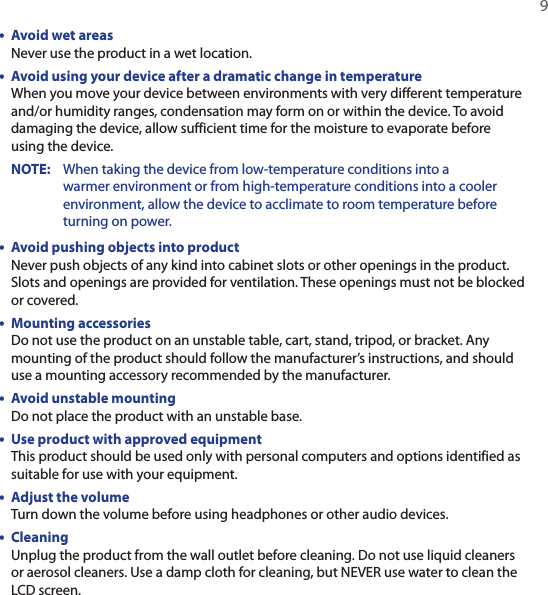
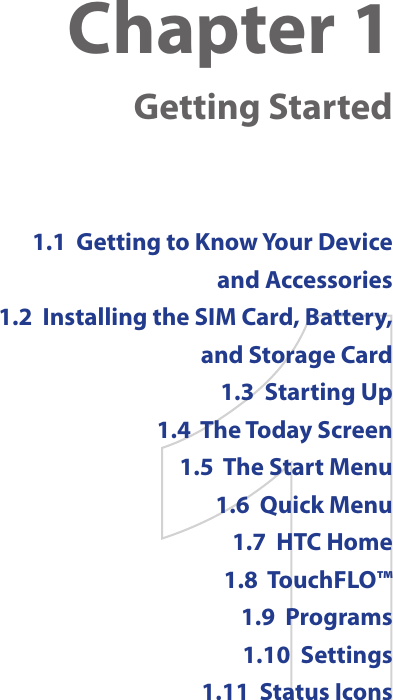
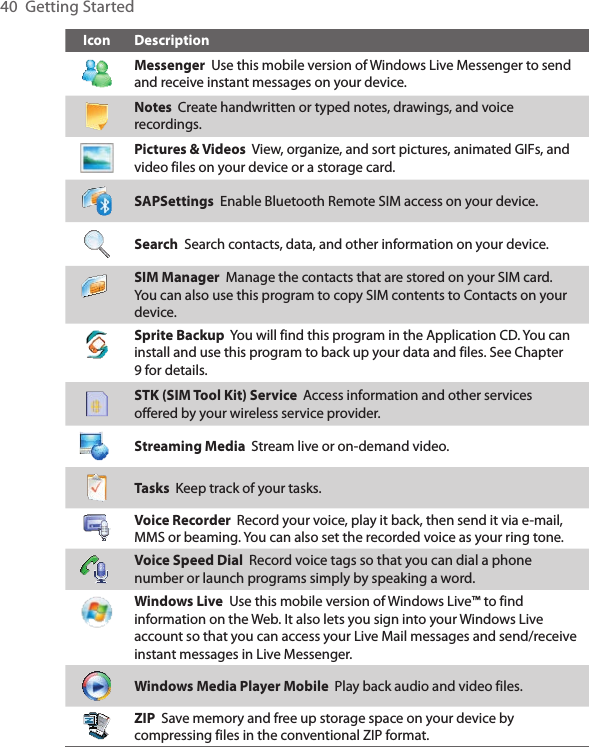
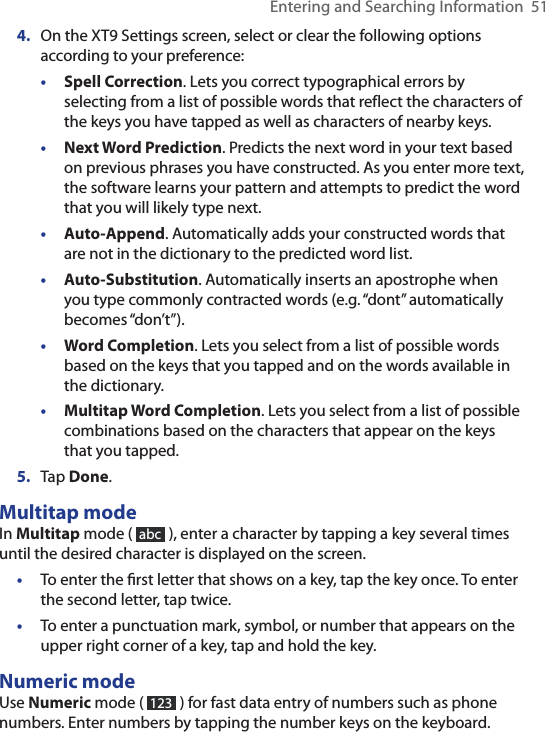
![94 Organizing Contacts, Appointments, Tasks, and Other InformationTo store your SIM card’s phone number1. On the SIM Manager screen, tap Menu > Tools > List of Own Numbers.2. Tap [Voice Line 1].3. Change the name, if desired, then enter your mobile phone number.4. Tap Save.When your phone number is stored on the SIM card, it will appear on the SIM Manager screen.6.3 CalendarUse Calendar to create appointments, including meetings and other events. You can also synchronize Calendar appointments between your device and PC.Create appointmentsTo schedule an appointment1. Tap Start > Calendar.2. Tap Menu > New Appointment.3. Enter a name for the appointment.4. Do one of the following:• If it is a special occasion such as a birthday or a whole-day event, set the All Day option to Yes.• If there is a time frame for the appointment, select the start and end dates and time.5. Specify the type of category for your appointment, so that it can be grouped with other related appointments. Tap Categories, then](https://usermanual.wiki/HTC/EFN.Users-Manual-1/User-Guide-851554-Page-94.png)