HTC PB74120 PDA PHONE User Manual 3
HTC Corporation PDA PHONE Users Manual 3
UserManual.wiki
>
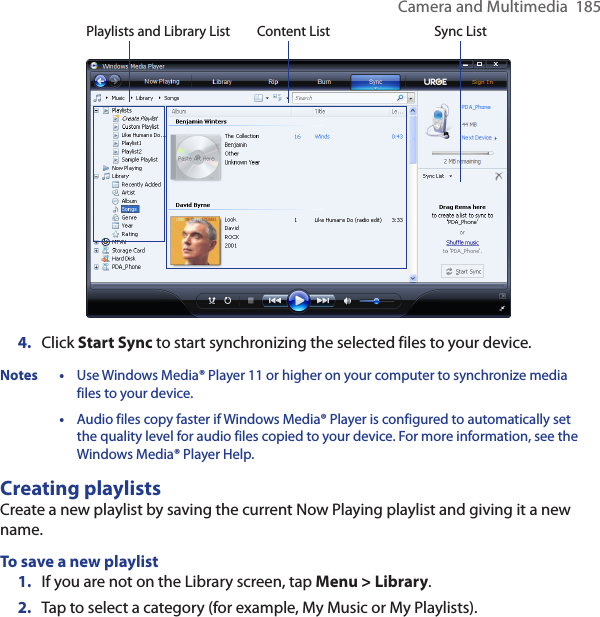
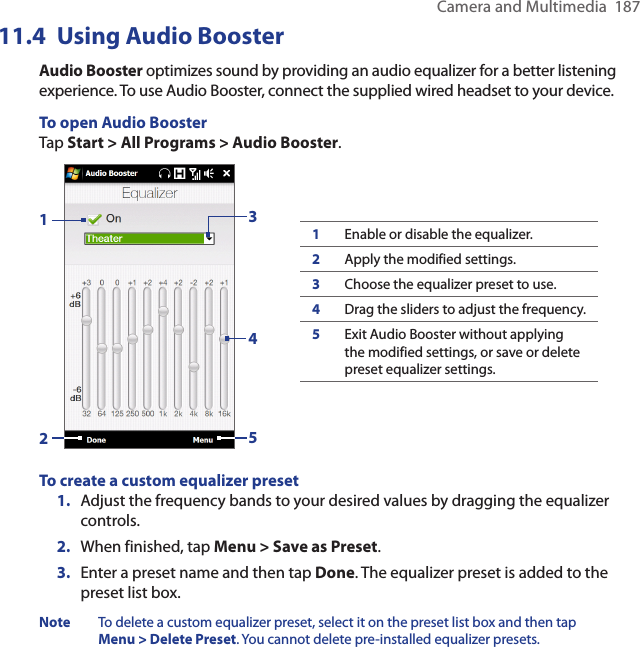
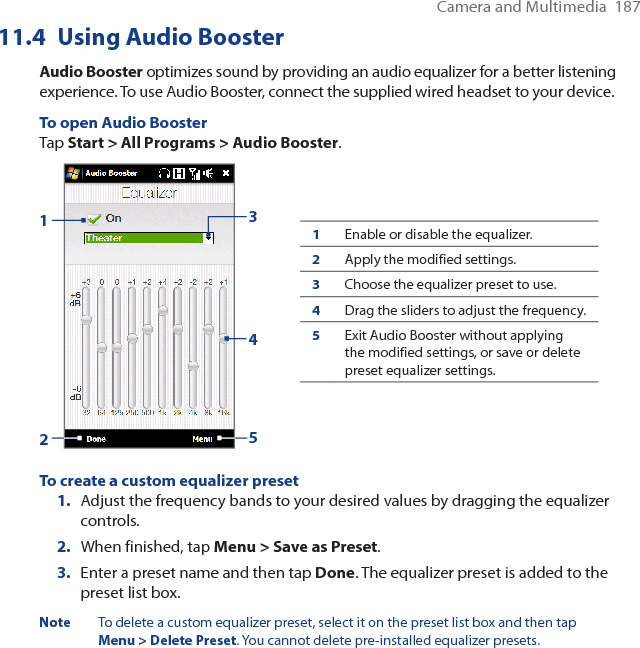
HTC
>
PB74120 User Manual
>
Users Manual 3
Contents
1.
Manual 1
2.
Users Manual 1
3.
Users Manual 2
4.
Users Manual 3
5.
Users Manual 4
Users Manual 3
Navigation menu
Upload a User Manual
Namespaces
Wiki Guide
HTML
PDF
Info
Views
User Manual
Discussion / Help
Navigation
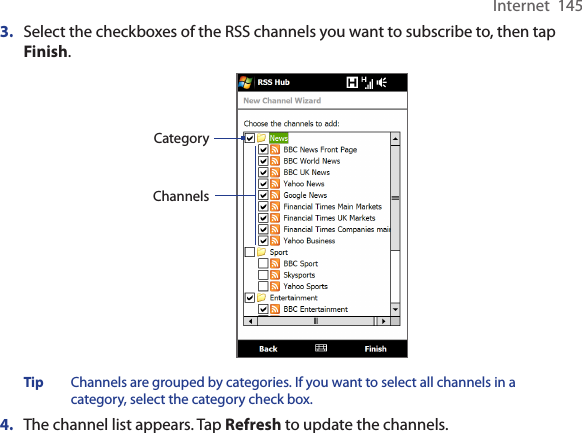
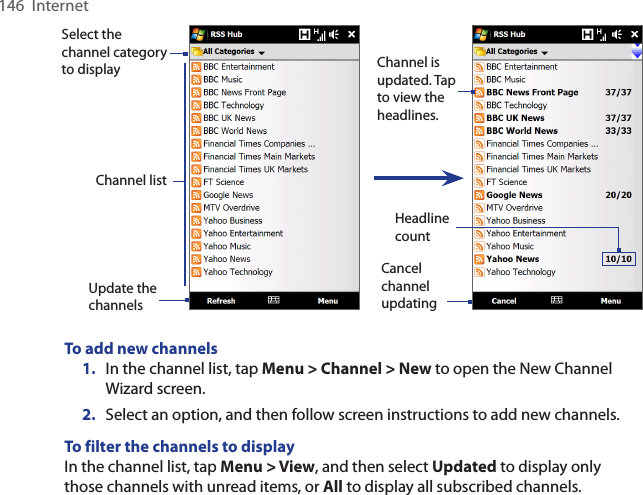
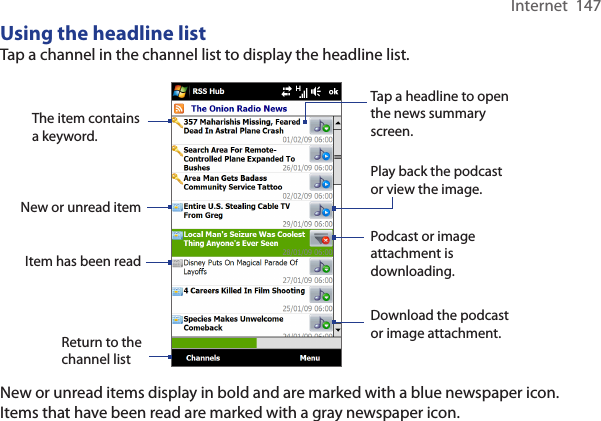
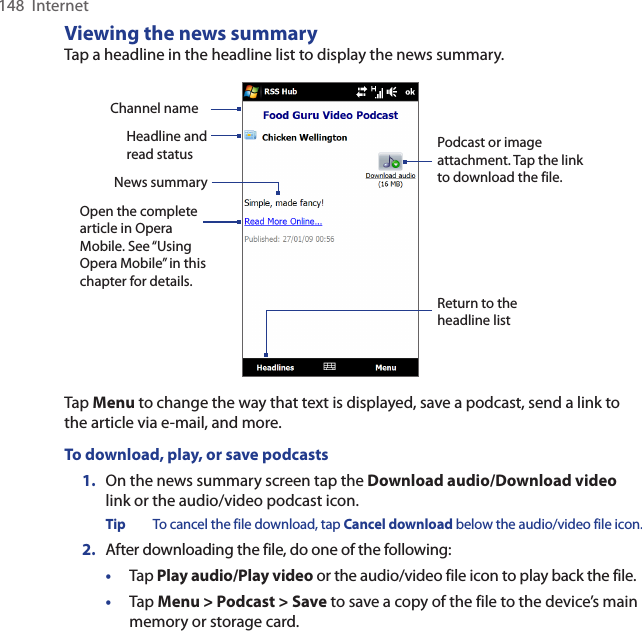
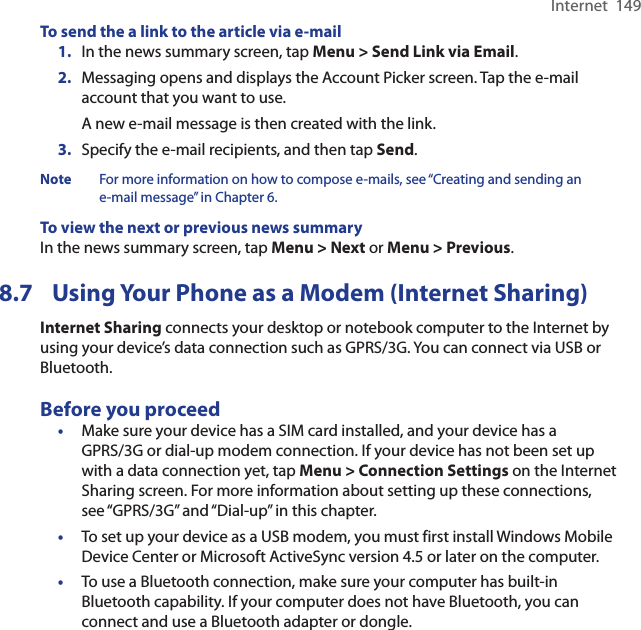
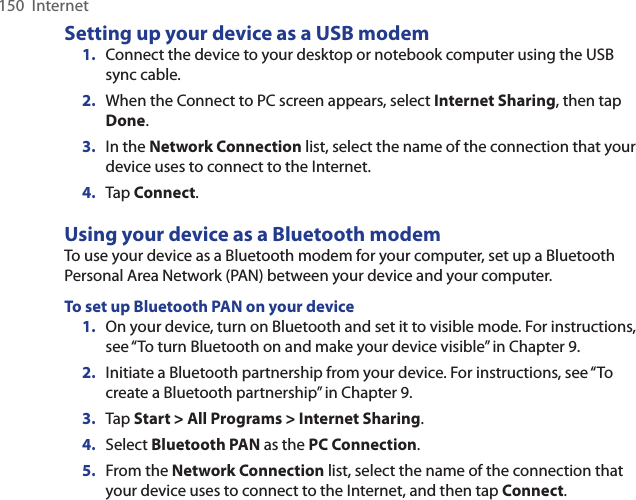

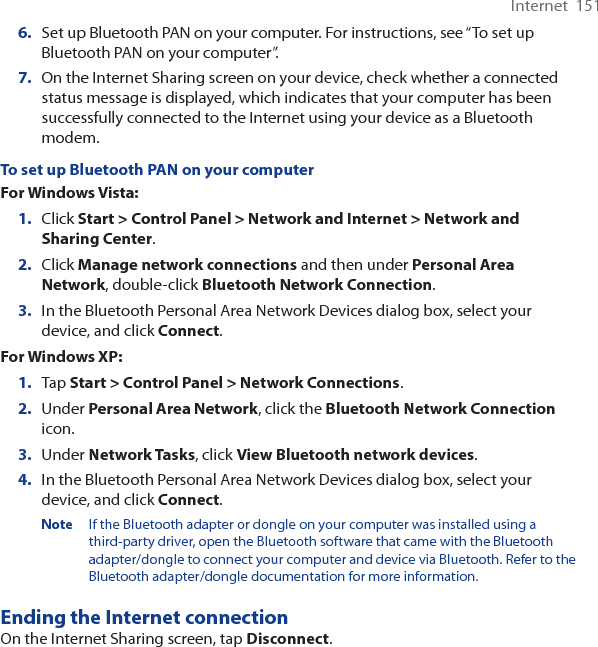
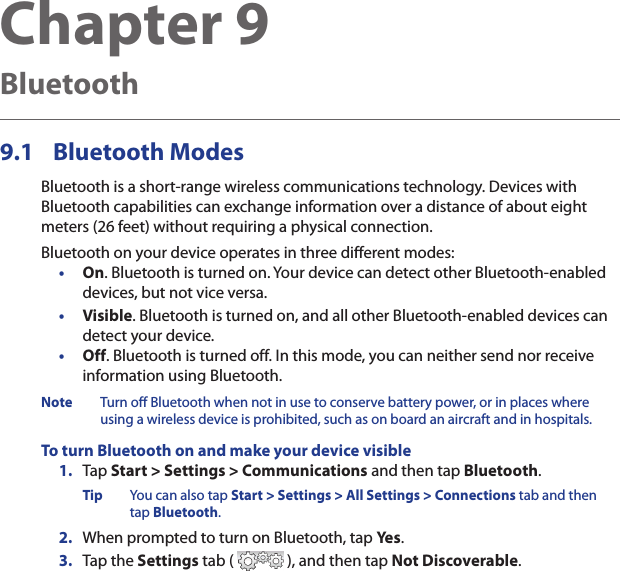
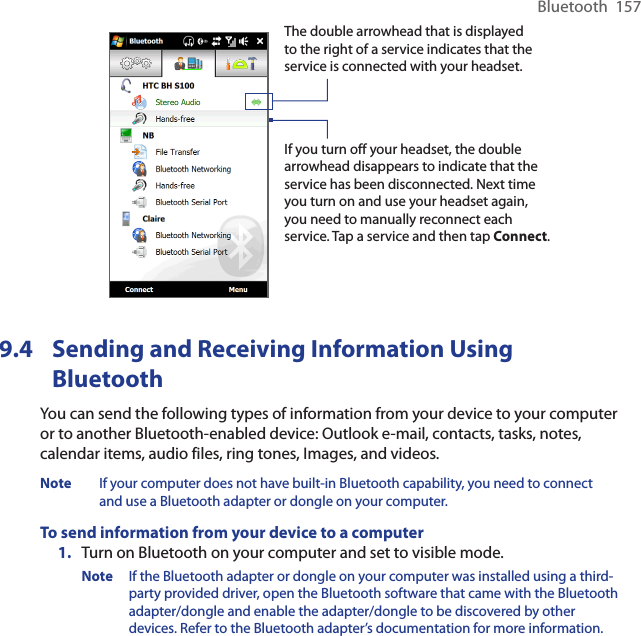
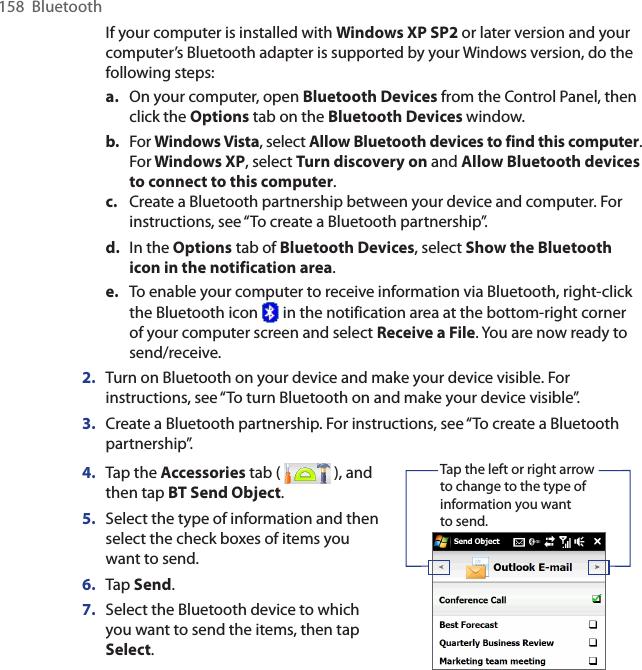

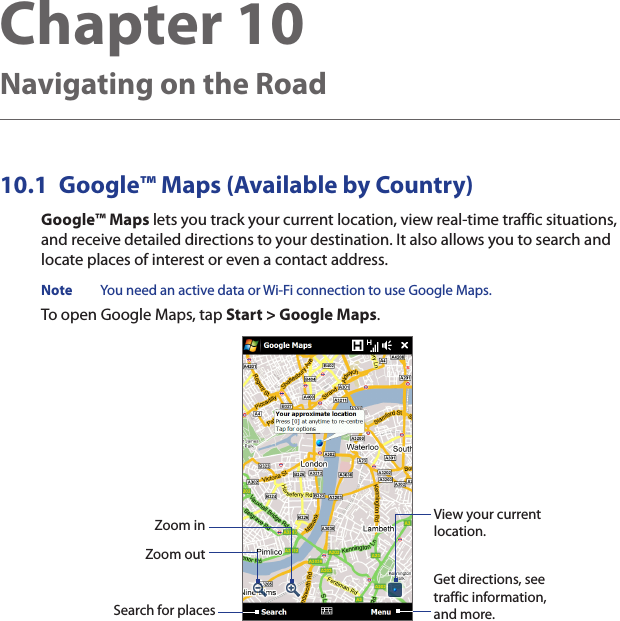

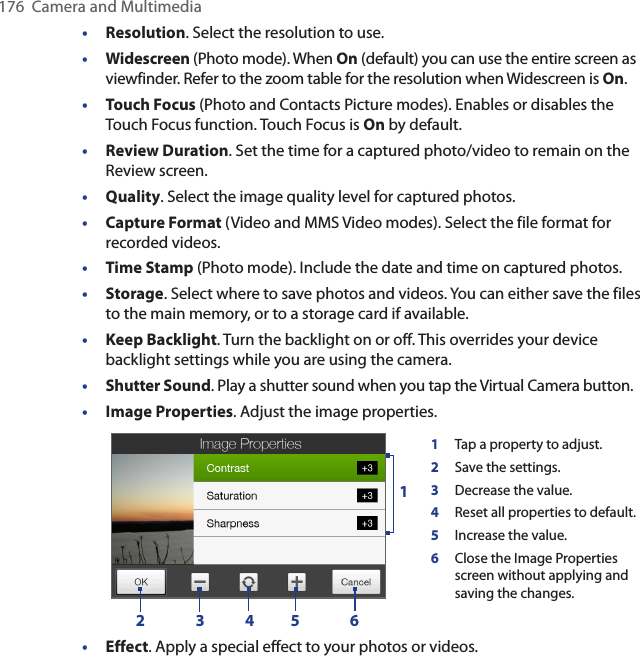
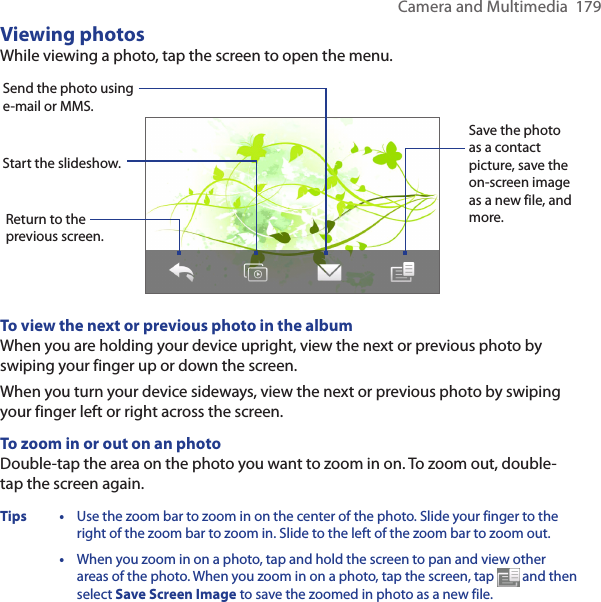
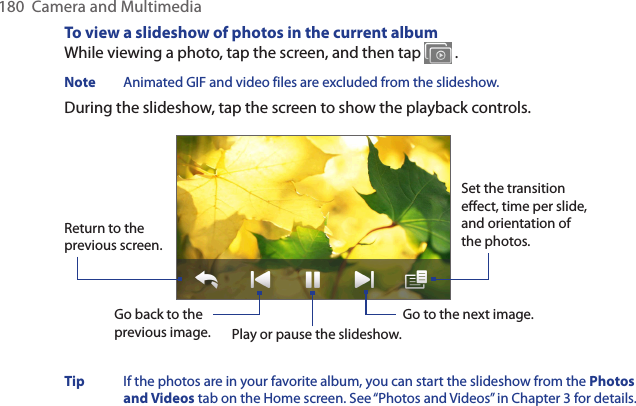
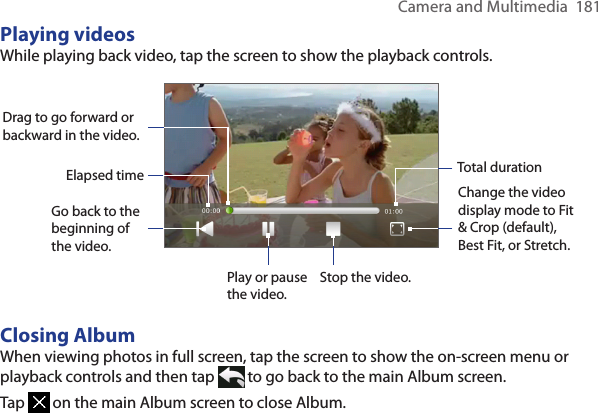
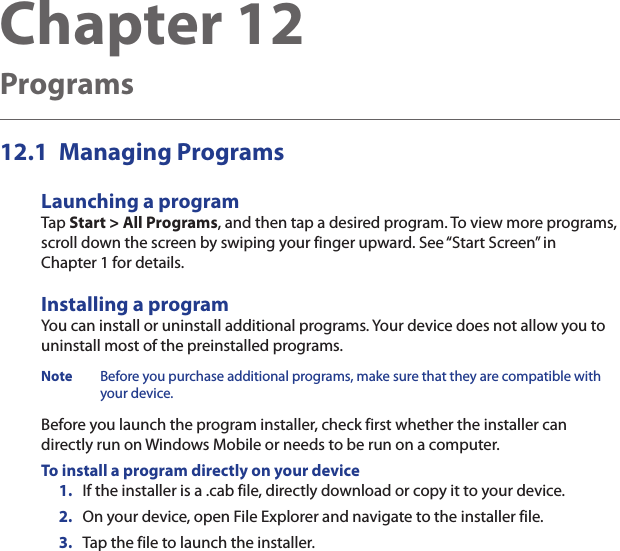
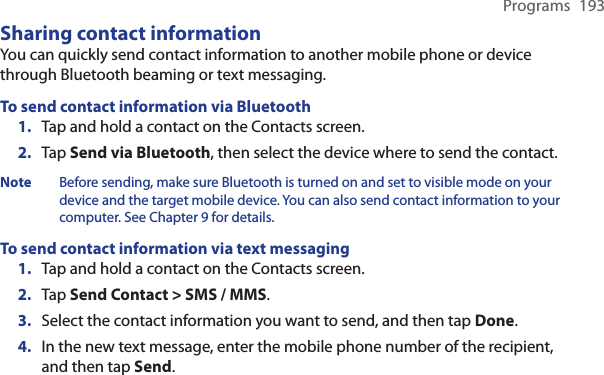
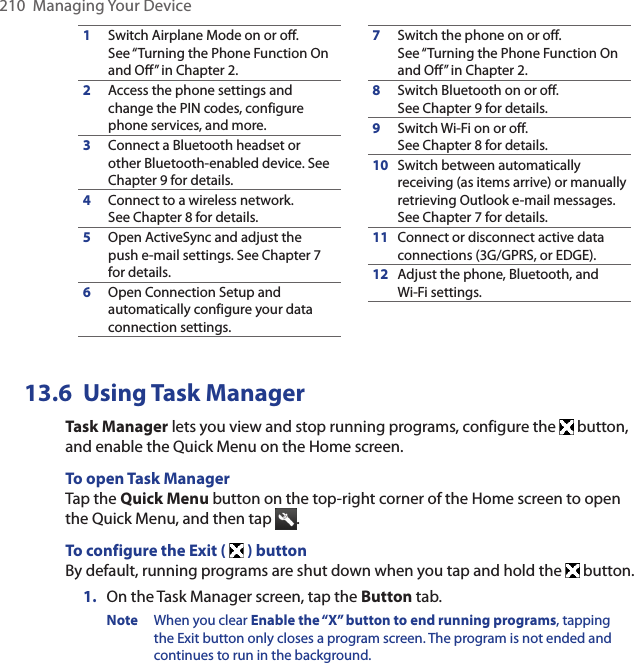
![Navigating on the Road 1654. On the Address tab, tap:• The [phone number] to call the place of interest.• The web address (if available) to go to the web site of the place of interest.• Get directions to get directions to the place of interest from your current location.• Street view (available by country) to display a street view of the place of interest, when available.• Send as text message to send the place’s contact information to your contact via SMS.• Save as favorite to add the place of interest to your list of favorite places. To access your favorite places, on the Google Maps screen, tap Menu > Favorites.• Save as contact to save the contact information of the place of interest to your contacts list.5. Tap See map to view the place of interest on the map.For more information about Google Maps, go to http://www.google.com/gmm/index.html.Guidelines and Preparation for Using 10.2 GPSIf you installed a GPS navigation software on your device, follow these guidelines before and when using your device for GPS navigation.• When using GPS navigation software in the car, always plot your GPS route before starting to drive. Do not try to configure the GPS navigation software while driving.• The plotted GPS route is only for driving reference. It should not interfere with actual driving behavior.](https://usermanual.wiki/HTC/PB74120.Users-Manual-3/User-Guide-1166856-Page-22.png)