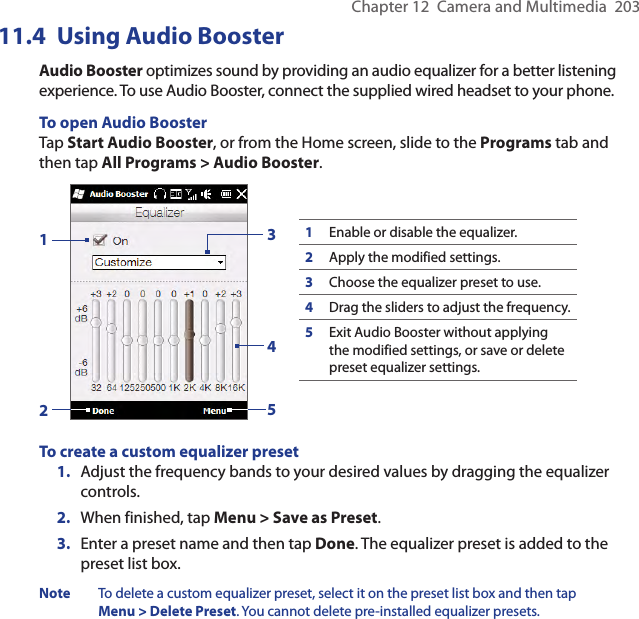
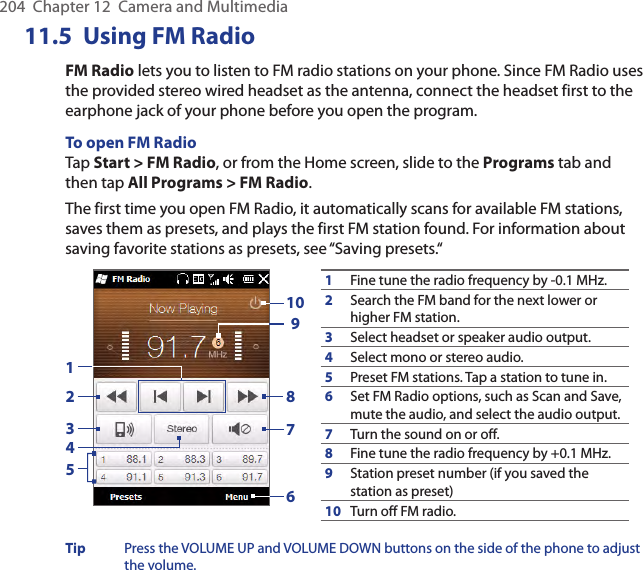
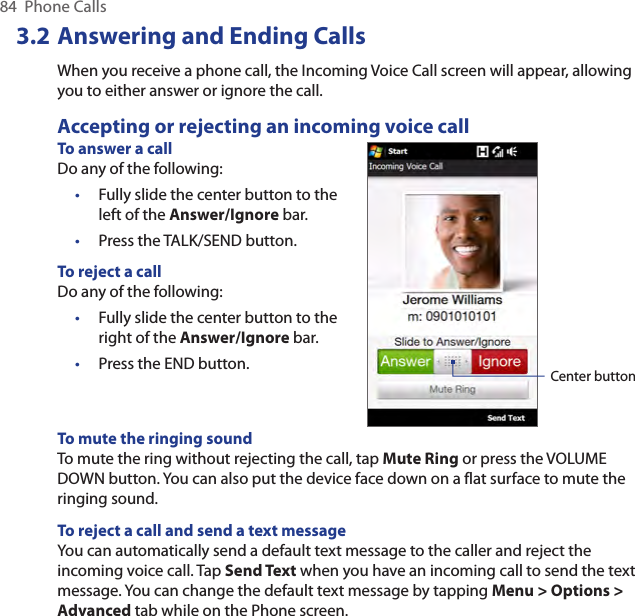
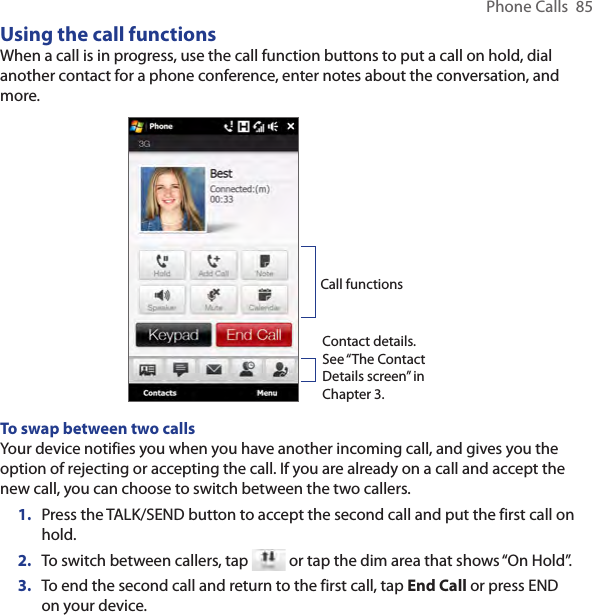
HTC PB81100 POCKET PC PHONE User Manual
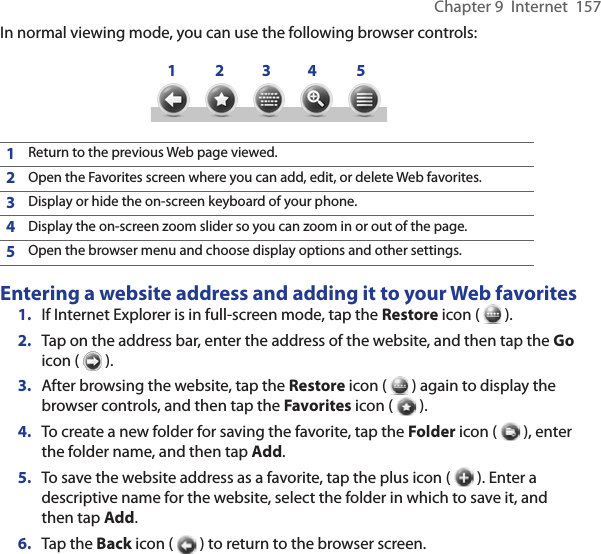
HTC Corporation POCKET PC PHONE Users Manual
UserManual.wiki
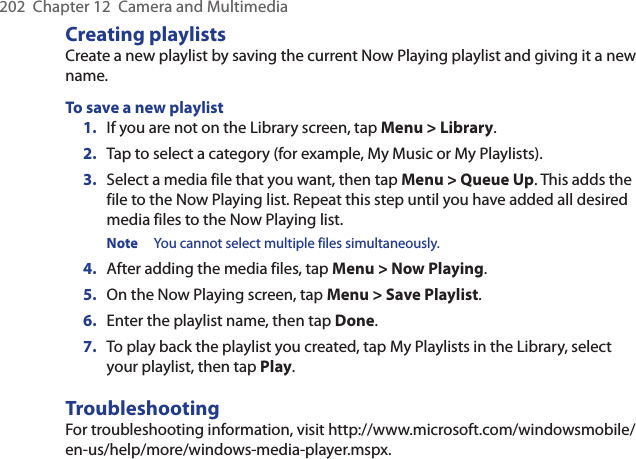
>
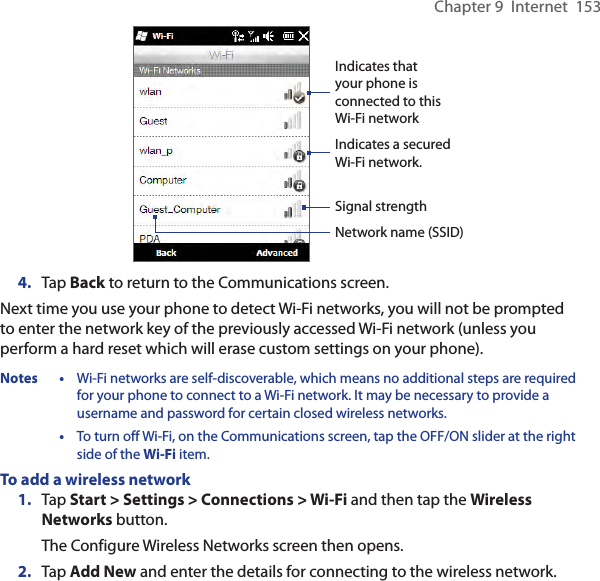
HTC
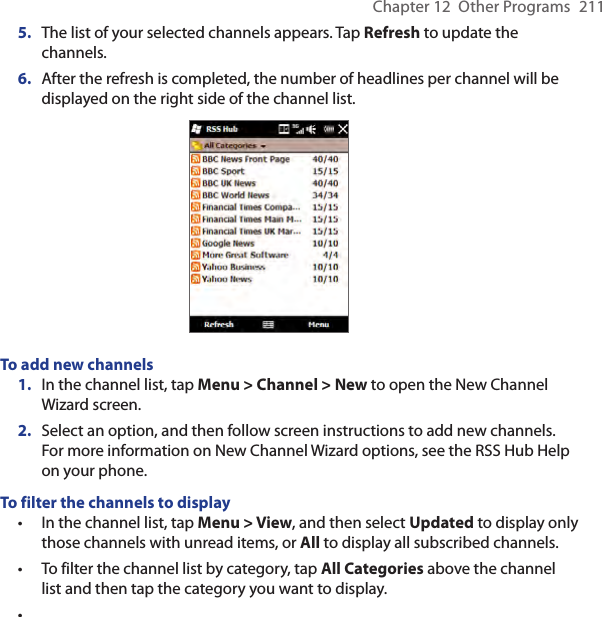
>
PB81100 User Manual
Users Manual
Navigation menu
Upload a User Manual
Namespaces
Wiki Guide
HTML
PDF
Info
Views
User Manual
Discussion / Help
Navigation
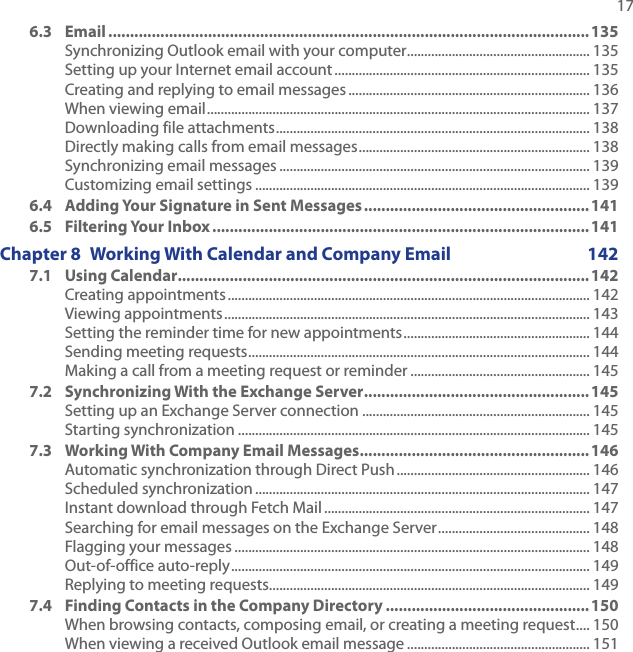


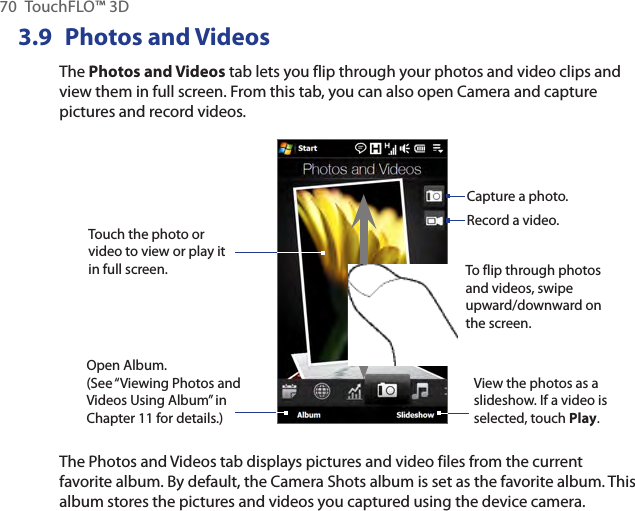
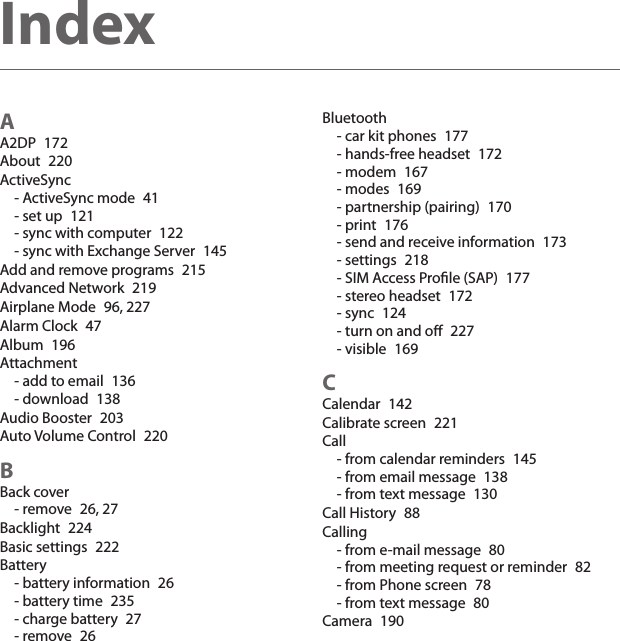
![TouchFLO™ 3D 73To move forward or backward in the current music trackTouch and hold on the thin bar below the album art to display the progress bar:Drag your finger right or left on the progress bar to move forward or backward in the current track.To set repeat and shuffle modesTouch Menu > Repeat and choose whether to repeat the current track, repeat all tracks in the current album or playlist, or not to repeat. To turn shuffle mode on or off, touch Menu > Shuffle and then select Shuffle On or Shuffle Off.The icons on the upper-right side of the Music tab show whether repeat and shuffle modes are enabled.Repeat [One] Repeat [All] Shuffle [On]To browse and play music in the LibraryThe Library organizes music into categories, such as Now Playing, Artists, Albums, Genres, and All Songs. When you add more albums or music tracks to your device, go to the Library to locate and play the new albums or music tracks.On the Music tab, touch Library to open the Library screen.The tabs at the bottom of the Library screen correspond to the different categories. To browse music under a certain category, slide to the tab that corresponds to the desired category.Keep tapping an item on a category tab (for example, an artist) until the music tracks display on the screen.Tap a music track to play it.Note When you select a category in the Library such as Artists and play its music, the Now Playing list will be replaced with the music tracks from that category.1.2.3.4.](https://usermanual.wiki/HTC/PB81100/User-Guide-1181565-Page-73.png)


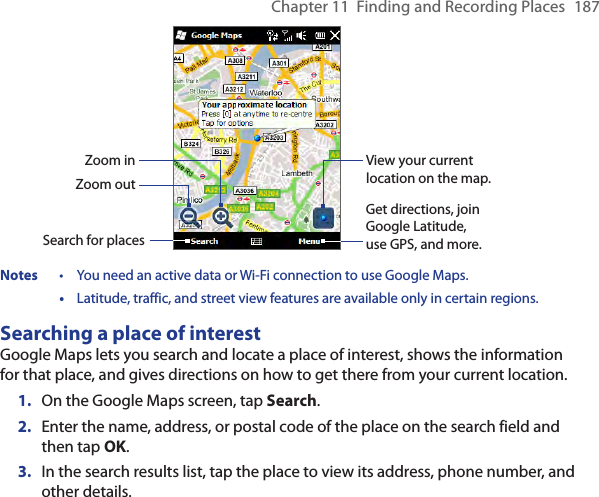
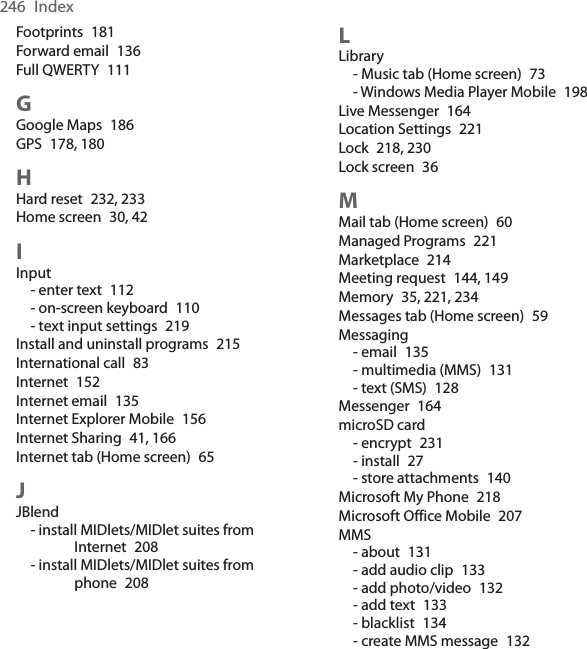
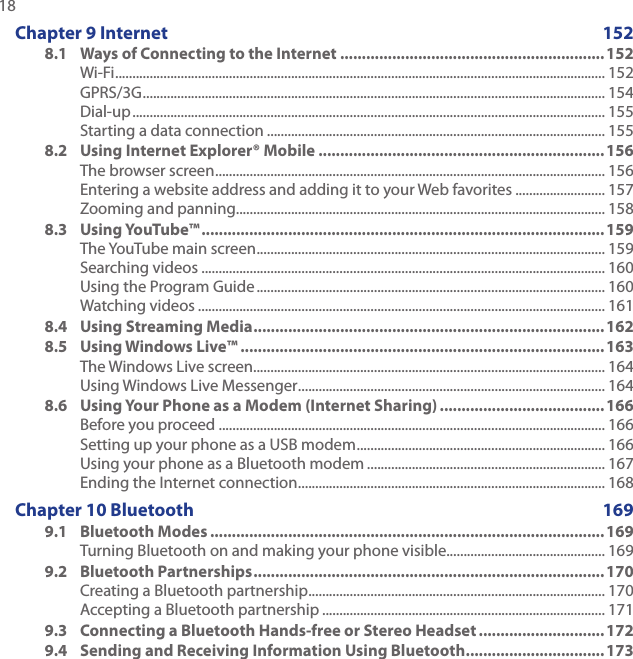
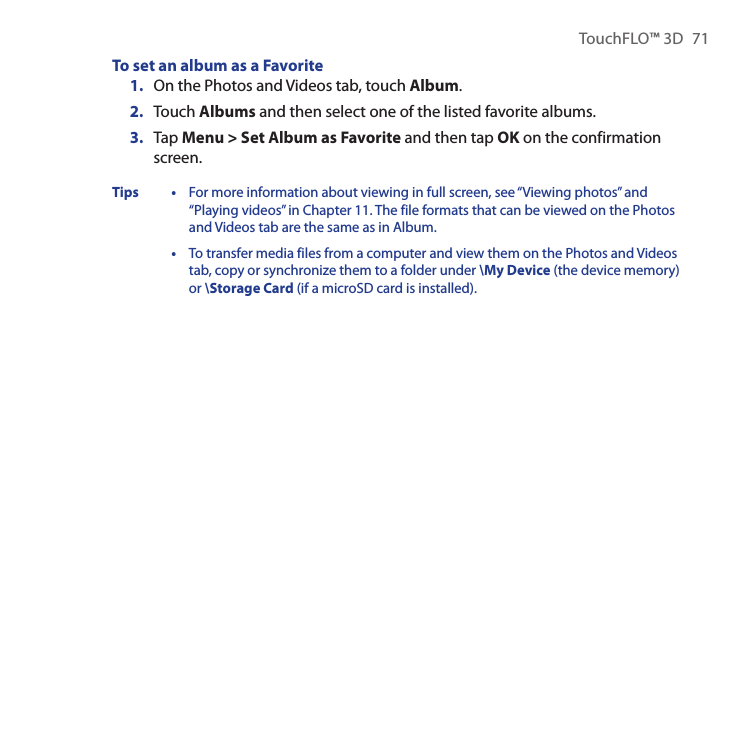
![188 Chapter 11 Finding and Recording Places 4. On the Address tab, tap:• The [phone number] to call the place of interest.• The Web address (if available) to go to the website of the place of interest.• Get directions to get directions to the place of interest from your current location.• Street view (available by country) to display a street view of the place of interest, when available.](https://usermanual.wiki/HTC/PB81100/User-Guide-1181565-Page-188.png)