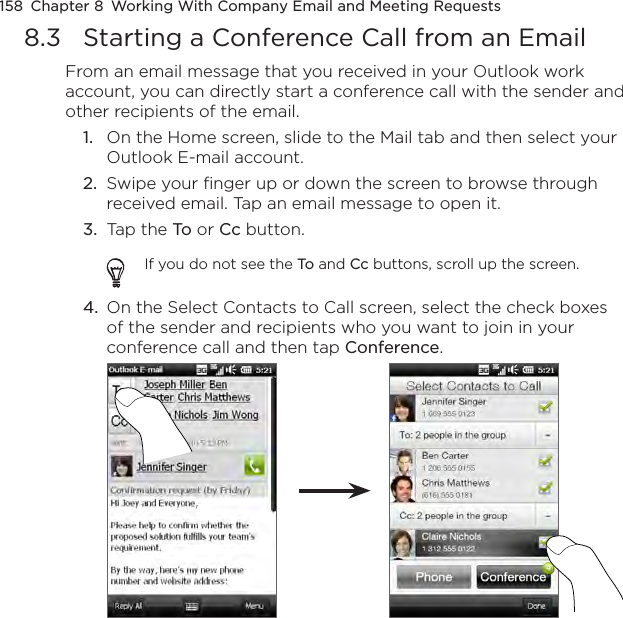
HTC PB92100 WINDOWS PHONE User Manual 1 2
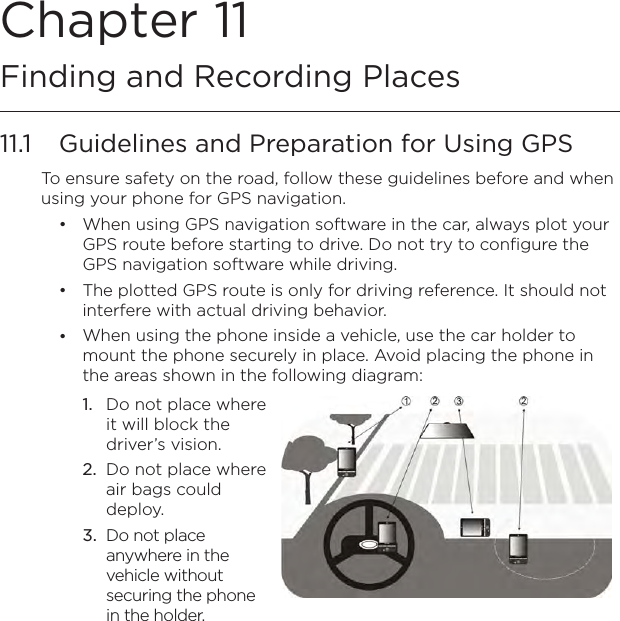
HTC Corporation WINDOWS PHONE Users Manual 1 2
UserManual.wiki
>
HTC
>
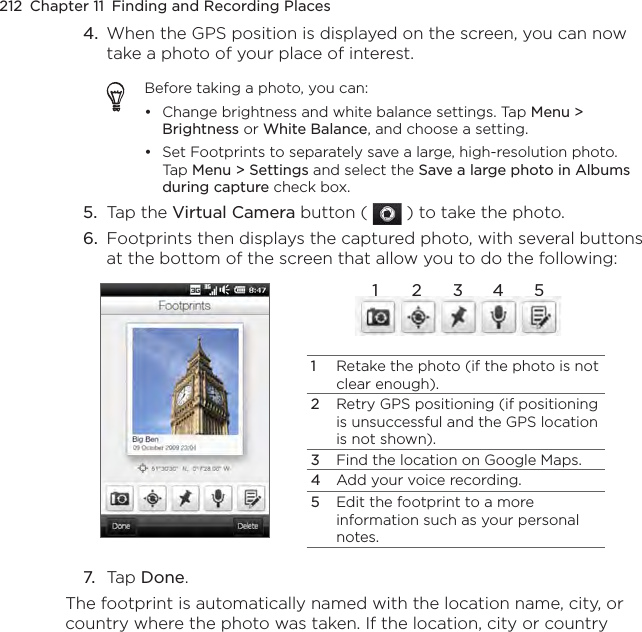
PB92100 User Manual
>
Users Manual 1.2
Contents
1.
Users Manual 1.1
2.
Users Manual 1.2
3.
Users Manual 2
Users Manual 1.2
Navigation menu
Upload a User Manual
Namespaces
Wiki Guide
HTML
PDF
Info
Views
User Manual
Discussion / Help
Navigation


![218 Chapter 11 Finding and Recording Places3. Tap See list to view a list of search results. In the list, tap the place to view its address, phone number, and other details. 4. On the Address tab, tap:The [phone number] to call the place of interest.Get directions to get directions to the place of interest from your current location.Street view (available by country) to display a street view of the place of interest, when available.Add star to mark the place of interest as a favorite and add it to your Starred Items list. To access your favorite places, on the Google Maps screen, tap Menu > Starred Items.Save as contact to save the contact information of the place of interest to your contacts list.Send as text message to send the place’s information to someone via SMS.5. Tap See map to view the place of interest on the map.For more information about Google Maps and its many features, go to: http://www.google.com/gmm/index.html.••••••](https://usermanual.wiki/HTC/PB92100.Users-Manual-1-2/User-Guide-1254519-Page-71.png)