HTC WZ PDA Phone User Manual Wizard Generic Manual English indb
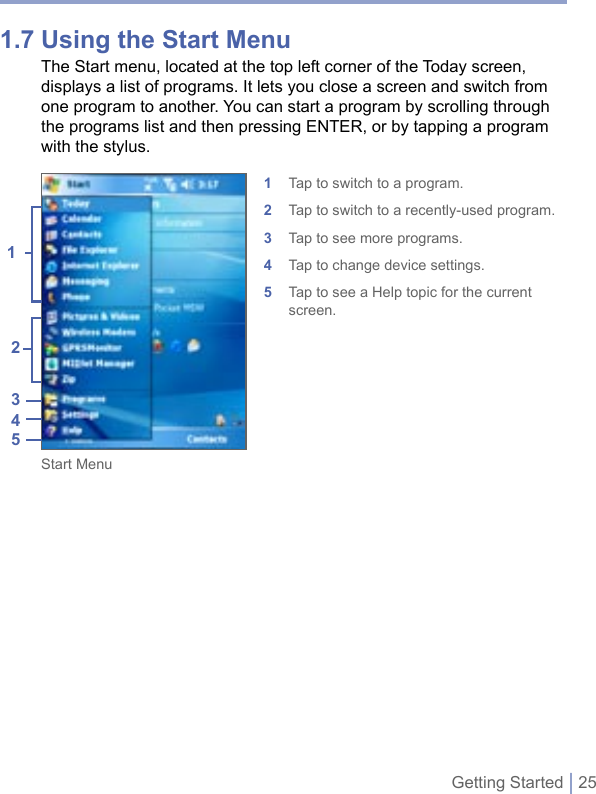
HTC Corporation PDA Phone Wizard Generic Manual English indb
UserManual.wiki
>
HTC
>
WZ User Manual
>
User Manual WIZA 100 110
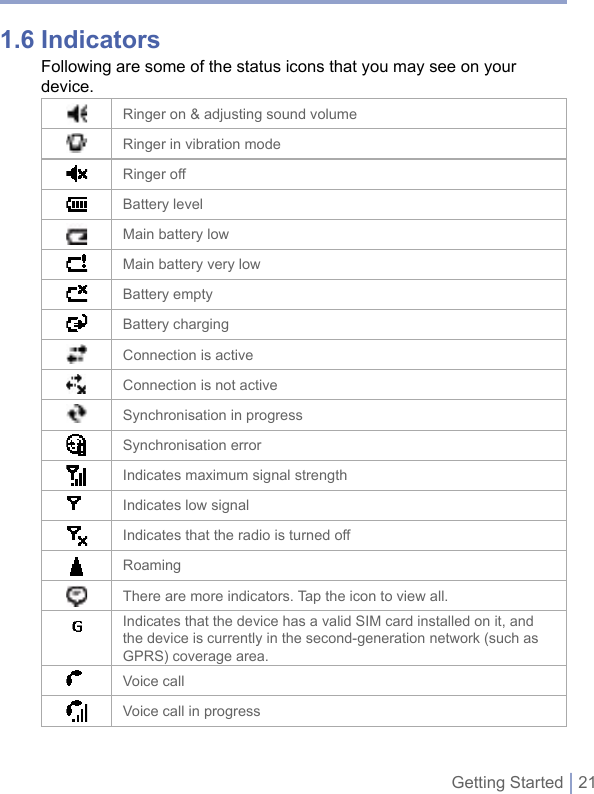
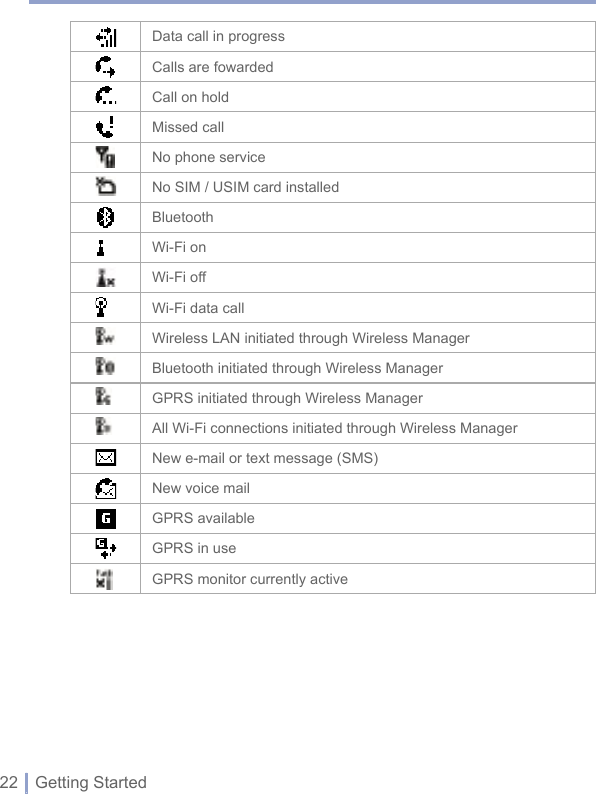
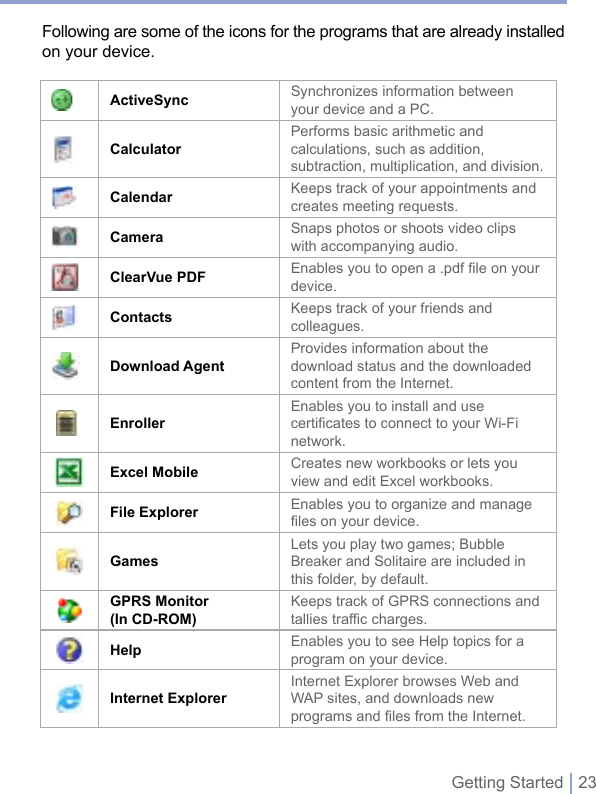
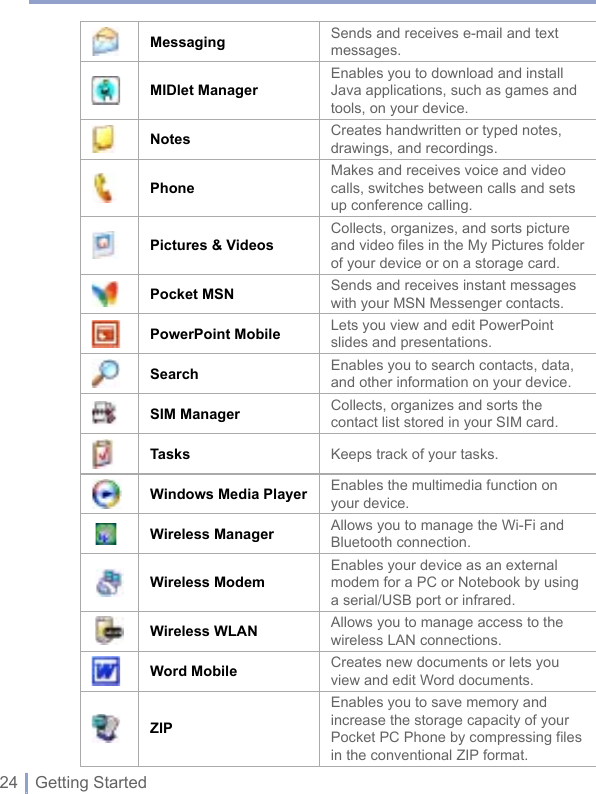
Contents
1.
User Manual WIZA 100 110
2.
User Manual WIZA 200
User Manual WIZA 100 110
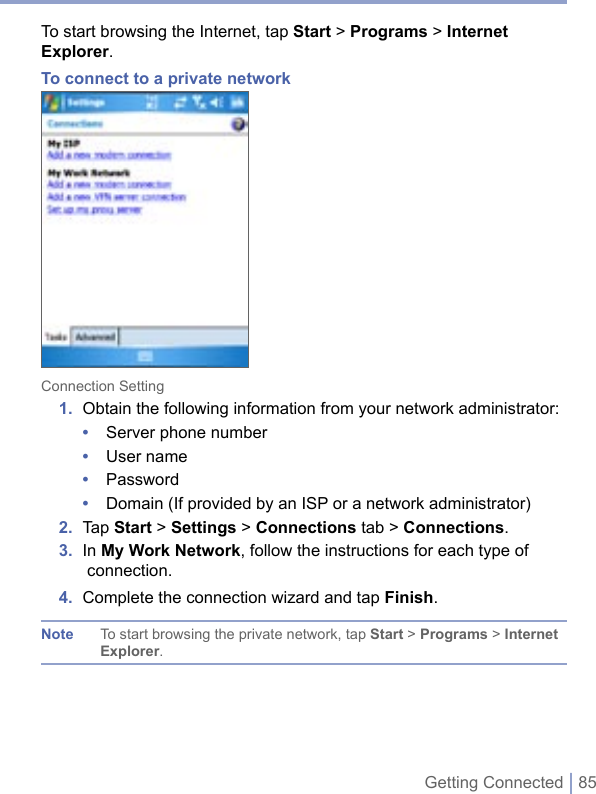
Navigation menu
Upload a User Manual
Namespaces
Wiki Guide
HTML
PDF
Info
Views
User Manual
Discussion / Help
Navigation

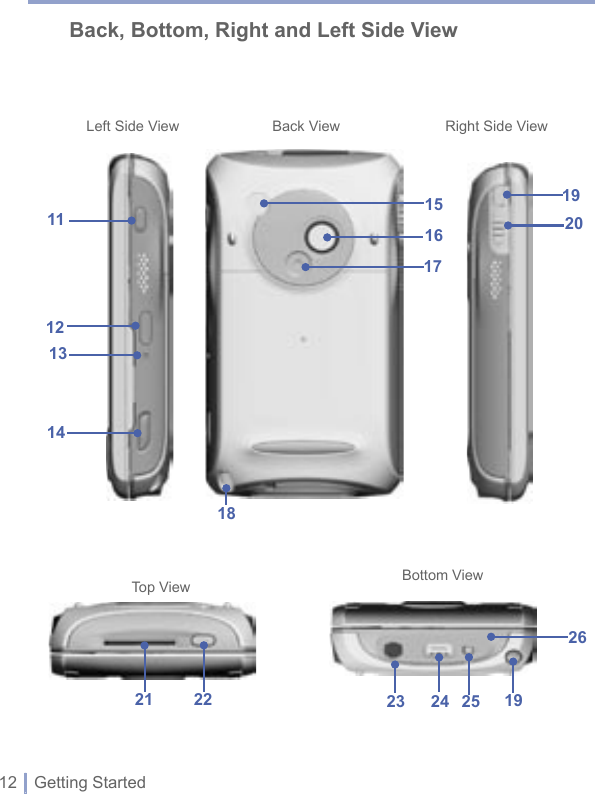

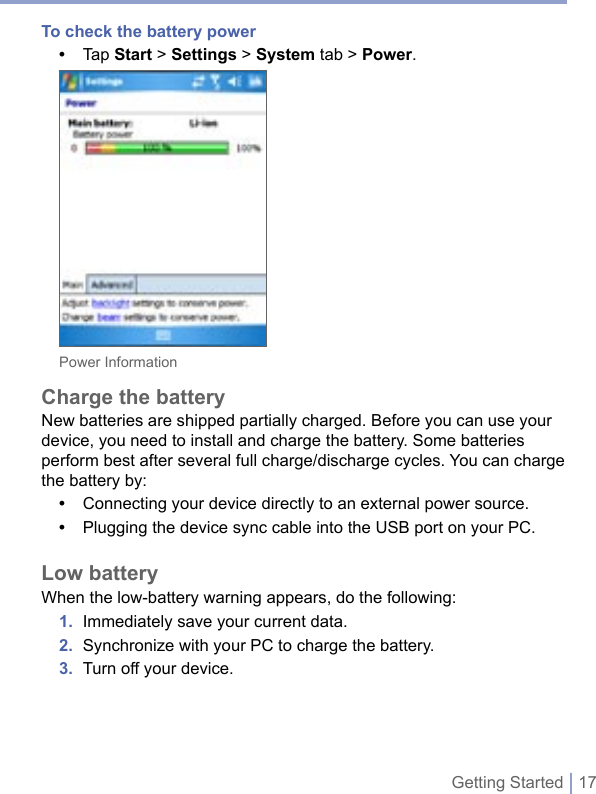


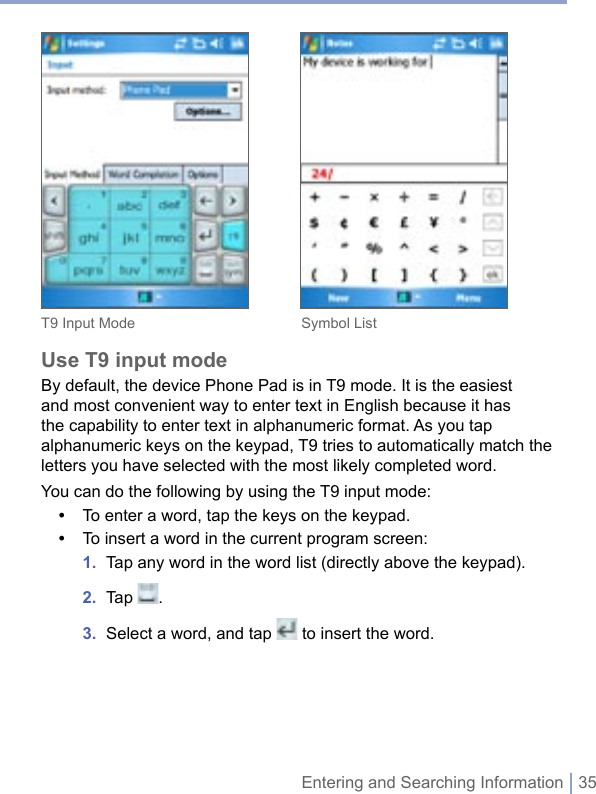
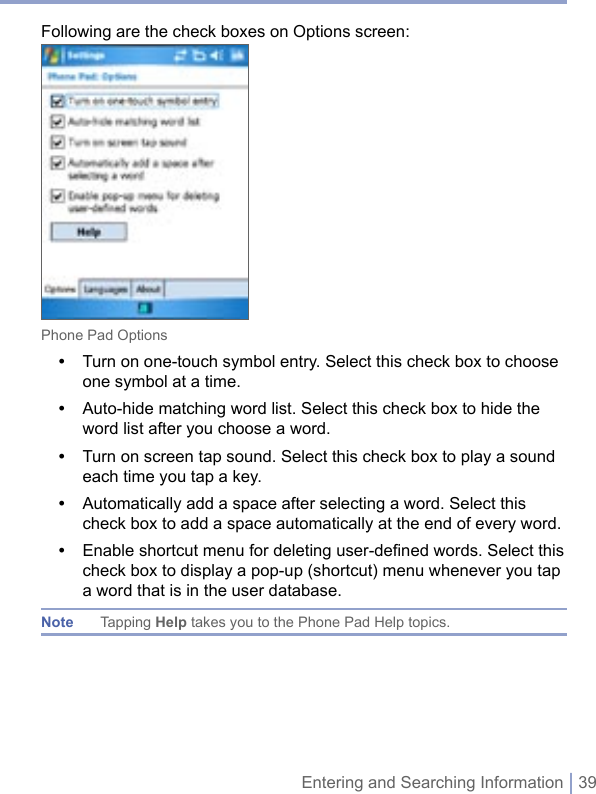


![Getting Connected | 93To delete a Bluetooth partnership1. Tap Start > Settings > Connections tab > Bluetooth.2. Tap and hold the partnership on the Devices tab. 3. Tap Delete from the shortcut menu.Beam information using BluetoothTo beam information from your device1. On the device, tap and hold an item to beam.The item can be an appointment in your calendar, a task, a contact card, or a file.2. Tap Beam [type of item].3. Tap the device name to which you want to send the beam.The item is beamed to the device you selected.Note If the device you want to beam to does not appear in the box, make sure that it is turned on, discoverable, and within close range (10 meters) of your device. Use a Bluetooth device as a modemYou can use a phone that has Bluetooth capabilities as a modem for your device. To do so, create a Bluetooth modem connection on your device and then send information to another device by using Bluetooth. The device relays the information over the network and then sends back to your device any information that you had requested over the connection. Once you create a modem connection to the Bluetooth phone, you can reuse it whenever you want to use the phone as a modem. Make sure that your device and the destination device are turned on, Bluetooth is turned on, and that the devices are within close range.](https://usermanual.wiki/HTC/WZ.User-Manual-WIZA-100-110/User-Guide-555638-Page-93.png)