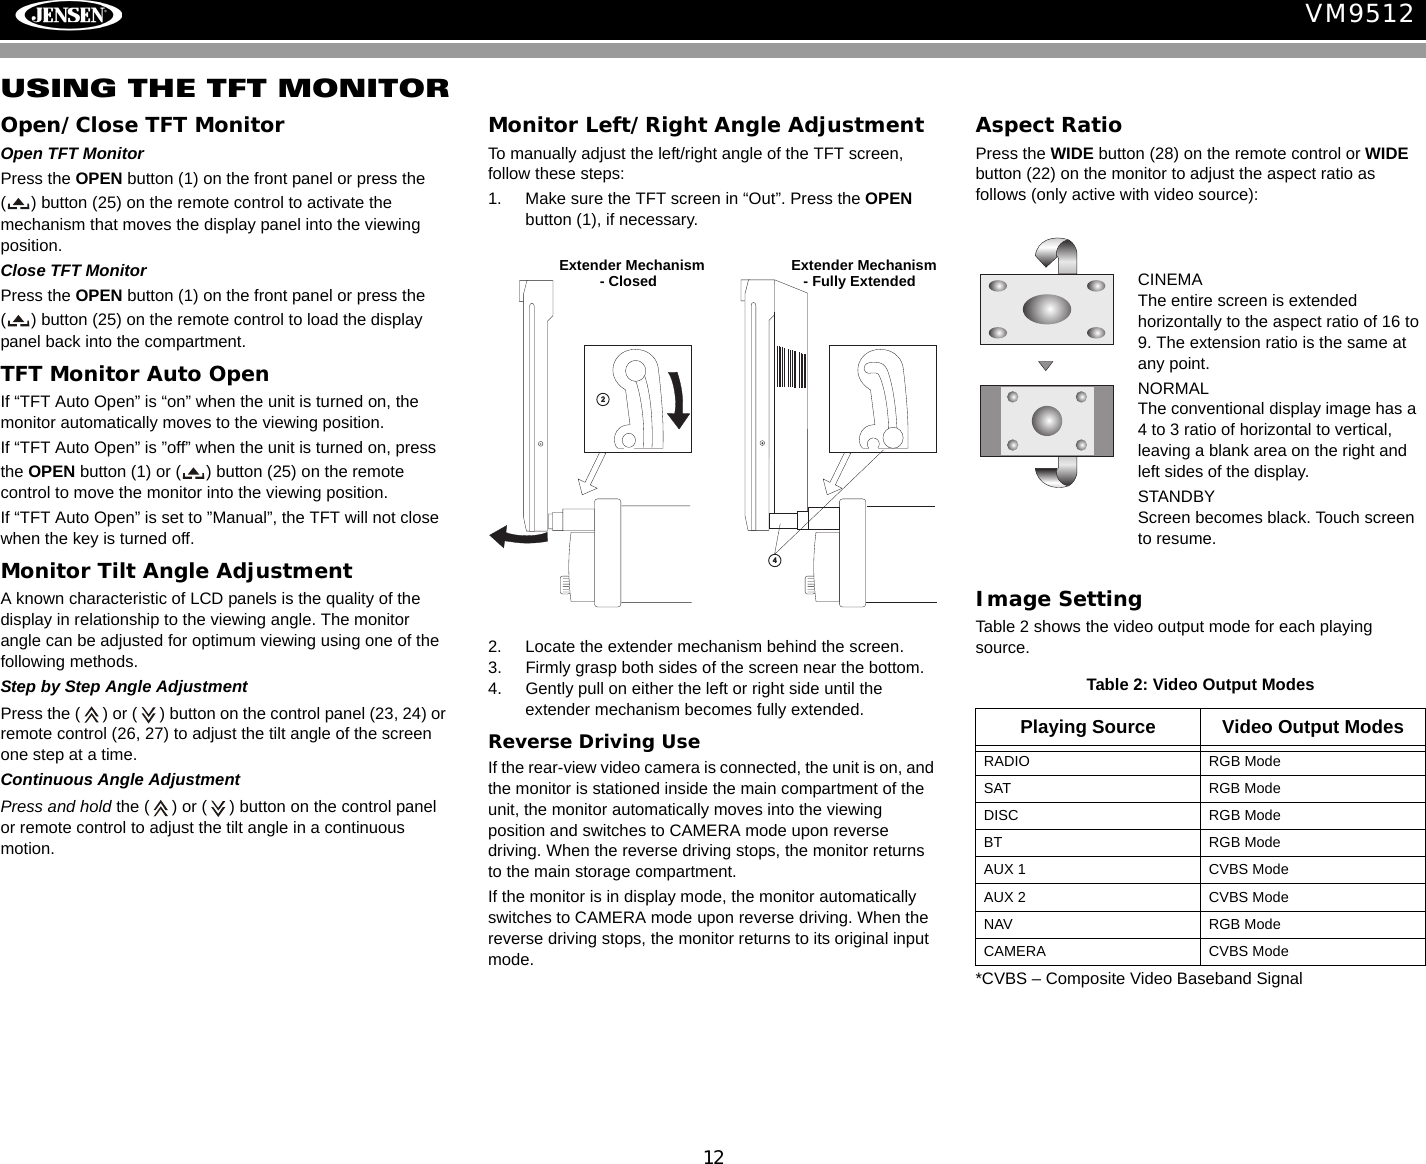
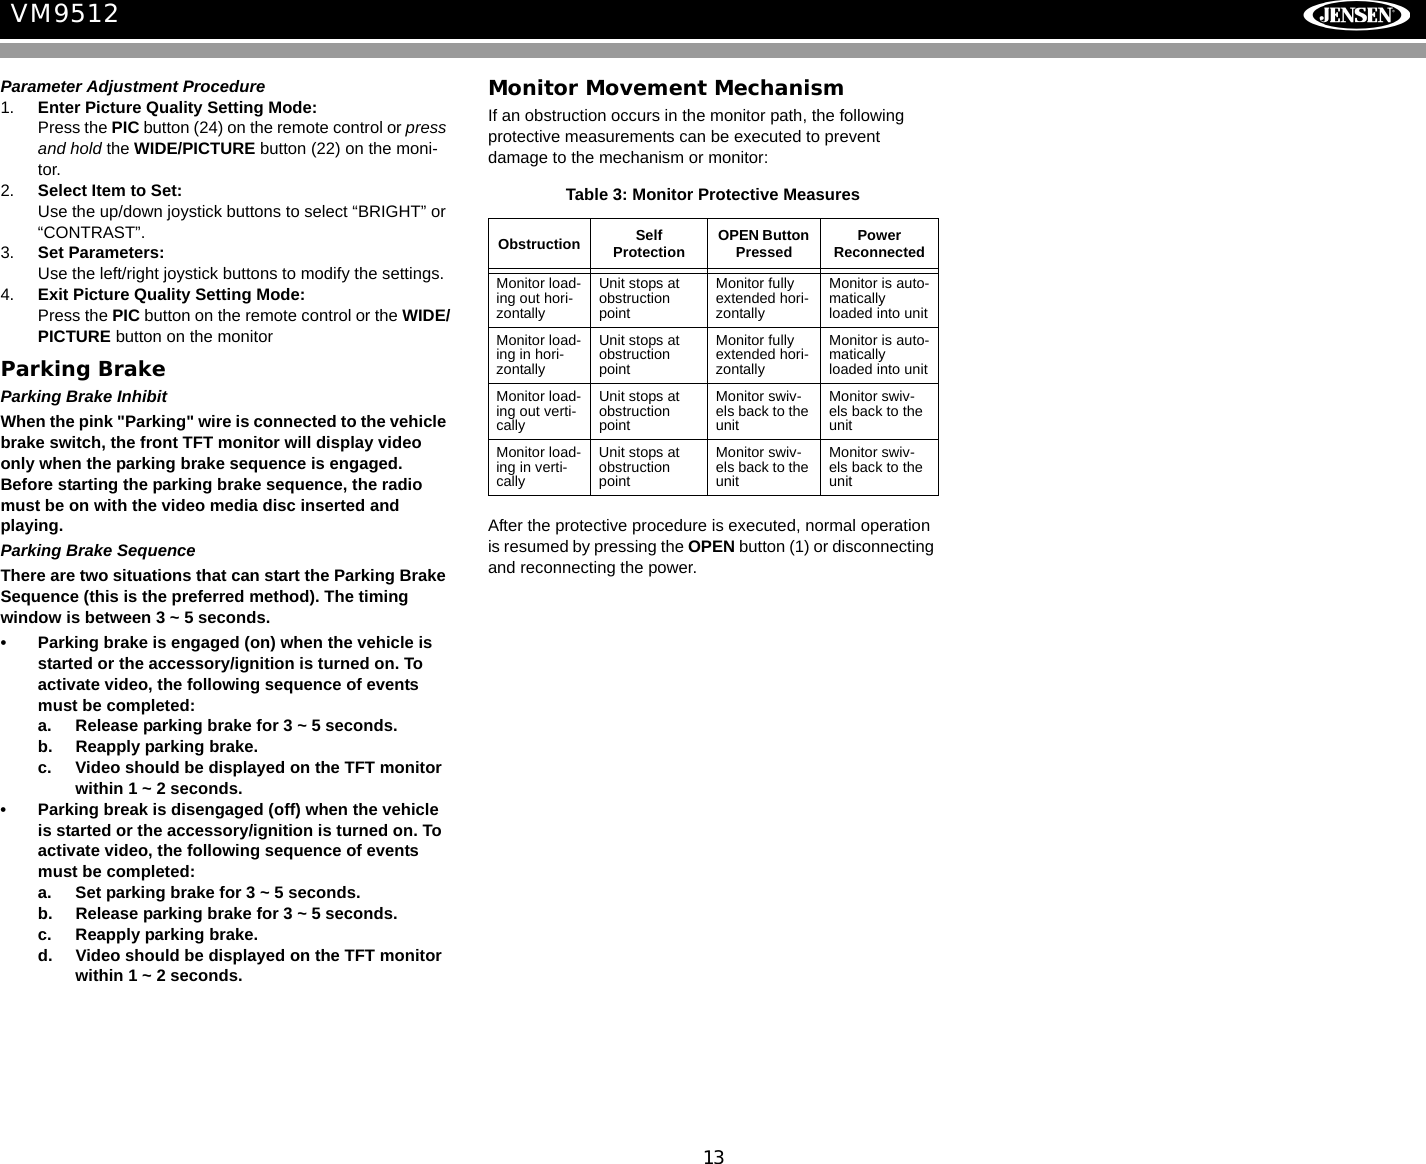
HUIZHOU FORYOU GENERAL ELECTRONICS FGEDV7310 Car DVD Player User Manual
HUIZHOU FORYOU GENERAL ELECTRONICS CO.,LTD. Car DVD Player
UserManual.wiki
>
HUIZHOU FORYOU GENERAL ELECTRONICS
>
FGEDV7310 User Manual
User manual
Navigation menu
Upload a User Manual
Namespaces
Wiki Guide
HTML
PDF
Info
Views
User Manual
Discussion / Help
Navigation
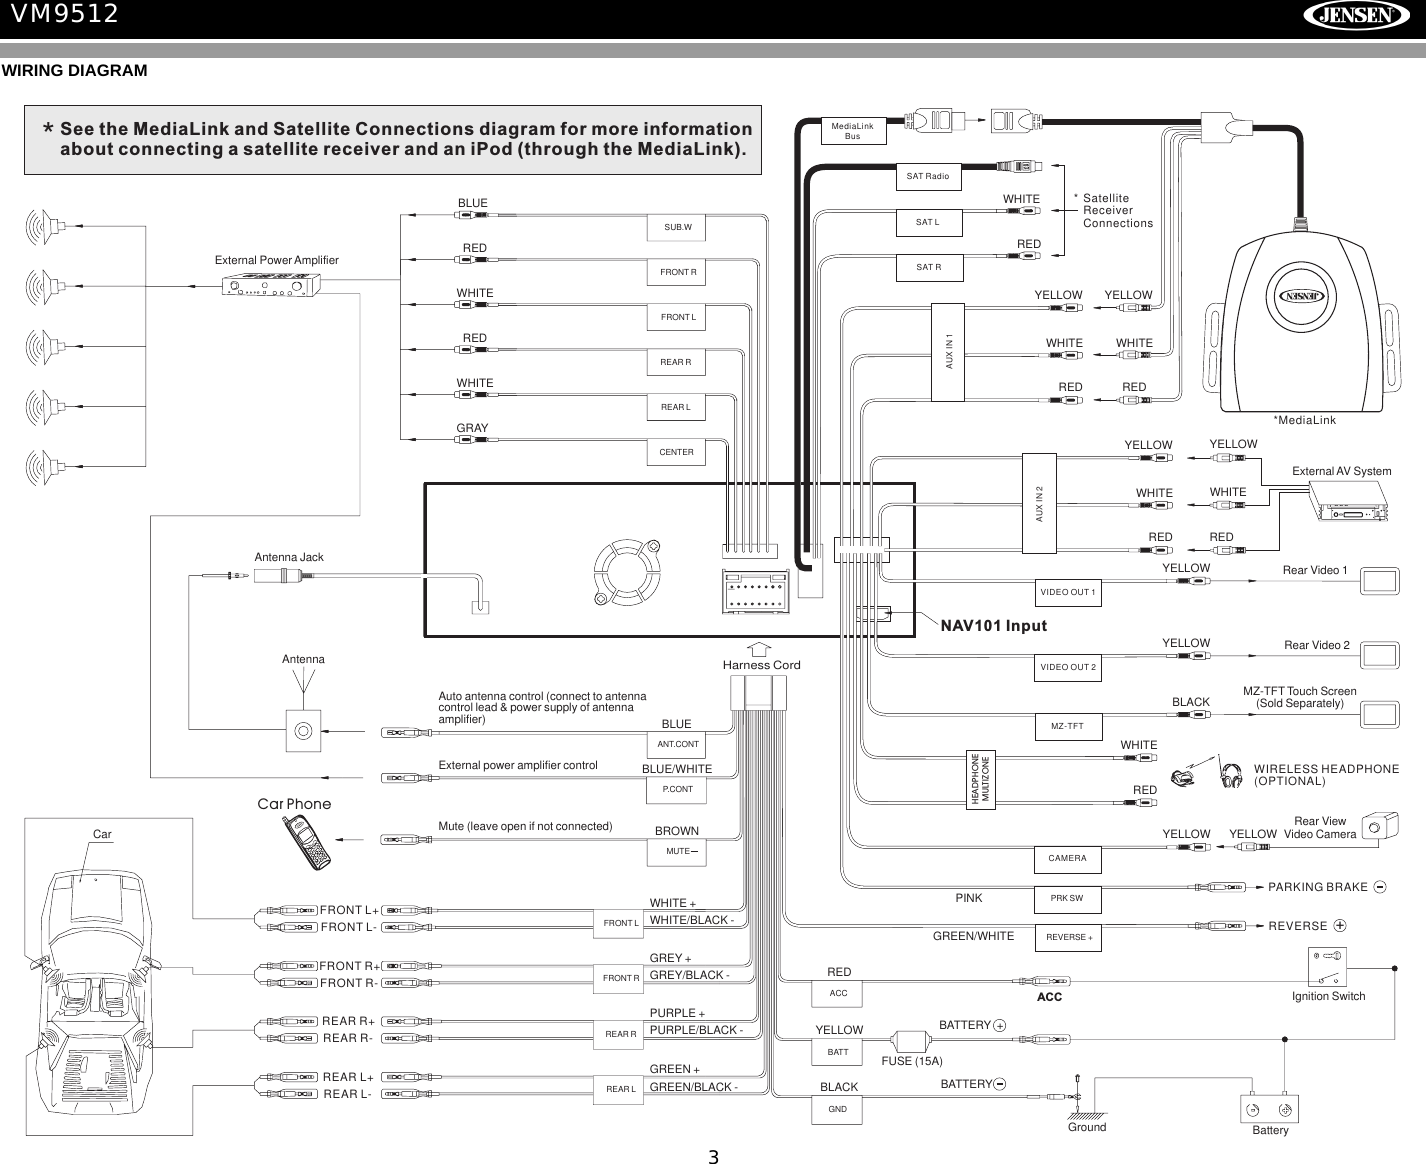

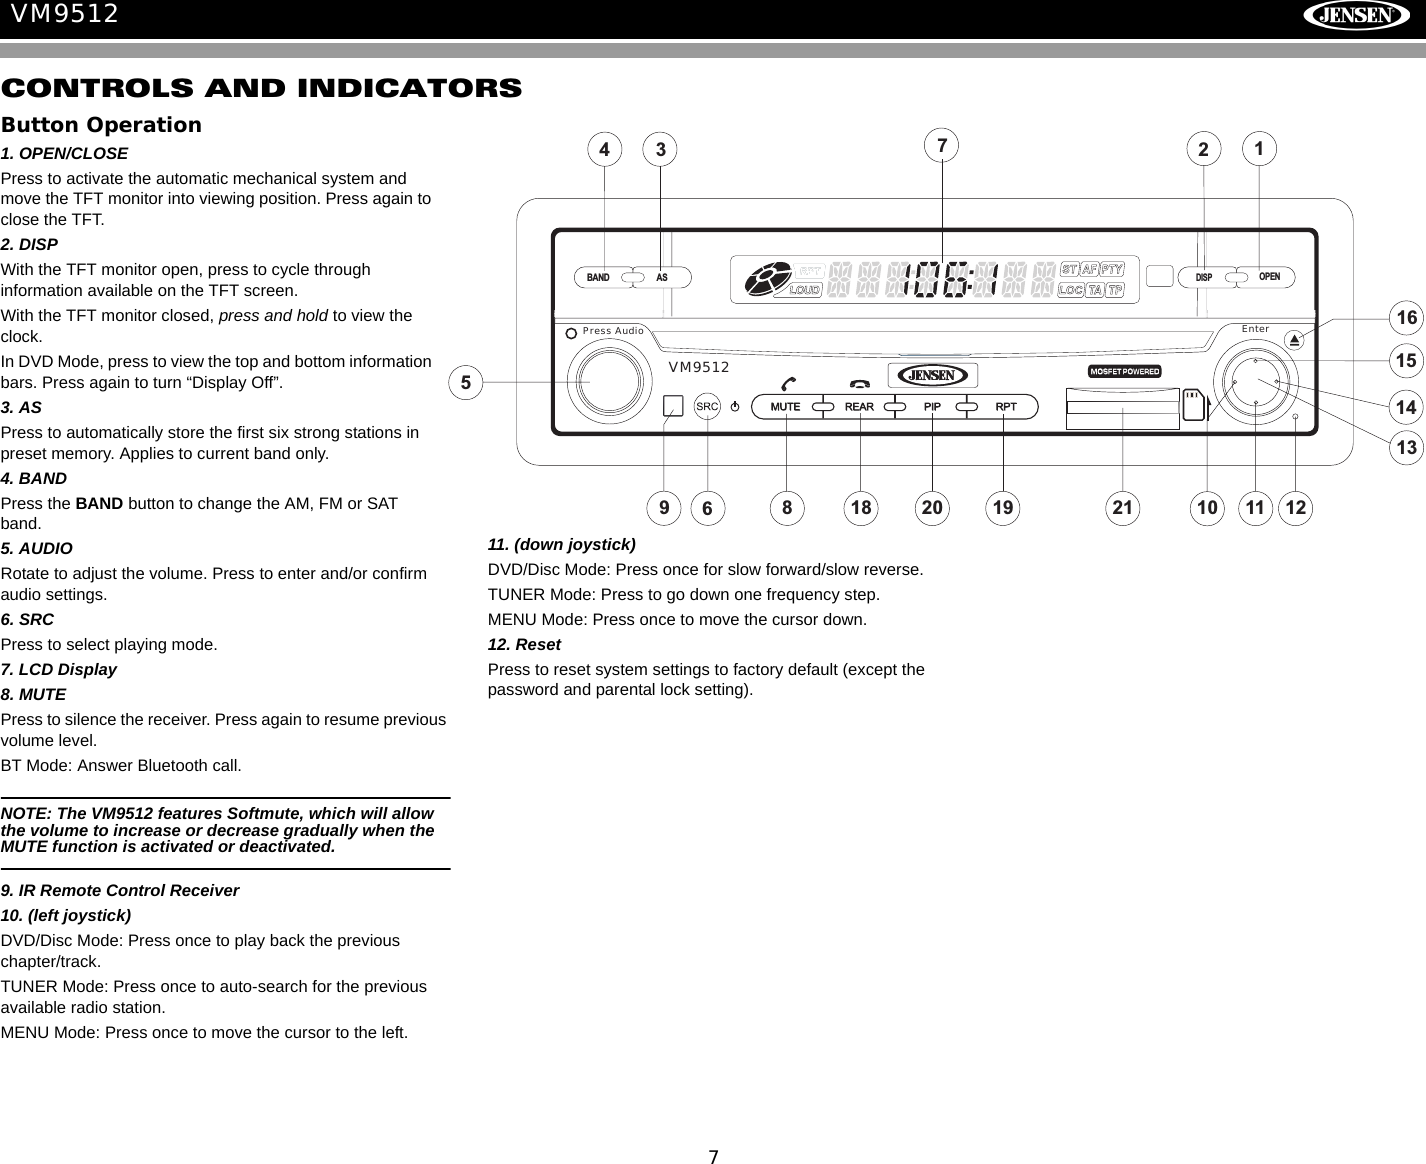
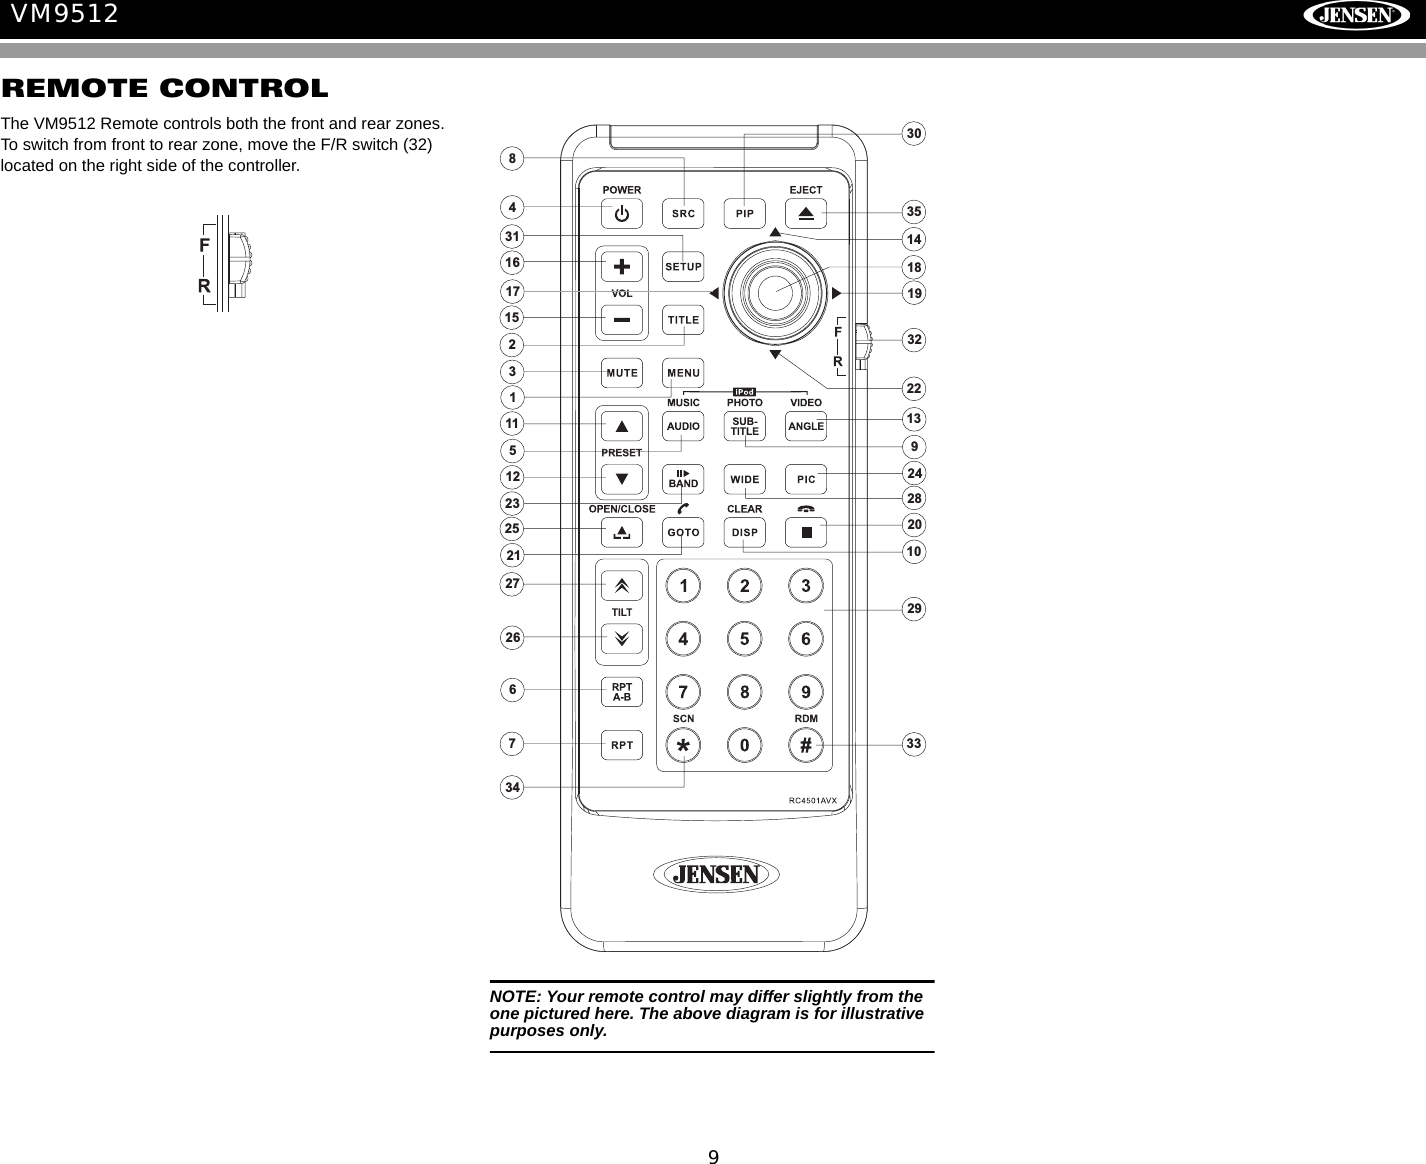
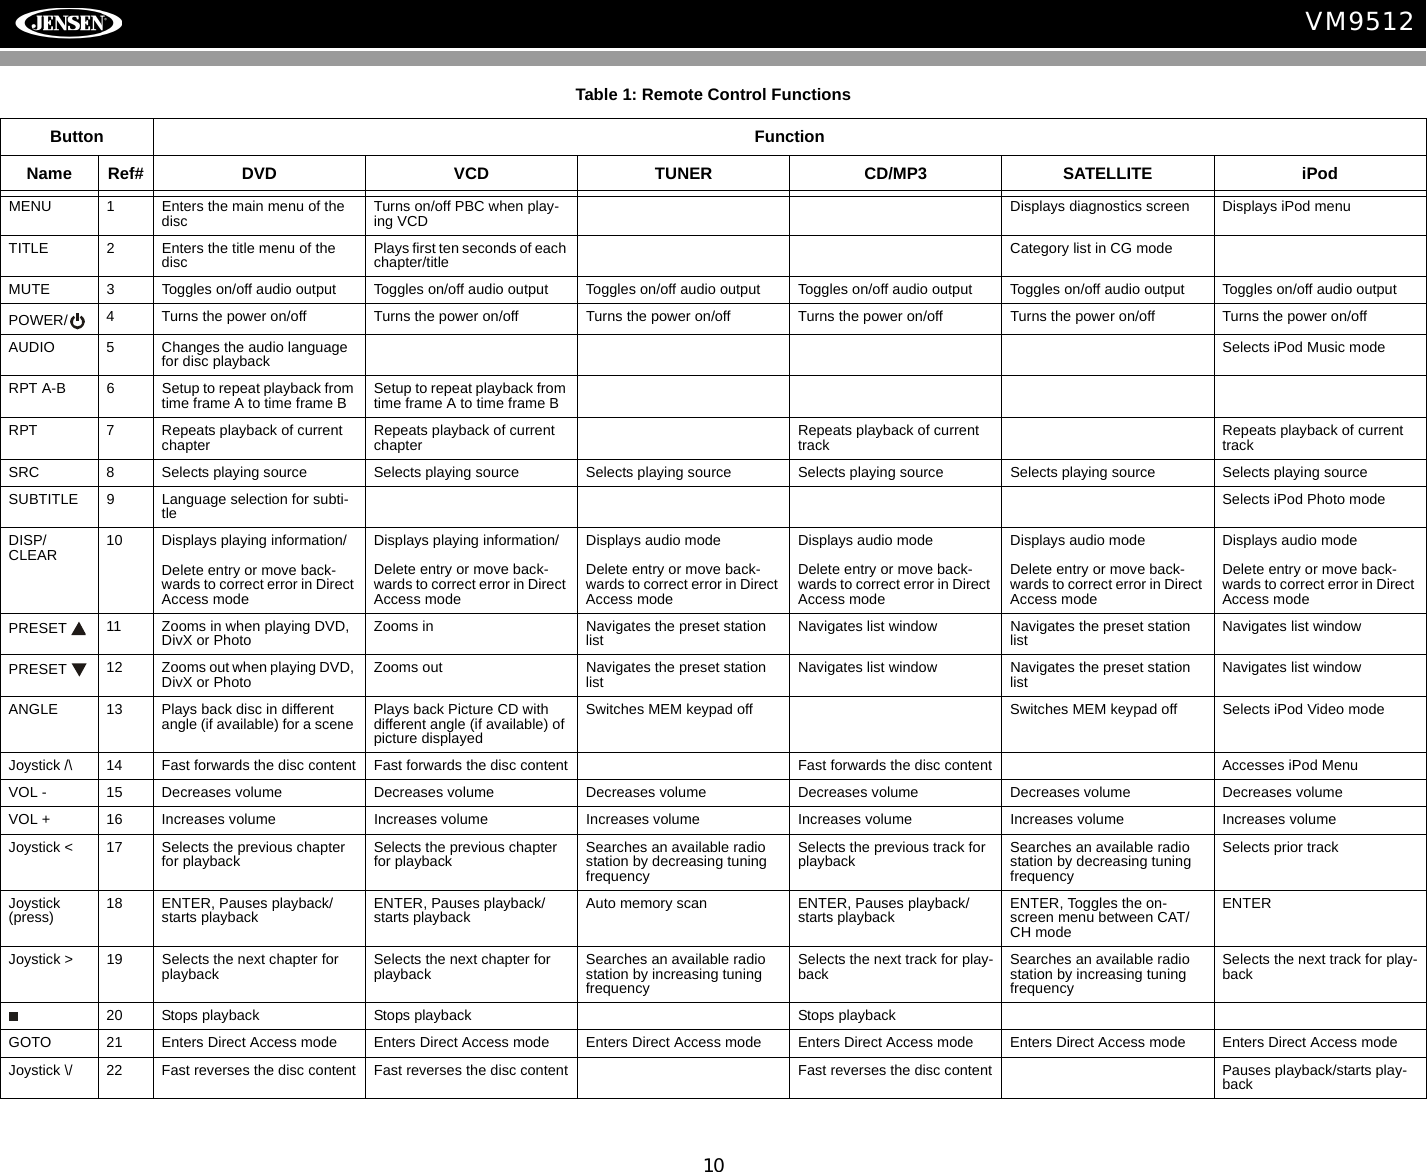

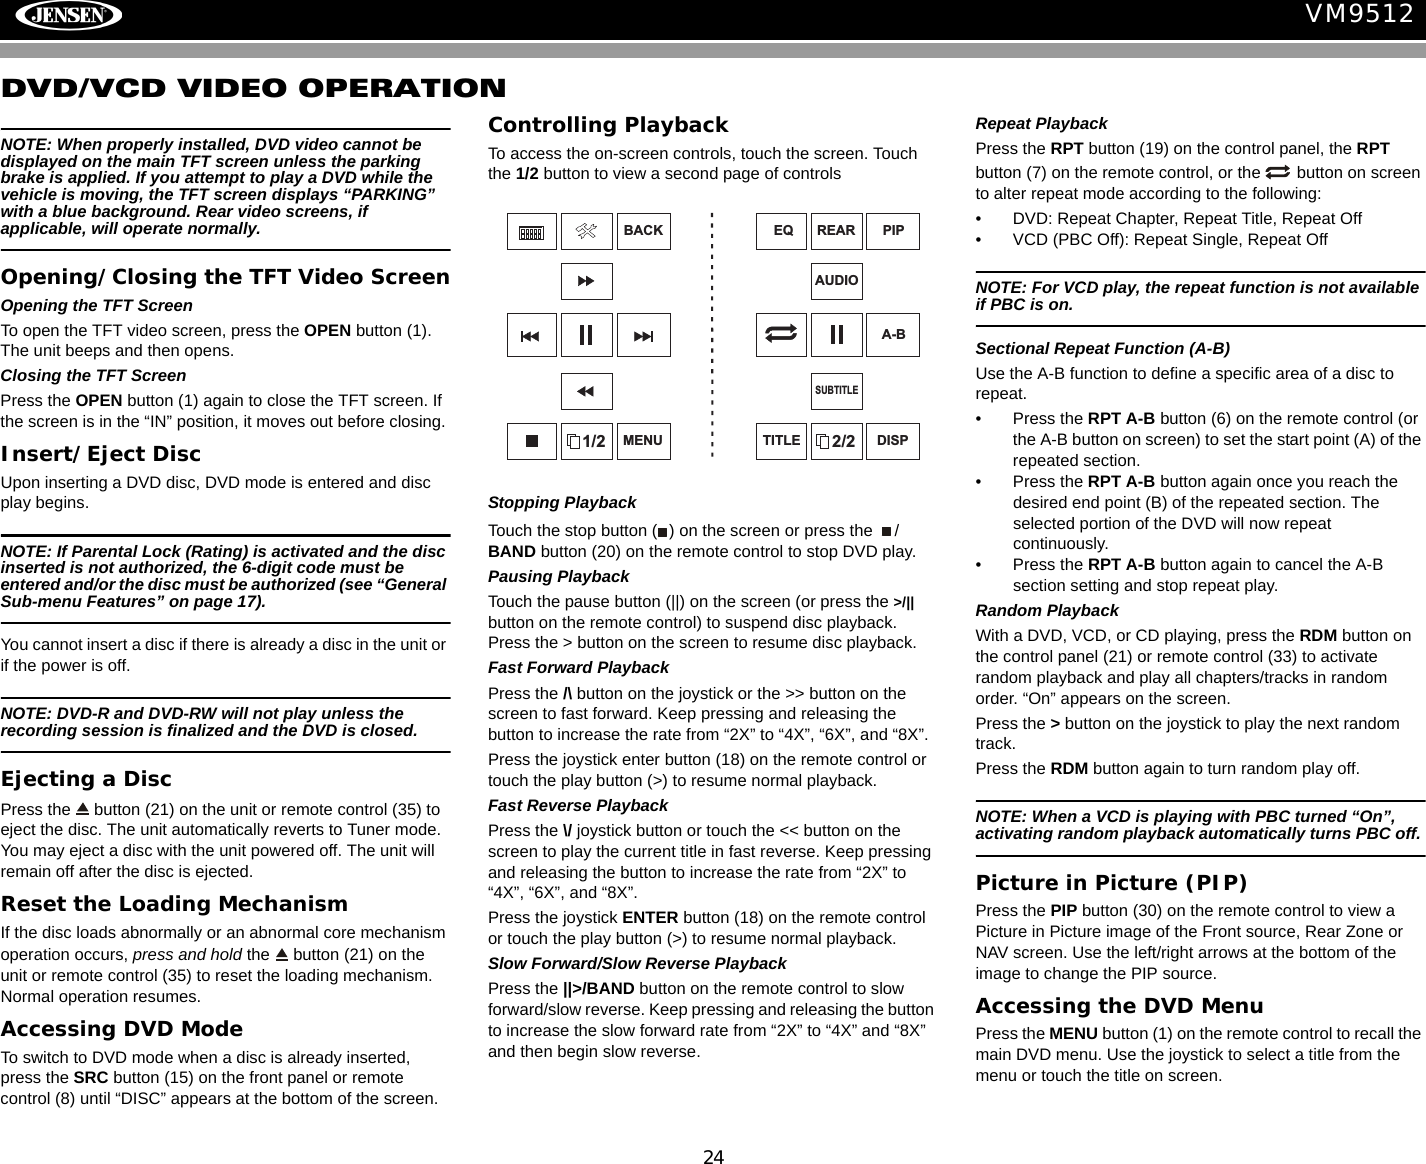
![15VM9512•PIP: Touch to view the Rear Zone, current Front Zone, or NAV screen. Use the left/right arrows below the PIP image to change the PIP source.System ResetTo correct a system halt or other illegal operation, use the tip of a pen to press the reset button (12) located on the front bottom-right corner of the unit. After a system reset, the unit restores all factory default settings.NOTE: If the unit is reset while a DVD is playing, the DVD resumes play once the reset is complete.PIP: DISCDISCMP3 4/84 00:00:2301:02 AM1 Cherry Poppin Da2 Chris Isaak - Baby3 Crazy Town - Butt4 Phish - Birds Of A5 Phish - Bouncin' R6 Phish - Freebird (L(Root)1/2EQREARPIP[RESET] Button](https://usermanual.wiki/HUIZHOU-FORYOU-GENERAL-ELECTRONICS/FGEDV7310/User-Guide-931497-Page-20.png)