HYT Science and Technology Co TC1600 FM Handheld Transceiver User Manual TC 1600 User s Manual
Shenzhen HYT Science &Technology; Co Ltd FM Handheld Transceiver TC 1600 User s Manual
UserManual.wiki
>
HYT Science and Technology Co
>
TC1600 User Manual
Users Manual
Navigation menu
Upload a User Manual
Namespaces
Wiki Guide
HTML
PDF
Info
Views
User Manual
Discussion / Help
Navigation


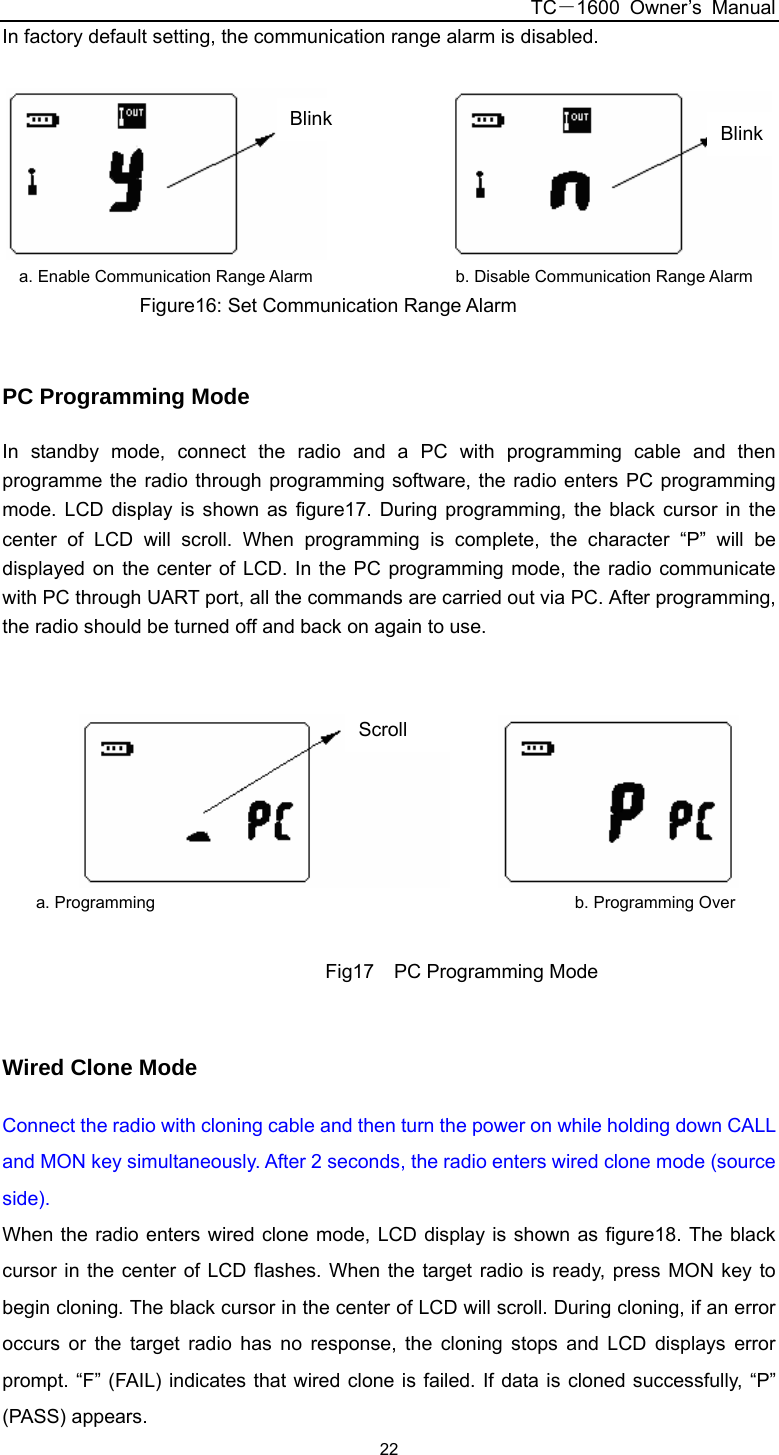
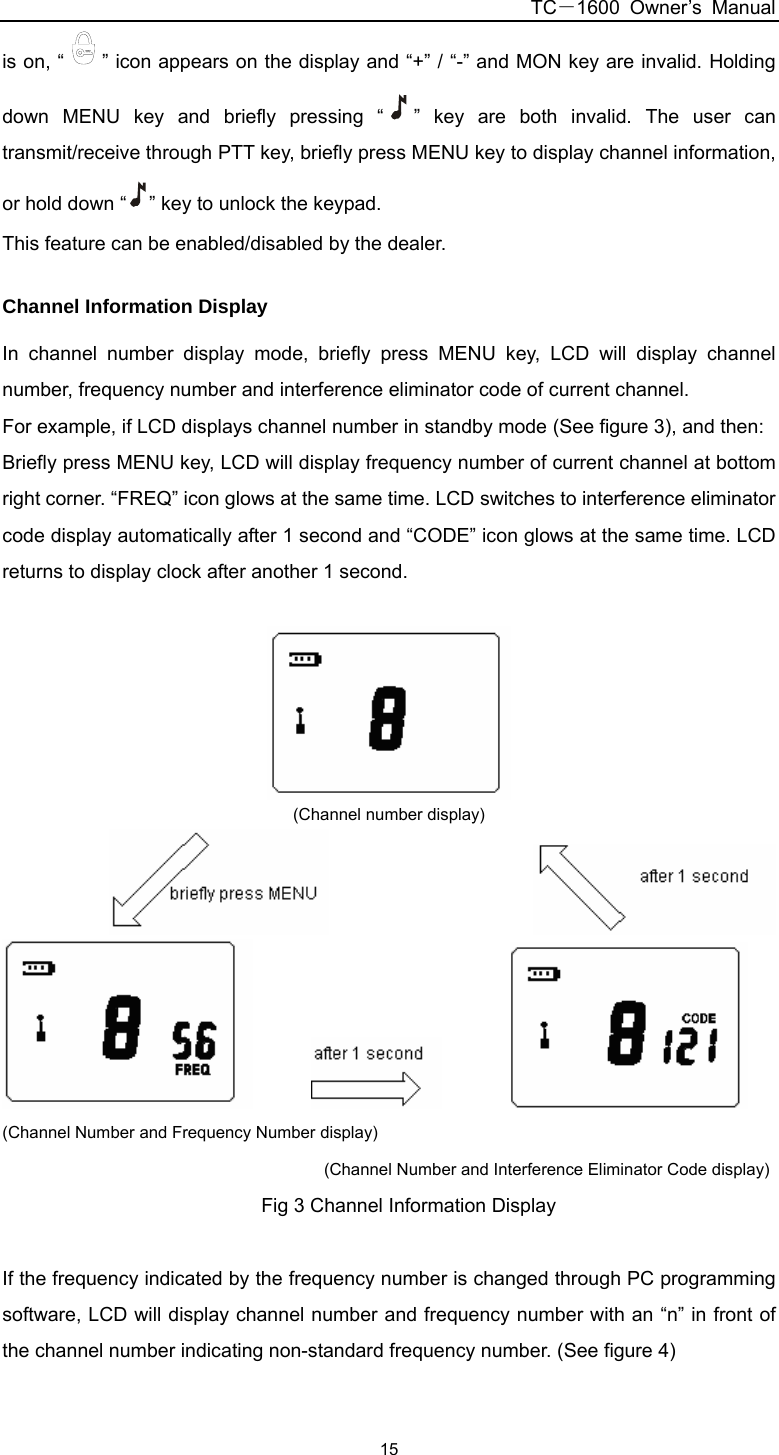
![TC-1600 Owner’s Manual 14 Insert plug of earphone (with external PTT) into the accessory jack of the radio. Put on the earphone and press PTT. Speak into the microphone to talk. Fig 2 (a) Tx Interface Fig 2 (b) Rx Interface Call Tone The call tone feature is valid only when you have set a call tone in the menu mode. You can send a call tone to your partner before begin talking with him/her. Briefly press “ ” key to transmit a call. The call tone will sound when you receive a call. This feature can be enabled/disabled by the dealer. VOX Feature This feature is valid only when the radio is connected with external audio accessory. Insert plug of VOX accessory into the accessory jack of the radio, set the VOX Sensitivity Level in the menu mode, and then speak into the microphone to talk. When transmitting using VOX feature, you will hear yourself talking through the accessory speaker. VOX feature allows you to talk hands-free. Press PTT key on the radio to disable VOX feature. This feature is enabled when you turn on the power next time. This feature can be enabled/disabled by the dealer. TOT Function This feature defines the time period of transmission on certain channel, which avoids possible damage to the radio caused by long-time transmission. The time period can be set as one minute, 5 minutes or off by your dealer. Channel Select In conventional mode, pressing “+” / “-” key can select your wanted channel. The maximum number you can select is decided by the number of available channels and the minimum number is 1. Holding down “+” / “-” key can increase/decrease the channel number continuously. Keypad Lock In conventional mode, holding down “ ” key can lock/unlock keypad. When keypad lock 批注 [w1]: 07.27 根据中文第三次确认修改,增加内容](https://usermanual.wiki/HYT-Science-and-Technology-Co/TC1600/User-Guide-719129-Page-15.png)
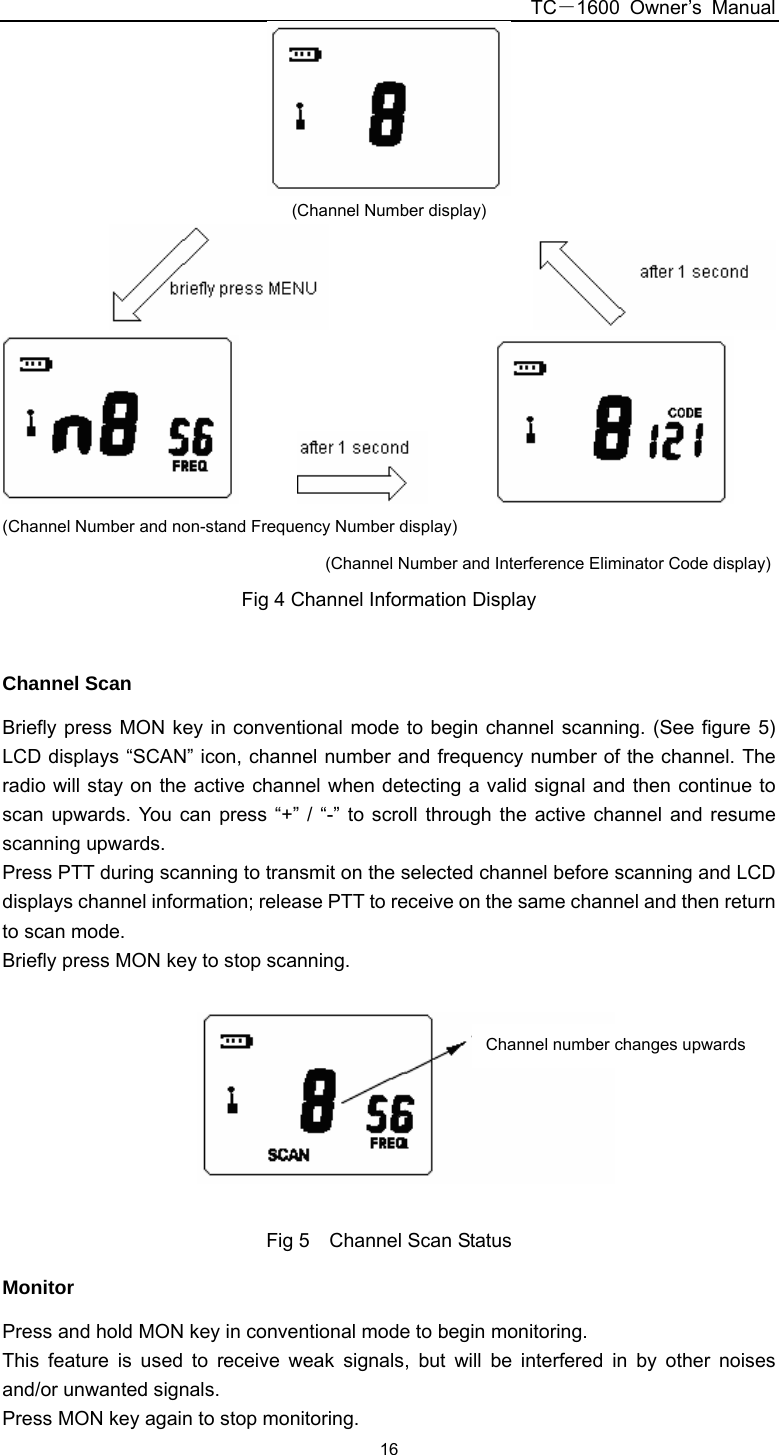
![TC-1600 Owner’s Manual 17Low Battery Detect and Battery Power Indication The radio detects battery voltage periodically and indicates the battery power. The battery power indicator “ ”on the top left corner of LCD will flash when the battery power is low. You should recharge the battery or replace it with a fresh one. Communication Range Alarm The feature is valid only when you have enabled communication range alarm feature in the menu mode. The communication range alarm icon “ ” flashes and the radio beeps when you are almost out of range during receiving. The beeps and flashing icon continue until you are within the range again or turn the communication range alarm off. This feature can be enabled/disabled by the dealer. Battery Save In conventional mode, when no activity is on channel and no key is pressed for 10 seconds, the battery save feature will be turned on automatically. In this mode, the radio works normally for 200ms then turns to sleep mode for 600ms. This feature can be enabled/disabled by the dealer. Channel Setting Mode Turn the power on while holding down MON and PTT key simultaneously. The radio enters channel setting mode after 2 seconds. The current setting of channel setting will flash when entering this mode. You can make settings as following: Select Channel Number During setting, the channel number flashes (See figure 6-1). LCD displays frequency number and interference eliminator code of the current channel alternately. Press “+” / “-” key to select channel number. The maximum number you can select is decided by the number of available channels and the minimum number is 1. Press MENU key to confirm the setting and switch to the next setting. Press “ ” key to save the setting and to exit channel setting mode. (a) Channel Number & Frequency Number display (b) Channel Number. & Interference Eliminator Code display Fig.6 Channel Number Select Set Frequency Number When setting frequency number of the channel, “FREQ” icon appears on LCD and the Blink 批注 [w2]: Translated](https://usermanual.wiki/HYT-Science-and-Technology-Co/TC1600/User-Guide-719129-Page-18.png)