HYUNDAI MOBIS AC240INAN CAR AUDIO (BLUETOOTH) User Manual
HYUNDAI MOBIS CO., LTD. CAR AUDIO (BLUETOOTH) Users Manual
UserManual.wiki
>
HYUNDAI MOBIS
>
AC240INAN User Manual
Users Manual
Navigation menu
Upload a User Manual
Namespaces
Wiki Guide
HTML
PDF
Info
Views
User Manual
Discussion / Help
Navigation

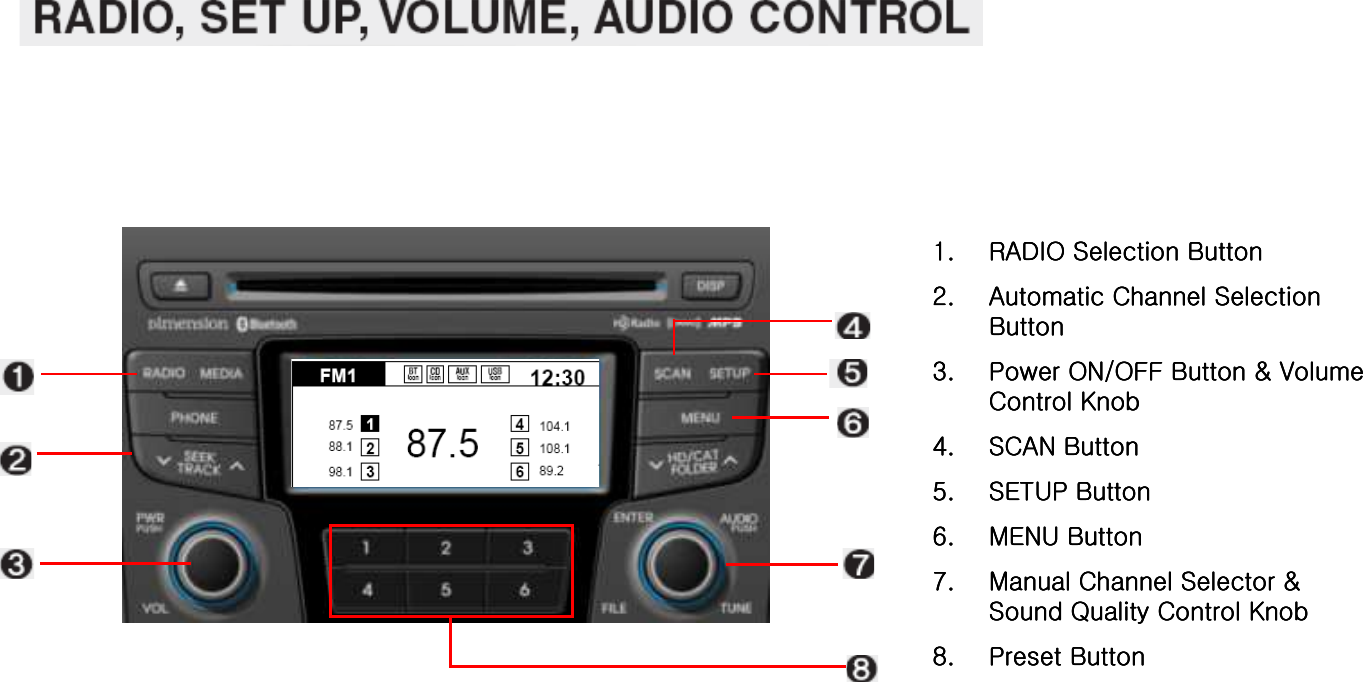
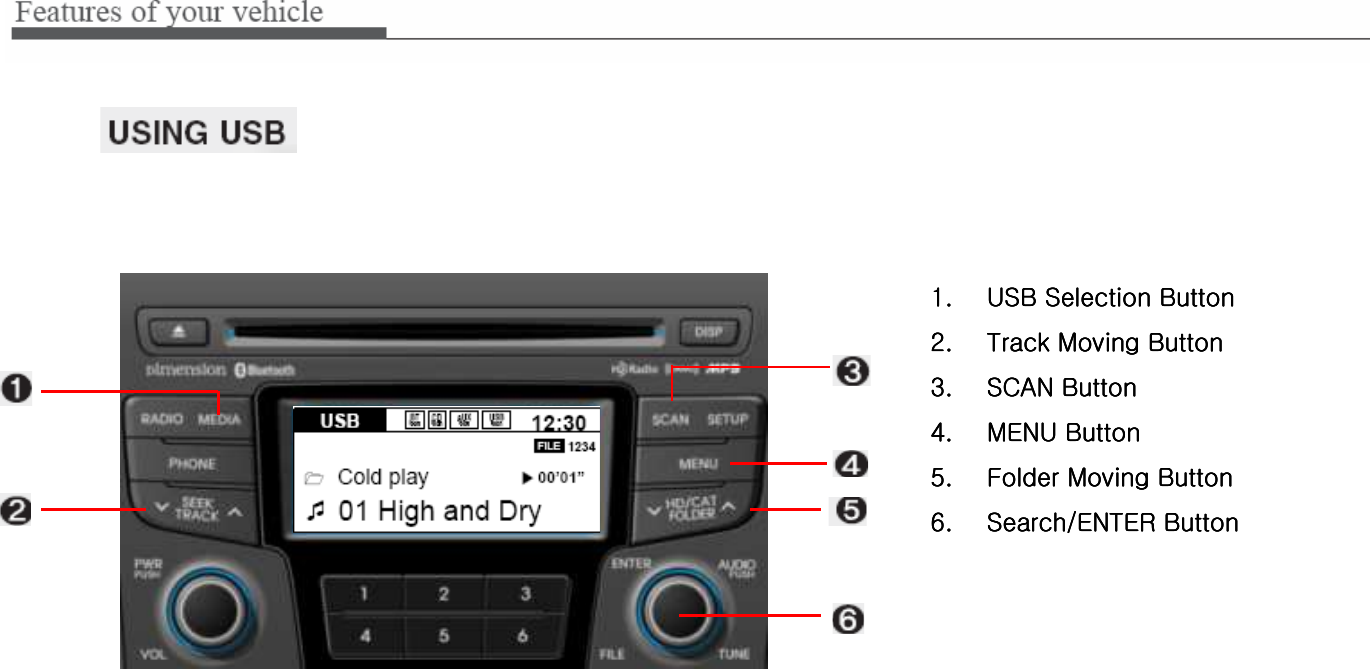
![1. RADIO Button1. RADIO Button1. RADIO Button1. RADIO ButtonTurns to FM,AM and XM mode, and toggles in the order of FM1 FM2 AM XM1 XM2 XM3 FM1…when the button is pressed each time.5. SETUP Button5. SETUP Button5. SETUP Button5. SETUP ButtonPress this button to turn to the adjustment mode.If no action is taken for 10 seconds after pressing the button, it will return to the play mode.(After entering SETUP mode, move between items using the left,right and PUSH functions of the [TUNE] knob.)The setup changes in the order of Display Sound Phone System…6. MENU Button6. MENU Button6. MENU Button6. MENU ButtonPress this button to turn to the AST mode.](https://usermanual.wiki/HYUNDAI-MOBIS/AC240INAN/User-Guide-1430751-Page-5.png)
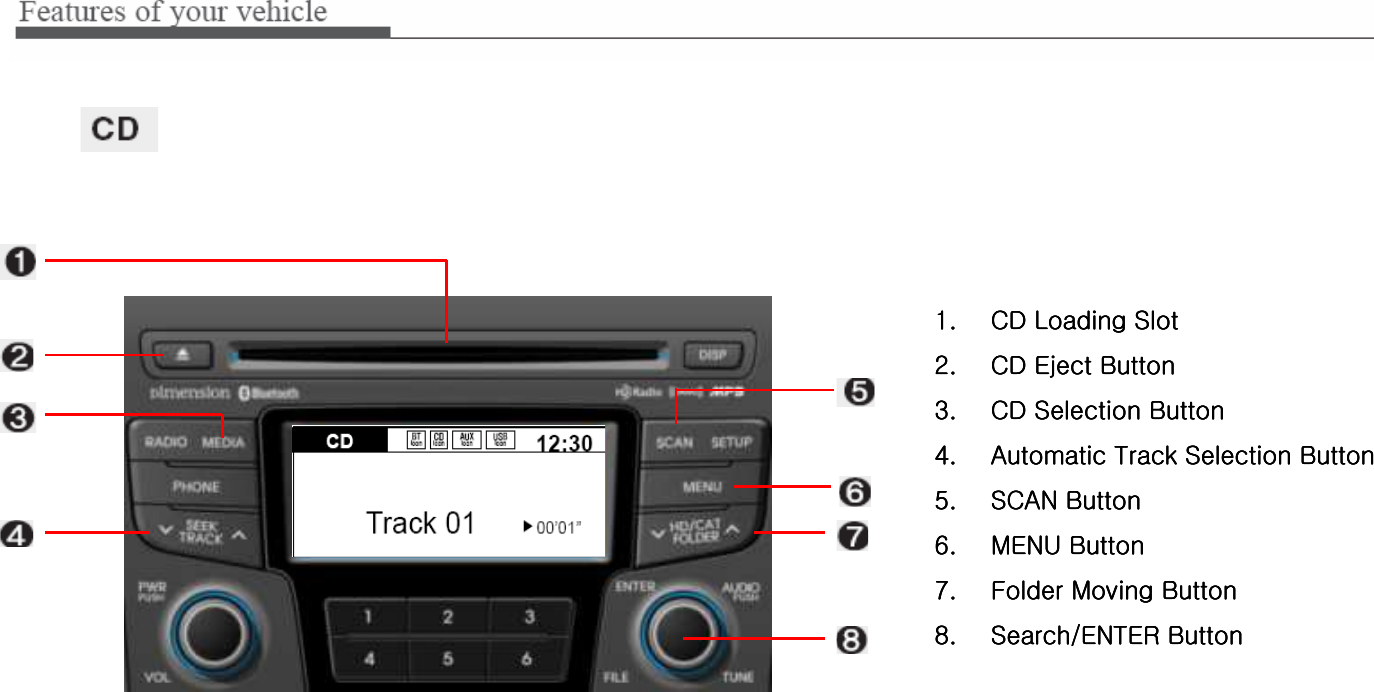
![6. MENU Button6. MENU Button6. MENU Button6. MENU ButtonPush the MENU button to enter Menu Mode. Select desired item by rotating the [TUNE] knob, the push the knob.](https://usermanual.wiki/HYUNDAI-MOBIS/AC240INAN/User-Guide-1430751-Page-7.png)
![4. MENU Button4. MENU Button4. MENU Button4. MENU ButtonPush the MENU button to enter Menu Mode. Select desired item by rotating the [TUNE] knob, the push the knob.](https://usermanual.wiki/HYUNDAI-MOBIS/AC240INAN/User-Guide-1430751-Page-11.png)
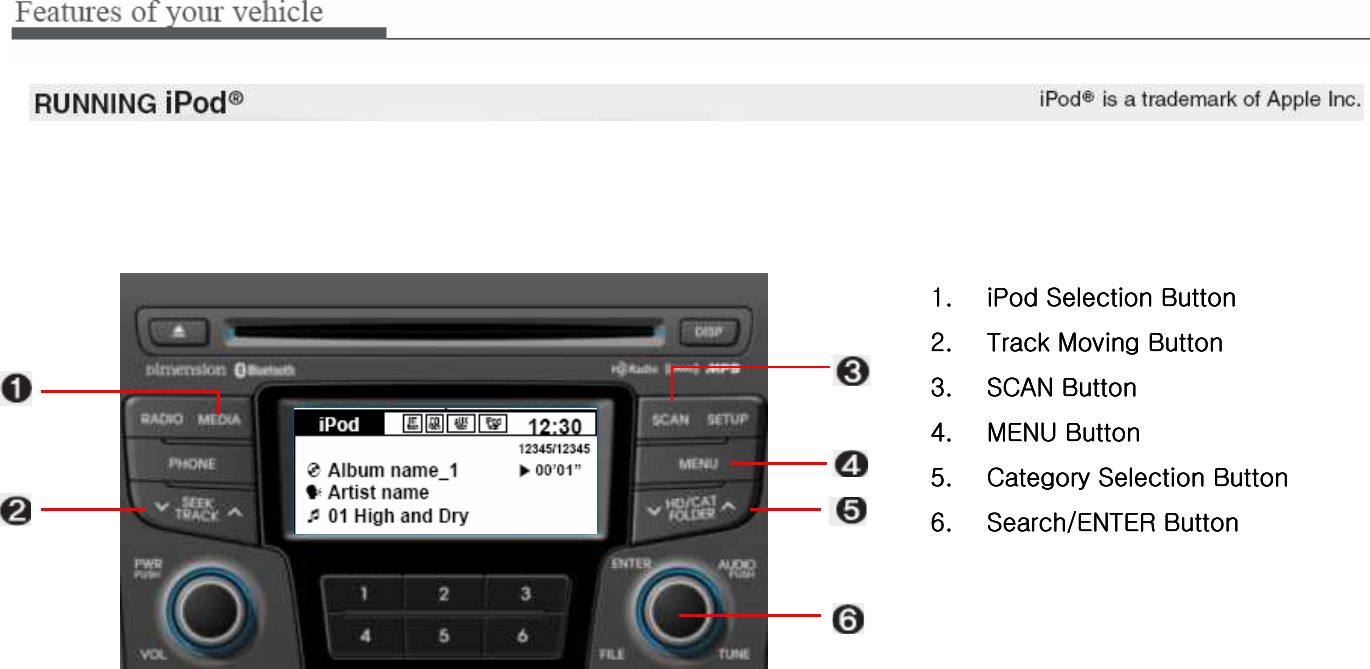
![4. MENU Button4. MENU Button4. MENU Button4. MENU ButtonPush the MENU button to enter Menu Mode. Select desired item by rotating the [TUNE] knob, the push the knob.](https://usermanual.wiki/HYUNDAI-MOBIS/AC240INAN/User-Guide-1430751-Page-14.png)

![2) Select “Phone”item by rotating the [TUNE] knob, then push the knob.Select “Phone”, then “Phone List”in Phone menu.](https://usermanual.wiki/HYUNDAI-MOBIS/AC240INAN/User-Guide-1430751-Page-20.png)