HYUNDAI MOBIS AC240INAN CAR AUDIO (BLUETOOTH) User Manual
HYUNDAI MOBIS CO., LTD. CAR AUDIO (BLUETOOTH) Users Manual
Users Manual
1.
1.1.
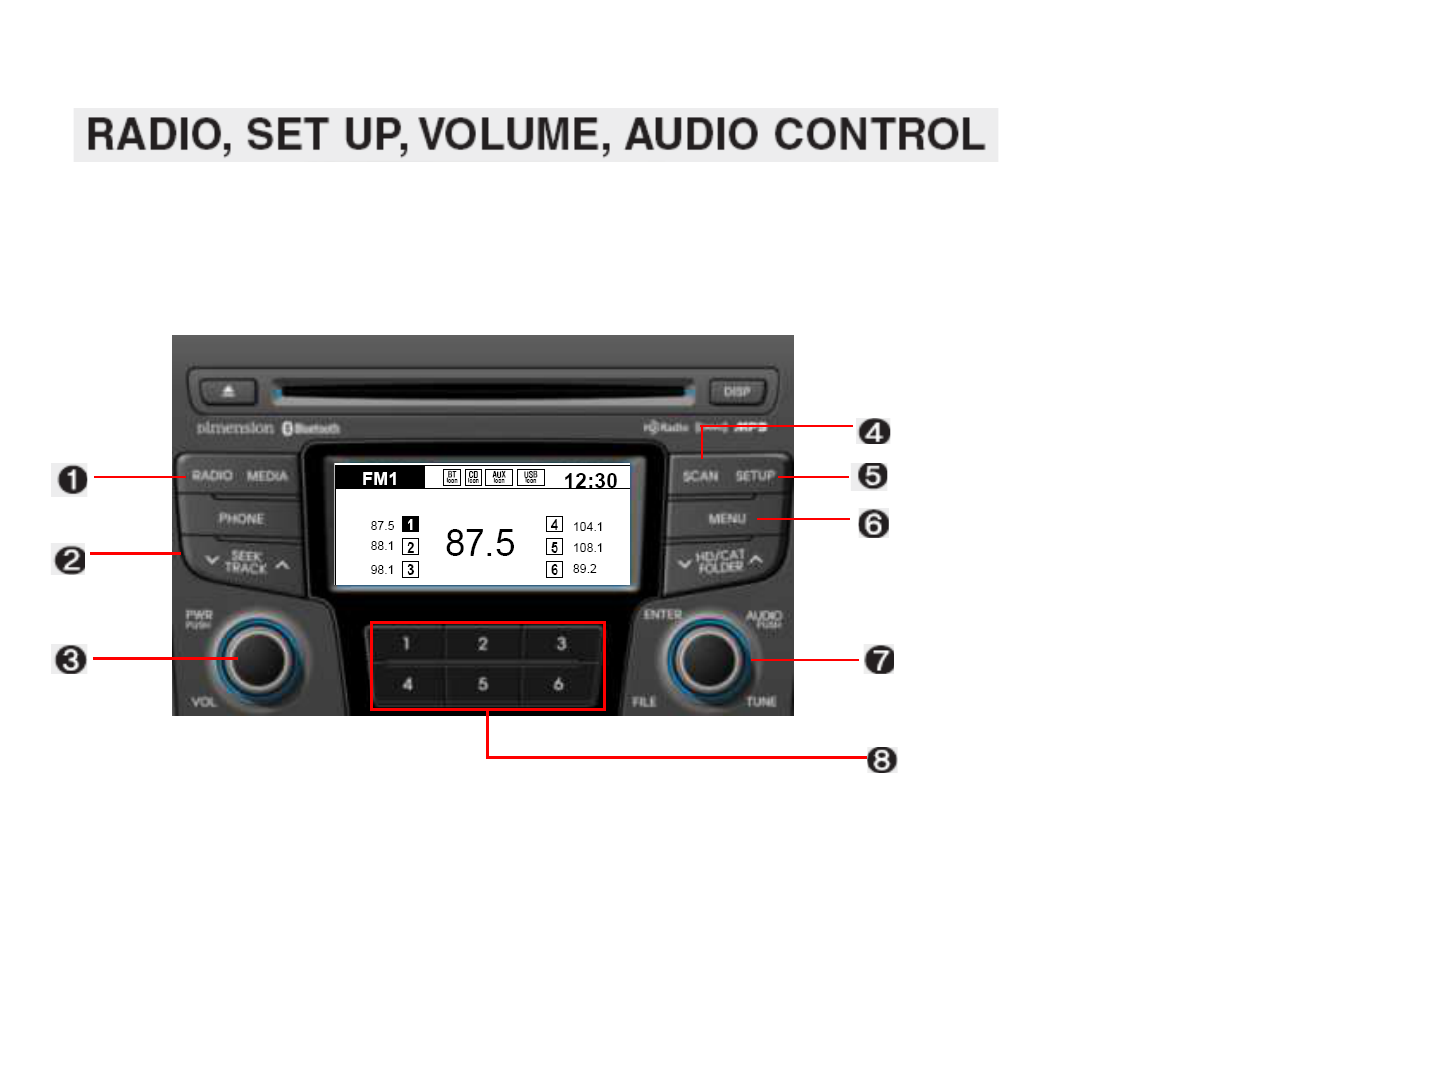
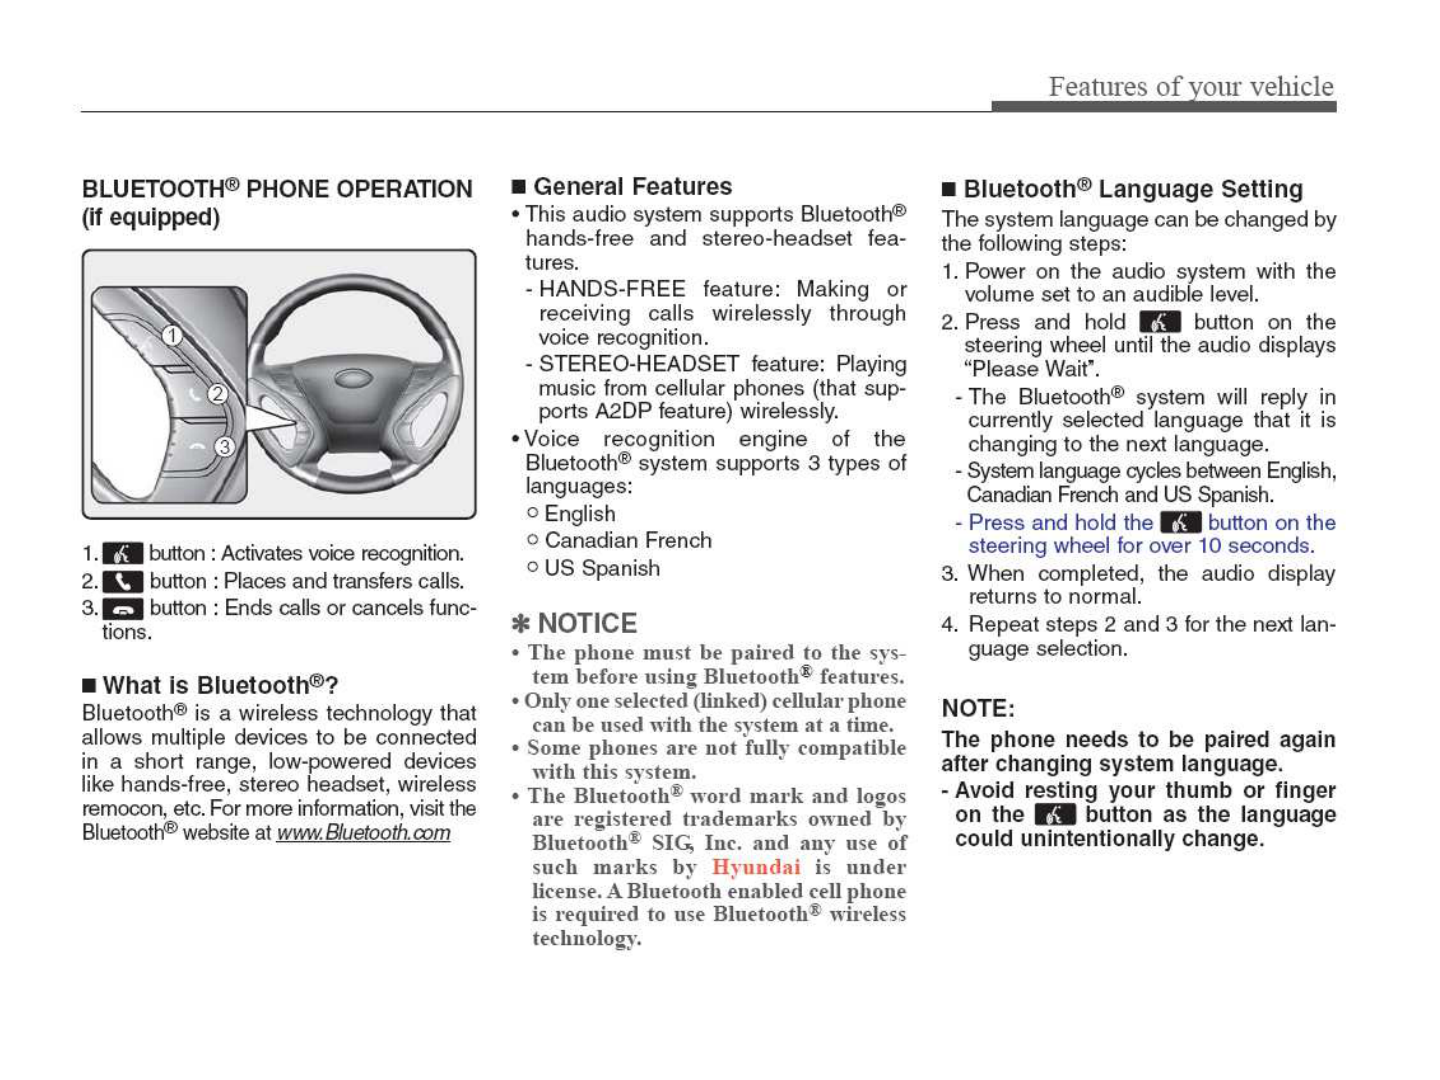
1. RADIO Selection Button
RADIO Selection ButtonRADIO Selection Button
RADIO Selection Button
2.
2.2.
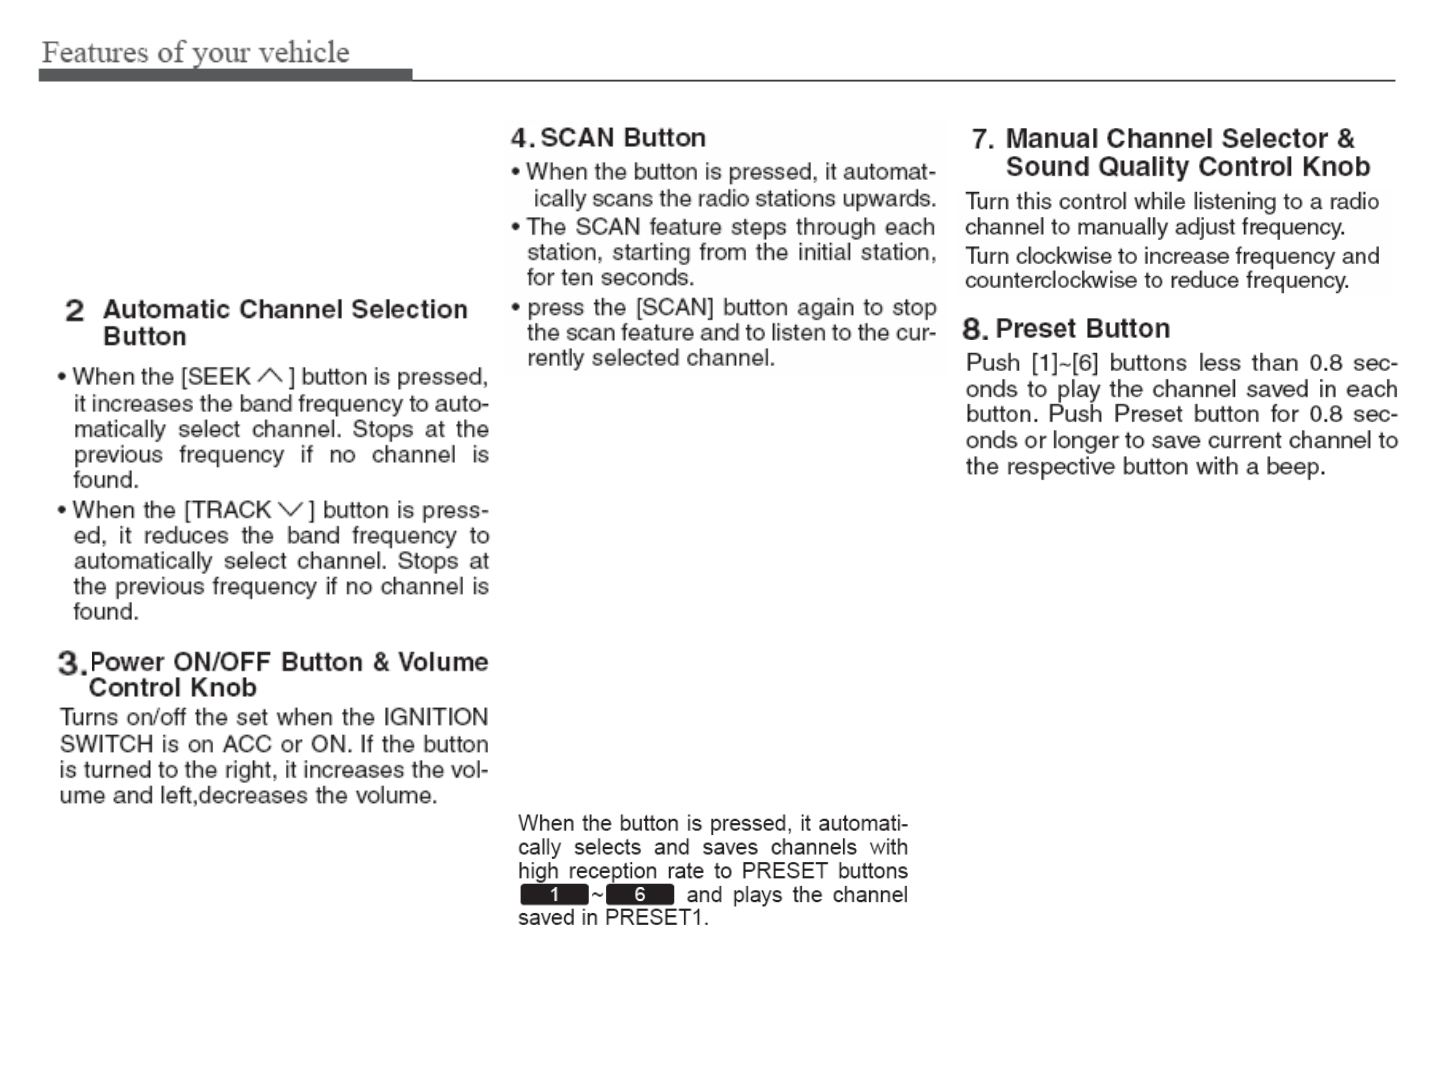
2. Automatic Channel Selection
Automatic Channel Selection Automatic Channel Selection
Automatic Channel Selection
Button
ButtonButton
Button
3.
3.3.
3. Power ON/OFF Button & Volume
Power ON/OFF Button & Volume Power ON/OFF Button & Volume
Power ON/OFF Button & Volume
Control Knob
Control KnobControl Knob
Control Knob
4.
4.4.
4. SCAN Button
SCAN ButtonSCAN Button
SCAN Button
5.
5.5.
5. SETUP Button
SETUP ButtonSETUP Button
SETUP Button
6.
6.6.
6. MENU Button
MENU ButtonMENU Button
MENU Button
7.
7.7.
7. Manual Channel Selector &
Manual Channel Selector & Manual Channel Selector &
Manual Channel Selector &
Sound Quality Control Knob
Sound Quality Control KnobSound Quality Control Knob
Sound Quality Control Knob
8.
8.8.
8. Preset Button
Preset ButtonPreset Button
Preset Button
1. RADIO Button
1. RADIO Button1. RADIO Button
1. RADIO Button
Turns to FM,AM and XM mode, and
toggles in the order of FM1 FM2
AM XM1 XM2 XM3 FM1…
when the button is pressed each time.
5. SETUP Button
5. SETUP Button5. SETUP Button
5. SETUP Button
Press this button to turn to the
adjustment mode.
If no action is taken for 10 seconds
after pressing the button, it will return
to the play mode.(After entering
SETUP mode, move between items
using the left,right and PUSH functions
of the [TUNE] knob.)
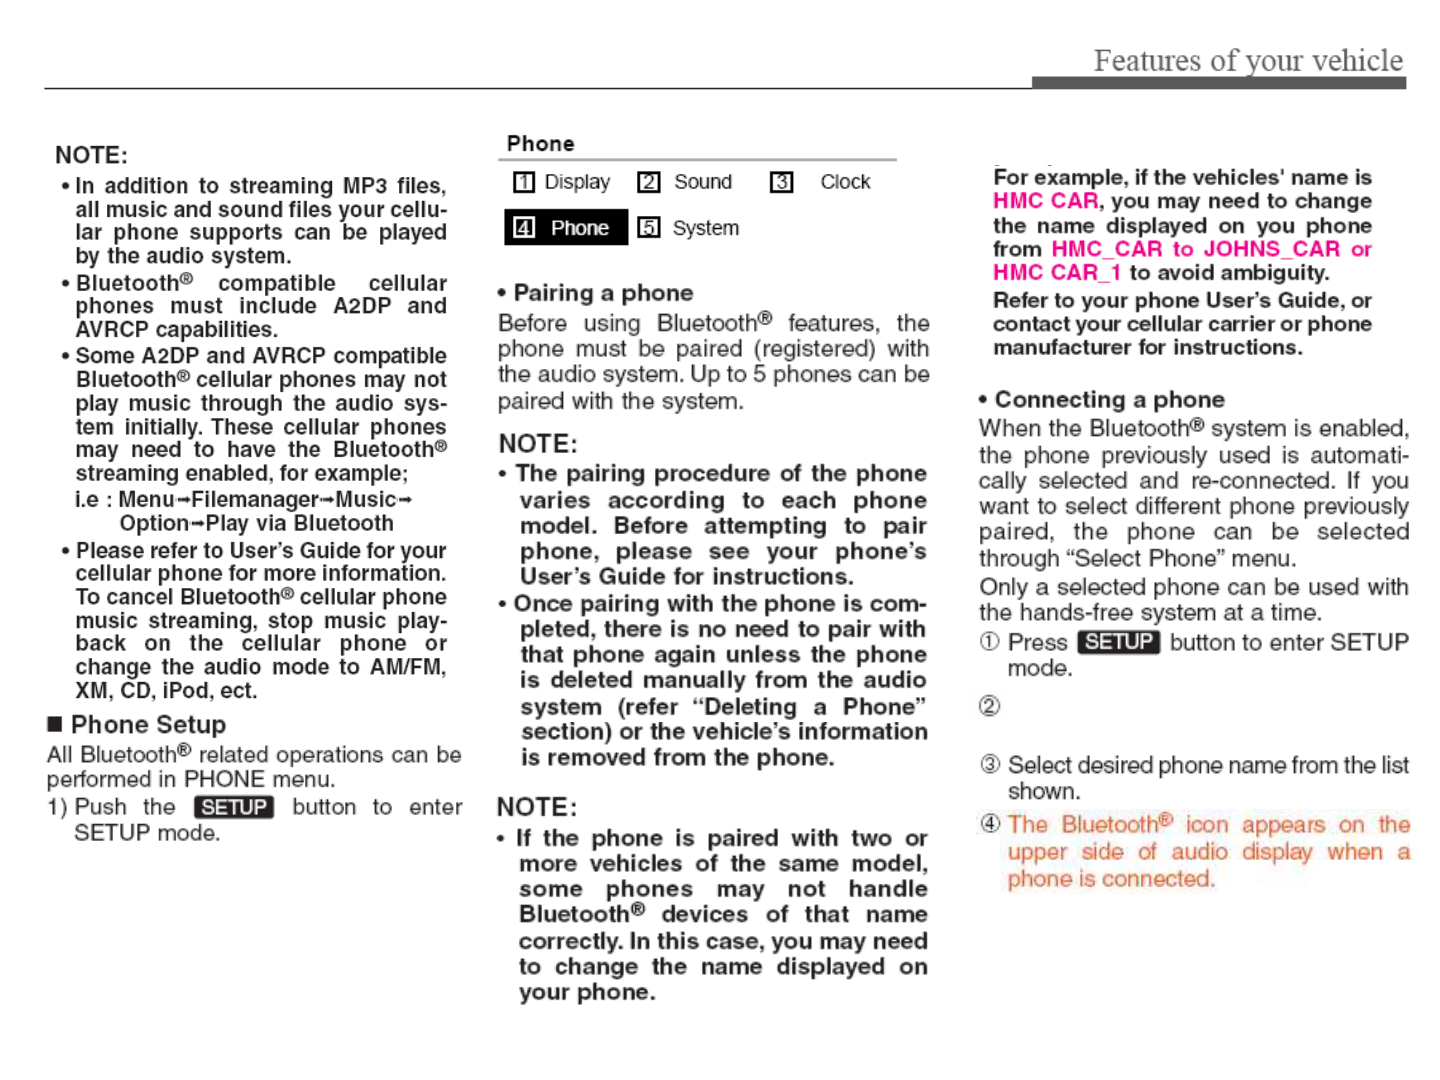
The setup changes in the order of
Display Sound Phone System…
6. MENU Button
6. MENU Button6. MENU Button
6. MENU Button
Press this button to turn to the AST
mode.
1.
1.1.
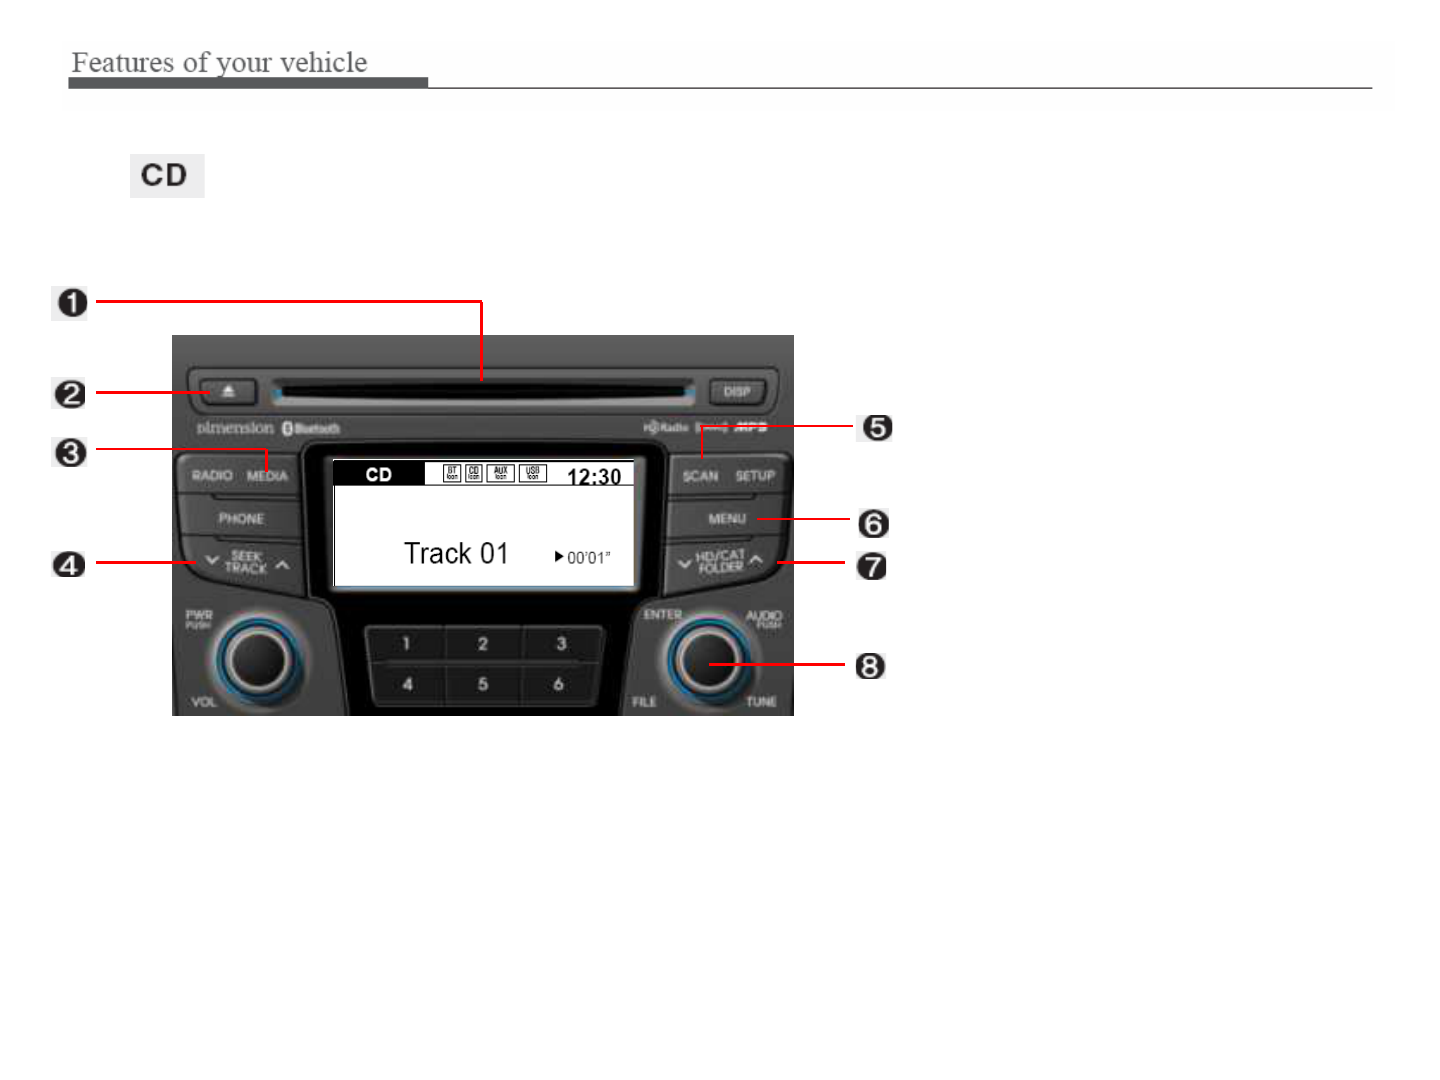
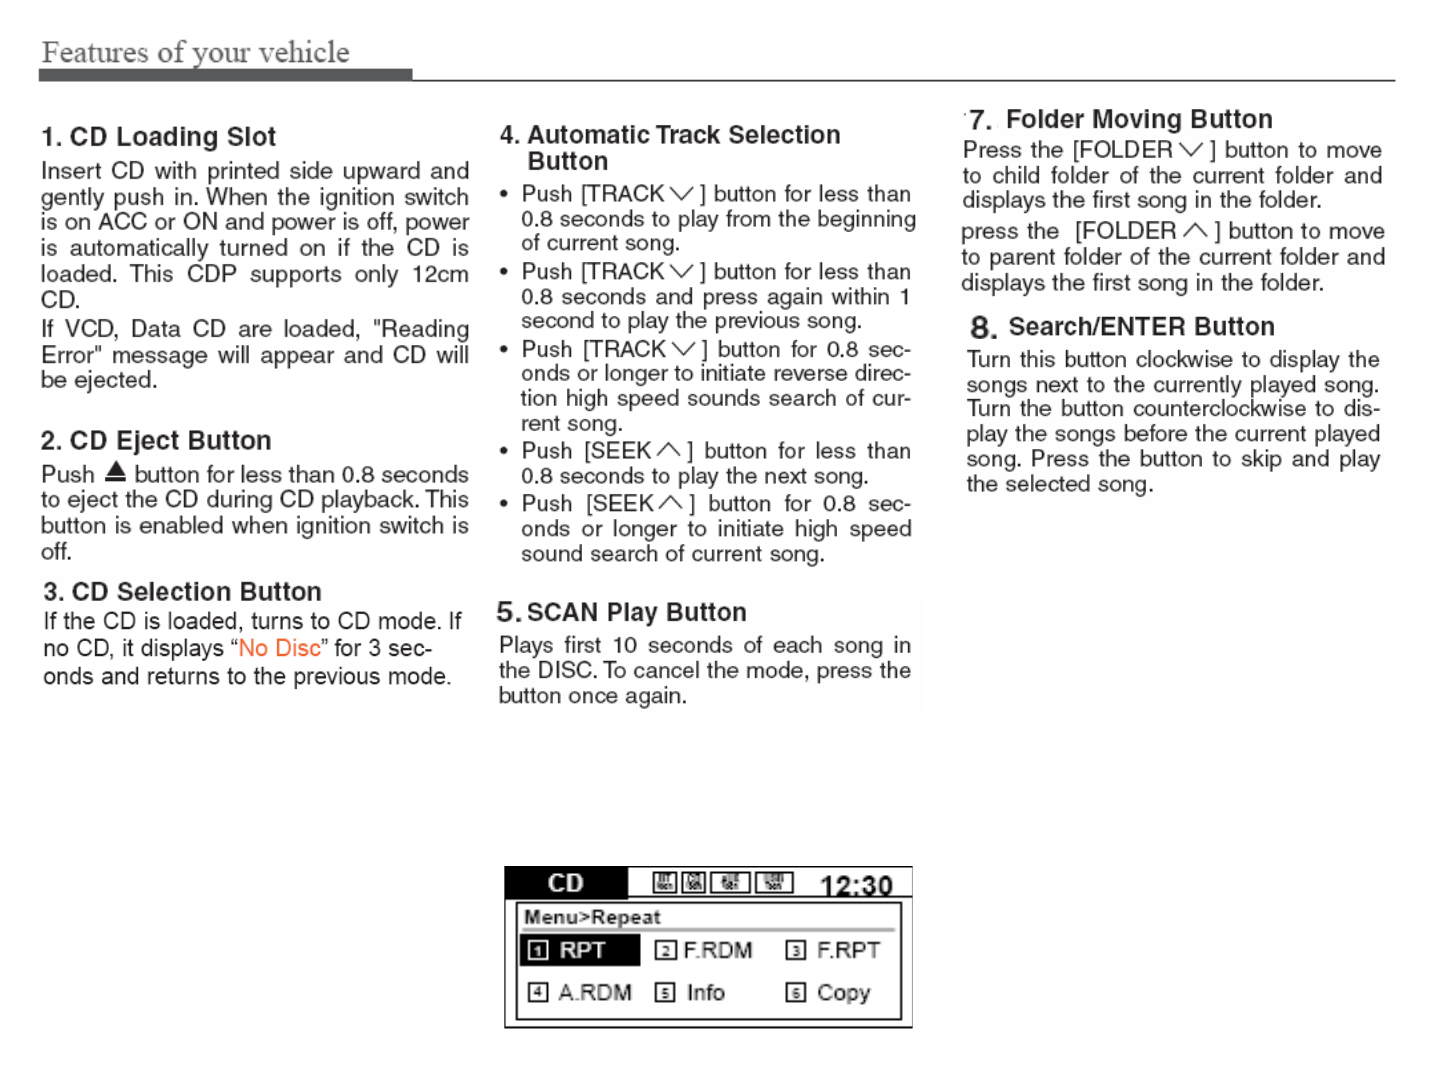
1. CD Loading Slot
CD Loading SlotCD Loading Slot
CD Loading Slot
2.
2.2.
2. CD Eject Button
CD Eject ButtonCD Eject Button
CD Eject Button
3.
3.3.
3. CD Selection Button
CD Selection ButtonCD Selection Button
CD Selection Button
4.
4.4.
4. Automatic Track Selection Button
Automatic Track Selection ButtonAutomatic Track Selection Button
Automatic Track Selection Button
5.
5.5.
5. SCAN Button
SCAN ButtonSCAN Button
SCAN Button
6.
6.6.
6. MENU Button
MENU ButtonMENU Button
MENU Button
7.
7.7.
7. Folder Moving Button
Folder Moving ButtonFolder Moving Button
Folder Moving Button
8.
8.8.
8. Search/ENTER Button
Search/ENTER ButtonSearch/ENTER Button
Search/ENTER Button
6. MENU Button
6. MENU Button6. MENU Button
6. MENU Button
Push the MENU button to enter Menu
Mode. Select desired item by rotating
the [TUNE] knob, the push the knob.

1.
1.1.
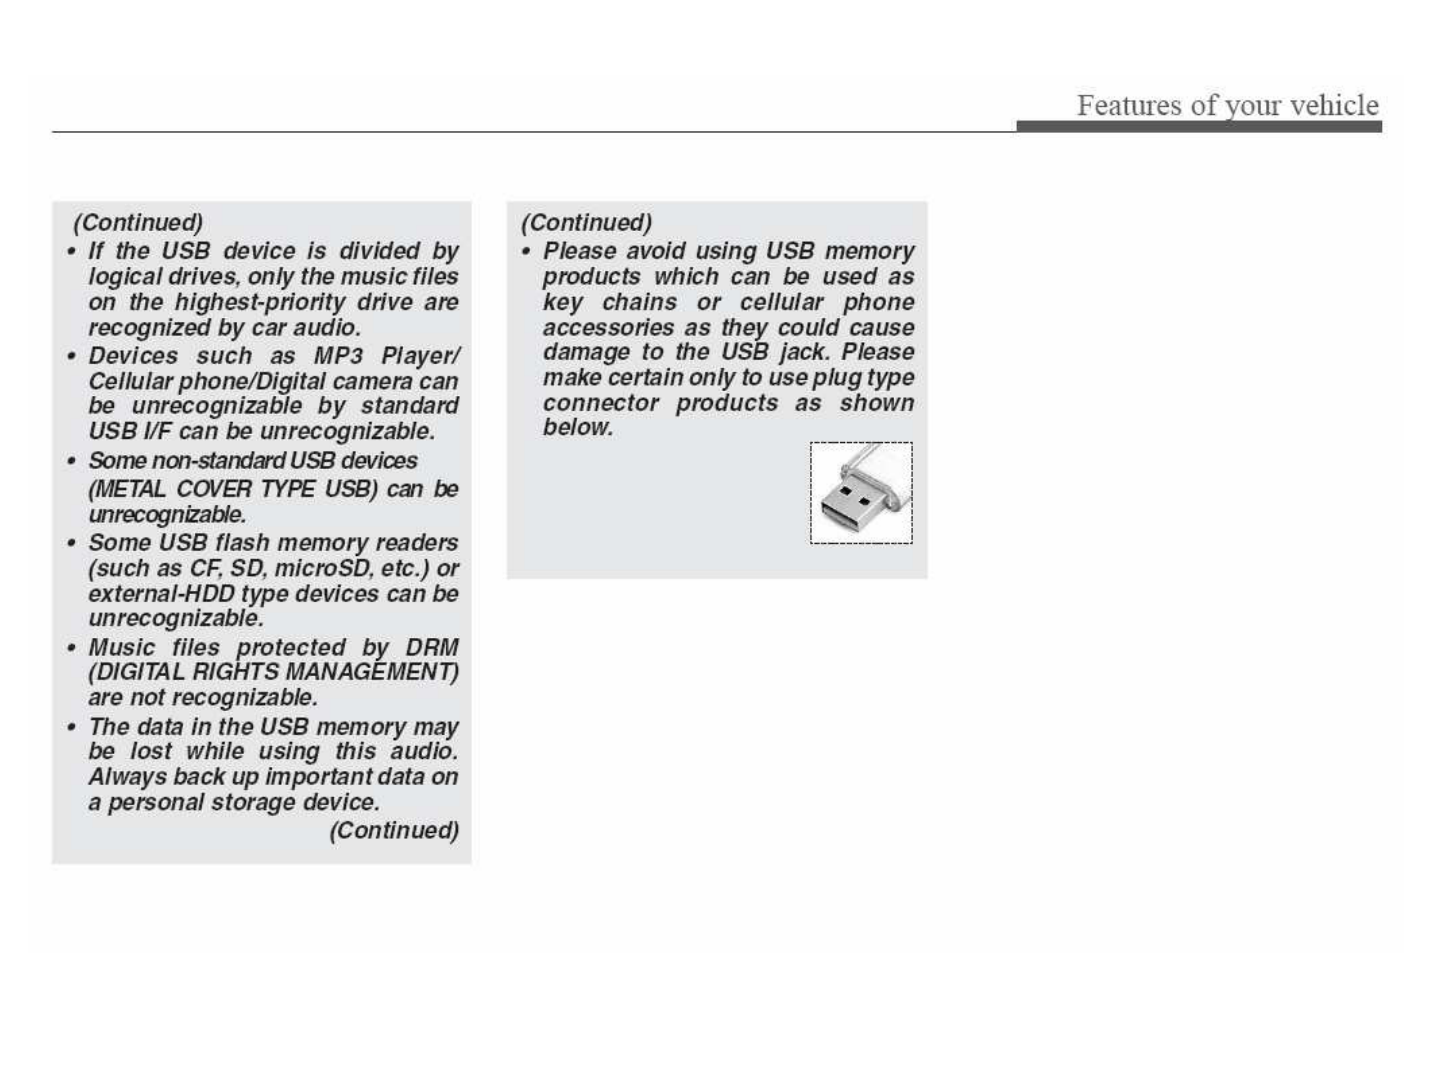
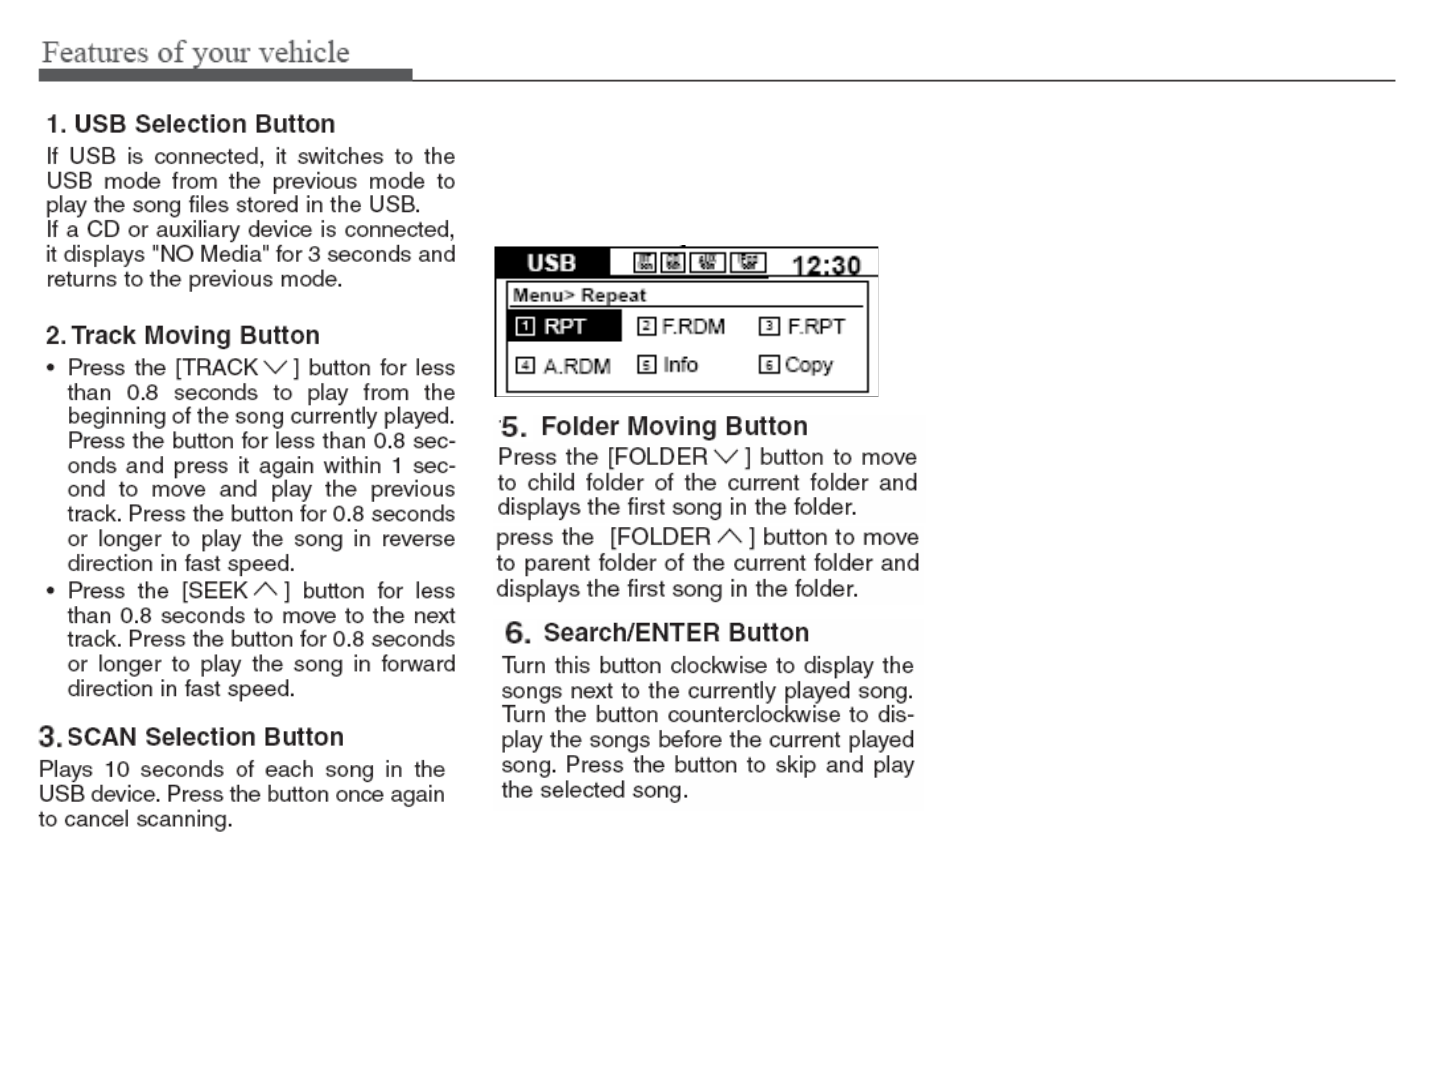
1. USB Selection Button
USB Selection ButtonUSB Selection Button
USB Selection Button
2.
2.2.
2. Track Moving Button
Track Moving ButtonTrack Moving Button
Track Moving Button
3.
3.3.
3. SCAN Button
SCAN ButtonSCAN Button
SCAN Button
4.
4.4.
4. MENU Button
MENU ButtonMENU Button
MENU Button
5.
5.5.
5. Folder Moving Button
Folder Moving ButtonFolder Moving Button
Folder Moving Button
6.
6.6.
6. Search/ENTER Button
Search/ENTER ButtonSearch/ENTER Button
Search/ENTER Button
4. MENU Button
4. MENU Button4. MENU Button
4. MENU Button
Push the MENU button to enter Menu
Mode. Select desired item by rotating
the [TUNE] knob, the push the knob.
1.
1.1.
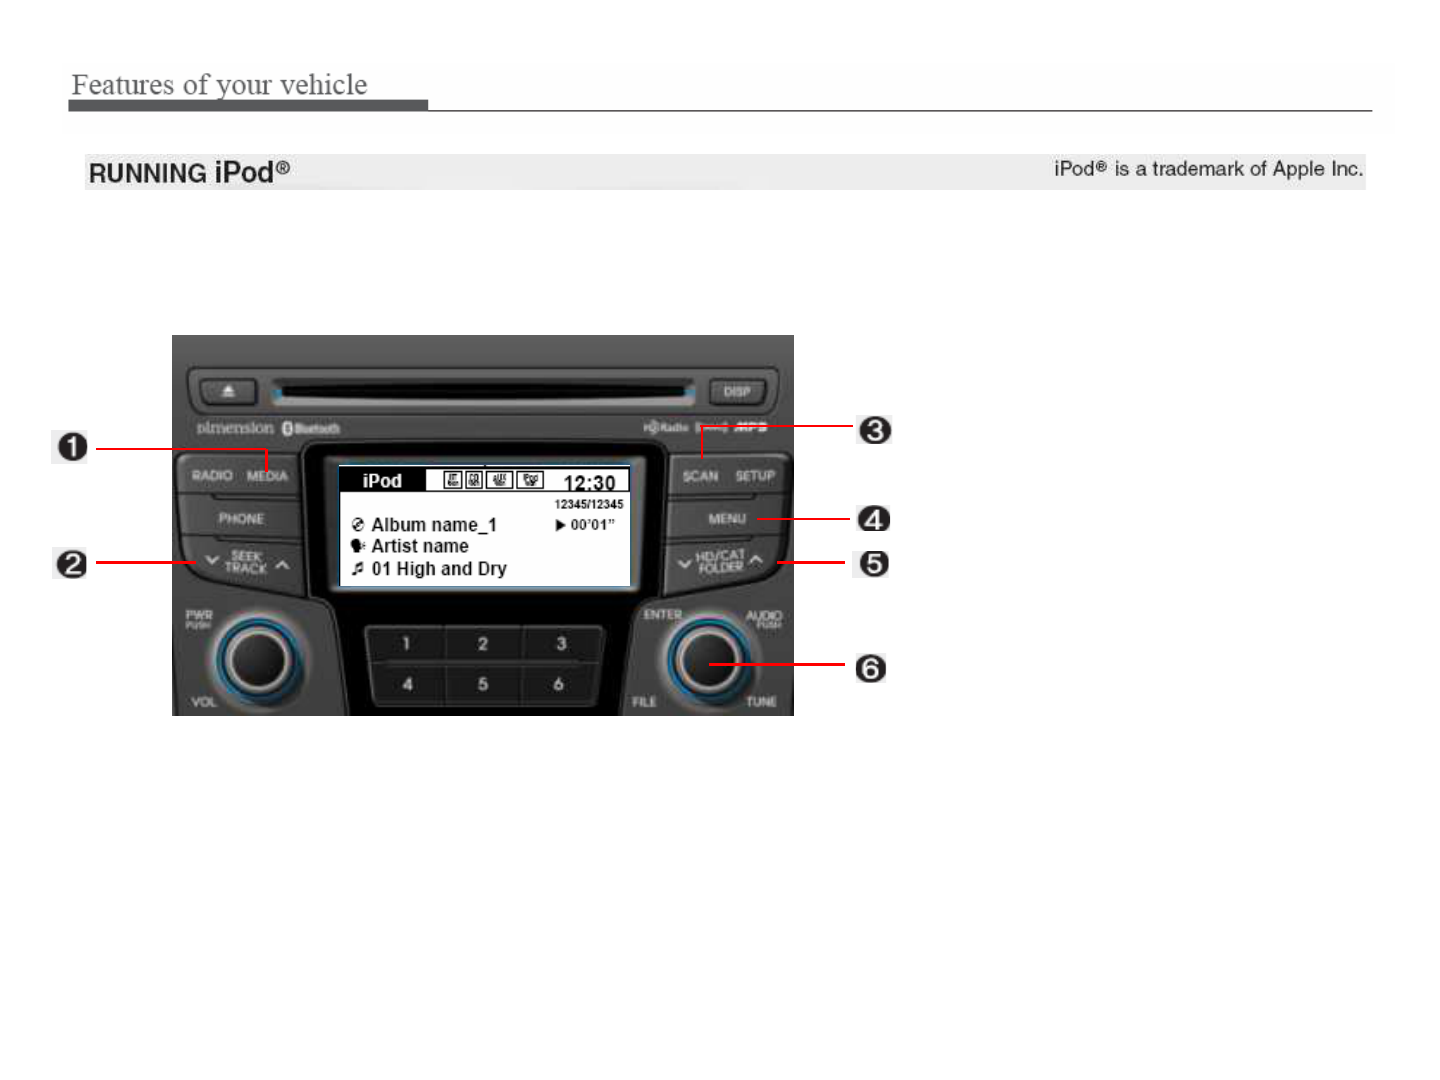
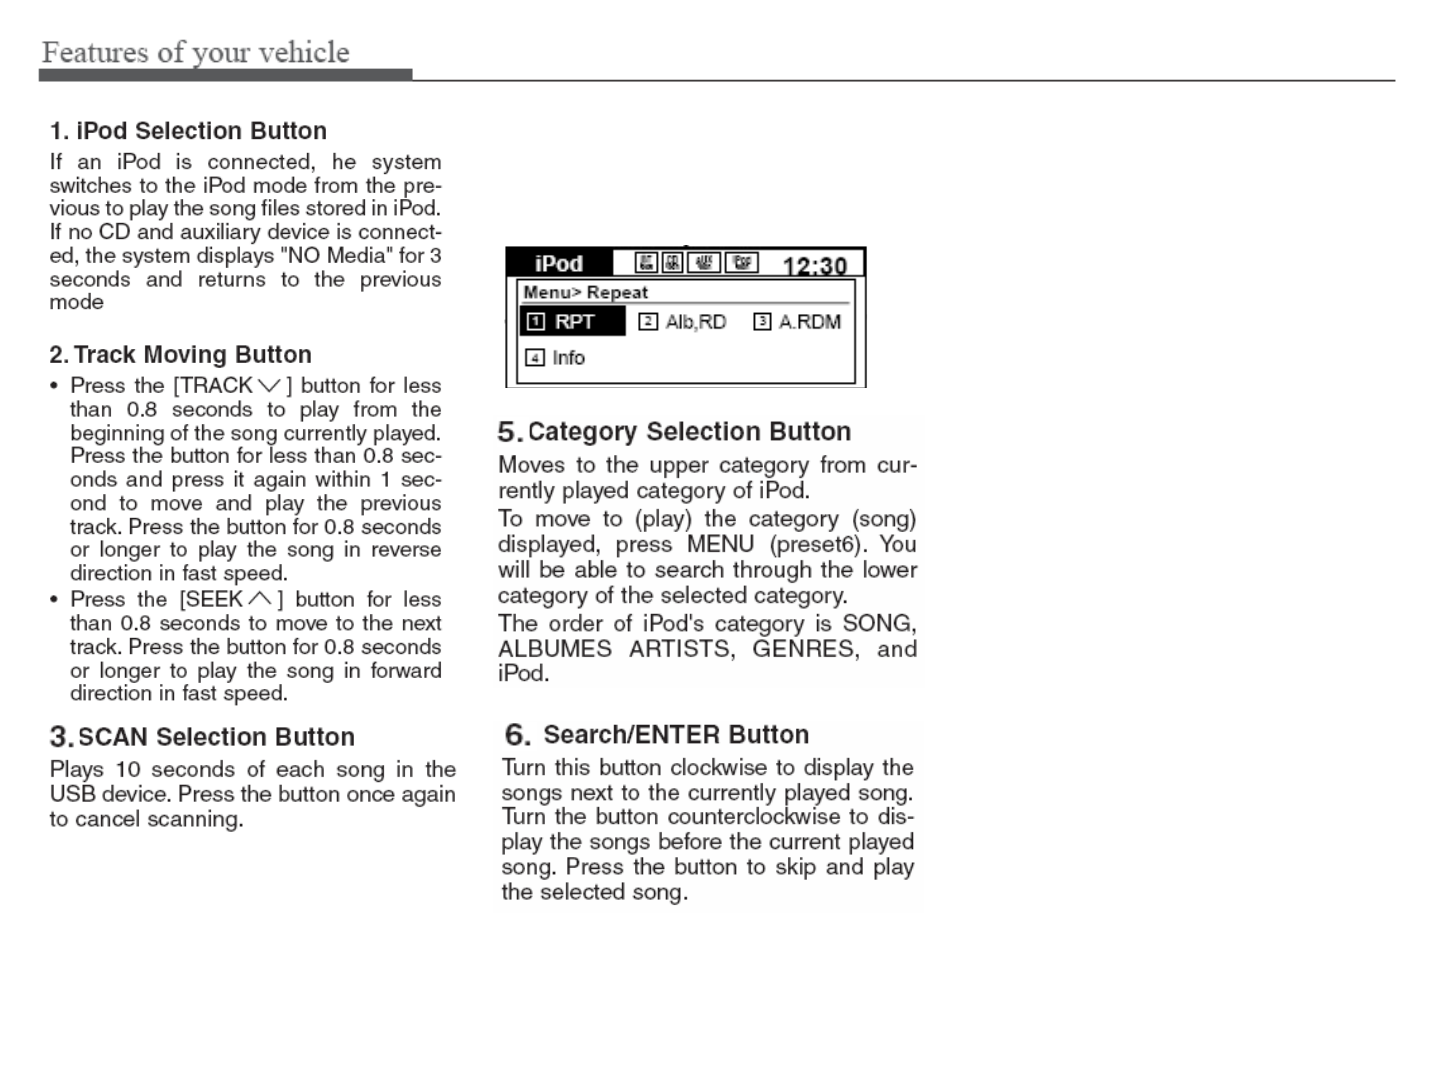
1. iPod
iPodiPod
iPod Selection Button
Selection ButtonSelection Button
Selection Button
2.
2.2.
2. Track Moving Button
Track Moving ButtonTrack Moving Button
Track Moving Button
3.
3.3.
3. SCAN Button
SCAN ButtonSCAN Button
SCAN Button
4.
4.4.
4. MENU Button
MENU ButtonMENU Button
MENU Button
5.
5.5.
5. Category Selection Button
Category Selection ButtonCategory Selection Button
Category Selection Button
6.
6.6.
6. Search/ENTER Button
Search/ENTER ButtonSearch/ENTER Button
Search/ENTER Button
4. MENU Button
4. MENU Button4. MENU Button
4. MENU Button
Push the MENU button to enter Menu
Mode. Select desired item by rotating
the [TUNE] knob, the push the knob.
1.
1.1.
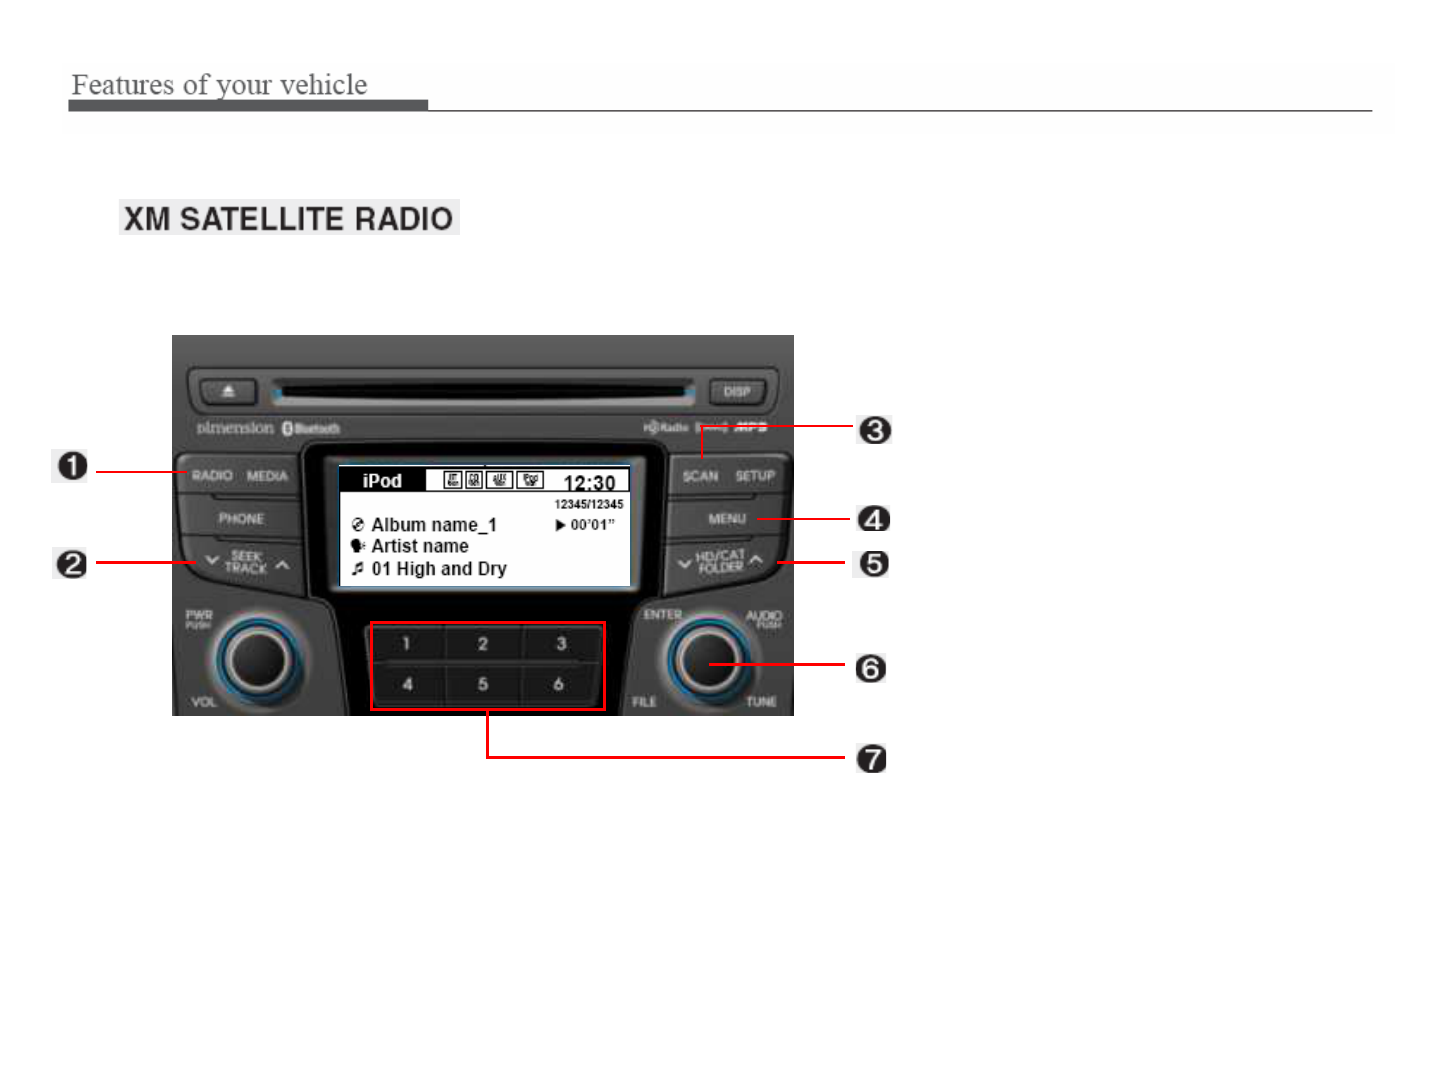
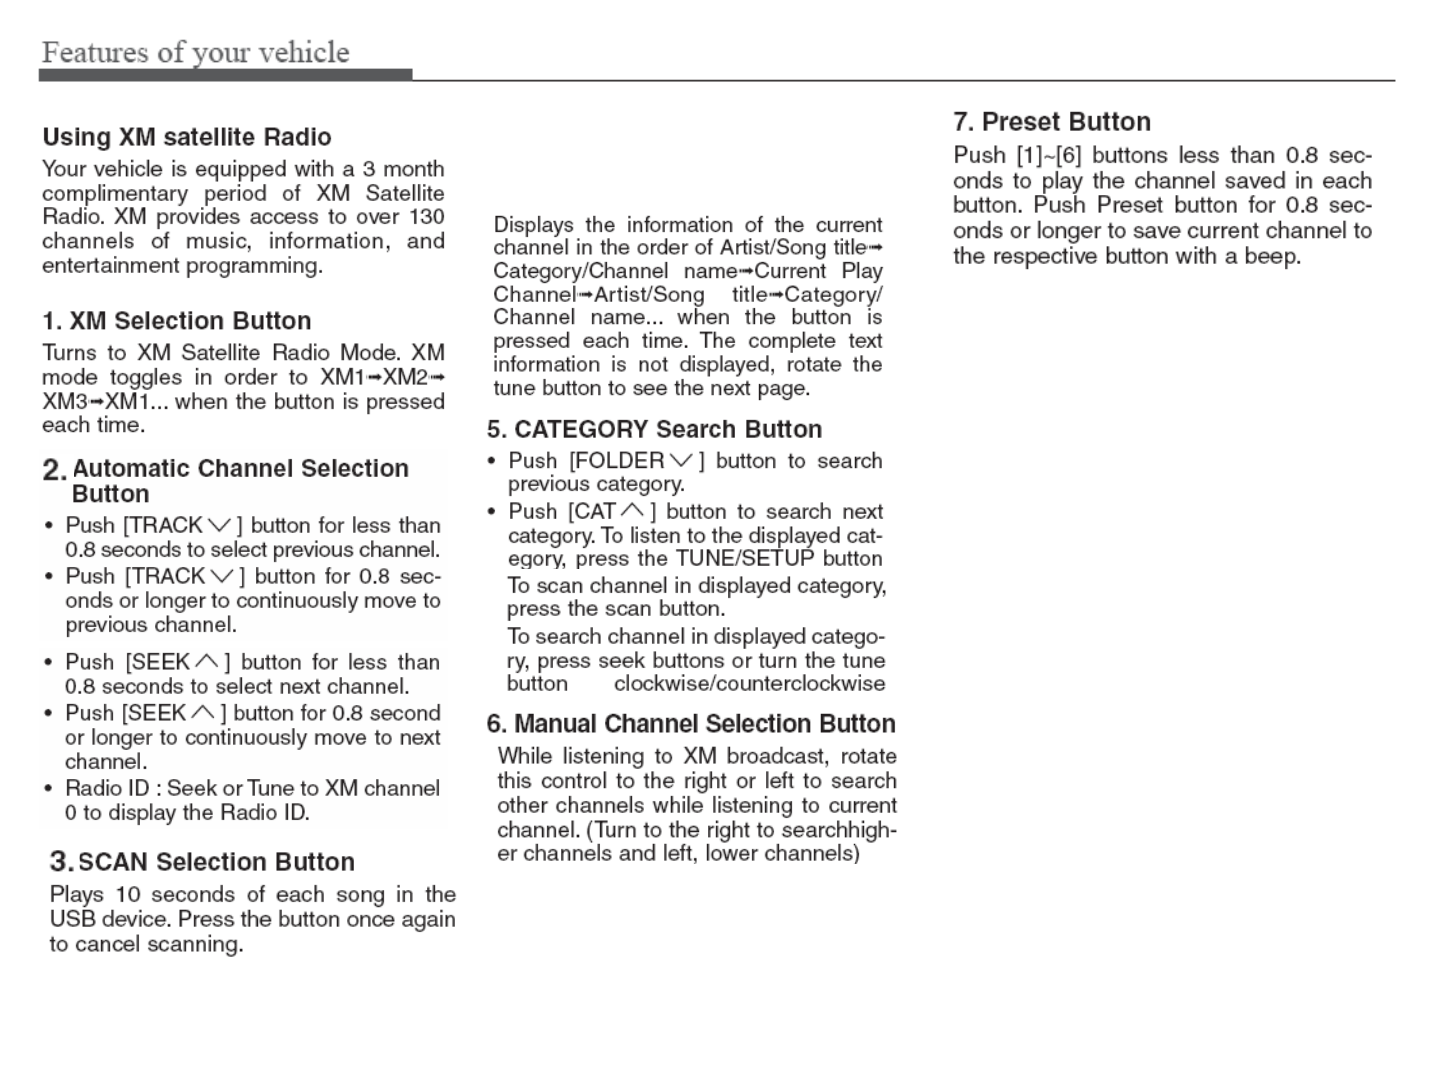
1. XM Selection Button
XM Selection ButtonXM Selection Button
XM Selection Button
2.
2.2.
2. Automatic Channel Selection
Automatic Channel Selection Automatic Channel Selection
Automatic Channel Selection
Button
ButtonButton
Button
3.
3.3.
3. SCAN Button
SCAN ButtonSCAN Button
SCAN Button
4.
4.4.
4. MENU Button
MENU ButtonMENU Button
MENU Button
5.
5.5.
5. Category Search Button
Category Search ButtonCategory Search Button
Category Search Button
6.
6.6.
6. Manual Channel Selection Button
Manual Channel Selection ButtonManual Channel Selection Button
Manual Channel Selection Button
7.
7.7.
7. Preset Button
Preset ButtonPreset Button
Preset Button
4. MENU Button
4. MENU Button4. MENU Button
4. MENU Button
Press this button to turn to the Info
mode.
2) Select “Phone”item by rotating the
[TUNE] knob, then push the knob.
Select “Phone”, then “Phone List”
in Phone menu.
This equipment has been tested and found to comply with the limits for a Class A digital device, pursuant to part 15 of the FCC Rules.
These limits are designed to provide reasonable protection against harmful interference in a residential installation. This equipment
generates, uses and can radiate radio frequency energy and, if not installed and used in accordance with the instructions, may cause
harmful interference to radio communications. However, there is no guarantee that interference will not occur in a particular
installation. If this equipment does cause harmful interference to radio or television reception, which can be determined by turning the
equipment off and on, the user is encouraged to try to correct the interference by one or more of the following measures:
ˍ Reorient or relocate the receiving antenna.
ˍ Increase the separation between the equipment and receiver.
ˍ Connect the equipment into an outlet on a circuit different from that to which the receiver is connected.
ˍ Consult the dealer or an experienced radio/TV technician for help.
Caution: Any changes or modifications to this device not explicitly approved by manufacturer could void your authority to operate this
equipment.
This device complies with part 15 of the FCC Rules. Operation is subject to the following two conditions: (1) This device may not
cause harmful interference, and (2) this device must accept any interference received, including interference that may cause undesired
operation.
This equipment complies with FCC radiation exposure limits set forth for an uncontrolled environment. This equipment should be
installed and operated with minimum 20 cm between the radiator and your body. This transmitter must not be collocated or operating
in conjunction with any other antenna or transmitter unless authorized to do so by the FCC.
IC Warning
Operation of this device is subject to the following two conditions: (1) this device may not cause interference, and
(2) this device must accept any interference, including interference that may cause undesired operation of the device.