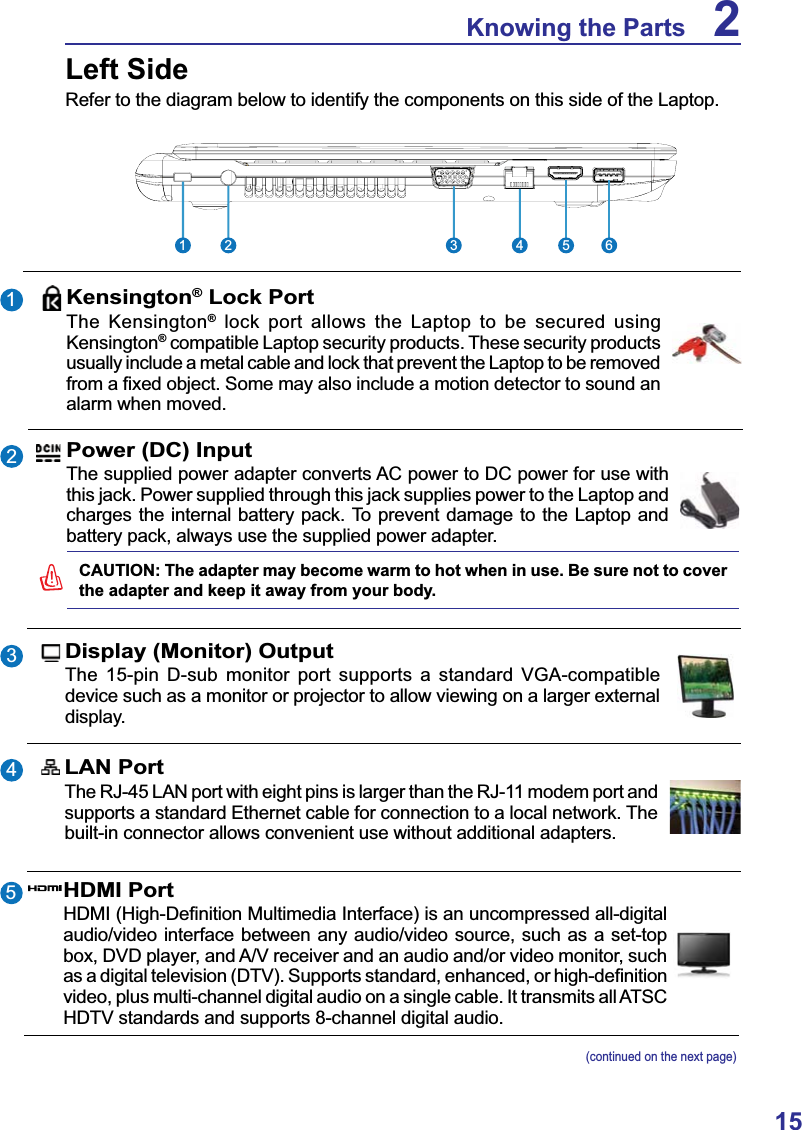
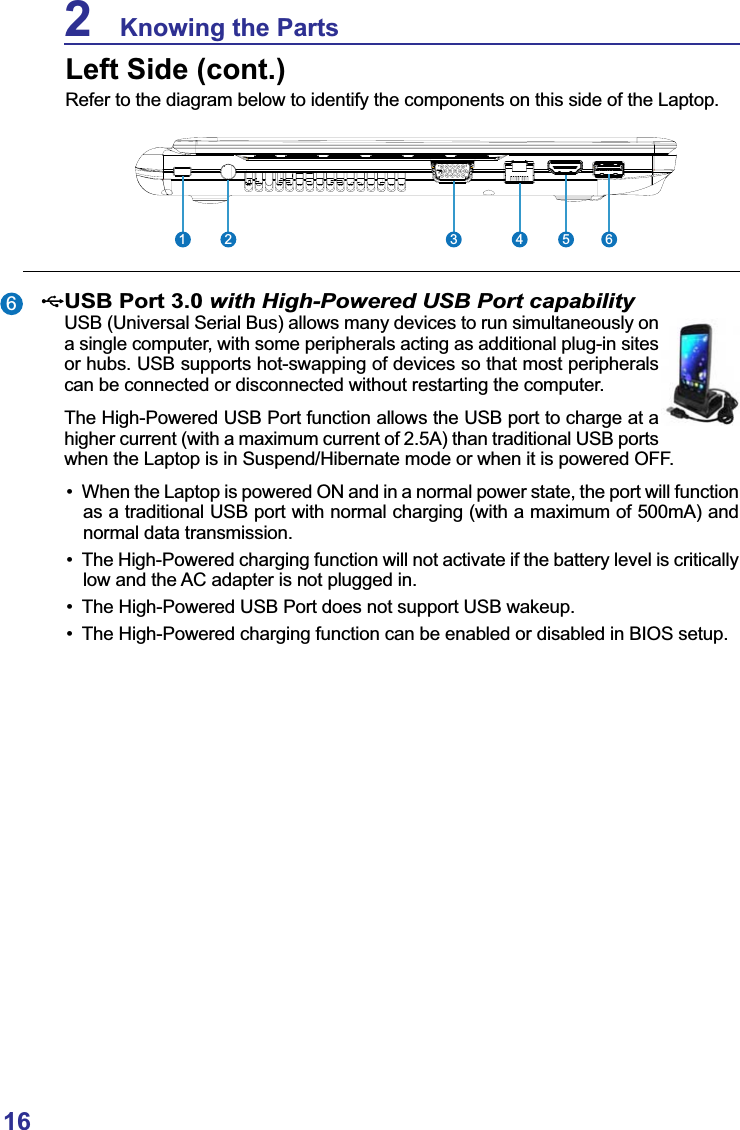
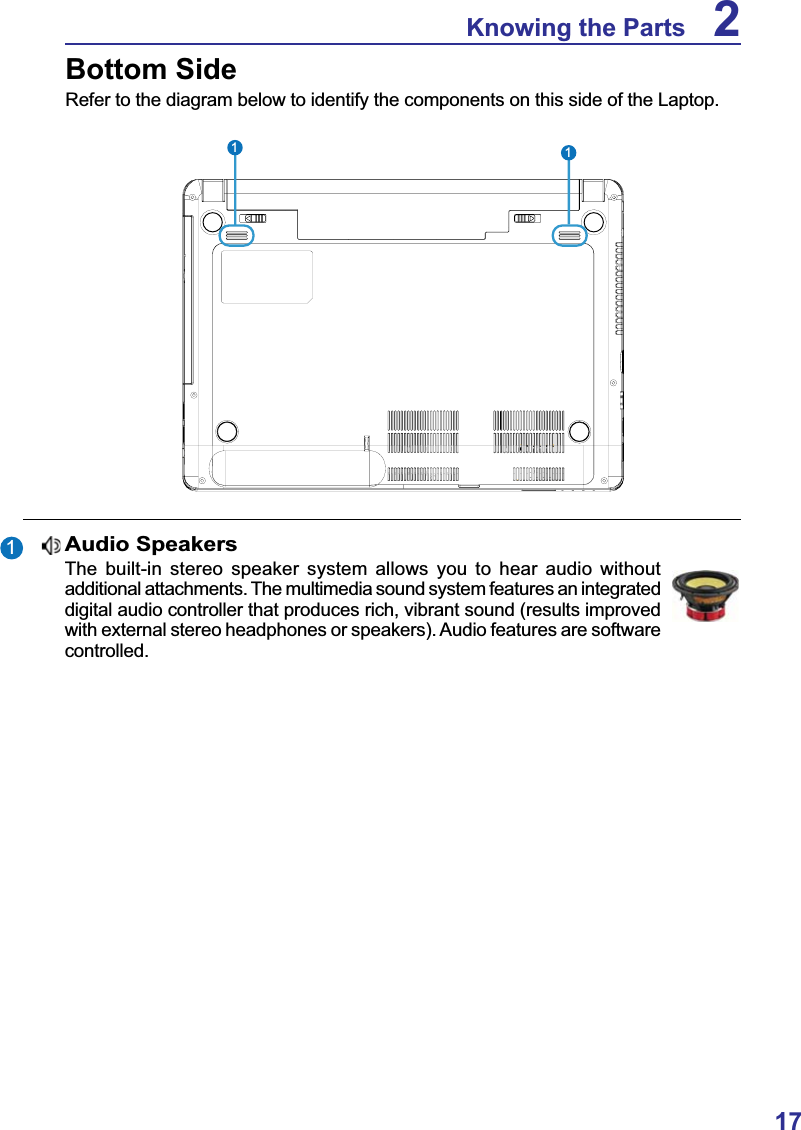
Haier Information Technology C14XXXX Laptop User Manual
Haier Information Technology(Shenzhen)CO.,Ltd Laptop
UserManual.wiki
>
Haier Information Technology
>
C14XXXX User Manual
Users Manual
Navigation menu
Upload a User Manual
Namespaces
Wiki Guide
HTML
PDF
Info
Views
User Manual
Discussion / Help
Navigation

![61 Introducing the LaptopGeneral OverviewThis document provides information on the various components in the Laptop and how to use them. The following are the major sections of this document:1. Introducing the LaptopIntroduces you to the Laptop and its documentation.2. Knowing the PartsGives you information on the Laptop’s components.3. Getting StartedGives you information on getting started with the Laptop.4. Using the Laptop Gives you information on using the Laptop’s components.Notes For The UserA few notes and warnings in bold are used throughout this document that you should be aware of in order to complete certain tasks safely and completely. These notes have different degrees of importance as described below:TIP: Tips and useful information for completing tasks.IMPORTANT! Vital information that must be followed to prevent damage to data, components, or persons.WARNING! Important information that must be followed for safe operation.Text enclosed in < > or [ ] represents a key on the keyboard; do not actually type the < > or [ ] and the enclosed letters. < > [ ]NOTE: Tips and information for special situations.](https://usermanual.wiki/Haier-Information-Technology/C14XXXX/User-Guide-2404914-Page-6.png)


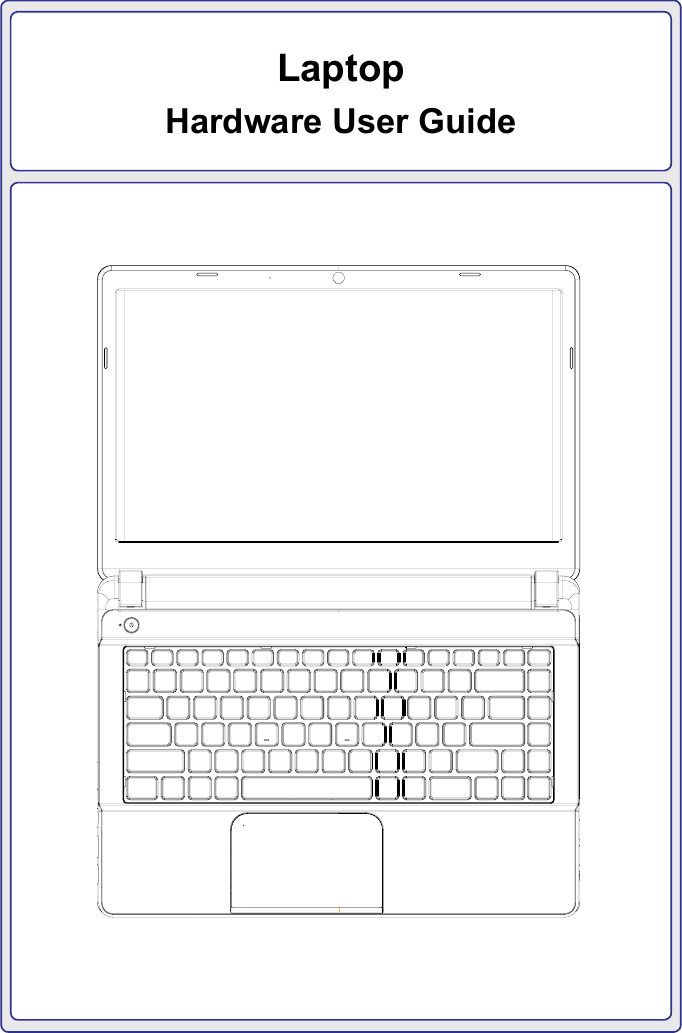
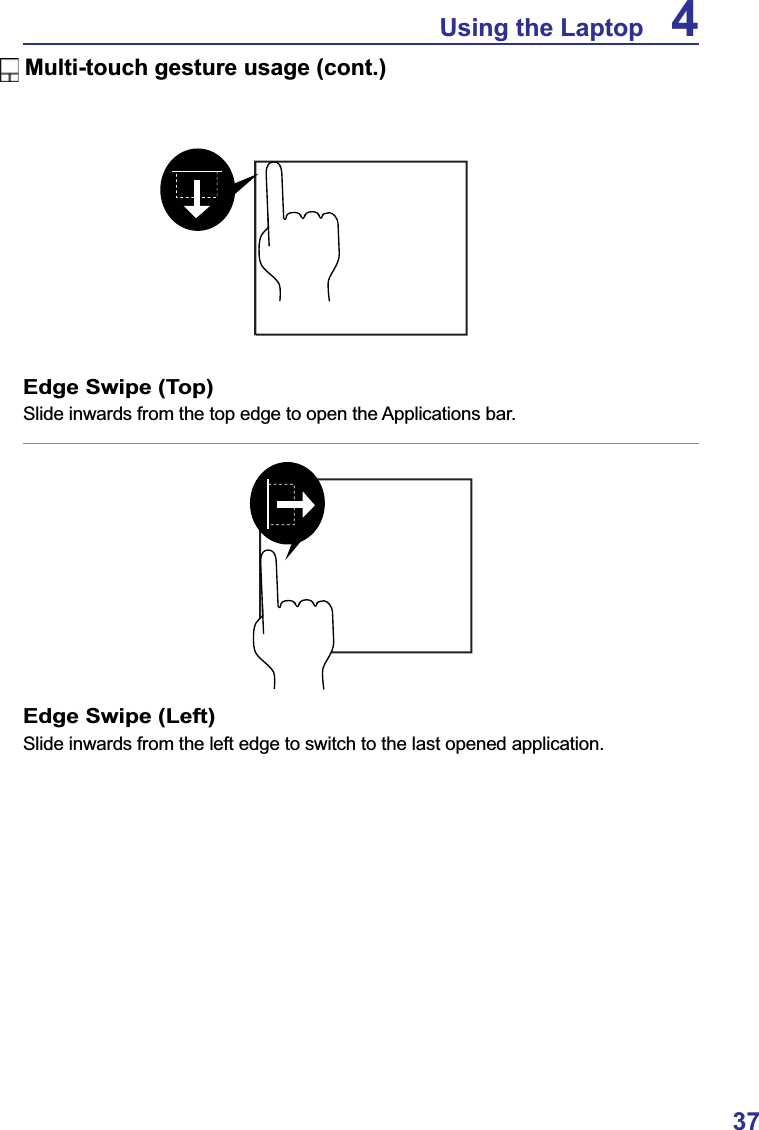
![364 Using the LaptopMulti-touch gesture usage Multi-touch recognizes multiple simultaneous touch points to allow advanced software DFWLRQVXVLQJ\RXU¿QJHUV*HVWXUHDYDLODELOLW\GHSHQGVRQ/DSWRSPRGHOTwo Finger Scrolling6OLGHWZR¿QJHUVXSGRZQOHIWULJKWWRVFUROOZLWKLQDQDSSOLFDWLRQZLQGRZTwo Fingers Pinch Zoom6OLGH WZR ¿QJHUV RXWZDUGV WR ]RRP LQ 6OLGH WZR ¿QJHUV LQZDUGV WR ]RRP RXWConvenient for viewing photos.Edge Swipe (Right)Slide inwards from the right edge to open the sidebar.](https://usermanual.wiki/Haier-Information-Technology/C14XXXX/User-Guide-2404914-Page-36.png)

![47Appendix AR&TTE Directive (1999/5/EC)7KHIROORZLQJLWHPVZHUHFRPSOHWHGDQGDUHFRQVLGHUHGUHOHYDQWDQGVXI¿FLHQWIRUthe R&TTE (Radio & Telecommunications Terminal Equipment) directive: (VVHQWLDOUHTXLUHPHQWVDVLQ>$UWLFOH@ 3URWHFWLRQUHTXLUHPHQWVIRUKHDOWKDQGVDIHW\DVLQ>$UWLFOHD@ 7HVWLQJIRUHOHFWULFVDIHW\DFFRUGLQJWR>(1@ 3URWHFWLRQUHTXLUHPHQWVIRUHOHFWURPDJQHWLFFRPSDWLELOLW\LQ>$UWLFOHE@ 7HVWLQJIRUHOHFWURPDJQHWLFFRPSDWLELOLW\LQ>(1@>(1@ 7HVWLQJDFFRUGLQJWR>@ (IIHFWLYHXVHRIWKHUDGLRVSHFWUXPDVLQ>$UWLFOH@ 5DGLRWHVWVXLWHVDFFRUGLQJWR>(1@FCC Radio Frequency (RF) Exposure Caution StatementThis equipment complies with FCC RF exposure limits set forth for an uncontrolled environment. To maintain compliance with FCC RF exposure compliance requirements, please follow operation instructions in the user guide. This equipment is for operation within the 2.4 GHz frequency range and is restricted to indoor environments only.)&&&DXWLRQ$Q\FKDQJHVRUPRGL¿FDWLRQVQRWH[SUHVVO\DSSURYHGE\WKHSDUW\responsible for compliance could void the user’s authority to operate this equipment. “The manufacturer declares that this device is limited to Channels 1 through 11 in WKH*+]IUHTXHQF\E\VSHFL¿HG¿UPZDUHFRQWUROOHGLQWKH86$´FCC RF Exposure Guidelines (Wireless Clients)This device has been tested for compliance with FCC RF Exposure (SAR) limits in W\SLFDOSRUWDEOHFRQ¿JXUDWLRQV,QRUGHUWRFRPSO\ZLWK6$5OLPLWVHVWDEOLVKHGLQWKHANSI C95.1 standards, it is recommended when using a wireless LAN adapter that WKHLQWHJUDWHGDQWHQQDLVSRVLWLRQHGPRUHWKDQ>FP@IURP\RXUERG\RUQHDUE\persons during extended periods of operation. If the antenna is positioned less WKDQ>FP@IURPWKHXVHULWLVUHFRPPHQGHGWKDWWKHXVHUOLPLWWKHH[SRVXUHWLPHCE Mark WarningThis is a Class B product, in a domestic environment, this product may cause radio interference, in which case the user may be required to take adequate measures.](https://usermanual.wiki/Haier-Information-Technology/C14XXXX/User-Guide-2404914-Page-47.png)
![48A AppendixService warning labelWARNING: Making adjustments or performing procedures other than those VSHFL¿HGLQWKHXVHUJXLGHPD\UHVXOWLQKD]DUGRXVODVHUH[SRVXUH'RQRWDWWHPSWto disassemble the optical drive. For your safety, have the optical drive serviced only by an authorized service provider.CAUTION: INVISIBLE LASER RADIATION WHEN OPEN. DO NOT STARE INTO BEAM OR VIEW DIRECTLY WITH OPTICAL INSTRUMENTS.Optical Drive Safety InformationLaser Safety InformationInternal or external optical drives sold with this Laptop contains a CLASS 1 LASER 352'8&7/DVHUFODVVL¿FDWLRQVFDQEHIRXQGLQWKHJORVVDU\DWWKHHQGRIWKLVuser guide.+'0,WKH+'0,ORJRDQG+LJK'H¿QLWLRQ0XOWLPHGLD,QWHUIDFHare trademarks or registered trademarks of HDMI Licensing, LLC.](https://usermanual.wiki/Haier-Information-Technology/C14XXXX/User-Guide-2404914-Page-48.png)