Haier Telecom 0701HG-E30 GSM 850/ 1800/ 1900 Mobile User Manual Brief Introduction
Haier Telecom (Qingdao) Co., Ltd. GSM 850/ 1800/ 1900 Mobile Brief Introduction
UserManual.wiki
>
Haier Telecom
>
0701HG E30 User Manual
users manual
Navigation menu
Upload a User Manual
Namespaces
Wiki Guide
HTML
PDF
Info
Views
User Manual
Discussion / Help
Navigation
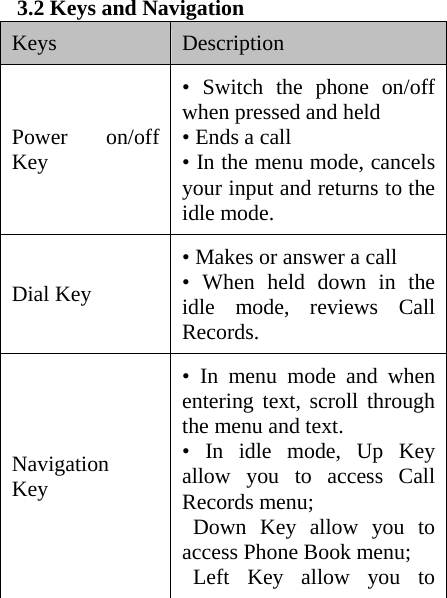
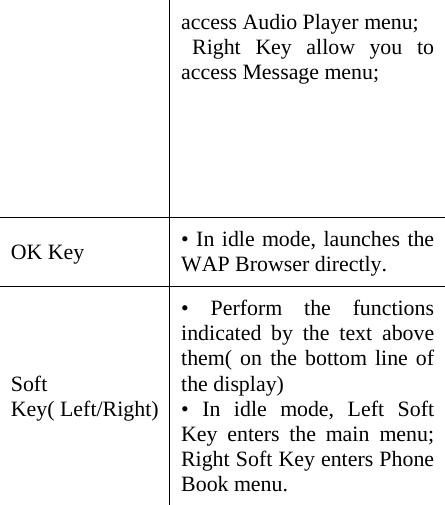
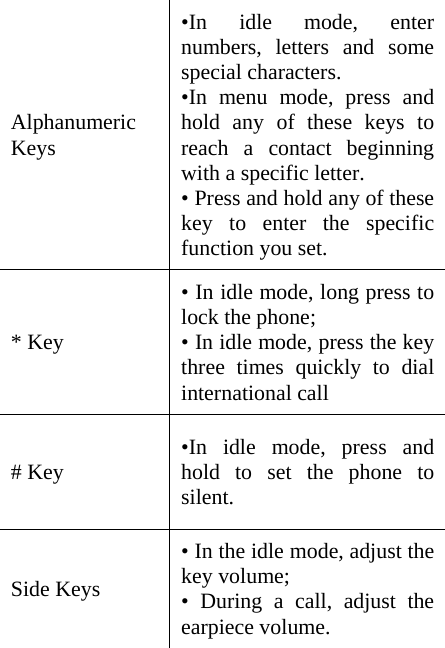
![3.5.6 Adjusting the Volume During a call, if you want to adjust the earpiece volume, use the side keys on the right side of the phone. Press the Up Side key to increase and the Down Side key to decrease the volume. 3.5.7 Answering Call When call comes in, the phone alerts you by ringing, vibration, vibration and ring, vibration then ring or only light according to the setting of mobile phone. If you want to receive the call, press Dial key. If you want to reject the call, press [power on/off] or press right soft key to “refuse”. Notes: If you have applied Calling Number Identification, calling number will display on the screen when calling. If this number has](https://usermanual.wiki/Haier-Telecom/0701HG-E30/User-Guide-754711-Page-28.png)
![been saved in telephone memory book, the name corresponding to this number will display on the screen. 3.5.8 Viewing Missed Calls The number of missed calls displays on the idle screen immediately after a call is missed. You can press “ View” to read the information. 3.5.9 Rapid Dial-up This mobile phone provides 9 shortcut key. You can self-define the telephone numbers corresponding to these keys (see “telephone directory” for detailed description). Only when you press any key from [2-9] keys under power saving state, you can rapidly dial out; Notes: 1、key of rapid dial-up must be pressed for over 2 seconds. If you press shortcut key and have not defined in setup/mobile phone setup/rapid dial-up, it is hard to dial out. 2、[1] key is set as rapid dial-up of voice mail box number. After set up voice mail box](https://usermanual.wiki/Haier-Telecom/0701HG-E30/User-Guide-754711-Page-29.png)


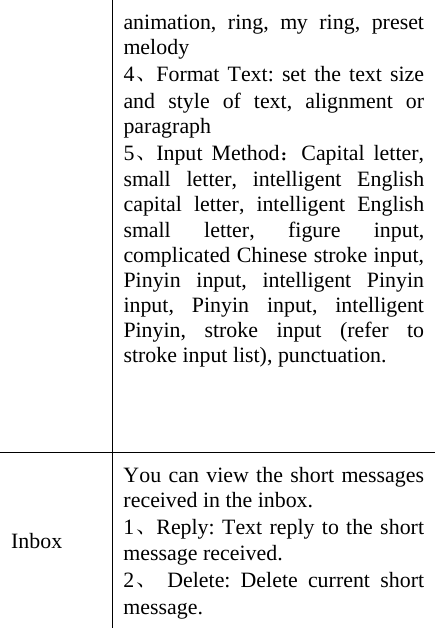
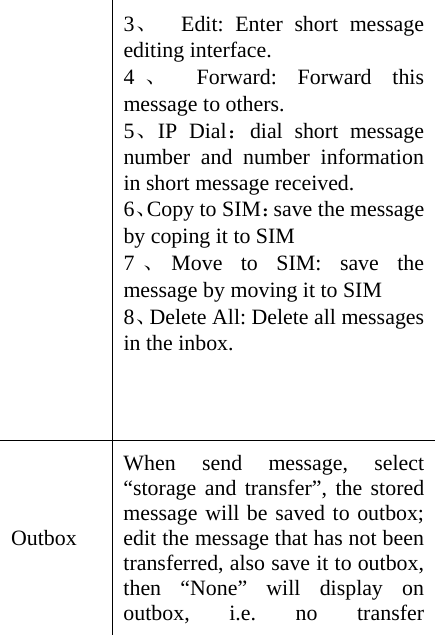
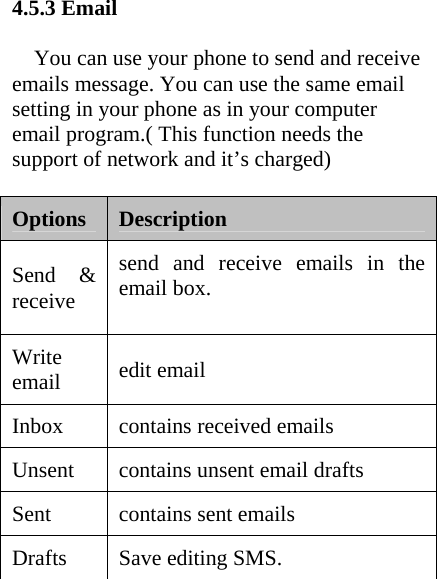
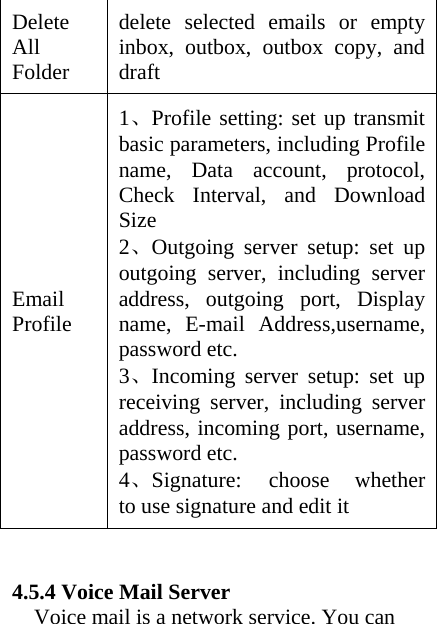
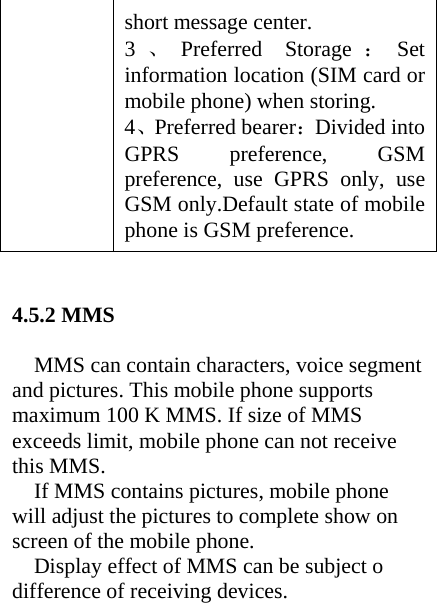
![destination. The short message saved in outbox can be edited, sent, deleted, all deleted, received number. Drafts Save editing SMS. Other operations same as [Inbox]. Template Edit or delete common phrases. Short Message Setup You can set up some parameters of short message in this menu. 1、Profile setting:In order to send message, local short message center number must be input first. Notice: short message number is provided by network supplier. 2、Common Setup: 1) Deliver Report :Network informs the other party whether receive short message and receiving time. 2) Reply Path: Transfer answer path to network end. This function need to be supported by](https://usermanual.wiki/Haier-Telecom/0701HG-E30/User-Guide-754711-Page-57.png)
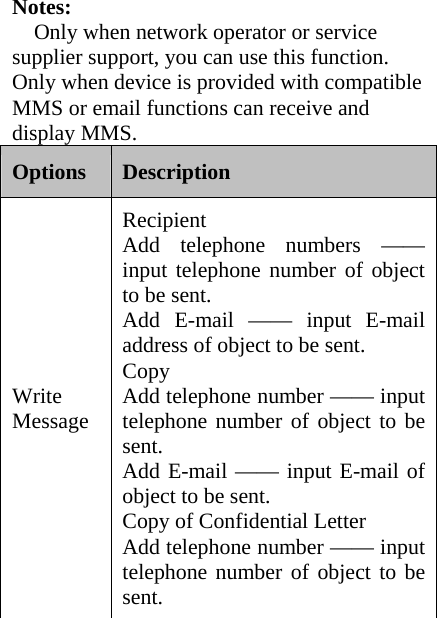
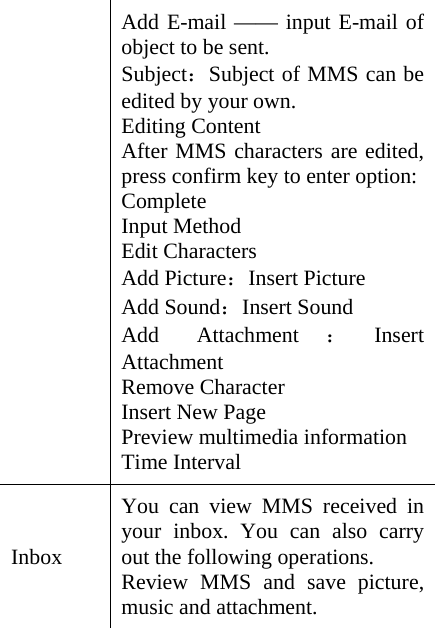
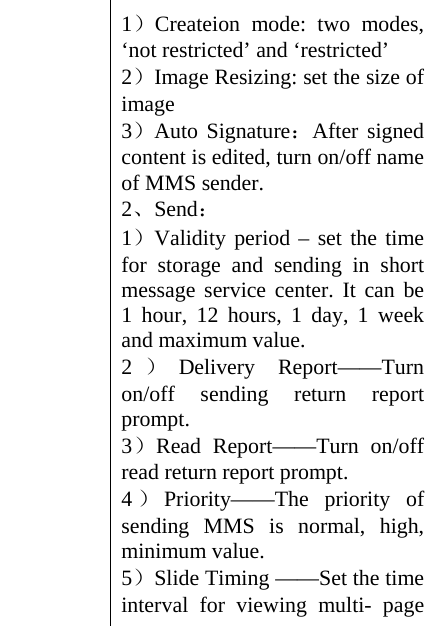
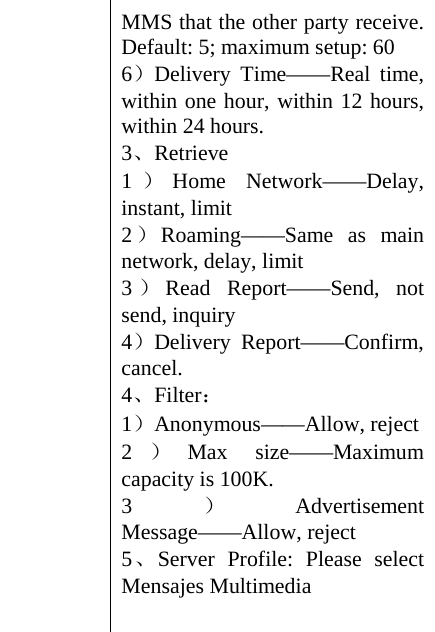
![Review MMS details. Reply MMS Reply to all Forward MMS Delete current MMS Delete all MMS Save or use the number of MMS or inside MMS查看并处理已收到的彩信。 Outbox View MMS that has not been sent out. Other operations same as [Inbox]. Drafts Save editing MMS. Other operations same as [Inbox]. TemplateYour mobile phone has 5 built-in preset MMS. Can enter to view detailed information, create new message operation from sample. Message Setting You can set up some parameters for MMS in this menu. 1、Compose](https://usermanual.wiki/Haier-Telecom/0701HG-E30/User-Guide-754711-Page-61.png)