Haier Telecom 1101HW-A57W Quad-Band GSM/GPRS/EDGE and WCDMA Mobile Phone User Manual
Haier Telecom (Qingdao) Co., Ltd. Quad-Band GSM/GPRS/EDGE and WCDMA Mobile Phone
UserManual.wiki
>
Haier Telecom
>
1101HW A57W User Manual
User Manual
Navigation menu
Upload a User Manual
Namespaces
Wiki Guide
HTML
PDF
Info
Views
User Manual
Discussion / Help
Navigation
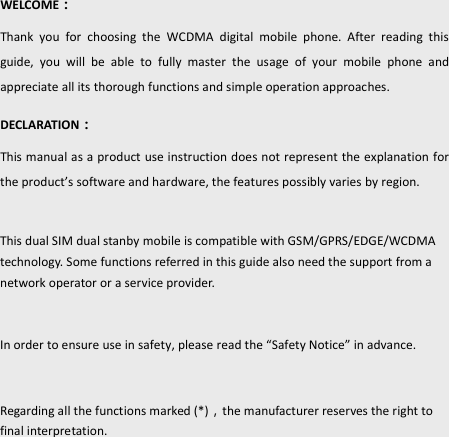
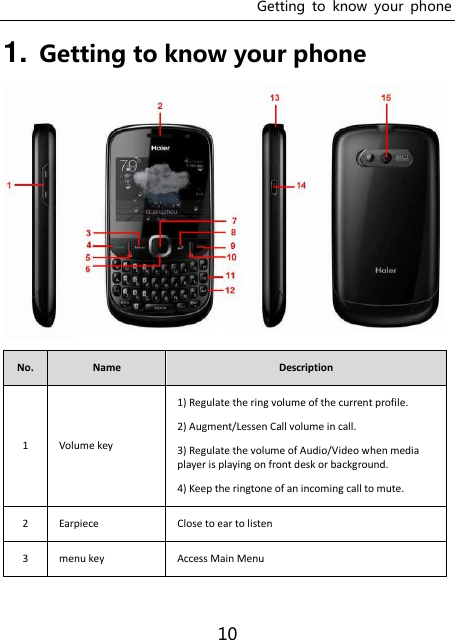


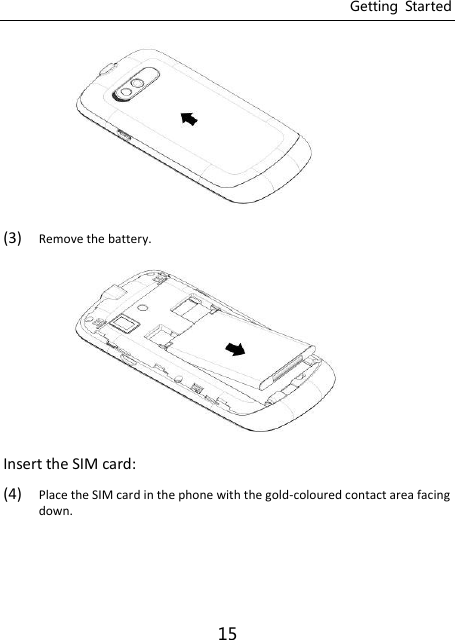
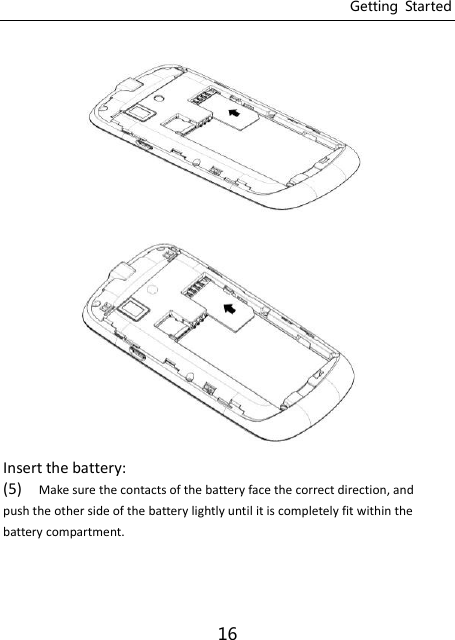
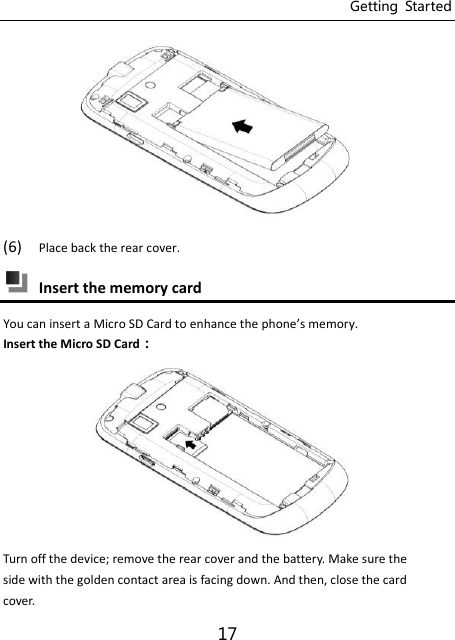
![Getting Started 14 2. Getting Started Install the USIM/SIM card and battery Always turn off your device before inserting or replacing the USIM/SIM card and battery. Battery performance depends on various factors, including network configuration, signal strength, the temperature of the environment in which you operate the device, the features and/or settings you select and use, items attached to connecting ports, and your talk time, data transmission, and other software usage patterns. To reduce risk of fire or burns: - Do not attempt to open, disassemble, or repair the battery. - Do not crush, puncture, short-circuit the external connector, or dispose in fire or water. - Do not expose to temperatures above 60℃ (140℉). - Replace only with the battery designated for this product. - Recycle or dispose of used battery as stipulated by local regulations. Remove the rear cover and the battery: (1) If the phone is on, press and hold [Power] to turn it off. (2) Hold the device with the front panel facing down, and remove the rear cover.](https://usermanual.wiki/Haier-Telecom/1101HW-A57W/User-Guide-1433592-Page-14.png)
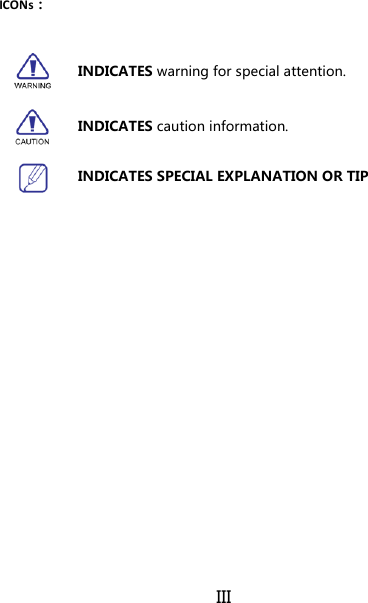
![Getting Started 18 Charge the battery Charging the battery by the travel charger: (1) Make sure the battery inserted in the phone. (2) Connect the USB cable to the travel charger. (3) Insert the USB cable to USB port on the phone carefully, and connect the charger to a standard wall outlet. (4) When the battery is fully charged (the icon is no longer moving), unplug the travel charger from the power outlet. New batteries have been pre-charged partially before shipment. Before you start using your device, it is recommended that you insert and charge the battery. Some batteries perform best after several full charge/discharge cycles. Do not remove the battery from the device while charging. Turn your phone on and off After installing your SIM card and battery and charging the battery, you can now power on and start using your device. Press and hold the [END/POWER] key for a few seconds. Password PIN code PIN code (Personal Identification Number) will avoid illegal use on your SIM. PIN code is provided with SIM card. If inputting wrong PIN code for three times, you should unlock it by PUK code. Default PIN code is 1234. For more](https://usermanual.wiki/Haier-Telecom/1101HW-A57W/User-Guide-1433592-Page-18.png)
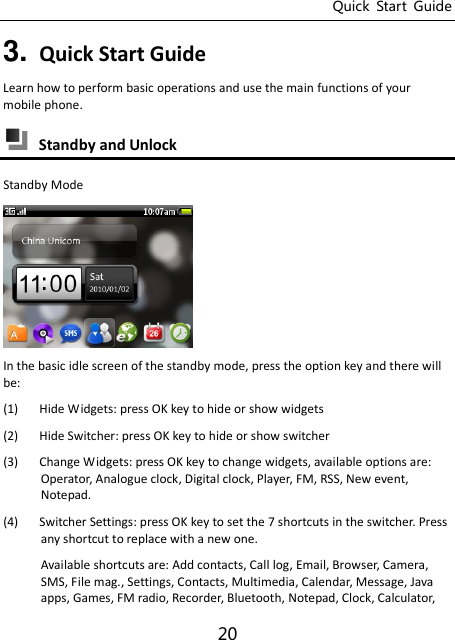
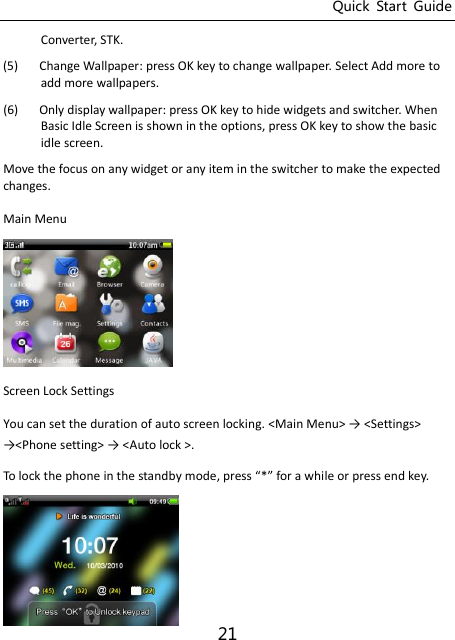
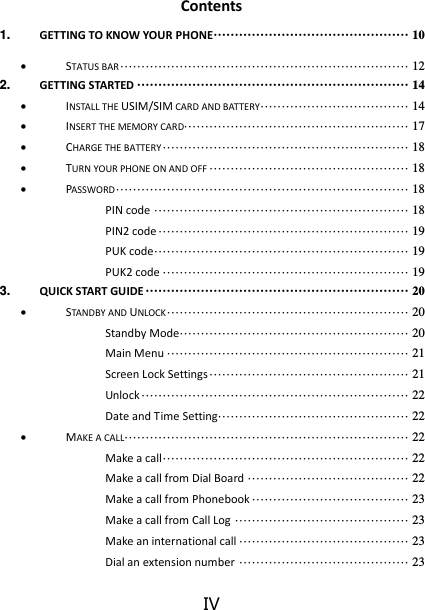
![Quick Start Guide 23 Make a call from Phonebook (1) In main menu, press <Contacts> to enter the Contacts menu. (2) Scroll to search for the contact, or search for a contact through instant initial letter searching. (3) Press <send> key to make a call. Make a call from Call Log (1) In standby mode, press < Send > key to enter Call history menu. (2) Scroll to search for a Call Log. (3) Press <send>key to make a call. Make an international call (1) press for a log tie ad sho + i dial board (2) input country code and phone number (3) Press <send>key to make a call. Dial an extension number You should dial the phone number first and then dial the extension number. If you isert Plog press the key * to shift to pi dial oardetee phoe number and the extension number, then press <send>key, so call to the extension will be made automatically. Make an emergence call Input the emergence number and then press [send] key.](https://usermanual.wiki/Haier-Telecom/1101HW-A57W/User-Guide-1433592-Page-23.png)
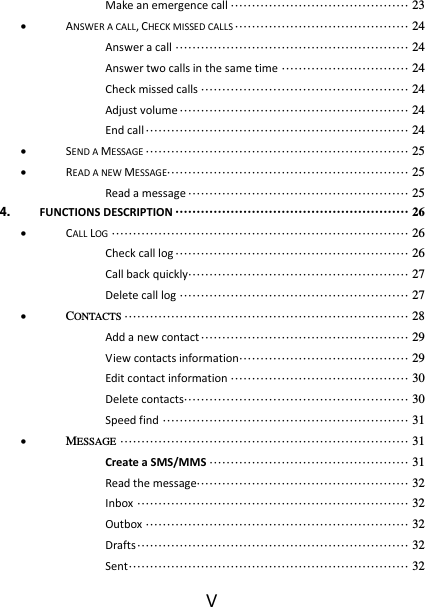
![Quick Start Guide 24 Answer a call, Check missed calls Answer a call When a call comes in, a dialog box will appear, showing the incoming number or a contact, press <send> key to answer, or <end> key to reject the call. When a call comes in, press <volume>key or <send> key -<silence> in the screen to stop ringing. Answer two calls in the same time If call waiting is on, (service from the operator is required), you can follow as below when the second call comes: Press sendkey to answer the second call , the current call will be on hold. Press endkey to reject the second call, the current call continuous. Check missed calls Your phone will display a pop-up box to prompt the calls you have missed, to check details, press [ok] key ; to cancel, press <end>key, and a missed call icon will appear in Status line. You can also enter the <Call Log> to check missed calls. Adjust volume Press Ǐvolumeǐkey to adjust the volume in the calling. End call Press Ǐendǐkey to end call.](https://usermanual.wiki/Haier-Telecom/1101HW-A57W/User-Guide-1433592-Page-24.png)

![Input Method 34 Editing Profile (1) In <Profile> menu, Press [option key], select Settings (2) Set the options according to menu prompt. In Standby mode, the current profile settings and ring mode is displayed in the Status line on the top of screen. Personal display Set the themes, wallpaper, widgets and shortcuts Personal ringtone Include: Call default ringtone SIM voice call ringtone SIM video call ringtone Message ringtone Phone setting Time and Date You can set the time, the date and the format in the menu. If you remove the battery from the phone or the battery is depleted for a long time, then you may need to reset the time and the date when restart the phone after charging/reinstalling the battery. Language Select the language shown on the phone, including English and Chinese.](https://usermanual.wiki/Haier-Telecom/1101HW-A57W/User-Guide-1433592-Page-34.png)
![Input Method 38 Input password. (Default password is "0000".) Camera You a use the phoe’s aera to take photos ad adjust the aera’s settings. The camera is on the back of the phone and takes the screen as a viewfinder. The photos taken by the camera are in JPG format. Please use the appropriate software to view them when you upload to the computer. You need to delete some pictures or other files i file manager to release some space in memory if the memory space is not enough for new picture. Preview In the preview screen, press option key then you can perform: Switch mode: switch between camera and camcorder. Scene mode: Select Normal, Continuous, MMS or other modes. Switch : switch between the main camera and the front camera Exposure value: adjust Exposure value. Settings: including settings of Resolution, Timer, White Balance, Effects, ISO, Image quality, Shutter sound and Storage. Album: view pictures in album. Take a photo To a take photo, press [back] key when there is no option menu. After shooting, you can delete, send, rename the photo or set it as wallpaper or slideshow or details.](https://usermanual.wiki/Haier-Telecom/1101HW-A57W/User-Guide-1433592-Page-38.png)
![Input Method 39 Record a video To record a video, press [back] key when there is no option menu, press [pause] key or [stop] key to stop recording. After recording, you can delete, send, rename or replay the video. Recorder You a use the phoe’s recorder to record sounds and adjust the recorder’s settings. The voice clips are taken in AMR format. Please use the appropriate software to use when you upload the voice clips to the computer. In the main screen of the recorder, press OK key to record, press OK key again to stop and this record clip will be saved automatically. In the main screen of the recorder, press option key to view: Voice clips In this screen, you could view the voice clips in list. Press option key to have: Delete Rename Send via: MMS, Email, Bluetooth Set as: profile ringtone, caller ringtone Settings: to view the record mode and the storage location Details: to view the name, format, size, date and protect or not Settings record mode: choose normal or MMS storage location: choose to save the voice clips in the phone or storage card](https://usermanual.wiki/Haier-Telecom/1101HW-A57W/User-Guide-1433592-Page-39.png)
![Input Method 40 You need to delete soe pitures or other files i file manager to release some space in memory if the memory space is not enough for new Multimedia The device supports to play music in MP3, WMA, AMR, AAC, MIDI format and play video in MP4, WMV, 3GP format. You may see the following submenu in Multimedia screen:: Now playing: to view all the music files being played now 1Settings includes equalizer setting, play mode, sleeping mode and lyrics display 2Update: to update the music files in the multimedia player All Tracks: to view all the music files in memory, and play all the songs. Artists: to search music files and play the alu y Artist’s ae. Albums: to search music files and play the alu y alu’s name. Playlists: to view the playlists and play songs in lists. Movies: to view all the video files in memory. In the menu screen, choose <Now playing>on the screen to enter the player. Play music Choose a music file to play. The phone supports to play MP3 as the background music. In Multimedia screen, press [END] to return to standby mode and music will be played as the background music. If you want to close the multimedia player, please](https://usermanual.wiki/Haier-Telecom/1101HW-A57W/User-Guide-1433592-Page-40.png)
![Input Method 43 Java app You can download and view all installed JAVA games and applications in JAVA menu. Bluetooth Enter the Bluetooth screen to activate the Bluetooth for more operations. Bluetooth operates as below: ˄1˅ Press [option key] in device list screen ˄2˅ Select Devices you wanted ˄3˅ Input password ˄4˅ Choose next (input the same password to the corresponding devices) ˄5˅ Display ok ˄6˅ Select a document you want to send ˄7˅ Press [option key], select Send via>Bluetooth ˄8˅ Select Device you wanted ˄9˅ Choose ok Bluetooth technology enables wireless connections between electronic devices within a range of 10 meters (33 feet). A Bluetooth connection can be used to send images, videos, texts, business cards, calendar notes, or to wirelessly connect to devices using Bluetooth technology. When Bluetooth technology starts, the distance between phone and Bluetooth device will greatly influence transfer speed and the quality of talk. Activate Bluetooth: selet o/off. o aepts other devices to connect to your phone; off rejets other devices to connect to your phone. My phoe’s isibility: select Shown to all or Hidden to decide if the phone can be searched by other devices.](https://usermanual.wiki/Haier-Telecom/1101HW-A57W/User-Guide-1433592-Page-43.png)