Hanbit Electronics HSD329TN USB STORAGE DEVICE User Manual HSD329TN Manual Eng 031001
Hanbit Electronics Co., LTD. USB STORAGE DEVICE HSD329TN Manual Eng 031001
UserManual.wiki
>
Hanbit Electronics
>
HSD329TN User Manual
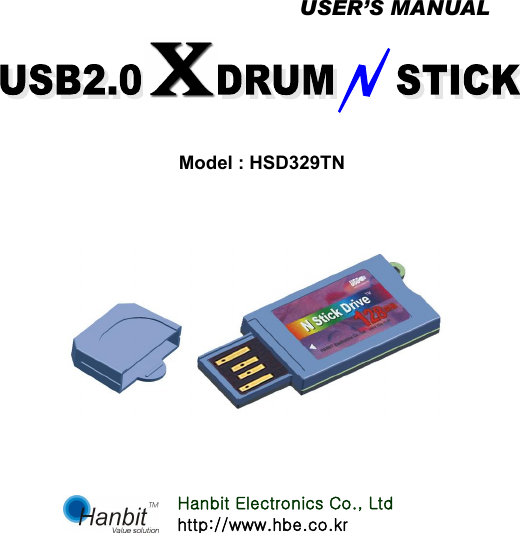
USERS MANUAL
Navigation menu
Upload a User Manual
Namespaces
Wiki Guide
HTML
PDF
Info
Views
User Manual
Discussion / Help
Navigation

![Hanbit Electronics Co.,Ltd. All rights reserved Rev.5.0, 2003-09-03 Page 4/4 www.hbe.co.kr ■ How to Use the USB2.0 XDRUM N Stick You can use the USB2.0 XDRUM N Stick right away simply by inserting it in the USB port of your PC. (WindowsME/2000/XP and beyond, excluding Windows98/SE, will automatically recognize the USB2.0 XDRUM N Stick) For users with Windows98/SE O/S, the Windows98/SE driver must first be installed. Please refer to page 7 for driver installation. Should you wish to use the security or partition functions, install the USB2.0 XDRUM N Stick.EXE program. Please refer to page 9. For more information about USB, visit http://www.usb.org.faq/. ■ How to Use the USB2.0 XDRUM N Stick with Windows When you insert the USB2.0 XDRUM N Stick in your USB port, Windows will automatically recognize it as a “portable storage device” and designate the drive accordingly. Go to “My Computer”, and the [portable disk] icon will appear. When the [safe hardware removal] icon is displayed on the [task bar], you can double-click it to remove the device safely.](https://usermanual.wiki/Hanbit-Electronics/HSD329TN/User-Guide-374930-Page-4.png)
![Hanbit Electronics Co.,Ltd. All rights reserved Rev.5.0, 2003-09-03 Page 5/5 www.hbe.co.kr To confirm whether the device is installed properly, choose “Start-> Settings-> Control Panel-> System-> Hardware”, then double-click on the device manager to display the [Universal Serial Bus] icon. Double-click that icon to see if the “USB mass storage device” is installed. It is recommended to use USB2.0 XDRUM N Stick compatibly with “Hi-Speed USB 2.0”. If you connect the USB2.0 XDRUM N Stick to a “non Hi-Speed USB 2.0 Hub”, Windows will display a warning message as shown below. You may use the device without changing any settings, but reading/writing speed will slow down. Remove the USB2.0 XDRUM N Stick In order to remove the device safely, double-click the [safe hardware removal] icon, remove device, then choose “Stop-> OK-> OK-> Close”.](https://usermanual.wiki/Hanbit-Electronics/HSD329TN/User-Guide-374930-Page-5.png)
![Hanbit Electronics Co.,Ltd. All rights reserved Rev.5.0, 2003-09-03 Page 9/9 www.hbe.co.kr ■ How to Use the XDRUM N Stick Utility Program The XDRUM N Stick provides functions such as password protection, partitioning, and booting setup alteration. How to Install the XDRUM N Stick Utility Program Follow the installation guide: 1. Execute “XDRUM N Stick.EXE” from the driver CD enclosed with the product. 2. When the Installation Wizard appears, click [Next>]. 3. Installation Wizard begins to copy and install required files and programs. Click “Yes”, and then “Next”.](https://usermanual.wiki/Hanbit-Electronics/HSD329TN/User-Guide-374930-Page-9.png)
![Hanbit Electronics Co.,Ltd. All rights reserved Rev.5.0, 2003-09-03 Page 10/10 www.hbe.co.kr 4. Clicking on “OK”, to completes installation of the utility program. 5. Check if the [XDRUM N Stick] folder is displayed in the [program] folder of the [Start] menu. Note: When the “XDRUM N Stick” is inserted into the USB port, a key-shaped program execution icon will appear in the lower right corner of the startup screen. Click that icon to execute the utility program.](https://usermanual.wiki/Hanbit-Electronics/HSD329TN/User-Guide-374930-Page-10.png)
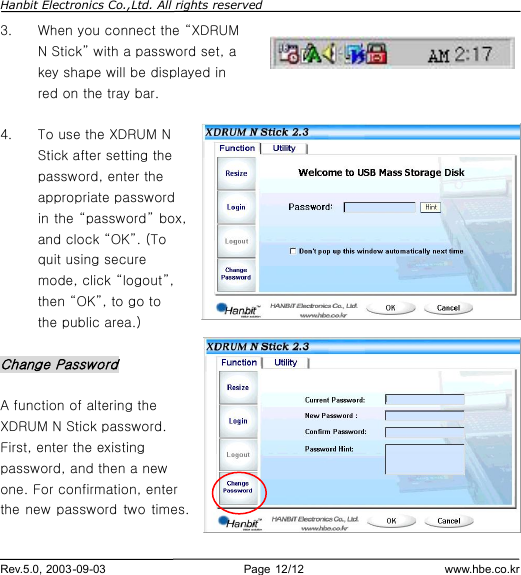
![Hanbit Electronics Co.,Ltd. All rights reserved Rev.5.0, 2003-09-03 Page 11/11 www.hbe.co.kr ■ How to Use the XDRUM N Stick Utility Program Set/Check Password The XDRUM N Stick allows the setting or alteration of a [password]. In order to set a password for the first time, choose “resize” as displayed in the following picture. If a password is already set, a message will appear advising you to enter that password. If you want to alter the password, follow this procedure. 1. Double-click the key-shaped icon on the tray bar in the lower right corner of the startup screen to execute the XDRUM N Stick utility. 2. To enter secure mode, select “Public Area + Security Area”, enter the password you wish to use in the “New Password” box, then click “OK”.](https://usermanual.wiki/Hanbit-Electronics/HSD329TN/User-Guide-374930-Page-11.png)
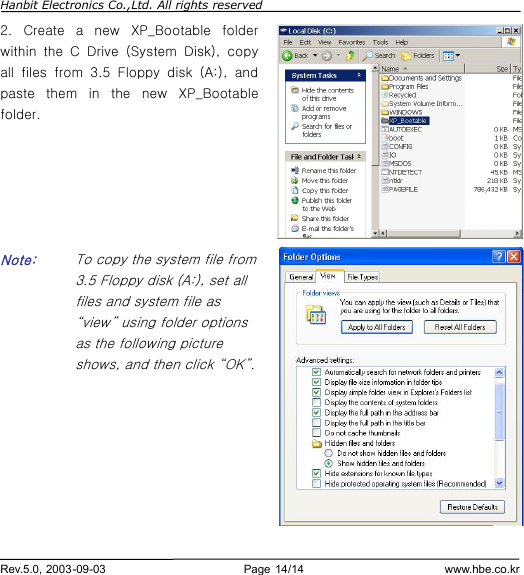
![Hanbit Electronics Co.,Ltd. All rights reserved Rev.5.0, 2003-09-03 Page 13/13 www.hbe.co.kr How to Use the Boot Up Function [Copy System File] This function is used to enable you to boot your computer with the USB disk. Choose [Utility], and the following window will pop up. USB Flash Disk supports USB FDD, ZIP or HDD booting functions. However, you can use this function only when your PC’s mainboard supports it. How to Make a Boot Up Floppy for Win XP [Copy System File] 1. Click 3.5 Floppy disk (A:) in the Win XP “My Computer” menu, choose “Format”, then “Make DOS Starting Disk”, and click “Start”.](https://usermanual.wiki/Hanbit-Electronics/HSD329TN/User-Guide-374930-Page-13.png)
![Hanbit Electronics Co.,Ltd. All rights reserved Rev.5.0, 2003-09-03 Page 15/15 www.hbe.co.kr 3. Choose the [Utility] index from the XDRUM N Stick utility, and click “USB ZIP”, then “OK”. Note: This function may not be supported depending on the O/S that you use. When your O/S does not support this function, utility index window wont be activated. (available only on Win98/XP) Note: To use this booting function on Win XP, BootDisk folder should be located at C Drive. Note: This function is not supported in Windows ME or Windows 2000. Note: Not all computers support the USB Flash Disk. When your computer does not support it, contact the PC or mainboard manufacturer. In this case, you should set a proper [boot sequence] compatible with your USB Flash Drive in the mainboard BIOS Setup.](https://usermanual.wiki/Hanbit-Electronics/HSD329TN/User-Guide-374930-Page-15.png)