Hanbit Electronics STORIUM USB Drive User Manual Manual En3 0
Hanbit Electronics Co., LTD. USB Drive Manual En3 0
users manual
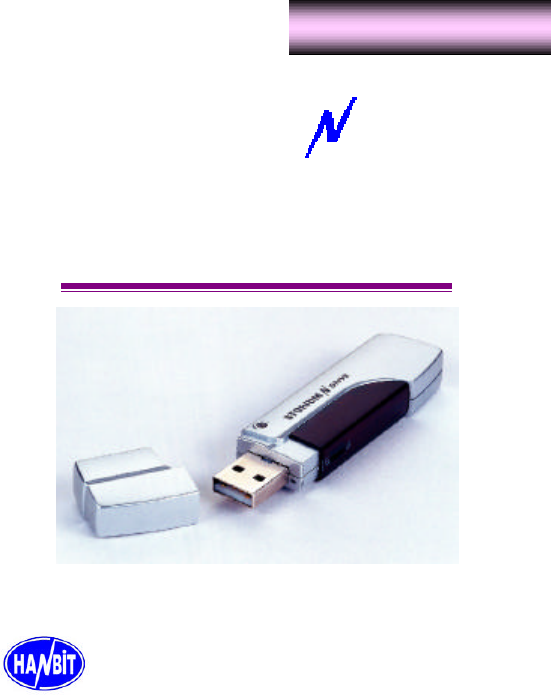
USB STORiUM DRIVE
HANBiT Electronics Co., LTD. [www.hbe.co.kr]
Portable Flash Memory Disk Drive
USER’S MANUAL

[ INDEX ]
1. Installation for Windows98 ……...…………………………..3
2. Format …………………..………………………………………5
3. Password …………………………….……………………….. 6
4. Change password …………………………………………….8
5. USB STORiUM N Drive Specification …………………….. 9
6. Warranty Card …………………………………………………10
■
Contents
Please check whether the package contains following items !
1. USB STORiUM N DRIVE x 1EA
2. Installation CD-ROM x 1EA
3. Neck Strap x 1EA
4. User’s Manual & Warranty Card x 1EA
.
1. Driver Installation
1.1 Windows2000/ME/XP,Linux 2.4X,Mac OS9.X/Mac OS X operating system:
Just insert STORiUM NDrive into USB port, then system will install the hardware
automatically.
* Notice
* Please wait for 3~5minutes until a pointer of a mouse is stopped before you insert
STORiUM N Drive into USB port or remove it from USB port.
When you insert STORiUM NDrive into USB port before the pointer of mouse is
stopped, the functions of STORiUM NDrive would be damaged.
* The write protect switch must be on the "open" position in all procedures to install
the STORiUM NDrive.
1.2 Installation Method for Windows 98.
* Installation Method 1.
The procedures to install before plugging STORiUM NDrive into USB port.
1.2.1 Please insert your STORiUM NDriver CD,then you can find the folder named
"Win98DRIVE" in the folder named “N DRIVE” and double click the "DrvSetup” file
required for installation.
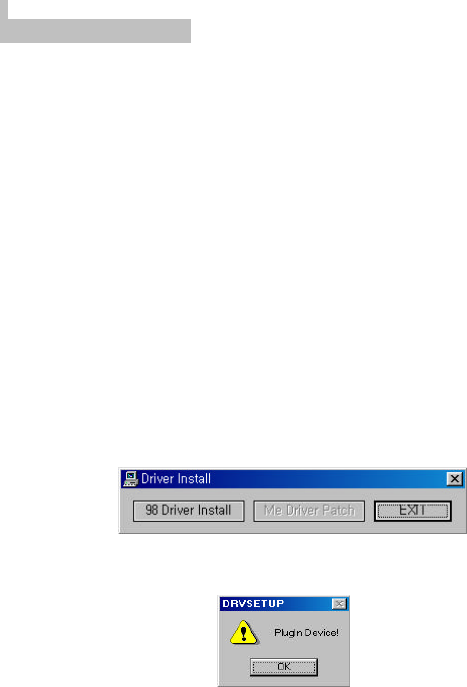
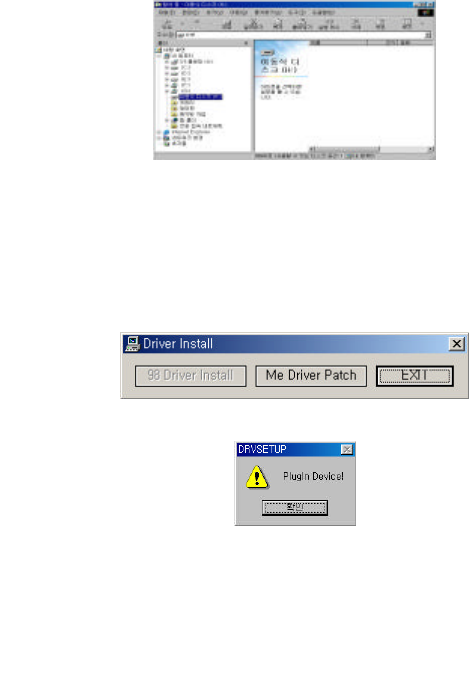
1.2.2 Click "98 Driver Install" button.
1.2.3 Press “OK”button to continue.
1.2.4 Plug USB STORiUM NDrive into the USB port.
1.2.5 Press again “OK”button on the “PlugIn Device" wizard and then click “EXIT”button
on the “Drive Install" wizard.
1.2.6 Now all the drivers have been installed into your system, you should see the
Removable Disk icon appearing in the window when you activate "My Computer"
icon.
* Installation Method 2.
The procedures to install after plugging STORiUM NDrive into USB port.
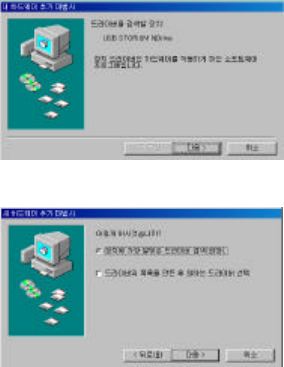
1.2.7 Plug STORiUM NDrive into USB port,then add new hardware wizard occurs.
1.2.8 Select “Search for the best driver for your device.(Recommended)” and click
“Next”button.
1.2.9 Check “Specify a location”, click “Browse..” and select the driver folder named
"Win98DRIVE" in the folder named “N DRIVE” from driver CD.
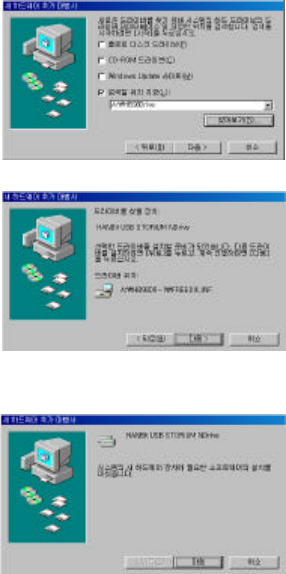
1.2.10 After searching driver, click “Next” button.
1.2.11 When Windows has finished the installation of STORiUM NDrive, the wizard as
below appears. If installation is to be continued,press “Finish”button.
1.2.12 Open “My Computer” to check the new storage exist. "Removable Disk"will appear
in "My Computer"automatically,then you can operate USB STORiUM NDrive just as
your local hard disk.
1.3 How to patch security function for Windows ME.
* Please follow the procedures below to patch security function, before plugging the
USB STORiUM NDrive into USB port.
1.3.1 Please insert STORiUM NDrive CD,then you can find the folder named
"WIN98DRIVE" in the folder named “N DRIVE” and double click "DrvSetup”file.
1.3.2 Click "Me Driver Patch" button.
1.3.3 Press “OK” button to continue.
1.3.4 Please insert USB STORiUM NDrive into USB port again for using it when a pointer
of a mouse is stopped(3~5minutes),after taking USB STORiUM NDrive out.
2. Format Function
* Recommend to do format the USB STORiUM NDrive when it is used for the first time.
* Method of format is same in all OS supported including Windows98.
* Method to reset the password when it is lost.
(When the data storaged is deleted, the password will be set up ‘0000’ automatically)
2.1 Insert the STORiUM NDrive into the USB port.
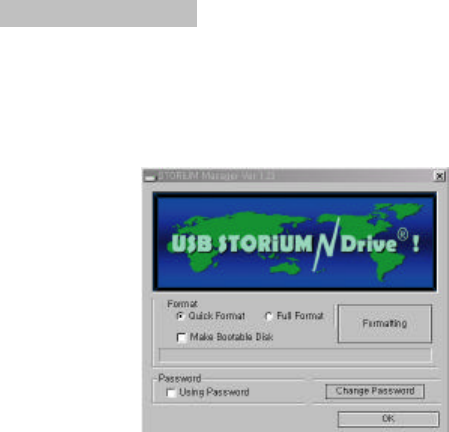
2.2 Find the file “Manager” from directory “\\ N Drive\STORiUM Manager” of the attached CD-
ROM, and then click it. The wizard as below appears.
2.3 Click “Quick Format” or “Full Format” and press “Formatting” button.
(It takes a lot of time to format if you click “Full Format”)
- Quick Format : format only the data block of memory in the STORiUM NDrive.
- Full Format : format the all data block of memory in the STORiUM NDrive.
* Note: Recommend to do format using the file “Manager” from directory “\\ N
Drive\STORiUM Manager” of the attached CD-ROM.
2.4 You can use the STORiUM NDrive normally, after finishing format’s execution.
(The password will be set up ‘0000’ automatically, after formatting)
3. Password Function
3.1 Insert the STORiUM NDrive into the USB port, after finishing format’s execution.
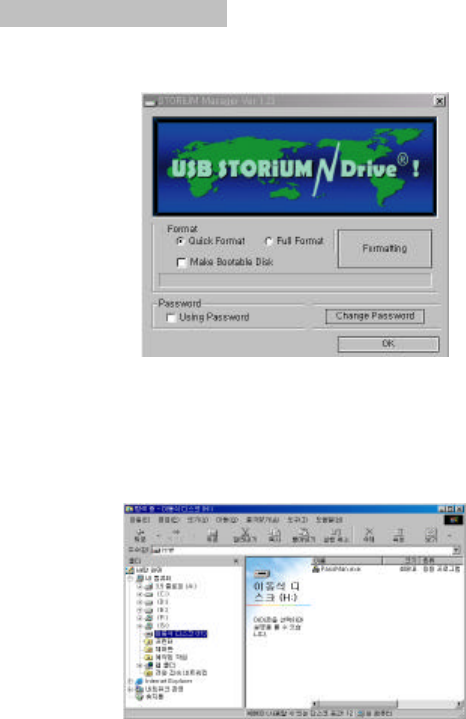
3.2 Execute the file “Manager” from directory “\\ N Drive\STORiUM Manager” of the
attached CD-ROM.
3.3 lf you want to use password function, click “Using Password” and press “O.K”
button.Unplug the STORiUM NDrive from the USB port and plug it again to the USB port
of the PC after waiting for 3~5 minutes until the icon is not worked.
3.4 You should see the Removable Disk icon appearing in the window when you activate
"My Computer"icon after plugging the STORiUM NDrive into the USB port.
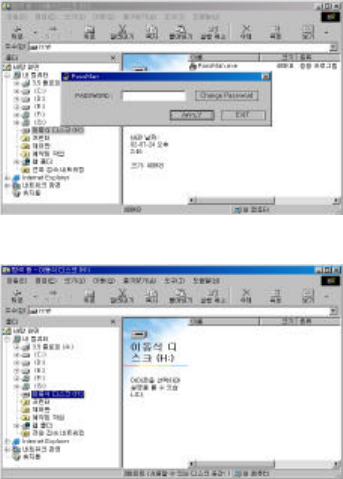
3.5 To input the password “0000”, the screen,executed “PassMan”, is displayed as below.
Prass “APPLY ”button to continue.
(The basic passwordl be set up ‘0000’ automatically)
3.6 If you have followed the all procedures, you can easily access the STORiUM NDrive after
inputting the password “0000”.
4. Changing Password
4.1 Plug the STORiUM NDrive into the USB port for changing password.
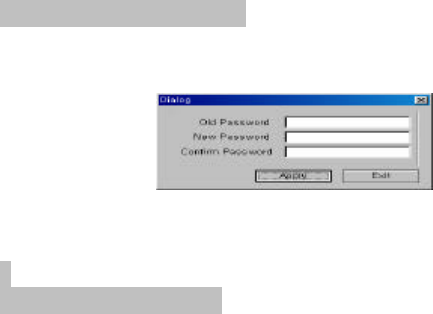
4.2 Execute “PassMan” on the Removable Disk icon and the password ,set up
already,can be changed by clicking “Change Password”.
* Old password : Input the password, set up already.
* New Password : Input a new Password you want to change.
* Confirm Password : Confirm the new password again.
5. Using booting disk
* Note (For Window98) : Do click “Make Bootable Disk” for using the function of booting
disk when the question for option to make booting appears during setting Windows
98 up.
5.1 Just double click the file “Manager” under the directory “N Drive\STORiUM
Manager” in the attached CD-ROM.
(The wirte protect switch should be located to the “open”position)
5.2 Click “Make Bootable Disk” and press “Formatting” button at the right of wizard
after “ STORiUM Manager” wizard appears.

5.3 Reboot the system after executing format. Find “BIOS Features” on screen
occurred after pressing “Delete” on your keyboard and select “USB-ZIP” in
“Boot Device” of BIOS Features.
* Booting disk can be used on PC suppored USB-ZIP mode in “Boot Device” of BIOS
Features.
8 Caution : Do not select “Using Password” on the “STORiUM Manager” wizard during
the making the booting disk.
6. Write Protect Function
* The write protect function is located on the left of the STORiUM N Drive.
* Open : You can read and write data, if it is located “open” position.
* Lock : If it is located “open” position, you can only read data, but not wirte.
* Caution: How to remove the USB STORiUM N Drive
safely
* Unplug the STORiUM N Drive from the USB port after the pointer of mouse is not
stopped.
* Windows 98 : Do not unplug the STORiUM N Drive from the USB port while its LED
is blinking.
* Windows ME, 2000 : Unplug the STORiUM N Drive from the USB port after executing
“Removable Device” located on the bottom of the right in the Windows.
* Mac : Unplug the STORiUM N Drive from the USB port after throwing it away to the
trash box.
* Linux : Unplug the STORiUM N Drive from the USB port after executing “Unmount”
commend

7. USB STORiUM N Drive
Capacity 16, 32, 64, 96, 128, 192, 384, 512MB
Read Performance 942KB/sec
Write Performance 885KB/sec
Hardware IBM PC / Notebook / Mac etc…
PC System with USB Port
Available Operating System Windows 98 / Me / 2000 / XP / CE
Linux OS, Mac OS 9.0 or Higher
Drive Support Win98 Install driver / Win ME Patch
driver ( Drive : Special support )
Power Supply No external power supply
USB power supply (4.5V to 5.5V)
Data Retention Over 10 years
LED Indicator Light LED fast mode for Transmitting and
Receiving data ( reading / writing )
USB Interface USB data transmission with USB 1.1
Operating Temperature 0 to 70°C
Storage Temperature -10°C to 125°C
Suspend Current < 350uA ( Max :<500uA )
Operating Current < 31mA

Warranty Card
Customer Card
Product Name : Model :
Purchasing Date : . . . Customer Name: Telephone:
E-Mail :
Address:
Purchasing product is made through a close inspection, quality control and formal approval.
HANBIT Elec. Co., LTD. put into a service such as below conditions as the Compensation Provision
for Consumer Damage when the product have defects.
1. Limited Quality Warranty
A. Period : Within one year from purchasing date
B. HANBIT Elec. Co., LTD as a manufacture of USB Storium Drive guarantee
s this hardware against
defects in material and workmanship for a period of one year from original retail purchase.
C. This Limited Quality Warranty does not cover loss, damage, which occur in shipment to or from
the reseller, improper installation, maintenance, misuse, neglect, repair, improper environment,
extreme temperature, electrical power failure, surges, other irregularities, salespeople, modification
by anyone who is not authorized.
D. More than one year for product does not get the guarantee by rules.
2. No compensation/ compensation Service
1) No compensation Service
A. Content of compensation for damage (within 1 year from purchasing date) :
Need to repair due to a functional defect in the normal state within 10 days after purchasing.
B. Exchange or Repayment : Need to repair for the efficiency or functional defect in the normal
state within 1 month after purchasing.
C. Product Exchange : Occurrence defects until 3 times as the same reason within 1 month.
2) Compensation Service
A. Functional defects exceeded the period of validity quality warranty.
B. Distortion or crack by shock.
C. Modification by anyone who is not authorized.
D. Irregularities or Use other non-standard parts
E. natural disaster
F. Obvious fault by purchaser
※ Note
In order to get a service with guarantee, Do show this card certainly.
Do not reissue this card.
HANBtT Elec. Tel )+82-(0)31-218-1900 www.hbe.co.kr Shopping Mall : www.memorymart.co.kr
1 Year
Limited
Warranty

FCC NOTICE
This device complies with Part 15 of the FCC Rules.
Operation is subject to the following two conditions:
(1)This Device may not cause harmful interference, and
(2) This device must accept any interference received,
including interference that may cause undesired
operation.
Caution: Changes or Modifications not expressly approved by the party responsible for compliance could void the users
authority to operate the equipment.
If the EUT requires accessories such as special shielded cables and/or connectors to enable compliance with emission limits,
the instruction manual for the EUT shall include appropriate instructions on the first page of the text concerned with the
installation of the device that these special accessories must be used with the device. It is the responsibility of the user to use
the needed special accessories supplied with the equipment.
For a CLASS B digital device or peripheral, the instructions furnished the user shall include the following or similar statement
placed in a prominent location in the text of the manual.
Note: This equipment has been tested and found to comply with the limits for a CLASS B digital device, pursuant to Part 15 of
FCC Rules. These limits are designed to provide reasonable protection against harmful interference when the equipment is
operated in a commercial environment. This equipment generates, uses and can radiate radio frequency energy and, if not
installed and used in accordance with the instructions, may cause harmful interference to radio communications. However, there
is no guarantee that interference will not occur in a particular installation. If this equipment does cause harmful interference to
radio or television reception, which can be determined by turning the equipment off and on, the user is encouraged to try correct
the interference by one or more of the following measures:
-- Reorient or relocate the receiving antenna.
-- Increase the separation between the equipment and receiver.
-- Connect the equipment into an outlet on a circuit different from that to which the receiver is connected.
-- Consult the dealer or an experienced radio/TV technician for help.