Handheld Group 0112070926724 Rugged Tablet PC User Manual Tablet PC
Handheld Group AB Rugged Tablet PC Tablet PC
Contents
- 1. User manual part 1
- 2. User manual part 2
User manual part 2

User’s Manual 41
Chapter 3
Installing the
Device Driver
User’s Manual 42
CHAPTER 3 Installing the device driver
ThroughChapter3togofurtherforA7driverinstallationguide,youcaneasilyinstallallrelated
driversifwithoutoperationsystembyyourself.Thedefaultsystemwillincludeoperationsystem
andyoudoneedtoinstallanyofdriversatfirsttimeuse.
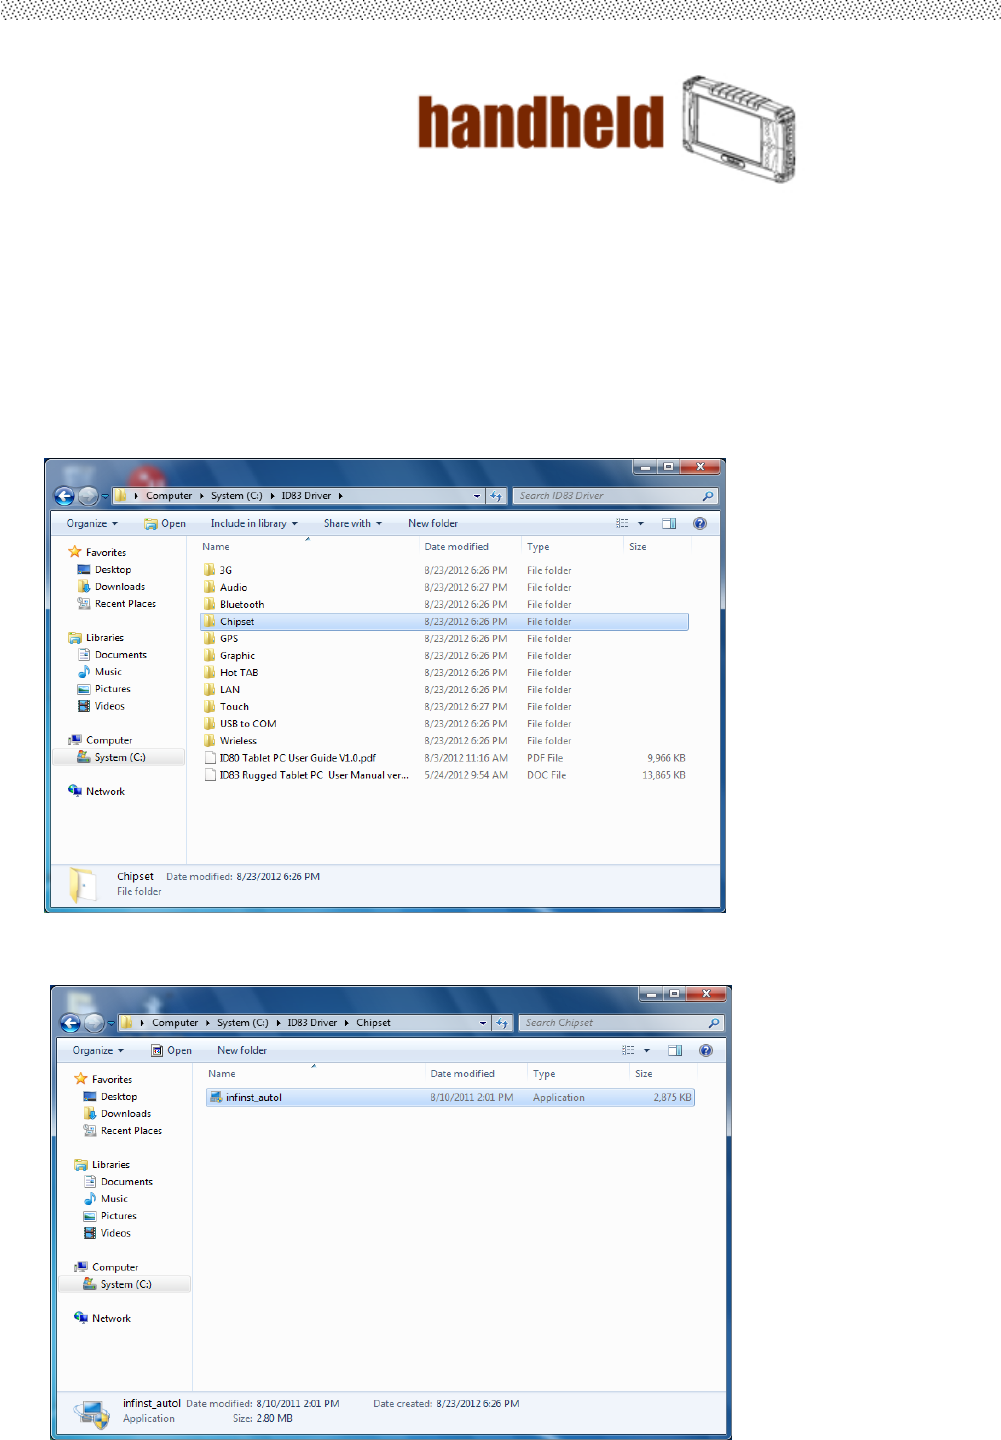
3.1 Chipset Driver Installation
1. Openthefiledocument“Chipset”fromC:\driversfolder.
2. Clickon“infinst_auto”toinstalldriver.
User’s Manual 43
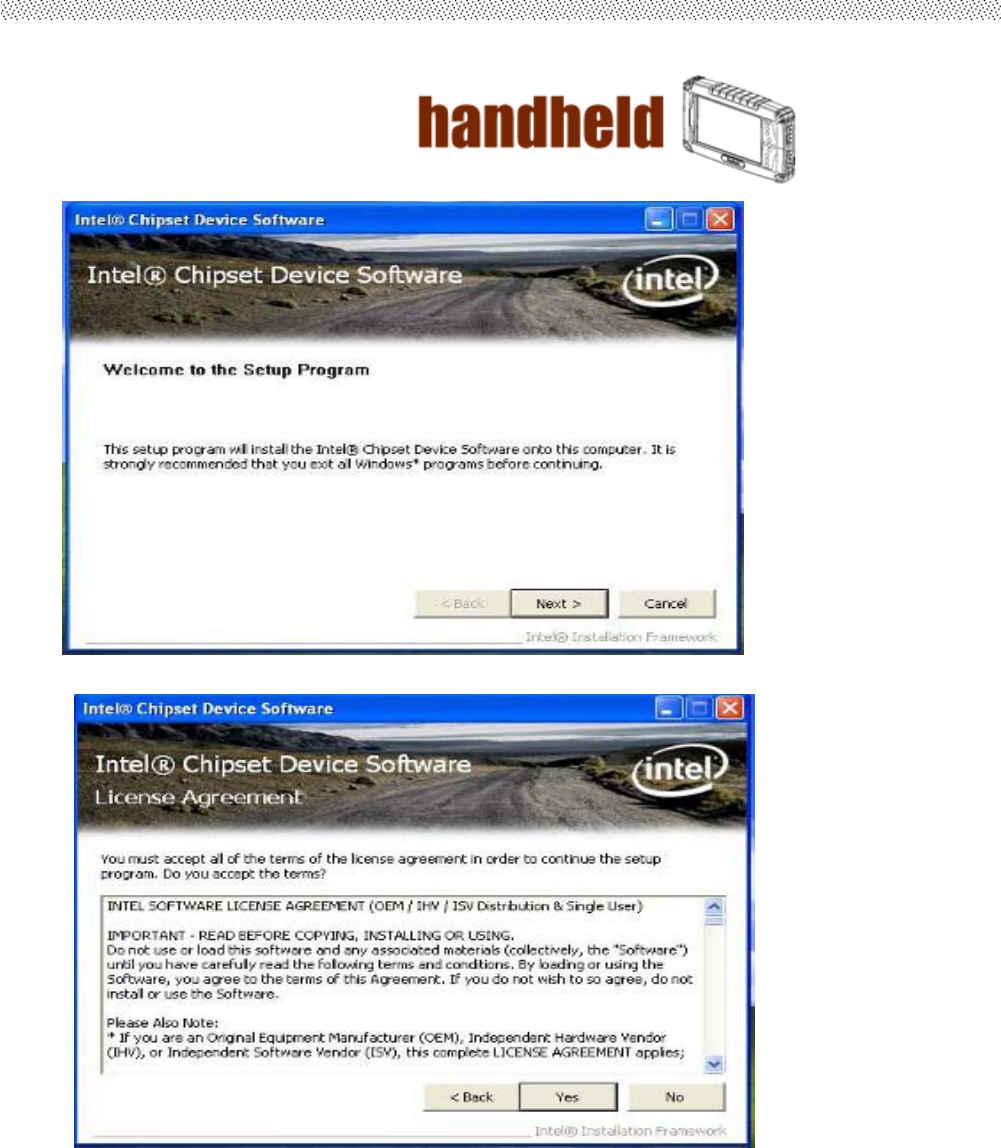
3. Clickon“Next“toinstalldriver.
4. Clickon“Yes“toagreeLicense
User’s Manual 44
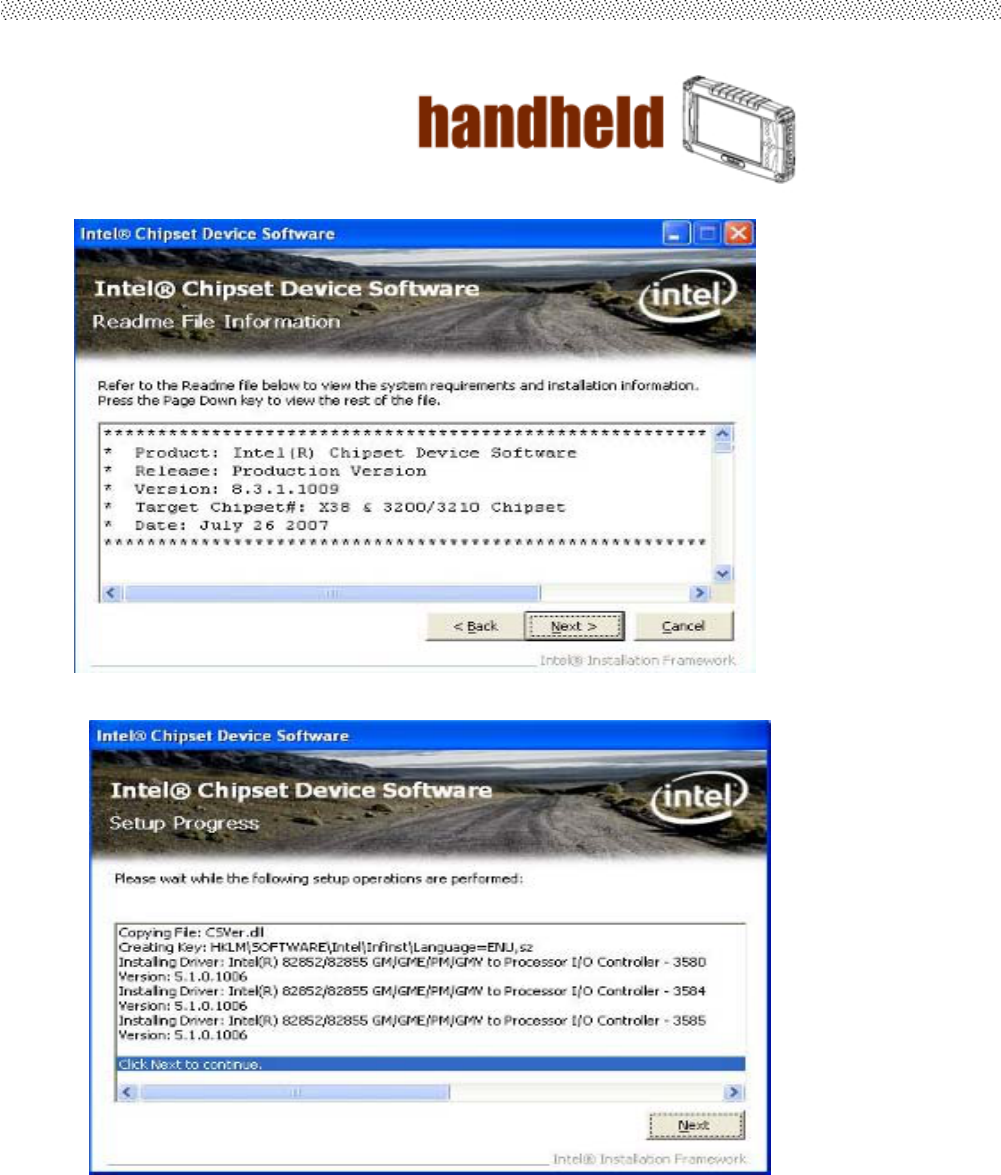
5. Clickon“Next“toinstalldriver.
User’s Manual 45
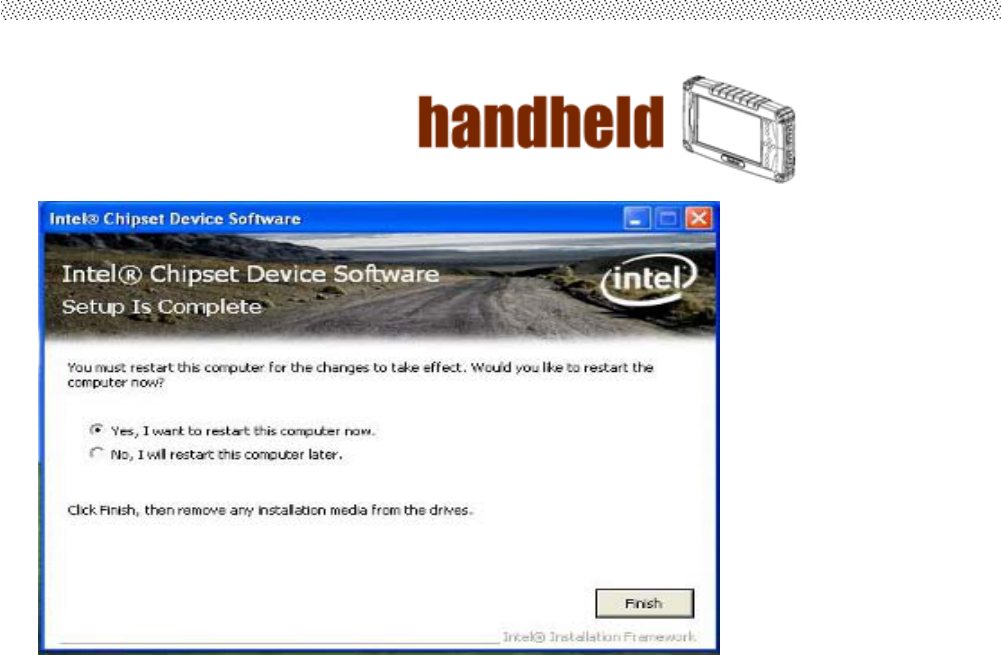
6. Clickon“Yes,Iwanttorestartthiscomputernow“togoon.
User’s Manual 46
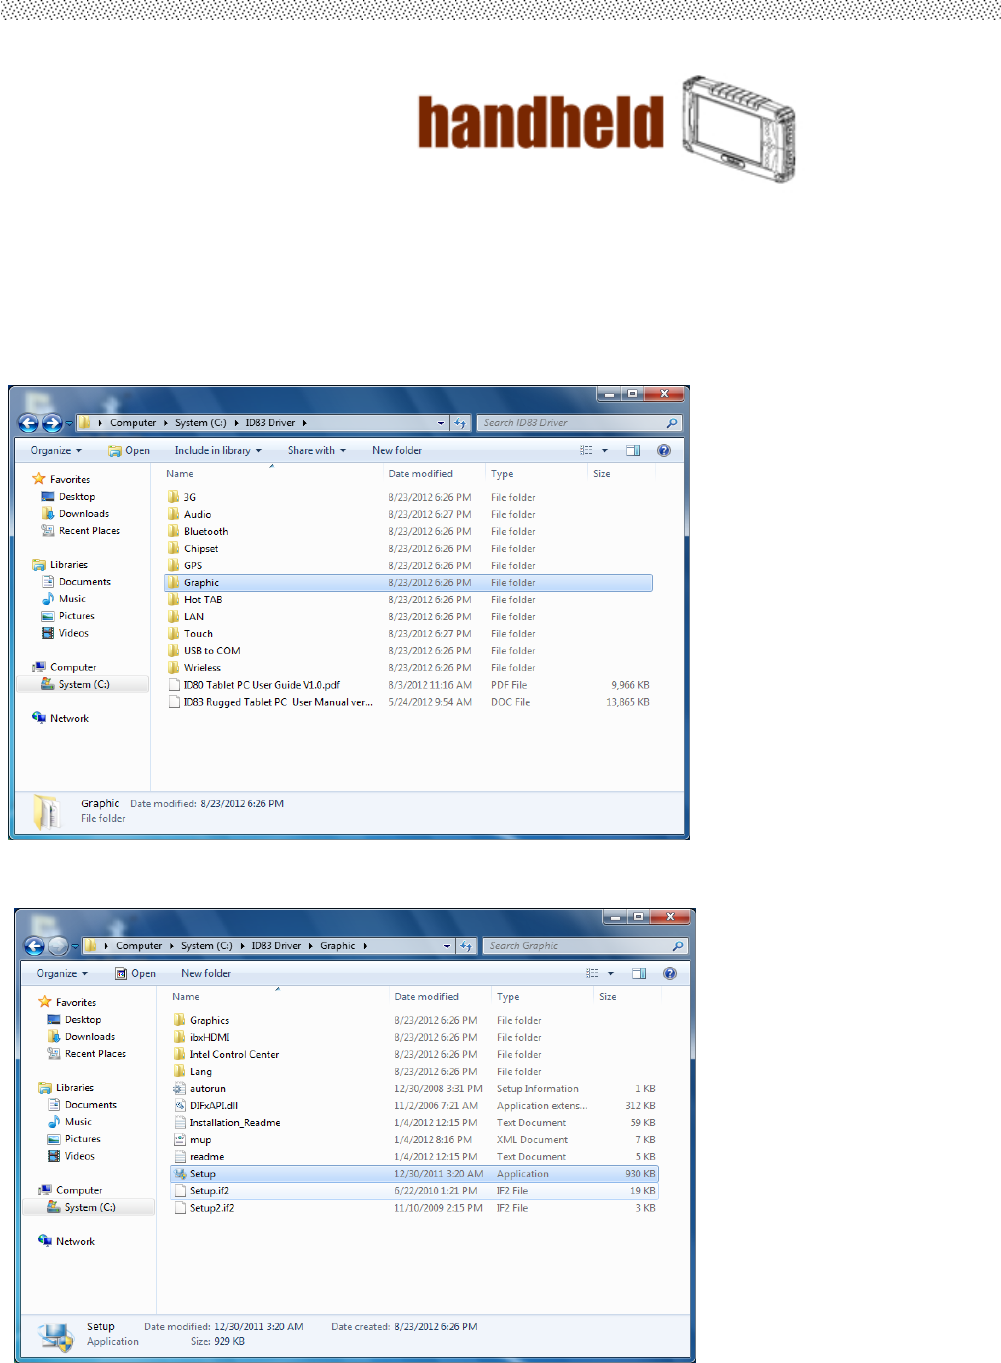
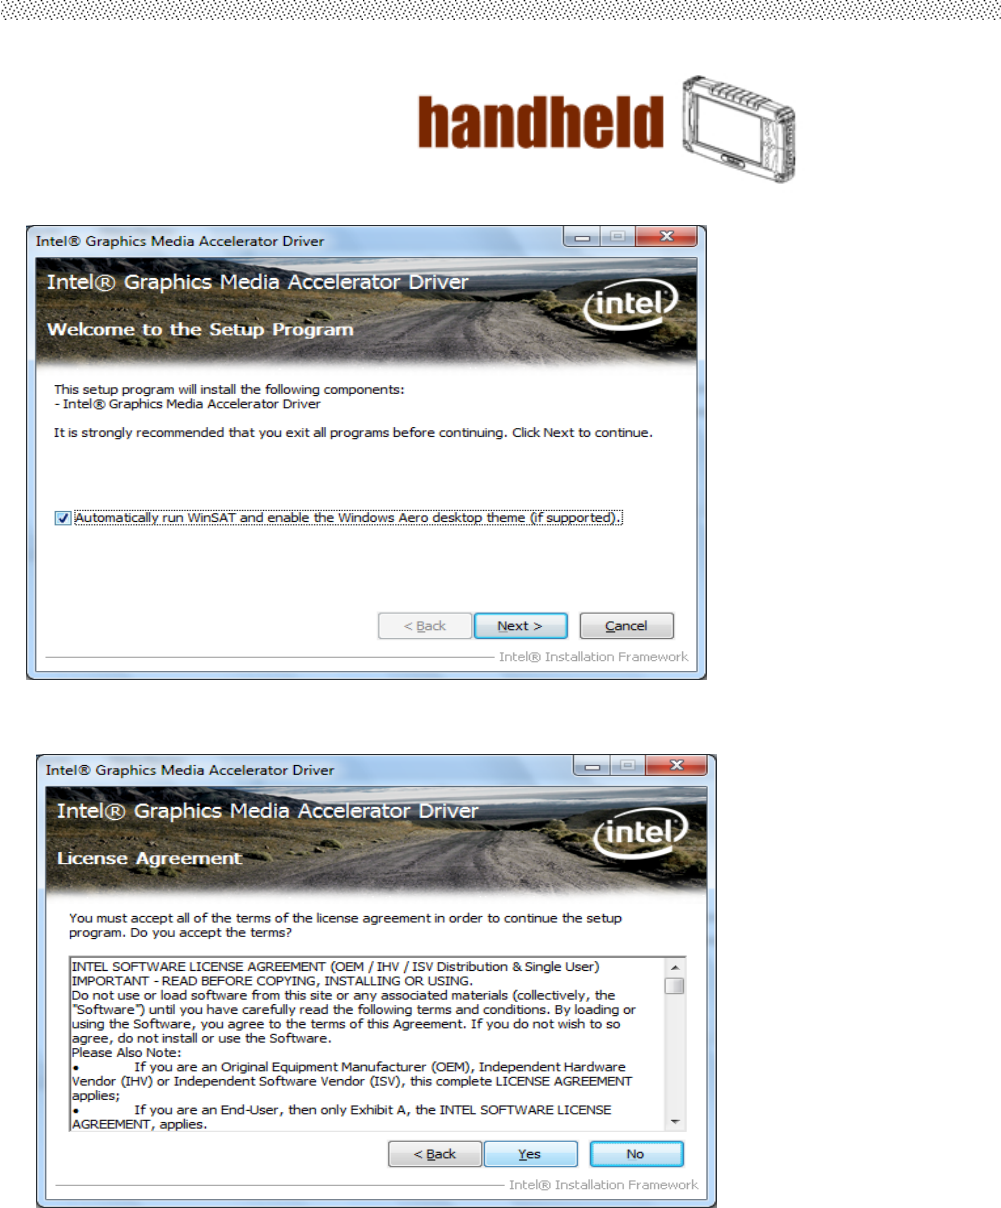
3.2 Graphic Driver Installation
ThesystemisequippedwithIntelNM10Chipset.TheIntelGraphicDriversshouldbeinstalledfirst,
anditwillenable“VideoController(VGAcompatible).Followtheinstructionsbelowtocomplete
theinstallation.Youwillquicklycompletetheinstallation.
1. Openthefiledocument“Graphic“fromC:\driversfolder.
2. Clickon
“Setup.exe”toexecutethesetup.
User’s Manual 47
3. Clickon“Next“toinstallDriver.
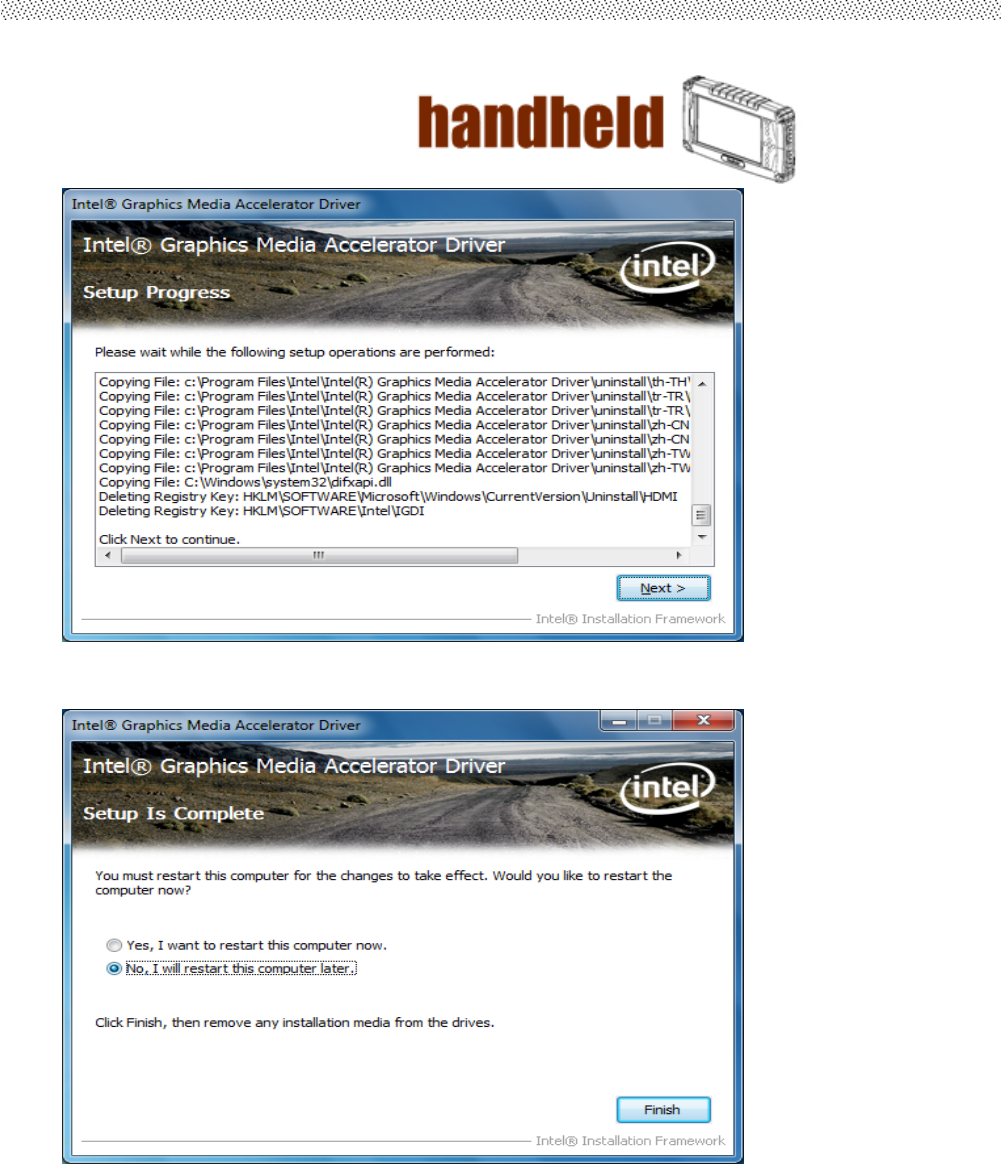
User’s Manual 48
4. Clickon“Yes,Iwanttorestartthiscomputernow“togoon.
User’s Manual 49
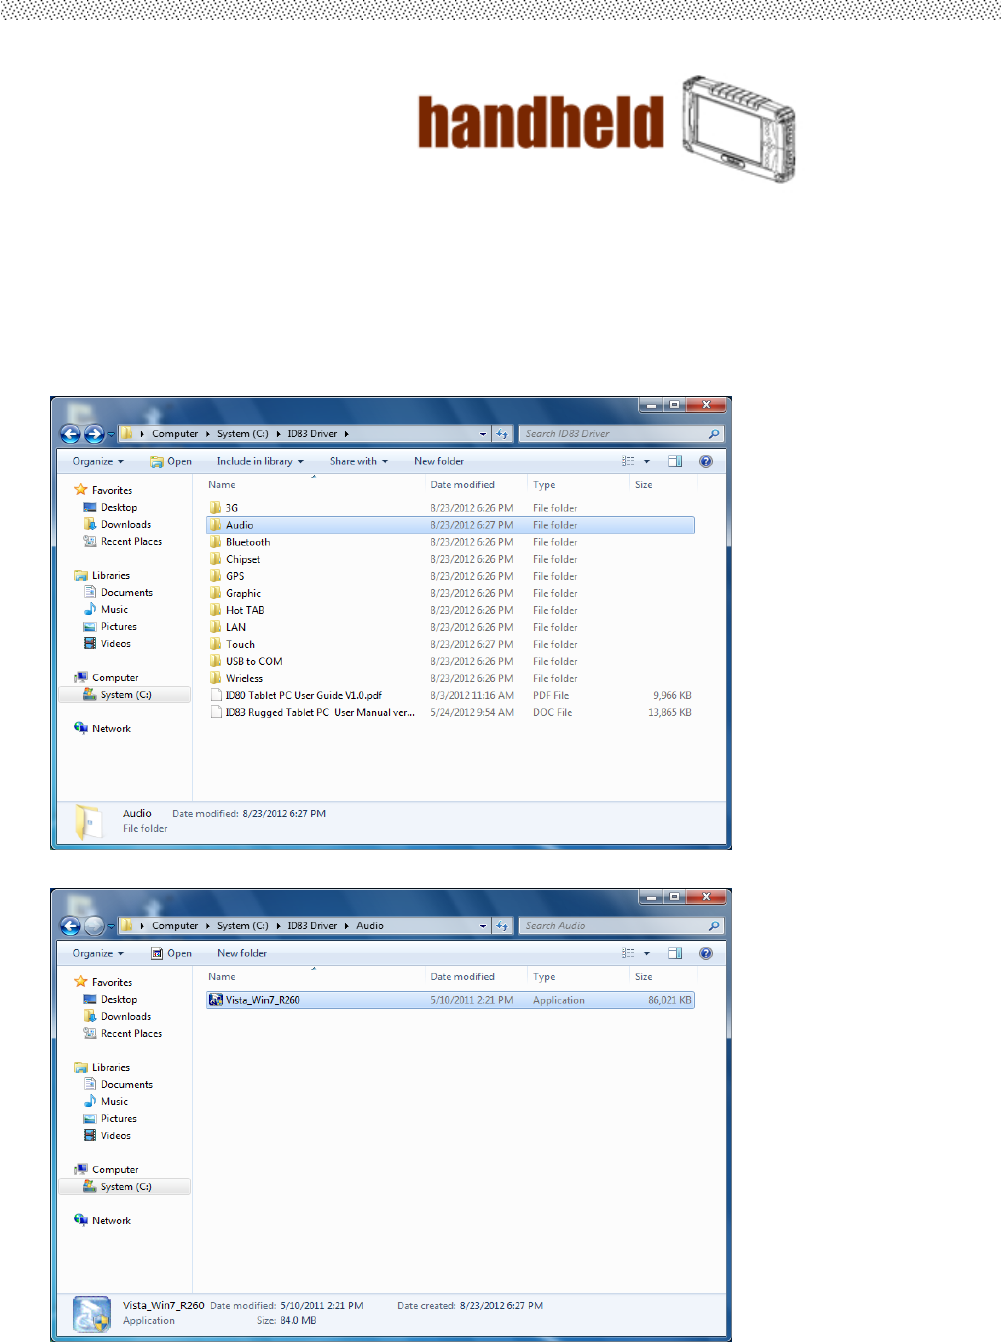
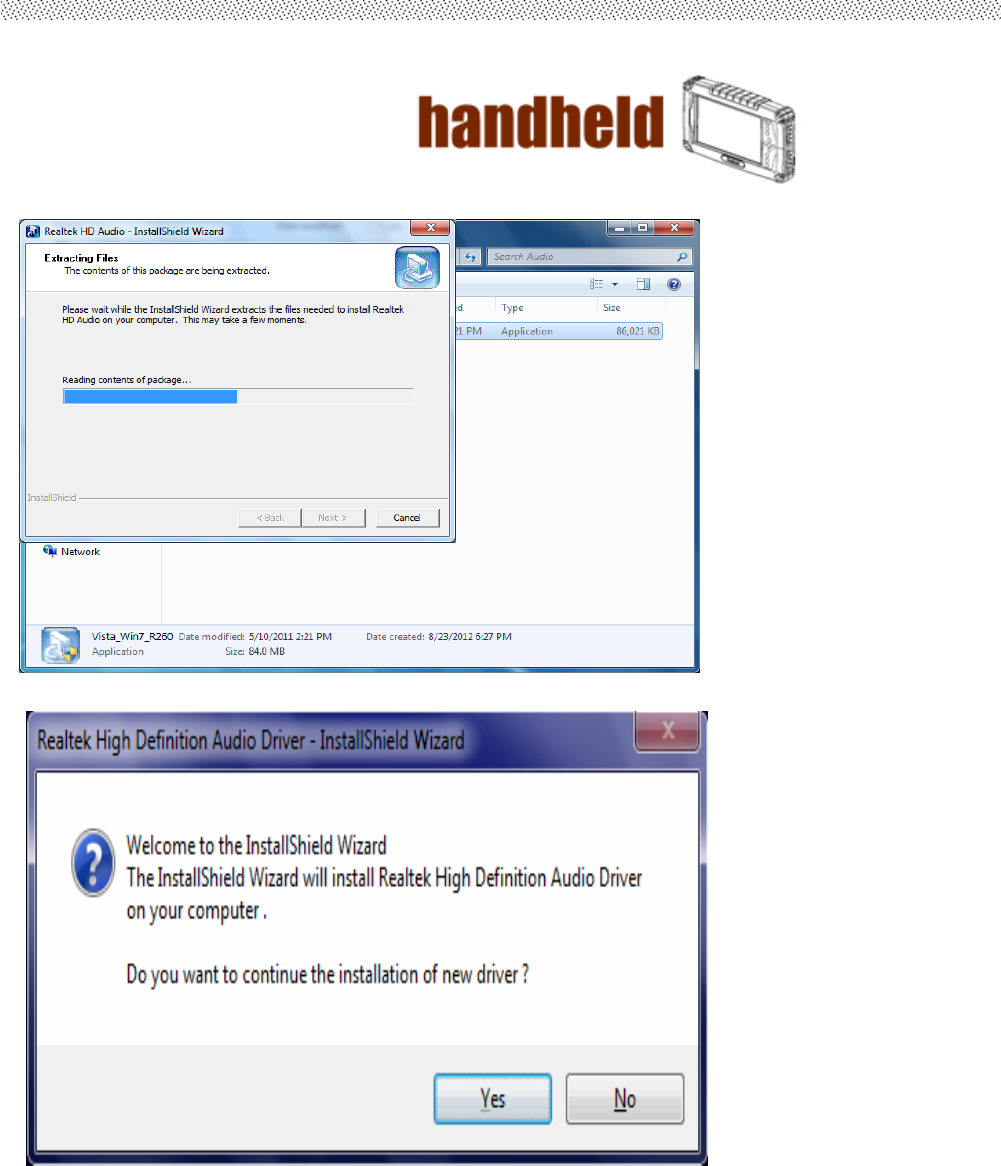
3.3 Audio Driver Installation
ThesystemisequippedwiththeRealtekALC886HDAudioCodecdesignedforPCmultimedia
systems,includinghost/softaudioandAMR/CNR‐baseddesigns.
1. Openthefiledocument“Audio”andclickon“Vista_Win7_R260.exe”fromC:\driversfolderto
executethesetup.
User’s Manual 50
2. Clickon“Next“toinstalldriver.
User’s Manual 51
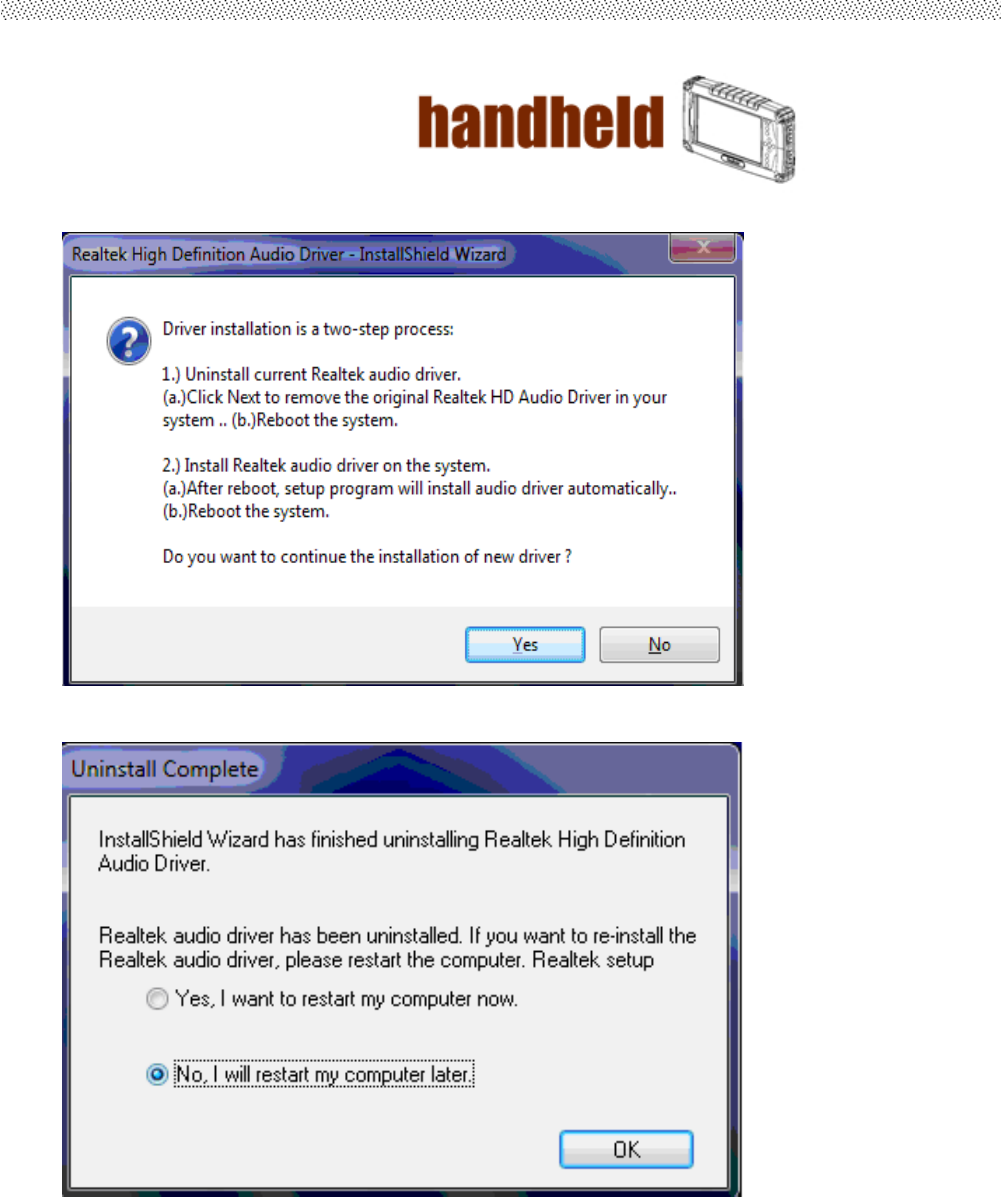
3. Clickon“Yes,tocontinuetheinstallationandthenclickon”Yes,Iwantto
restartmycomputernow”tofinishinstallation.
User’s Manual 52
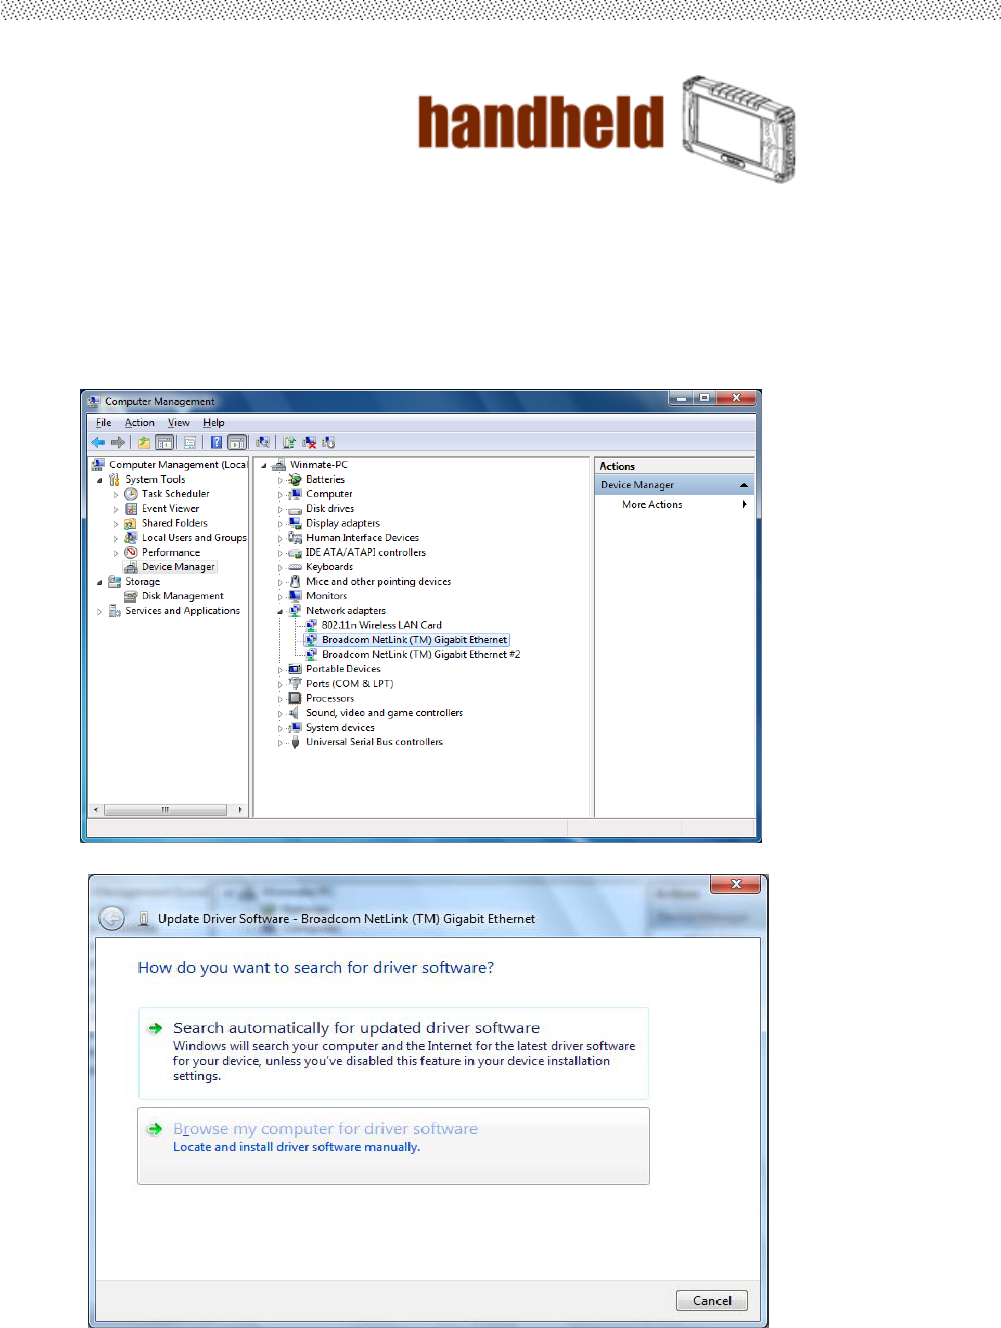
3.4 LAN Driver Installation
FollowthestepsbelowtocompletetheinstallationoftheLANdrivers.Youwillquicklycompletethe
installation.
1. IntheDeviceManagermenu,selectLANdevice,andrightclickselectupdatedriver
2. Openthefiledocument“LAN”.
User’s Manual 53
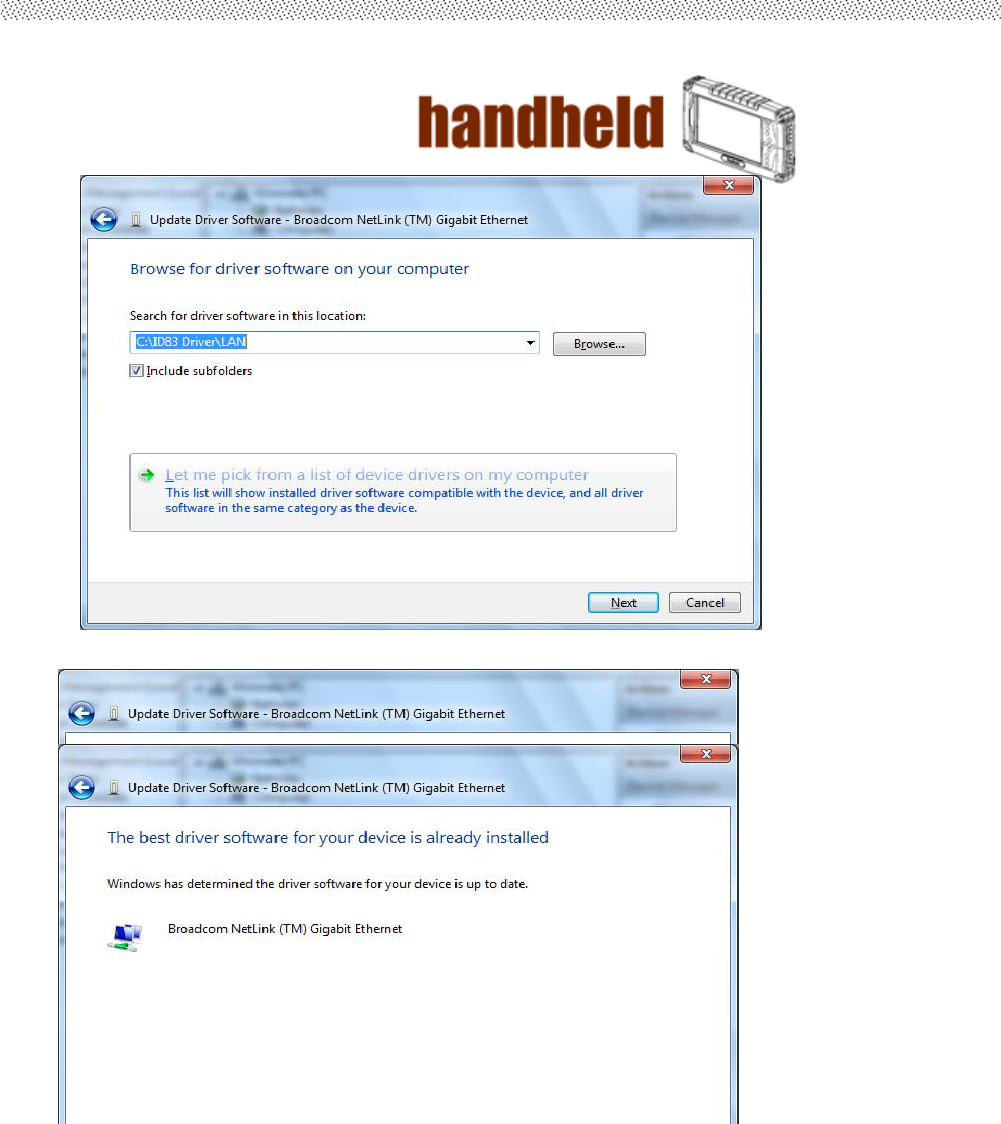
3. Selectthecorrectfileinthedocumentandclickonopentoexecutethesetup.
User’s Manual 54
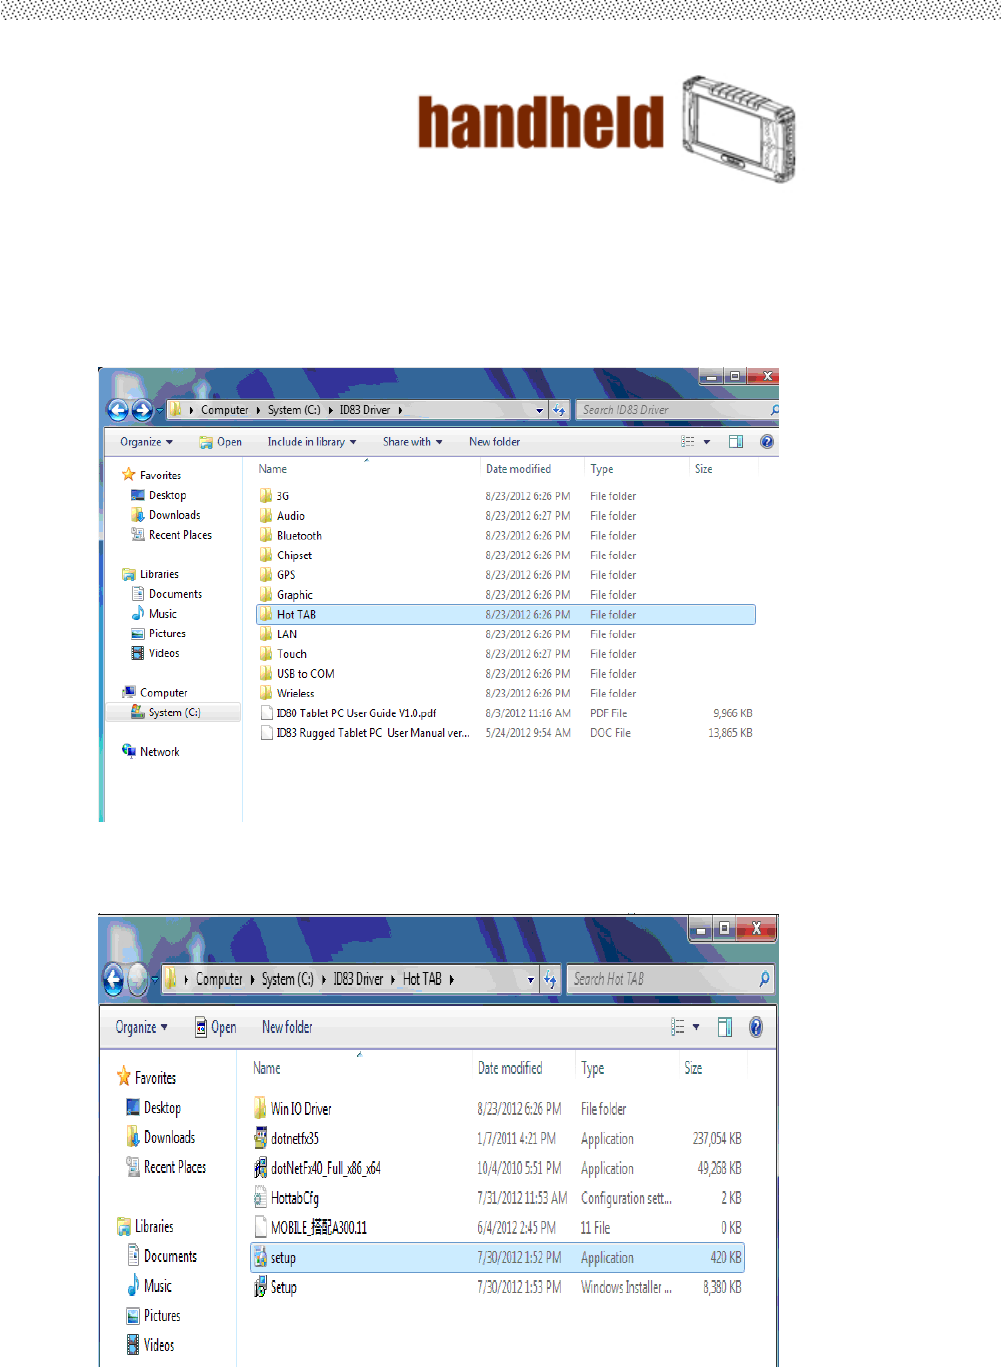
3.5 HotTab Utility Installation
WithourHotTabsoftwareapplicationutility,usercanveryeasytocontrolandprogramtheirusual
hotkeyforhelptheirjob.
1. Openthefiledocument“HotTAB”fromC:\driversfolder.
PresstheSetup.exetoexecutetheinstallationprogram.
2. Clickon“Setup.exe”tostarttotheinstallation.
User’s Manual 55
3. Click“Close”tofinishtheinstallation.
User’s Manual 56
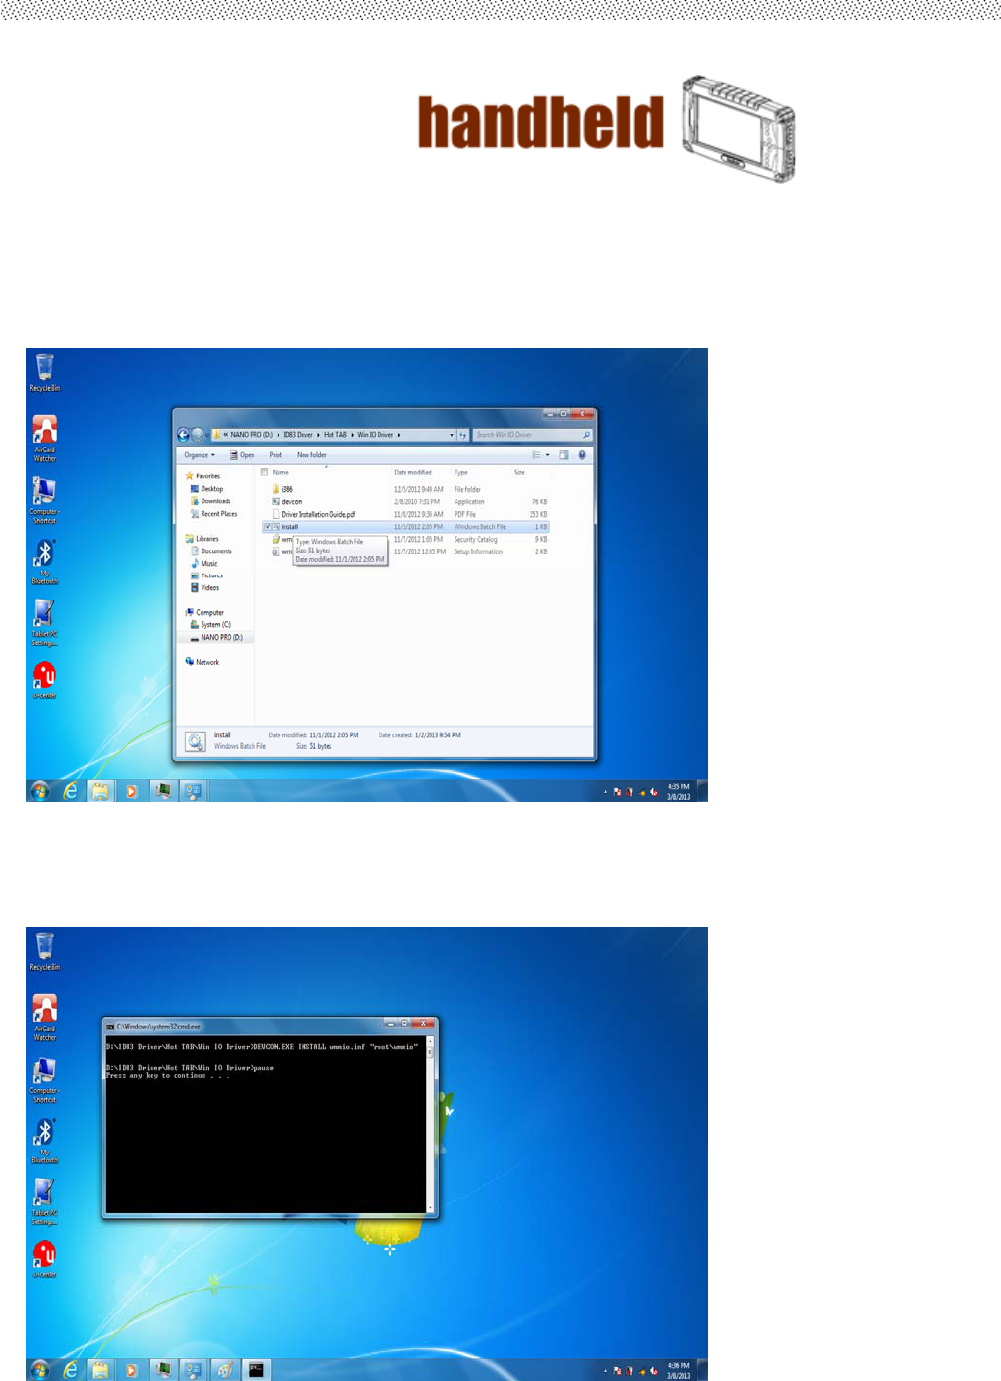
3.6 HotTab Driver Installation
Followingthestepbysteptofinishthedriverinstallation
1. OpenthefiledocumentWinIODriver”fromC:\driversfolder.
PresstheInstall.battoexecutetheinstallationprogram.
2. Pressanykeytocompletethedriverinstallation.
User’s Manual 57
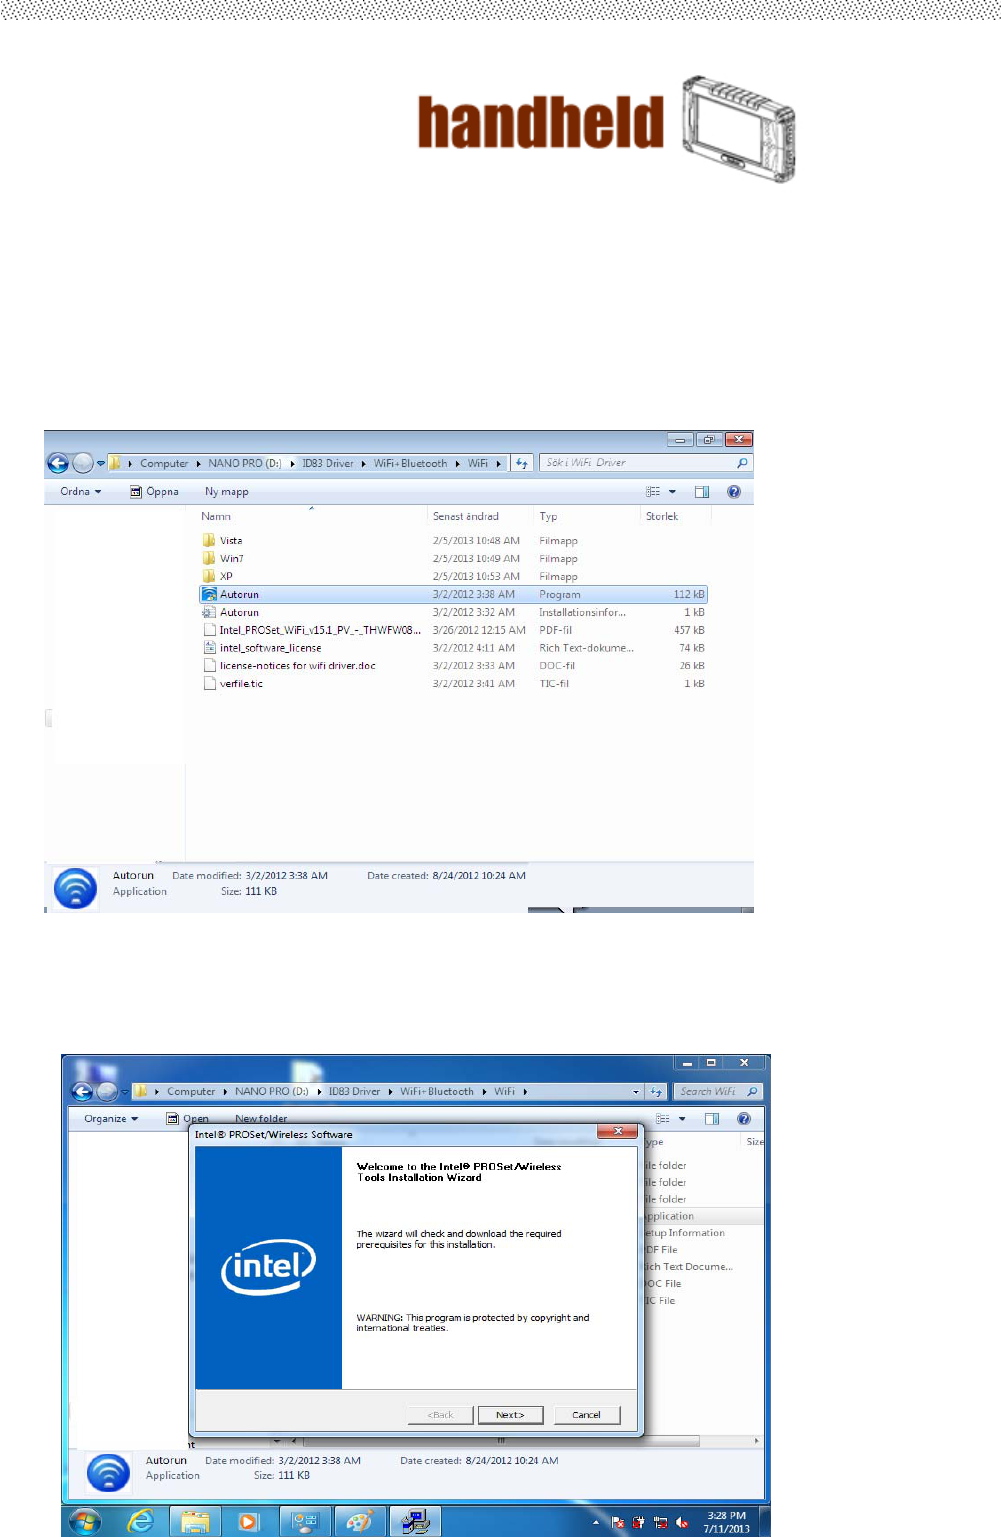
3.7 Wireless LAN Driver Installation
Followingthestepbysteptofinishthedriverinstallation
Step.1 Insert the Driver Utility DVD. Open the file document “Wireless”. Execute
“Autorun” to start the installation program.
Step.2 Follow the step by step and click “Next” to start the driver installation.
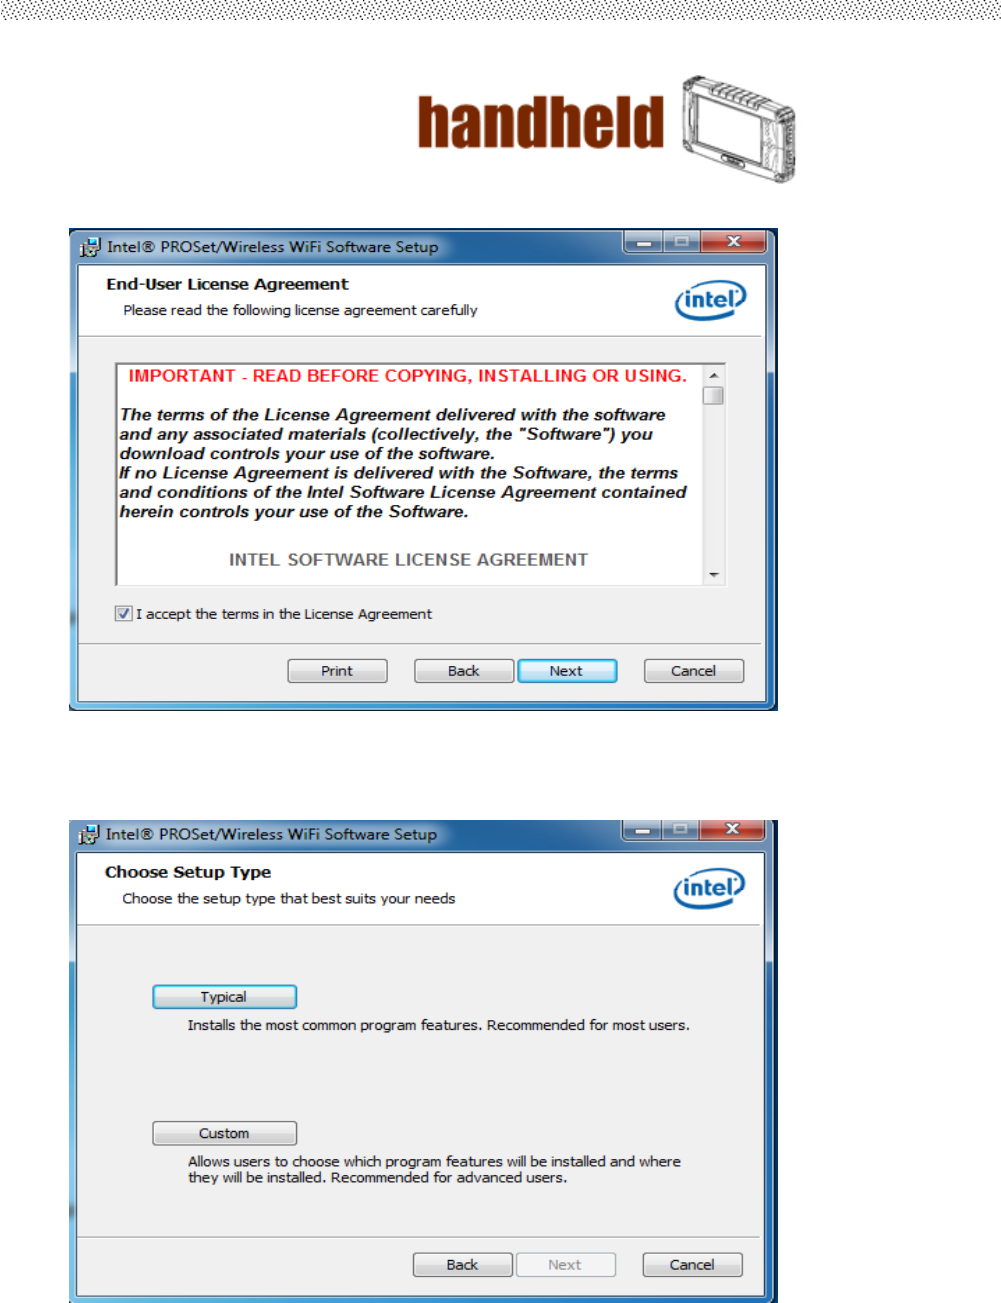
User’s Manual 58
Step.3 Check the box then choose “Next”.
Step.4 Choose “Typical”.
User’s Manual 59
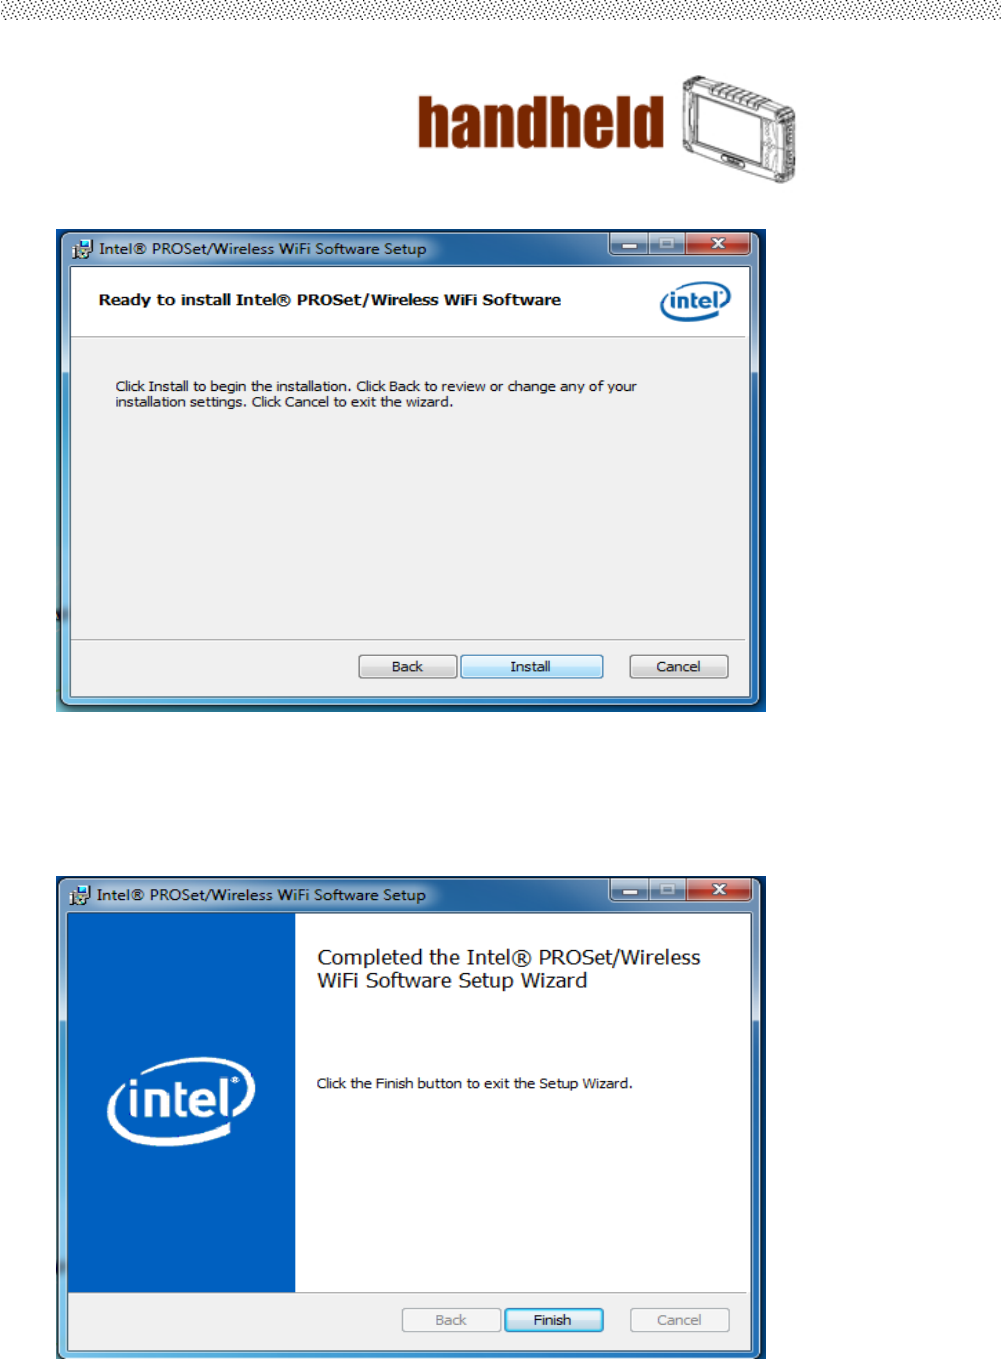
Step.5 Press “lnstall” to start the driver installation.
Step.6 Press “Finish” to complete the driver installation.
User’s Manual 60
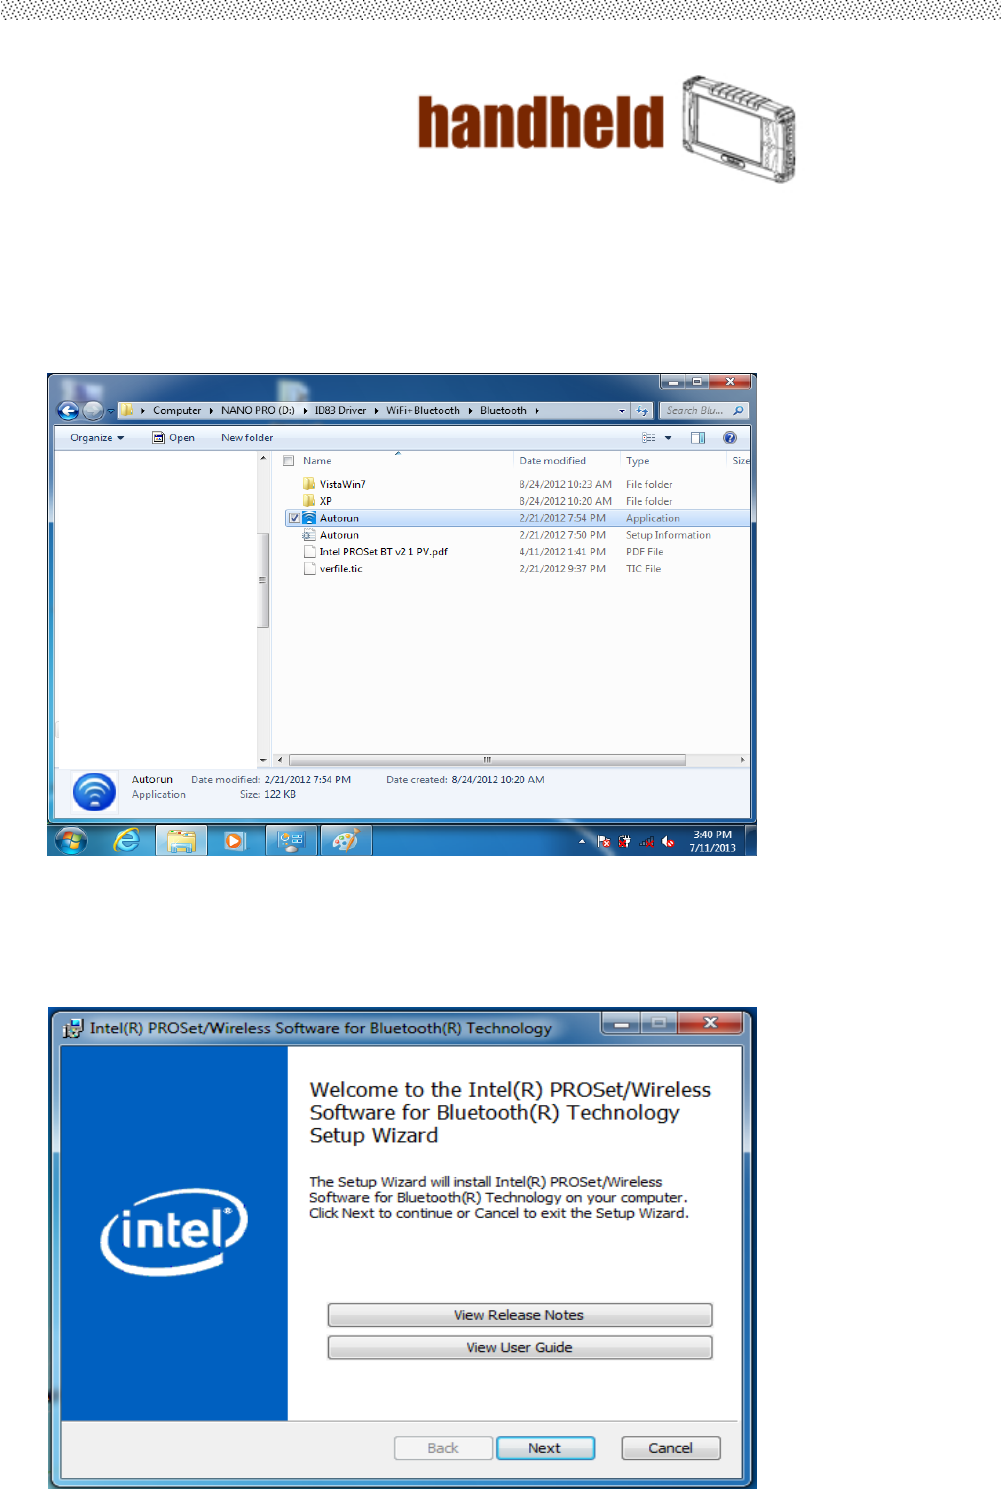
3.8 Bluetooth Driver Installation.
Following the step by step to finish the driver installation
Step.1 Insert the Driver Utility DVD. Open the file document “Bluetooth”. Press
“Autorun” to execute the installation program.
Step.2 Follow the step by step and click “Next” to start the driver installation.
User’s Manual 61
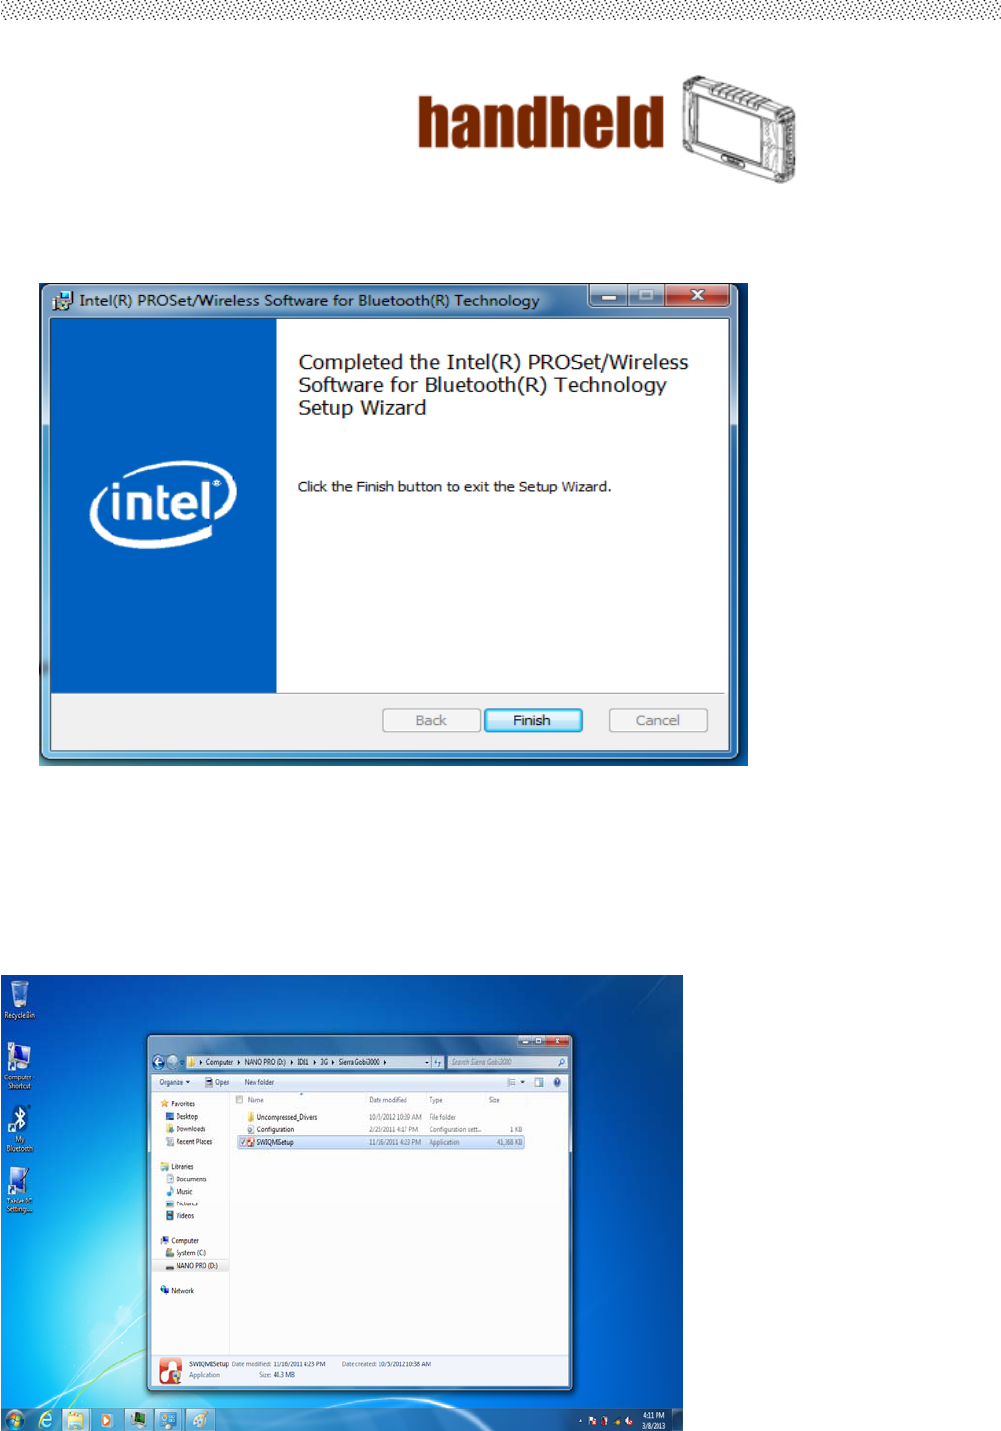
Step.3 Press “Finish” to complete the driver installation
3.9 WWAN Module Driver Installations
Followingthestepbysteptofinishthedriverinstallation
1. Openthefiledocument“WWAN”fromC:\driversfolder.
Press“SWIQMISetup.exe”toexecutetheinstallationprogram.
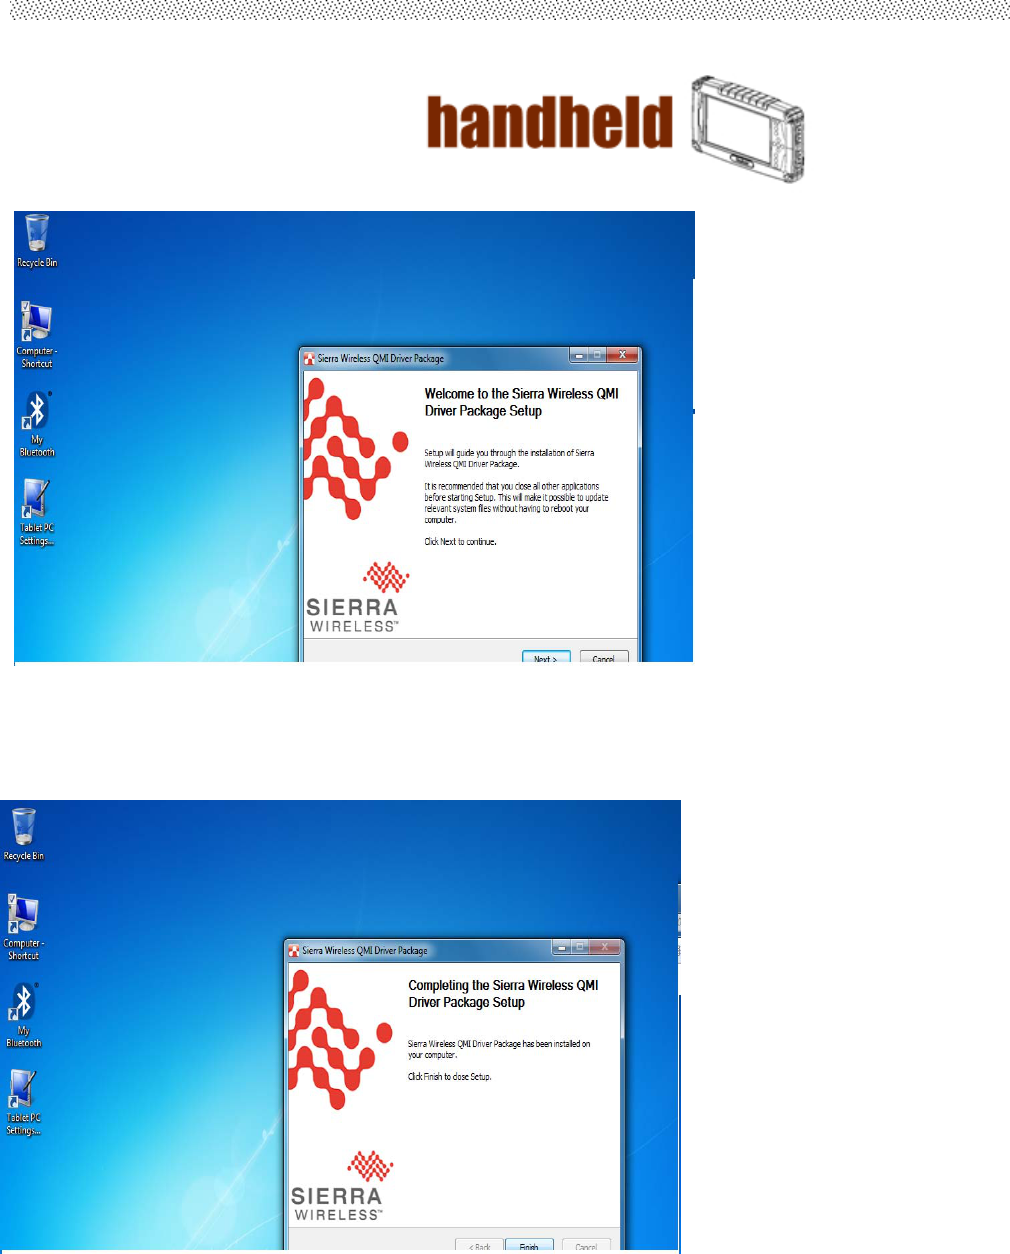
User’s Manual 62
2. Press“Finish”tocompletetheinstallation
.
User’s Manual 63
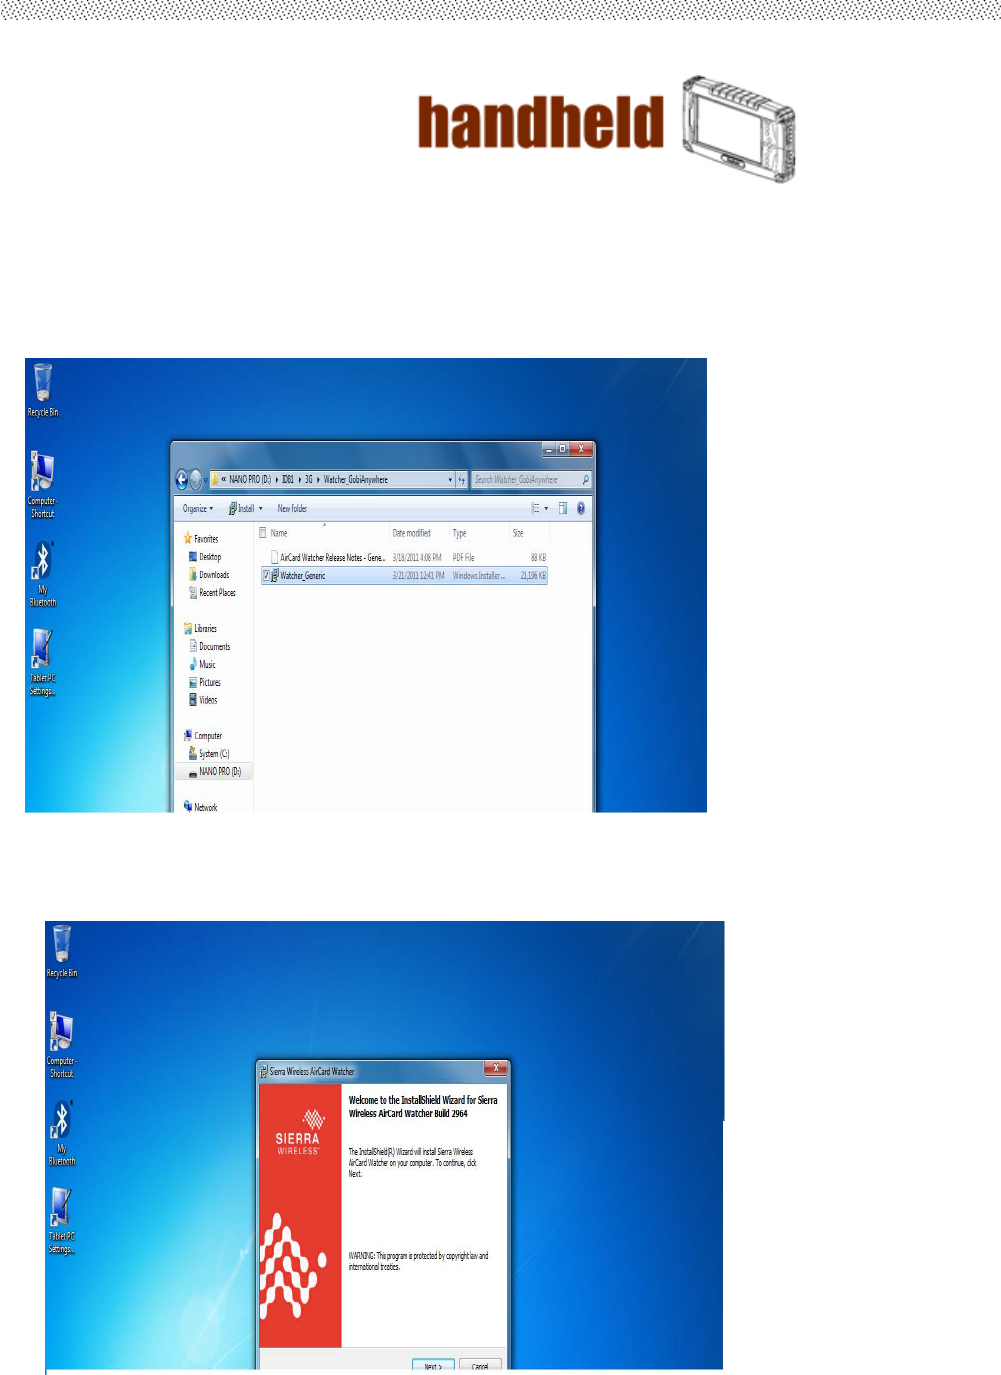
3.10 AirCard Watcher Installations
FollowingthestepbysteptofinishtheAircardWatcherinstallation
1. Openthefiledocument“Watcher_GobiAnywhere”fromC:\driversfolder.Press
“Watcher_Generic.msi”toexecutetheinstallationprogram.
2. Selectthe“Next”tonextstep.
User’s Manual 64
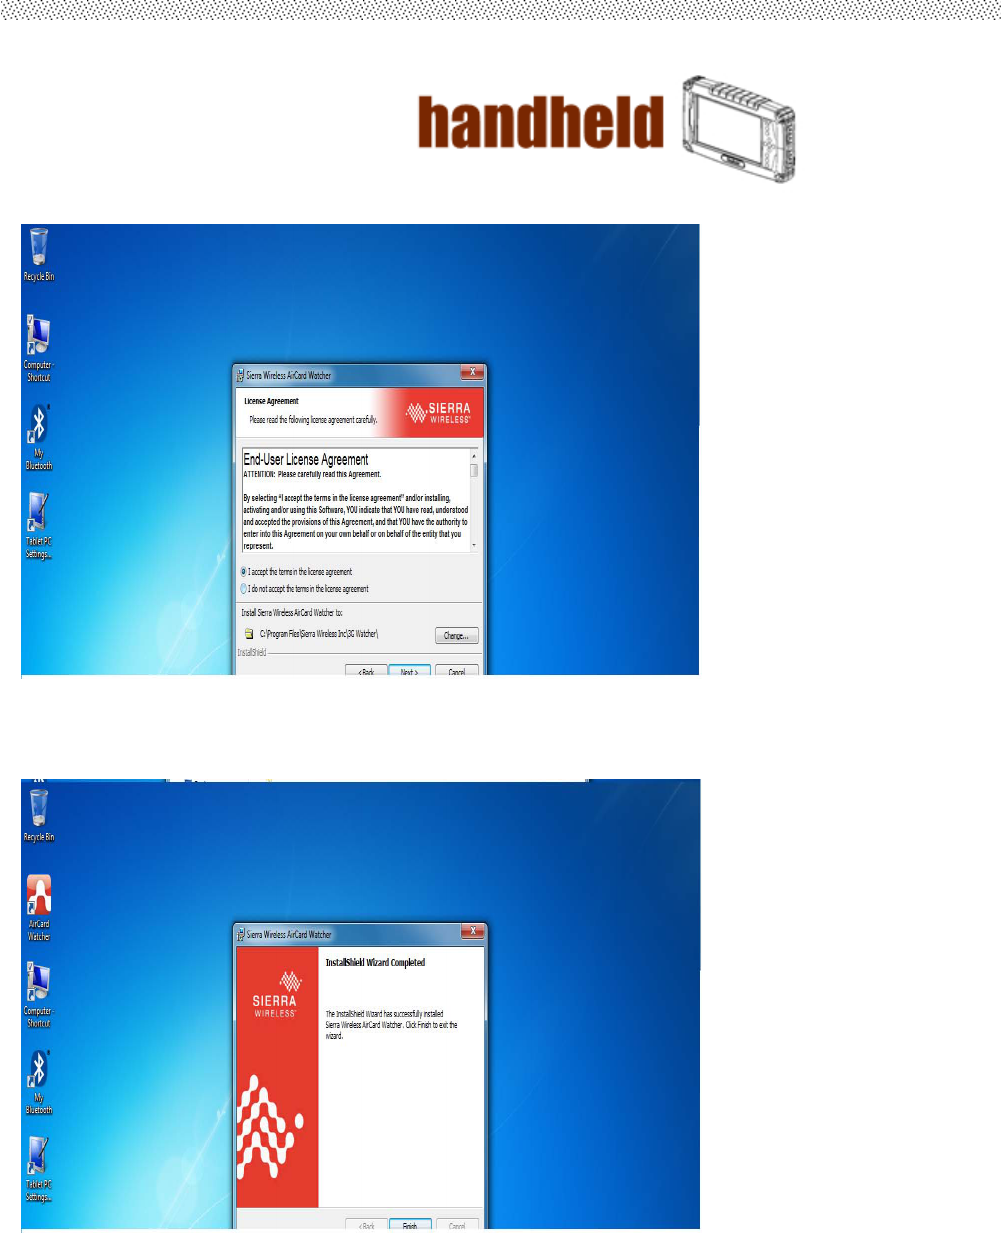
3. Press“Next’toinstallthedriver.
4. Click“Finish”tocompletetheinstallation.
User’s Manual 65
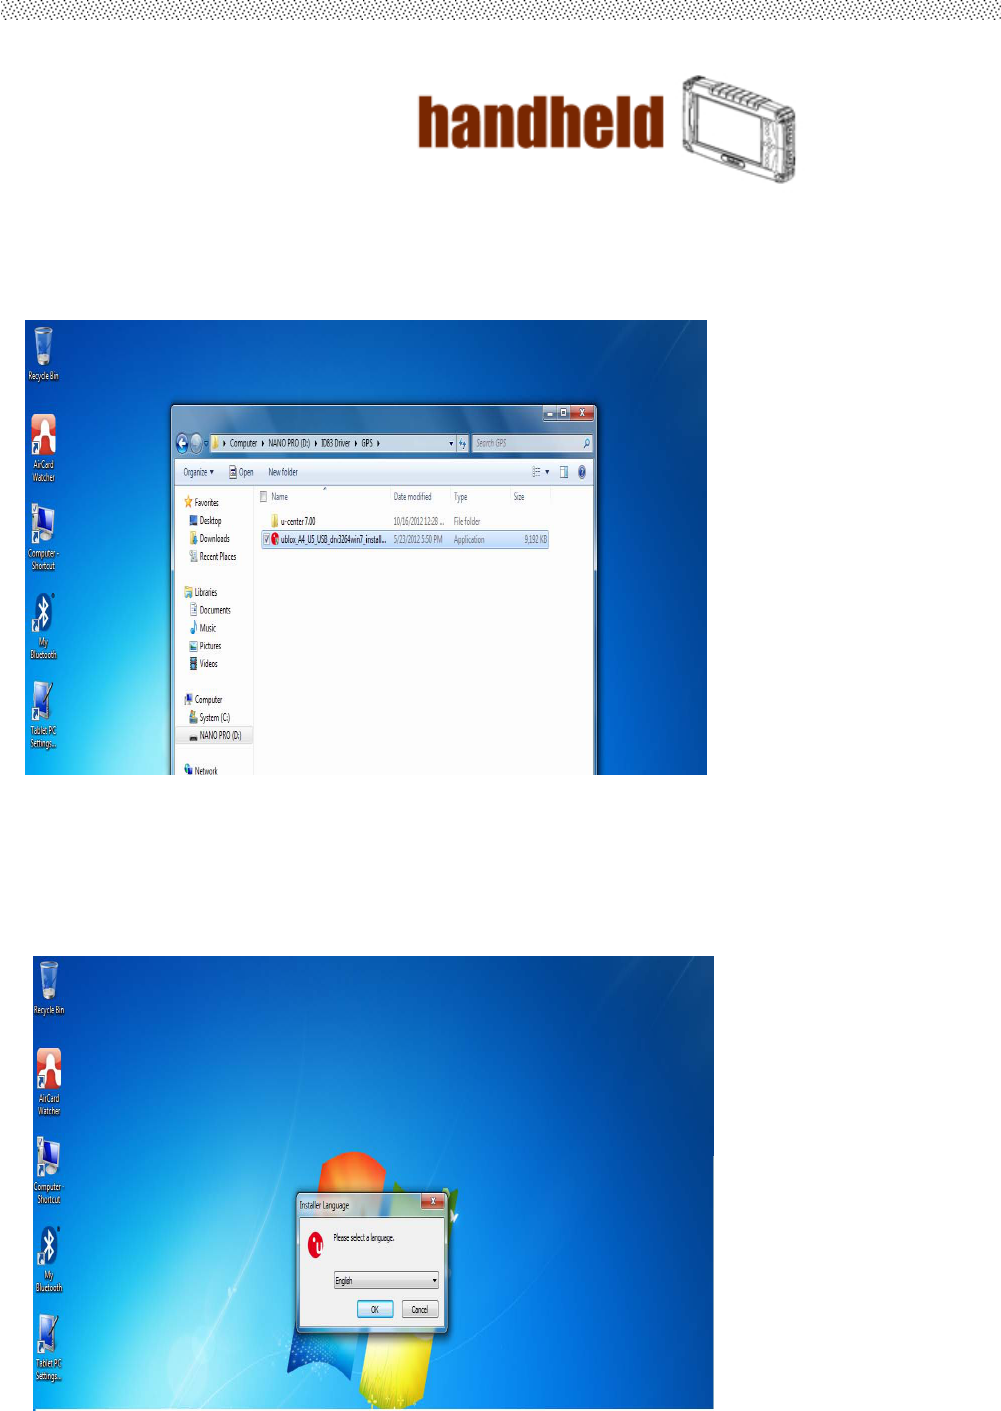
3.11 GPS Driver Installations
Followingthestepbysteptofinishthedriverinstallation
1. Openthefiledocument“GPS”.Press
“ublox_A4_U5_USB_drv3264win7_install_UI.exe”toexecutetheinstallationprogram.
2. Selectthe“English”andclickthe“ok”tonextstep.
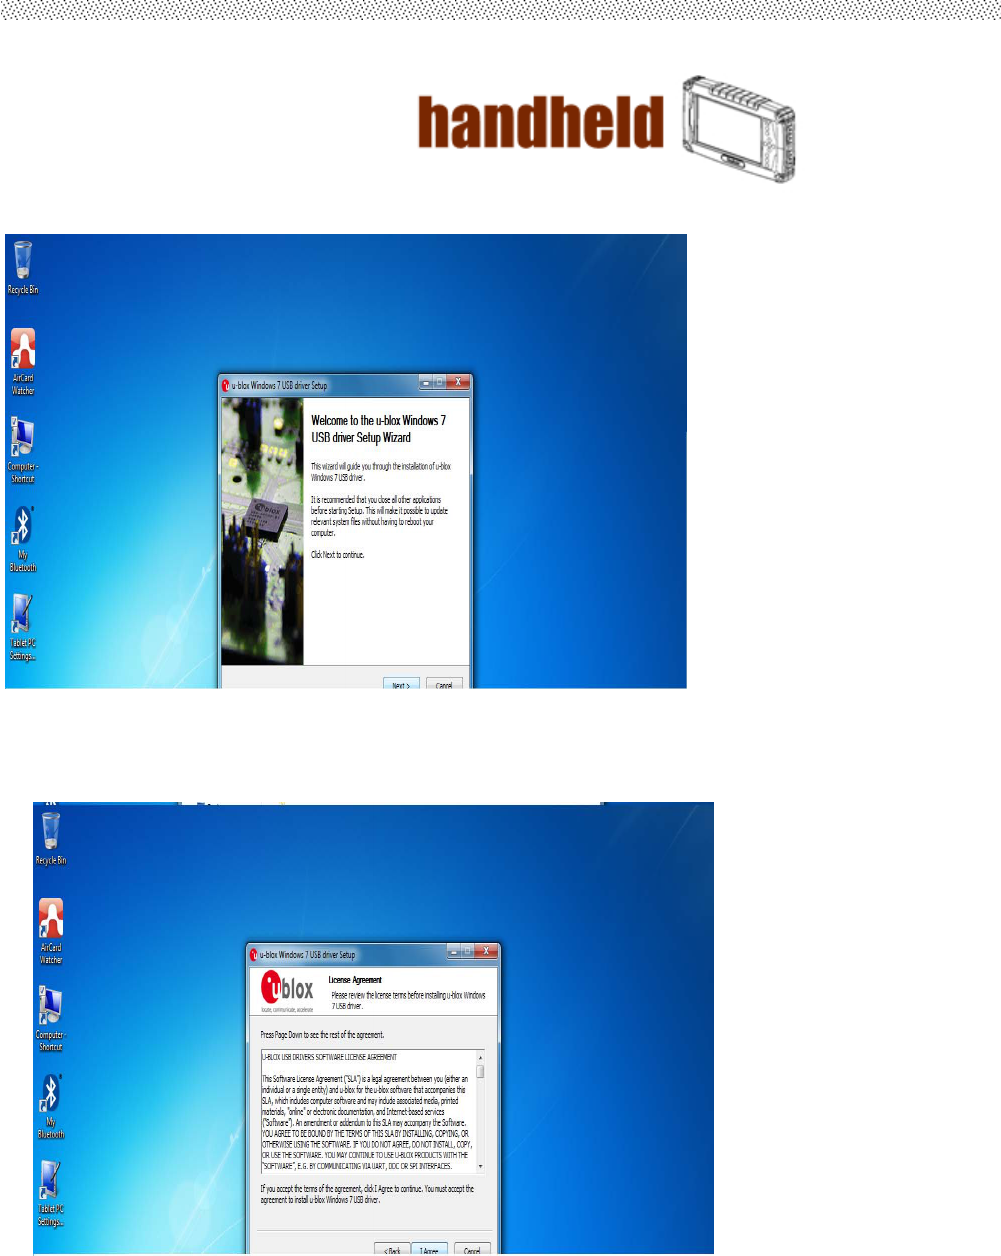
User’s Manual 66
3. Press“Next’toinstallthedriver.
4. Press“IAgree”toinstallthedriver.
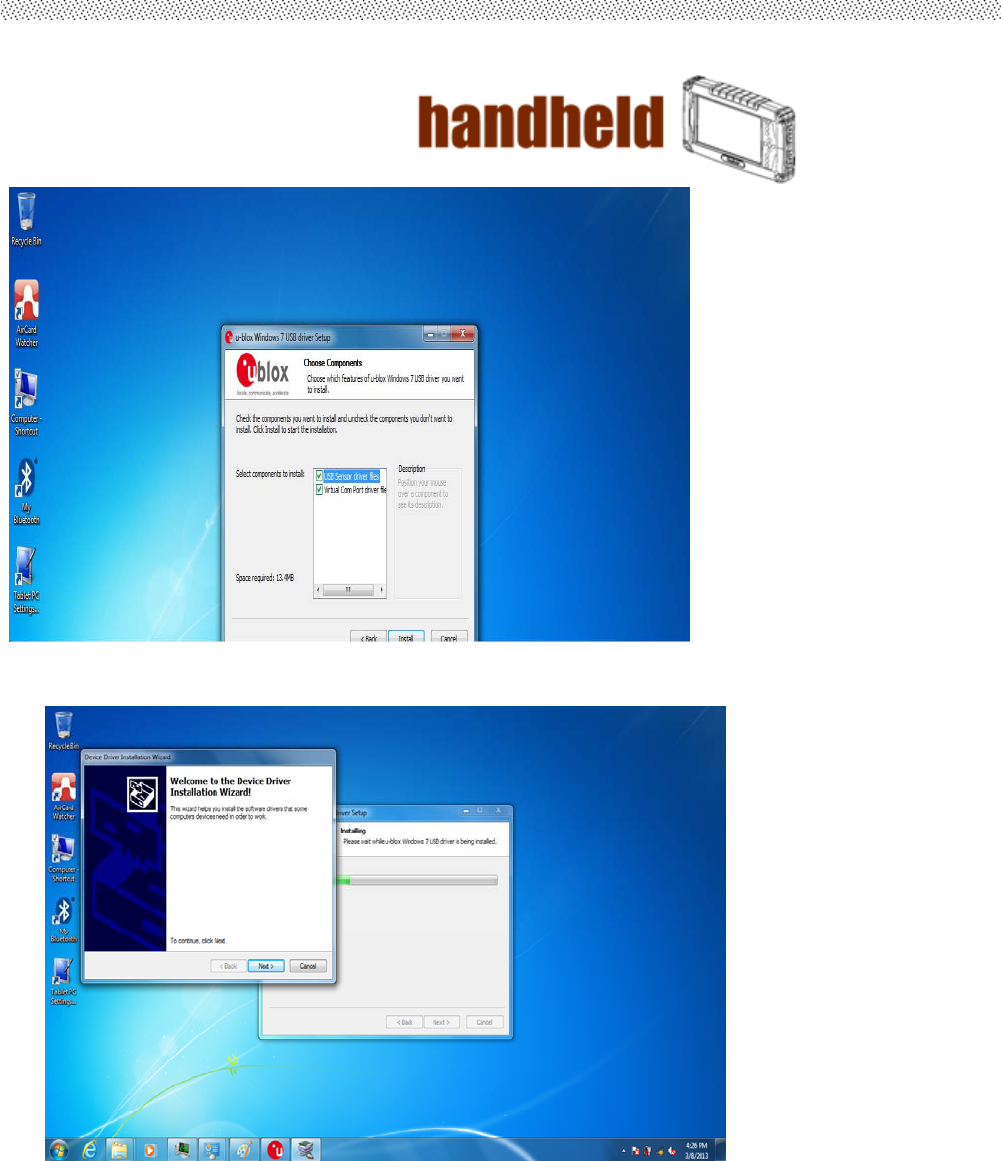
User’s Manual 67
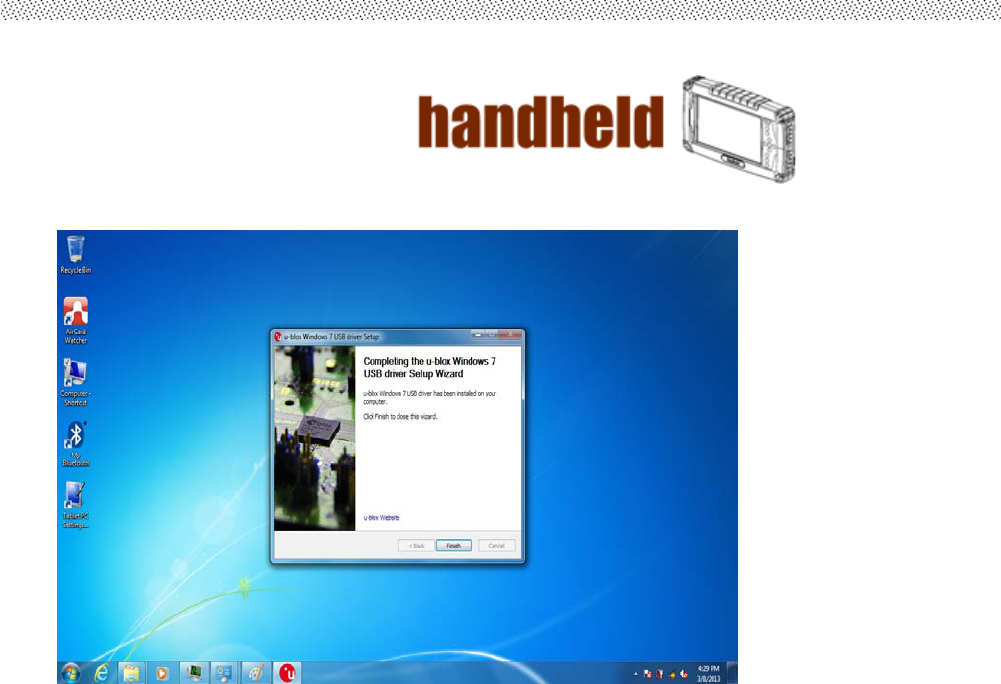
User’s Manual 68
5. Click“Finish”tocompletetheinstallation.
User’s Manual 69
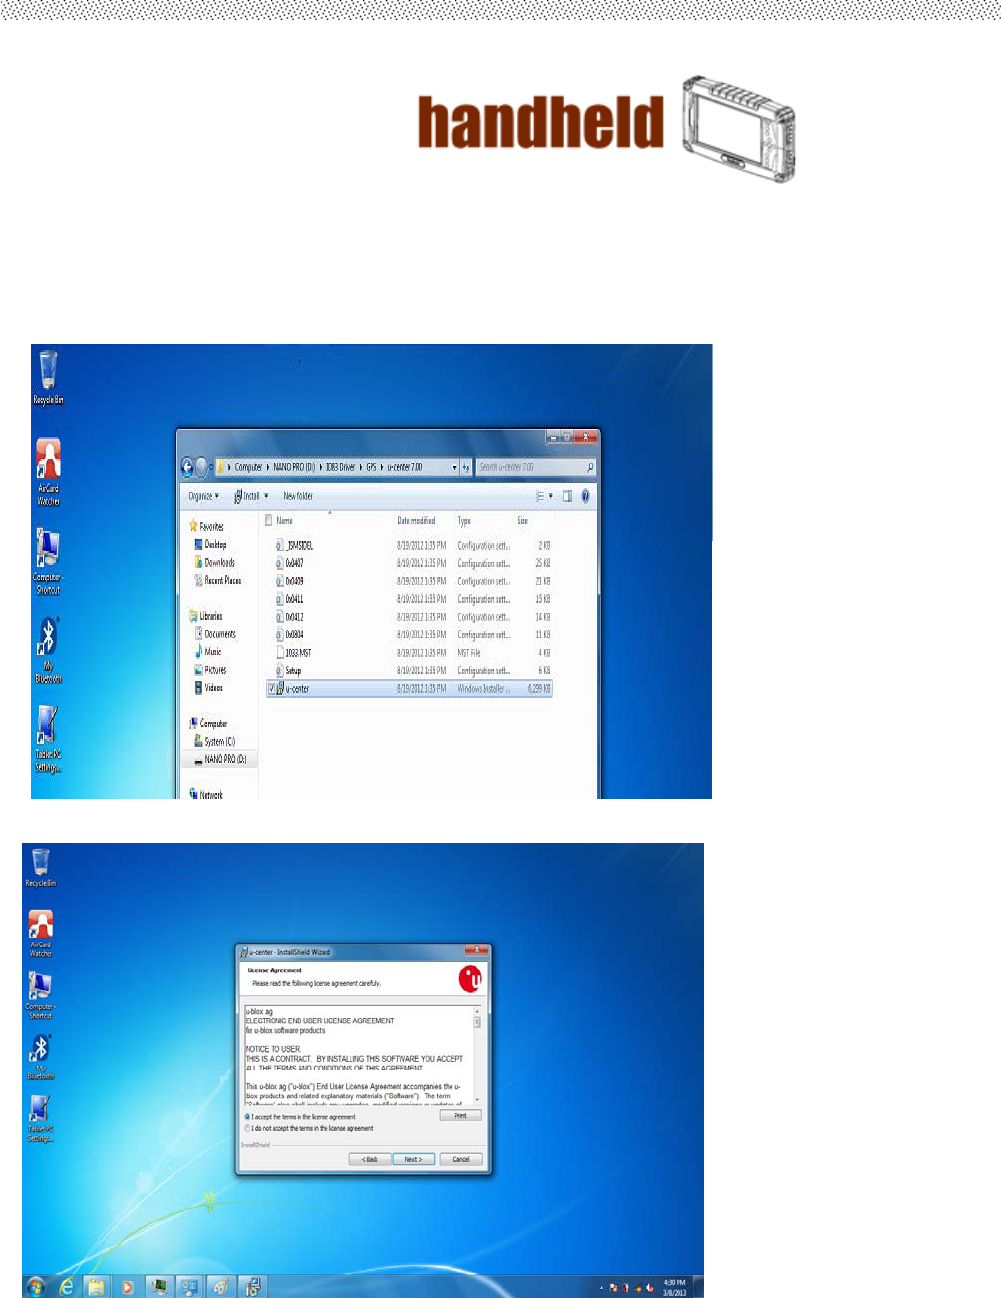
3.12 U-Center Installations
FollowingthestepbysteptofinishtheU‐Centerinstallation
1. Openthefiledocument“/GPS/u‐center7.00”.Press
“u‐center.msi”toexecutetheinstallationprogram.
2. Press
“Next’toinstalltheprogram.
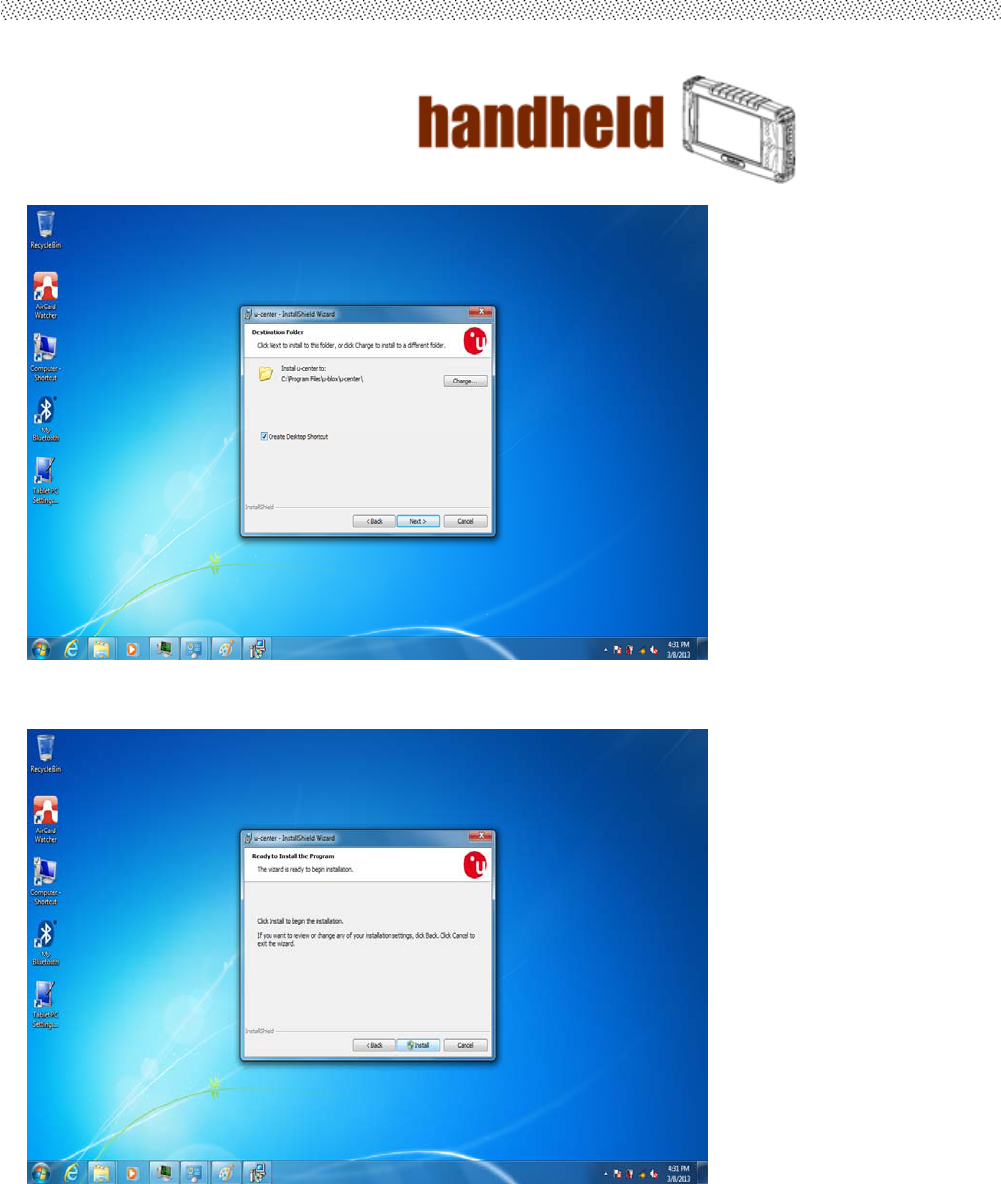
User’s Manual 70
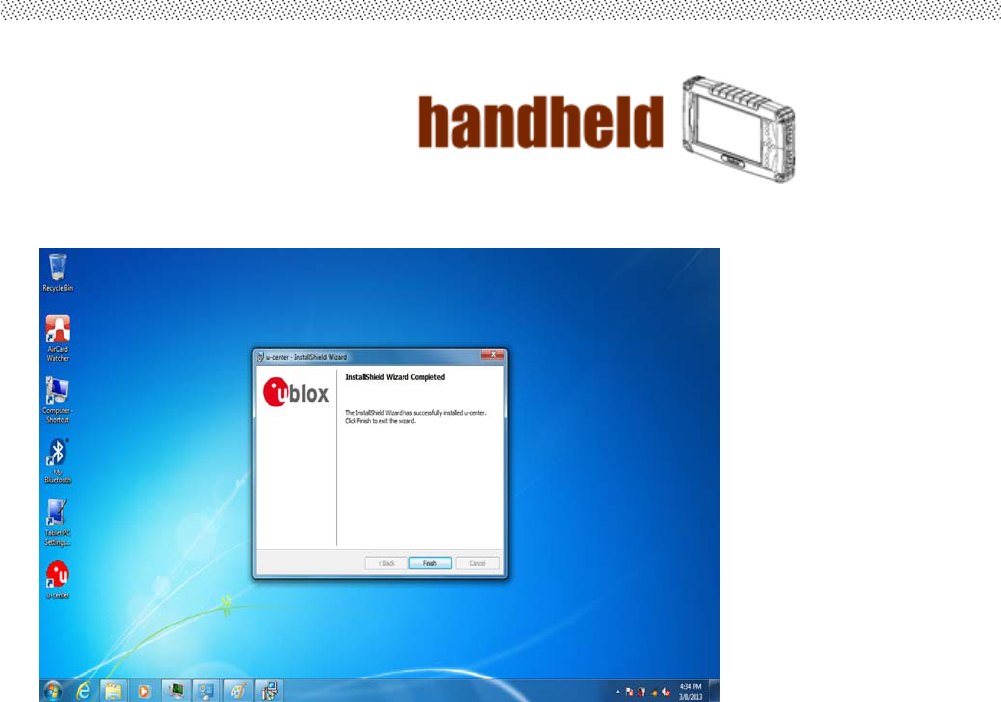
User’s Manual 71
3. Click“Finish”tocompletetheinstallation.

User’s Manual 72
Chapter 4
Caring Your Tablet
PC

User’s Manual 73
CHAPTER 4 Caring your tablet pc
4.1 Battery Protection Tips
It is recommended temperature range for charging the battery pack between
-5℃ ~ 35 ℃.
To avoid harm to the battery, recharge the battery pack when it is nearly
discharged. When recharging, make sure that the battery pack is fully charged.
The battery pack is a consumable product and the following conditions will
shorten its life:
Frequently charging the battery pack
When using, charging, or storing the battery in high temperature condition
To avoid hastening the deterioration of the battery pack thereby prolonging its
useful life, minimize the number of times you charge it so as not to frequently
increase its internal temperature.
A higher environment temperature will cause the battery pack’s temperature to
rise. Avoid charging the battery pack inside a closed vehicle and in hot weather
condition. Also, charging will not start if the battery pack is not within the
allowed temperature range.
It is recommended that you do not charge the battery pack more than once a
day.
Charging the battery pack with the system’s power off is recommended.
To maintain the battery pack’s operating efficiency, store it in a cool dark place
removed from the Tablet PC and with 30 % ~ 40 % charge remaining.
Avoid installing or removing the battery pack when the Tablet PC is in Standby
mode.
Charging time will be prolonged when the Tablet PC is turned on.

User’s Manual 74
4.2 Touch screen Protection Tips
Avoid using excessive force to the display, when use the finger or the included
touch screen stylus pen on the display, the recommended force can not
over 200gf.
Besides the included stylus, using a sharp or metallic object may cause
scratches and damage the display, thereby causing errors.
Wipe the touch screen with a clean, soft, lint-free cloth.
Using the touch screen during low temperature (less than 5 ℃) may cause a
slower response time, this is normal. A normal response time may be restored
upon returning to room temperature.
When there is noticeable discrepancy in the operation of the touch screen
function (wrong location on intended operation or improper display resolution),
refer to the Windows operating system for instructions on recalibrating the
touch screen display.

User’s Manual 75
4.3 Trouble shooting from A to L
A. Battery Problem
Condition Check Point
The battery does not charge
(Battery Charge indicator
does not light orange.
Make sure that the AC adapter is properly
connected.
Make sure that the battery is not too hot or cold.
Allow time for the battery pack to return to room
temperature.
Make sure that the battery pack is installed
correctly.
Make sure that the battery terminals are clean.
B. Bluetooth Transmission Problem
Condition Check Point
I cannot connect to another
device with Bluetooth
wireless technology.
Make sure that both devices have activated
Bluetooth feature.
Make sure that the distance between the two
devices are not over 10 meters or that there are
no walls or other obstructions between the
devices.
Make sure that the other device is not in
“Hidden” mode.
Make sure that both devices are compatible.
C. Display Problem
Condition Check Point
Nothing appears on the
screen. During operation, the screen may automatically
turn off as a result of power management. Press
any key to see if the screen comes back.
T
he brightness level might be too low. Increase
brightness by pressing the button.
D. Date/Time Problems
Condition Check Point
The date/time is incorrect. Correct the date and time via the operating system or
BIOS Setup program.
After you have performed everything as described
above and still have the incorrect date and time every
time you turn on the tablet PC, the RTC (Real-Time
Clock) battery is at the end of its life. Call an
authorized dealer to replace the RTC battery.

User’s Manual 76
E. SSD Problem
Condition Check Point
The SSD error message
appears on the screen. The SSD has defects. Ask your dealer for help.
The SSD operations seem
slow. The data files stored on the SSD may be
fragmented. Use a tool such as Window’s Disk
Defragmenter to defragment the files.
The SSD indicator glows
without blinking. The data files stored on the SSD may be
fragmented. Use a tool such as Window’s Disk
Defragmenter to defragment the files.
F. LAN Problem
Condition Check Point
I cannot access the network. Make sure that the LAN cable is properly
connected to the RJ-45 connector and the
network hub.
Make sure that the network configuration is
appropriate.
Make sure that the user name or password is
correct.
G. Power Management Problems
Condition Check Point
The Tablet PC does not enter
Standby or Hibernation mode
automatically.
If you have a connection to another computer,
the Tablet PC does not enter Standby or
Hibernation mode if the connection is actively in
use.
Make sure that the Standby or Hibernation
time-out is enabled.
The Tablet PC does not enter
Standby or Hibernation mode
immediately.
If the Tablet PC is performing an operation, it
normally waits for the operation to finish.
The Tablet PC does not
resume from Standby or
Hibernation mode.
The Tablet PC automatically enters Standby or
Hibernation mode when the battery pack is

User’s Manual 77
empty.
Do any one of the following:
- Connect the AC adapter to the Tablet PC.
- Replace the empty battery pack with a fully
charged one.
H. Startup Problems
Condition Check Point
When you turn on the Tablet
PC, it does not respond and
the Power indicator does not
light green.
If you are using an external AC power, make
sure that the AC adapter is correctly and
securely connected. If so, make sure that the
electrical outlet works properly.
If you are using the battery power, make sure
that the battery is not discharged.
Wait awhile.
When you turn on the Tablet
PC, it stops after POST. Restart your Tablet PC.
I. Sound Problems
Condition Check Point
No sound is produced. Make sure that the volume control is not set too
low. Increase volume by pressing the button.
Make sure that the Tablet PC is not in Standby
mode.
If using an external speaker, make sure that the
speaker is properly connected.
Distorted sound is produced. Make sure that the volume control is not set too
high or too low. In most cases, a high setting can
cause the audio electronics to distort the sound.
The external audio device
does not work. Make sure that your Tablet PC is equipped with
the driver needed.
Click the speaker symbol on the taskbar and
check the Windows volume control.
Check the volume control of your tablet PC.

User’s Manual 78
J. Wireless LAN Problem
Condition Check Point
I cannot use the wireless LAN
feature.
Make sure that the wireless LAN feature is
turned on.
Transmission quality is poor. Your Tablet PC may be in an out-of-range
situation. Move your Tablet PC closer to the
Access Point or another wireless LAN device it is
associated with.
Check if there is high interference around the
environment and solve the problem as described
next.
Radio interference exists. Move your Tablet PC away from the device
causing the radio interference such as
microwave oven and large metal objects.
Plug your Tablet PC into an outlet on a different
branch circuit from that used by the affecting
device.
Consult your dealer or an experienced radio
technician for help.
I cannot connect to another
wireless LAN device.
Make sure that the wireless LAN feature is
turned on.
Make sure that the SSID setting is the same for
every wireless LAN device in the network.
Your Tablet PC is not recognizing changes.
Restart the Tablet PC.
Make sure that the IP address or subnet mask
setting is correct.
I cannot communicate with
the computer in the network
when
Infrastructure mode is
configured.
Make sure that the Access Point your Tablet PC is
associated with is powered on and all the LEDs
are working properly.
If the operating radio channel is in poor quality,
change the Access Point and all the wireless
station(s) within the BSSID to another radio
channel.
Your Tablet PC may be in an out-of-range
situation. Move your Tablet PC closer to the
Access Point it is associated with.
Make sure that your Tablet PC is configured with
the same security option (encryption) to the
Access Point.
Use the Web Manager/Telnet of the Access Point
to check whether it is connected to the network.

User’s Manual 79
Reconfigure and reset the Access Point.
I cannot access the network. Make sure that the network configuration is
appropriate.
Make sure that the user name or password is
correct.
You have moved out of range of the network.
Turn off power management.
User’s Manual 80
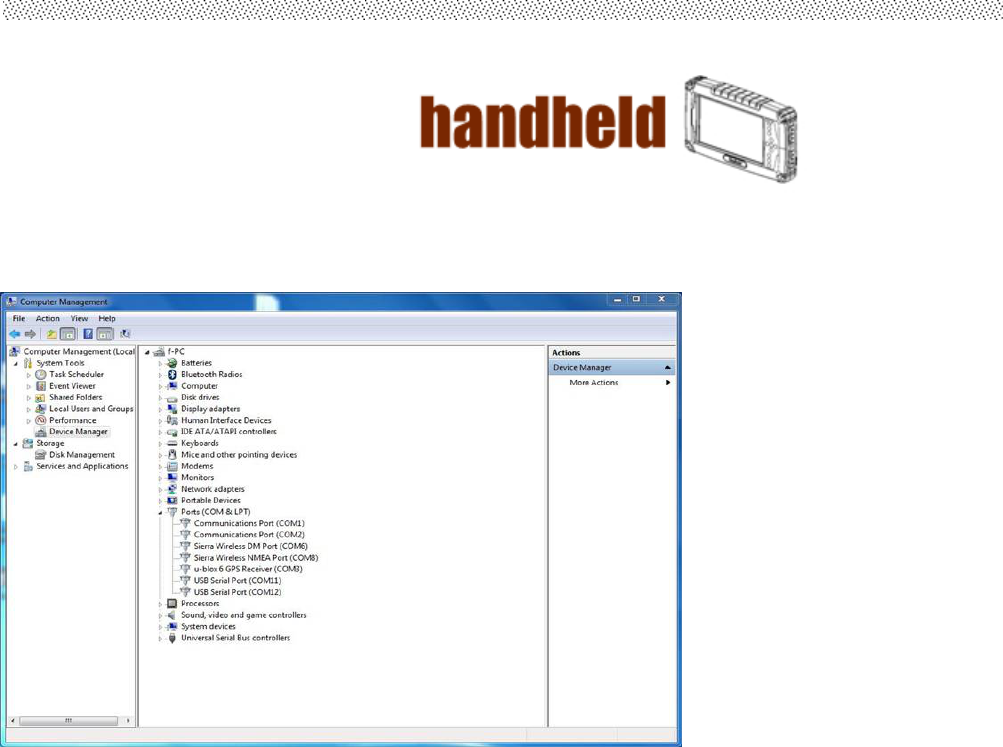
4.4 Appendix
A.COM PORT Define