Handheld Group 0112070926724 Rugged Tablet PC User Manual Tablet PC
Handheld Group AB Rugged Tablet PC Tablet PC
Contents
- 1. User manual part 1
- 2. User manual part 2
User manual part 1

A7 Handheld Rugged Tablet PC
User Manual
Version: 1.0
User’s Manual 2
Accessory
Item Description Note
2 piece of 2 Cell Li-Polymer Battery Pack
Hot-swappable
for battery
change
1 piece of Rugged Tablet PC QSG
1 piece of 12V Adapter w/ Standard Power
Cord.
Euro / U.S. Std type, 1.8m
Optional Accessory
Item Description Note
2 piece of 4 l Li-Polymer Battery Pack
Hot-swappable
for battery
change

User’s Manual 3
Copyright Notice
Copyright © 2010 Handheld Inc., ALL RIGHTS RESERVED. No part of
this document may be reproduced, copied, translated, or transmitted in any
form or by any means, electronic or mechanical, for any purpose, without the
prior written permission of the original manufacturer.
Trademark Acknowledgement
Brand and product names are trademarks or registered trademarks of
their respective owners.
Disclaimer
Handheld Inc. reserves the right to make any product changes without
notice, including circuits and/or software described or contained in this
manual in order to improve design and/or performance. Handheld Inc.
assumes no responsibility or liability for the use of the described product(s),
conveys no license or title under any patent, copyright, or masks work rights
to these products, and makes no representations or warranties that these
products are free from patent, copyright, or mask work right infringement,
unless otherwise specified. Applications that are described in this manual are
for illustration purposes only. Handheld Inc. makes no representation or
warranty that such application will be suitable for the specified use without
further testing or modification.
Warranty
Handheld Inc. warrants that each of its products will be free from material
and workmanship defects for a period of one year from the invoice date. If the
customer discovers a defect, Winmate will, at its option, repair or replace the
defective product at no charge to the customer, provided it is returned during
the warranty period of one year, with transportation charges prepaid. The
returned product must be properly packaged in its original packaging to obtain
warranty service.
If the serial number and the product shipping data differ by over 30 days,
the in-warranty service will be made according to the shipping date. In the
serial numbers the third and fourth two digits give the year of manufacture, and
the fifth digit means the month (e. g., with A for October, B for November and C
for December).

User’s Manual 4
For example, the serial number 1W10Axxxxxxxx means
October of year 2010.
Customer Service
We provide service guide for any problem as follow steps:First, visit the
website at www.handheldgroup.com to find the update information about the
product. Secondly, contact with your distributor, sales representative, or our
customer service center for technical support if you need additional assistance.
You may have the following information ready before you call:
Product’s serial number
Peripheral attachments
Software (OS, version, application software, etc.)
Description of complete problem
The exact wording of any error messages with print screen images
In addition, free technical support is available from our engineers in every
business day. We are always ready to give advice on application requirements
or specific information on the installation and operation of any of our products.
Please do not hesitate to call or e-mail us.
Manufacturer:Handheld Inc.
Address:Handheld Group AB, Kinnegatan 17 A, S-531 33, Linkoping, Sweden
TEL:+46 (0) 510-54 71 70
FAX:+46 (0) 510-282 05

User’s Manual 5
Safety Precautions
Warning!
Always completely disconnect the power cord from
your chassis whenever you work with the hardware. Do not
connect the electronic device with power socket while the
device’s power is on. Sensitive electronic components can
be damaged by sudden power surges. Only experienced
electronics personnel should open the Pac’s chassis
mechanical housing.
Caution!
Always ground yourself to remove any static charge
before touch the CPU card. The electronic devices are very
sensitive to static electricity. As a safety precaution, use a
grounding wrist strap all the time. Place all electronic
components in a static-dissipative surface or static-shielded
bag when they are not in the chassis.
Battery Notice!
WARNING
Do not fix or replace battery, it may cause
explosion! Only use with specified battery
by following the manufacturer’s user
manual’s instruction.
User’s Manual 6
UL Safety Announcement
UL Classification: Class I mark: with respect to electronic shock;
Fire and hazardous material only in accordance with the regulation
of UL-60950 and CAN/CSA C22.2 No. 601.1.
Power Supply Announcement
The Handheld Rugged Tablet PC Power Supplies are supported by Power
Adapter and Battery Pack, the power rating announcement and manufacturer
information list as below.
Power Notice!
(1) Please aware of the power code of adapter need to be
connected to the Earth ground.
(2) Please notice the Power Standby mode when push power
button at least 4 seconds to go to sleep status. (See Chapter 2.1
Starting and Stopping the Tablet PC)
Power Adapter Manufacture: EDAC Power Electronics Co Ltd
Model: EA1050C-120
Input Rated: 100-240Vac, 1.8A, 50-60Hz.
Output Rated: DC 12V, 6.66A.
Battery Pack Manufacture: JHT energy International Co Ltd
Model: ALG7-08A
Rated: 2600mAh DC 7.4V

User’s Manual 7
FEDERAL COMMUNICATIONS COMMISSION
This equipment has been tested and found to comply with the limits for a
Class B digital device, pursuant to Part 15 of the FCC Rules. These limits
are designed to provide reasonable protection against harmful
interference in a residential installation. This equipment generates, uses
and can radiate radio frequency energy and, if not installed and used in
accordance with the instructions, may cause harmful interference to radio
communications. However, there is no guarantee that interference will not
occur in a particular installation. If this equipment does cause harmful
interference to radio or television reception, which can be determined by
turning the equipment off and on, the user is encouraged to try to correct
the interference by one or more of the following measures:
– Reorient or relocate the receiving antenna.
– Increase the separation between the equipment and receiver.
– Connect the equipment into an outlet on a circuit different from that to
which the receiver is connected.
– Consult the dealer or an experienced radio/TV technician for help.
CAUTION:
Any changes or modifications not expressly approved by the party
responsible for compliance could void the user's authority to operate the
equipment.
RF exposure warning
The equipment complies with FCC RF exposure limits set forth for an
uncontrolled environment.
The antenna(s) used for this transmitter must not be co-located or operating in
conjunction with any other antenna or transmitter.

User’s Manual 8
RF exposure information (SAR)
This Rugged Tablet PC meets the government's requirements for exposure to
radio waves. This Rugged Tablet PC is designed and manufactured not to
exceed the emission limits for exposure to radio frequency (RF) energy set by
the Federal Communications Commission of the U.S. Government. The
exposure standard for wireless Rugged Tablet PC employs a unit of
measurement known as the Specific Absorption Rate, or SAR. The SAR limit
set by the FCC is 1.6 W/kg. Tests for SAR are conducted using standard
operating positions accepted by the FCC with the Rugged Tablet PC
transmitting at its highest certified power level in all tested frequency bands.
Although the SAR is determined at the highest certified power level, the actual
SAR level of the Rugged Tablet PC while operating can be well below the
maximum value. This is because the Rugged Tablet PC is designed to operate
at multiple power levels so as to use only the poser required to reach the
network. In general, the closer you are to a wireless base station antenna, the
lower the power output. The highest SAR value for US model Rugged Tablet
PC as reported to the FCC when tested for use at the body, as described in
this user guide, is 1.339 W/kg.
Industry Canada Class B Statement
This Class [B] digital apparatus complies with Canadian ICES-003.
Cet appareil numérique de la classe [B] est conforme à la norme NMB-003 du
Canada.
This device complies with Industry Canada licence-exempt RSS
standard(s).Operation is subject to the following two conditions: (1) this device
may not cause interference, and (2) this device must accept any interference,
including interference that may cause undesired operation of the device.
IEEE 802.11b or 802.11g operation of this product in the Canada is
firmware-limited to channels 1 through 11.
Déclarations d'exposition aux RF liéesAvertissement d'exposition RF:
L'équipement est conforme aux limites d'exposition aux RF établies pour un
environnement non contrôlé. L'antenne (s) utilisée pour ce
transmetteur ne doit pas être co-localisés ou fonctionnant en
conjonction avec une autre antenne ou transmetteur.
Ce dispositif est conforme à la norme de l'industrie Candada exempts de
licence RSS (s). L'opération est soumise aux deux conditions suivantes: (1)
Cet appareil ne peut causer d'interférences nuisibles, et (2) cet appareil doit
accepter toute interférence reçue, y compris les interférences qui peuvent
causer un mauvais fonctionnement de l'appareil.

User’s Manual 9
Contents
CHAPTER 1 SPECIFICATION ...................................................................... 11
1.1SYSTEM SPECIFICATION .................................................................................................................. 12
1.2HOW TO USE THE TABLET PC ............................................................................................................. 13
1.3LED INDICATOR ............................................................................................................................ 15
1.4USING THE BATTERY PACKS .............................................................................................................. 16
1.5THE BATTERY LIGHT SIGNAL INSTRUCTION ............................................................................................ 19
CHAPTER 2 SOFTWARE OPERATION ....................................................... 22
2.1TURNING ON AND OFF THE TABLET PC .................................................................................................. 22
2.1.1 Turn on the Tablet PC ............................................................................................................ 22
2.1.2 Turn off the Tablet PC ............................................................................................................ 22
2.2HOW TO USE THE SOFTWARE UTILITY .................................................................................................... 23
2.3HOT TAB SOFTWARE UTILITY FUNCTIONS ............................................................................................. 24
2.4HOW TO USE THE WIRELESS NETWORK ................................................................................................. 27
2.5HOW TO USE THE BLUETOOTH ............................................................................................................ 29
2.6HOW TO USE THE WWAN FEATURE ..................................................................................................... 32
2.7HOW TO USE THE GPS FEATURE ......................................................................................................... 33
2.8HOW TO USE THE CAMERA FEATURE ..................................................................................................... 36
2.9HOW TO ADJUST THE LCD BRIGHTNESS ................................................................................................ 38
2.10HOW TO ADJUST THE SPEAKER VOLUME. ................................................................................................ 39
2.11SHOW THE BATTERY INFORMATION.. ..................................................................................................... 40
2.12SHOW THE SYSTEM INFORMATION. ...................................................................................................... 40
CHAPTER 3 INSTALLING THE DEVICE DRIVER ....................................... 42
CHAPTER 4 CARING YOUR TABLET PC ................................................... 73
A. Battery Problem .................................................................................................................. 75
B. Bluetooth Transmission Problem .................................................................................. 75
C. Display Problem .................................................................................................................. 75
D. Date/Time Problems ......................................................................................................... 75
E. SSD Problem ........................................................................................................................ 76
F. LAN Problem ............................................................................ Error! Bookmark not defined.
G. Power Management Problems ....................................................................................... 76
H. Startup Problems ............................................................................................................... 77
I. Sound Problems ................................................................................................................... 77
J. Wireless LAN Problem ........................................................................................................ 78
A.COM PORT Define ................................................................................................................ 80

User’s Manual 10
Chapter 1
Specification
User’s Manual 11
CHAPTER 1 Specification
This User Manual cover the use of an A7 with Microsoft Windows 7 OS, but
other operating systems can also be used. Please contact your supplier for
further information.
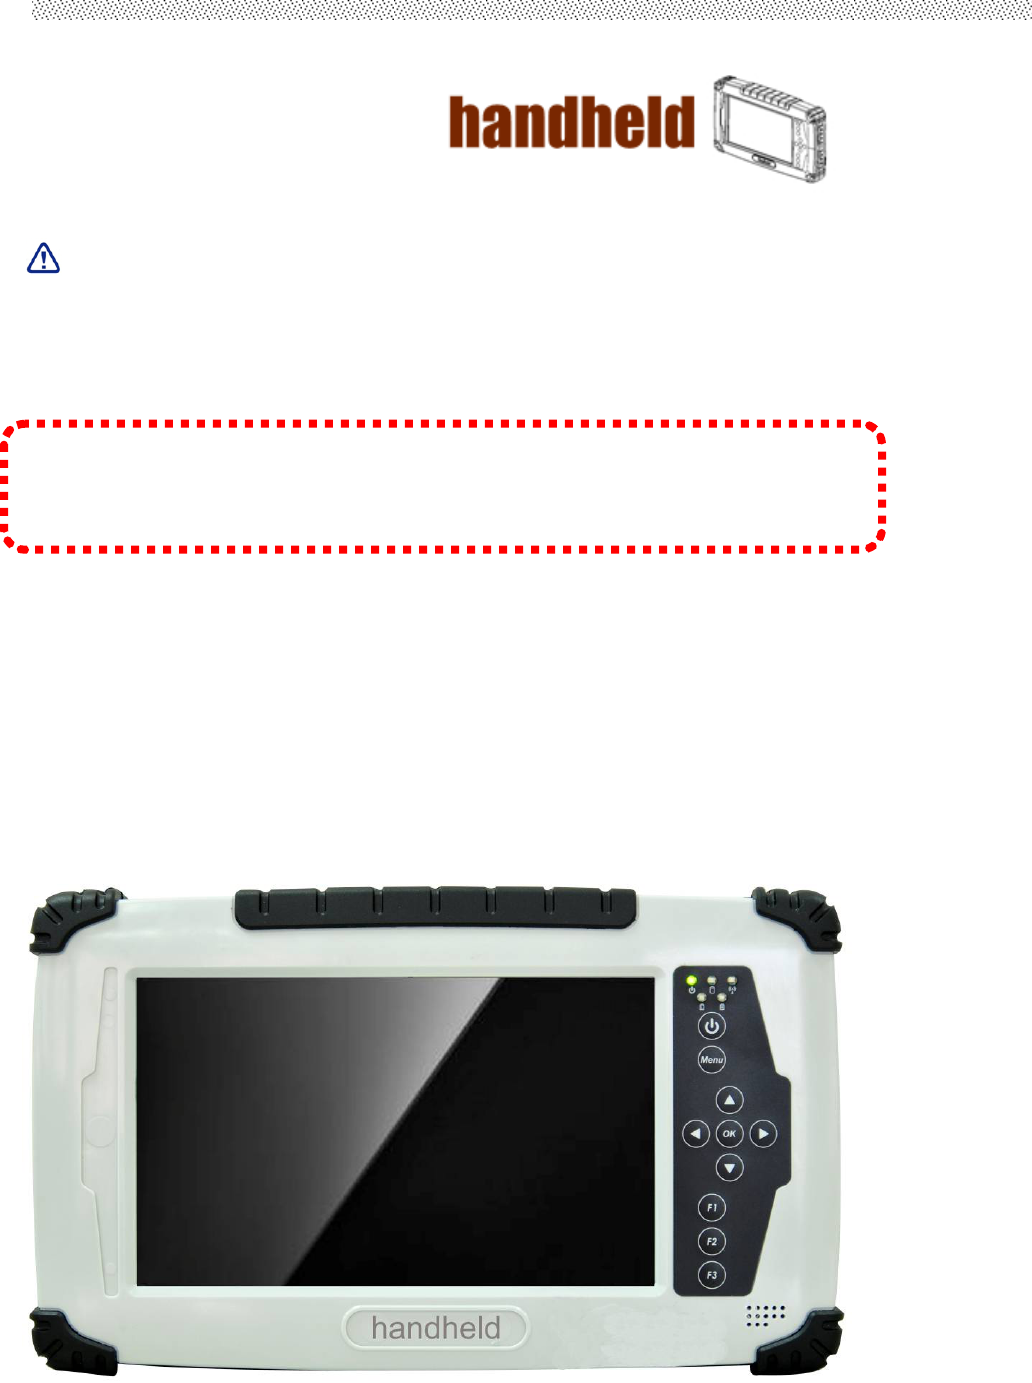
The A7 is a compact high performance, low weight rugged Tablet PC designed
for outdoor fieldwork purpose. The A7 can survive in severe environmental
conditions including vibration, shock, moisture and temperature variations. The
A7 is suitable for use in harsh environments such as construction sites,
warehousing, defense, manufacturing and field service. The A7 is delivered
with two batteries and an AC adapter.

User’s Manual 12
This Chapter introduces the 7” Handheld Tablet PC A7 specification.
1.1 System Specification
System
ProcessorIntel®Atom™N26001.6GHzDualCore
BIOSAMISystemBIOS
ChipsetIntelNM10
Memory4GBDDR31066SO‐DIMMRAM
LANControllerBroadcomBCM57780Chipset,10/100/1000Mbps
StorageMsata128GBSSD
AudioAudiooutforheadset,Micro‐informicrophonejack,1.5W
Speaker(Internal)
I/OConnectors
LeftI/OPort 1xMicro‐In,1xAudioOut,1xGigaLAN,1xUSB,1xDCPower
Jack
RightI/OPort1xRS232,1xUSB
BottomSidePogo‐pinfordocking
RearSideServiceWindow
InFrontControl
ControlButton1xPowerOn/Off,1xMenu,1xUp,1xDown,1xLeft,1xRight
3xProgrammableHotkeys
LEDindicator1xPowerStatus,1xHDDStatus,2xBatteryStatus,1xRF
DeviceStatus
DisplaySpecification
Size 7”(16:9)
Resolution1024x600
Brightness600nit
Touch4WireResistiveTouch
User’s Manual 13
PowerManagement
PowerInput12VDC@6.66A
PowerConsumption 9W
BatteryLi‐Polymer7.4V2S1P,2600mAh
Adapter100‐240V,50‐60Hz,12VDC
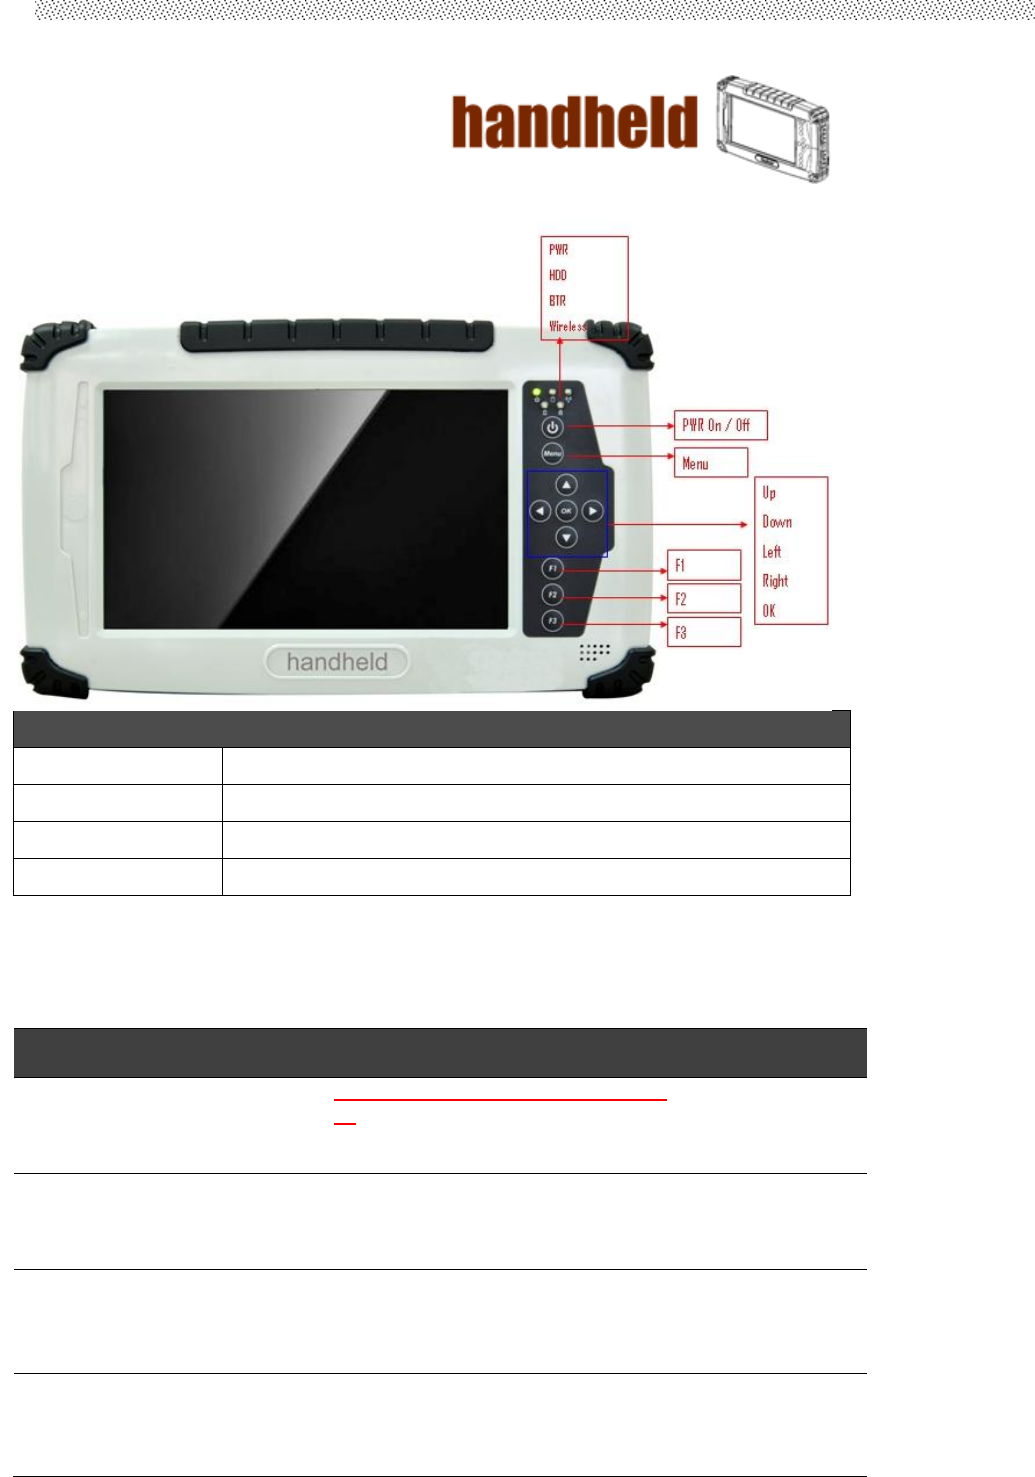
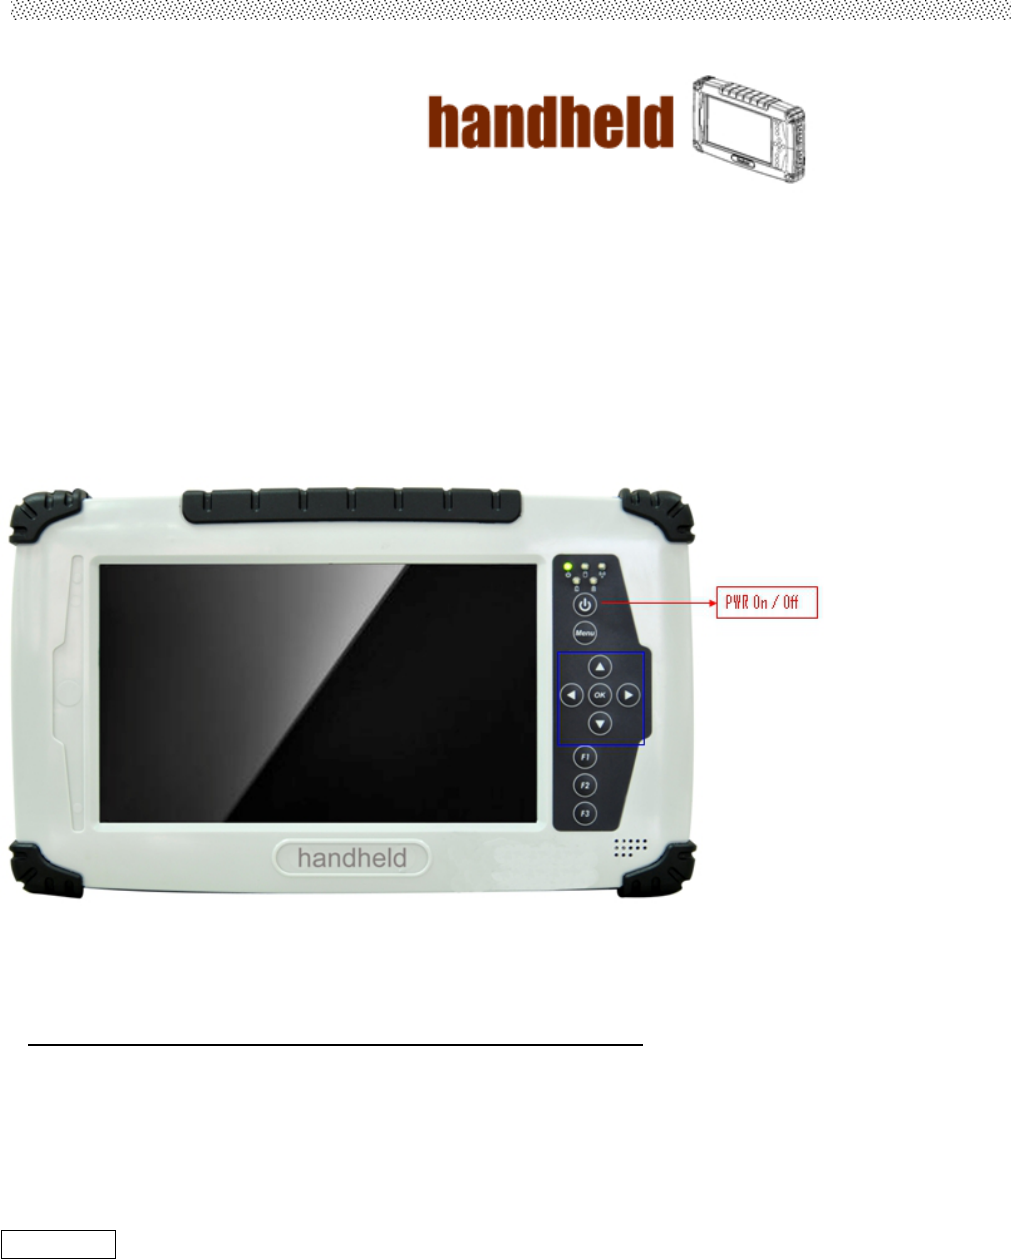
1.2 How to Use the Tablet PC
This section describes how to control this Tablet PC.
Components Function Description See Other
Intro.
1 Power On
Button
PUSH 4 seconds to turn on the tablet
pc
2 LED Indicator Shows the Power Status, HDD
Status, Left and Right Battery Status,
and Wireless Status
3 Menu Push Menu function to show
Brightness, Volume,Battery status
and Wireless Enable/Disable.
4 F1 – F3 Hotkey 6 programmable Hot-key functions
for user to define by application,
default first short push key (F1 short)
will turn-on Outlook Express

User’s Manual 14
5 Up/Down/ Left/
Right/OK
Button
Cotrol the up, down, left, right and
Enter function.
User’s Manual 15
1.3 LED Indicator
LED Term Indicator Status Description
Power mode Green: System Turn On.
No Light : System Turn Off
Battery
Status
No Light: 100% full charge or power on with AC adapter
Green Light: Product under charge
Red Light: Low battery status
Red blinking light : Low Battery warning < 5%
Storage
Status Green Light blinking: HDD is using
Wifi status Green Light blinking: Any RF Device On
No Light: RF device is not working

User’s Manual 16
1.4 Using the Battery Packs
This section describes the details of using the battery packs.
Using the Battery Packs
Before you use your Handheld tablet PC on the road, you will have to charge the
battery packs, the battery packs begins to charge as soon as the Handheld tablet PC
is connected with the external power source. Please fully charge the batteries before
using them in the first time. The new battery packs must 100% charged before the
Handheld tablet PC is disconnected with the external power source. The battery pack
is fully charged when the battery light indicator turns OFF. It takes about couple of
hours to fully charge the battery when the Handheld tablet PC is turned OFF.
Battery Care
The Handheld tablet packs like all rechargeable batteries, it have limit on the number
times it can be fully recharged. Fully draining and charging the battery once a day in
each day will leave the batteries last over a year, but rechargeable time limits are
based on your environmental temperature, humidity, and how your tablet PC is used.
The ideal environmental temperature range between 10∘C and 29 C∘ (50 F and ∘
85 F)∘.
Battery Power System
The Handheld tablet PC is designed to work with two removable battery packs located
inside the battery pack compartment. The fully charged batteries pack will provide
several hours of battery life, which can further extended by using power management
features through the BIOS setup. The battery system implements the power
management software which allows the battery to accurately report the amount of
charge percentage left in the battery.
Charging the Battery Pack
You can charge the battery pack by using the power adapter. When the power adapter
is plugged in, the inserted batteries packs automatically recharges whether your tablet
PC is ON or OFF. It takes about couples of hours for battery to receive fully charge
when the power is OFF but takes twice as long when the tablet PC is in use. When the
red charge LED indicator in flashing, charging is required. The battery is charging when
the red LED is solid, when the LED is turned OFF, the battery pack is fully charged.
Insert the battery pack
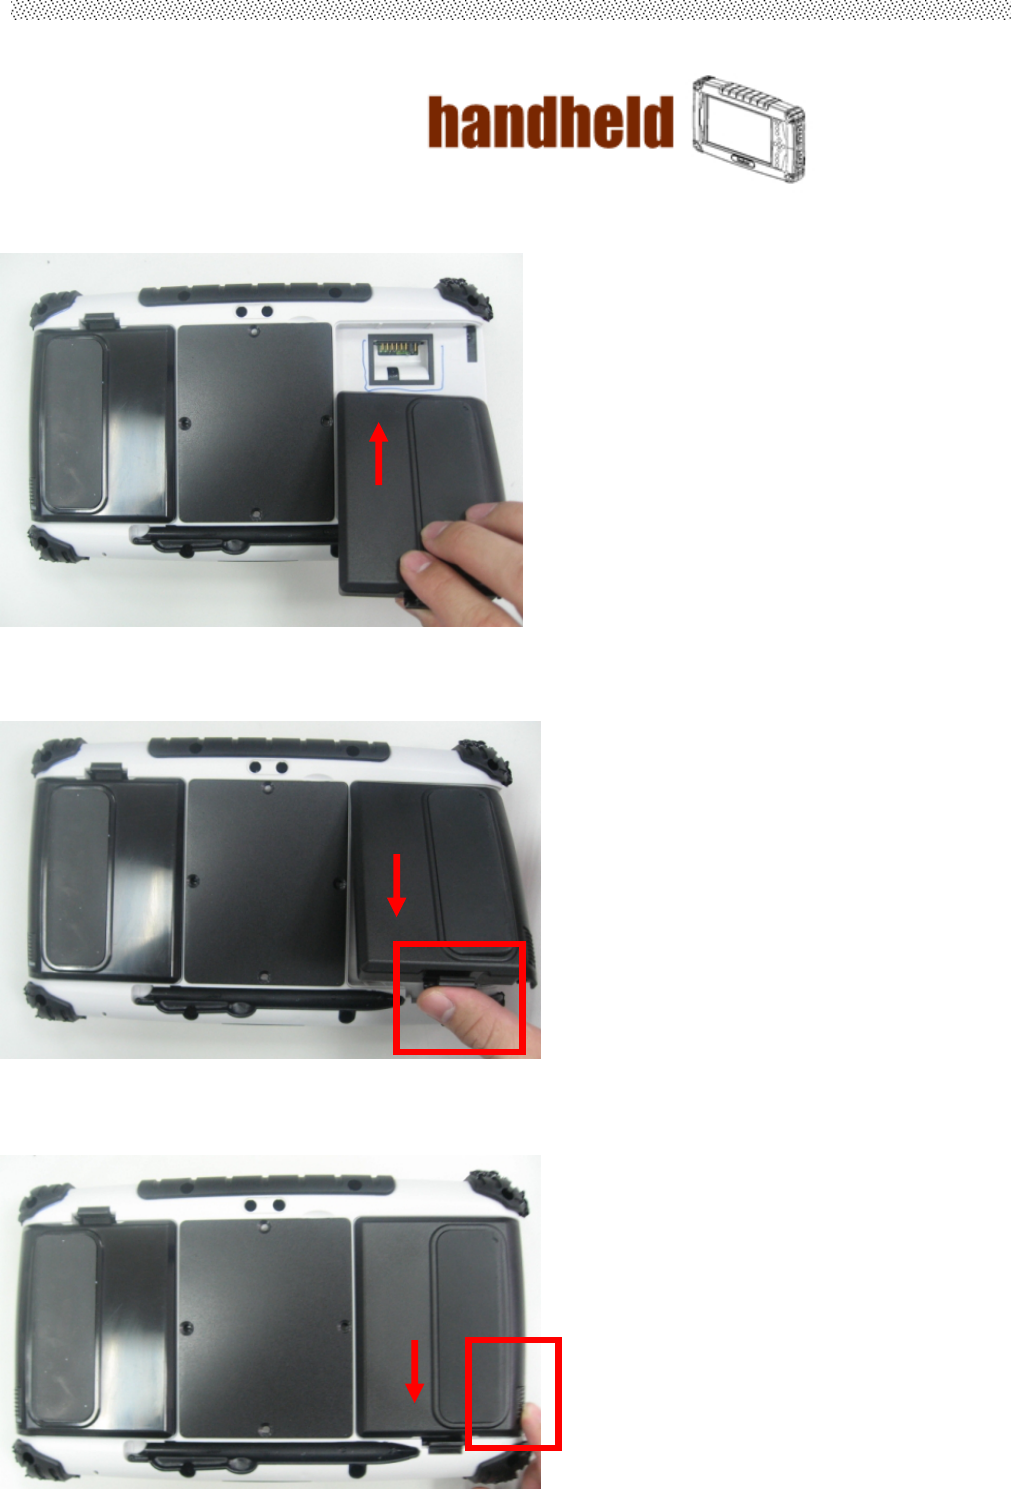
User’s Manual 17
Step 1
Insert the battery pack into the battery slot.
Step 2
Press down the compression lock into the tablet pc.
Step 3
Press the latch down to fasten the battery on the tablet PC
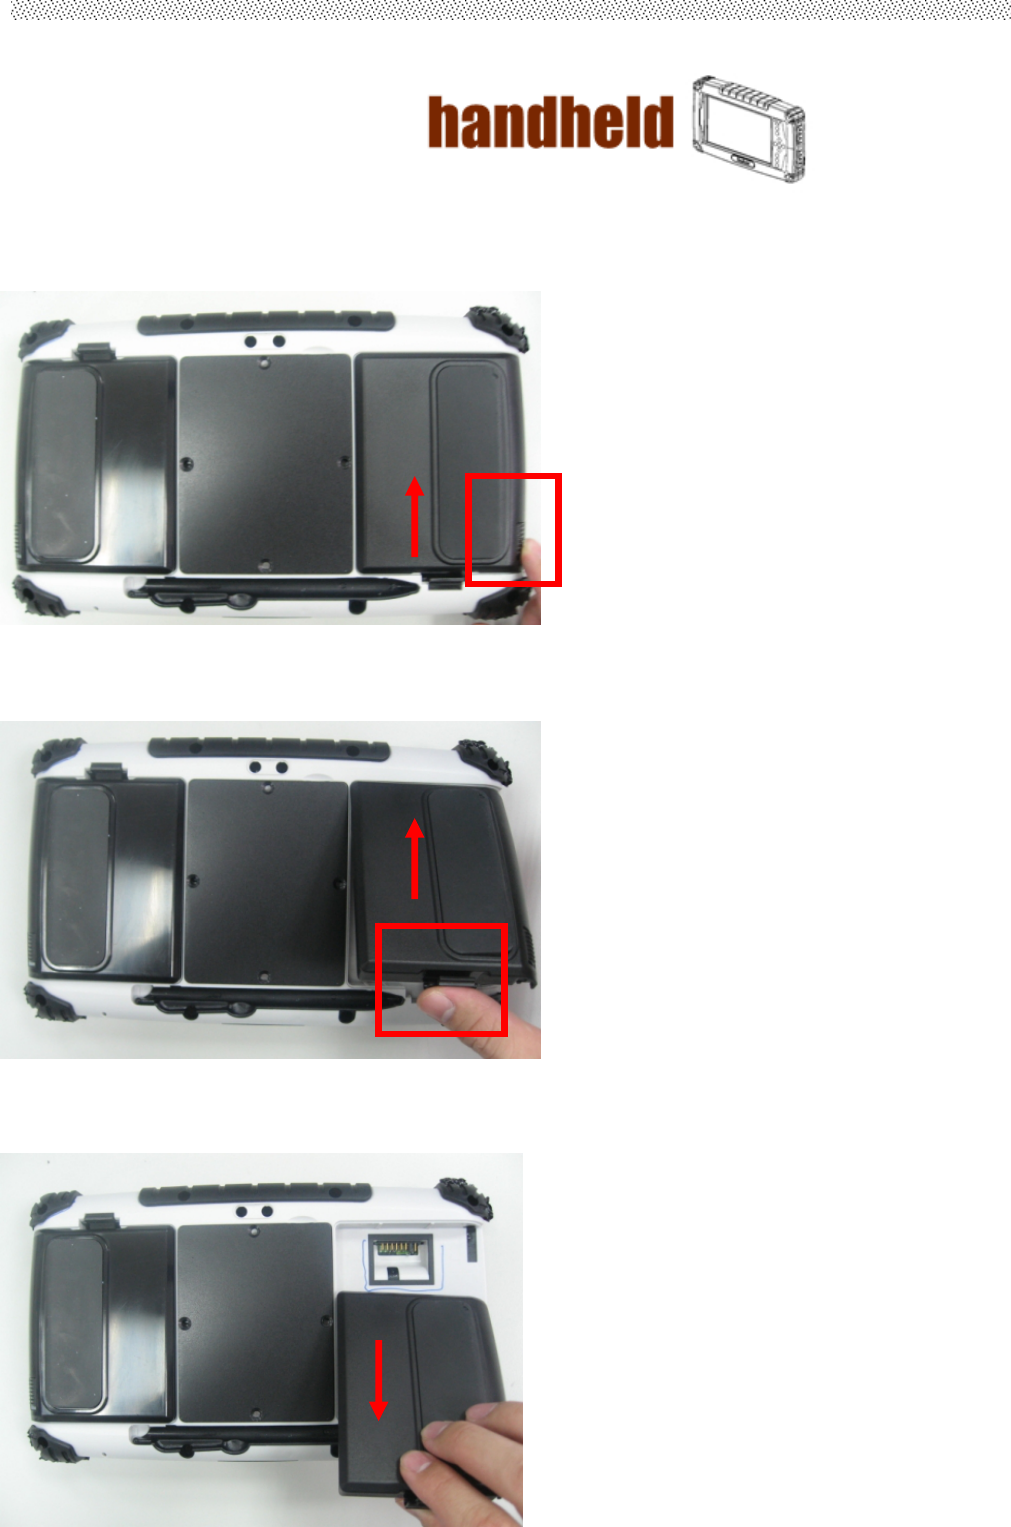
User’s Manual 18
To remove the Battery
Step 1
Press the latch up to loose the battery pack on the tablet PC
Step 2
Press up the compression lock from the tablet pc.
Step 3
Take the battery pack from the battery slot.
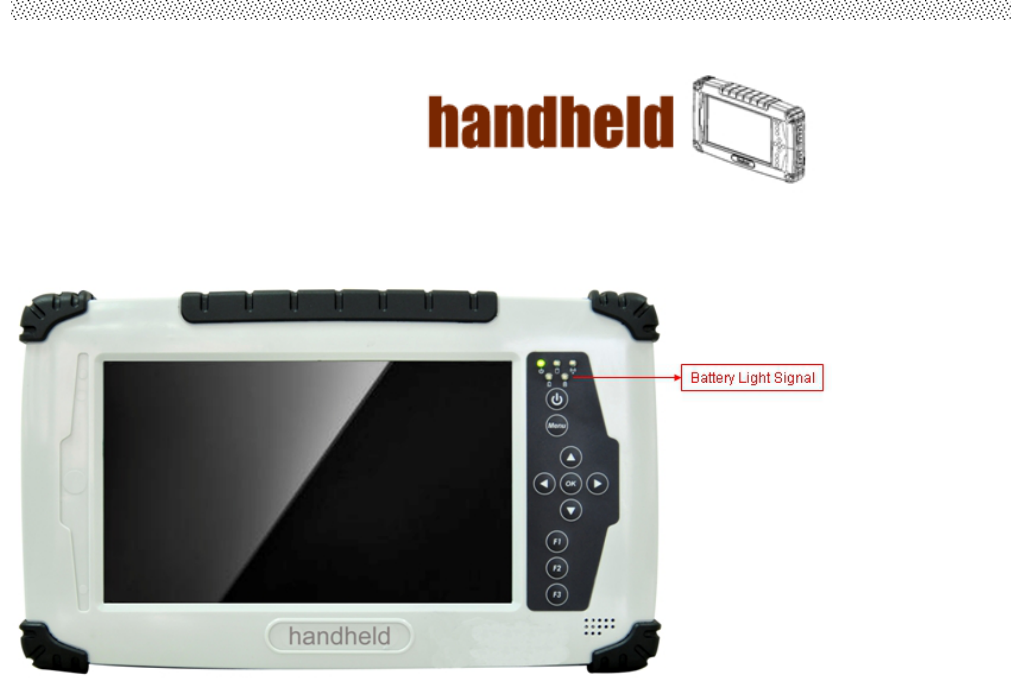
User’s Manual 19
1.5 The Battery Light Signal Instruction
1. The two battery packs charging procedure.
When the tablet pc is connected with the power source, the battery packs are starting
to charge.
A. Battery Charging Mechanism:
1. The battery packs are both at low power level
a. If first battery’s power level is higher the second battery than 10%, the PC will charge
the second battery first.
b. If both batteries’ power level differences are lower than 10%, the PC will charge two
batteries at the same time.
2. If one battery is full charged, the other is at low power level, the PC will charge the
battery which is at low power level.
3. If both batteries are full charged, the PC will shut down the charging current.
User’s Manual 20
B. Battery Discharging Mechanism:
1. If the battery on the right is full charged (>3%), the PC will select the right one as the
power source.
2. If the battery on the left is full charged (>3%), the PC will select the left one as the
power source.
3. If the both batteries are full charged, long push the F3 hot tab to switch the battery
power source.
4. When the battery’s power level is under 3%, the PC will automatically switch the
power source to the other battery.
5. When the battery’s power level is under 10%, the battery light is flashing the red light
to alarm.
6. .When both batteries power level are under 10%, the PC will send out the red light to
alarm.
6. When both batteries power level are under 3%, the PC will turn off the power
automatically to protect the battery pack.
Battery Light Signal: Charging ● Low Power ◎
Battery A\B B: 10%~100% B: 3%~10% B: 0%~3% B: No battery
A: 10%~100% Use A: ● ○
Use B: ○ ●
Use A: ● ◎
Use B: ○ ◎
Use A: ● ◎
Use B: Switch A
A: ● ○
A: 3%~10% Use A: ◎ ○
Use B: ◎ ●
Use A: ◎ ◎
Use B: ◎ ◎
Use A: ◎ ◎
Use B: Switch A
A: ◎ ○
A: 0%~3% Use A: Switch B
Use B: ◎ ●
Use A: Switch B
Use B: ◎ ◎
Turn off the PC Turn off the PC
A: No battery Use B: ○ ● Use B: ○ ◎ Turn off the PC Turn off the PC

User’s Manual 21
Chapter 2
Software Operation
User’s Manual 22
CHAPTER 2 Software Operation
This Chapter will guide you how to operate the Tablet PC, including start / stop the PC,
and how to use menu function including basic hardware function adjustment and the
Hot Tab hotkey utility software that is very easy & helpful for operating the computer.
2.1 Turning On and Off the Tablet PC
2.1.1 Turn on the Tablet PC
1. Place your tablet PC on a flat and stable surface or hold the tablet PC on your hand.
2. Make sure the tablet PC is either connected with AC power adapter or the battery
pack with power.
3. Press the power button at least for 4 seconds to turn it on.
2.1.2 Turn off the Tablet PC
Turn off the tablet PC power source by using the “Shut Down” command of your
operating system.
**Caution
If you have to turn the tablet PC on again immediately after turning it off, please wait for
at least for five seconds. Be sure to know that turn the tablet PC off and on rapidly can
damage the whole device.

User’s Manual 23
2.2 How to use the software utility
Hot-Tab Hotkey Function
PUSH
Menu
Function Description Function Adjustment
1st
Time
Show Current
Brightness
Click “Left/
Down” button to
increase
brightness (Or
Drag by Touch)
Click ”OK” to
confirm and
eliminate UI.
Click ”Right/Up”
to decrease
brightness(Or
Drag by Touch)
Click ”OK” to
confirm and
eliminate UI.
2nd
Time
Show current Volume
3rd
Time
Show current Battery Usage and Two
BTR status
4th
Time
Show current on/off
of Wireless mode
Use touch button to select all
kind of wireless communication
function Enable/ Disable
5th
Time
Show software version for
a. Hot TAB Utility version
b. BIOS / EC version
LONG
PUSH 4
sec
Lock/Unlock all button function
Push 4 seconds to Lock all button**(not
including Touch)
Push 4 seconds to Unlock back
to normal operation
90 %
50 %
User’s Manual 24
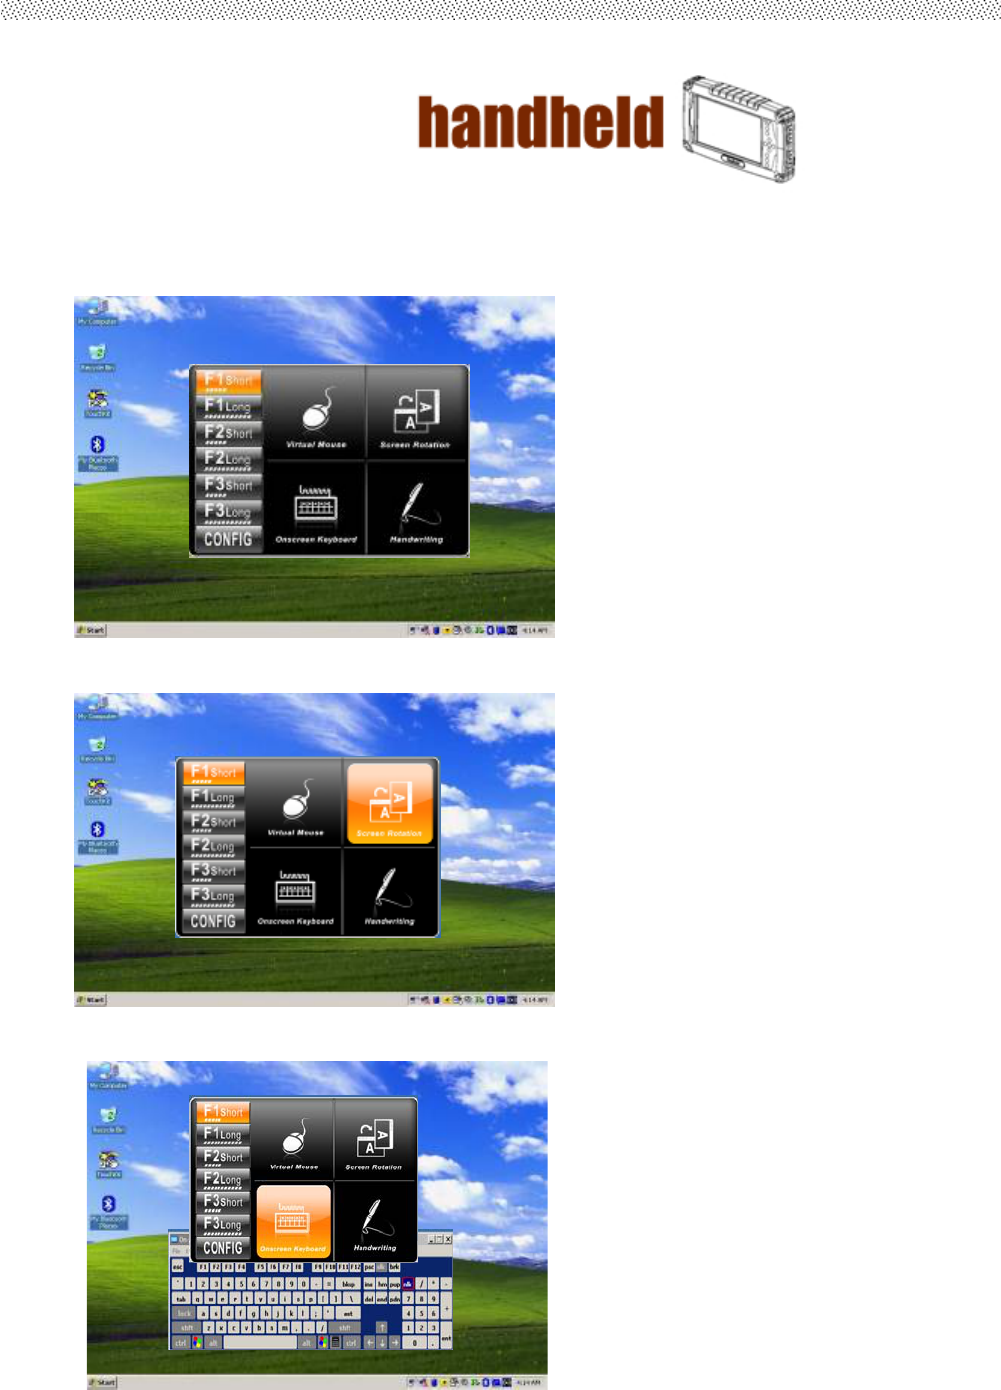
2.3 Hot TAB Software Utility Functions
1. F1 Hot TAB functions will show four functions
A. The first is virtual mouse
B. Screen rotation
C. Onscreen Keyboard

User’s Manual 25
D. Handwriting(Optional)
E. F2 to F3 functional Hot key
You can use “Browse” and choose the execution program file.
2. Power Manage function
User’s Manual 26
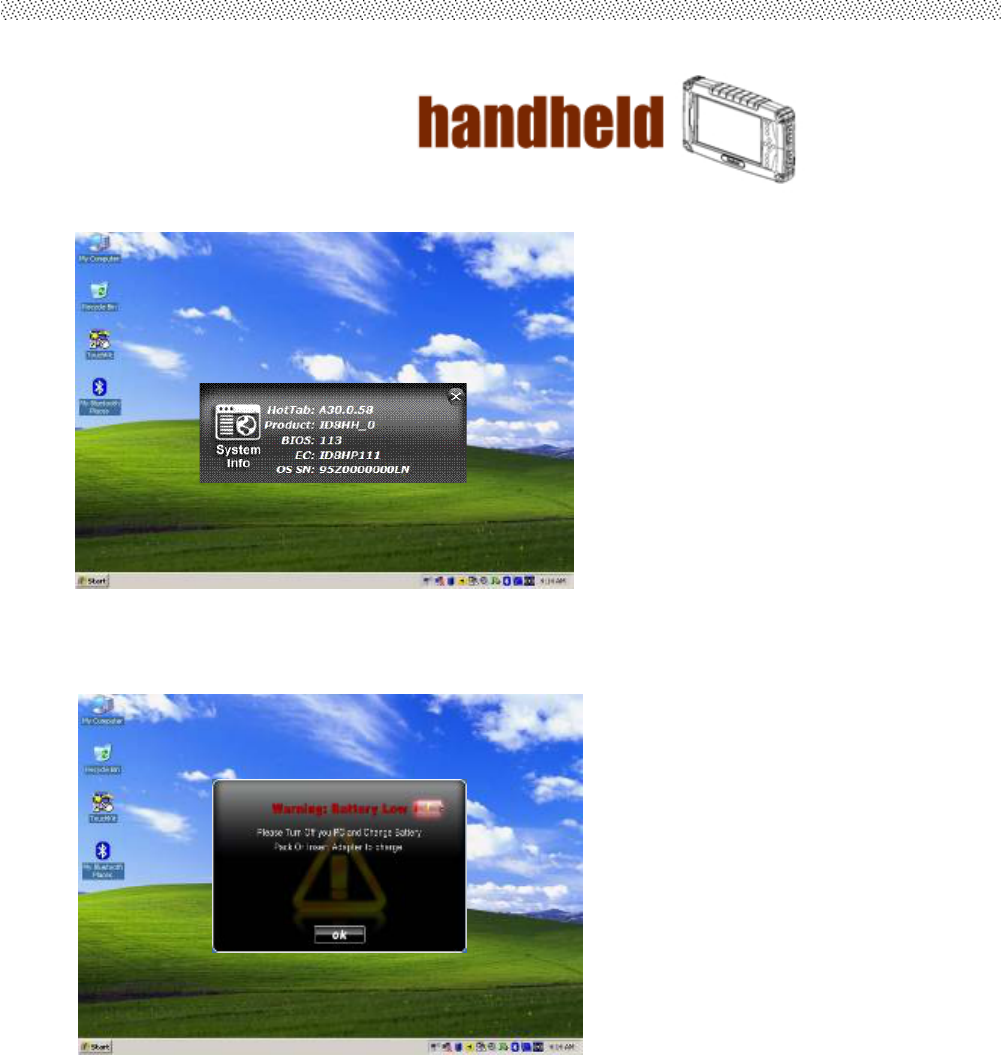
3. System Information
When you press menu 3rd time, you can see the system
information.
4. Low battery warning notice:
User’s Manual 27
2.4 How to use the Wireless Network
WeapplyIEEE802.11b/g/nWiFi+Bluetooth4.0HSStandard(ClassI)Halfminicardfordefaultfunctionof
theA7.
TheWLANfeaturesinclude:
SupportPeer‐to‐Peer(Ad‐Hoc)andAccessPoint(Infrastructure)modes.
Enhancedwirelesssecurity:64/128‐bitsWEP,WPA,WPA2.
Wirelessconnectionupto150Mbps
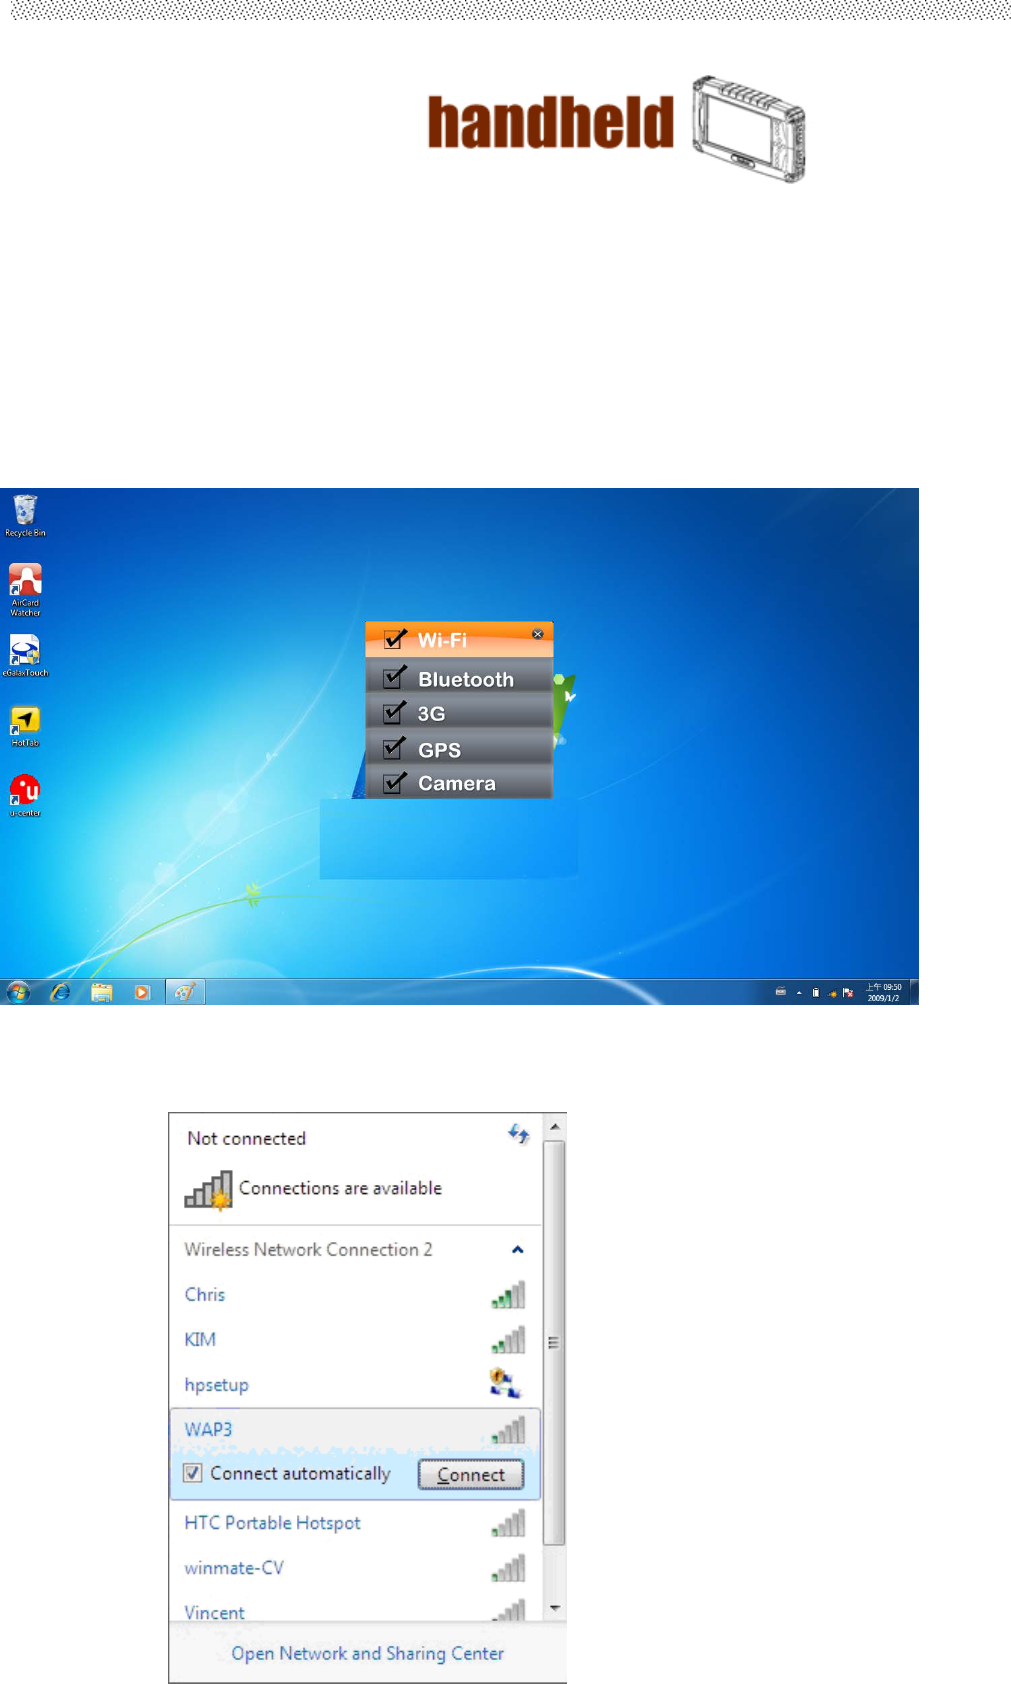
1. PresstheMenubuttononyourTabletPCtoopentheHottabmenu.Clickthe“Wi‐Fi”toswitchthewireless
radioon/off.
2. ClicktheWirelessNetworkicononthe
User’s Manual 28
taskbar.(Anorangelightintheiconindicatesconnectionsareavailable.)
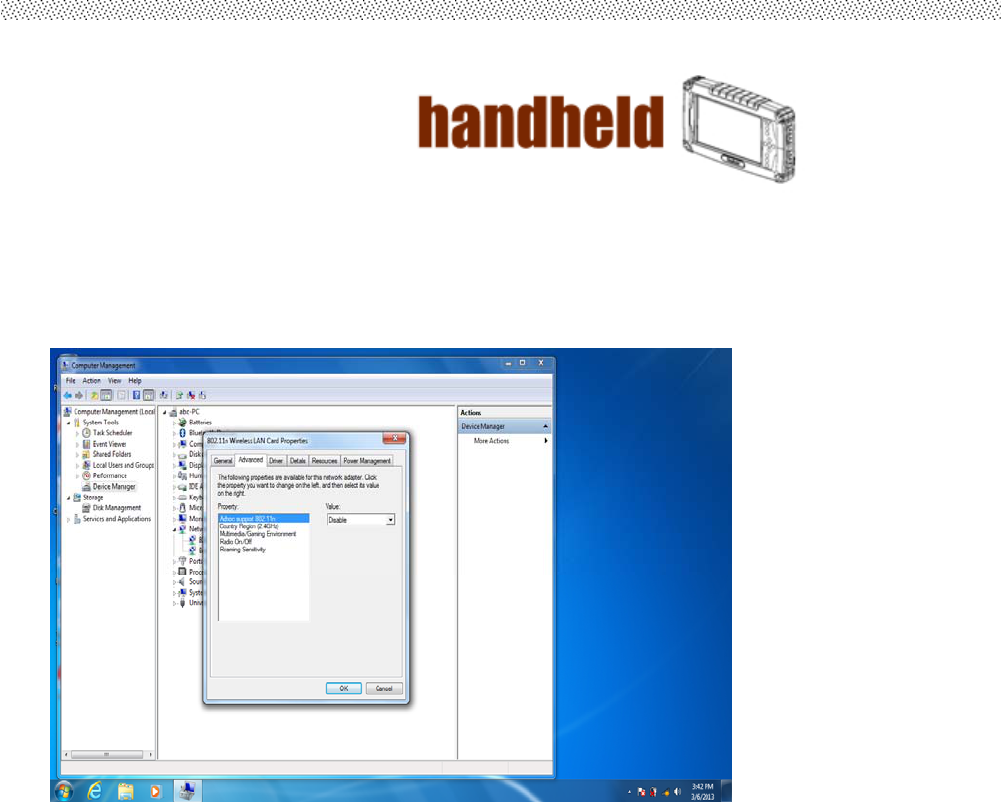
3. Youcanalsodosomedetailsettingfromthedevicemanager.
User’s Manual 29
2.5 How to use the Bluetooth
Dependingonyourapplication,theBluetoothmodulecangiveyoucapabilityforshort‐rangewireless
communicationsbetweendeviceswithoutrequiringacableconnection.Thetransmissioncangothroughwalls,
pocketsandbriefcasesaslongastwodevicesarewithinrangearound10meters.Followingtheeasystepto
connecttotheBluetoothcommunication.
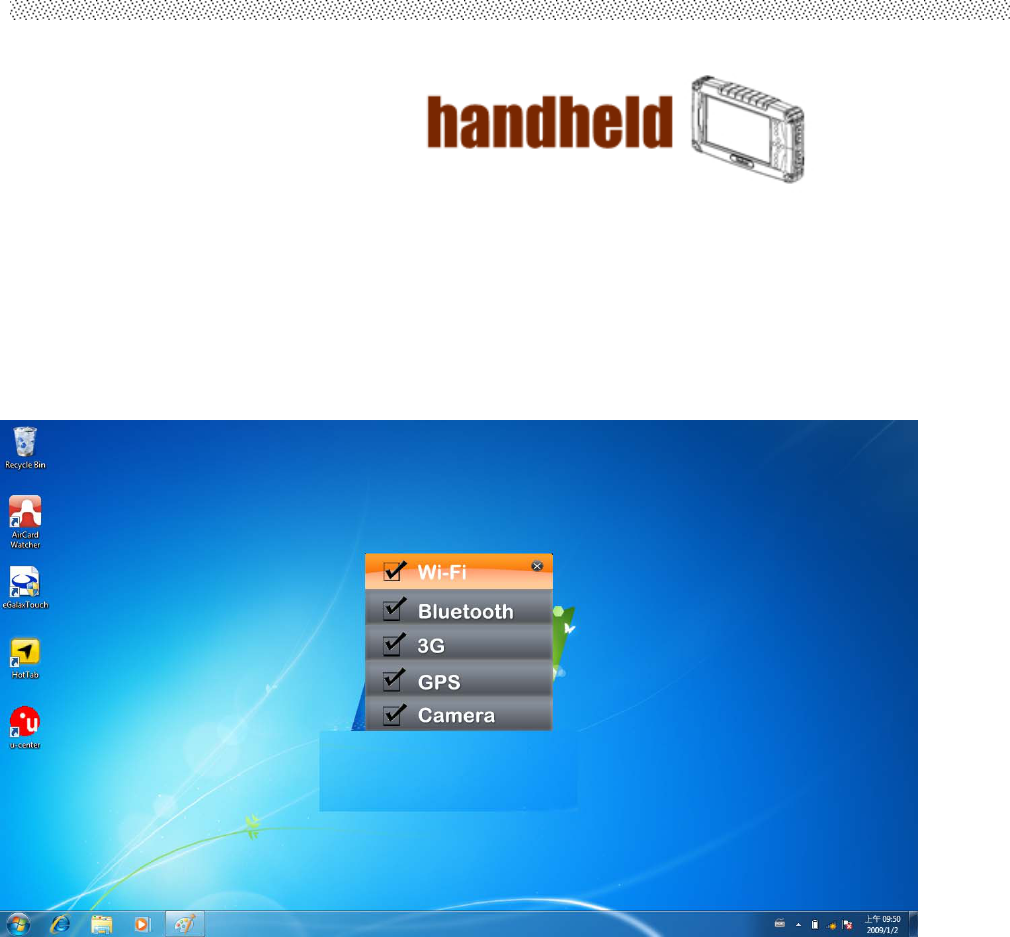
1. PresstheMenubuttononyourTabletPCtoopentheHottabmenu.Clickthe“Bluetooth”toswitchtheBT
radioon/off.
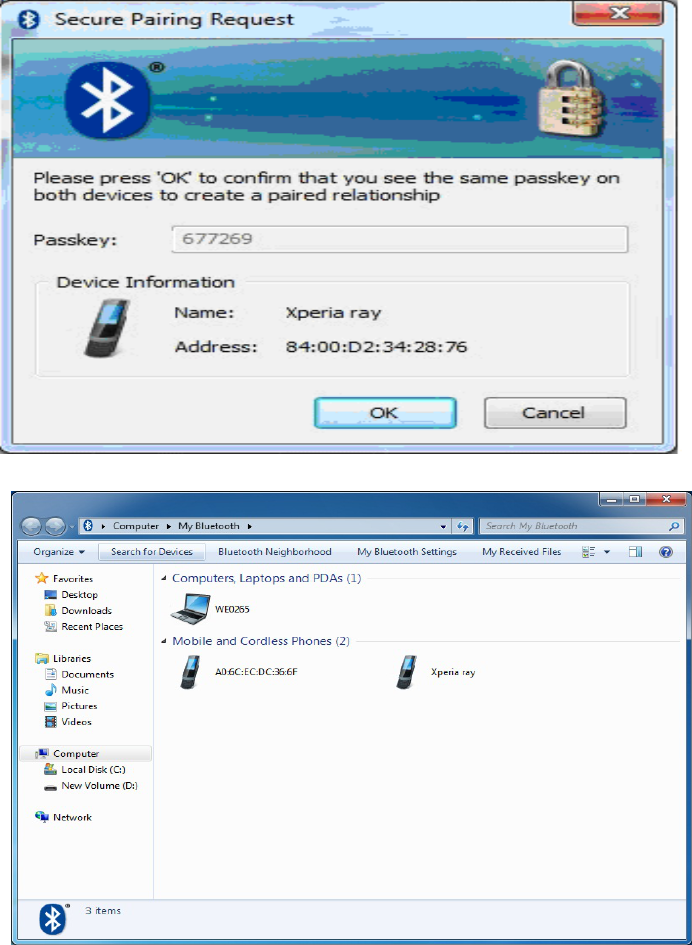
2. Afterinstallingthedriverutility,theBluetoothshortcutwillshownonscreen,doubleclicktheshortcutandit
willsearchanybluetoothdeviceautomatically.Ordoubleclick“SearchDevices”tosearchagain.
Users Manual Rugged Tablet PCs
3. Choosethebluetoothdeviceyouwanttoconnect,andleftclicktochoose“Connect”.Thenthe
devicewillbeconnectedtothemodule.
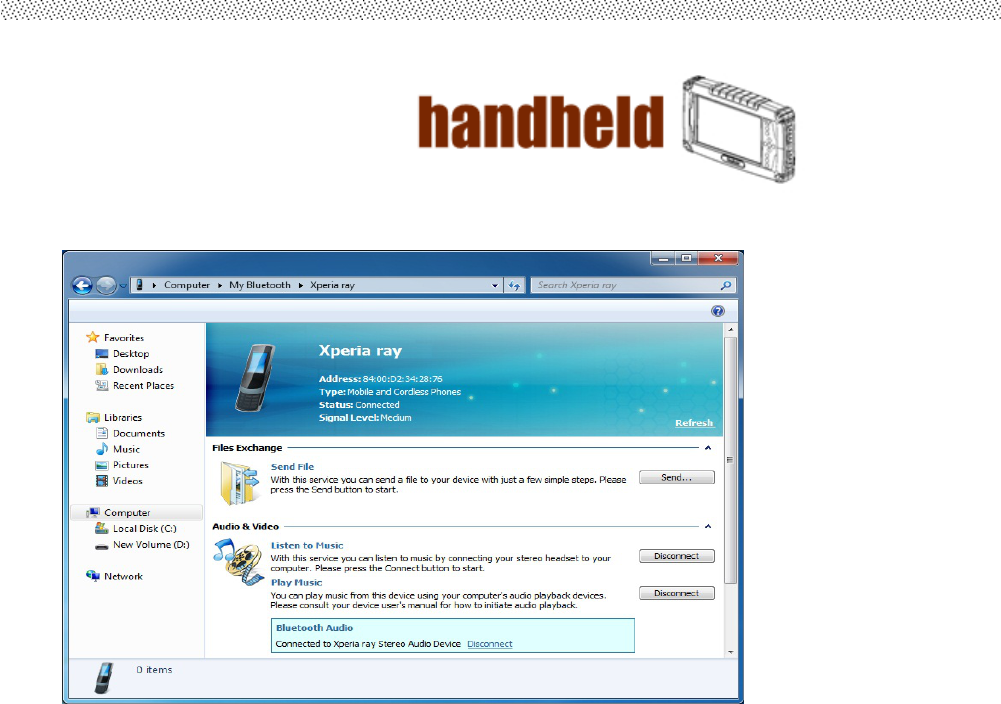
User’s Manual 31
4. Whenunderconnecting,youcanchoose“Send”tosendadatatothepair
device.connection.
User’s Manual 32
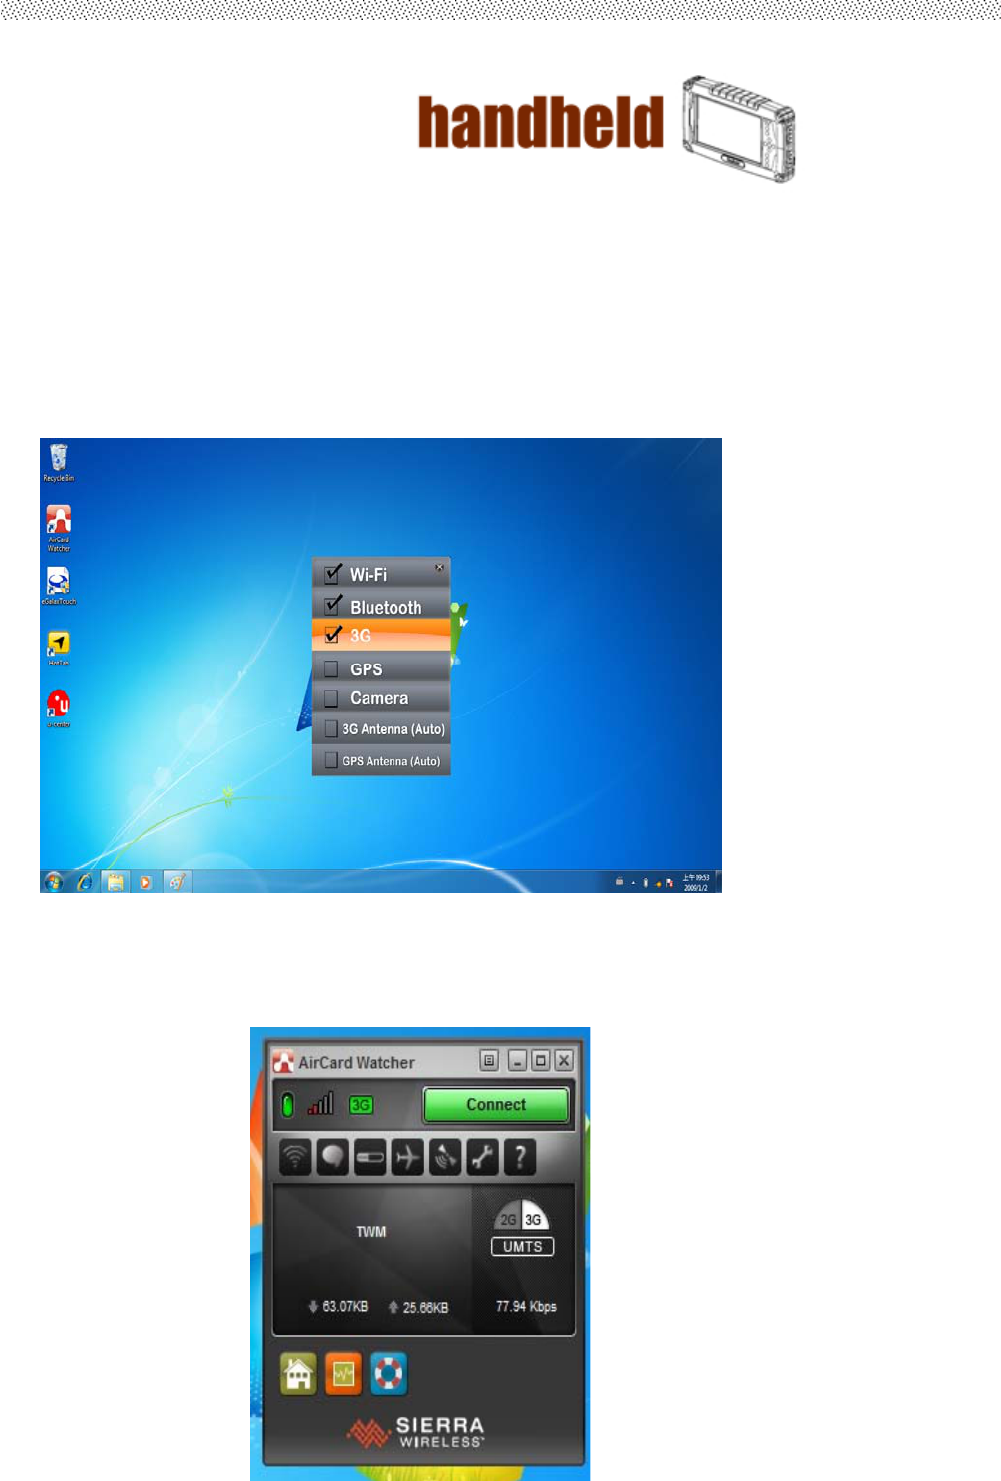
2.6 How to use the WWAN Feature
※PleaseinsertSIMcardbeforepoweron.
TheA7canapplyabuilt‐inMiniPCIe3Gmoduletoperformthe3Gfunction.Dependingonyour
application,the3GmodulecandatacardandhostPCsoftwarecombinationdelivermultiband
HSPA/UMTS,EDGE/GPRS,WCDMA/GSMconnectivityinasinglehardwareconfiguration.
1. PresstheMenubuttononyourTabletPCtoopentheHottabmenu.Clickthe“3G”toswitchthe
3Gradioon/off.
2. OnWindowsdesktop,double‐clicktheAirCardWatchershortcut.Thescreenasbelowappears.
〔Ifthe3Gdeviceisnotexist,theAirCardWatcherwillnotpopupautomatically.〕
User’s Manual 33
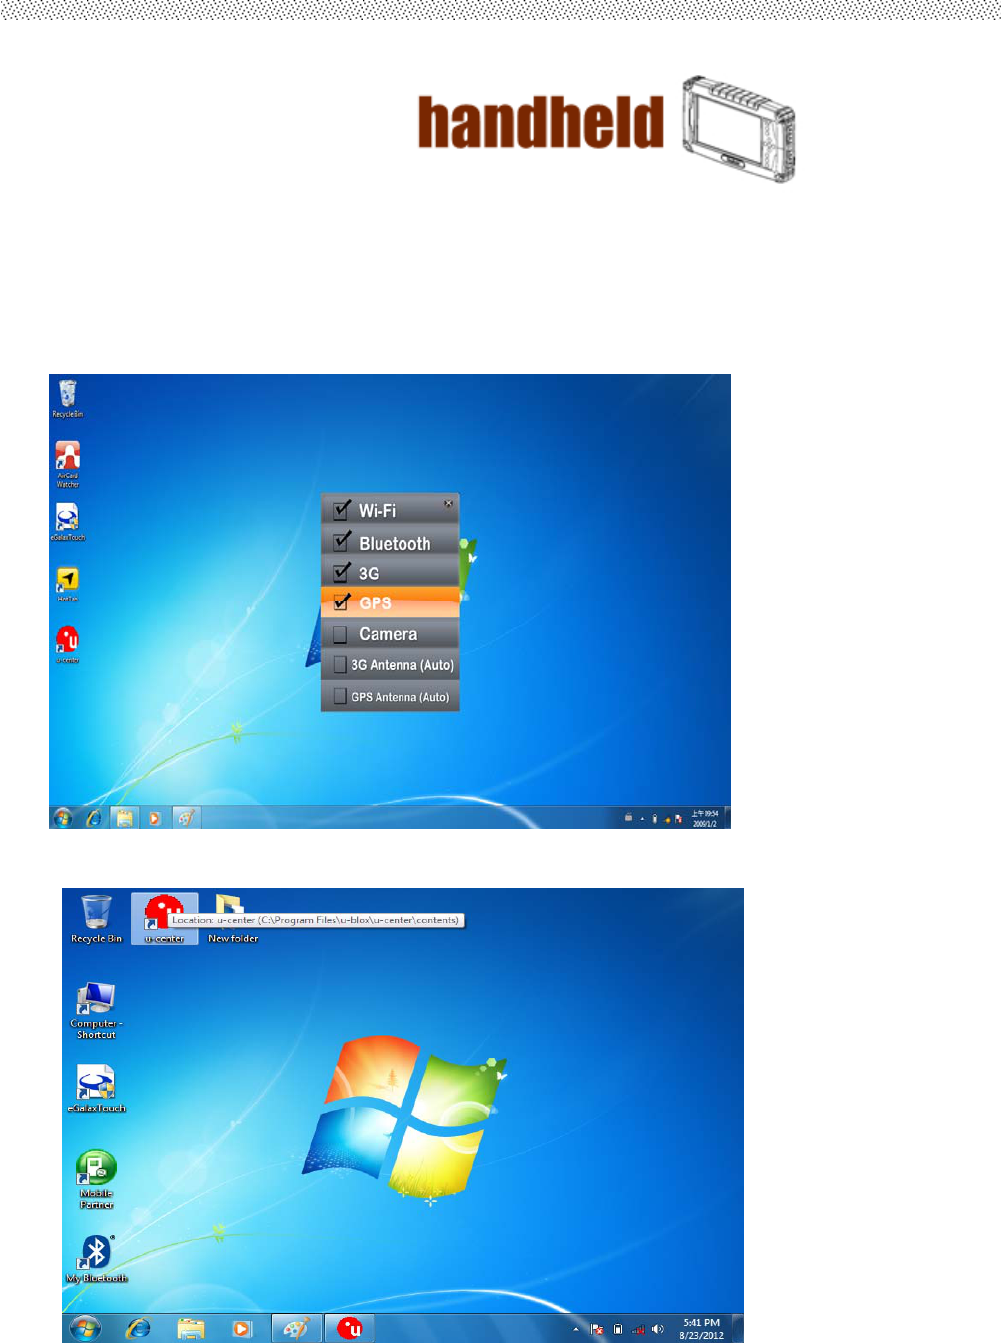
2.7 How to use the GPS Feature
WeapplyanonboardGPSmodulefordefaultfunctionoftheA7.
1. PresstheMenubuttononyourTabletPCtoopentheHottabmenu.Clickthe“GPS”toswitchthe
GPSradioon/off.
2. Click
theu‐centericontostarttheGPSfunctionsettings.
User’s Manual 34
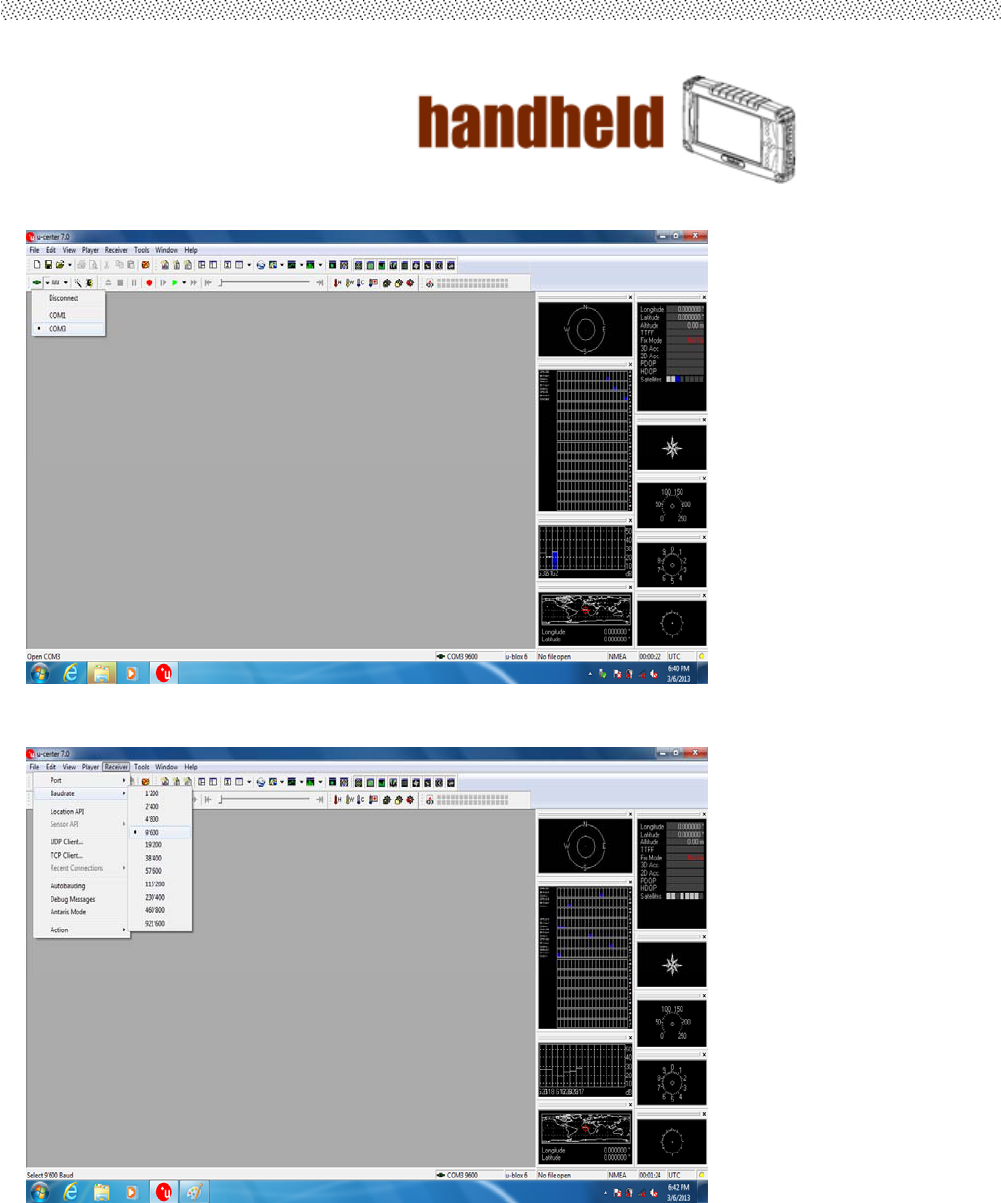
3. SettingtheReceiverPorttoCOM3
4. SettingtheReceiverBaudrateto9600
5. GPSModulewillstartColdStart.Whenthepositioningiscomplete,theFixModewillappearas
DR
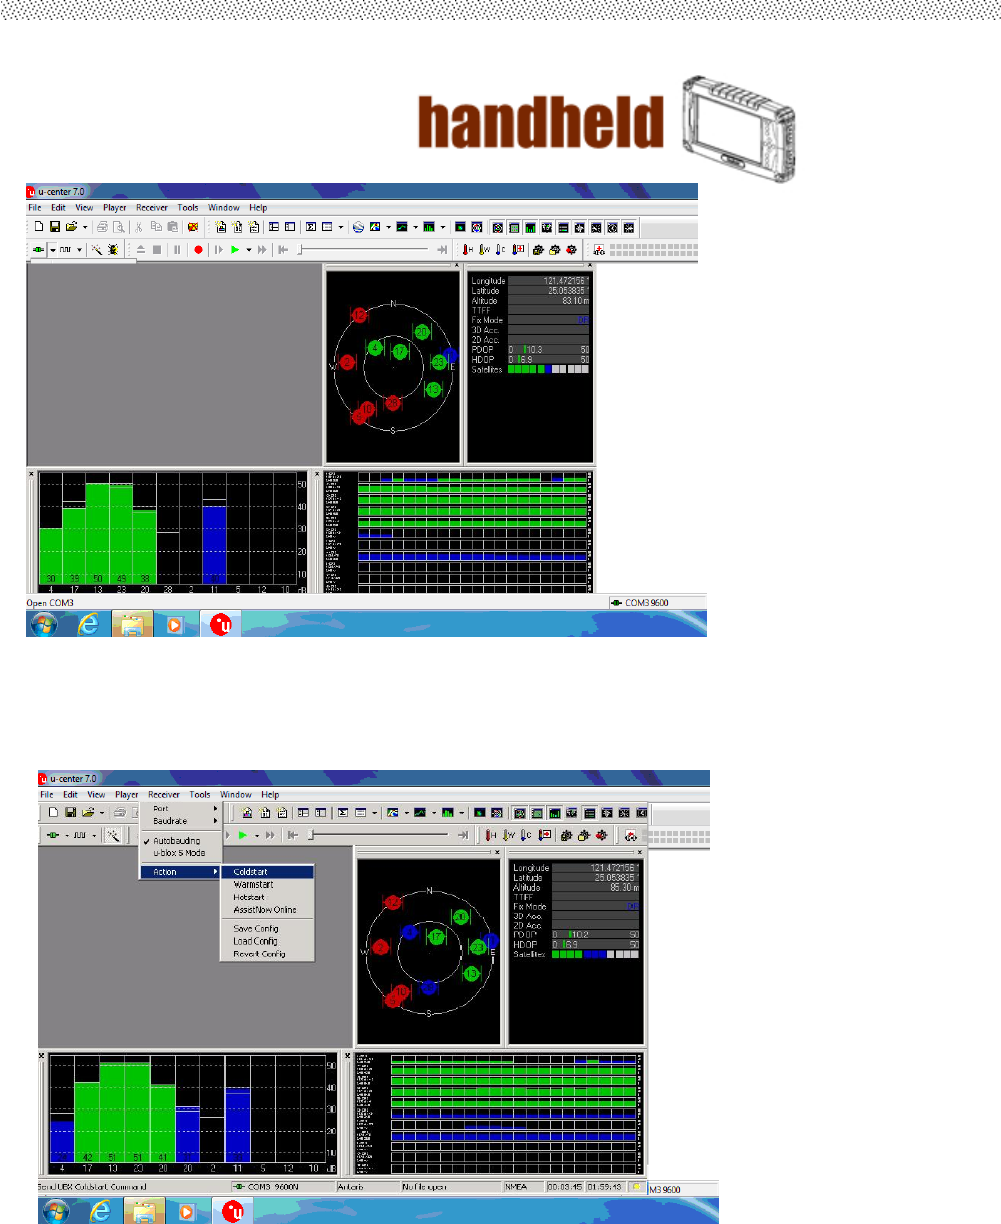
User’s Manual 35
6. Youcanchoosecoldstart,warmstartorHotstartfromReceiverAction
User’s Manual 36
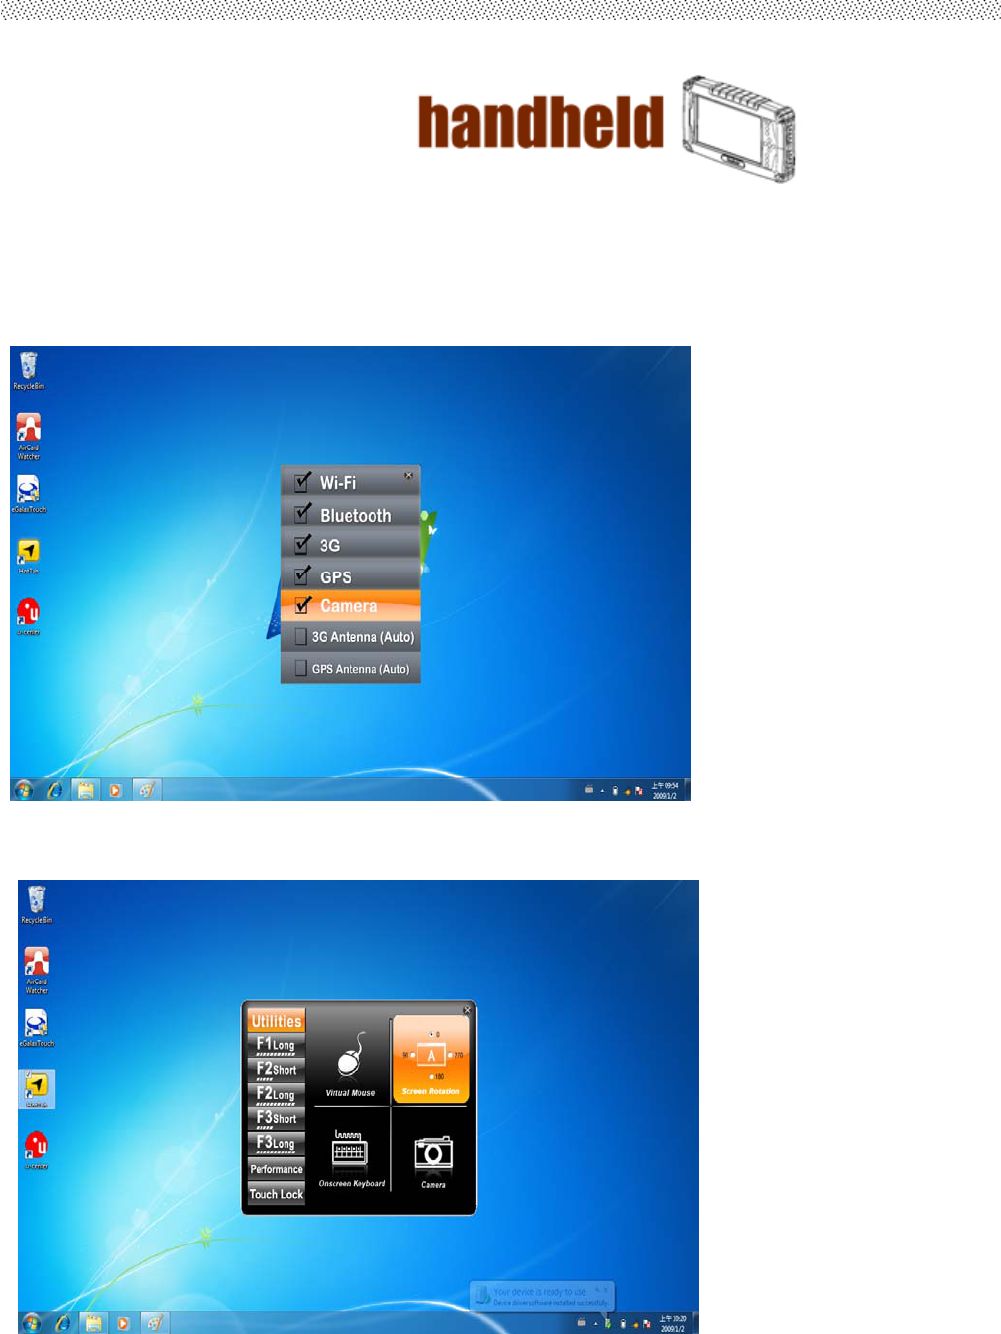
2.8 How to use the Camera Feature
TheA7appliesainternal5MPixelsCamerawithmicrophonemodulefordefaultfunction.
1. PresstheMenubuttononyourTabletPCtoopentheHottabmenu.Clickthe“Camera”toswitch
theCamerapoweron/off.
2. StarttheCameraprogram.YouwillbeinCameramode.
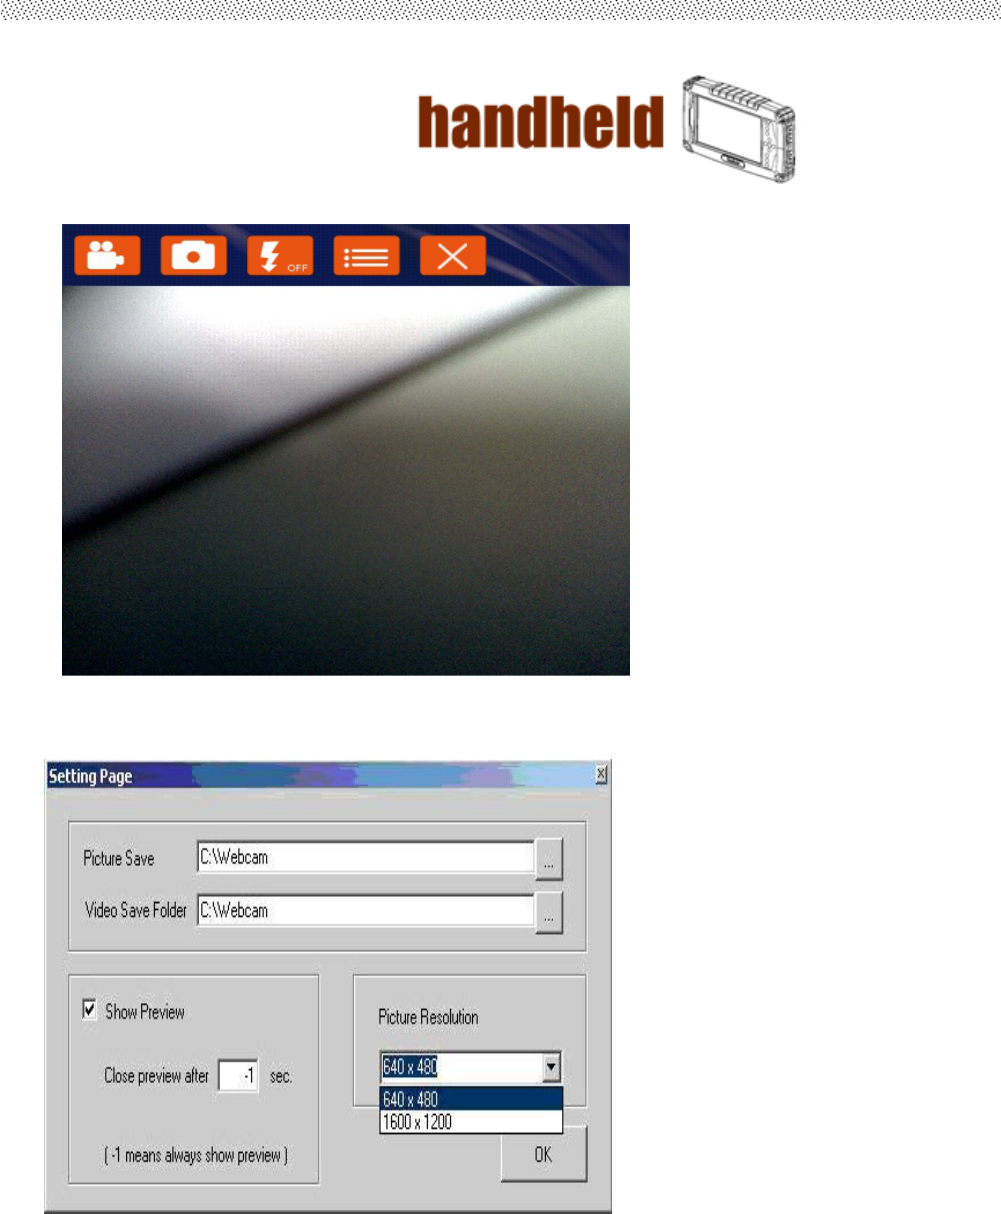
User’s Manual 37
3. Settingtheimagepre‐viewresolution.
4. Whenyousetthepre‐viewresolutionto640*480,thefinalpictureresolutionisalso640*480..
User’s Manual 38
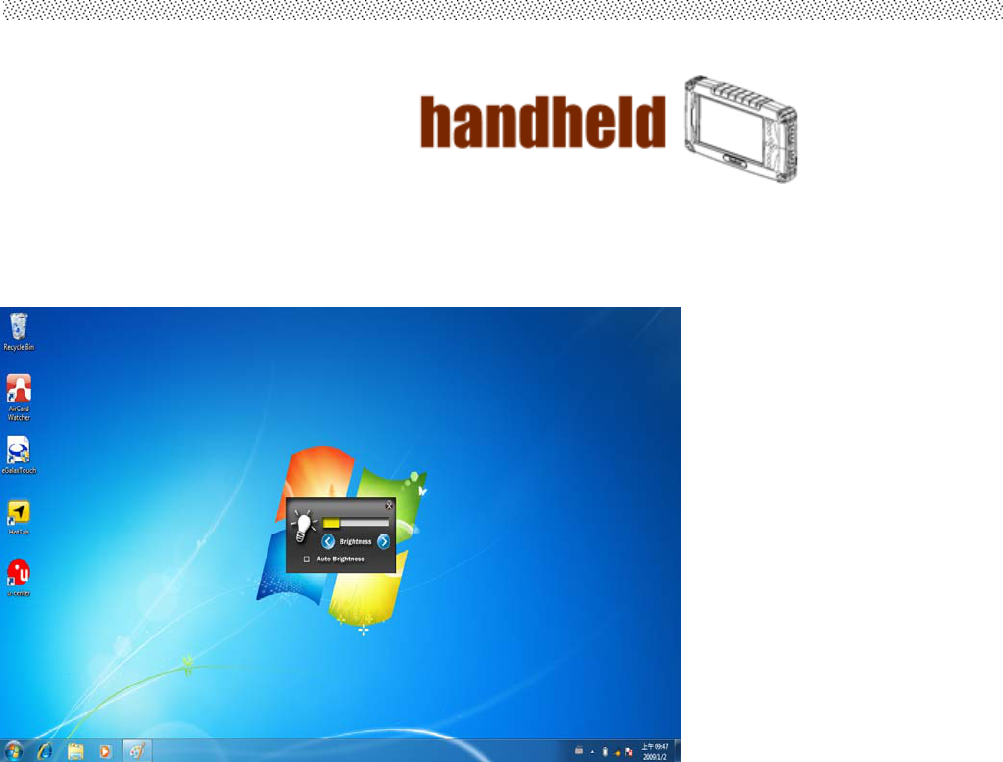
2.9 How to adjust the LCD brightness
1. PresstheMenubuttononyourTabletPCtoopentheHottabmenu.
2. AllowsyoutousetheleftandrightarrowkeystoadjusttheLCDbrightness.
3.The“AutoBrightness”choiceboxallowsyouconfigurehowthelightsensorworks.
User’s Manual 39
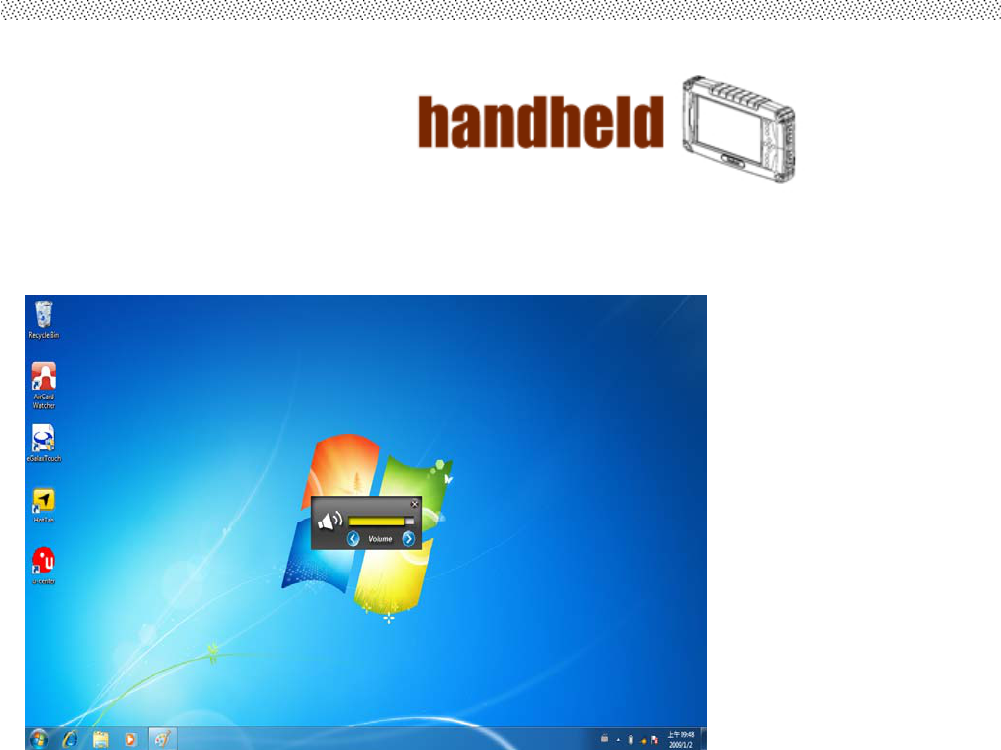
2.10 How to adjust the speaker volume.
1. PresstheMenubuttontwiceonyourTabletPCtoopentheHottabmenu.
2. Allowsyoutousetheleftandrightarrowkeystoadjustthespeakervolume..
User’s Manual 40
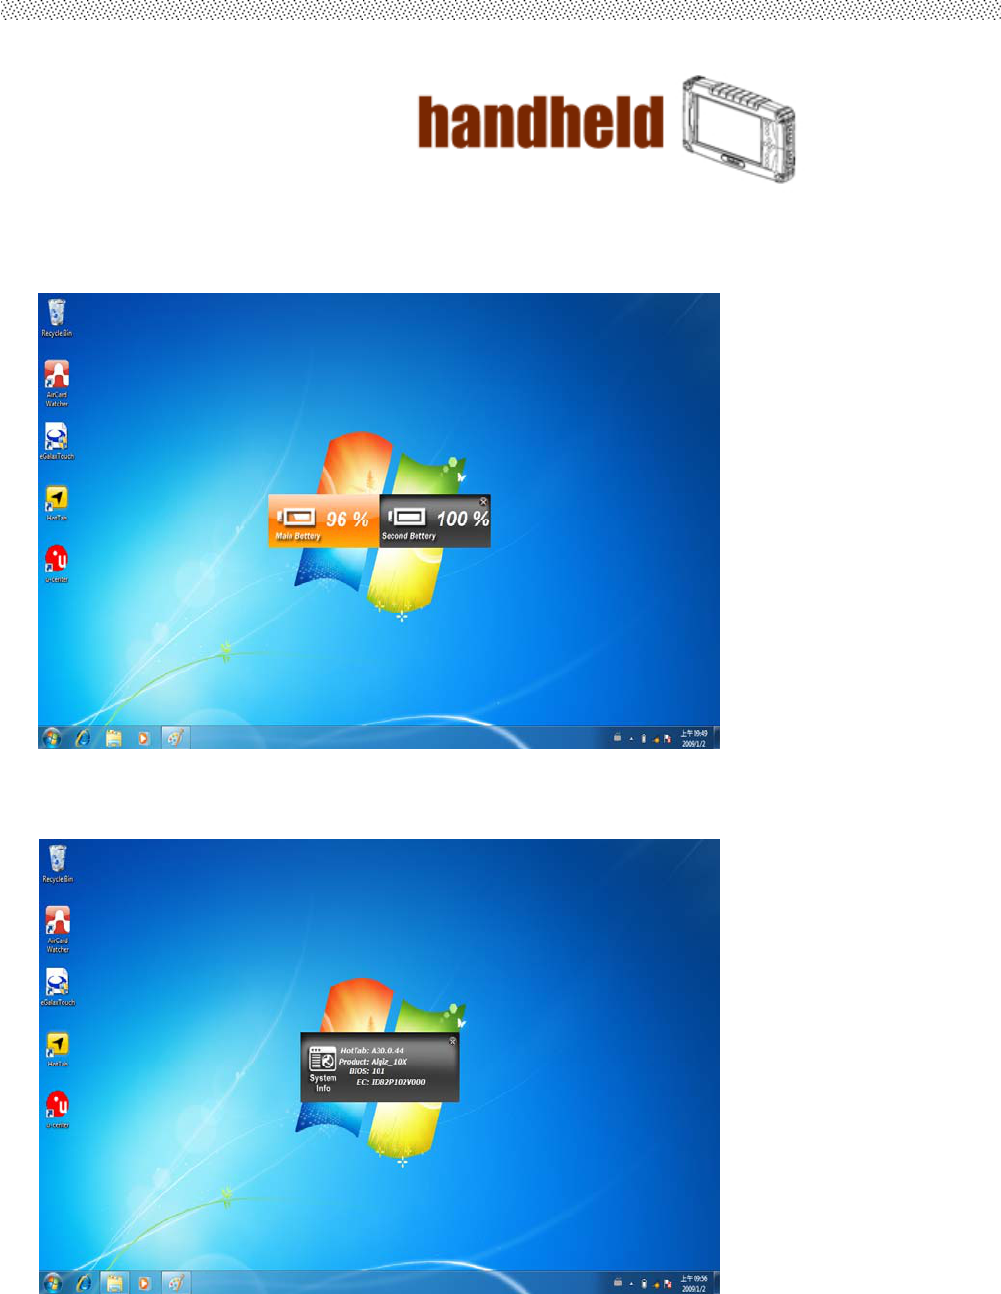
2.11 Show the battery information..
1. PresstheMenubuttonthirdtimesonyourTabletPCtoopentheHottabmenu.
2.12 Show the system information.
1.