Hangzhou Hikvision Digital Technology IPC2Q IP Camera User Manual
Hangzhou Hikvision Digital Technology Co., Ltd. IP Camera
UserManual.wiki
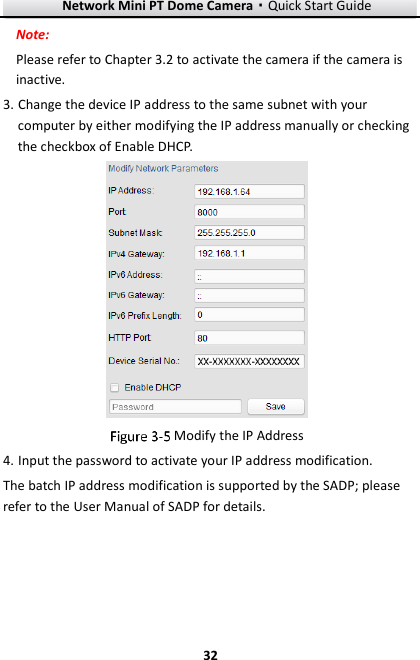
>
Hangzhou Hikvision Digital Technology
>
IPC2Q User Manual
User Manual
Navigation menu
Upload a User Manual
Namespaces
Wiki Guide
HTML
PDF
Info
Views
User Manual
Discussion / Help
Navigation


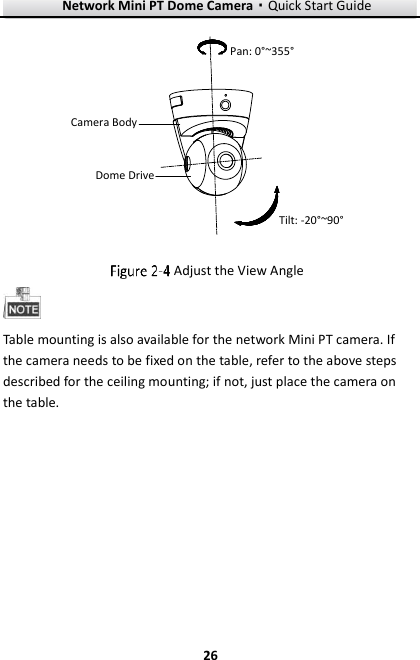
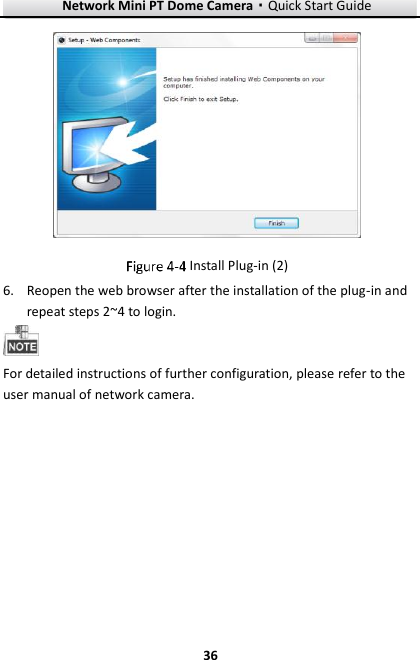
![Network Mini PT Dome Camera·Quick Start Guide 25 25 OPEN LOCK Install the Camera Adjust surveillance view angle. 1) Hold and rotate the main camera body to adjust the view angle in the pan direction: [0°~355°]. 2) Move the dome drive upwards or downwards to adjust the view angle in the tilt direction: [-20°~90°].](https://usermanual.wiki/Hangzhou-Hikvision-Digital-Technology/IPC2Q/User-Guide-2756185-Page-25.png)