Hansong ZEMIARIA Zemi Aria User Manual 30 43441 00 ZMA Manual artwork 9 28
Hansong(Nanjing) Technology Ltd. Zemi Aria 30 43441 00 ZMA Manual artwork 9 28
UserManual.wiki
>
Hansong
>
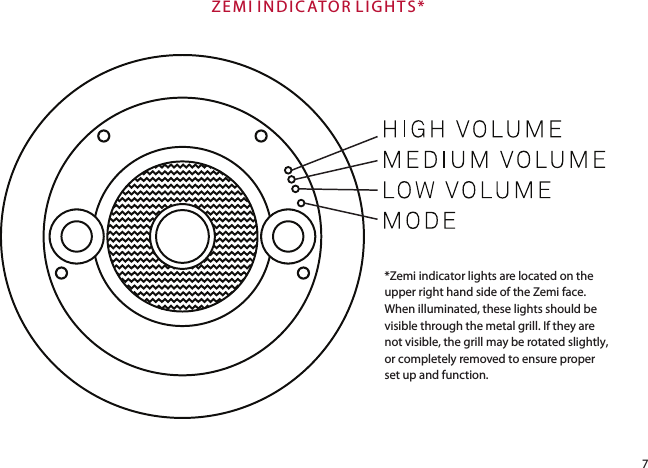
ZEMIARIA User Manual
user manual
Navigation menu
Upload a User Manual
Namespaces
Wiki Guide
HTML
PDF
Info
Views
User Manual
Discussion / Help
Navigation