Hantel HTT-800A CDMA Fixed Wireless Terminal User Manual
Hantel Co., Ltd. CDMA Fixed Wireless Terminal
UserManual.wiki
>
Hantel
>
HTT 800A User Manual
User Manual
Navigation menu
Upload a User Manual
Namespaces
Wiki Guide
HTML
PDF
Info
Views
User Manual
Discussion / Help
Navigation


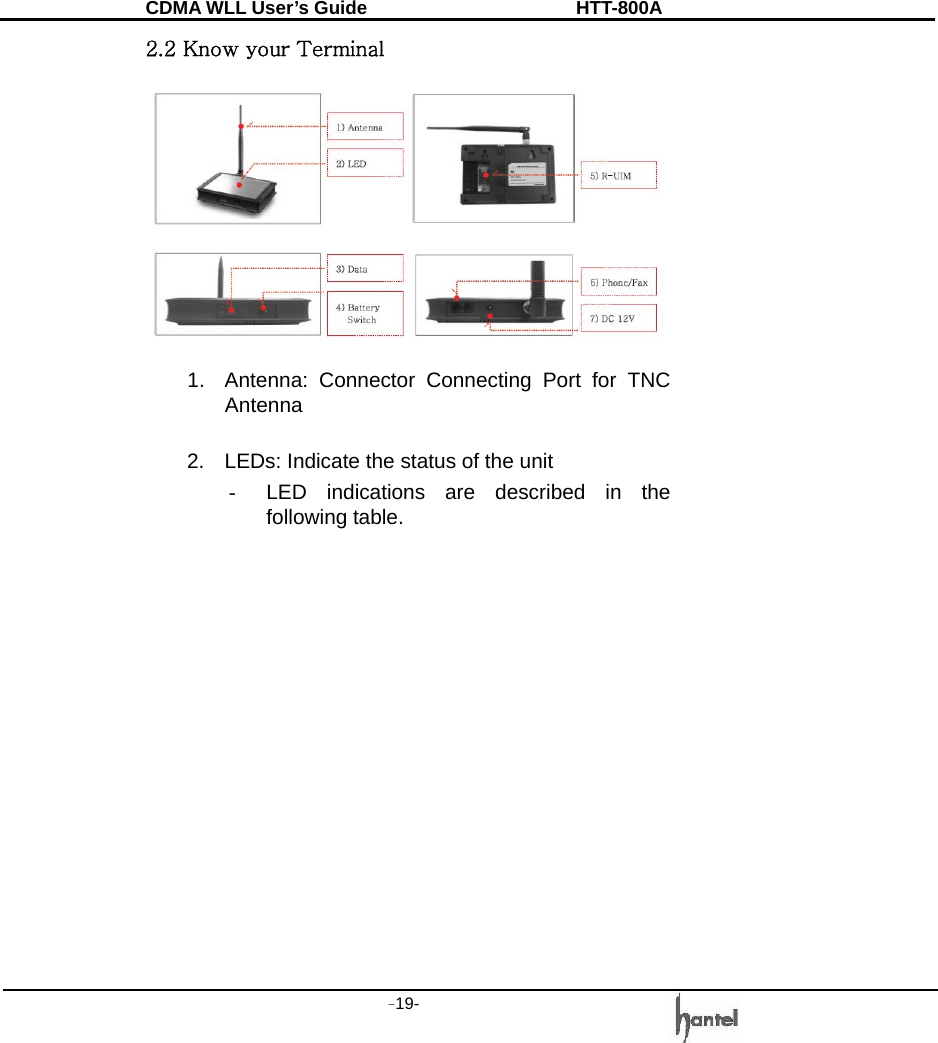
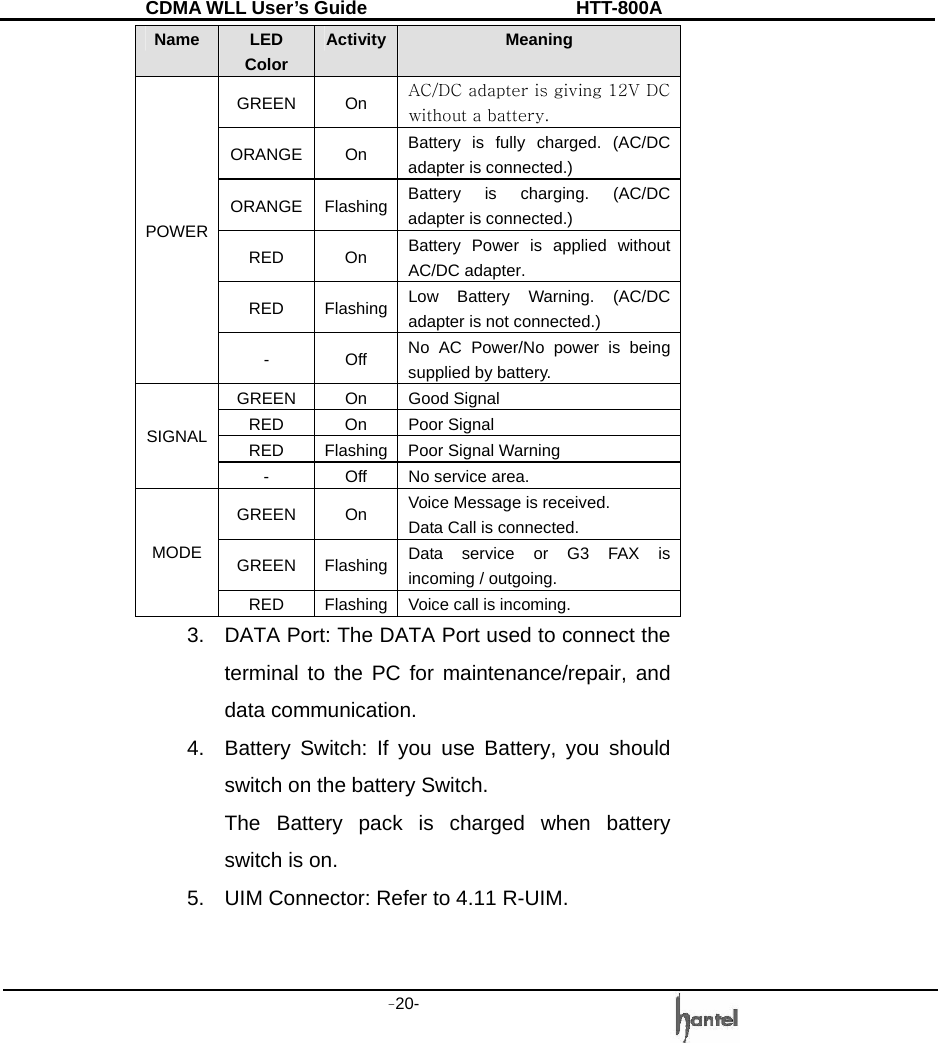
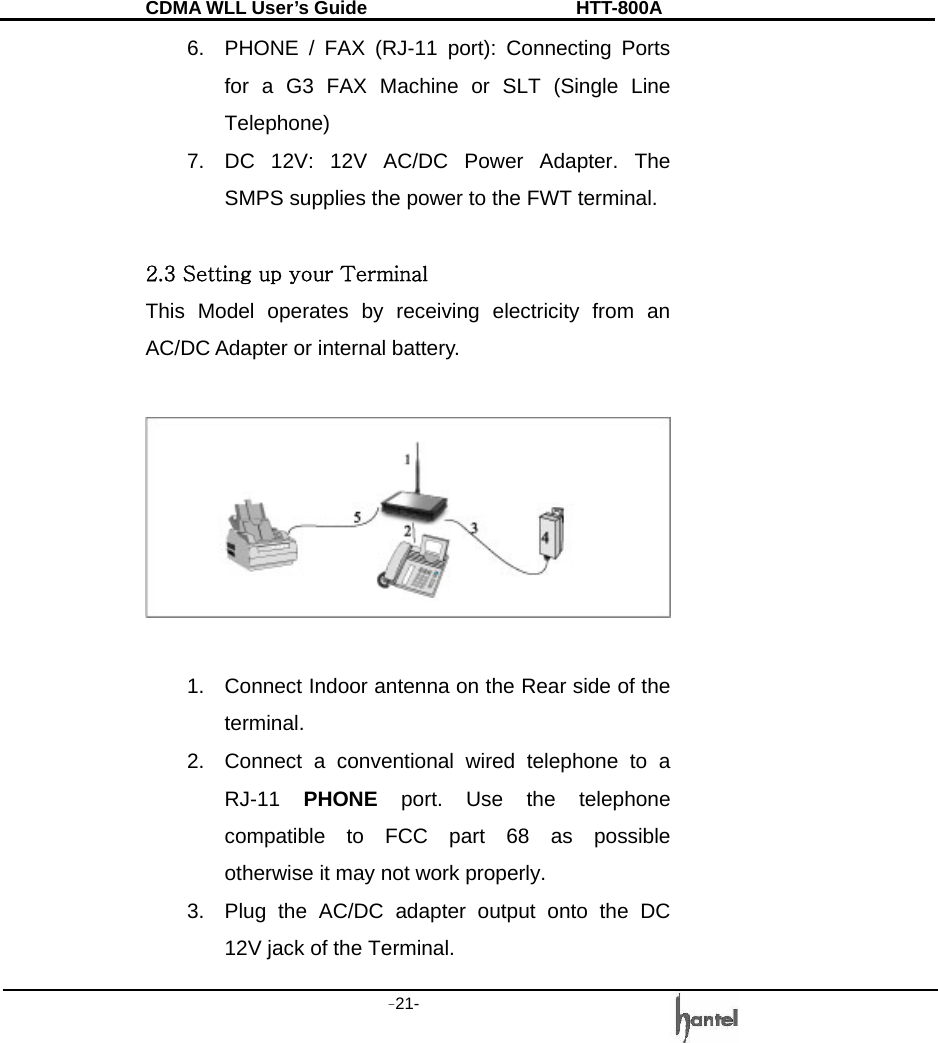

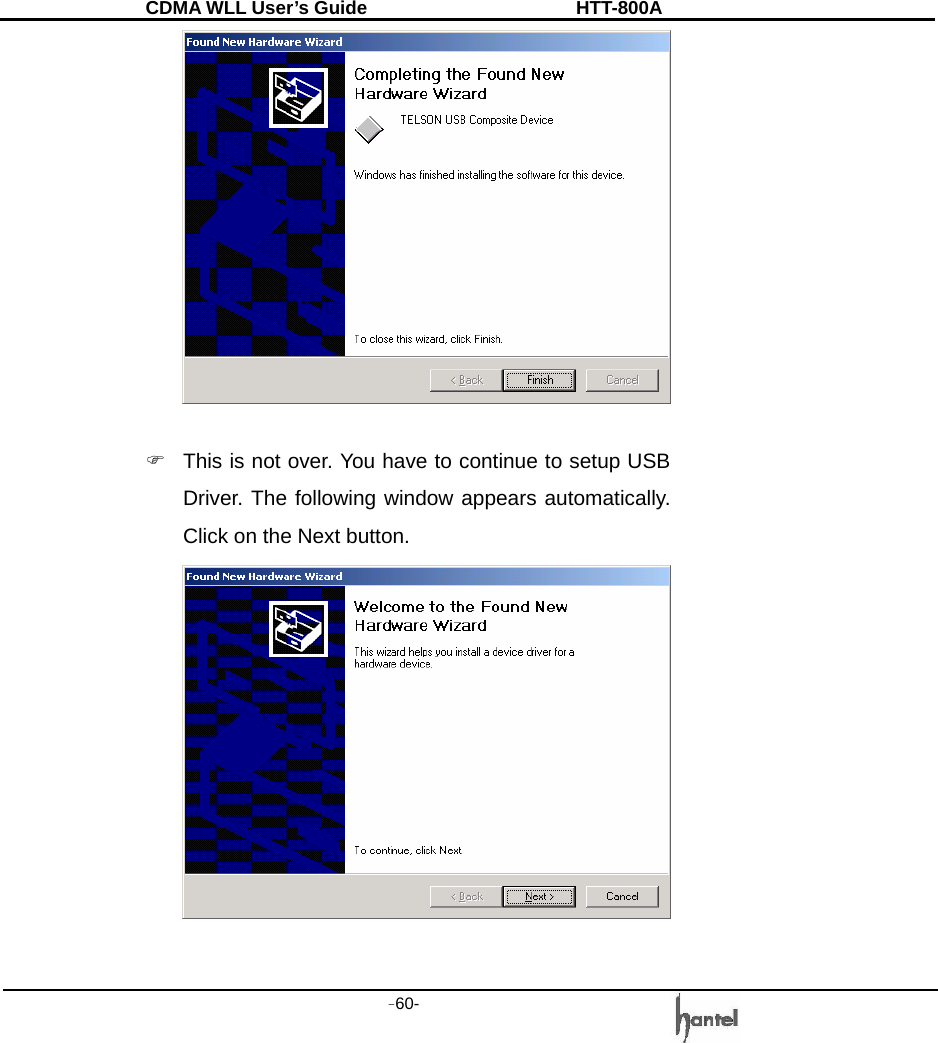

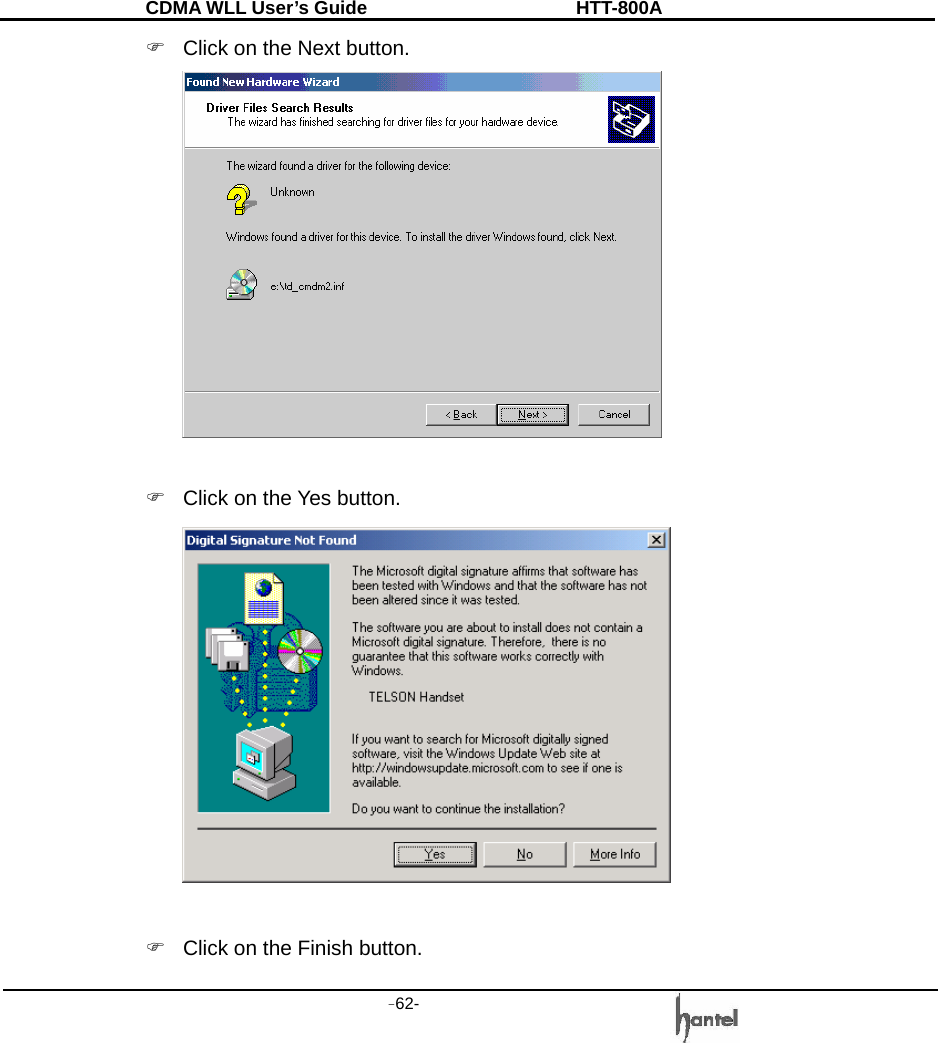

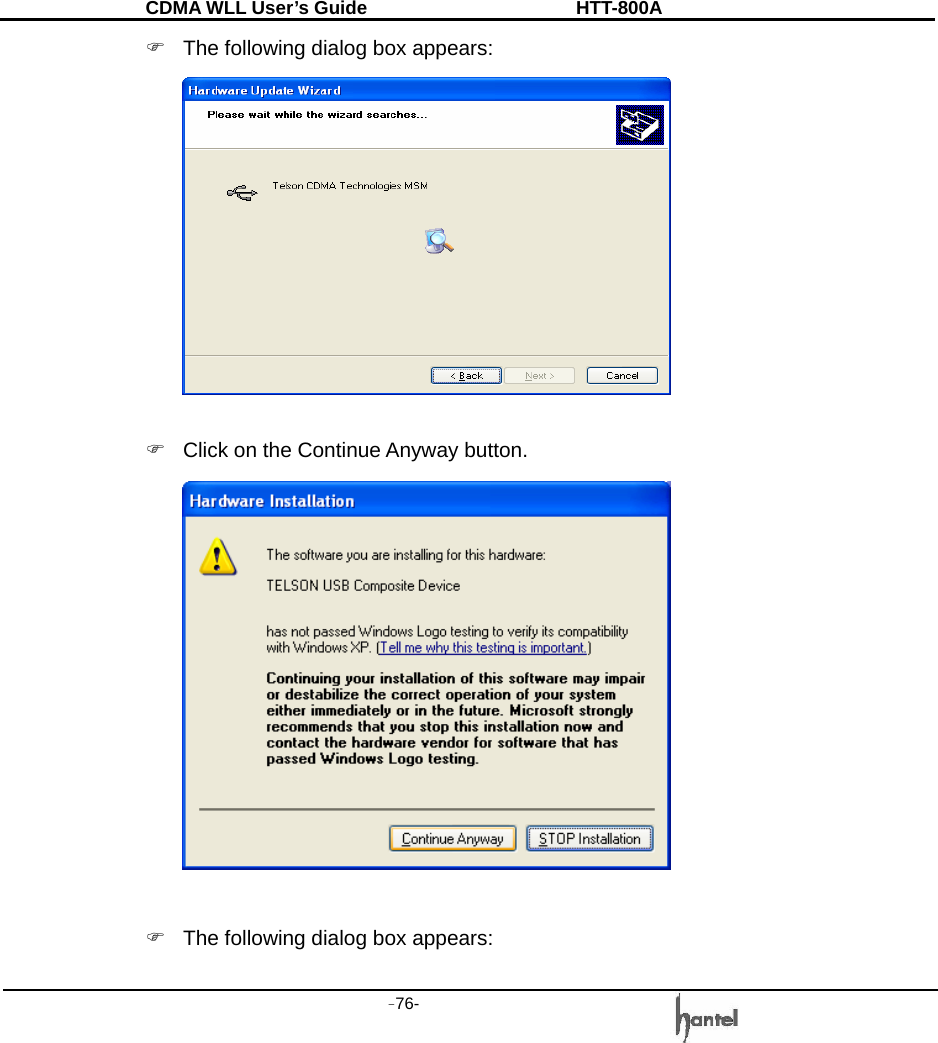
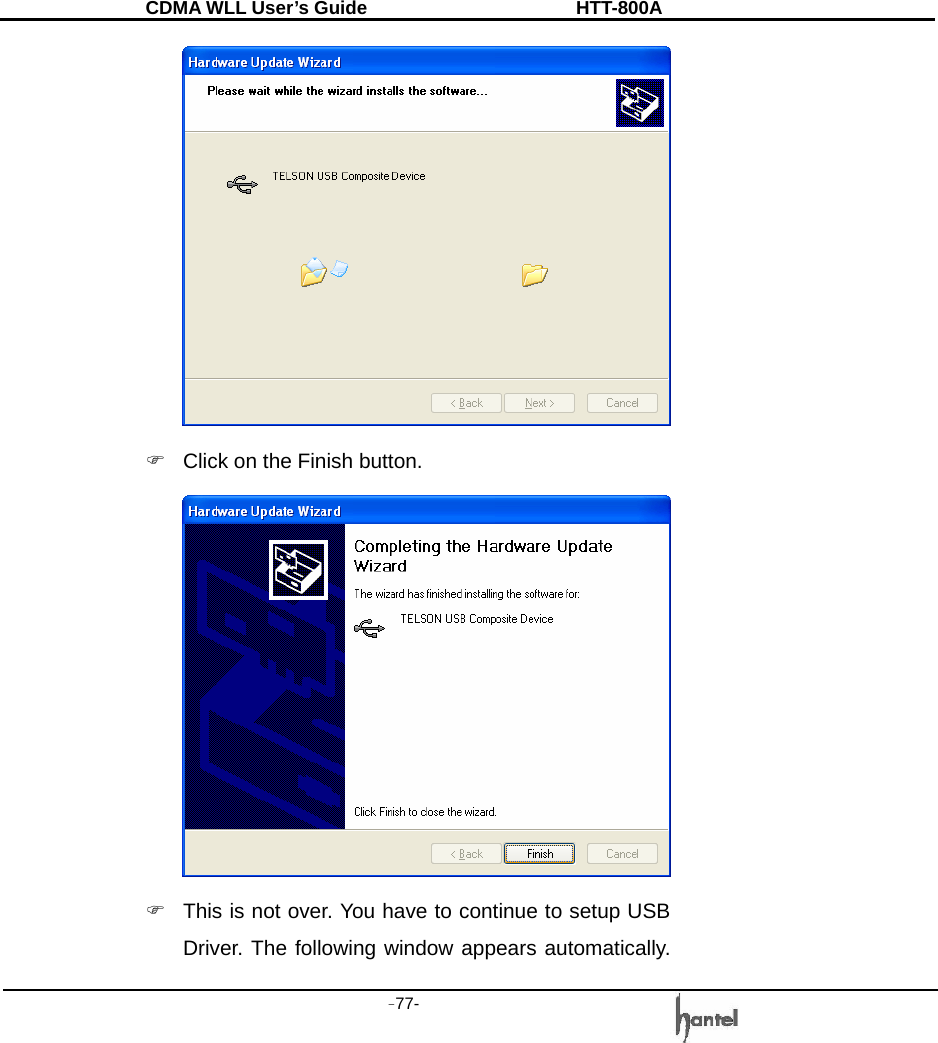
![CDMA WLL User’s Guide HTT-800A -65- ) Click on the Next button. ) Click on the Finish button. ) Double-click [control panel] → Double-click [system] → Click [hardware] → Click [device](https://usermanual.wiki/Hantel/HTT-800A/User-Guide-870740-Page-65.png)
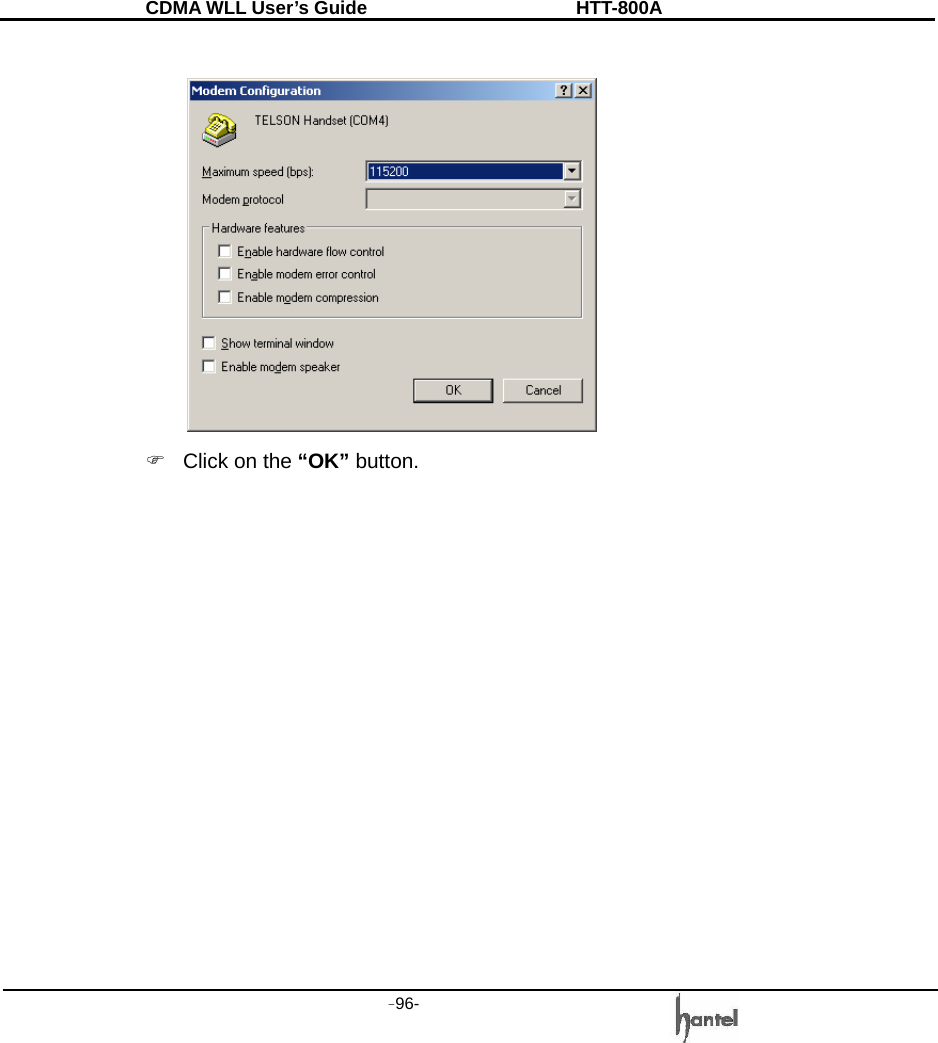
![CDMA WLL User’s Guide HTT-800A -66- manager]. You will see a ‘Modems’ icon. You can check if USB Driver setup is right or not. You have completed the setup for USB Driver. From now, you can use the USB, connecting the FWT (WLL). 8.1.3 Setting a Standard Modem in PC ) Click [Start] → Double-click [Phone and Modem Options] → click [Modem]. ) Select a COM port and click Properties. Make sure](https://usermanual.wiki/Hantel/HTT-800A/User-Guide-870740-Page-66.png)
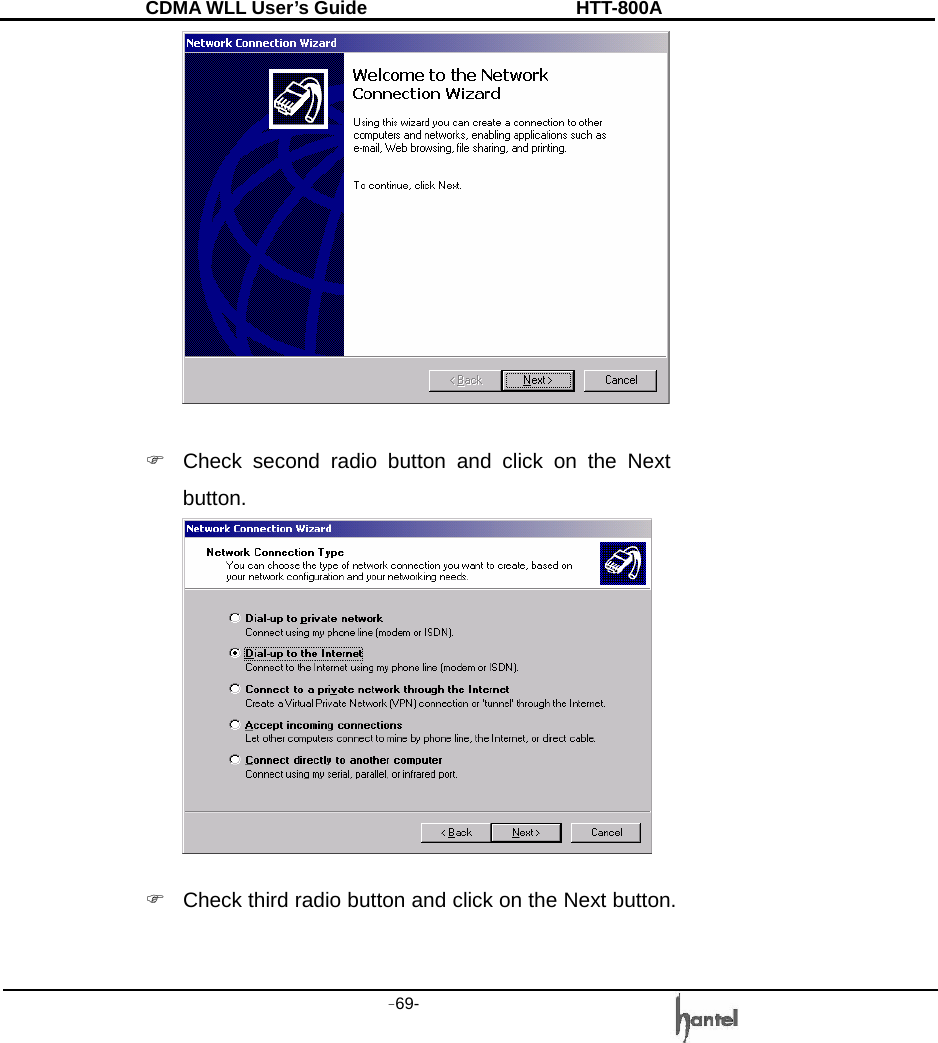
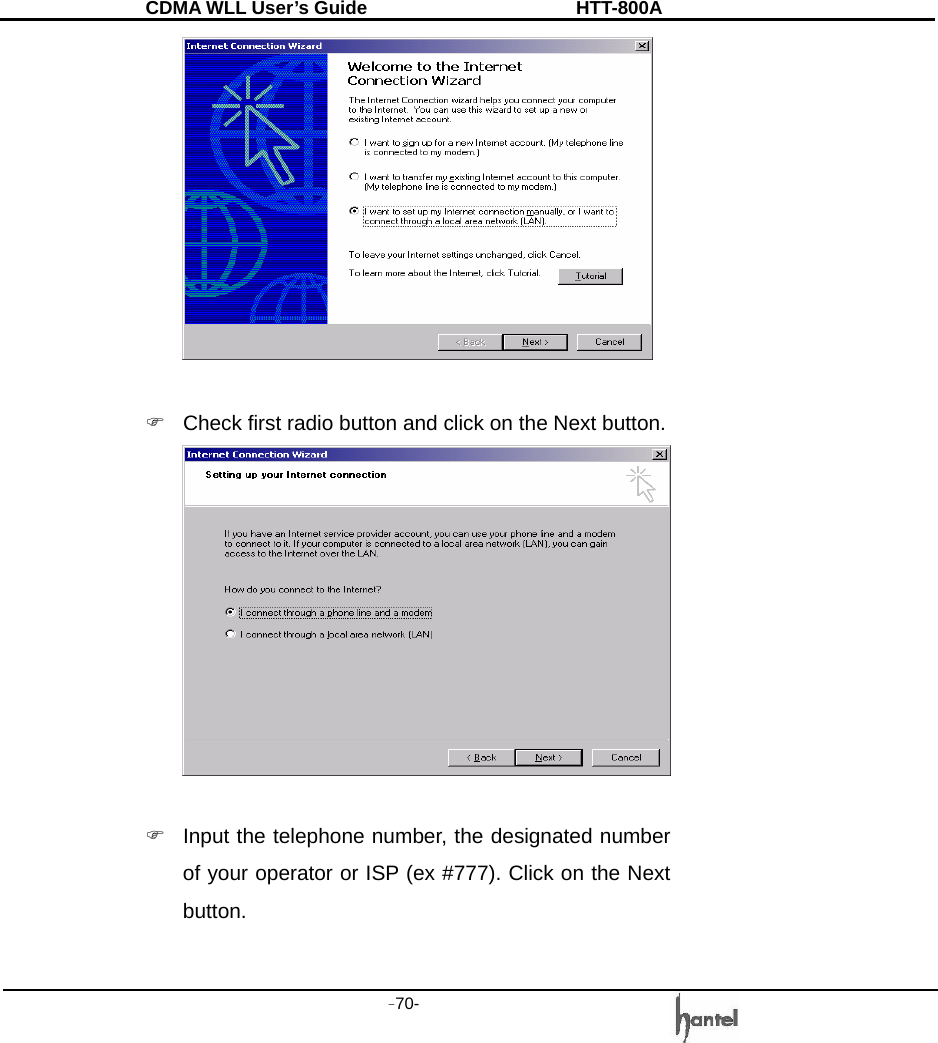
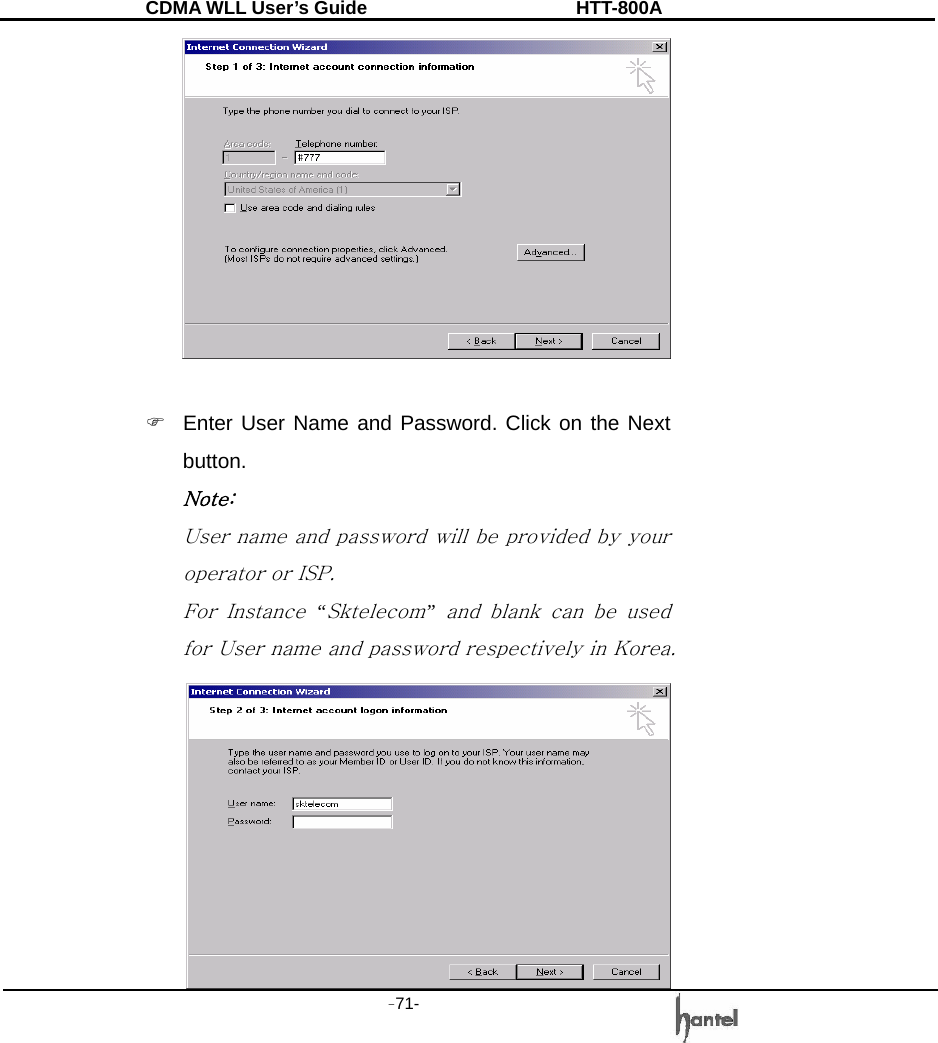
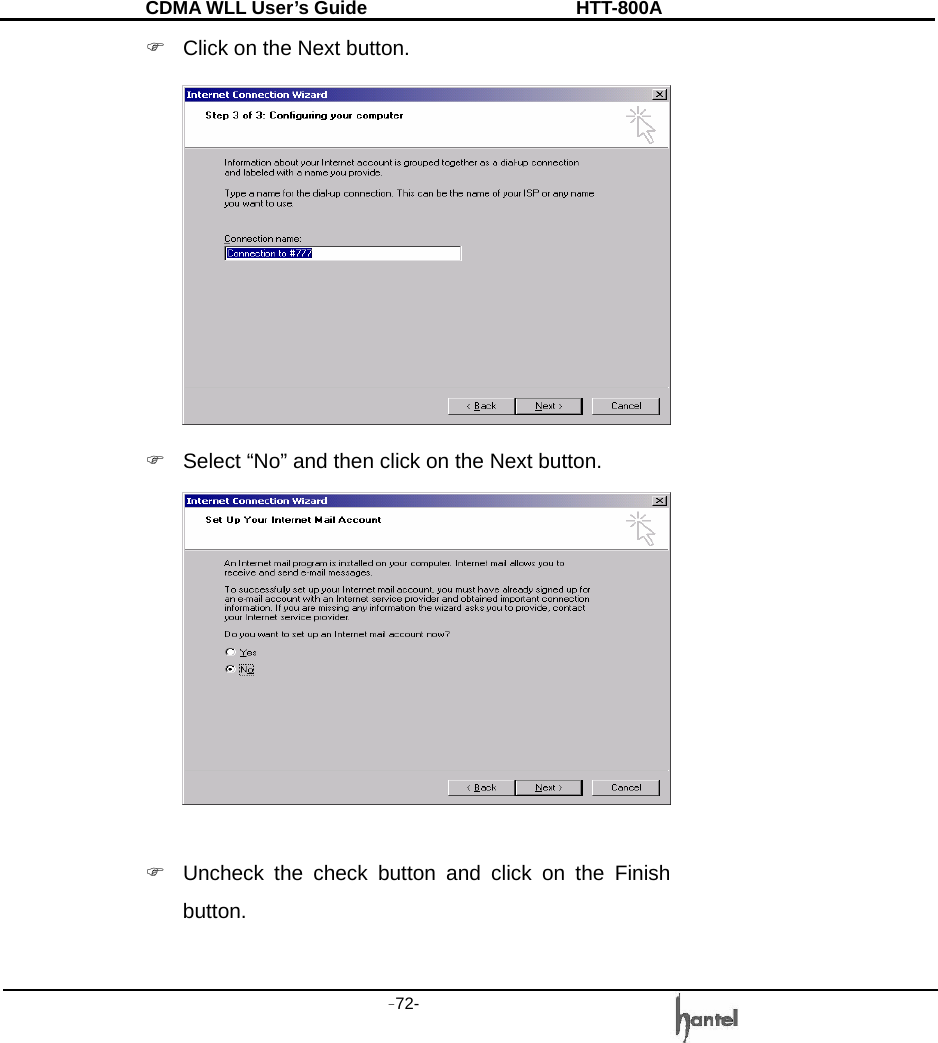
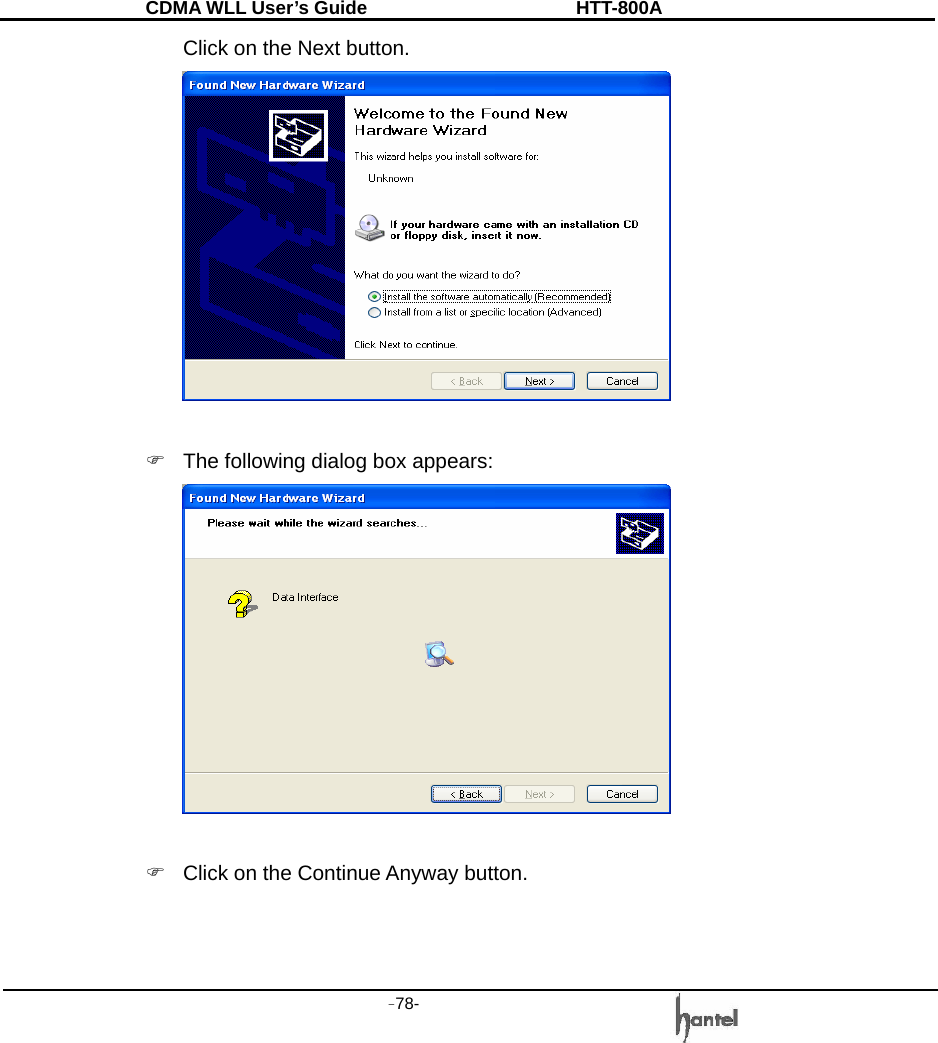
![CDMA WLL User’s Guide HTT-800A -68- 8.1.4 Browsing the Internet Setting a Dial-Up Networking ) Double-click [Control panel] → Double-click [Network and Dial-up Connections] → Double-click [Make New Connection]. ) Click on the Next button.](https://usermanual.wiki/Hantel/HTT-800A/User-Guide-870740-Page-68.png)
![CDMA WLL User’s Guide HTT-800A -73- ) Double-click [Control Panel] → Double-click [Network and Dial-up Connections]. You will see a new icon. (Dial-up networking icon)](https://usermanual.wiki/Hantel/HTT-800A/User-Guide-870740-Page-73.png)

![CDMA WLL User’s Guide HTT-800A -82- ) Double-click [control panel] → Double-click [system] → Click [hardware] → Click [device manager]. You will see a ‘Modems’ icon. You can check that USB Driver setup is right or not. You have Complete the setup for USB Driver. From now, you can use the USB, connecting the FWT (WLL) 8.2.3 Setting a Standard Modem in PC ) Click [Start] → Double-click [Phone and Modem](https://usermanual.wiki/Hantel/HTT-800A/User-Guide-870740-Page-82.png)
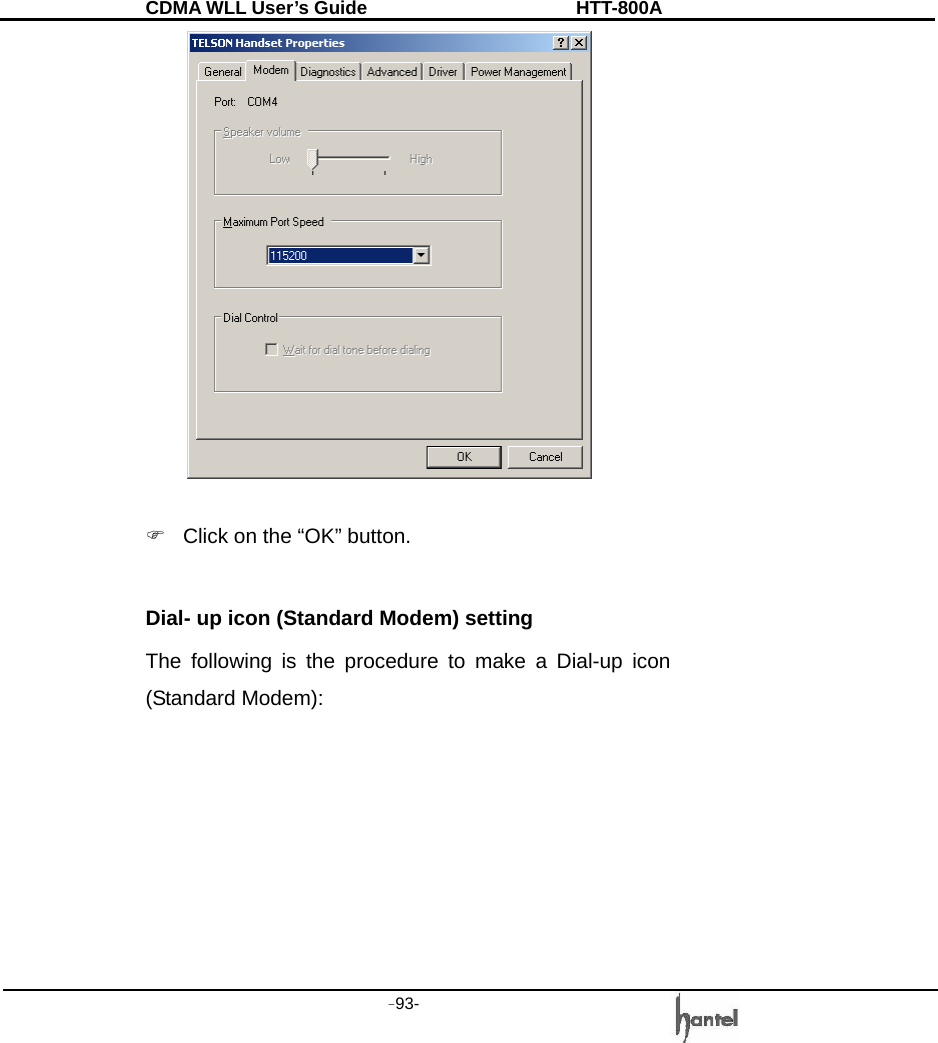
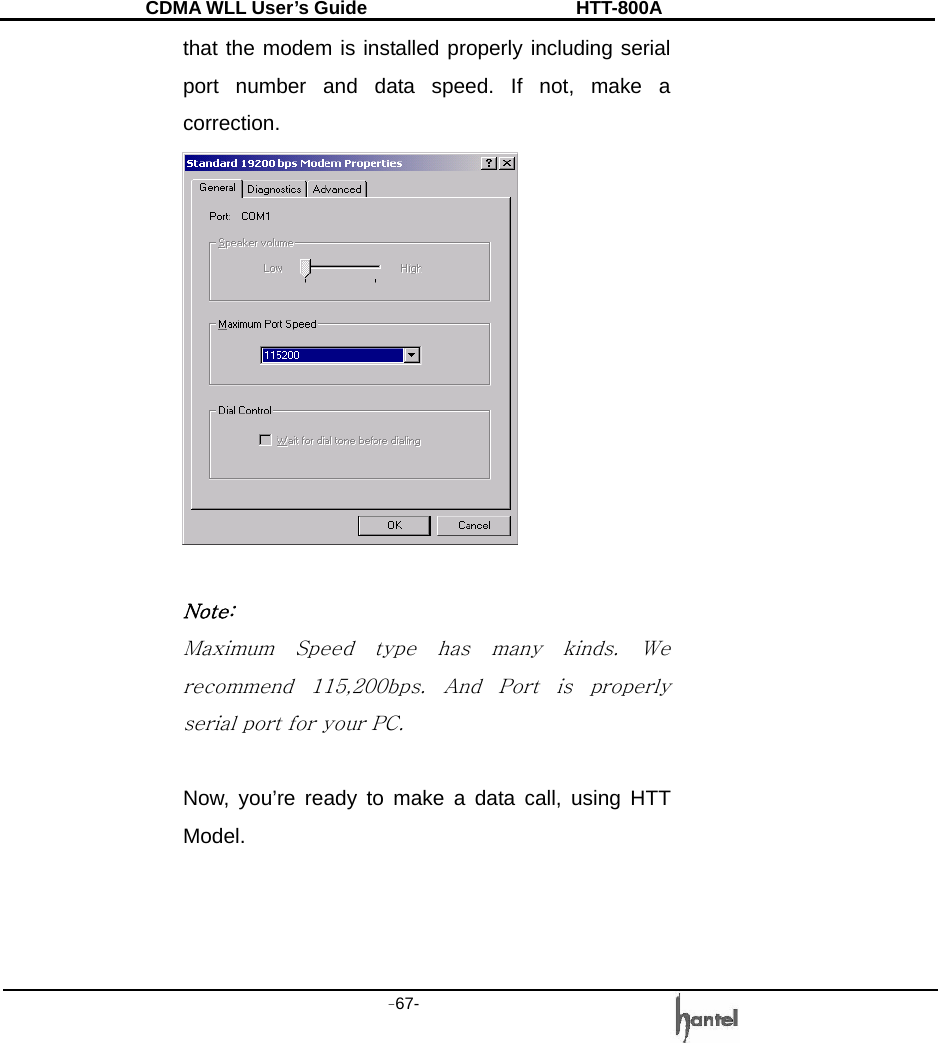
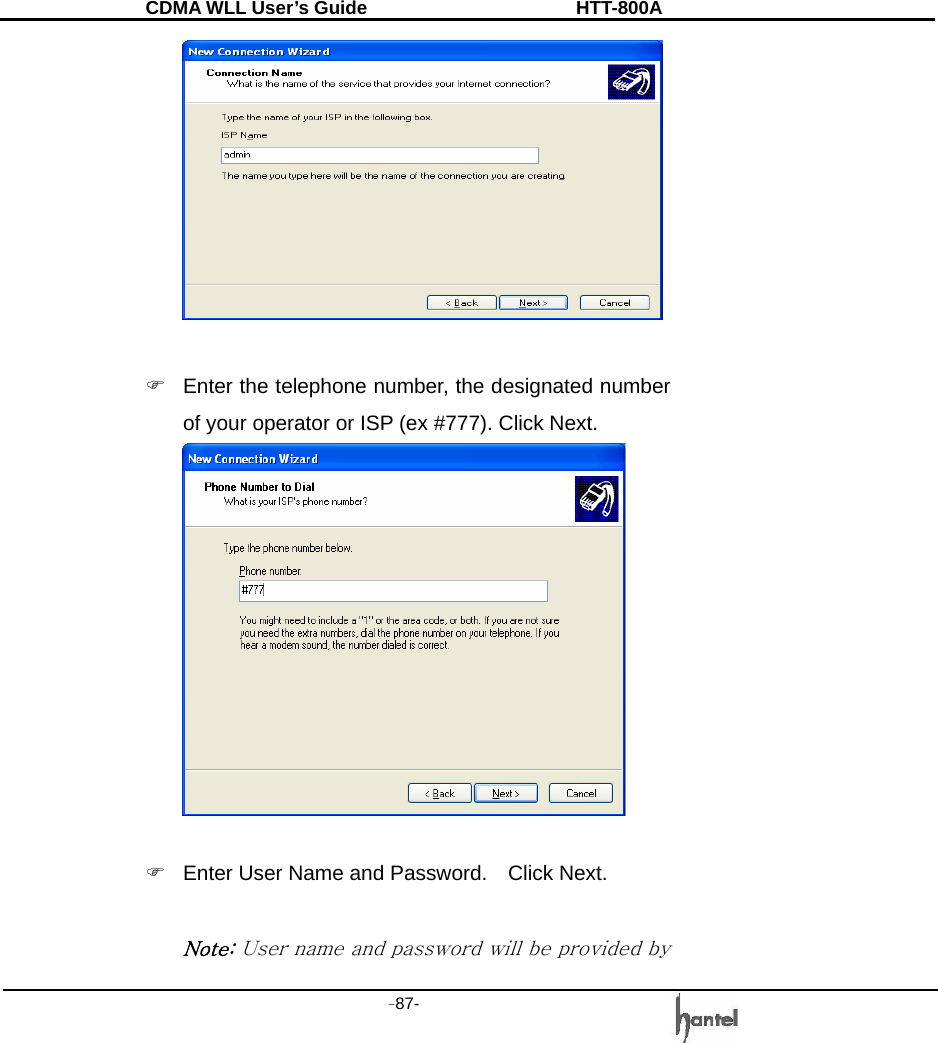
![CDMA WLL User’s Guide HTT-800A -83- Options] → click [Modem]. ) Select a COM port and click Properties. Make sure that the modem is installed properly including serial port number and data speed. If not, make a correction. Note: Maximum Speed type has many kinds. We recommend 115,200bps. You check it whether a port is properly serial port for your PC or not. Now, you’re ready to make a data call, using HTT model. 8.2.4. Browsing the](https://usermanual.wiki/Hantel/HTT-800A/User-Guide-870740-Page-83.png)
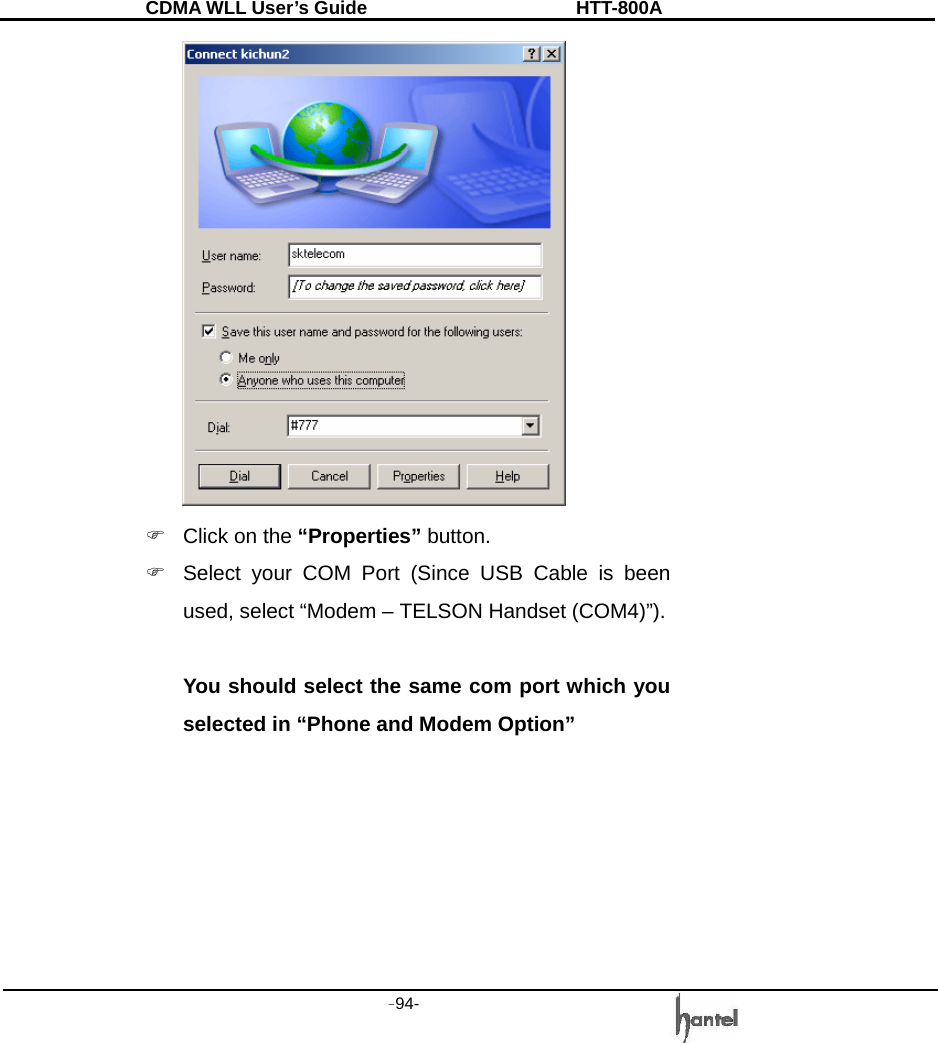
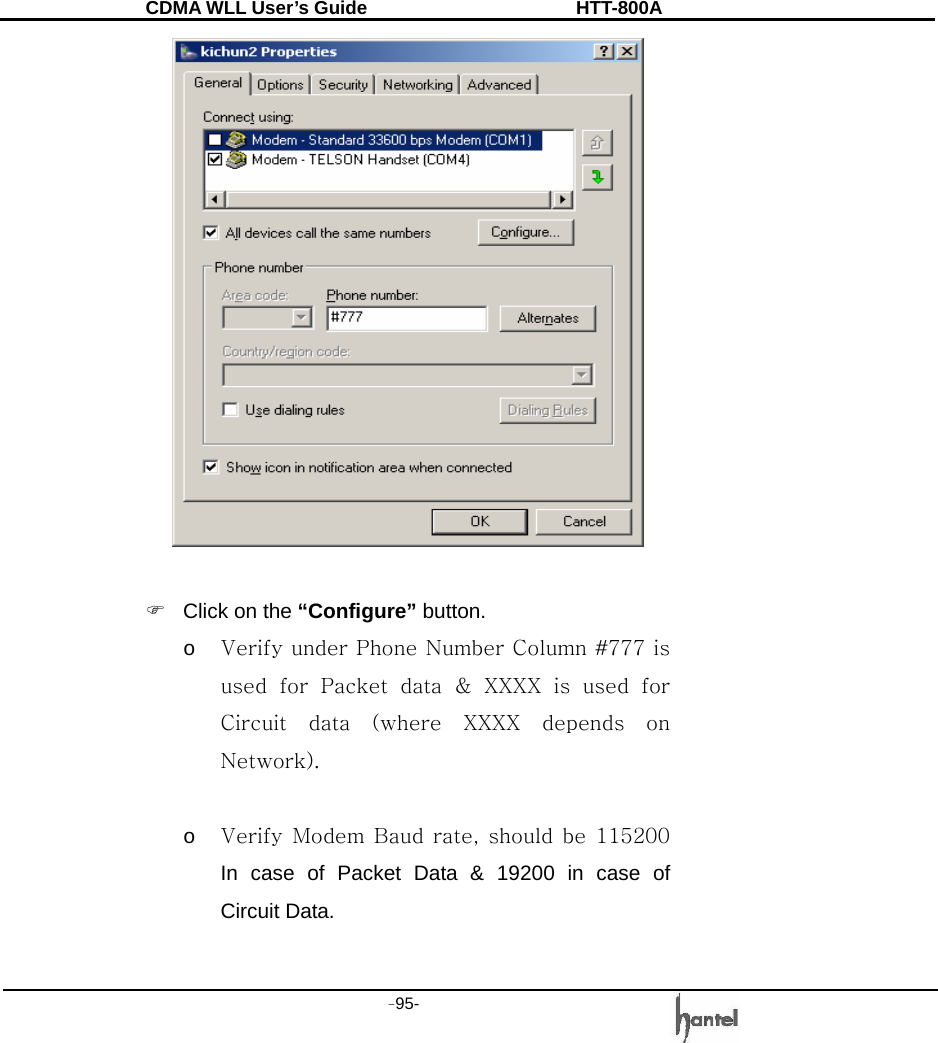
![CDMA WLL User’s Guide HTT-800A -84- Internet Setting a Dial-Up Networking ) Double-click [Control Panel] → Double-click [Network Connections] → Click [view network connects] → Click [Create a new connection]. ) Click next](https://usermanual.wiki/Hantel/HTT-800A/User-Guide-870740-Page-84.png)
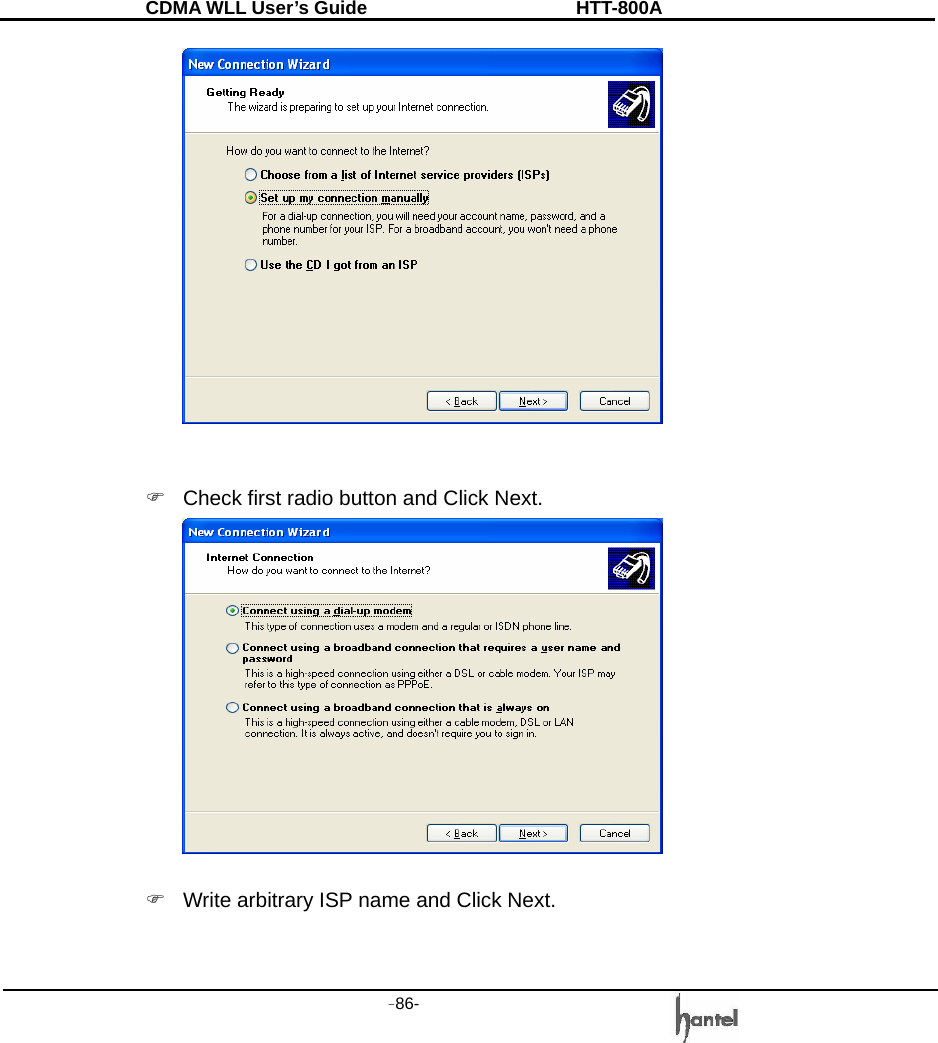
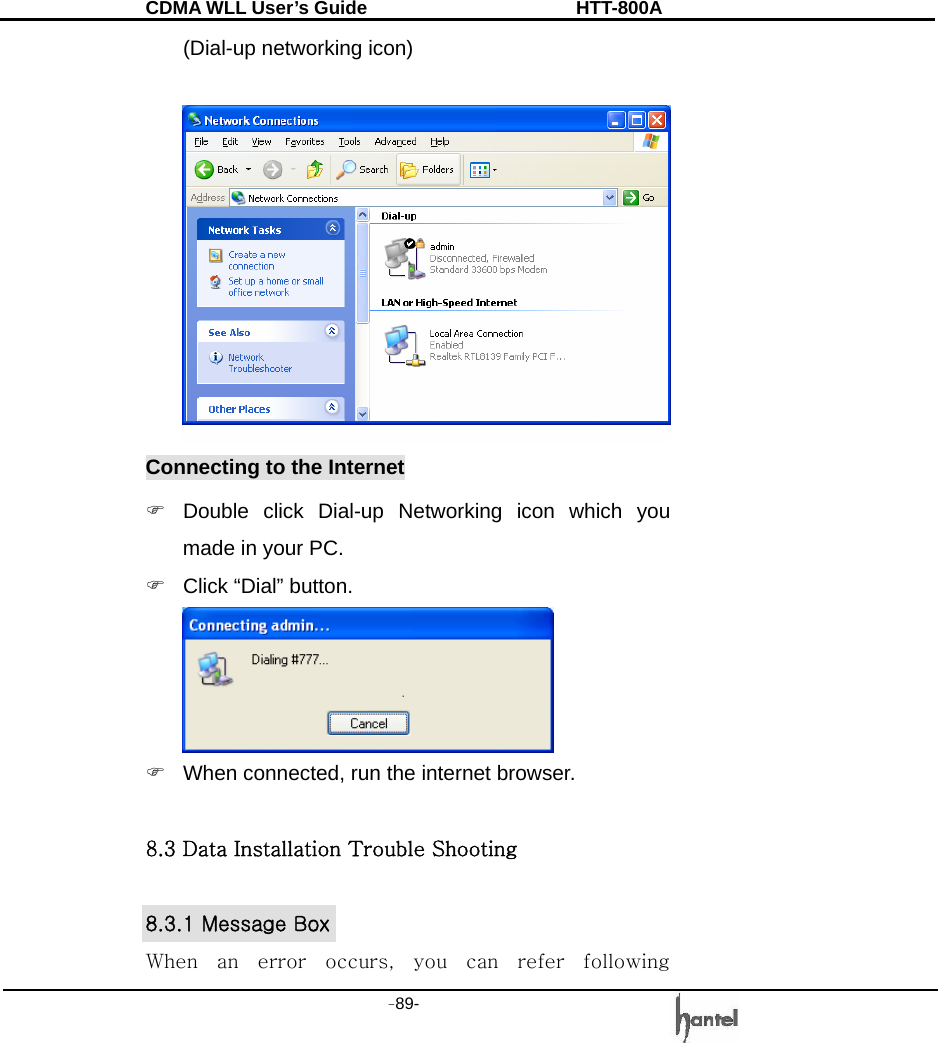
![CDMA WLL User’s Guide HTT-800A -88- your operator or ISP. ) Uncheck the check button and Click Finish. ) Double-click [Control Panel] → Double-click [Network Connections]. You will see a new icon.](https://usermanual.wiki/Hantel/HTT-800A/User-Guide-870740-Page-88.png)

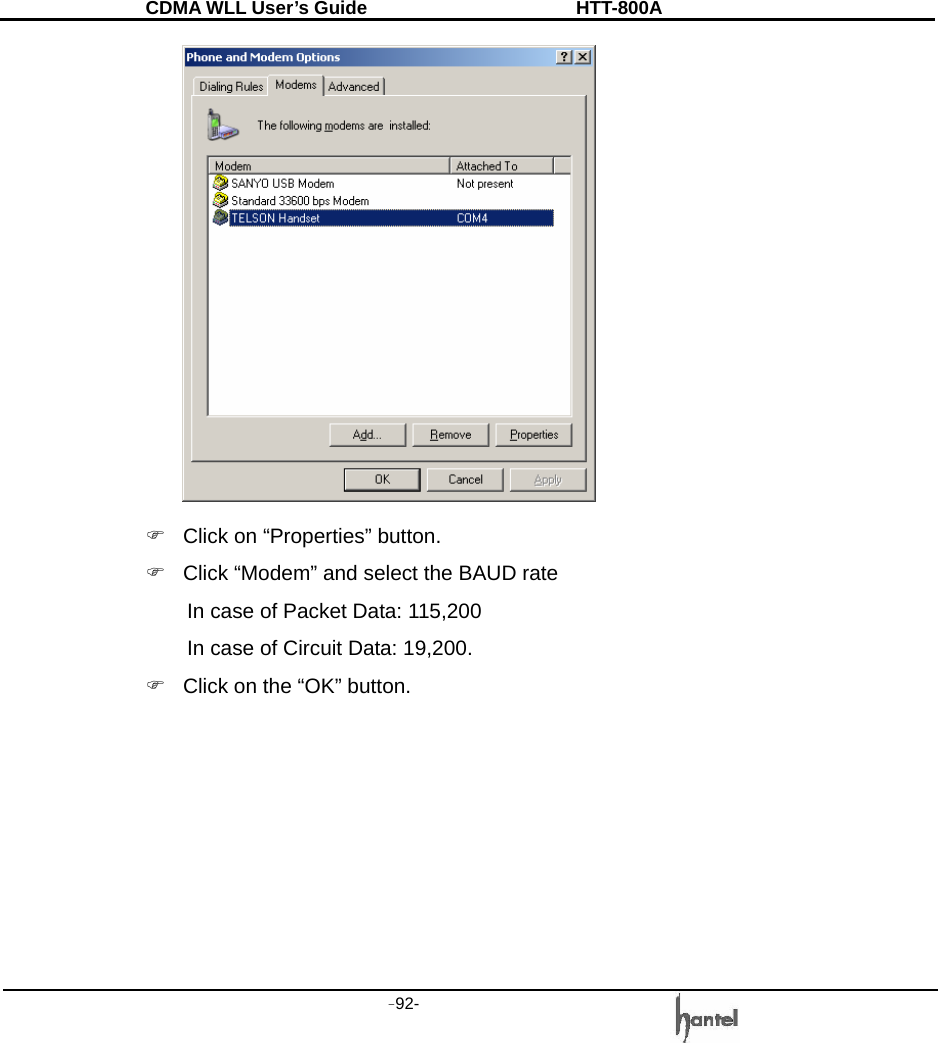
![CDMA WLL User’s Guide HTT-800A -91- 6) Error 619 : Disconnected This error may be displayed in case of setting problem. You have to check the DS Baud rate in 3 places. 1. Setting the phone into DS Baud 2. Setting [Phone and Modem Options] into your PC in the [Control panel]. Reference to section 8.1 (in case of Window 2000, Window98), section 8.2 (Window XP) 3. Setting the [Dial- up icon] into your PC [Dial- up icon] => Properties => Configure 8.3.2 PC setting Phone and Modem Option ) Control panel Æ Phone and Modem Option In this case, USB Cable is been used. Please verify TELSON Handset Modem is selected.](https://usermanual.wiki/Hantel/HTT-800A/User-Guide-870740-Page-91.png)