Hanwang Technology FACEID-MX000 Facial Recognition Terminal User Manual
Hanwang Technology Co., Ltd Facial Recognition Terminal Users Manual
UserManual.wiki
>
Hanwang Technology
>
FACEID MX000 User Manual
Users Manual
Navigation menu
Upload a User Manual
Namespaces
Wiki Guide
HTML
PDF
Info
Views
User Manual
Discussion / Help
Navigation

![Confidential Page 11 Admin. Types Super Admin. can operate all functions and normal administrators. The first administrator must be super admin and can‟t be deleted in system. Normal Admin. can operate User/Data/USB Management function, check system info. and auto test function. Verification modes: ID and Pin: Use ID and password sequentially as a verification method. ID and Face: Use ID and face sequentially as a verification method. Card and Face: Use card and face sequentially as a verification method. Card: Use card as a verification method. Add as an User: Press [OK] to make the admin. as an user. If don’t, please check [ESC]. If add as an user, please select the user privilege mode: Access & Attendance: The terminal is used for access control and time attendance with relay output. Attendance: The terminal is only used for time attendance without relay output.](https://usermanual.wiki/Hanwang-Technology/FACEID-MX000/User-Guide-2805996-Page-11.png)
![Confidential Page 12 User Photo: Press [OK] to capture a photo for the user. If don‟t, please check [ESC]. Admin Verification After set an admin. account, then press <MENU> to activate admin verification process. Input admin. ID (or using registered RFID card) Input corresponding password or using face verification, according to the mode during admin registration, after verification is successful, then the system enter to the main menu. Modify & Delete Admin account Select a registered admin. account to modify or delete this account. Modify admin. name Change verification mode: Modify password Re-enroll face template Re-register RFID card Delete the certain admin. account: If only one registered admin. account with in the system, then it will be banned to delete.](https://usermanual.wiki/Hanwang-Technology/FACEID-MX000/User-Guide-2805996-Page-12.png)
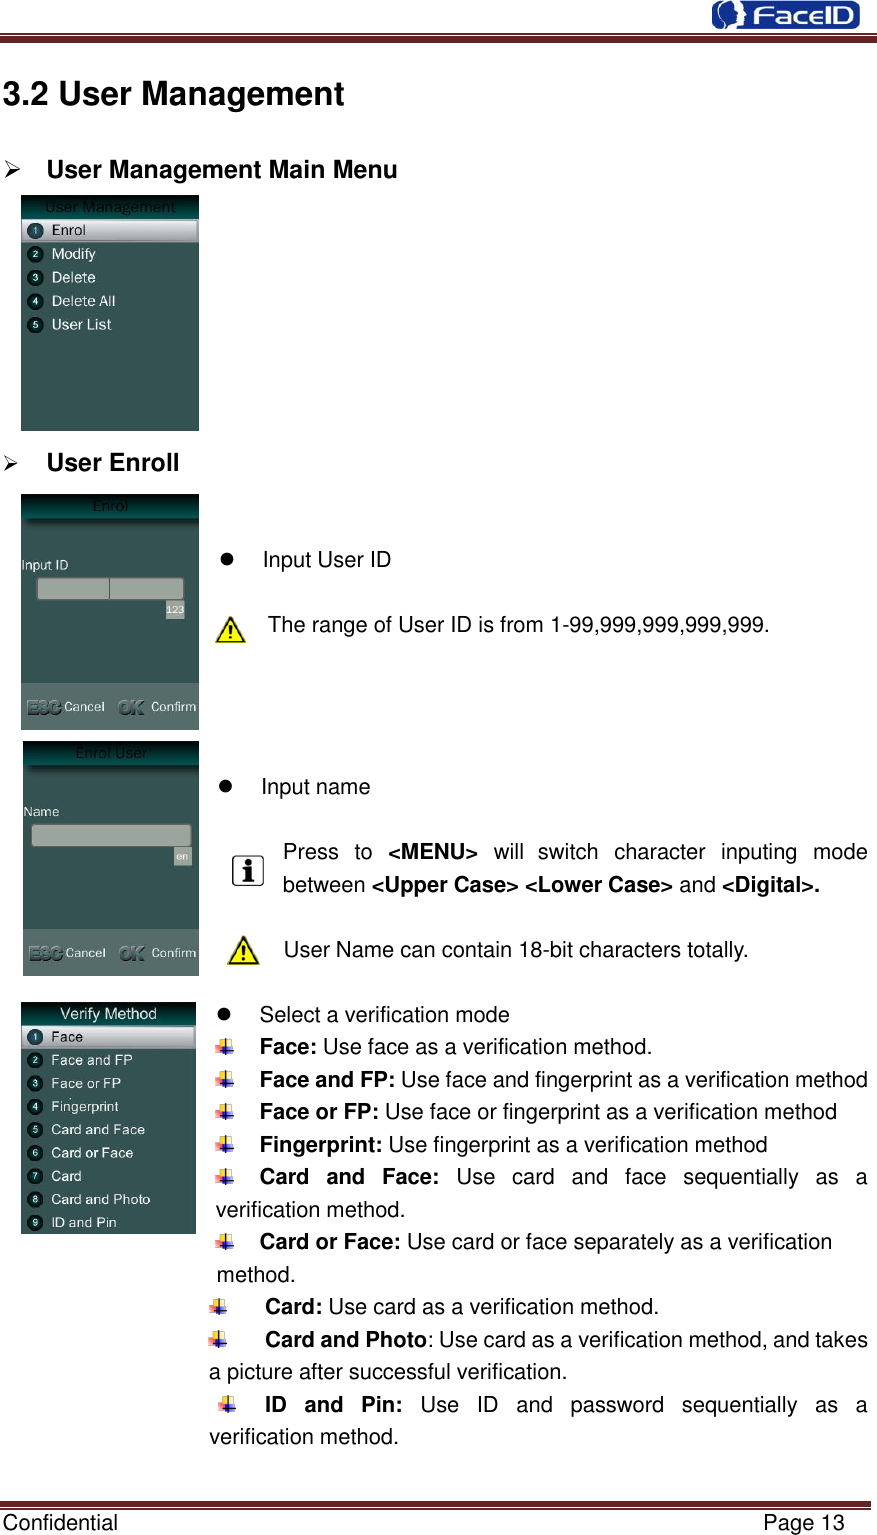
![Confidential Page 14 Select a privilege Access & Attendance: The terminal is used for access control and time attendance with relay output. Attendance: The terminal is only used for time attendance without relay output. User Photo: Press [OK] to capture a photo for the user. If don‟t, please check [ESC]. User registering finished. Modify User Input User ID Following the procedure to change <user name>, <verification mode> and <privilege>. Delete User Input an User ID Press [OK] (or [ESC]) to confirm (or cancel) this process.](https://usermanual.wiki/Hanwang-Technology/FACEID-MX000/User-Guide-2805996-Page-14.png)
![Confidential Page 15 Delete All Users Press [OK] (or [ESC]) to confirm (or cancel) this process. All user‟s ID, name and templates will be erased. This step is irreversible. Not affect Admin data and records. User List Enter user list to check Un-enrolled and Enrolled list. Press [OK] (or [ESC]) to confirm (or cancel) this process.](https://usermanual.wiki/Hanwang-Technology/FACEID-MX000/User-Guide-2805996-Page-15.png)