Hanwha Techwin DIGIMAXV70 Digital Camera User Manual v70en 02 v03
Samsung Techwin Co Ltd Digital Camera v70en 02 v03
Contents
- 1. Users Manual 1 of 3
- 2. Users Manual 2 of 3
- 3. Users Manual 3 of 3
Users Manual 2 of 3
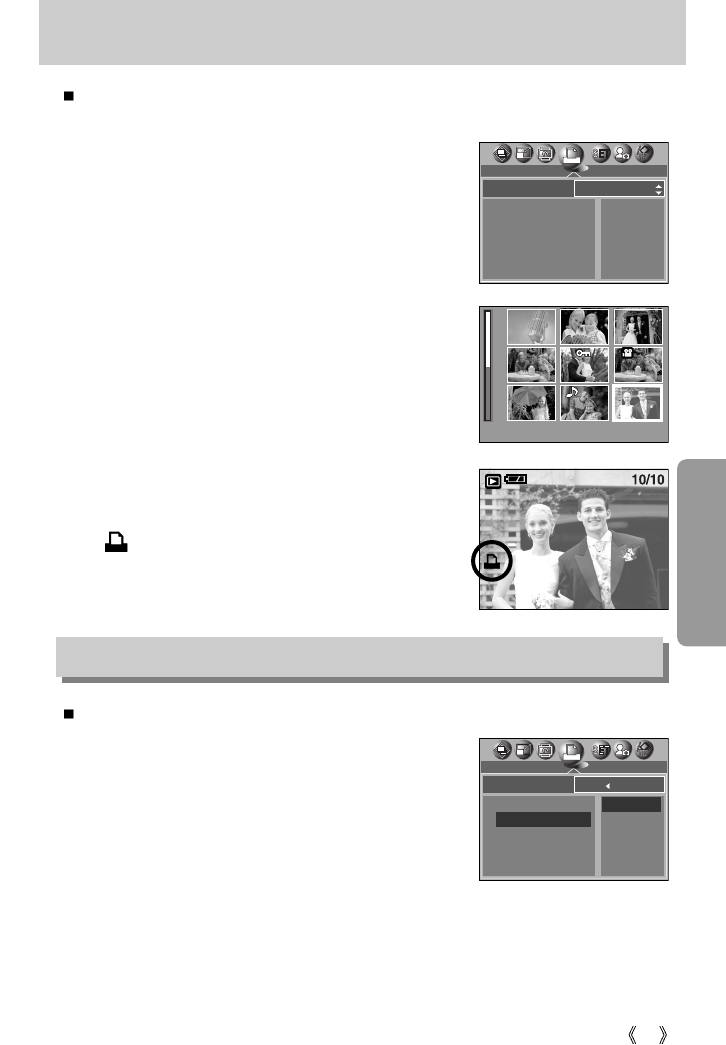
38
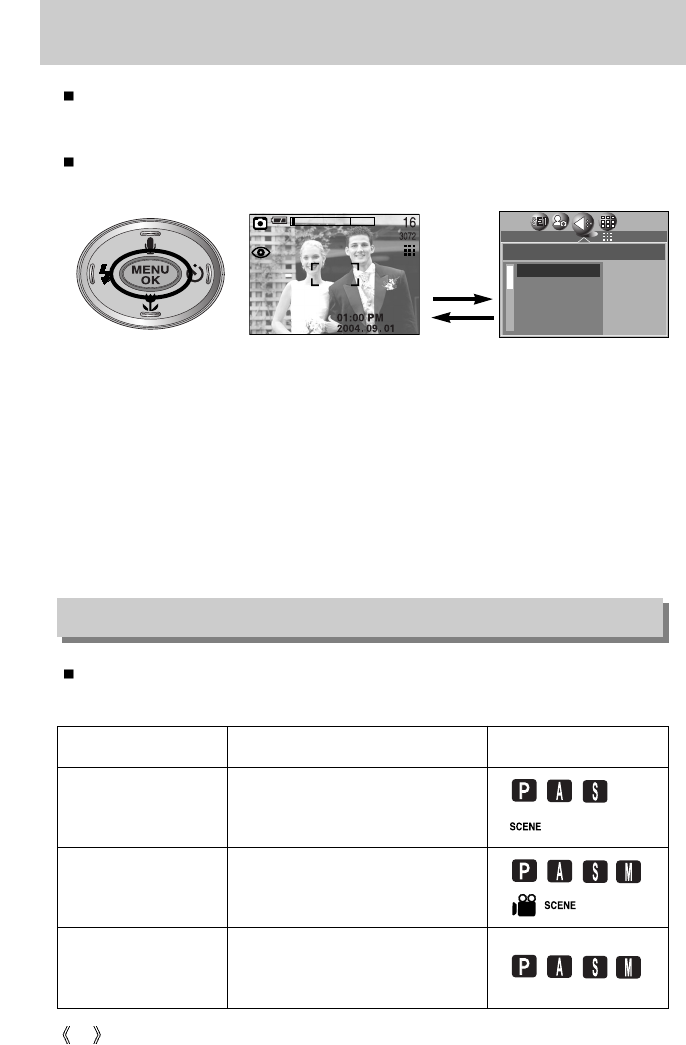
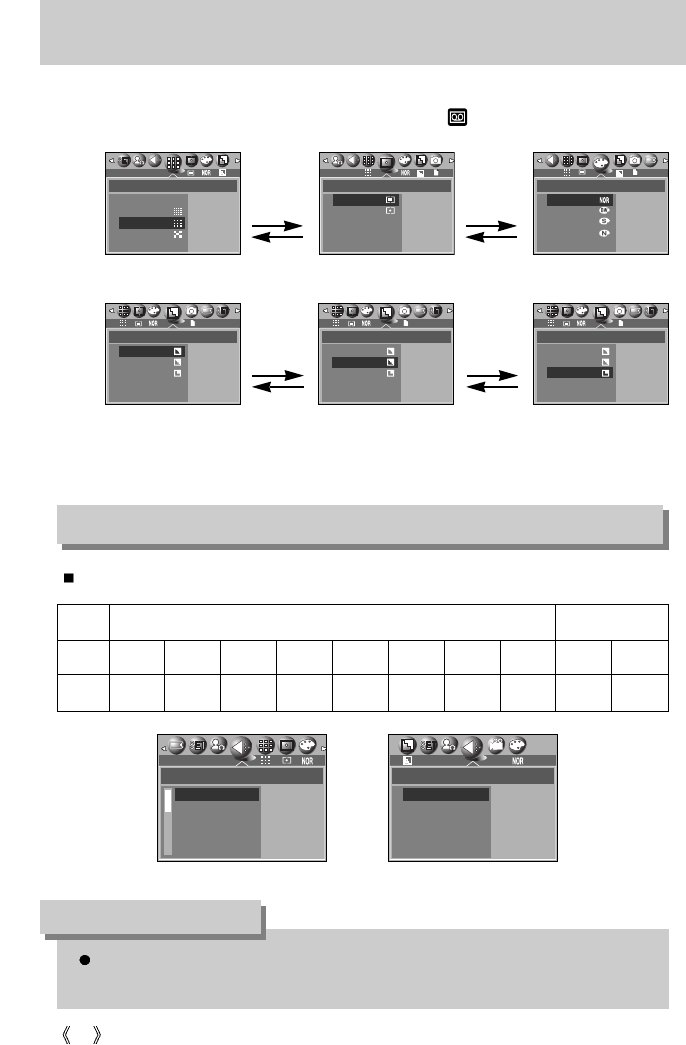
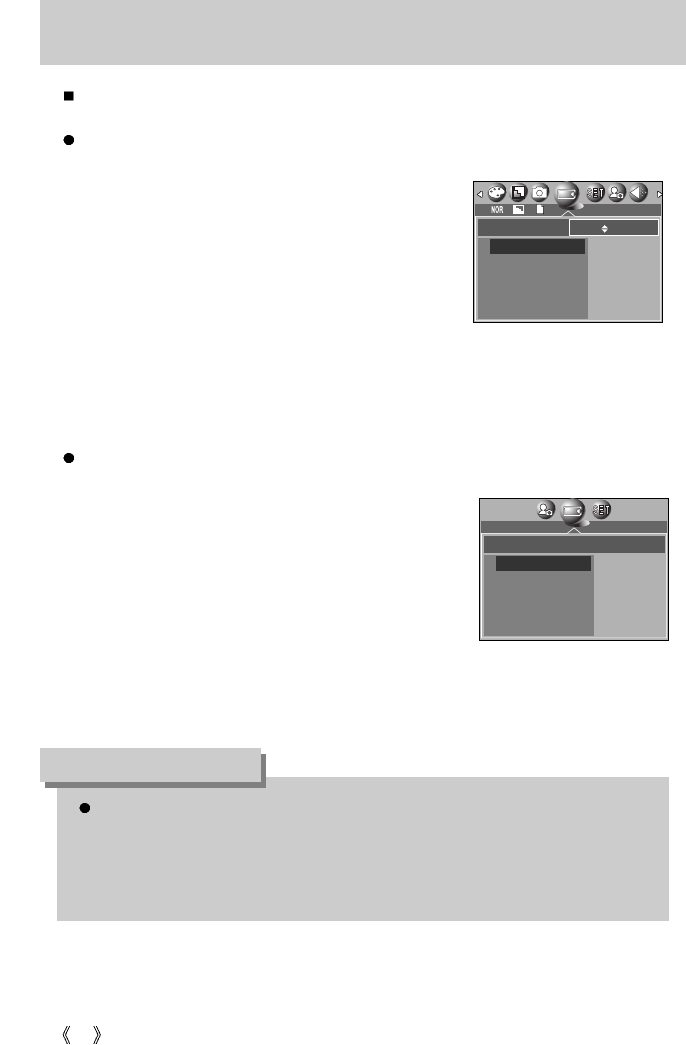
MENU/ OK button
If the menu is displayed, use the 5-Function buttons to change the data values and for your
changes to be accepted
If the menu is not displayed, press the MENU/OK button to display a menu for the current
camera mode on the LCD monitor. Press the button again to return to the previous state.
- There is no menu for VOICE RECORDING mode.
- The menu screen may not show on the LCD when another button is pressed or image data
is being processed. (The green lamp next to the view finder blinks)
- When the menu is showing on the LCD monitor, it is not possible to operate the shutter
button i.e. capture an image. To capture an image, simply cancel the menu display by
pressing the MENU button.
[ Menu on ]
[ Menu off ]
Pressing
the MENU
button
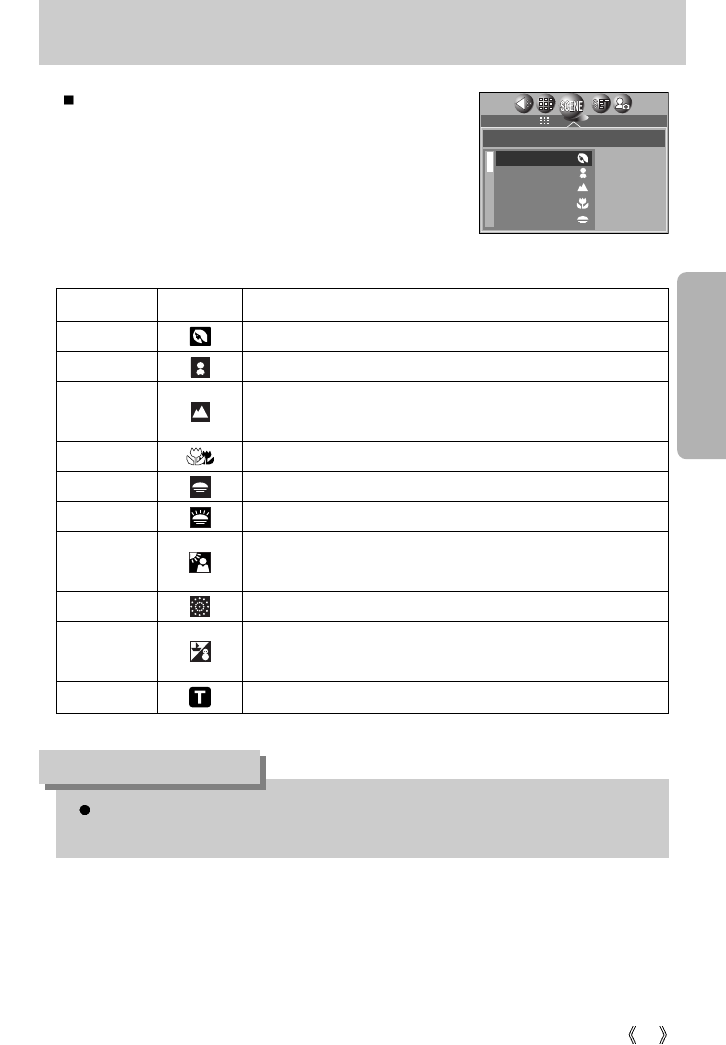
S button
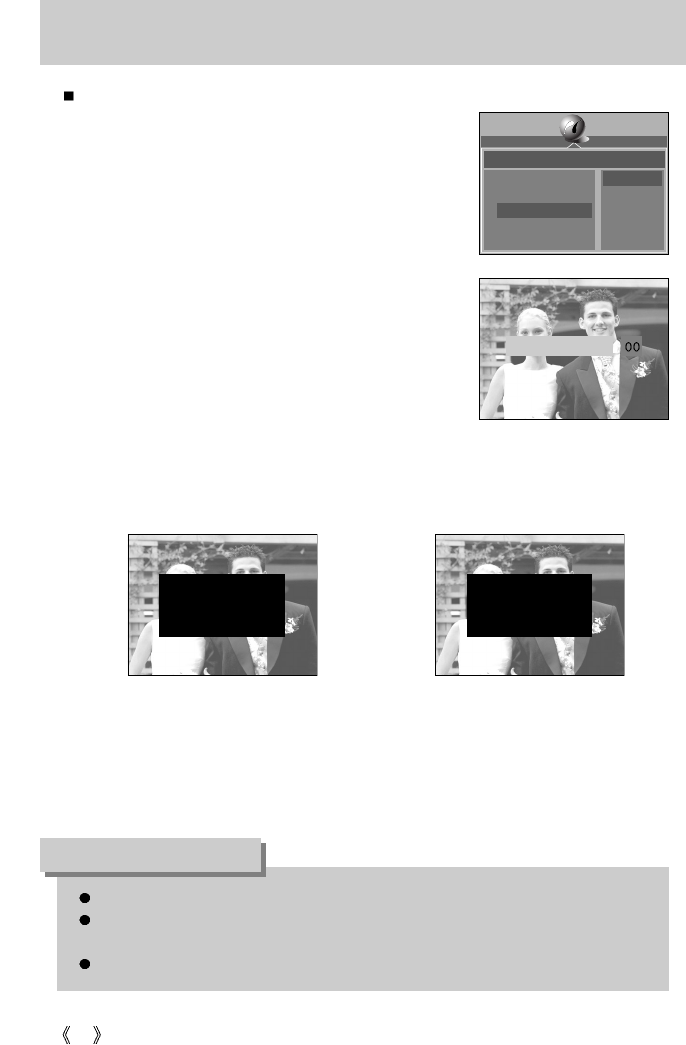
You can use the S button to adjust the values for the exposure compensation, white balance,
ISO, RGB, A/S/M mode and longtime shutter.
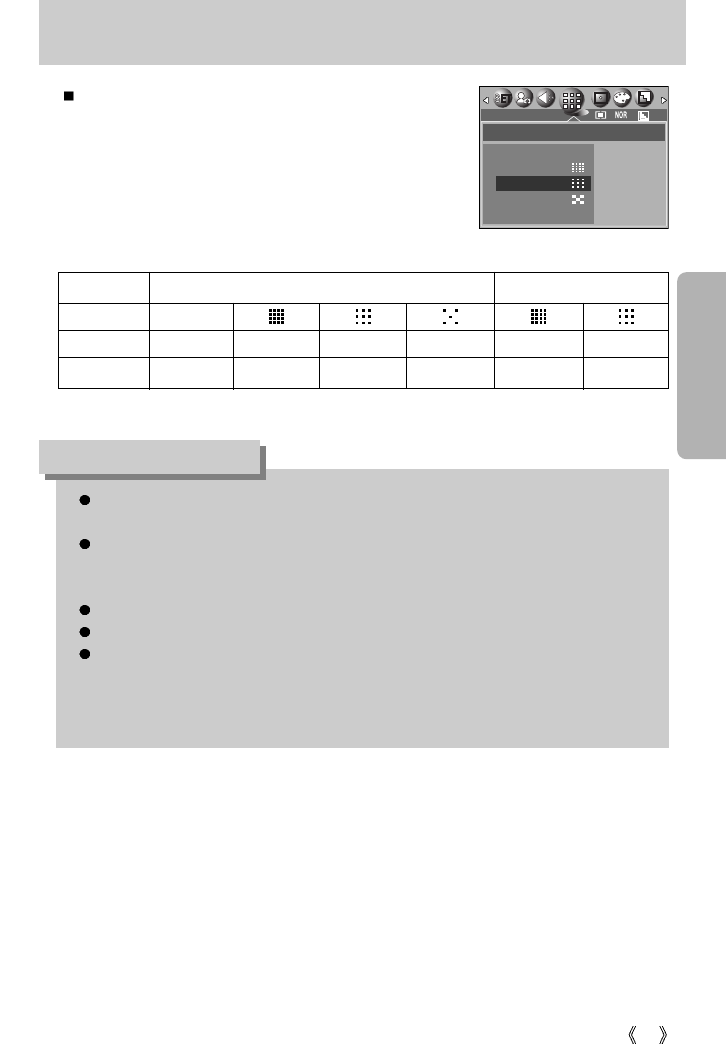
Main menu Sub menu Available camera mode
Exposure compensation
WHITE BALANCE
ISO
-2.0 ~ 0.0 ~ +2.0(0.5EV steps)
AUTO, DAYLIGHT, CLOUDY,
FLUORESCENT H, FLUORESCENT L,
TUNGSTEN, CUSTOM.
AUTO, 50, 100, 200, 400
SIZE
3072X2304 3072
2816X2112 2816
2592X1944 2592
2272X1704 2272
2048X1536 2048

39
S button
Main menu Sub menu Available camera mode
A (Aperture priority mode)
S (Shutter priority mode)
M (Manual mode)
Shutter speed, Aperture value
(Changed by zoom scale)
A/S/M mode
LT
RGB R(Red), G(Green), B(Blue)
Compensating Exposure
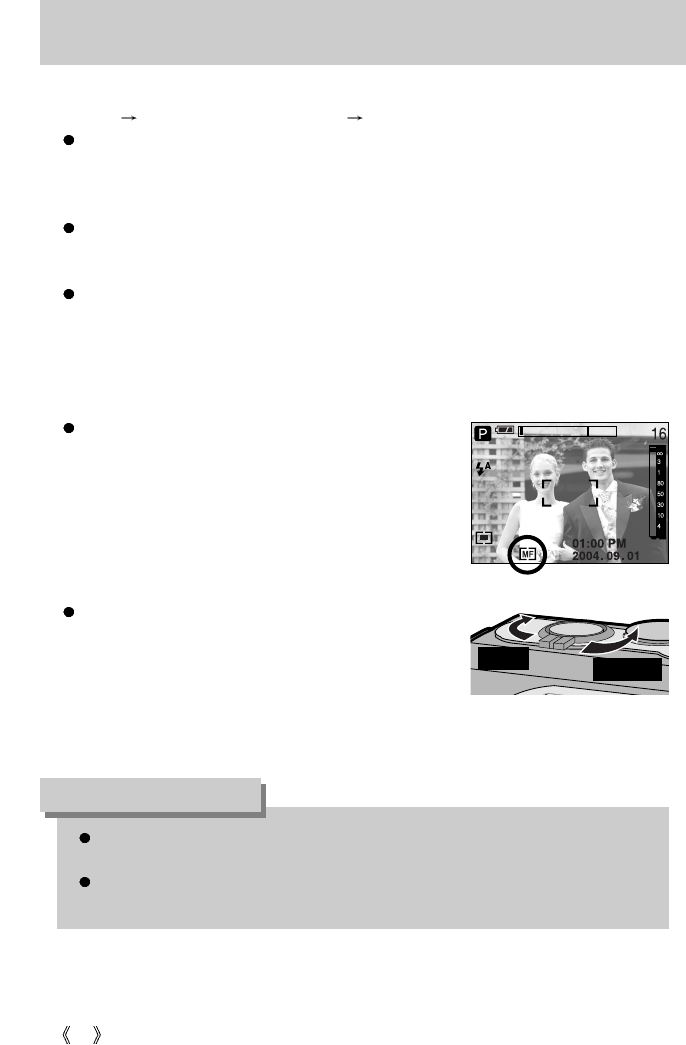
1. Press the S button, and then use the UP and DOWN
buttons to select the exposure compensation icon ( ).
The exposure compensation menu bar will appear as
shown.
2. Use the LEFT and RIGHT buttons to set the desired
exposure compensation factor.
3. Press the OK button.
The value you set will be saved and the Exposure
Compensation setup mode will close.
If you change the exposure value, the exposure indicator ( ) will be displayed on the
bottom of the LCD monitor.
* A negative exposure compensation value reduces the exposure.
Note that a positive exposure compensation value increases the exposure and the LCD
monitor will appear white or you may not get good pictures.
Exposure compensation : This camera automatically adjusts the exposure according to the
ambient lighting conditions. You can also select the exposure value
by using the S button.
40
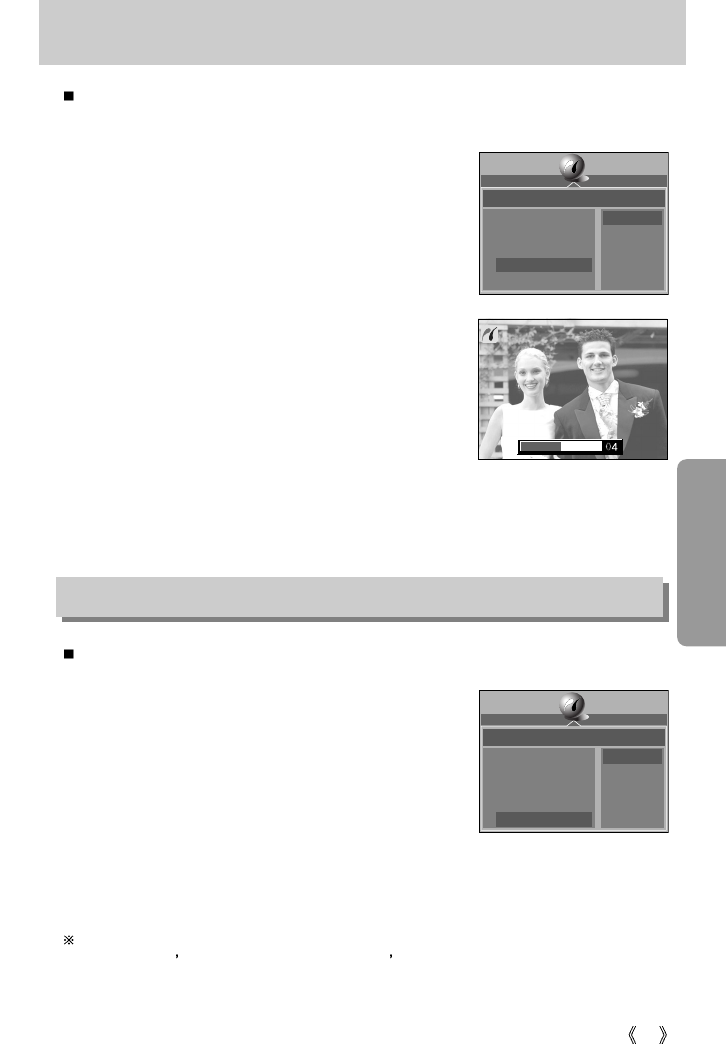
S button
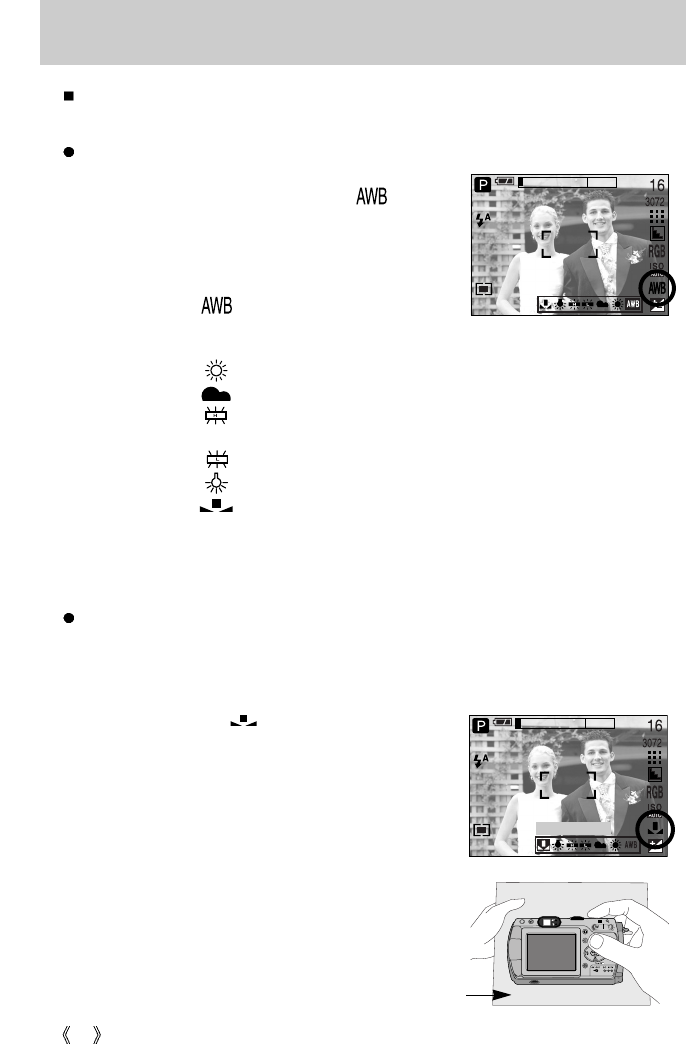
Selecting a White Balance
1. Press the S button, and then use the UP and DOWN
buttons to select the white balance icon ( ).
The white balance menu bar will appear as shown.
2. Use the LEFT and RIGHT buttons to set the white
balance to the desired value. The value you set will be
displayed on the LCD monitor.
AUTO : The camera automatically
selects the appropriate white
balance settings, depending on the prevailing lighting conditions.
DAYLIGHT : For taking images outside.
CLOUDY : For taking images under a cloudy and overcast sky.
Fluorescent H : For shooting under daylight fluorescent types of three-way
fluorescent lighting.
Fluorescent L : Shooting under white fluorescent lighting.
TUNGSTEN : For shooting under tungsten (standard light bulb) lighting.
CUSTOM : Allows the user to set the white balance according to the shooting
condition.
Different lighting conditions may cause a colour cast on your images.
3.
Press the OK button. The value you set will be saved and White Balance setup mode will end.
White balance : The white balance control allows you to adjust the colours to appear more
natural looking.
Using the Custom White Balance
White balance settings may vary slightly depending on the shooting environment.
You can select the most appropriate white balance setting for a given shooting environment
by setting up the custom white balance.
1. Select the CUSTOM( ) menu of the White Balance.
2. Place a sheet of white paper in front of the camera so
that the LCD monitor shows only white, and then press
the shutter button.
3. Press the OK button and your custom white balance
value is stored.
- The custom white balance value will be applied,
starting with the next picture you take.
- The user configured white balance will remain effective
until it is overwritten.
[ White paper ]
MEASURE:SHUTTER
41
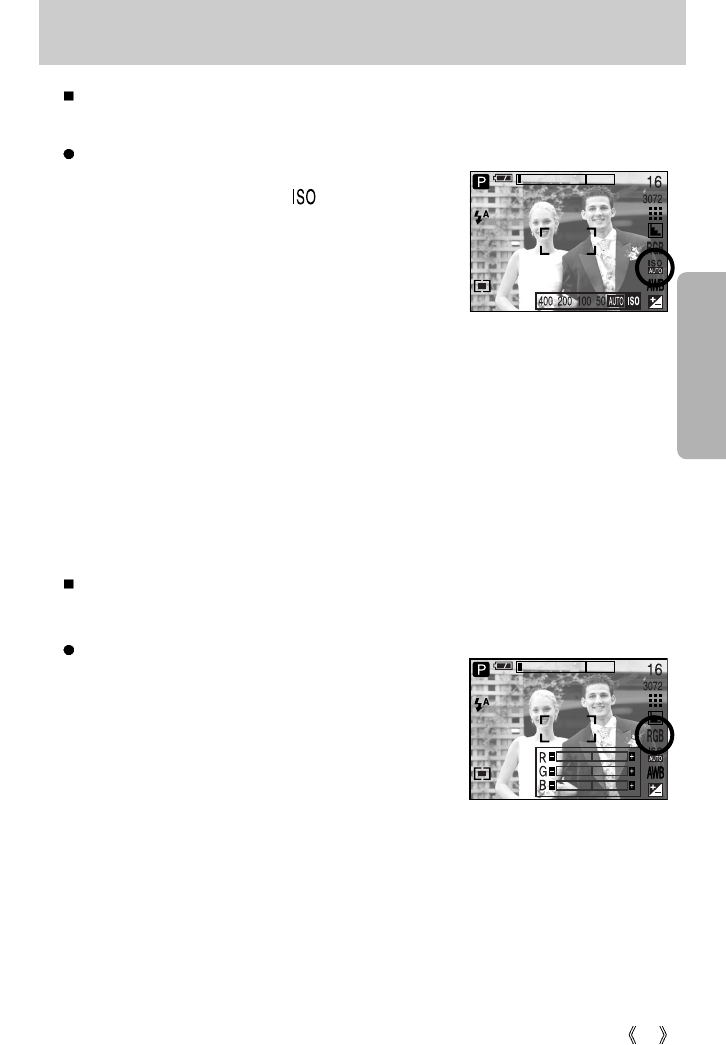
S button
Selecting an ISO Sensitivity
1. Press the S button, and then use the UP and DOWN
buttons to select the ISO icon ( ).
The ISO menu bar will appear as shown.
2. Use the LEFT and RIGHT buttons to select the desired
ISO sensitivity value.
- AUTO : The camera's sensitivity is
automatically changed by
variables such as lighting value or
subject brightness.
- 50, 100, 200, 400 : You can increase the shutter speed while the same amount of light is
present, by increasing the ISO sensitivity.
However, the image may be saturated in high luminance.
The higher the ISO value, the higher the camera’s sensitivity to light is and therefore the
greater its capacity to take pictures in dark conditions. However, the noise level in the
image will increase as the ISO value increases, making the image appear coarse.
3.
When you press the OK button, the value you set will be saved and ISO setup mode will end.
ISO : You can select the ISO sensitivity when taking pictures.
The speed or specific light-sensitivity of a camera is rated by ISO numbers.
RGB : Allows the user to adjust the R (Red), G (Green), and B (Blue) values of the images to
be captured.
Setting RGB Values
1. Press the S button, and then use the UP and DOWN
buttons to select the RGB icon ( RGB ). The RGB menu
bar will appear as shown.
2. Use the UP/ DOWN/ LEFT and RIGHT buttons to select
the desired RGB value.
- Up/ Down Button : Navigates between R, G, and B
icons.
- Left/ Right Button : Changes value of each icon.
3. When you press the OK button, the value you set will be saved and RGB setup mode will
end.

42
S button
A/S/M : The user can manually set shutter speed or aperture value in the menu.
Selecting the A/S/M shooting mode.
1. Turn the mode dial to select the ASM shooting mode.
2. Press the S button and use the Up and Down buttons to
select the A/S/M shooting mode icon ( ASM ) to open
the A/S/M shooting mode menu as shown in the picture.
3. Press the Left and Right buttons to select desired option
for the A/S/M shooting mode and press the S button.
- A (Aperture priority) shooting mode
: Set the aperture value for automatic exposure
depends on the brightness of the object by automatic shutter speed setting in the
camera. Turn the jog dial to the left or right to change the aperture value.
- S (Shutter priority) shooting mode
: Set the shutter speed for automatic exposure depends on the brightness of the object by
automatic aperture value setting in the camera.
Turn the jog dial to the left or right to change the shutter speed.
- M (Manual) shooting mode
: The user can manually set both the aperture value and the shutter speed.
Press the AEL button to select shutter speed or aperture value.
Rotate the jog dial to change the values.
If the set aperture value or shutter speed is out of
supported range(Between 2.0), the deviation of
exposure value is displayed red in the LCD by pressing the
shutter button down half way.
* Please adjust the shutter speed so that the red warning
message becomes white.
43
S button
Aperture values and shutter speeds that can be selected for each zoom position are as
follows :
- Aperture range : AUTO, WIDE : F2.7 ~ F6.7, TELE : F4.9 ~ F11.0
- Shutter speed range : AUTO, 1/2,000 ~ 15S
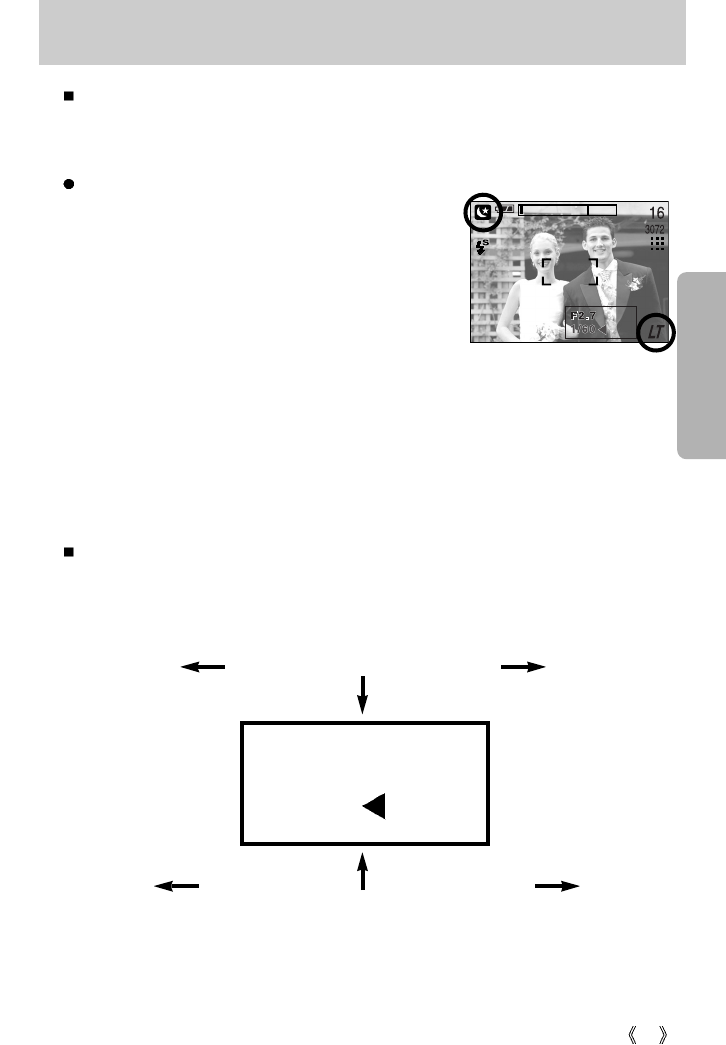
Long Time shutter : This camera automatically adjusts the shutter speed and aperture values
to the shooting environment. However, in NIGHT SCENE mode, you can
set the shutter speed and aperture values to your preference.
Adjusting the shutter speed and aperture values
1. Select the NIGHT SCENE mode by rotating the mode
dial.
2. Press S button and Long Time shutter menu (LT, For
selecting shutter speed and aperture value) will be
displayed.
3. Configure the Long Time shutter value with the up/
down/ left/ right button.
Up/ Down Button : Select the Aperture value / shutter speed.
Left/ Right Button : Change the value. Available aperture value options, depending on
zoom step will be displayed on the menu.
4. Press the OK button. The value you set will be saved and the mode will switch to NIGHT
SCENE mode. Press the SHUTTER button to take the picture.
(Press left button)
Aperture Value SmallLarge
(Press right button)
Shutter Speed
Fast
(Press left button)
Slow
(Press right button)
F 2.7
1/60
44
Use this button to select the focusing method. Repeatedly press the MF button to rotate [Manual
focusing] [Continuous automatic focusing] [Automatic focusing].
Automatic focusing : Slightly press the shutter to let the camera measure
distance to the object and select the best focusing.
If successfully focused with the slight press of the shutter,
the automatic focusing mark is turned green.
Manual focusing : Where the automatic focusing is not available such as very
dark place, use the manual focusing. Picture may become
blurring. Please be careful while using the manual focusing.
Continuous automatic focusing : The camera keeps focusing while the object is moving even
if the shutter button is not slightly pressed.
Note that using the Continuous automatic focusing uses
more battery than the Automatic focusing does.
MF button
Focus distance of 0.04~0.3m are only supported in the Wide zoom.
The flash is fixed as not available.
The focus value displayed in the LCD while manually focusing is measured from the
end of the lens
INFORMATION
Modes where the Continuous automatic focusing is
available
: Program, A/S/M mode, Children mode in the scene
shooting modes, and MySET mode. If selected, the CAF
icon is displayed in the bottom of the LCD.
m
cm
Long distance
Close-up
Manual focusing.
1. Press the MF button to display the MF bar.
The MF icon is displayed in the bottom of the LCD.
2. Use the jog dial to set the focus distance.
Turn to the left : Move the focus farther.
Turn to the right : Move the focus closer.
45
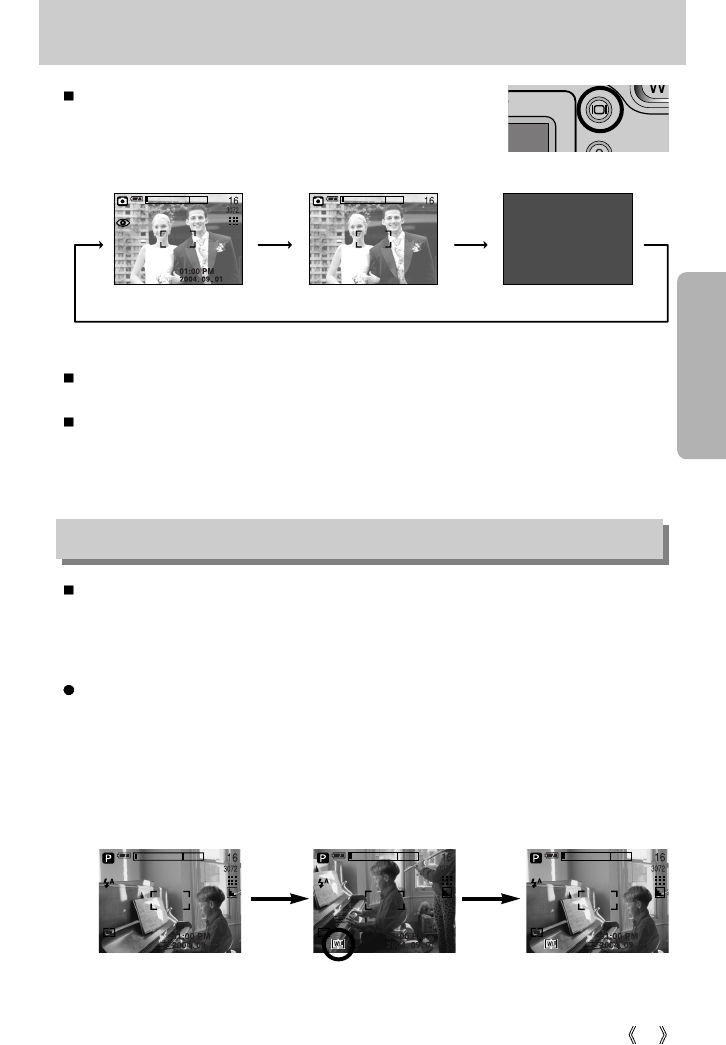
LCD button
The camera measures brightness of the object and automatically set the best exposure
value. If difference between the exposure values of the object and background is too great,
use the AEL button to manually set the exposure value against sunlight or in strong light.
This button is available in the AUTO, PROGRAM, MOVIE CLIP, SCENE mode.
Use the automatic exposure lock.
1. Ensure the subject in the center of the autofocus frame.
2. Move the camera to point the automatic focus mark on the object of desired exposure.
3. Press the AEL button to lock the exposure and display the AEL icon in the bottom of the
LCD.
4. Focus the camera again and press the shutter button again for shooting.
- The automatic exposure lock function is automatically unset after taking one picture.
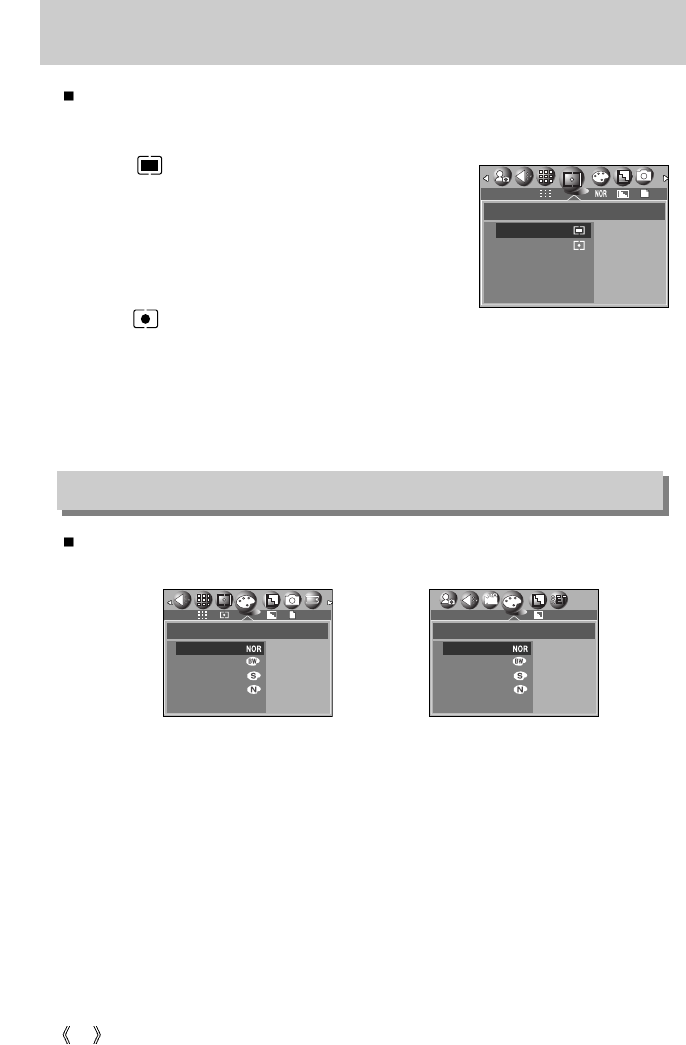
[
Image & full information
][
Image & basic information
] [ LCD off ]
You can check the recording status in the LCD monitor.
In any mode with the exception of VOICE RECORDING mode,
pressing the LCD button will change the display as shown below.
If the background image is too bright to view the menus, press the LCD button and the
background image turn to black to view clear menus.
If the LCD monitor is turned off, the mode dial lamp will light up.
Pressing the
LCD button Pressing the
LCD button
Pressing the LCD button
AEL button (Automatic Exposure Lock)
[ Screen for shooting ] [ Focus to the object and ]
press the AEL button
[ Refocus and fully press ]
the shutter button
46
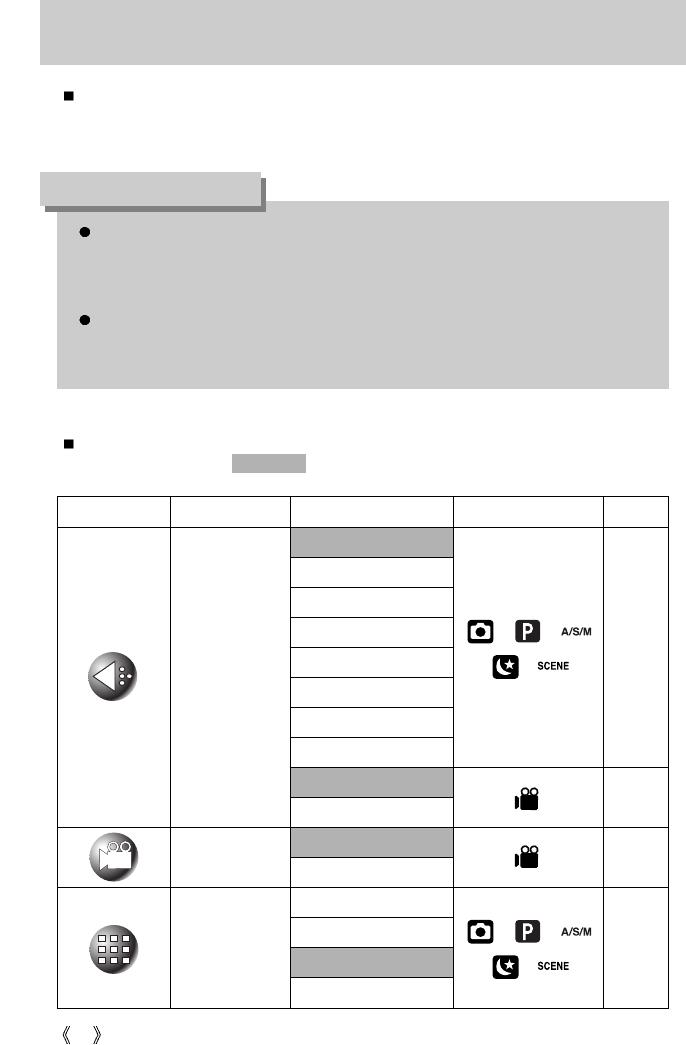
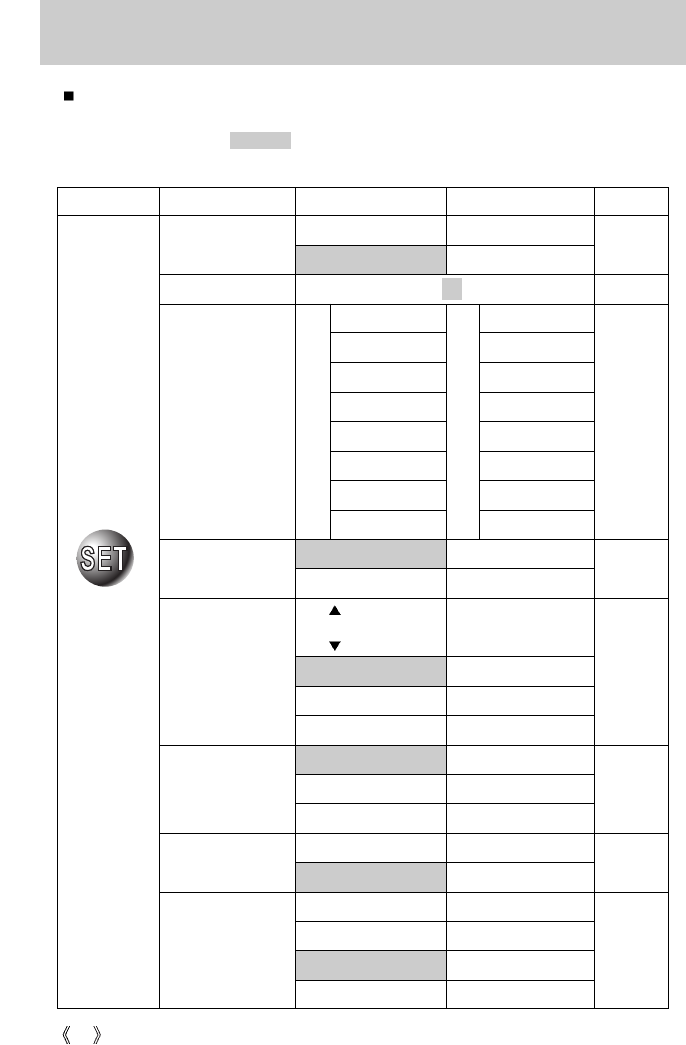
Using the LCD monitor to adjust the camera settings
You can use the menu on the LCD monitor to set up recording functions. In any mode with
the exception of VOICE RECORDING mode, pressing the MENU button displays the menu
on the LCD monitor.
The following functions are available, depending on the mode you have selected.
The items indicated by are default settings.
The menu will not be displayed on the LCD monitor in the following circumstances:
- When another button is being operated.
- While image data is being processed. (when the green lamp next to the viewfinder blinks)
- When there is no battery capacity.
When the menu is showing on the LCD monitor, it is not possible to operate the shutter
button i.e. capture an image.
To capture an image, simply cancel the menu display by pressing the MENU button.
INFORMATION
SIZE
FRAME RATE
QUALITY
p.48
p.48
p.49
p.49
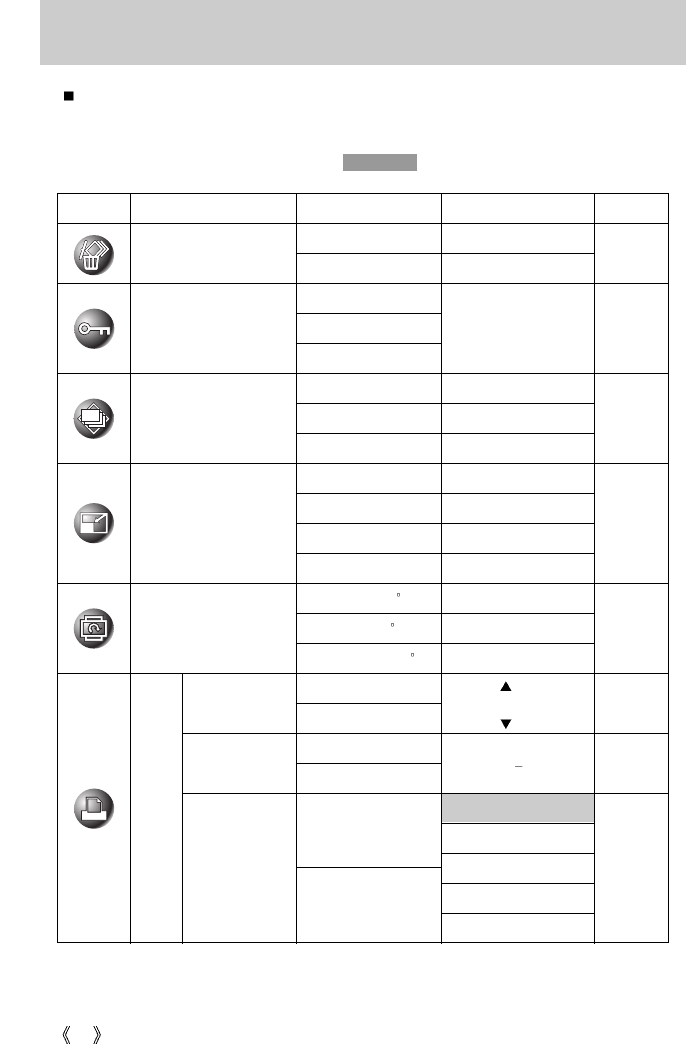
Menu tab Main menu Sub menu
Camera working mode
Page
3072X2304
2816X2112
2592X1944
2272X1704
2048X1536
1600X1200
1024X768
640X480
640X480
320X240
30FPS
15FPS
TIFF
S.FINE
FINE
NORMAL
47
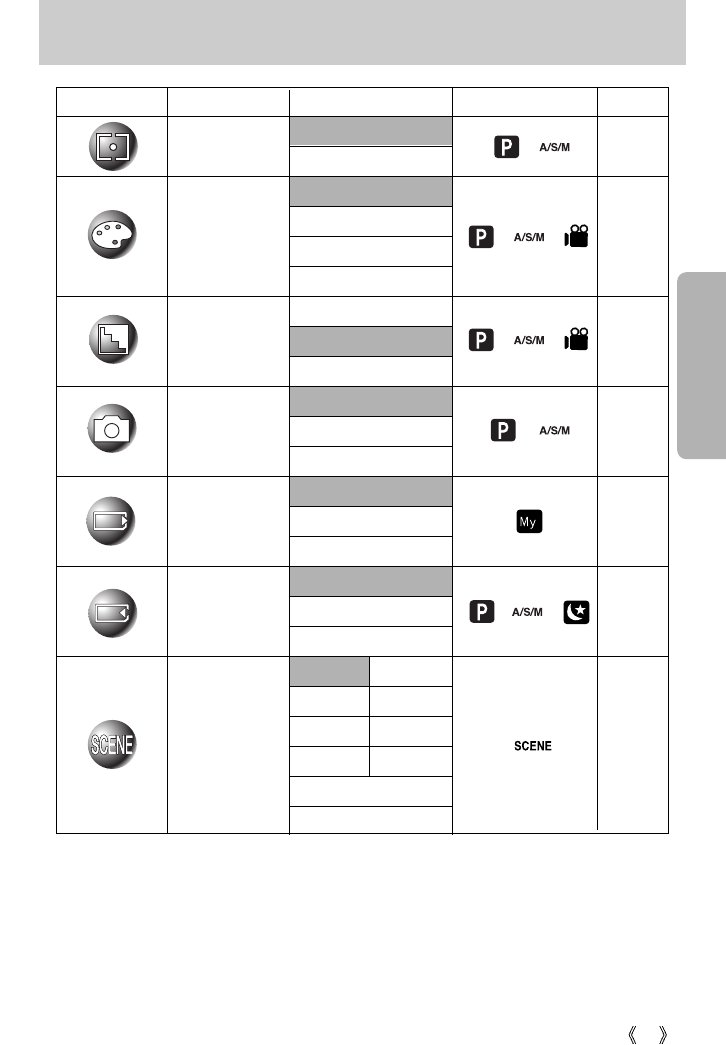
Using the LCD monitor to adjust the camera settings
Menu tab Main menu Sub menu
Camera working mode
Page
MULTI
SPOT
NORMAL
B & W
SEPIA
NEGATIVE
SOFT
NORMAL
VIVID
SINGLE
CONTINUOS
AEB
MYSET1
MYSET2
MYSET3
MYSET1
MYSET2
MYSET3
EFFECT
SHARPNESS
SHOOTING
LOAD
SCENE
SAVE
p.50
p.51
p.51
p.52
p.52
p.53
PORTRAIT CHILDREN
LANDSCAPE CLOSE UP
SUNSET DAWN
BACKLIGHT FIREWORKS
BEACH&SNOW
TEXT
METERING
p.50
* Menus are subject to change without prior notice.
48
How to use the menu
3. Use the UP and DOWN buttons to select a sub menu.
4. Select a sub menu, and then press the OK button. The value you set will be saved and the
menu will disappear.
1. Turn on the camera and press the MENU button. A menu for each camera mode appears.
However, there is no menu for Voice Recording mode ( ).
2. Use the LEFT and RIGHT buttons to navigate through the menus.
Press the UP
or DOWN
button.
Press the UP
or DOWN
button.
Press the
LEFT or
RIGHT button.
Press the
LEFT or
RIGHT button.
You can select the image size appropriate for your application.
[PROGRAM mode]
The higher the resolution, the lower the number of available shots will be because high
resolution images require more memory than lower resolution images.
INFORMATION
Size
[ MOVIE CLIP mode ]
3072
QUALITY
TIFF
TIFF
SUPER FINE
FINE
NORMAL
3072
METERING
MULTI
SPOT
3072
EFFECT
NORMAL
B & W
SEPIA
NEGATIVE
SIZE
3072X2304 3072
2816X2112 2816
2592X1944 2592
2272X1704 2272
2048X1536 2048
SIZE
640X480 640
320X240 320
30fps
SHARPNESS
SOFT
NORMAL
VIVID
SHARPNESS
SOFT
NORMAL
VIVID
SHARPNESS
SOFT
NORMAL
VIVID
Mode
Icon 3072 2816 2592 2272 2048 1600 1024 640 640 320
Size
3072X2304 2816X2112 2592X1944 2272X1704 2048X1536 1600X1200 1024X768 640X480 640X480 320X240
STILL IMAGE mode
MOVIE CLIP mode
49
Quality
You can select the compression ratio appropriate for your
application of the captured images. The higher the
compression ratio, the lower the picture quality.
Mode
Icon TIFF
Sub menu TIFF S.FINE FINE NORMAL 30FPS 15FPS
File Format tif jpeg jpeg jpeg mov mov
STILL IMAGE mode MOVIE CLIP mode
TIFF is the highest quality and NORMAL is the lowest setting.
Choose the setting appropriate for your needs.
The TIFF file format is for professionals and provides the best quality.
However, large file size reduces number of available pictures to take and increases
saving time to the memory card.
[PLEASE WAIT !] message is displayed while saving a TIFF file to the memory card.
This file format complies with the DCF(Design rule for Camera File system).
JPEG (Joint Photographic Experts Group): JPEG is the image compression standard
developed by the Joint Photographic Experts Group. This type of compression is most
commonly used for compressing photos and graphics because it can compress the files
efficiently without damaging the data.
INFORMATION
[PROGRAM mode]
3072
QUALITY
TIFF
TIFF
SUPER FINE
FINE
NORMAL
50
Metering
If you cannot obtain suitable exposure conditions, you can change the metering method to
take brighter pictures.
MULTI ( ) : Exposure will be calculated based on an
average of the available light in the
image area.
However, the calculation will be biased
towards the centre of the image area.
This is suitable for general use.
SPOT ( ) : Only the rectangular area in the center of
the LCD monitor will be metered for light.
This is suitable when the subject in the center is exposed correctly,
regardless of the back lighting.
Effect
By using the camera's digital processor, it is possible to add special effects to your images.
NORMAL : No effect is added to the image.
B & W : Converts the image to black and white.
SEPIA : Captured images will be stored in a sepia tone (a gradient of yellowish brown
colours).
NEGATIVE : Save the image in negative mode.
[ PROGRAM mode ]
[ PROGRAM mode ] [ MOVIE CLIP mode ]
EFFECT
NORMAL
B & W
SEPIA
NEGATIVE
3072
EFFECT
NORMAL
B & W
SEPIA
NEGATIVE
30fps
640
3072
METERING
MULTI
SPOT
51
If less than 3 pictures are available in the memory, the Sequential and the AEB shooting
are not available.
It is best to use a triangular support for the AEB shooting for saving time is long and
hand shaking may occur.
The Digital zoom is not supported in the Sequential and AEB shootings.
INFORMATION
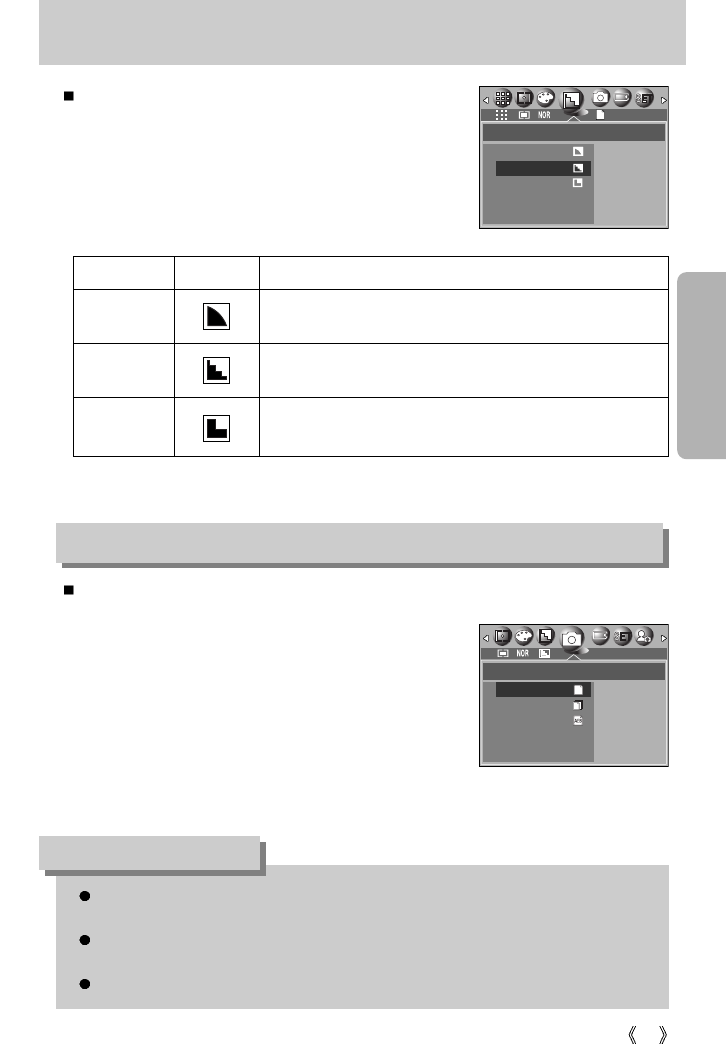
Sharpness
You can adjust the sharpness of the picture you want to
take. You cannot check the sharpness effect on the LCD
monitor before you take a picture, because this function is
applied only when the captured image is stored on the
memory.
Sub menu Icon Description
VIVID
NORMAL
SOFT
If you select CONTINUOUS or AEB, the flash will automatically be set to Flash Off.
[SINGLE] : Take one picture only
[CONTINUOS] : Take three pictures in a series by pressing
the shutter button only once.
[AEB] : Take three pictures in a series in different
exposures: over exposure (+0.5EV),
standard exposure (0.0EV), and short
exposure (-0.5EV). Use the mode if it is
hard to decide exposure of the object.
Continuous shot
[ PROGRAM mode ]
The edges of the image are softened.
This effect is suitable for editing images on your PC.
The edges of the image are sharp.
This is suitable for printing.
The edges of the image are emphasized. The edges will
appear sharp, but noise may occur in the recorded image.
SHOOTING
SINGLE
CONTINUOUS
AEB
[ PROGRAM mode ]
SHARPNESS
SOFT
NORMAL
VIVID
52
Use the MySET mode to save frequently used camera settings (SAVE) and use it later (LOAD)
Saving the camera configuration : Available in the PROGRAM, A/S/M and NIGHT SCENE
shooting modes.
1. Use the camera buttons and menu to set desired
camera configuration.
2. Press the menu button in any modes except AUTO,
VOICE RECORDING, MySET, MOVIE CLIP or SCENE
mode.
3. Press the Left/Right buttons to select the [SAVE] menu
tap.
4. Press the Up/Down buttons to select desired MySET
slot number to save.
5. Press the OK button to save the current configuration in
the selected MySET slot and close the menu.
Save / Load the camera configuration (MySET)
Loading the saved camera configuration: available in the
MySET shooting mode.
1. Turn the mode dial to select the MySET shooting mode
and press the menu button.
2. Press the Left/Right buttons to select the [LOAD] menu
tap.
3. Press the Up/Down buttons to select a MySET slot
number to load.
4. Press the OK button to set the camera configuration as
saved in the MySET slot.
* The current MySET slot number is displayed in the top left of the LCD.
Saving is available for the following camera functions.
Functions using the camera buttons - Macro, flash, white balance, ISO, Aperture value
and Shutter speed.
Functions using the menu screen - Size, quality, metering, effect, sharpness and
continuous shot.
INFORMATION
[ PROGRAM mode ]
[ MySET mode ]
LOAD
MYSET 1
MYSET 2
MYSET 3
SAVE
MYSET 1
MYSET 2
MYSET 3
MOVE: SET:OK
3072
53
Scene
Select the [SCENE] submenu to automatically configure
optimal settings, depending on the selected scene.
Only available in the Scene Mode.
[ SCENE mode ]
When the close-up, sunset, dawn, fireworks are selected, it is possible that camera
shake will occur. If this is the case, use a tripod to eliminate this.
INFORMATION
SCENE
PORTRAIT
CHILDREN
LANDSCAPE
CLOSE UP
SUNSET
3072
Sub menu Icon Description
CHILDREN
LANDSCAPE
CLOSE UP
SUNSET
DAWN
BACKLIGHT
FIREWORK
BEACH
&SNOW
Take a still picture of capturing moving children.
PORTRAIT To take picture of a person.
Close-up shooting for small objects such as plants and insects.
Splendor of the setting sun.
Scenery with green woods or blue sky.
Daybreak scenes.
Portrait without shadows caused by back light.
Firework scenes.
TEXT
Use this mode to shoot a document.
For ocean, lake, beach and snowscape scenes.
54
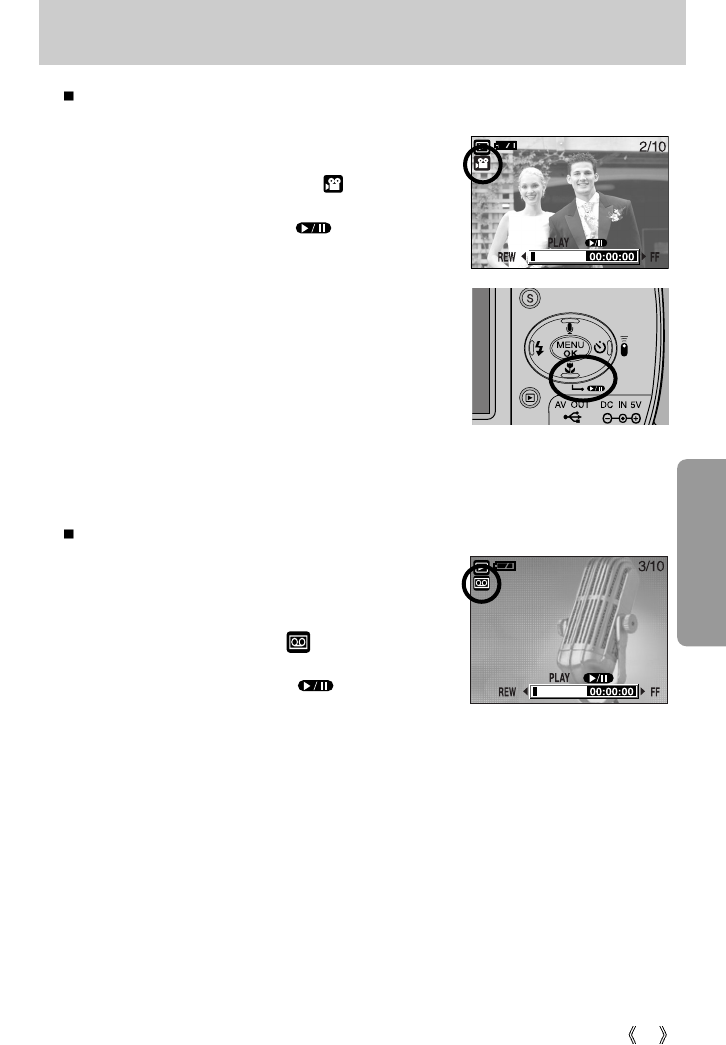
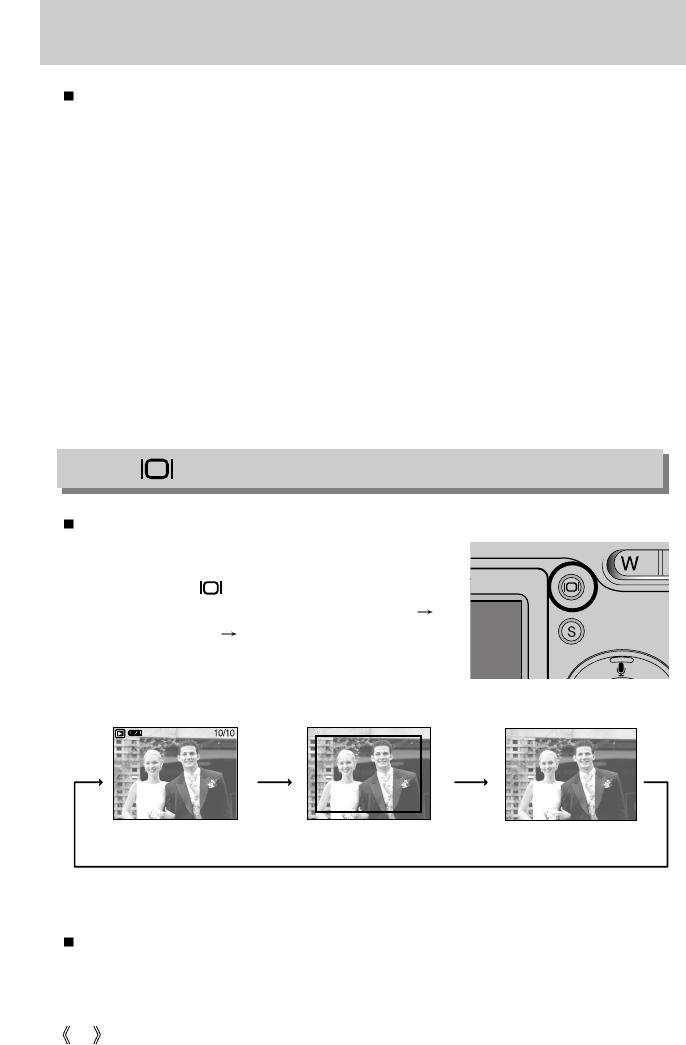
Starting play mode
Turn the camera on and select Play mode by pressing the play mode button ( ).
The camera can now play back the images stored in the memory.
If you have turned on the camera by pressing the POWER button, you can press the PLAY
MODE button once to switch to Play mode and press it again to switch to Recording mode.
You can turn the power on with the play mode button.
You can turn the power on with the play mode button. The camera is turned on in play mode.
Press the play mode button again to switch to the Recording mode. Switch the mode dial to
change to another shooting mode while the camera is on.
You can set up the PLAY mode function by using the camera buttons and LCD monitor.
If you press PLAY button to switch to Play mode, the camera lens will retract into the camera
body for protection of the lens in about 30 seconds.
Playing back a still image
1. Select the PLAY mode by pressing the play
mode button ( ).
2. The last image stored on the memory is
displayed on the LCD monitor.
3. Select an image that you want to play back by
pressing the LEFT / RIGHT button.
Press and hold the LEFT or RIGHT button to
play back the images quickly.
Use the jog dial to fast display only saved
image numbers instead of the actual images in
the LCD. This function is useful for browsing
many images.
Manner mode : Pressing the power button for more than 3 seconds changes the buzzer
and start-up sound setting to OFF, even though you may have set these to ON.
Even if the camera’s power is off, you can start the play mode by pressing the play
mode button.
INFORMATION
55
Starting play mode
Playing back a movie clip
Steps from 1-2 are the same as those to play back a still image.
3. Select the recorded movie clip that you want to play
back by using the LEFT/RIGHT button. If you select a
movie clip, the movie clip indicator ( ) will be
displayed on the LCD monitor.
4. Press the play & pause button ( ) to play back a
movie clip file.
- To pause a movie clip file while playing it back, press
the play & pause button again.
- Pressing the play & pause button again will cause the
movie clip file will restart.
- To rewind the movie clip while it is playing, press the
LEFT button. To fast forward the movie clip, press the
RIGHT button.
- To stop playback of the movie clip, press the play &
pause button, and then press the LEFT or RIGHT
button.
Playing back a recorded voice
Steps from 1-2 are the same as those to play back a still
image.
3. Select the recorded voice that you want to play back by
using the LEFT/RIGHT button. If you select a recorded
voice file, the voice indicator ( ) will be displayed on
the LCD monitor.
4. Press the play & pause button ( ) to play back a
recorded voice file.
- To pause a recorded voice file, while playing it back,
press the play & pause button again.
- To resume playback of the voice file, press the play & pause button.
- To rewind the voice file while it is playing, press the LEFT button.
To fast forward the voice file, press the RIGHT button.
- To stop playback of the voice file, press the play & pause button, and then press the
LEFT or RIGHT button.
56
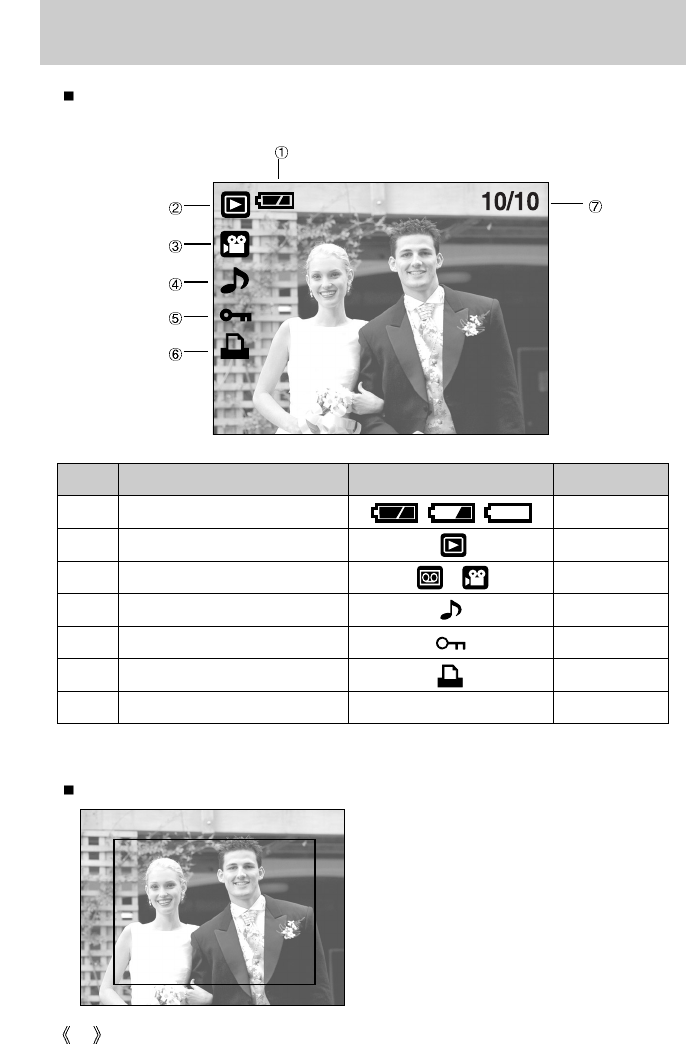
LCD monitor indicator
The LCD monitor displays information about the shooting conditions.
No. Description Icon Page
1 Battery p.15
2 Play mode
3 File Type
4 Voice memo p.58
5 Protect indicator p.65
6 DPOF indicator p.68
7 Stored image number 10/10
SIZE : 3072X2304 Size
AV : F2.7 Aperture value
TV : 1/60 Shutter speed
ISO : 75 ISO sensitivity
FLASH : OFF Whether or not the
flash is used.
DATE : 2004/09/01 Recording date
SIZE : 3072X2304
AV : F2.7
TV : 1/60
ISO : 75
FLASH : OFF
DATE : 2004/09/01
If you press the LCD button, you can check the following recording information:
57
Using the camera buttons to adjust the camera
In Play mode, you can use the buttons on the camera to conveniently set up the Play mode
functions.
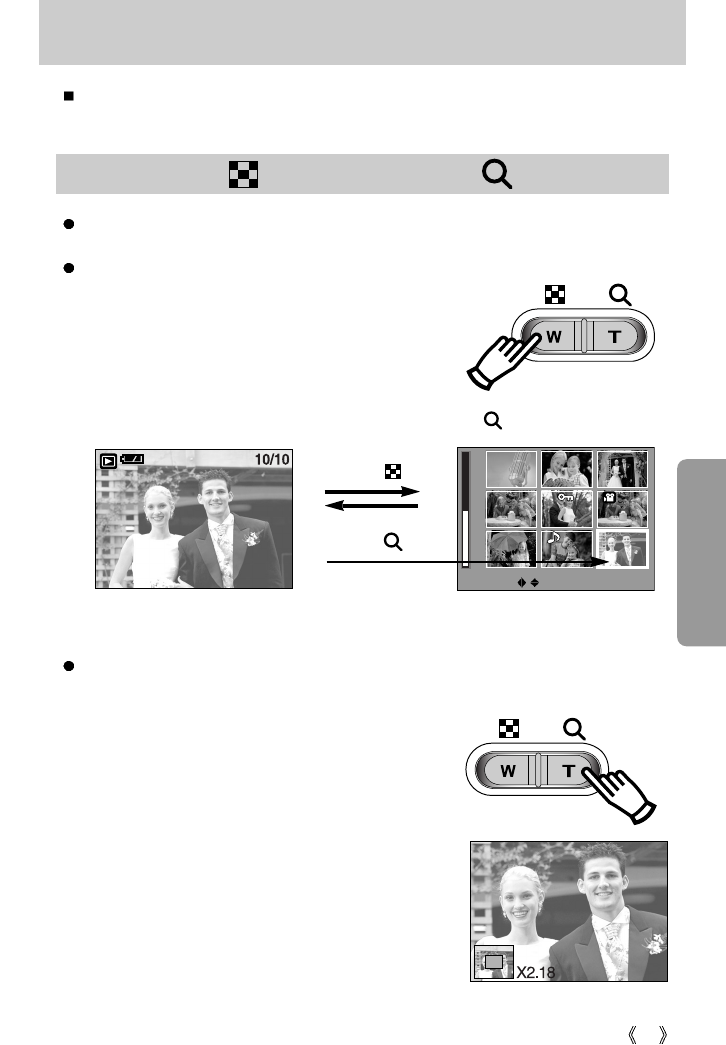
Image enlargement
1. Select an image that you want to enlarge and press the enlargement button.
2. Different parts of the image can be viewed by pressing
the 5 function button.
3. Pressing the thumbnail button will zoom back to the
original full sized image.
- You can tell whether the image displayed is an
enlarged view by checking the image enlargement
indicator shown at the bottom left of the LCD monitor.
(If the image is not an enlarged view, the indicator will
not be displayed.) You can also check the area of
enlargement.
- TIFF, Movie clips and WAV files can’t be enlarged.
- If an image is enlarged, a loss of quality may occur.
Thumbnail ( ) / Enlargement ( ) button
You can view multiple pictures, enlarge a selected picture, and crop and save a selected area
of an image.
Thumbnail display
1. While an image is displayed full screen, press the
thumbnail button.
2. The thumbnail display will highlight the image that had
been showing at the time the thumbnail mode was
selected.
3. Press the 5 function button to move to a desired image.
4. To view an image separately, press the enlargement button ( ).
[ Normal display mode ] [ Thumbnail display mode ]
Pressing the thumbnail
button ( )
Pressing the enlargement
button ( )
Highlighted image
MOVE: EXIT:T
58
Thumbnail( ) / Enlargement( ) button
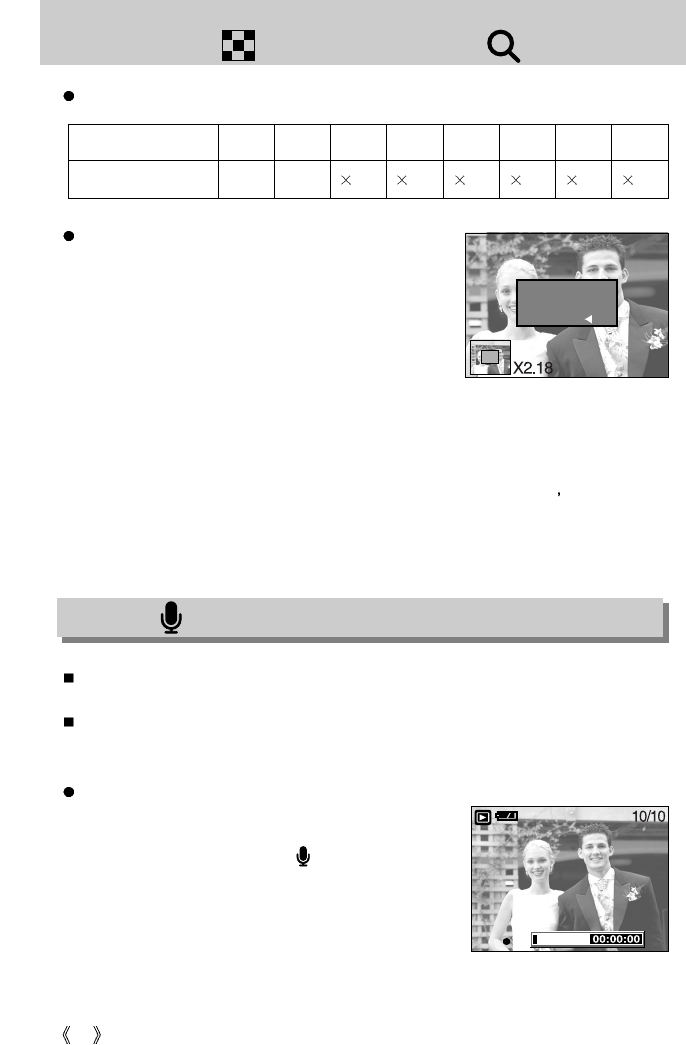
The maximum enlargement rate in proportion to the image size.
Trimming : You can extract part of the image that you want
and save it separately.
1. Select an image that you want to enlarge and press the
enlargement button.
2. Different parts of the image can be viewed by pressing
the 5 function button.
3. Press the MENU button and a message will be
displayed as shown alongside.
4. Press the OK button to save the trimmed image with a
new file name.
The trimmed image will be displayed on the LCD monitor.
Press the LEFT button to return to the image before it was selected.
- If there is little memory space to save the trimmed image, the image can t be trimmed.
Voice ( ) memo / Up button
When the menu is displayed on the LCD monitor, pressing the UP button makes the menu
cursor move up.
When the menu is not displayed on the LCD monitor, the UP button operates as the voice
memo button. You can add your voice to a stored still image.
Adding a Voice Memo to a Still Image
1. Press the LEFT/ RIGHT button to select an image that
you wish to add sound to.
2. Press the voice memo button ( ) and the voice
memo indicator will display. The camera is now ready to
record a voice memo.
TRIMMING?
TRIM : OK
CANCEL :
START:SHUTTER
REC
Image size
3072 2816 2592 2272 2048 1600 1024 640
Maximum enlargement rate
X12 X11 9.00 6.45 5.33 5.00 4.00 3.33
59
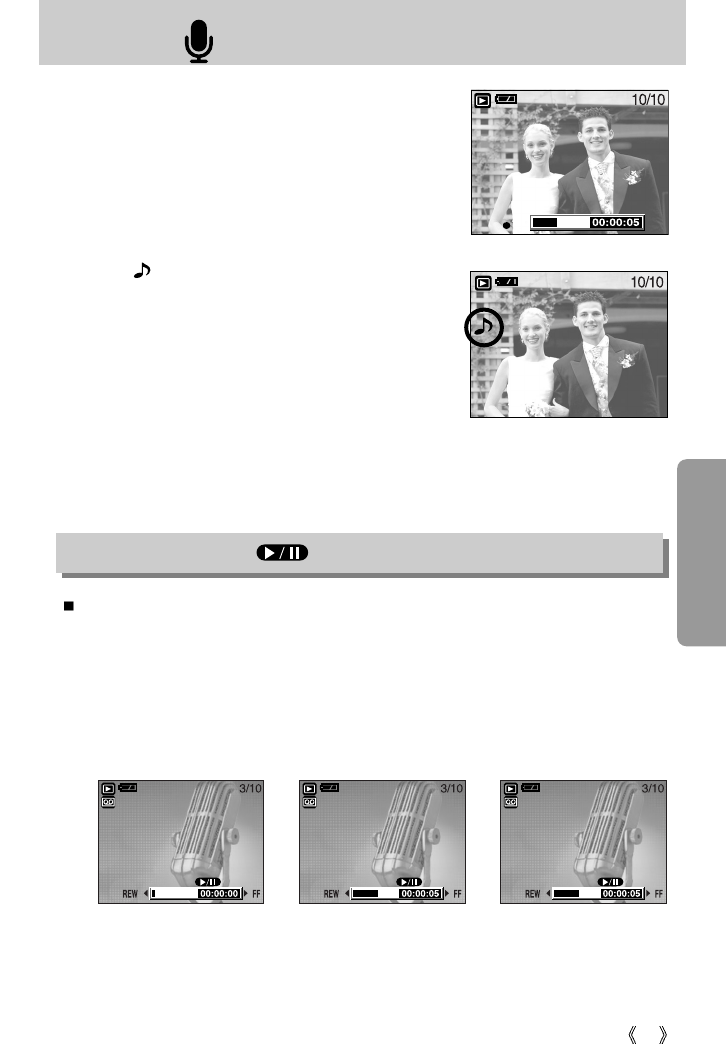
Voice ( ) memo / Up button
3. Press the shutter button to start recording and voice will
be recorded to the still image for 10 seconds.
While the voice is recording, the recording status
window will be displayed as shown alongside.
4. The recording can be stopped by pressing the shutter
button again.
5. The ( ) icon will be displayed on the LCD monitor
after voice memo recording has finished.
- Voice memos can’t be recorded onto movie clip files.
- A distance of 40cm between you and the camera
(microphone) is the best distance to record sound.
- The voice memo will be saved in *.wav format, but has
the same file name as the still image to which it
corresponds.
- If you add a new voice memo to the still image that
already has a voice memo, the existing voice memo will be erased.
Play & Pause ( )/ Down button
In Play mode, the play & pause/ down button works as follows:
- If the menu is displayed
Press the DOWN button to move from the main menu to a sub menu, or to move down the
sub menu cursor.
- If a still image with a voice memo, a voice file, or a movie clip is playing
In Stop mode : Plays a still image with a voice memo, a voice file, or a movie clip.
During playback : Temporarily stops playback.
In Pause mode : Resumes playback
[ Voice recording is stopped ] [ Voice recording is paused ][ Voice recording is playing ]
STOP.SHUTTER
REC
PLAY
PAUSE
PLAY
60
LEFT/ RIGHT/ MENU/ OK button
LEFT / RIGHT/ MENU/ OK buttons activate the following.
- LEFT button : While the menu is showing, press the LEFT button to select the menu tab
to the left of the cursor.
- RIGHT button : While the menu is showing, press the RIGHT button to select the menu tab
to the right of the cursor, or to move an secondary menu.
- MENU button : When you press the MENU button, the play mode menu will be displayed
on the LCD monitor. Pressing it again will return the LCD to the initial
display.
- OK button : When the menu is displayed on the LCD monitor, the OK button is used for
confirming data that is changed by using the 5 function button.
If the background image is too bright to view the menus, press the LCD button and the
background image turn to black to view clear menus.
The shooting information will be displayed on the LCD monitor.
The last image stored in the memory is displayed on the
LCD monitor by pressing the play mode button.
Pressing the LCD( ) button in the PLAY mode will
change the display as shown below. [Image & Icons]
[Image & Information] [Image only]
[ Image & Icons ] [ Image & Information ] [ Image only ]
Pressing the LCD button
Pressing
the LCD
button
Pressing
the LCD
button
LCD ( ) button
SIZE :
3072X2304
AV : F2.7
TV : 1/60
ISO : 75
FLASH : OFF
DATE : 2004/09/01

61
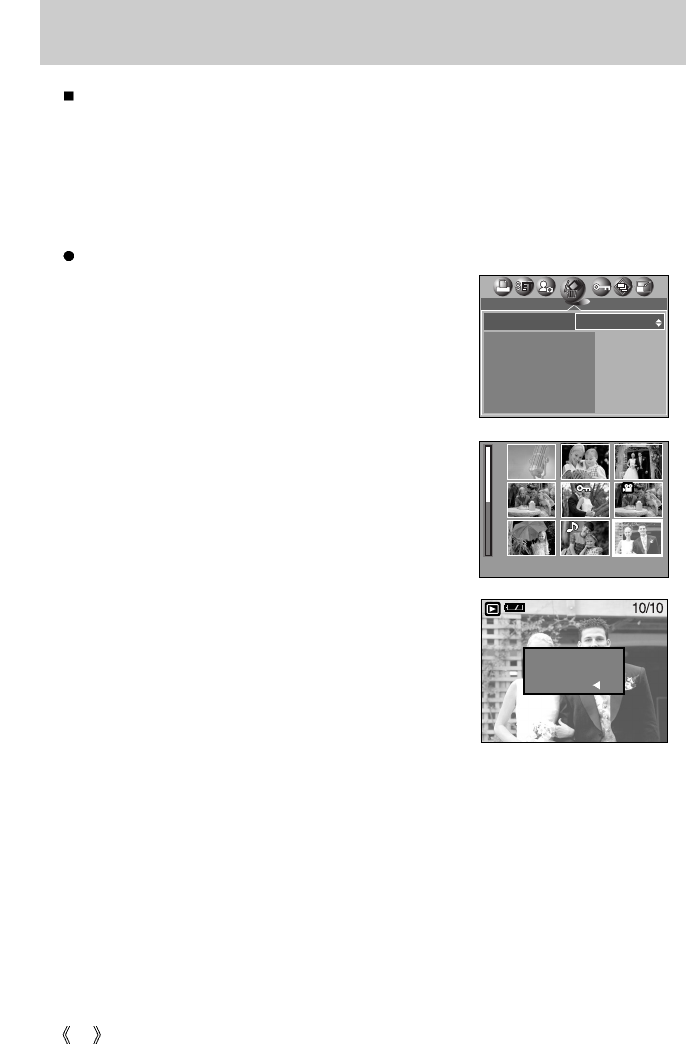
Delete( ) button
This deletes images stored on the memory card.
Deleting Images in Play Mode
1. Select an image that you want to delete by pressing the
LEFT / RIGHT button and press the DELETE( )
button.
2. A message will display as shown alongside on the LCD
monitor.
3. Press the OK button to delete the image.
Before deleting images from the camera, you should protect or download images to
your computer that you wish to keep.
INFORMATION
DELETE?
DEL. : OK
CANCEL :
62
Setting up the play back function using the LCD monitor
PLAY mode functions can be changed by using the LCD monitor. In the PLAY mode,
pressing the MENU button displays the menu on the LCD monitor. The menus you can set
up in Play mode are as follows. To capture an image after setting up the play menu, press
the PLAY button. The items indicated by are default settings.
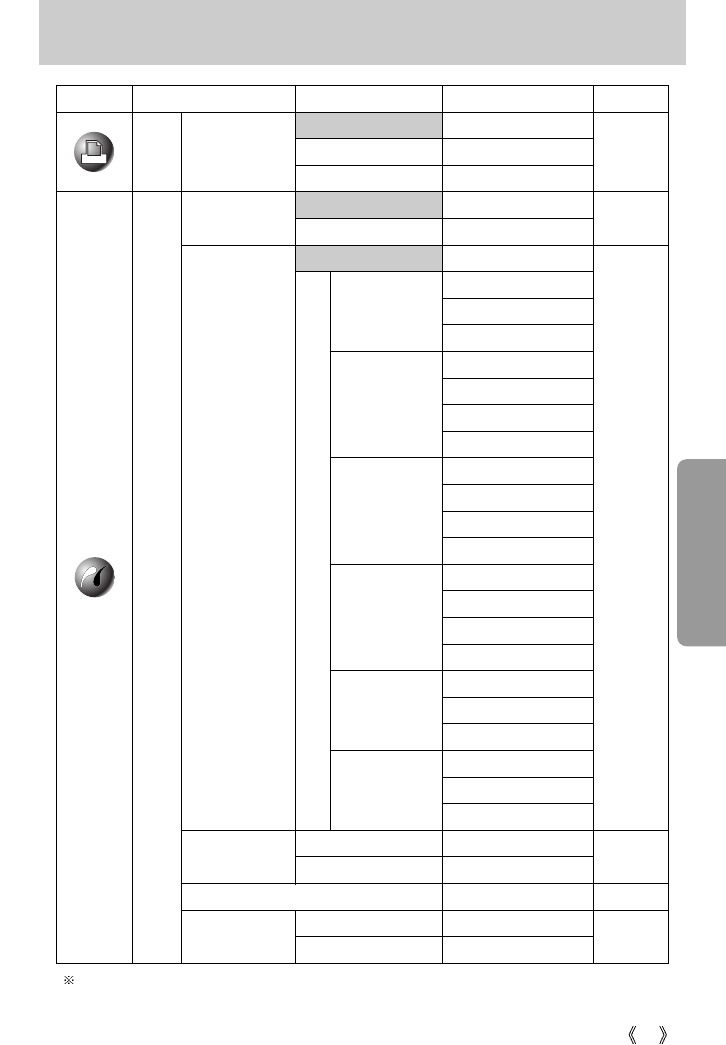
Menu tab Main menu Sub menu Secondary menu Page
-
-
-
-
-
DEFAULT
3X5
4X6
5X7
8X10
SLIDE
PROTECT
RESIZE
ROTATE
DELETE
STANDARD
INDEX
SIZE
D
P
O
F
p. 66
p. 65
p. 67
p. 64
p. 68
p. 69
p. 69
p. 70
0 ~ 30 PRINTS
ONE PIC
SELECT
ALL PICs
INTERVAL
REPEAT
START
UNLOCK / LOCK
2816X2112
2272X1704
2048X1536
1600X1200
2592X1944
1024X768
640X480
LOGO
01 ~ 10SEC
OFF, ON
-
RIGHT(90 )
LEFT(90 )
UPDOWN(180 )
SELECT
ALL
NO
YES
ALL PICs
SELECT
SELECT
ALL PICs
63
Setting up the play back function using the LCD monitor
Menus are subject to change without prior notice.
Menu tab Main menu Sub menu Secondary menu Page
STANDARD
-
INDEX
-
SIZE
-
ONE PIC -
ALL PICs -
DEFAULT -
AUTO
POSTCARD, 4X6, L
2L, A4, A3
AUTO
FULL
INDEX
1, 2, 4, 9, 16
AUTO
PLAIN
PHOTO
FASTPHO.
AUTO
DRAFT
NORMAL
FINE
AUTO
OFF
ON
AUTO
OFF
ON
STANDARD
-
INDEX
-
-
NO -
YES
P
I
C
T
B
R
I
D
G
E
C
U
S
T
O
M
I
Z
E
p. 70
p. 72
p. 73
p. 74
p. 75
p. 75
PRINTER
SETUP
SELECT
DPOF PRINT
PRINT
RESET
PAPER SIZE
LAYOUT
PAPER TYPE
PRINT QUALITY
DATE PRINT
FILE NAME
CANCEL
D
P
O
F
64
Deleting images
Of all the files stored in the memory card, the unprotected files in the DCIM subfolder will be
deleted. Remember that this will permanently delete unprotected images. Important shots
should be stored on a computer before deletion takes place. The startup image is stored in
the camera's internal memory (i.e., not on the memory card) and it will not be deleted even if
you delete all files on the memory card.
Deleting images
1. Press the play mode button and press the menu button.
2. Press the LEFT/ RIGHT button and select the [DELETE]
menu tab.
3. Select a desired sub menu by pressing the UP/ DOWN
button.
[SELECT] : Press the OK button and a window for
selecting the image to be deleted is opened.
1) Up/Down/Left/Right : Select an image
S button : Select an image to delete.
If an image is selected, the image becomes dim.
2) Press the OK button and the selected images will be
deleted.
[ALL] : Press the OK button and confirmation window will
be displayed. Press the OK Button again to
delete all unprotected images.
If there aren't protected images, all the images
are deleted and a [NO IMAGE!] message will
display.
4. After deletion, the screen will be changed to the play
mode screen.
DELETE
SELECT
ALL
EXIT:OK MOVE:
DELETE?
DEL. : OK
CANCEL :
SELECT:S
SET:OK
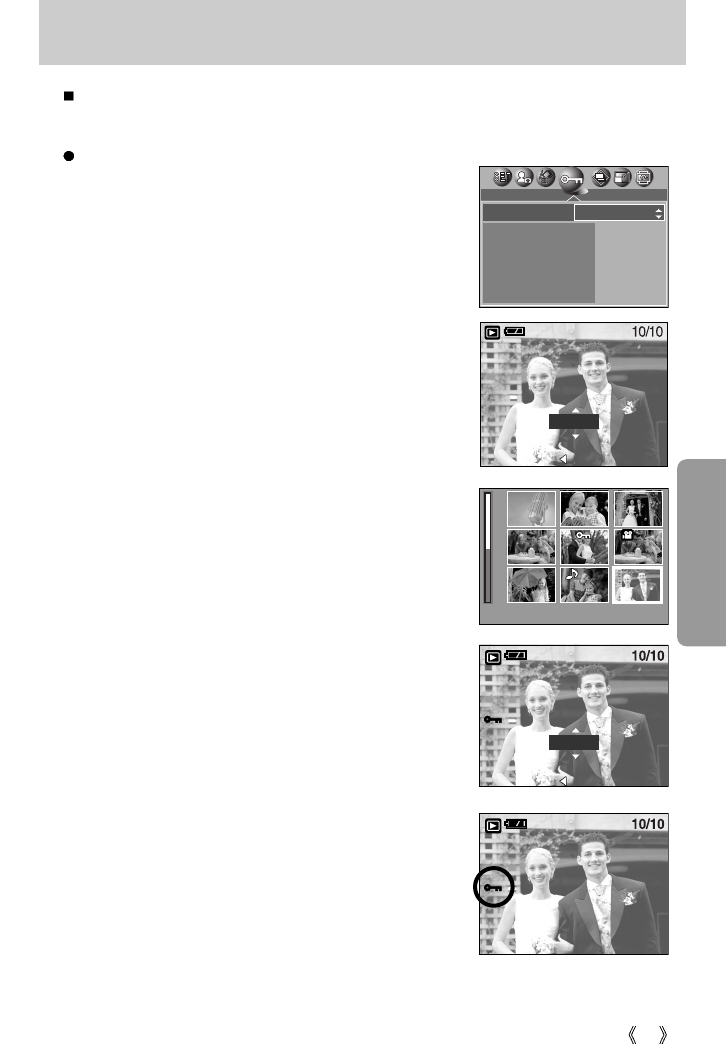
65
Protecting images
This is used to protect specific shots from being accidentally erased (LOCK).
It also unprotects images that have been previously protected (UNLOCK).
Protecting Images
1. Press the play mode button and press the menu button.
2. Press the LEFT/ RIGHT button and select the [PROTECT]
menu tab.
3. Select a desired sub menu by pressing the UP/ DOWN
button and press the OK button.
[ONE PIC] : Only an image that is displayed on the LCD
monitor is protected or unprotected.
- UP/DOWN Button : Protect/release the image.
- OK button : Your changes will be saved and the menu
will disappear.
[SELECT] : Selection window for an image to be
protected/released is displayed.
- Up/ Down/ Left/ Right : Select an image
- S Button : Protect/ release the image
- OK button : Your changes will be saved and the
menu will disappear.
[ALL PICs] : Protect/ release all saved images
- UP/ DOWN Button : Protect/release the images.
- OK button : Your changes will be saved and the
menu will disappear.
- If you protect an image, the protect icon will be displayed on
the LCD monitor. (An unprotected image has no indicator)
- An image in LOCK mode will be protected from the delete
function or [DELETE] functions, but will NOT be protected
from the [FORMAT] function.
PROTECT
ONE PIC
SELECT
ALL PICs
EXIT:OK MOVE:
UNLOCK
CCAANNCCLLEE::SSEETT::OOKK
LOCK
CCAANNCCLLEE::SSEETT::OOKK
SELECT:S
SET:OK
66
01 SEC
ON
Starting the slide show
Images can be displayed continuously at pre-set intervals. You can view the slide show by
connecting the camera to an external monitor.
1. Press the play mode button and press the menu button.
2. Press the LEFT/ RIGHT button and select the [SLIDE]
menu tab.
Setting play interval: Set the slide show play interval.
1. Use the Up/Down buttons to select the [INTERVAL] menu
and press the Right button.
2. Use the Up/Down buttons to select the desired interval.
3. Press the OK button to save the configuration.
Repeat setting : Repeat or not the slide show after finishing the first cycle.
1. Use the Up/Down buttons to select the [REPEAT] menu and press the Right button.
2. Use the Up/Down buttons to select the desired sub menu.
[ON] selected : The slide show is repeated until canceled.
[OFF] Selected : The slide show is closed after one cycle.
3. Press the OK button to save the configuration.
Start the slide show: The slide show can start only in the [START] menu.
1. Use the Up/Down buttons to select the [START] menu.
2. Press the OK button to start the slide show.
- Press the Pause button to pause the slide show.
- Press the Pause button ( ) again to resume the slide show.
- Press the OK button to stop the slide show.
The loading time depends on the image size and quality.
The slide show will start from an image that was displayed on the LCD monitor.
The [PWR SAVE] function can’t be activated.
While the slide show is playing, only the first frame of an MOVIE file is displayed.
INFORMATION
SLIDE
INTERVAL
REPEAT
START
EXIT:OK MOVE:
67
Resize
Change the resolution (size) of pictures taken. Select [LOGO] to save an image to be the
start-up image. The resized image will have a new file name.
1. Press the play mode button and press the menu button.
2. Press the LEFT/ RIGHT button and select the [RESIZE]
menu tab.
3. Select a desired sub menu by pressing the UP/ DOWN
button and press the OK button.
A large sized image can be resized to a smaller sized image, but not vice versa.
Only JPEG images can be resized. TIFF, Movie clip(MOV) and Voice recording(WAV)
files can’t be resized.
You can change the resolution of only those files compressed in the JPEG 4:2:2 format.
The resized image will have a new file name. The [LOGO] image is stored not on the
memory card but on the internal memory.
Only one [LOGO] image can be saved. If you save a new [LOGO] image, the existing
startup image will be deleted.
If the memory capacity is insufficient to store the resized image, a [CARD FULL!]
message will display on the LCD monitor and the resized image will not be stored.
INFORMATION
Image Resize Types
RESIZE
2816X2112 2816
2592X1944 2592
2272X1704 2272
2048X1536 2048
1600X1200 1600
EXIT:OK MOVE:
3072 O O O O O O O O
2816 X O O O O O O O
2592 X X O O O O O O
2272 X X X O O O O O
2048 X X X X O O O O
1600 X X X X X O O O
1024 X X X X X X O O
640 X X X X X X X O
Resize
2272X
1704
2816X
2112
2592X
1944
2048X
1536
1600X
1200
1024X
768
640X
480
LOGO
68
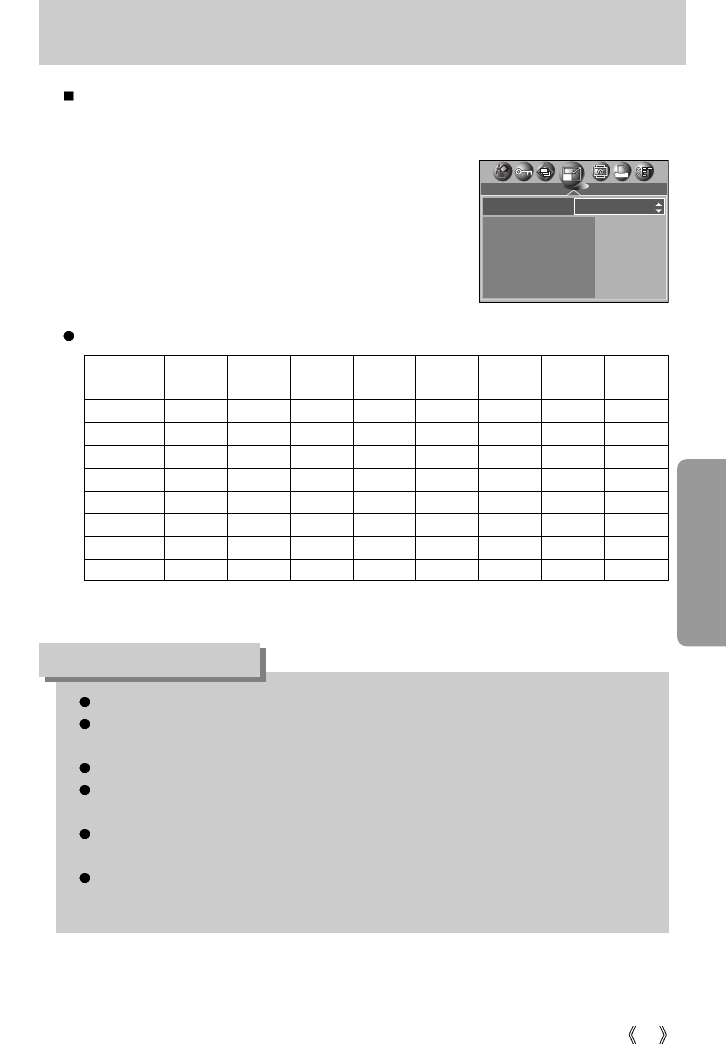
Rotating an image
DPOF
DPOF(Digital Print Order Format) allows you to embed printing information on your memory
card’s MISC folder. Select the pictures to be printed and how many prints to make.
The DPOF indicator will display on the LCD monitor when an image that has DPOF
information plays back. Images can then be printed on DPOF printers, or at an increasing
number of photo labs.
This function is not available for Movie clips and Voice recording files.
You can rotate the stored images by 90, 180, or 270 degrees. You can view a picture in its
proper orientation if the picture has been taken with the camera oriented vertically or up-side-
down. The rotated image can’t be enlarged or trimmed.
1. Press the play mode button and use the Left / Right
buttons to select an image to rotate.
2. Press the menu button and use the Left / Right buttons
to select the [ROTATE] menu tap.
3. Select a desired sub menu by pressing the UP/ DOWN
button.
[RIGHT] : Rotate picture in a clock-wise direction
[LEFT] : Rotate picture in a counter-clock-wise direction
[UPDOWN] : Rotate picture 180 degrees
[
Picture after 90 degrees
]
CW rotation
[ Picture after 180 degrees ]
rotation
[
Picture after 90 degrees
]
CCW rotation
4. Press the OK button. The rotated image will be displayed and the menu will disappear.
If you display the rotated image on the LCD monitor, empty spaces may appear to the left
and right of the image.
ROTATE
RIGHT(90 )
LEFT(90 )
UPDOWN(180 )
EXIT:OK MOVE:
69
DPOF : STANDARD
Images (except for movie clips and voice file) are printed as index type.
1. Press the play mode button and press the menu button.
2. Press the LEFT/ RIGHT button and select the [DPOF]
menu tab.
3. Select the [INDEX] menu by pressing the UP/ DOWN
button and press the RIGHT button.
4. Select a desired sub menu by pressing the UP/ DOWN
button.
If [NO] is selected : The image will not be printed in index
format.
If [YES] is selected : The image will be printed in index format.
5. Press the OK button to confirm the setting.
DPOF : INDEX
This function allows you to embed print quantity information on a stored image.
1. Press the play mode button and press the menu button.
2. Press the LEFT/ RIGHT button and select the [DPOF]
menu tab.
3. Select the [STANDARD] menu by pressing the UP/
DOWN button and press the RIGHT button.
4. Select a desired sub menu by pressing the UP/ DOWN
button and press the OK button.
[SELECT] : A window for selecting the image to be printed
is opened.
- Up/ Down/ Left/ Right : Select an image
- S button : Confirming an image
- W/T button : Select a number of prints
[ALL PICs] : Set the number of copies to print for each
picture, excluding movie clips and voice
recordings.
- Up/ Down button : Select a number of prints
5. Press the OK button to confirm the setting.
If an image carries DPOF instructions, the DPOF indicator
( ) will show.
DPOF
STANDARD
INDEX
PRINT SIZE
CANCEL
SELECT
NO
ALL PICs
STANDARD
EXIT:OK MOVE:
DPOF
BACK: SET:OK
STANDARD
INDEX
PRINT SIZE
CANCEL
NO
YES
SELECT:S PRINTS:W/T SET:OK
70
DPOF : CANCEL
DPOF : PRINT SIZE
You can specify the print size when printing images stored on the memory card.
The [PRINT SIZE] menu is available only for DPOF 1.1 compatible printers.
Setting the Print Size
1. Press the play mode button and press the menu button.
2. Press the LEFT/ RIGHT button and select the [DPOF]
menu tab.
3. Select the [PRINT SIZE] menu by pressing the UP/
DOWN button and press the RIGHT button.
4. Select a desired sub menu by pressing the UP/ DOWN
button and press the OK button.
[SELECT] : A window for selecting the print size is
opened.
Up/ Down/ Left/ Right : Select an image
W/ T button : Select a print size
S button : Selecting an image or cancel the selection
[ALL PICs] : print size of all images are changed.
SIZE : DEFAULT, 3X5, 4X6, 5X7, 8X10
* The [DEFAULT] print size varies depending on the printer
manufacturer.
For your printer's default value, please refer to the user's
guide that came with your printer.
You can cancel the [STANDARD], [INDEX], or [SIZE] settings. Cancel the setting to reset the
value to its default.
1. Press the play mode button and press the menu button.
2. Press the LEFT/ RIGHT button and select the [DPOF]
menu tab.
3. Select the [CANCEL] menu by pressing the UP/ DOWN
button and press the RIGHT button.
4. Select a desired sub menu by pressing the UP/ DOWN
button.
If [STANDARD] is selected: Cancels the standard print setting.
If [INDEX] is selected : Cancels the index print setting.
If [SIZE] is selected : Cancels the print size setting.
5. Press the OK button to confirm the setting.
DPOF
BACK: SET:OK
STANDARD
INDEX
PRINT SIZE
CANCEL
SELECT
ALL PICs
DPOF
BACK: SET:OK
STANDARD
INDEX
PRINT SIZE
CANCEL
DPOF
BACK: SET:OK
STANDARD
INDEX
PRINT SIZE
CANCEL
STANDARD
INDEX
PRINT SIZE
DEFAULT
3X5
4X6
5X7
8X10
SELECT:S SIZE:W/T SET:OK
71
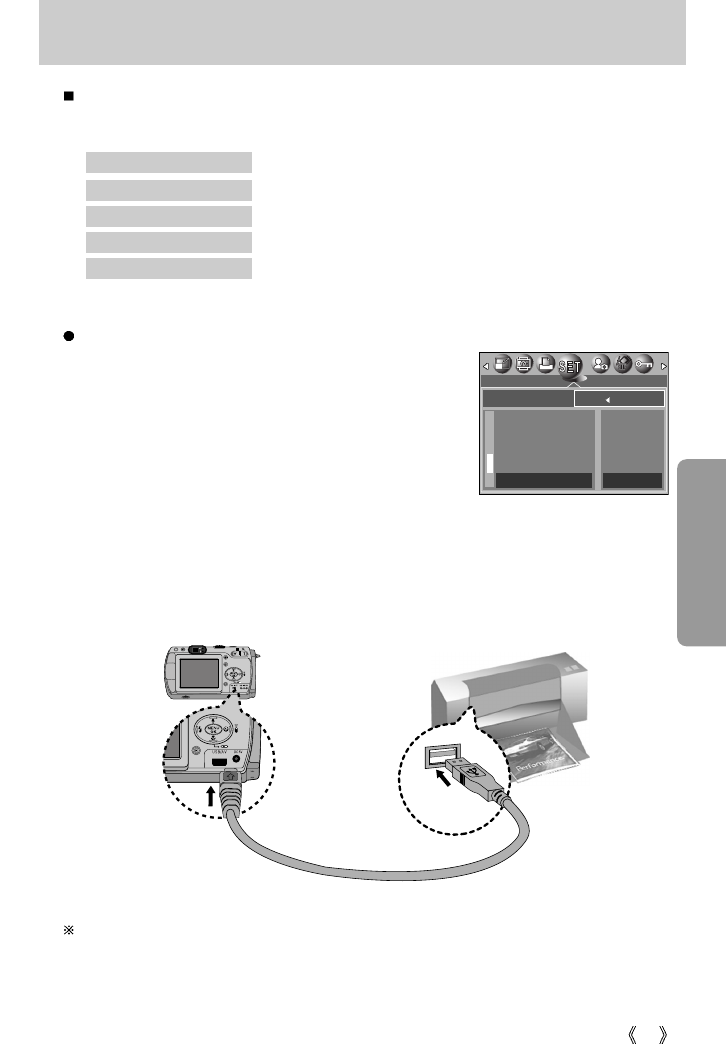
PictBridge
You can use the USB cable to connect this camera to a printer that supports PictBridge (sold
separately) and print the stored images directly. TIFF, Movie clips and voice files cannot be
printed. You can set up the following settings from the PictBridge menu.
SELECT : Setting up the scope of PictBridge
PRINTER SETUP : Setting up printing
PRINT : Printing pictures
DPOF PRINT : Printing the DPOF files
RESET : Initializing the PictBridge functions
Connecting the Camera to a Printer
1. Press the POWER button to turn on the camera.
2. In a mode other than Voice Recording mode, press the
MENU button.
3. Press the LEFT/ RIGHT button and select [SETUP]
menu tab.
4. Select [USB] menu by pressing the UP/ DOWN button
and press the RIGHT button.
5. Select [PRINTER] menu by pressing the UP/ DOWN
button and press the OK button.
6. Press the menu button twice and the menu will disappear.
7. Use the supplied USB cable to connect the camera to the printer as shown below.
8. Turn on the printer to connect the camera to the printer.
If you selected [Computer] in Step 5, when you connect the camera to your printer, the
[USB I/F COMPUTER] message will display and the connection will not be established.
In this case, disconnect the USB cable, and then follow the procedure from Step 2 and
onward.
SET UP
BACK: SET:OK
SOUND
LCD
VIDEO
Q.VIEW
USB
COMPUTER
PRINTER

72
PictBridge: Picture Selection
You can select the scope of the PictBridge function.
1. Connect the camera to your printer.
The USB menu must be set to [PRINTER] before you
connect the camera to the printer.(See p.71)
2. The [PICTBRIDGE] menu will appear.
3.Select the [SELECT] menu by pressing the UP/ DOWN
button and press the RIGHT button.
4. Use the UP and DOWN buttons to select the desired
submenu value, and then press the OK button.
When [ONE PIC] is selected : The PictBridge function will be applied only to the picture
currently displayed.
When [ALL PICs] is selected : The PictBridge function will be applied to all pictures,
excluding TIFF, movie clips and voice files.
Setting the Number of Copies to Print
- Select [ONE PIC] or [ALL PICs].
A screen where you can set the number of copies to print will appear as shown below.
[ When [ONE PIC] is selected ] [ When [ALL PICs] is selected ]
- Use the UP and DOWN buttons to select the number of copies to print and then press the
OK button.
The number of copies you wish to make : 01~30
Unless you press the OK button, the changed number of prints will not be applied.
- When selecting [ONE PIC] in Step 4, you can use the LEFT and RIGHT buttons to move to
the previous or next picture.
- Press the SHUTTER button to return to the PictBridge menu.
PICTBRIDGE
SELECT
PRINTER SETUP
PRINT
DPOF PRINT
RESET
ONE PIC
ALL PICs
MOVE: COPY:
EXIT
:SH
MENU:OK
01 PRINTS
MOVE: COPY:
EXIT
:SH
MENU:OK
01 PRINTS
73
PictBridge: Print Setting
You can select the Paper Size, Print Format, Paper Type, Print Quality, Date Print, and File
Name Print menus for printed pictures.
Menu Function Sub menu
1. Connect the camera to your printer.
The USB menu must be set to [PRINTER] before you
connect the camera to the printer.(See p.71)
2. The [PICTBRIDGE] menu will appear.
3. Select the [PRINTER SETUP] menu by pressing the UP/
DOWN button and press the RIGHT button.
4. Use the UP and DOWN buttons to select the desired
submenu value, and then press the OK button.
If [DEFAULT] is selected
: The print format will be set to the printer's default values.
If [CUSTOM] is selected
: A window from which the user can set up the print
format with the desired values will appear.
Use the UP and DOWN buttons to select a
submenu value, and then press the RIGHT button.
Auxiliary menus will appear. Use the UP and
DOWN buttons to select the desired auxiliary
menu, and then press the OK button.
The menus you can set up are as follows:
PAPER SIZE
Setting the size of the printing paper
Setting the number of pictures to be
printed on a sheet of paper
Setting the quality of the printing paper
Setting the quality of the picture to
be printed
Setting whether to print the date
Setting whether to print the file name
AUTO, POSTCARD, 4X6, L, 2L, A4, A3
AUTO, INDEX, 1, 2, 4, 9, 16
AUTO, PLAIN, PHOTO, FASTPHOTO
AUTO, DRAFT, NORMAL, FINE
AUTO, OFF, ON
AUTO, OFF, ON
LAYOUT
PAPER TYPE
PRINT QUALITY
DATE PRINT
FILE NAME
Depending on the manufacturer and model of your printer, some menus are inaccessible.
Even though these menus will still appear on the LCD monitor, but you will not be able to
select them.
PICTBRIDGE
SELECT
PRINTER SETUP
PRINT
DPOF PRINT
RESET
DEFAULT
CUSTOMIZE
CUSTOMIZE
PAPER SIZE
LAYOUT
PAPER TYPE
PRINT QUALITY
DATE PRINT
AUTO
POSTCARD
4X6
L
2L
74
PictBridge: Picture Printing
Printing Pictures
1. Connect the camera to your printer.
The USB menu must be set to [PRINTER] before you
connect the camera to the printer.(See p.71)
2. The [PICTBRIDGE] menu will appear.
3. Select the [PRINT] menu by pressing the UP/ DOWN
button and press the RIGHT button.
4. Select a desired sub menu by pressing the UP/ DOWN
button and press the OK button.
[STANDARD] : Print a selected image according to the
number of copies required.
[INDEX] : Print all images displayed in the Index
format.
5. The screen shown on the right will appear and the
picture will be printed. If no picture is selected, the
[NO IMAGE!] message will be displayed. If you press
the SHUTTER button during printing, printing will be
canceled and the menu from Step 2 will appear.
6. If an error occurs during printing, the screen shown below will appear.
When printing pictures by connecting the camera to the printer, use the AC adapter.
If the printer is turned off during printing, the printing will stop and the paper will be
dispelled.
If there are continuous print error, please check the print condition.
INFORMATION
Press the LEFT button to cancel printing.
Follow the Steps 1 to 4 again to print the
picture(s).
Press the OK button to resume printing,
or press the LEFT button to cancel
printing.
[ Fatal error ] [ Recoverable error ]
PICTBRIDGE
SELECT
PRINTER SETUP
PRINT
DPOF PRINT
RESET
STANDARD
INDEX
ERROR
LEFT : CANCEL
WARNING
OK: RESUME
LEFT: CANCEL
CANCEL:SH1
75
PictBridge : DPOF AUTO PRINT
This allows you to directly print the files with DPOF information.
For instructions on how to set up DPOF, refer to pages 69 to 70.
1. Connect the camera to your printer.
The USB menu must be set to [PRINTER] before you
connect the camera to the printer.(See p.71)
2. The [PICTBRIDGE] menu will appear.
3. Select the [DPOF PRINT] menu using the UP/DOWN
button and press the RIGHT button. Next, select [YES]
using the Up/Down button, and then press the OK
button.
4. The screen shown on the right will appear and the
picture will be printed. If no picture is selected, the
[NO IMAGE!] message will be displayed. If you press
the SHUTTER button during printing, printing will be
canceled and the menu from Step 2 will appear.
5. If an error occurs during printing, the error message
number 6 on page 74 will be displayed.
For details, please refer to page 74.
This allows you to restore the values of the PictBridge menu, which was changed in
CUSTOMIZE, to their default values.
1. Connect the camera to your printer.
The USB menu must be set to [PRINTER] before you
connect the camera to the printer.(See p.71)
2. The [PICTBRIDGE] menu will appear.
3. Select the [RESET] menu by pressing the UP/ DOWN
button and press the RIGHT button.
4. Select a desired sub menu by pressing the UP/ DOWN
button and press the OK button.
- If [NO] is selected : Settings will not be reset.
- If [YES] is selected : All print and image settings will be reset.
Default print setting varies depending on the printer manufacturer.
For your printer s default setting, refer to the user s guide that came with your printer.
PictBridge : RESET
STOP.SHUTTER
PICTBRIDGE
SELECT
PRINTER SETUP
PRINT
DPOF PRINT
RESET
YES
NO
PICTBRIDGE
SELECT
PRINTER SETUP
PRINT
DPOF PRINT
RESET
YES
NO
76
Setup menu
In this mode, you can set up basic settings. You can use the setup menu in all camera
modes, except Voice Recording mode.
The items indicated by are default settings.
Menu tab Main menu Sub menu Secondary menu Page
RESET -
SERIES -
NO -
YES -
YY/MM/DD -
MM/DD/YY -
DD/MM/YY -
OFF -
DATE -
DATE & TIME -
OFF -
ON -
OFF -
LOW -
MEDIUM -
HIGH -
04/09/01 13:00
FILE
PWR SAVE
LANGUAGE
FORMAT
DATE. TIME
IMPRINT
LAMP
ENGLISH
FRENCH
GERMAN
SPANISH
ITALIAN
RUSSIAN
DUTCH
PORTUGUESE
A
T
Y
P
E
B
T
Y
P
E
ENGLISH
KOREAN
S.CHINESE
T.CHINESE
DANISH
SWEDISH
THAI
MALAYSIAN
OFF, 01 ~ 03 ~ 10MIN
p.77
p.78
p.79
p.79
p.80
p.80
p.81
p.82
SOUND
-
77
Setup menu
This function allows the user to select the file naming format.
Assigning File Names
1. In any mode other than Voice Recording mode, press the
MENU button.
2. Press the LEFT/ RIGHT button and select the [SETUP]
menu tab.
3. Select the [FILE] menu by pressing the UP/ DOWN button
and press the RIGHT button.
4. Select a desired sub menu by pressing the UP/ DOWN
button and press the OK button.
[RESET] : After using the reset function, the next file name will be set from 0001 even
after formatting, deleting all or inserting a new memory card.
[SERIES] : Under this system, the file name will directly follow the last stored file name,
regardless of any actions such as file deletion or formatting.
File name
Menu tab Main menu Sub menu Secondary menu Page
DARK -
NORMAL -
BRIGHT -
NTSC -
PAL -
OFF -
COMPUTER -
PRINTER -
NO -
YES -
1 ~ 5 SEC
LCD
VIDEO
Q.VIEW
USB
RESET
p.82
p.83
p.84
p.84
p.85
SET UP
FILE
PWR SAVE
LANGUAGE
FORMAT
DATE.TIME
BACK: SET:OK
3072
RESET
SERIES
-