Hanwha Techwin SEW3042WN Wireless Baby Monitor User Manual
Hanwha Techwin Co., Ltd. Wireless Baby Monitor
UserManual.wiki
>
Hanwha Techwin
>
SEW3042WN User Manual
User manual
Navigation menu
Upload a User Manual
Namespaces
Wiki Guide
HTML
PDF
Info
Views
User Manual
Discussion / Help
Navigation

![6 · Getting StartedFunctional DescriptionPowering your monitorAfter opening the box, fully charge the monitor before use. After initial charge, recharge as needed.Wireless CameraThe Wireless Camera must be plugged in at all times in order to view.Wireless MonitorYou can use the device while charging with connected adapter, and the device is portable if charged. n `Check if the Power LEDs of wireless monitor is turned on. GETTING STARTED Operating the SystemThe basic operation is as follows:PairingThe units already come paired for your convenience. This button is used to add an additional camera. User can select camera number to assign. Up to 4 Cameras may be paired. 1. Power on wireless monitor and wireless camera. The power LED for the monitor should be ON.2. Touch the live view screen on the monitor, and then the settings icon will appear.3. Press the [ ] button on the monitor.4. Select [ ] icon.5. Select camera number. The monitor search a camera which sets to pairing mode. A count down clock appears at the middle of screen which starts counting from 30 to 0.6. Press the [PAIR] button on the camera.7. Within 30 seconds, if the monitor successfully pairs with the camera, the monitor will automatically switch to the camera's current view. PAIR](https://usermanual.wiki/Hanwha-Techwin/SEW3042WN/User-Guide-2893451-Page-6.png)
![English · 702 Getting StartedVoice activated (VOX)Select to monitor significant sound with reduced ambient noise. The screen goes off in “VOX” mode if there is no significant sound louder than a certain level about 30 seconds. Meanwhile, the monitor screen turns on as soon as detecting sound around the camera. In “VOX” mode, you can set the sensitivity.o Low Sound Level Detection : Sets to higher sensitivity.o High Sound Level Detection : Sets to lower sensitivity.Multi camera mode Press [ / ] switch the split mode. According to the paired camera, screen split mode is different. When two cameras are paired, it displays as 2-split mode. When there are more than 2 cameras are paired, it displays as 4 split mode. Up to 4 cameras can be paired.Out of RangeIf the monitor is outside of transmission range with the paired camera, the “Out of Range” message appears with warning beeps at regular intervals.Two-way talkPress the [ ] icon while talking.Sound levelThe louder the sound around the camera, the more LEDs turn on.Portable monitoringSlide the belt clip upwards to use the integrated belt clip on the monitor. When not in use, please push the clip back to its original position.](https://usermanual.wiki/Hanwha-Techwin/SEW3042WN/User-Guide-2893451-Page-7.png)
![8 · Viewing Mode DisplayIndicator DescriptionHow to use the indicatorbc Signal IndicatorThe signal indicator shows the strength of the signal being received from the camera. The number of bars in the signal indicator shows the strength of the signal – One or no bars indicate the signal is poor, and 5 bars indicate a strong signal.b Digital ClockDisplays the time that is set on the monitor. It only provides AM / PM time format and no 24hour format.c Camera NumberIndicates which camera is being displayed on the current screen. When scan mode is selected, this icon will flash. Sound level IndicatorIndicate the sound level of the Active Camera. x1/x1.5/x2 Zoom modeIndicates that current screen is Zoomed in. Press [ ] icon on the monitor to zoom back out. Night Vision IndicatorIndicates camera night vision mode is turned on. The screen will appear in Black/White in this mode. VOX OnIndicates you select Low Sound level detection or High Sound level detection in VOX menu. Monitor Speaker MuteIndicates the monitor speaker is muted. Once the monitor’s speaker is muted, no sound from the camera is produced. Battery Capacity Level Indicates remaining battery charge. Indicated in 4 levels, and one discharge warning. ChargingIndicates the battery is charging by DC input power. If battery nearly empty, it will flash to alert user to charge up the unit. Two-way talkPress the [ ] icon while talking.No Signal WarningsThe "Out of Range" message means the monitor cannot access the camera. Please reposition the camera, or check the camera power. VIEWING MODE DISPLAY](https://usermanual.wiki/Hanwha-Techwin/SEW3042WN/User-Guide-2893451-Page-8.png)
![English · 903 Viewing Mode DisplayMenu OperationHow to use the function toolsPress the screen of the monitor to display the menu screen.bc Navigation ControlsUsing the navigation [ ] icons, you can move screen around in x1.5 or x2 zoom mode.b Menu SettingMenu setting mode is including monitor and camera settings.c Monitor VolumeUsing the [ / ] icons, you can adjust the monitor volume. Zoom IN / Zoom Out When x1/x1.5 Zoom mode, the magnifier icon is [ ] inside, means press this icon will zoom in video image. When x2 Zoom mode, the magnifier icon is [ ] inside, means press this icon will zoom out video image. LullabyPress the icon to turn on and turn off lullabies. How to use the setup iconAfter configuring the settings, press the [ ] icon to save the changes.To return to the Live screen, press the [ ] icon.6HWWLQJV b c BrightnessAdjusts the brightness of the image shown. If you are using multiple camera, you can adjust the brightness of each individual camera.b Set Camera Speaker VolumeAdjust the volume of the speaker on the camera in this menu. The volume can be adjusted from 0 to 5, with 5 being the loudest setting and 0 is mute.c Time SettingSet the time shown on the monitor. Use the [ ] or [ ] icon to change the numbers in the selected field. Feed TimerSet the feed time shown on the monitor. Use the [ ] or [ ] icon to change the numbers in the selected field.](https://usermanual.wiki/Hanwha-Techwin/SEW3042WN/User-Guide-2893451-Page-9.png)
![10 · Viewing Mode Display Camera VOX SensitivityIf not in “VOX” mode, [ ] icon is not displayed. In VOX mode, you can select “Low Sound Level Detection” or “High Sound Level Detection”. If set to “Low Sound Level Detection”, monitor can be triggered by lower audio level than “High Sound Level Detection” setting.o Audio Only Mode :Video will turn on 30 seconds and then video will turn off, monitor speaker is still playing camera background sound.o Continuous Video and Audio Mode : Video will not turn off and always streaming video all the time. When you press Power Key, Monitor will be automatically switched to Low Sound Level Detection mode.o Low Sound Level Detection : Small baby cry level can trigger video to turn on for 30 seconds, then back to stand-by.o High Sound Level Detection : Loud baby cry level can trigger video to turn on for 30 seconds, then back to stand-by. PairingYou can register a wireless camera with the monitor using the registration menu where you can view the video of the selected wireless camera. ResetChoose <YES> to reset the monitor to factory defaults. All settings except for time information will be reset to the factory defaults.](https://usermanual.wiki/Hanwha-Techwin/SEW3042WN/User-Guide-2893451-Page-10.png)
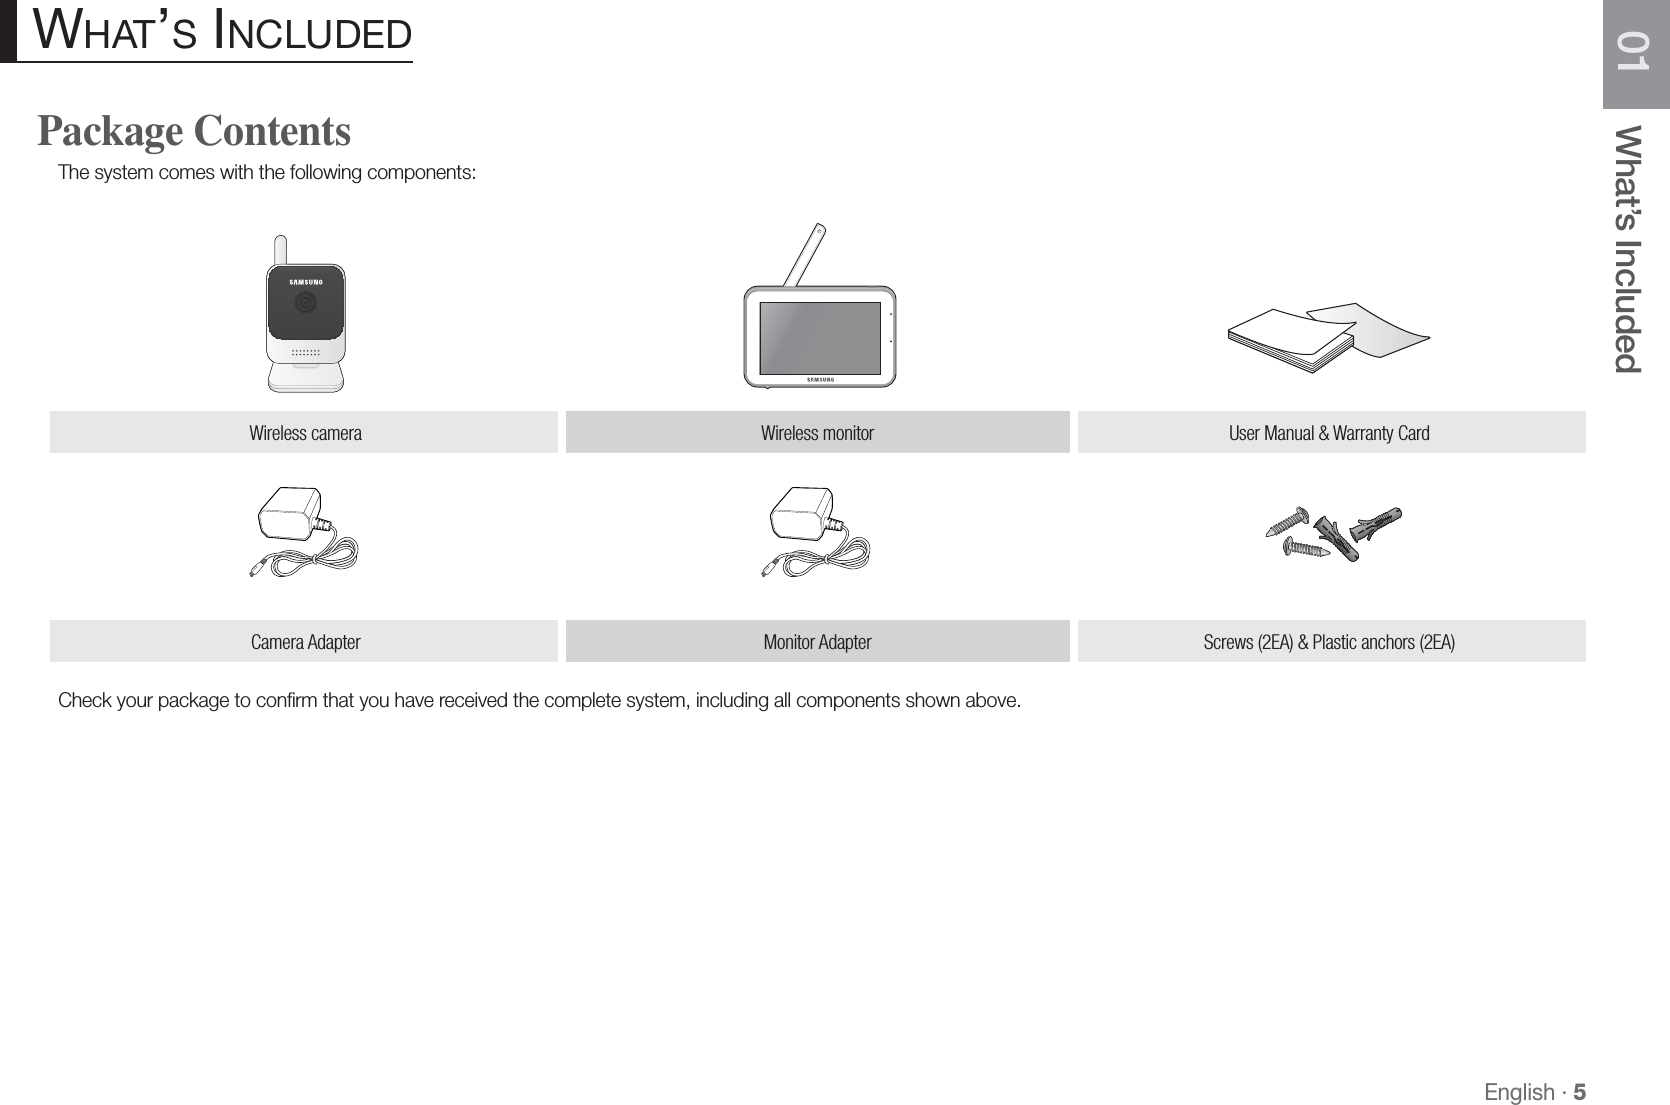
![English · 1104 OverviewGetting to know your Monitoring systemWireless MonitorAfter opening the box, fully charge the monitor before use. After initial charge, recharge as needed.Front Controls OVERVIEW 5" LCD ScreenDisplays video from the camera.Power LEDWhen the monitor is being recharged or monitor has low electricity, red light flashes.When the monitor is working, the LED becomes solid red light.MicrophoneTransmits audio to the camera when [ ] icon is pressed down and held like a walkie talkie.Monitor AntennaReceives and sends signals from or to the camera. Navigation ControlsViewing Mode: The following controls are used while watching live video from the camera:o Press [ ] icon to zoom in/out the screen. While in zooming, use [ ] icon to move the screen around.Menu Mode: Press the [ ] icon to confirm the menu selection.](https://usermanual.wiki/Hanwha-Techwin/SEW3042WN/User-Guide-2893451-Page-11.png)