Hanwha Techwin SNHV6435DN SMARTCAM D1 User Manual
Hanwha Techwin Co., Ltd. SMARTCAM D1
UserManual.wiki
>
Hanwha Techwin
>
SNHV6435DN User Manual
User manual
Navigation menu
Upload a User Manual
Namespaces
Wiki Guide
HTML
PDF
Info
Views
User Manual
Discussion / Help
Navigation

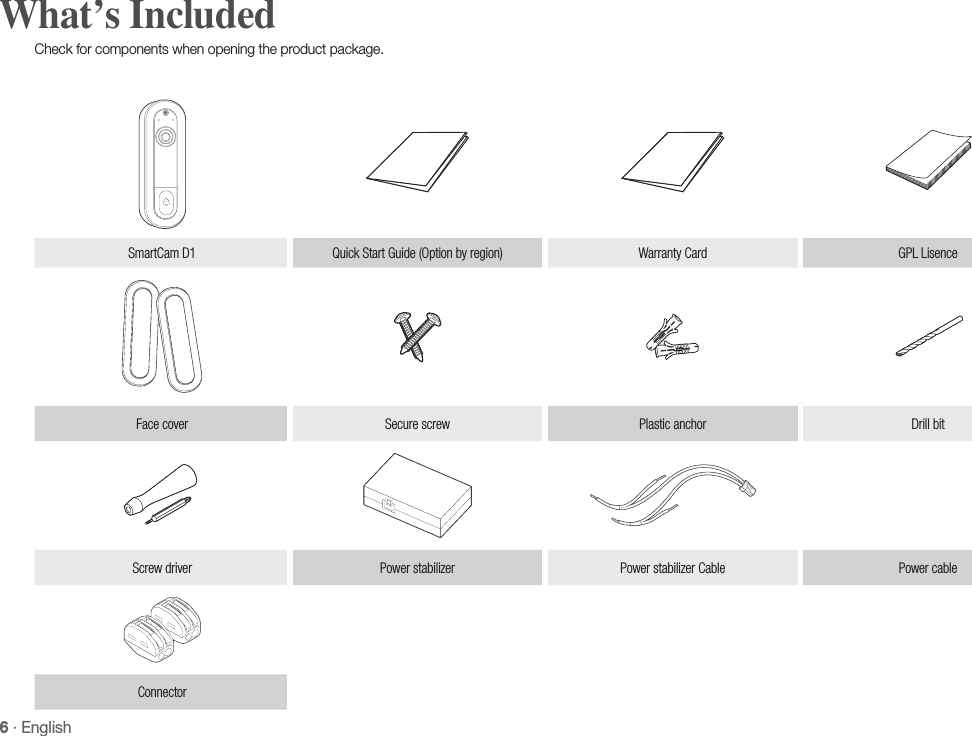
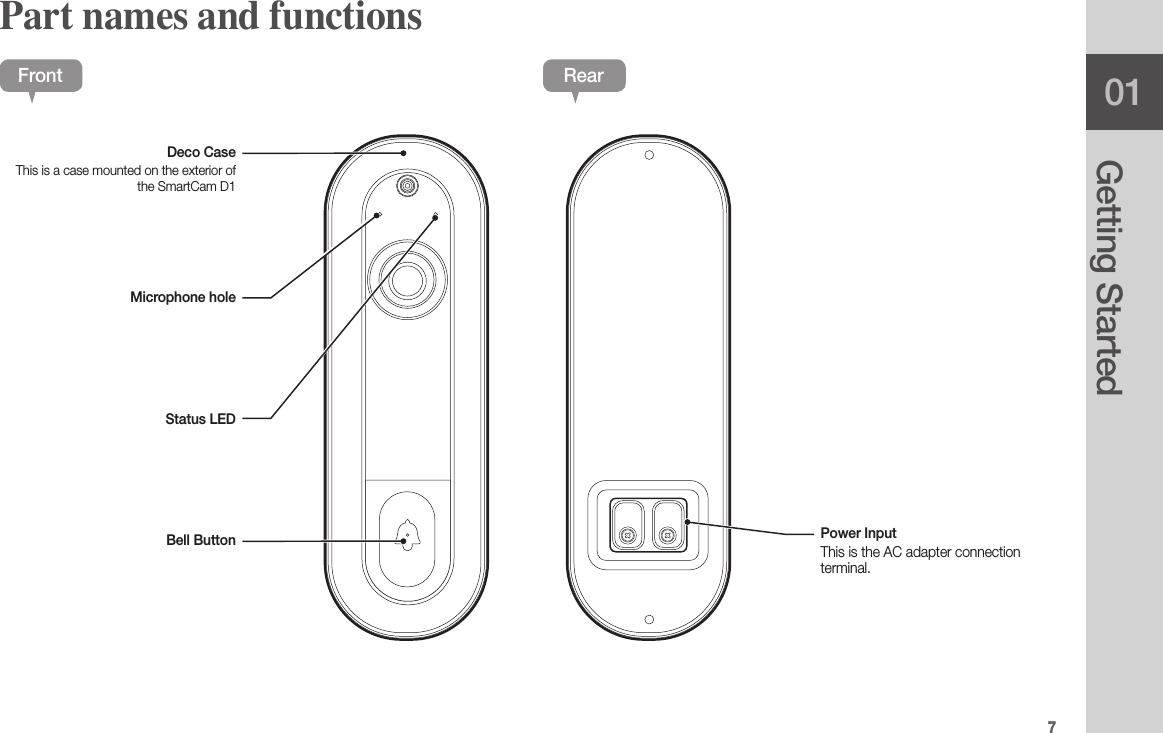
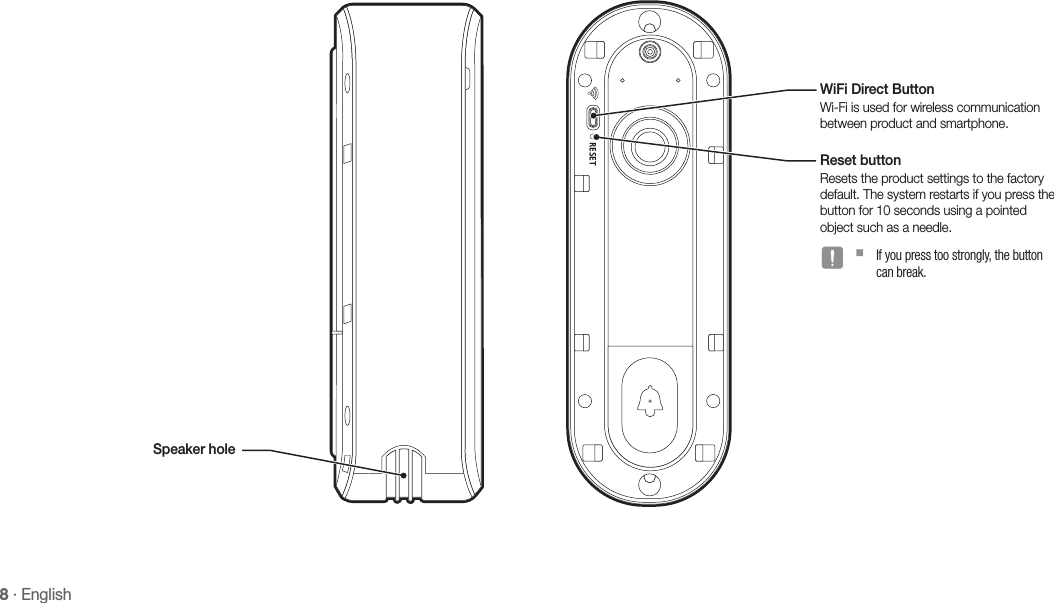
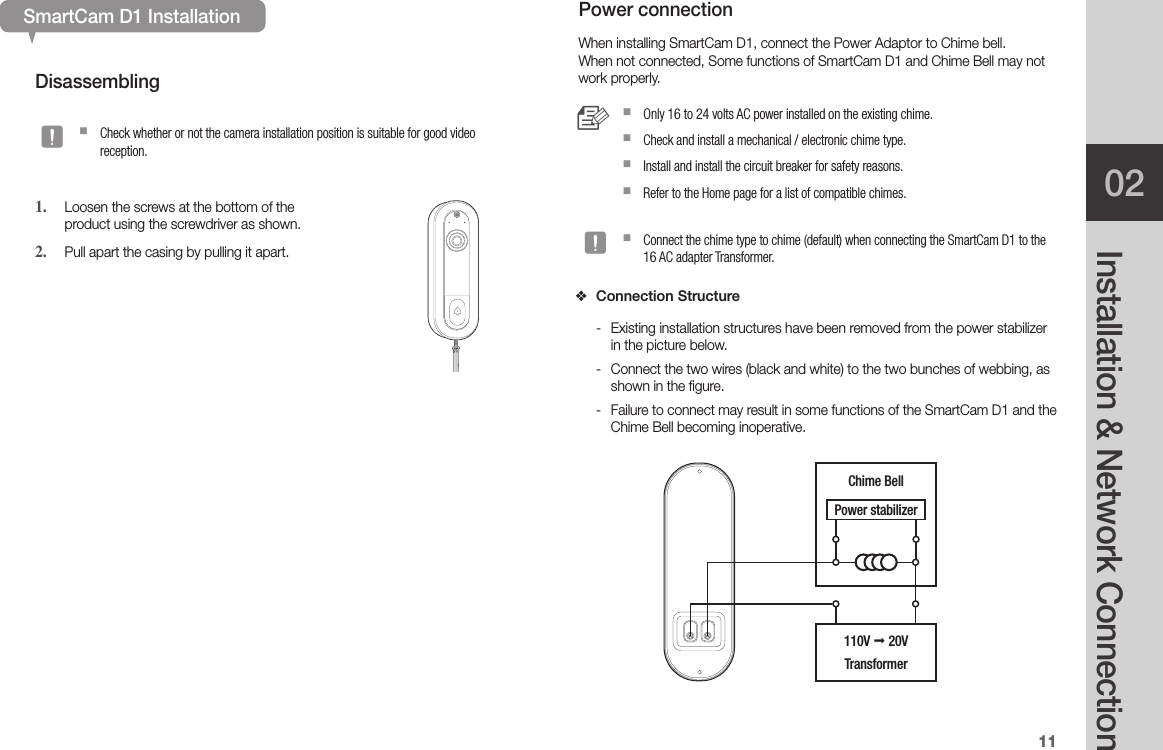
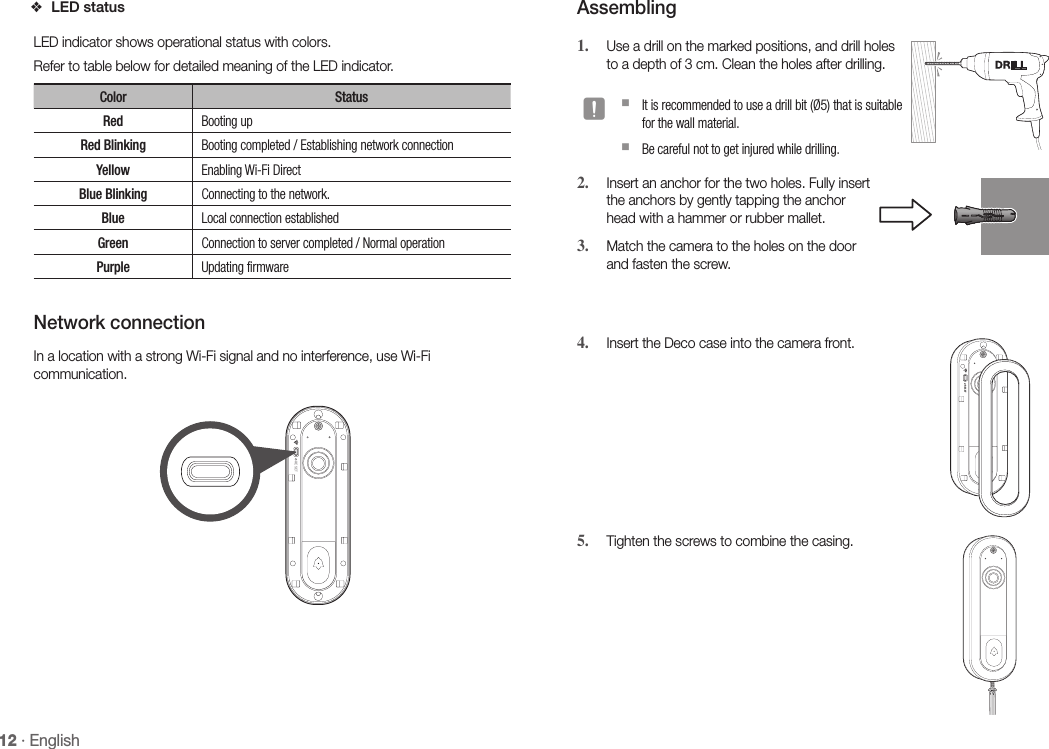
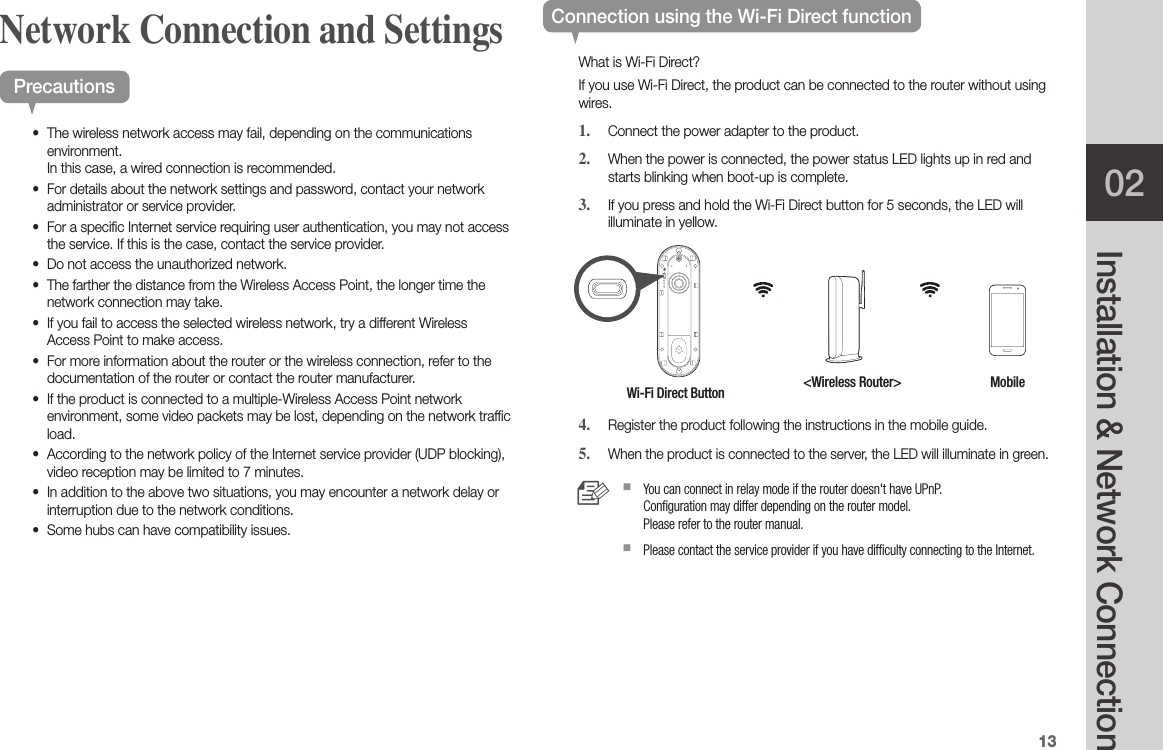
![10 · EnglishTo check before installing• Check your in-home chime whether it is a mechanical or electrical one.• It is expected most of current mechanical chimes work properly except for one with a special feature, etc.• Check out the compatible chime list on the website which is updated on monthly basis.Installing Power stabilizerConnecting Power stabilizer to existing mechanical chime.1. Find a breaker to cut off the electricity2. Find existing chime bell in the house. (following your sound)3. Open the chime cover and unscrew the [FRONT] [TRANS] wires with a screwdriver.4. Connect the supplied power cord to the power stabilizer socket.5. Open the holding pins of the enclosed two connectors, connect the wire pulled out from [FRONT], and close the holding pin.6. Connect each “L” connectors to each of the two wires inside the chime.7. Place the power stabilizer in a suitable place inside the chime. (If there is no space, attach a double-sided tape to the outside.)8. Close the chime cover.FRONTTRANSREAR](https://usermanual.wiki/Hanwha-Techwin/SNHV6435DN/User-Guide-3422267-Page-10.png)