Harman Becker Automotive Systems 9091 Infotainment System with Fondunit (with BT, Kleer technology) User Manual BA 222 ECE NA 2013 05b kein Druck 1 en GB
Harman Becker Automotive Systems Infotainment System with Fondunit (with BT, Kleer technology) BA 222 ECE NA 2013 05b kein Druck 1 en GB
Contents
- 1. User Manual
- 2. User Manual II
User Manual II

is displayed as soon as the message memory is full. The symbol disappears once you delete
at least one message.
Switching on and changing telephony
operating modes
Overview
COMAND Online starts the telephony mode
depending on whether:
Ra telephone module with Bluetooth® (SAP
profile) is inserted into the fittings or not
Ra mobile phone bracket is inserted or not
Depending on which mobile phone bracket is
inserted, COMAND Online starts telephony
via the Bluetooth® interface.
If neither a telephone module with Blue-
tooth® (SAP profile) nor a mobile phone
bracket is inserted, COMAND Online imme-
diately starts the telephony over the Blue-
tooth® interface.
Activating with inserted telephone
module with Bluetooth® (SAP profile)
If a telephone module with Bluetooth® (SAP
profile) is inserted, COMAND Online starts
the SAP telephony.
iIf no telephone module with Bluetooth®
(SAP profile) is inserted, COMAND Online
checks whether a mobile phone bracket is
inserted and, if so, which type.
iBefore using your telephone module with
Bluetooth® (SAP profile) for the first time,
you need to set it up so that it will be rec-
ognised by COMAND Online; see the sep-
arate operating instructions of the data-
enabled telephone module with Blue-
tooth® (SAP profile).
If no mobile phone is connected to the data-
enabled telephone module with Bluetooth®
(SAP profile), the Ready for Bluetooth
telephony... message appears. Approx-
imately two minutes after switching on
COMAND Online, a prompt will appear asking
whether you wish to switch to Bluetooth® tel-
ephony.
If you confirm by selecting Yes, the Ready
for Bluetooth telephony... message
will appear. COMAND Online will search for
the two mobile phones last connected via the
Bluetooth® interface. If one of the two mobile
phones is found, the telephone basic menu
for Bluetooth® telephony appears
(Y page 432). If neither of the mobile phones
is found, the Ready for Bluetooth tel‐
ephony... message remains in the display.
You can now connect your mobile phone
(Y page 426).
If you choose No, the Ready for SAP tel‐
ephony... message reappears.
Activating without a telephone module
with Bluetooth® (SAP profile)
Bluetooth® telephony is started
COMAND Online starts telephony via the
Bluetooth® interface and searches for the last
two mobile phones to have been connected
via the Bluetooth® interface. If one of the two
mobile phones is found, the telephone basic
menu for Bluetooth® telephony appears
(Y page 432). If neither of the mobile phones
is found, the Ready for Bluetooth tel‐
ephony... message remains in the display.
You now have to connect your mobile phone
(Y page 426).
iIf you do not connect another mobile
phone via the phone list, the Bluetooth®
connection with the mobile phone remains
active until the next time COMAND Online
is switched off. While the Bluetooth® con-
nection is active, only the Bluetooth® inter-
face functions are available to you.
Telephone 433
COMAND Online
Z
Switching between modes of telephony
If your vehicle is equipped with an optional
data-enabled telephone module with Blue-
tooth® (SAP profile), you can switch the tel-
ephony mode.
You can change the mode of telephony in the
Bluetooth® phone list by selecting either a
Bluetooth® telephone or an SAP telephone.
XCall up the phone list (Y page 426).
XTo select the mobile phone with the con-
troller: turn and press the controller.
iSAP telephony: mobile phones which are
connected to an optional data-enabled
telephone module with Bluetooth® (SAP
profile) are shown in the telephone list
under the title Telephones of the SAP
module. By selecting an SAP telephone,
you change to SAP telephony.
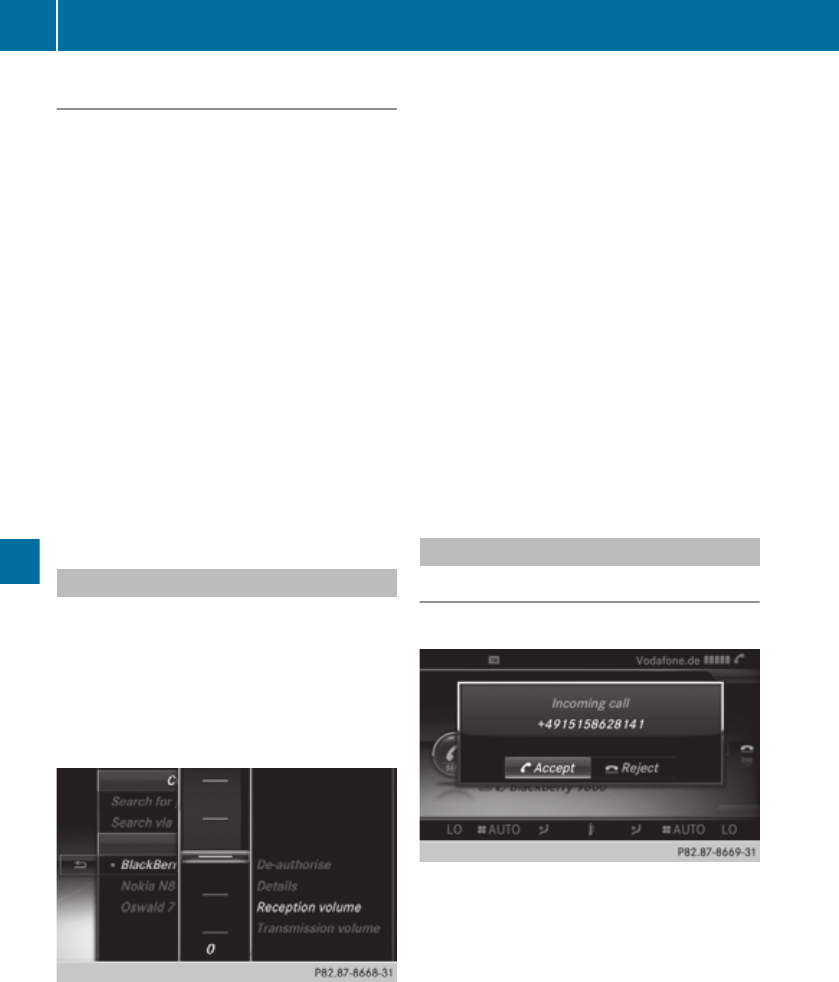
Reception and transmission volume
Once the mobile phone has been authorised,
you can optimise the transmission and recep-
tion volume settings. To find out about the
best possible settings for your mobile phone,
contact a Mercedes-Benz Service Centre or
visit http://www.mercedes-benz.com/
connect.
XTo call up the telephone basic menu: press
the % button one or more times.
XTo switch to the menu bar: slide VÆ the
controller.
XTo select Connect device: turn the con-
troller and press to confirm.
The telephone list appears.
XTo select an authorised mobile phone from
the list: turn the controller.
XTo select the list symbol to the right of the
entry: slide VY the controller and press to
confirm.
XTo select Reception volume or Trans‐
mission volume: turn the controller and
press to confirm.
XTo select a volume setting: turn the con-
troller.
XTo close the setting scale: press or slide
XVY the controller.
iIncorrect settings may have an impact on
the quality of calls.
Telephone operation
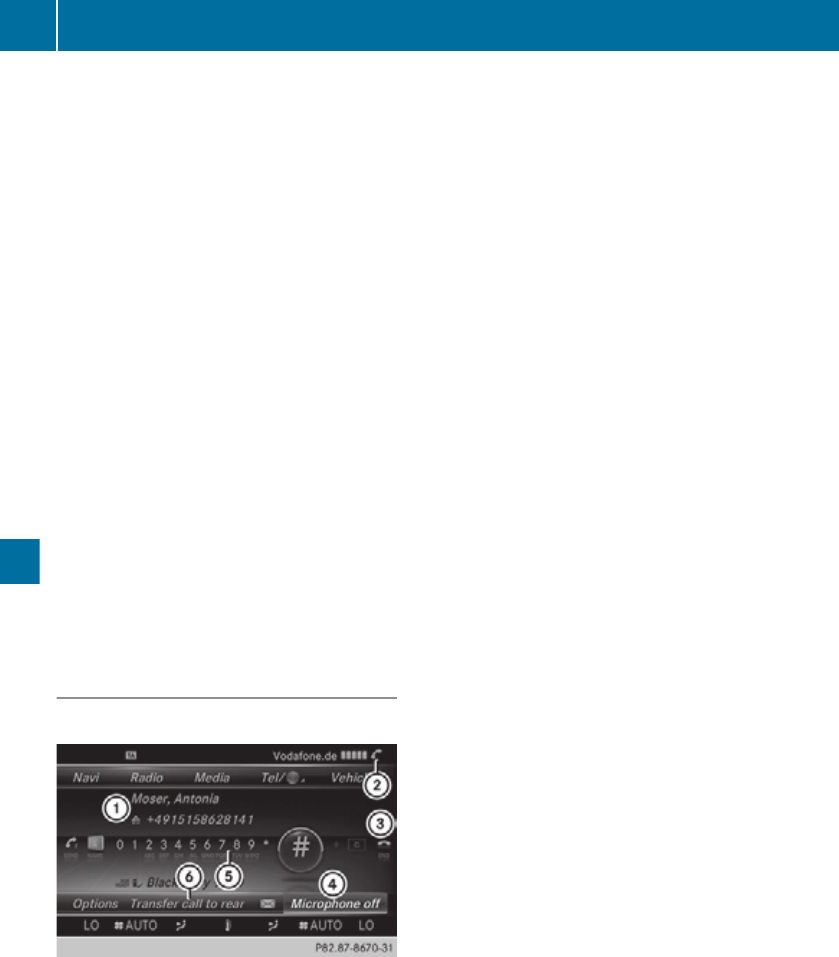
Incoming calls
Accepting a call
XTo select Accept: press the controller.
or
XPress the 6 button on COMAND Online
or on the multifunction steering wheel.
iYou can also accept the call by voice com-
mand using LINGUATRONIC (see the sep-
arate operating instructions).
Once you have accepted the call, you can use
hands-free mode.
The call volume can be adjusted
(Y page 369).
434 Telephone
COMAND Online

Other functions during a call (Y page 436).
If the phone number of the caller is transfer-
red, it appears in the display.
If there is an entry for the caller in the phone
book, you will also see the name.
If the phone number is not transferred,
Unknown appears in the display.
iYou can also accept a call as described
above when another main function is
switched on in COMAND. Once you have
accepted the call, the display switches to
telephone mode. After the call is finished,
you see the display of the previous main
function again.
The display does not switch to the tele-
phone display if you:
Rpress the % button beside it and then
Raccept the call using the 6 button on
the multifunction steering wheel
Rejecting a call
XTo select Reject: turn the controller and
press to confirm.
or
XPress the ~ button on COMAND Online
or on the multifunction steering wheel.
Making a call
Using the number keypad
XCall up the telephone basic menu
(Y page 432).
XEnter the digits using the number keypad.
XTo connect the call: press the 6 but-
ton on COMAND Online or on the multi-
function steering wheel.
iAs soon as one of the numbers is touched,
the corresponding button is highlighted in
the display. This means you can keep your
eyes on the screen at all times.
Using the telephone basic menu
XCall up the telephone basic menu
(Y page 432).
XTo select all numbers one after the other:
turn and press the controller each time.
Dialling a number:
XTo select ° from the character list: turn
the controller and press to confirm.
or
XPress the 6 button on COMAND Online
or on the multifunction steering wheel.
Redialling
XCall up the telephone basic menu
(Y page 432).
XTo select ° from the character list: turn
the controller and press to confirm.
or
XIf the telephone basic menu is displayed,
press the 6 button on COMAND Online.
The list of dialled numbers appears. The
most recently dialled number is at the top.
XTo select a call: turn the controller.
XTo make a call: press the controller.
For redialling using the multifunction steering
wheel, see the separate vehicle Owner's Man-
ual.
Using the call list or COMAND phone book
XOpen a call list and select an entry
(Y page 443).
or
XCall up the COMAND phone book and
select an entry (Y page 440).
XTo make a call: press the controller or the
6 button.
Select and place a call using the multifunction
steering wheel, see the separate vehicle Own-
er's Manual.
Telephone 435
COMAND Online
Z
Using speed dial presets to make a call
The speed dial list contains stored entries
from the phone book (Y page 445).
Option 1:
XPress one of the number keys for longer
than two seconds.
The telephone basic menu displays the
selected entry. This initiates dialling.
Option 2:
XCall up the telephone basic menu
(Y page 432).
XTo switch to the menu bar: slide VÆ the
controller.
XTo select Call lists: turn the controller
and press to confirm.
A menu appears.
XTo select Speed dial preset list: turn
the controller and press to confirm.
The speed dial list appears.
XTo select the preset: turn the controller and
press.
The telephone basic menu displays the
selected entry. This initiates dialling.
Functions available during a call
Overview
Telephone operation with a single call
:Person you are calling
;Icon for active telephone connection
=To end the call
?To switch the hands-free microphone off/
on (Y page 436)
ATo send DTMF tones (not possible with all
mobile phones) (Y page 436)
BSend call to the rear
Switching the hands-free microphone on/
off
This function is also available during an active
phone call.
XCall up the telephone basic menu
(Y page 432).
Switching off:
XTo switch to the menu bar: slide VÆ the
controller.
XTo select Mike off: turn the controller and
press to confirm.
If the microphone is switched off, the dis-
play shows the Q icon, and the The
microphone is off message appears for
a short period.
Switching on:
XTo select Mike on: turn the controller and
press to confirm.
The Q symbol disappears. You will briefly
see the The microphone is on message.
Sending DTMF tones
This function is not supported by all mobile
phones.
Answering machines or other devices can be
controlled by DTMF tones, e.g. for remote
query functions.
XIf you would like to listen to the messages
on your answering machine, for example,
select the corresponding number.
Transmitting individual characters:
XOnce a connection has been established to
the answer phone, select the desired char-
436 Telephone
COMAND Online

acters in the character bar: turning and
pressing the controller each time.
or
XPress the corresponding key on the
COMAND Online number keypad.
Every character selected will be transmit-
ted immediately.
Transmitting a phone book entry as a DTMF
character string:
XTo select Name: turn the controller and
press to confirm.
XTo select the required phonebook entry:
turn the controller and press to confirm.
The entry is sent as a DTMF character
string.
Changing back to the call display:
XTo select Back: turn the controller and
press to confirm.
iDTMF tones can also be transmitted using
LINGUATRONIC; see the separate operat-
ing instructions.
Transferring a call to the rear compart-
ment and back again
You can transfer a call to the telephone con-
nected to the rear unit.
XTo switch to the menu bar: slide VÆ the
controller.
XTo select Send call to rear: turn and
press the controller.
The rear-compartment telephone (hand-
set ) rings. In the bottom menu bar, the
Call to front entry is now visible.
Retrieving the call:
XTo select Call to front: turn and press
the controller.
Calls with several participants
Rejecting or accepting a waiting call
The mobile phone network provider must sup-
port and activate the call-waiting function.
Depending on the mobile phone used, the
system behaviour differs when accepting a
call.
If you have a call in progress and receive
another call, a new window appears in the
display. You also hear a tone. You can accept
or reject the call.
Rejecting:
XTo select Reject: turn the controller and
press to confirm.
or
XPress the ~ button on COMAND Online
or on the multifunction steering wheel.
Accepting:
XTo select Accept: turn the controller and
press to confirm.
or
XPress the 6 button on COMAND Online
or on the multifunction steering wheel.
The system behaviour after accepting the
incoming call depends on your mobile phone.
RThe mobile phone supports the call waiting
function (via Bluetooth®) when:
the previously active call is held. You can
then switch back and forth between both
calls (call waiting) (Y page 438).
RThe mobile phone does not support the call
waiting function (via Bluetooth®) when:
the previously active call is ended.
This is also the case if you accept the wait-
ing call using LINGUATRONIC (see the sep-
arate operating instructions).
Valid in both cases: if you accept the waiting
call using the mobile phone, the active call is
put on hold. You then have two calls. The call
you have just accepted is active.
The COMAND display changes. If you con-
tinue to operate functions on the mobile
phone, the COMAND Online display may dif-
fer from that of the mobile phone.
Telephone 437
COMAND Online
Z

Making a second call
If the following requirements are met, you can
make another call while on the phone with
someone else:
Rthe mobile network must permit this func-
tion.
Rthe mobile phone must allow you to make
a second call via Bluetooth®.
Rthe corresponding setting must be activa-
ted on the mobile phone.
If your mobile phone allows you to make a
second call via Bluetooth®, you can make
another while on the phone with someone
else. This action puts the previous call on
hold. The function is available.
XTo select symbol :: turn the controller and
press to confirm.
or
XPress the 6 button on COMAND Online.
XEnter the phone number:
Rmanually (Y page 435)
Rusing the phone book (Y page 440)
Rusing the call lists (Y page 443)
Rusing speed dial (Y page 436)
Call waiting
You can switch back and forth between calls
with this function. The function is available if
your mobile phone supports the toggling
function (via Bluetooth®).
You can use the function if you are answering
a second call or making a second call. Both
discussions are marked with 1 or 2. The active
call is highlighted.
XTo select the telephone symbol (2): turn the
controller and press to confirm.
or
XPress the 6 button on COMAND Online
or on the multifunction steering wheel.
The previous call on hold is activated.
Ending the active call:
XSelect ¢ in the telephone basic menu:
turn the controller and press to confirm.
or
XPress the ~ button on COMAND Online
or on the multifunction steering wheel.
The call on hold is active.
Conference calls
You can interconnect calls (active and on
hold) on COMAND Online. This permits sev-
eral parties to hear one another and speak
with one another.
XMake a second call (Y page 438).
XTo switch to the menu bar: slide VÆ the
controller.
XTo select Conference: turn and press the
controller.
The new participant is included in the con-
ference call.
Transferring a call
From the hands-free system to the mobile
phone
If you want to continue a call in private mode,
you will need to perform the necessary steps
on the mobile phone (see the mobile phone
operating instructions).
From the mobile phone to the hands-free
system
If you want to continue a call using COMAND
Online, you have to carry out the necessary
steps on the mobile phone (see the mobile
phone operating instructions).
438 Telephone
COMAND Online
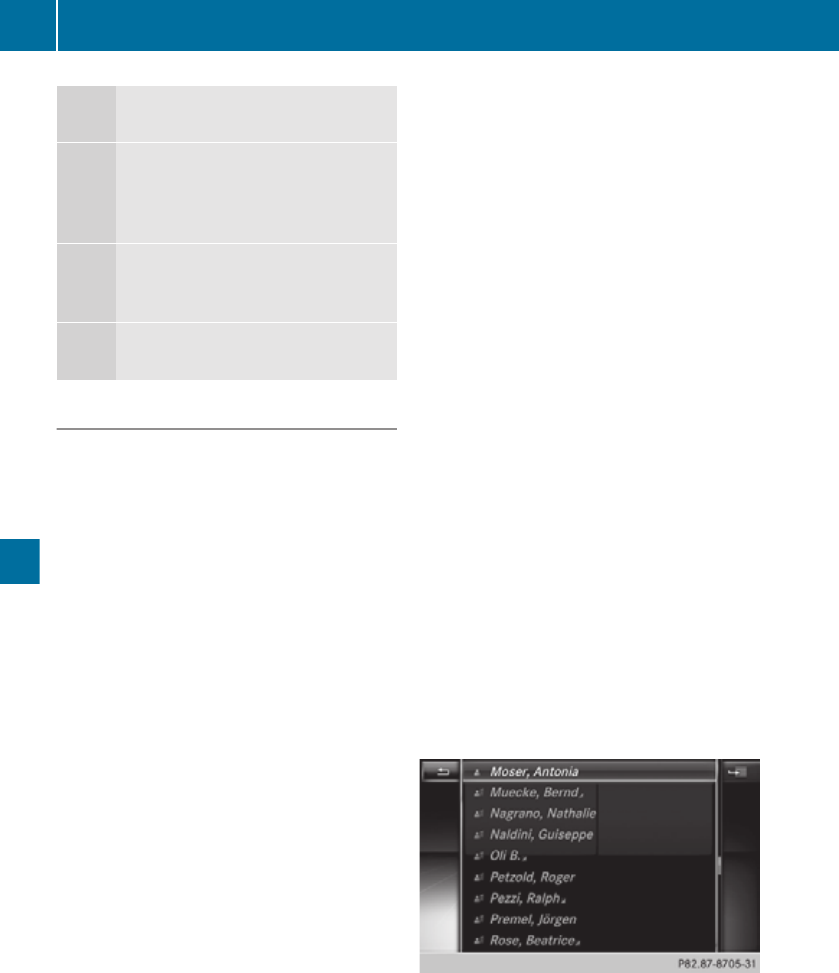
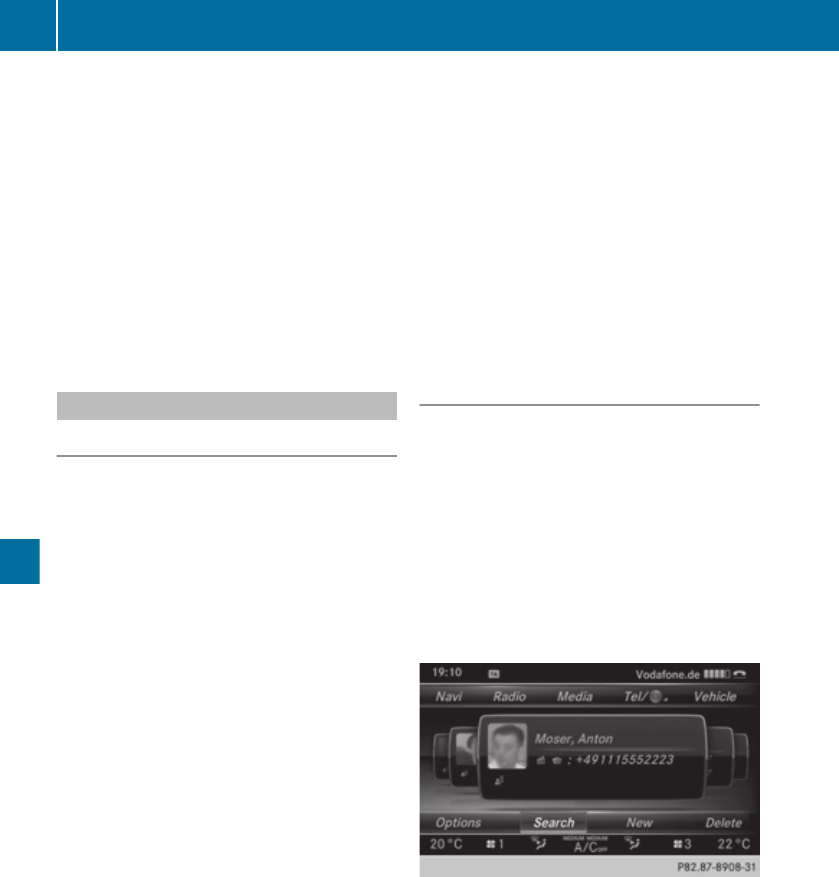
Using the phone book
Introduction
The phone book displays the names and
phone numbers of all address book entries
saved in the COMAND address book. If an
address book entry does not have a tele-
phone number, it does not appear in the
phone book.
In addition, MB Contact is listed as the first
entry. This allows you to place a call to the
Mercedes-Benz Service hotline
(Y page 459).
The phone book of the mobile phone is auto-
matically downloaded to COMAND Online
after connection.
In the telephone book, you can:
Rsave phone numbers (Y page 441)
Rsearch for entries (Y page 440)
Rdelete entries (Y page 441)
Rimport contacts (Y page 456)
Rdelete contacts (Y page 458)
Rreceive vCards (Y page 457)
iThe stored phone book and the vCards
remain in COMAND Online even if you use
COMAND Online with another mobile
phone. The entries can be viewed without
a mobile phone. For this reason, you should
delete any phone book entries before hand-
ing over or selling the vehicle.
Calling up the phone book
Opening the phone book
XTo call up the telephone basic menu: press
the % button one or more times.
XTo select Name from the telephone basic
menu: turn the controller and press to con-
firm.
If the phone book contains entries, they will
be displayed in alphabetical order. The
character bar at the bottom of the display
is active.
The character bar is used for fast selection
of an entry.
Enter the character using the character bar
(Y page 369).
iYou can also call up the telephone book
with the multifunction steering wheel, see
the separate vehicle Owner's Manual.
Closing the phone book
XTo select & from the character bar: turn
the controller and press to confirm.
or
XPress the % button.
Using the multifunction steering wheel
XUse the = or ; button to select the
Tel menu.
XUse 9, : or 9 to call up the phone
book.
Symbol overview
Sym-
bol
Explanation
ÆAddress book entry that has been
entered or changed via COMAND
Online
Imported contact that has been
saved in the phone or address book
\Address book entry with voice tag
These entries have also been
assigned a voice tag. Voice tags are
available in vehicles with LINGUA-
TRONIC (see the separate operat-
ing instructions).
Telephone 439
COMAND Online
Z
Sym-
bol
Explanation
ÃContact imported from a mobile
phone that supports PBAP or
imported from a convenience
phone
¯Entry which has been imported
from the SD memory card or USB
device
®Entry imported via the Bluetooth®
interface
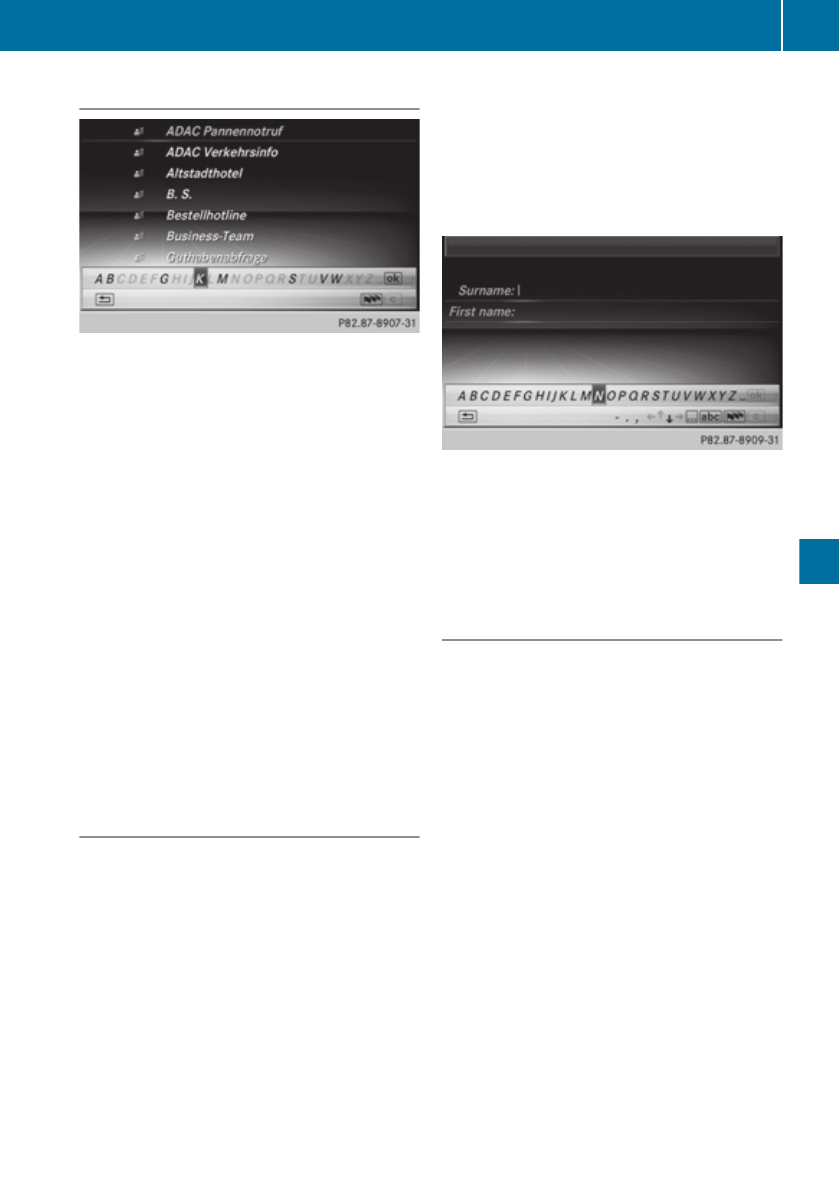
Searching for a phone book entry
Searching with the character bar
You determine the first letter of the entry you
are looking for with the first character you
enter.
XTo select characters: turn the controller
and press to confirm.
The first entry in the list that starts with the
letter selected is highlighted. If there are
similar entries, the next different character
is shown. For example, with entries such as
Christel and Christine, the beginnings
of the names are similar. In this case, you
will be offered a choice between E and I.
XSelect the characters of the entry you are
searching for one by one, pressing and con-
firming with the controller each time.
When the selection is clear,
COMAND Online switches automatically to
the selection list.
XTo complete the search: slide VZ the con-
troller repeatedly or press and hold until the
character bar disappears.
The selection list appears.
Information about character entry
(Y page 369)
Searching with the number keypad
You determine the first letter of the entry you
are looking for with the first character you
enter.
XPress the corresponding number keys in
rapid succession.
More information on entering characters
using the number keypad (direct entry)
(Y page 371).
Directly from the list
You can switch to the list at any time during
character entry.
XSlide VZ the controller repeatedly or press
and hold until the character bar disappears.
or
XTo select ¬: turn the controller and
press to confirm.
XSelect an entry: turn and press the control-
ler.
The G symbol indicates that an entry con-
tains more than one phone number.
XTo select a telephone book entry with the
G symbol: turn the controller and press to
confirm.
The sub-entries appear. The G symbol
changes to I.
XTo select a sub-entry: turn the controller
and press to confirm.
440 Telephone
COMAND Online
Returning to the telephone book with char-
acter bar:
XTo select & from the list: turn the con-
troller and press to confirm.
or
XPress the % button.
Using the multifunction steering wheel
XDial a number from the telephone book; see
the separate vehicle Owner's Manual.
Displaying the details of an entry
XTo select an entry from the selection list:
turn the controller.
XTo select the list symbol to the right of the
entry: slide VY the controller and press to
confirm.
XTo select Details: turn and press the con-
troller.
The detailed display appears.
Closing the detailed display:
XSlide XVY the controller until the entry is
highlighted once again.
or
XPress the % button.
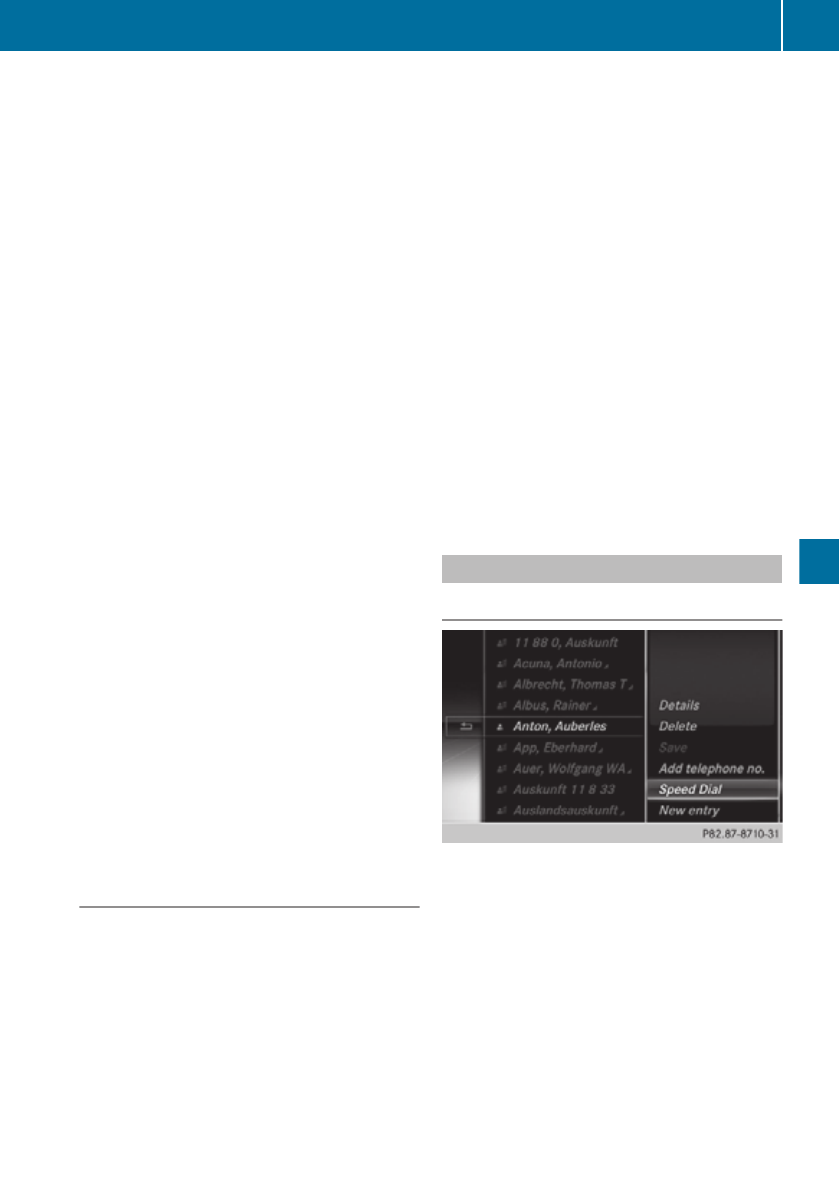
Deleting an entry from the phone book
If the entry contains only phone numbers, it
is deleted from the phone book and address
book.
If it contains additional data, such as a navi-
gable destination, the entry is deleted in the
phone book. However, the entry is retained in
the address book.
XTo select an entry from the selection list:
turn the controller and press to confirm.
XTo select the list symbol to the right of the
entry: slide VY the controller and press to
confirm.
XTo select Delete: turn the controller and
press to confirm.
A prompt appears asking whether the entry
should be deleted.
XTo select Yes or No: turn or press the con-
troller.
If you select Yes, the entry is deleted in
accordance with the rules described above.
If you select No, the process will be cancel-
led.
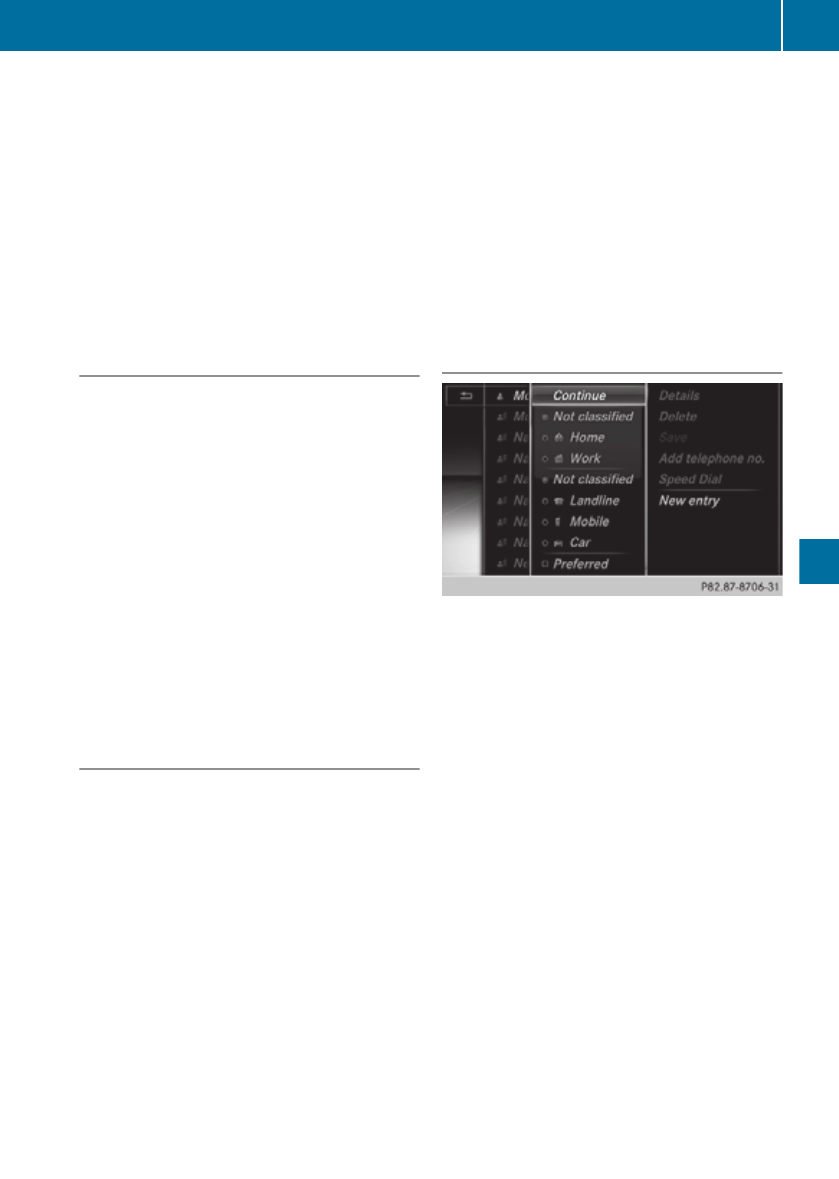
Creating a new entry in the phone book
XSlide ZV the controller repeatedly in the
phone book until the selection list appears.
XTo select the list symbol to the right of the
selection list: slide VY the controller and
press to confirm.
XTo select New entry: turn the controller
and press to confirm.
XTo select a category for the number, e.g.
Home: turn the controller and press to con-
firm.
XTo select a phone category, e.g. Mobile:
turn the controller and press to confirm.
iIf you have marked a number as preferred,
it will be highlighted in the list.
XTo select Preferred: turn the controller
and press to confirm.
XTo select Continue: turn the controller and
press to confirm.
The input menu with data fields appears.
Telephone 441
COMAND Online
Z
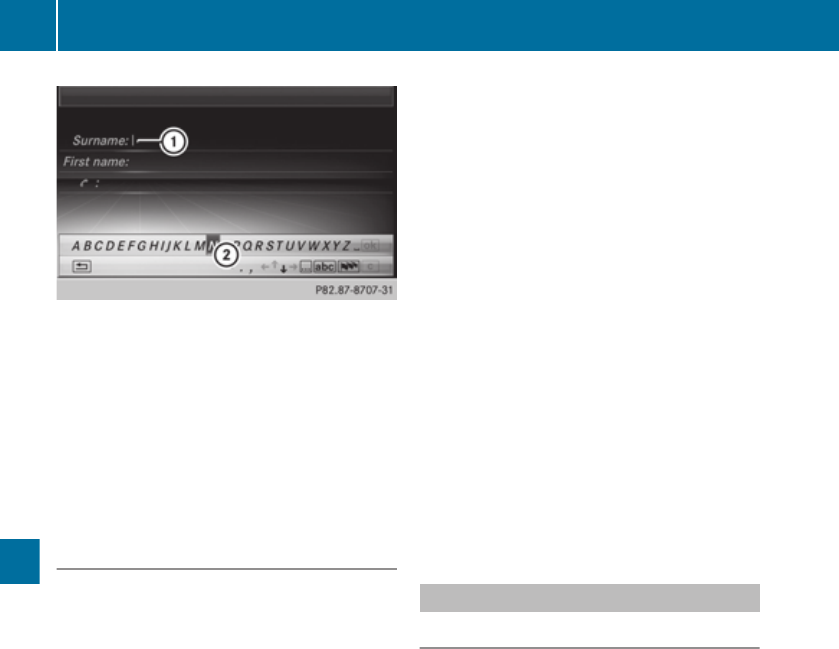
:Selected data field with cursor
;Character bar
XEntering characters (Y page 369)
Saving the entry:
XTo select ¬ from the character list: turn
the controller and press to confirm.
The entry is created in the phone book and
in the address book.
Adding to a phone book entry
You can add telephone numbers to an exist-
ing phone book entry.
XTo select an entry from the selection list:
turn the controller and press to confirm.
XTo select the list symbol to the right of the
entry: slide VY the controller and press to
confirm.
XTo select Add number: turn the controller
and press to confirm.
XTo select a category for the number, e.g.
Home: turn the controller and press to con-
firm.
XTo select a phone category, e.g. Mobile:
turn the controller and press to confirm.
iIf you have marked a number as preferred,
it will be highlighted in the list.
XTo select Preferred: turn and press the
controller.
XTo select Continue: turn the controller and
press to confirm.
COMAND Online stores the data if there are
fewer than five numbers assigned to the
entry you are searching for in the selected
number category.
If five numbers are stored for the entry in
the selected number category, a prompt
will appear. You can then choose whether
to overwrite one of the existing numbers.
XTo select Yes or No: turn or press the con-
troller.
If you select Yes, a selection list will appear
containing the five existing numbers.
If you select No, the process will be cancel-
led.
XTo select the number to be overwritten:
turn the controller and press to confirm.
An input menu appears. The data field for
entering the new phone number is high-
lighted.
XEnter characters (Y page 369).
XSave the entry (Y page 370).
Using call lists
Introduction
While the telephone is being used,
COMAND Online stores individual lists for
both incoming and outgoing calls (including
missed calls). Call lists are not available
unless a mobile phone is connected to
COMAND Online.
COMAND Online supports the PBAP Blue-
tooth® profile. The system behaviour differs
as follows:
RBluetooth® telephone with PBAP Blue-
tooth® profile:
The call lists are downloaded automatically
from the mobile phone by
COMAND Online as soon as the mobile
phone is connected to COMAND Online.
RBluetooth® telephone without PBAP Blue-
tooth® profile:
The call lists are created and displayed by
COMAND Online.
442 Telephone
COMAND Online
iFor Bluetooth® telephones without the
PBAP Bluetooth® profile, the call lists in
COMAND Online are not synchronised with
those on your mobile phone. These calls
may or may not be listed on your mobile
phone, depending on the model.
iIf no mobile phone is connected, then the
Call lists menu item is greyed out and
cannot be selected. If you connect a mobile
phone other than the previous one to
COMAND Online the previously available
call lists will be deleted automatically. The
call lists are still available on the mobile
phone itself.
iYou will only be able to select the respec-
tive menu items once calls have been
received or dialled from COMAND Online.
Displaying missed calls in the COMAND
display is not supported by all mobile
phones.
Opening the call list and selecting an
entry
XTo call up the telephone basic menu: press
the % button one or more times.
XTo switch to the menu bar: slide VÆ the
controller.
XTo select Call lists: turn and press the
controller.
A menu appears.
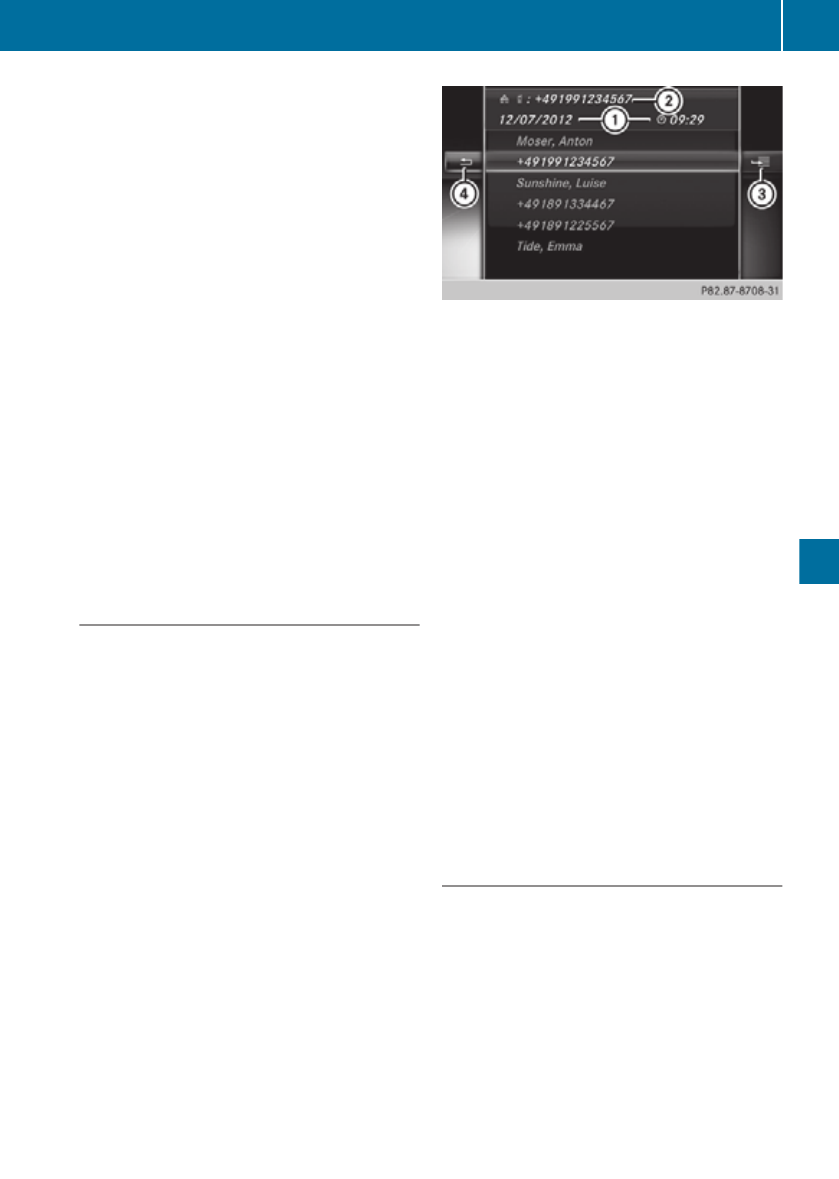
Example: list of selected phone numbers
:Date/time (if available), symbols (if
assigned) and telephone number of the
entry highlighted
;To call up options
=To close the list
XTo select Entered or Selected: turn the
controller and press to confirm.
The corresponding list appears.
iYou can also call up the list of dialled calls
by pressing the 6 button when the tele-
phone basic menu is shown. In this case,
the list will only show phone numbers.
XTo select an entry: turn the controller.
XTo dial a phone number: press the control-
ler.
XTo select & to the left of the list: slide
XV the controller and press to confirm.
or
XPress the % button.
The list is closed.
Displaying details from a list entry
COMAND Online can also show a shortened
list entry in full.
XTo select a list entry: turn the controller.
XTo select the list symbol to the right of the
entry: slide VY the controller and press to
confirm.
Telephone 443
COMAND Online
Z
XTo select Details: turn the controller and
press to confirm.
The detailed display appears.
XTo go back to the list: slide XVY the con-
troller repeatedly until the list is highligh-
ted.
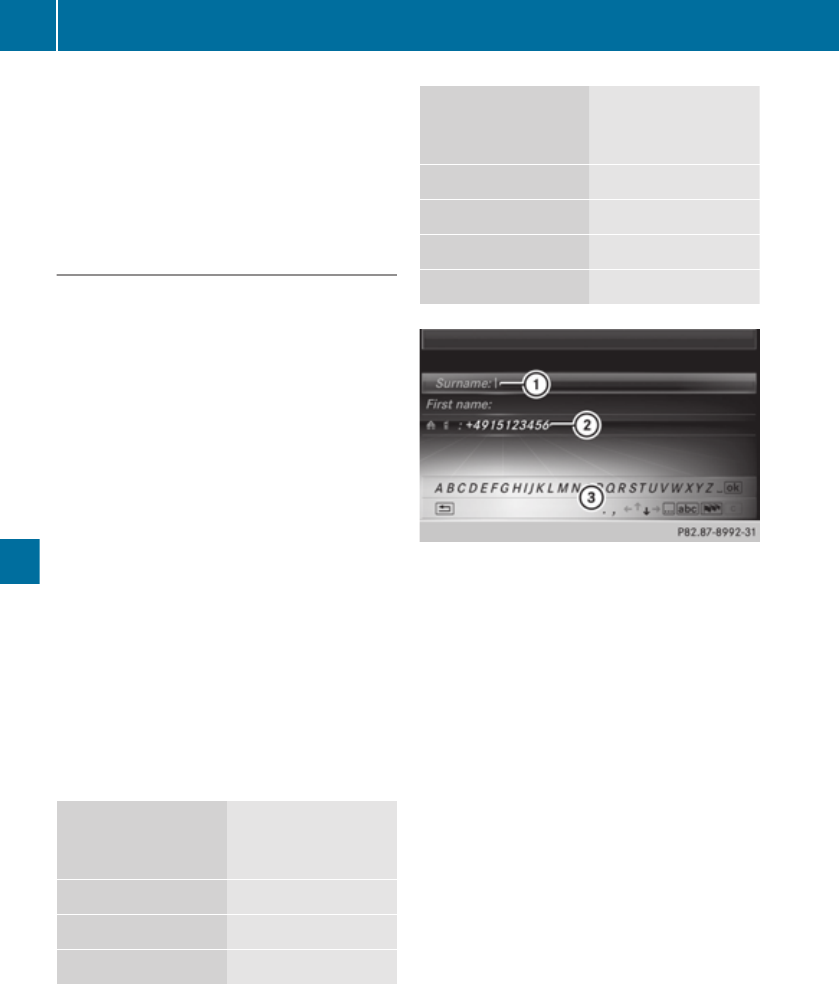
Storing a phone number
New address book entry
For incoming calls from a person who is not
in the address book, COMAND Online dis-
plays the phone number in the call list. You
can save this entry.
XOpen a call list and select an entry
(Y page 443).
XTo select the list symbol to the right of the
entry: slide VY the controller and press to
confirm.
XTo select Save: turn the controller and
press to confirm.
XSelect New entry and press W to confirm.
XTo select a category for the number, e.g.
Home: turn the controller and press to con-
firm.
XTo select a phone category, e.g. Home: turn
the controller and press to confirm.
An input menu with data fields is shown.
The data field for the telephone number is
filled in automatically.
Number category Display (phone
book and address
book)
Not classified No symbol
Home ¸
Work ·
Phone category Display (phone
book and address
book)
Not classified ;
Landline ¬
Mobile Ï
Car ´
:Data field with cursor
;Telephone number and symbol for the
phone category are automatically entered
=Character bar
Adding information to an address book
entry
For incoming calls from a person who is not
in the address book, COMAND Online dis-
plays the phone number in the call list. You
can save this entry.
XOpen a call list and select an entry
(Y page 443).
XTo select the list symbol to the right of the
entry: slide VY the controller and press to
confirm.
XTo select Save: turn the controller and
press to confirm.
iSave is shown in grey if the selected list
entry has already been saved.
XTo select Add number: turn and press the
controller.
444 Telephone
COMAND Online
XTo select a category for the number, e.g.
Home: turn the controller and press to con-
firm.
XSelect a phone category, e.g. Home, turn the
controller and press to confirm.
XTo select Save: turn the controller and
press to confirm.
The search menu for address book entries
appears.
XSearch for the required entry
(Y page 440).
XPress the controller when you have finished
searching.
COMAND Online stores the data if there are
fewer than five numbers assigned to the
entry you are searching for in the selected
number category.
You will see a message to this effect.
If five numbers are stored for the entry you
are searching for, a prompt will appear ask-
ing whether you wish to overwrite one of
the existing numbers.
XTo select Yes or No: turn the controller and
press to confirm.
If you select Yes, a selection list with the
five existing numbers is displayed.
If you select No, the process will be cancel-
led.
XTo select the number to be overwritten
from the list: turn the controller and press
to confirm.
COMAND Online overwrites the selected
number with the new data.
Deleting call lists
If you are using a Bluetooth® phone that does
not support the PBAP Bluetooth® profile, the
call lists are generated and managed by
COMAND Online. You can delete these call
lists in COMAND Online.
If you download call lists from a Bluetooth®
phone that supports the PBAP Bluetooth®
profile, you cannot delete them from
COMAND Online.
XTo switch to the menu bar in the telephone
basic menu: slide V¬ the controller.
XTo select Call lists: turn and press the
controller.
XTo select Delete call lists: turn the
controller and press to confirm.
A prompt appears asking whether you wish
to delete all call lists.
XTo select Yes or No: turn the controller and
press to confirm.
If you select Yes, the call lists are deleted.
If you select No, the process will be cancel-
led.
iIf you delete these call lists from the
mobile phone (see the separate mobile
phone operating instructions),
COMAND Online updates the call list dis-
play the next time it connects.
Using the speed dial list
Storing an entry
Speed dial menu
You can assign ten speed dial presets (0 to 9)
in the speed dial list. There are two options
available for this purpose.
Option 1:
XSearch for a phone book entry in the phone
book (Y page 440).
XIf an entry has several phone numbers,
select the desired number by turning the
controller.
Telephone 445
COMAND Online
Z
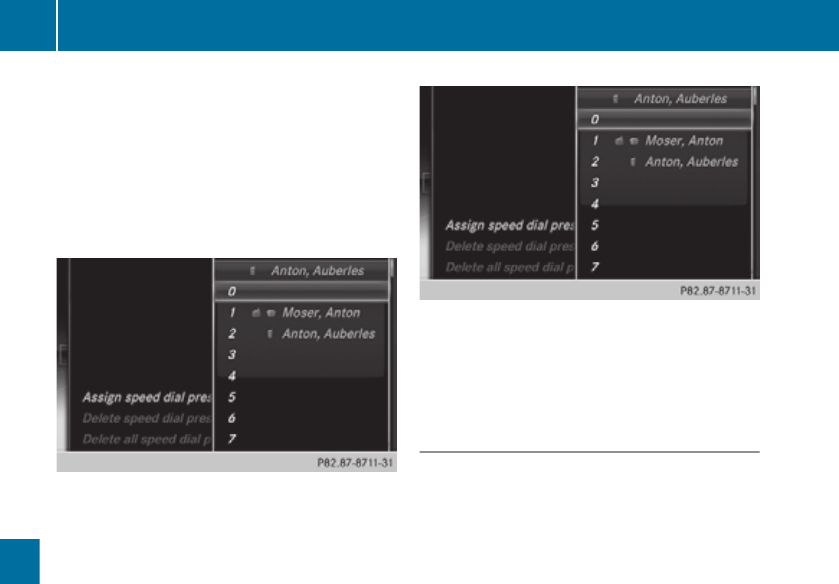
XTo select the list symbol to the right of the
entry: slide VY the controller and press to
confirm.
A menu appears.
XTo select Speed dial preset: turn and
press the controller.
A menu appears.
XTo select Assign speed dial preset:
turn and press the controller.
The speed dial list appears. The selected
phone book entry appears at the top. The
next free speed dial preset is highlighted.
XTo select speed dial preset: turn controller
and press to confirm.
The phone book entry is saved in the speed
dial preset.
Option 2
XCall up the telephone basic menu
(Y page 432)
XTo switch to the menu bar: slide VÆ the
controller.
XTo select Call lists: turn and press the
controller.
XTo select Speed dial preset list: turn
the controller and press to confirm.
The speed dial list appears.
XTo select the list symbol to the right of the
entry: slide VY the controller and press to
confirm.
XTo select Assign speed dial preset:
turn the controller and press to confirm.
The speed dial list appears. The selected
phone book entry appears at the top. The
next free speed dial preset is highlighted.
XTo select speed dial preset: turn controller
and press to confirm.
The phone book entry is saved in the speed
dial preset.
Using speed dial presets to make a call
The speed dial list contains stored phone
book entries (Y page 445).
Option 1:
XPress one of the number keys for longer
than two seconds.
The telephone basic menu displays the
selected entry. This initiates dialling.
Option 2:
XCall up the telephone basic menu
(Y page 432).
XTo switch to the menu bar: slide VÆ the
controller.
XTo select Call lists: turn and press the
controller.
XTo select Speed dial preset list: turn
and press the controller.
The speed dial list appears.
XTo select the preset: turn the controller and
press. Press W to confirm.
The telephone basic menu displays the
selected entry. This initiates dialling.
446 Telephone
COMAND Online
Deleting a speed dial preset
Deleting a speed dial preset:
XTo select Delete a speed dial preset
in the speed dial menu: turn the controller
and press to confirm.
The speed dial preset is deleted.
Deleting all speed dial presets:
XTo select Delete all speed dial pre‐
sets in the speed dial menu: turn controller
and press to confirm.
You will be asked if you would like to con-
tinue.
XTo select Yes or No: turn and press the con-
troller.
If you select Yes, all speed dial presets will
be deleted from the speed dial list.
If you select No, the process will be cancel-
led.
Messages (text and e-mail)
Information and requirements
The following conditions must be met in order
to use the message functions (text messages
and e-mails):
RFor text messages and e-mails:
The Bluetooth® mobile phone supports the
MAP Bluetooth® profile (Message Access
Profile).
RFor e-mails:
-The Bluetooth® mobile phone (smart-
phone) supports the e-mail function.
-An e-mail account is set up on the mobile
phone (see the mobile phone operating
instructions).
When the mobile phone is connected, the 150
most recent text messages and e-mails that
are currently stored on the mobile phone are
loaded into the COMAND Online message
inbox. 100 e-mails and 100 text messages are
displayed.
If the above conditions are met, new incoming
messages appear in the COMAND Online
message inbox. In addition, a tone sounds
and the / icon appears. The symbol dis-
appears once you have read the message.
The ú mail symbol is displayed if the mes-
sage memory is full. The symbol disappears
once you delete at least one message.
iFor more information about suitable
mobile phones and mobile phone brackets,
contact your Mercedes-Benz Service
Centre or visit http:// www.mercedes-
benz.com/connect.
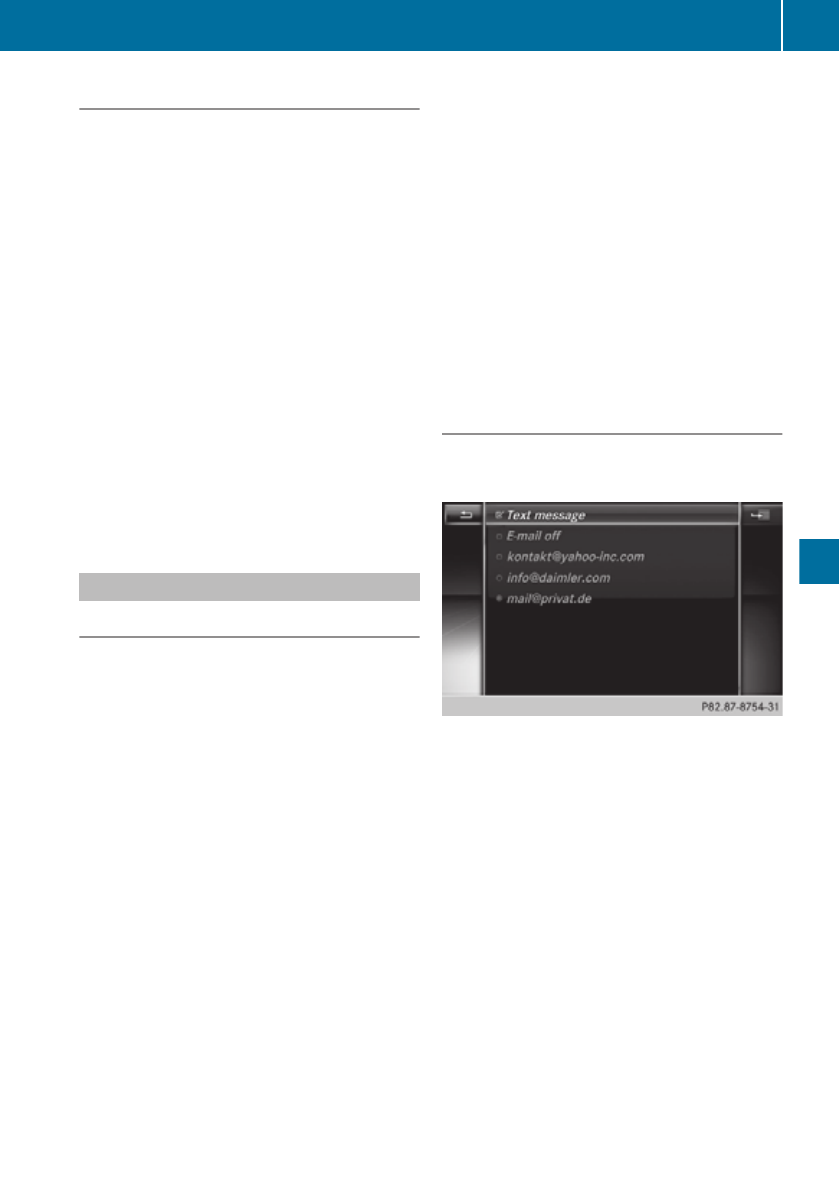
Settings for receiving messages
Calling up the settings menu for mes-
sages
XTo call up the telephone basic menu: press
the % button once or repeatedly.
XTo switch to the menu bar: slide V¬ the
controller.
XTo select 0: turn and press the control-
ler.
The message menu appears.
XSelect Settings and confirm.
Select Text message and the addresses of
the e-mail account of the connected mobile
phone are displayed.
iIf text message reception is activated, a
tick is displayed next to Text message.
Before you can use the e-mail function on
COMAND Online, you must first set up one
or more e-mail accounts on your mobile
phone (smartphone), see the mobile phone
Telephone 447
COMAND Online
Z

operating instructions. Only then are you
able to select the account you wish to use
in COMAND Online.
Setting text message reception
XCall up the settings menu for messages.
XTo select Text message: turn and press
the controller.
A menu appears.
You have the following options:
RAll messages
All messages are downloaded automati-
cally.
RNew messages
Only new messages received by the phone
are downloaded automatically.
ROff
Text message reception is deactivated.
XTo select the required option: turn and
press the controller.
Setting e-mail reception
Deactivating the e-mail function:
XCall up the settings menu for messages.
XTo select E-mail off: turn and press the
controller.
E-mail reception is deactivated.
Selecting and setting the e-mail account:
XTo select the e-mail account: turn and press
the controller.
A menu appears.
XTo select Automatic download: turn and
press the controller.
You have the following options:
RAll messages
All messages are downloaded automati-
cally.
RNew messages
Only new messages received by the phone
are downloaded automatically.
ROff
E-mail reception is deactivated.
Entering your own e-mail address:
XTo select My e-mail address: turn and
press the controller.
The input menu for entering your own e-
mail address is displayed. If your address
is in the address book, the input line is
already filled in with the address.
Displaying messages
New messages
New messages are indicated by an audible
signal and by 0 in the status bar.
XTo call up the telephone basic menu: press
the % button once or repeatedly.
XTo switch to the menu bar: slide V¬ the
controller.
XTo select 0: turn and press the control-
ler.
You will see a carousel view with the unread
messages.
XTo select the message: turn and press the
controller.
The message text is displayed.
XTo close the message text: press the
% button.
The message disappears from the carousel
view.
Calling up the messages folder
448 Telephone
COMAND Online

XTo call up the telephone basic menu: press
the % button once or repeatedly.
XTo switch to the menu bar: slide V¬ the
controller.
XTo select 0: turn and press the control-
ler.
The message menu appears.
XTo switch to the menu bar: slide V¬ the
controller.
XTo select Folder: turn and press the con-
troller.
XTo select the required folder under the title
SMS or E-mail, : turn and press the con-
troller.
The selected folder is displayed.
iThe following folders can be selected:
RInbox
The folder contains all the incoming mes-
sages
ROutbox
RDrafts
Folders cannot be selected if they are
empty.
Reading messages
XCall up the messages folder (Y page 448).
XTo select the message from the list: turn
and press the controller.
The message appears.
XTo scroll through the display or select
phone numbers in the text: turn the
COMAND controller.
The display scrolls up or down line by line,
or skips to the next or previous telephone
number and automatically highlights it.
XTo return to the list: press %.
Read-aloud function for messages
Settings for the read-aloud function:
RLanguage (Y page 379)
RSpeed (Y page 376)
XTo start the read-aloud function: press the
controller when the message is displayed.
XTo select Read aloud: turn and press the
controller.
COMAND Online reads out the message.
XTo cancel the read-aloud function: press
the 8 button.
or
XPress the controller, select Cancel read-
aloud function and press the controller
again.
Displaying details and phone numbers
COMAND Online can also show a shortened
sender display in full.
XCall up the messages folder (Y page 448).
XTo select the message: turn the controller.
XTo select the list symbol on the right-hand
side next to the message: slide VY and
press the controller.
XTo select Details: turn and press the con-
troller.
The detailed display appears.
XTo close the detailed display: slide XVY the
controller.
XTo return to the telephone basic menu:
press the % button.
Telephone 449
COMAND Online
Z
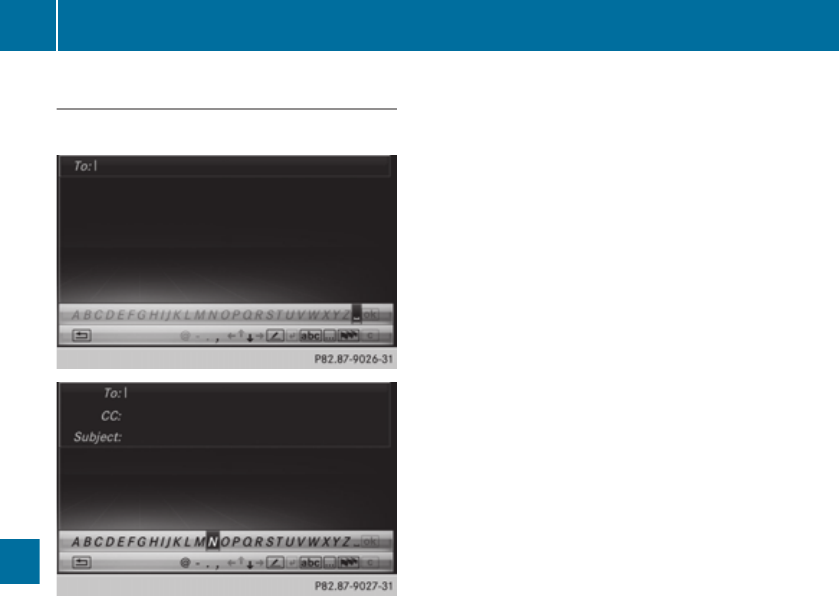
Writing messages
New message
XTo call up the telephone basic menu: press
the % button once or repeatedly.
XTo switch to the menu bar: slide V¬ the
controller.
XTo select 0: turn and press the control-
ler.
The message menu appears.
XTo switch to the menu bar: slide V¬ the
controller.
XTo select New: turn and press the controller.
XTo select SMS or E-mail: turn and press the
controller.
The input menu for a new text message or
a new e-mail appears.
XEntering characters (Y page 369)
Once you have entered at least one char-
acter into the addressee line, ¬ is active
in the first line of the character bar.
iCOMAND Online contains templates
which you can use to compile your mes-
sages.
Calling up a template:
XTo switch to the bottom line of the charac-
ter bar: slide V¬ the controller.
XTo select the pen icon: turn and press the
controller.
The list of templates appears.
XTo select a template: turn and press the
controller.
The text of the template appears in the text
area of the input menu.
Sending a message:
XTo select ¬ in the first line of the char-
acter bar: turn and press the controller.
The message is sent. If the message has
been sent successfully, the telephone
basic menu appears. If the message fails to
be sent, the Sending message failed
message is displayed followed by the input
menu again.
Saving the message as a draft:
XPress the % button.
The Save the message in the drafts
folder? prompt appears.
XTo select Yes or No: turn and press the con-
troller.
If you select Yes, the message is saved.
If you select No, the message is deleted.
iYou can also start sending a message
from an entry in the address book
(Y page 454).
Replying to a message
XDisplay the message (Y page 448).
XPress the controller.
A menu appears.
XTo select Reply: turn and press the con-
troller.
The input menu appears. The addressee's
details are automatically filled in using the
details in the original message.
For further options such as sending a new
message, see (Y page 448).
450 Telephone
COMAND Online

iWhen replying to an e-mail, you can also
select Reply all instead of Reply. In this
case, the reply is sent not just to the sender
but to all those who received the original
message.
Forwarding messages
XDisplay the message (Y page 448).
XPress the controller.
A menu appears.
XTo select Forward: turn and press the con-
troller.
The input menu appears. The subject line
is automatically filled in with the same
details as those in the original message.
For further options such as sending a new
message, see (Y page 448).
Managing messages
Calling a text message (SMS) sender
XPress W the controller while the text mes-
sage is being displayed.
XTo select Call sender: turn and press the
controller.
The telephone makes the call to the sender.
Using a telephone number or e-mail
address in the text
You can use any character sequences which
are highlighted in red in the text.
XTo select a usable telephone number or e-
mail address when displaying the message:
turn and press the controller.
XTo select Use: turn and press the controller.
XSelect Call.
The telephone makes the call.
iIt is possible that a highlighted numerical
sequence may not contain a telephone
number.
iYou can use the "New entry" or "Add no."
functions to save this telephone number or
to add it to an existing entry.
Storing a sender as a new entry in the
address book
This function is not available if the sender’s
telephone number or e-mail address is
already stored in the address book.
XPress the controller while the message is
being displayed.
XText messages:
To select Save number: turn and press the
controller.
XE-mails:
To select Save the sender's e-mail
address: turn and press the controller.
XTo select New entry: turn and press the
controller.
XText messages: save the telephone num-
ber (Y page 444)
XE-mails: save the e-mail address
(Y page 454)
Adding the sender to an address book
entry
XPress W the controller while the message
is being displayed.
XText messages:
To select Save number: turn and press the
controller.
XE-mails:
To select Save the sender's e-mail
address: turn and press the controller.
XTo select Add: turn and press the controller.
XProceed from the step "Selecting a cate-
gory" (Y page 442).
Deleting messages
XCall up the message folder (Y page 448).
XTo select the message: turn and press the
controller.
XTo select the list symbol on the right-hand
side next to the message: slide VY and
press the controller.
Telephone 451
COMAND Online
Z
XTo select Delete: turn and press the con-
troller.
A deletion prompt appears.
XTo select Yes or No: turn and press the con-
troller.
If you select Yes, the message is deleted.
If you select No, the process will be cancel-
led.
iThis delete function is not supported by
all mobile phones. The Delete failed
message appears.
Using the address book
Introduction
The address book organises and stores
entries that are entered from different sour-
ces (mobile phone, memory card, USB device,
COMAND telephone book, navigation sys-
tem).
You can use these entries to make telephone
calls and to navigate.
iNumber of contacts in the address
book: the address book can store a total of
4,000 contacts.
1,500 entries each are reserved in the
address book for:
Rcontacts from the mobile phone
Rcontacts that you create in
COMAND Online or import from other
sources
The remaining 1,000 entries are assigned
by COMAND Online as necessary.
iDisplay of mobile phone contacts: con-
tacts downloaded from the mobile phone
remain in the address book even if you dis-
connect the mobile phone
from COMAND Online. Contacts that have
previously been available can be displayed
as soon as the mobile phone is reconnec-
ted. COMAND Online downloads the con-
tacts again so that any new contacts that
have been added to the mobile phone can
be displayed.
As soon as you connect a new mobile
phone to COMAND Online all the contacts
from the previous mobile phone are
replaced by those from the new phone's
address book.
Address book entries remain stored if the
mobile phone is disconnected. For this rea-
son, delete your personal data using the
reset function before selling your vehicle,
for example (Y page 380).
Calling up the address book
Using the telephone button:
XPress the % button one or more times.
From the telephone basic menu:
XTo switch to main function bar: slide VZ
the controller.
XTo select Tel: turn the controller and press
to confirm.
XTo select Address book from the carousel:
turn the controller and press to confirm.
XTo browse in the address book: turn the
controller.
XTo jump to a specific letter: press the cor-
responding button on the keypad one or
more times.
XTo close the address book: press the
% button.
452 Telephone
COMAND Online
Searching for an address book entry
:¥ Address book entry
;L Complete address data from the nav-
igation system
=Character bar
?d Phone book entry on the mobile phone
AEntry with voice tag
The symbols to the left of the list entries can
be found in the symbol overview
(Y page 439).
XCall up the address book (Y page 452).
XTo switch to the menu bar: slide V¬ the
controller.
XTo select Search: turn the controller and
press to confirm.
The address list with character bar
appears.
XFind an entry (Y page 440).
Creating a new entry in the address
book
You can enter address data directly into the
address book. If you store telephone num-
bers in the COMAND phone book, these are
also saved in the address book. If you store a
navigation destination, COMAND Online cre-
ates an address book entry which includes
the complete navigable address data.
XCall up the address book (Y page 452).
XTo switch to the menu bar: slide VÆ the
controller.
XTo select New: turn the controller and press
to confirm.
An input menu for surname, first name and
telephone number appears.
Input menu with data fields
:Selected data field with cursor
;Character bar
XEnter characters (Y page 369)
XSave the entry (Y page 370)
Deleting an address book entry
XSearch for the address book entry
(Y page 453).
XTo select the list symbol to the right of the
entry: slide VY the controller and press to
confirm.
XTo select Delete: turn and press the con-
troller.
A query appears.
XTo select Yes or No: turn the controller and
press to confirm.
If you select Yes, the entry will be deleted.
If you select No, the process will be cancel-
led.
Telephone 453
COMAND Online
Z
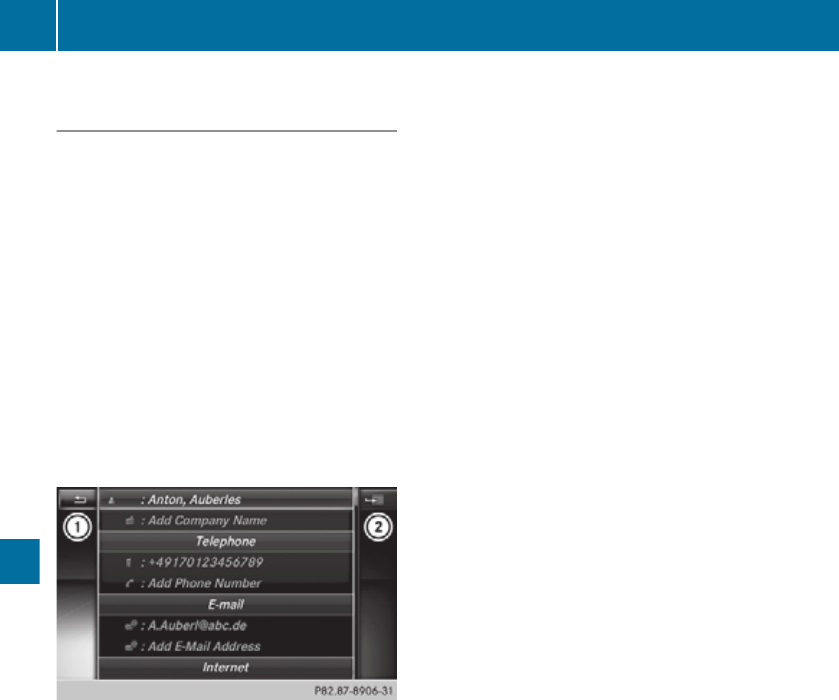
Displaying details for an address book
entry
Selecting an entry
iAn address book entry can contain the
following information:
Rname
Rfirst name
Rcompany
Rup to five telephone numbers
Rtwo email addresses
RInternet address
Rtwo addresses
Rtwo navigation addresses (transferred
from Navigation)
Rgeo-coordinates
Detailed display of address book
:To go back to the previous menu
;\ Business details
;6 Home details
=List symbol (to call up options)
XCall up the address book (Y page 452).
XSelect an entry: turn and press the control-
ler.
The address book entry with all data fields
appears.
Adding information to an address book
entry
XTo select the required data field (e.g. e-
mail): turn the controller.
XTo select the "Add..." bar (example: Add e-
mail address): turn the controller and
press to confirm.
Depending on the type of data field, the
corresponding input menu appears.
XEnter characters (Y page 369).
XSave the entry (Y page 370).
Starting route guidance to an address
XTo select the address data field: turn the
controller and press to confirm.
The route to the destination address is cal-
culated and route guidance starts.
Calling a telephone number
XTo select the telephone number data field:
turn the controller and press to confirm.
This initiates dialling and you can then
make your call (Y page 436).
Sending text messages
XTo select a telephone number: turn the con-
troller.
XTo select the list symbol to the right of the
data field: slide VY the controller and
press to confirm.
XTo select Send a text message: turn the
controller and press to confirm.
The text message input menu appears
(Y page 450).
Sending e-mail
XTo select the e-mail address: turn the con-
troller.
XTo select the list symbol to the right of the
data field: slide VY the controller and
press to confirm.
XTo select Send e-mail: turn the controller
and press to confirm.
The e-mail input menu appears
(Y page 450).
454 Telephone
COMAND Online

Displaying sub-entry information
XTo select the desired data field: turn the
controller.
XTo select the list symbol to the right of the
data field: slide VY the controller and
press to confirm.
XTo select Details: turn and press the con-
troller.
The display is shown in full.
XTo close the detailed display: press the
% button.
Changing an address book entry
XTo select the desired data field: turn the
controller.
XTo select the list symbol to the right of the
data field: slide VY the controller and
press to confirm.
XTo select Edit: slide the controller and
press to confirm.
The input screen for the selected data field
appears.
Information about character entry
(Y page 369).
Changing the category of a data field
XTo select the desired data field: turn the
controller.
XTo select the list symbol to the right of the
data field: slide VY the controller and
press to confirm.
XTo select Change category: turn the con-
troller and press to confirm.
XTo select a category: turn the controller and
press to confirm.
Storing the phone number as a speed
dial number
XCall up the address book (Y page 452).
XSelect an entry: turn and press the control-
ler.
The address book entry with all data fields
appears.
XTo select the desired telephone number
data field: turn the controller.
XTo select the list symbol to the right of the
data field: slide VY the controller and
press to confirm.
XTo select Speed dial preset: turn the
controller and press to confirm.
You can now store the number in one of the
ten speed dial presets (Y page 445).
Starting route guidance to an entry
This function is available as soon as you have
stored a destination in the destination mem-
ory (Y page 417).
XCall up the address book (Y page 452).
XTo select an entry with the L symbol: turn
the controller and press to confirm.
The address book entry with all data fields
appears.
XTo select the desired address data field:
turn the controller.
XTo select the list symbol to the right of the
data field: slide VY the controller and
press to confirm.
XTo select Navigate: turn the controller and
press to confirm.
Route guidance begins.
iRoute guidance can also be started for an
address book entry without the L symbol.
If the address data or designations do not
match the digital map, COMAND Online
prompts you to re-enter the address.
The navigable address is added to the
address book entry automatically.
Voice tags
Introduction
You can enter voice tags via LINGUATRONIC
(see the separate operating instructions).
Once you have assigned a voice tag to an
address book entry, you can vocally call up
this entry and dial a phone number, for exam-
Telephone 455
COMAND Online
Z

ple. You can add one voice tag per address
book entry.
Adding or changing a voice tag
XSearch for an address book entry with or
without a voice tag (¦) (Y page 453).
XTo select the list symbol to the right of the
entry: slide VY the controller and press to
confirm.
XTo select Voice tag: turn the controller
and press to confirm.
XTo select Add or Change: turn the controller
and press to confirm.
Subsequent operation is voice-controlled.
LINGUATRONIC guides you through the
dialogues.
Deleting a voice tag
XSearch for an address book entry with a
voice tag (Y page 453).
XTo select the list symbol to the right of the
entry: slide VY the controller and press to
confirm.
XTo select Voice tag: turn and press the
controller.
XTo select Delete: turn and press the con-
troller.
A deletion prompt appears.
XTo select Yes or No: turn the controller and
press to confirm.
If you select Yes, COMAND Online deletes
the voice tag.
If you select No, the process will be cancel-
led.
Listening to a voice tag
XSearch for an address book entry with a
voice tag (Y page 453).
XTo select the list symbol to the right of the
entry: slide VY the controller and press to
confirm.
XTo select Voice tag: turn the controller
and press to confirm.
XTo select Voice tag: turn the controller
and press to confirm.
XSelect Listen and press W to confirm.
You hear the voice tag.
Importing phone book entries
This function allows you to store phone book
entries from the mobile phone in the address
book.
Possible sources are:
Rthe mobile phone
Rthe memory card
Rthe USB device
Rthe Bluetooth® interface
Imported phone book entries are indicated in
the phone book by different symbols
(Y page 439).
XSearch for an entry in the phone book on
the mobile phone d(Y page 440).
XTo select the list symbol to the right of the
entry: slide VY the controller and press to
confirm.
XSelect Save entry and press W to con-
firm.
The Data saved. message appears. The
phone book entry is now saved as an
address book entry.
The d symbol is replaced by the ¥ sym-
bol.
Importing contacts
Information and requirements
You can import contacts (vCards) from the
memory card and from a USB device into the
address book, or receive vCards via Blue-
tooth®.
iUp to 2,500 entries can be imported into
the address book. A message notifies you
when the maximum number is reached.
You then have to delete existing entries in
order to import new entries (Y page 453).
456 Telephone
COMAND Online

Depending on the source of the contact data,
different requirements apply:
Source Conditions
Memory card The SD memory card is
inserted. It contains
importable contact details.
USB device The USB device is inserted
into the USB port. It con-
tains importable contact
details.
Requirements for receiving vCards via
Bluetooth®
You can receive vCards from devices (e.g.
from a PC) that support the sending of vCards
via Bluetooth®.
It is not necessary to authorise the device in
COMAND to do so.
Please bear the following in mind:
RBluetooth® must be activated in COMAND
and on the Bluetooth® device; see the oper-
ating instructions for the device.
Rthe Bluetooth® device must be able to send
vCards via Bluetooth® (see the operating
instructions for the device).
Rthe Bluetooth® device in the vehicle must
be switched on.
Importing from the memory card or USB
device
Entries imported from the memory card or
from a USB device have the ¯ symbol.
The following conditions must be fulfilled in
order to import vCards:
RvCards (vcf files) may be located in the main
directory or in folders. COMAND Online
allows you to select the relevant folders
directly.
RvCards must have the ".vcf" file extension.
iOne vcf file may contain several vCards.
COMAND Online supports vCards in ver-
sions 2.1 and 3.0.
XTo change to the menu bar when in the
address book or the telephone basic menu:
slide VÆ the controller.
XTo select Options: turn and press the con-
troller.
XTo select Import contacts: turn the con-
troller and press to confirm.
A menu appears.
XTo select From the memory card or From
USB device in the menu: turn controller
and press to confirm.
XTo select Add or Overwrite: turn the con-
troller and press to confirm.
Add imports the entries from the memory
card or USB device into the address book.
Overwrite imports the entries from the
memory card or USB device and overwrites
all entries in the address book with the
¯ symbol. The previous entries are then
no longer available.
After the contact data has been imported
successfully, you will see a message to this
effect. The address book or the respective
telephone basic menu is displayed.
iYou can select Overwrite if the address
book already contains corresponding
entries. A message notifies you if the
address book is full.
Receiving vCards via Bluetooth®
XTo change to the menu bar when in the
address book or the telephone basic menu:
slide VÆ the controller.
XTo select Options: turn and press the con-
troller.
XTo select Import contacts: turn the con-
troller and press to confirm.
A menu appears.
XTo select Receive business cards: turn
the controller and press to confirm.
This interrupts the Bluetooth® connection
between COMAND Online and your active
mobile phone. COMAND Online is, how-
ever, ready to receive vCards from another
Bluetooth® device (PC, mobile phone).
Telephone 457
COMAND Online
Z
XStart the data transfer on the external Blue-
tooth® device (see the operating instruc-
tions for the device).
The number of vCards received is dis-
played.
XTo end reception: press the controller or
the % button.
COMAND Online then reconnects to the
mobile phone.
Received vCards are identified by the ®
symbol in the address book.
iIf you switch to another main function,
e.g. navigation, while receiving vCards, the
reception of vCards will be terminated.
Deleting contacts
XTo change to the menu bar when in the
address book or the telephone basic menu:
slide VÆ the controller.
XTo select Options: turn and press the con-
troller.
XTo select Delete contacts: turn the con-
troller and press to confirm.
XSelect one of the following options:
RInternal contacts
RContacts from storage device
RReceived business cards
RDelete all
Turn and press the controller.
A prompt corresponding to your selection
appears.
XTo select Yes or No: turn the controller and
press to confirm.
If you select Yes, the contacts are deleted
according to your selection.
If you select No, the process will be cancel-
led.
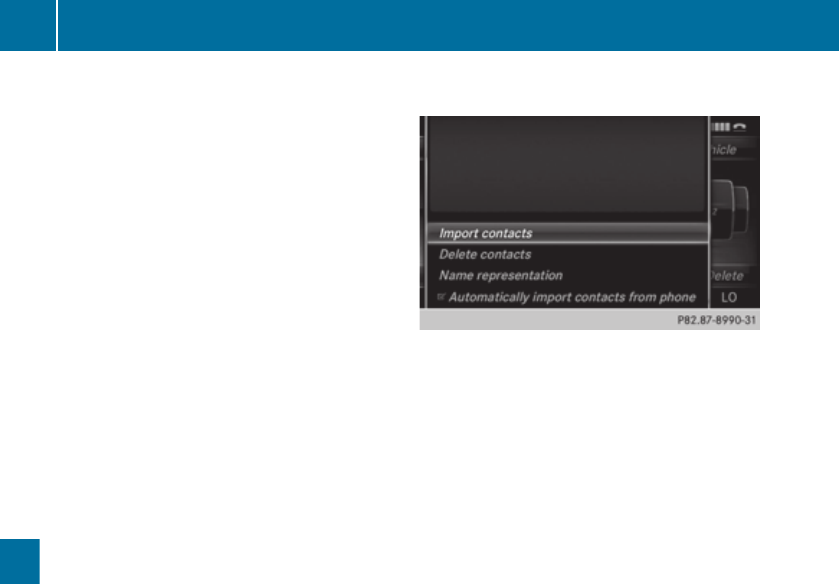
Switching import of contacts on/off
You can choose to have contacts downloaded
automatically when a mobile phone is con-
nected with COMAND Online or to have this
function suppressed.
XConnecting a mobile phone (Y page 426).
XTo switch to the menu bar in the basic
address menu: slide VÆ the controller.
XTo select Options: turn the controller and
press to confirm.
A menu appears.
XSelect Automatically retrieve con‐
tacts from "My Phone" and confirm with
W.
You can allow O or suppress ª the auto-
matic download.
Proceed as follows if you do not want to have
sensitive contacts saved in the address book:
XConnect the mobile phone with COMAND
Online.
The contacts are automatically downloa-
ded to the address book.
XDelete the sensitive contacts in the
address book.
XSwitch the Automatically import of
contacts from "My Phone" function off
ª.
Then no contacts will be downloaded and
therefore no new ones will be added when
your mobile phone is reconnected with
COMAND Online.
458 Telephone
COMAND Online

Mercedes-Benz Contact
Introduction
Mercedes-Benz Contact offers fast assis-
tance at the touch of a button – around the
clock. For any queries about the vehicle,
Mercedes-Benz Contact offers a fast and easy
connecting call to the Mercedes-Benz Cus-
tomer Centre. You can request an appoint-
ment, or call for help in the event of a break-
down.
All important vehicle data is sent via mobile
phone to ensure that you receive optimum
support. The mobile phone must be connec-
ted to COMAND Online via the Bluetooth®
interface.
The following data is transmitted:
Rthe vehicle identification number
Rthe total distance recorder reading
Rthe vehicle position
Rthe telephone number
Rthe service code (only when required for
maintenance)
iPlease note that Mercedes-Benz Contact
is a Mercedes-Benz customer service. In
emergencies, always call the national
emergency services first, using the stand-
ard national emergency service telephone
numbers.
iCurrently, this service is available for vehi-
cles from the following European countries:
RBelgium
RGermany
RFrance
RUnited Kingdom
RIreland
RItaly
RLuxembourg
RNetherlands
RAustria
RPoland
RSwitzerland
RSlovakia
RSpain
RCzech Republic
RHungary
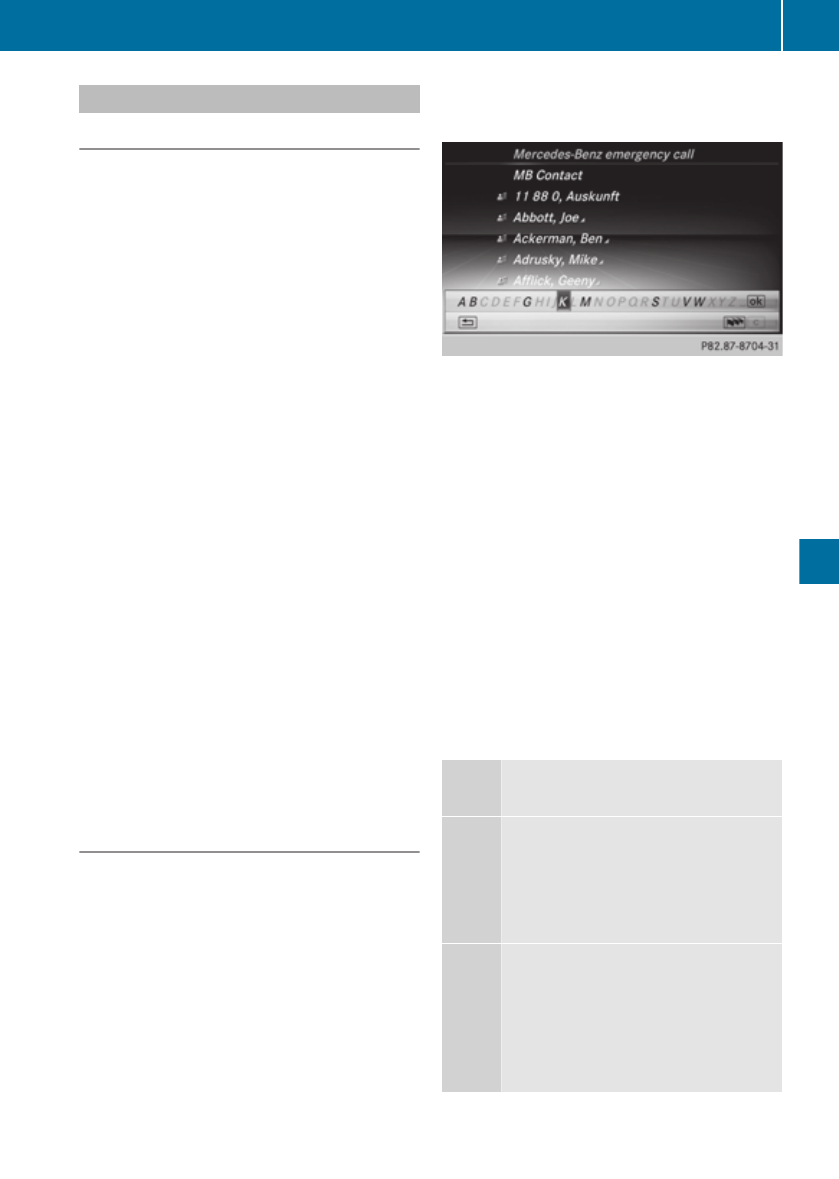
Calling the Mercedes-Benz Customer
Centre
GWARNING
Pay attention to the traffic conditions. You
may otherwise be distracted from the traffic
conditions, cause an accident and injure your-
self and others.
XCall up the COMAND phone book
(Y page 439).
The MB Contact entry is the first entry in
the COMAND phone book. The entry is
highlighted.
There are two ways to contact the Mercedes-
Benz Customer Centre:
XPress the controller.
or
XPress the 6 button on the telephone
keypad.
This initiates a call. When the call is con-
nected, a voice message prompts you to
confirm the data transmission by pressing
the stated number on the telephone key-
pad. After confirmation, COMAND Online
sends the required vehicle data.
iAlternatively, you can make the call using
the 6 button on the multifunction steer-
ing wheel.
During data transmission, you will see a cor-
responding symbol in the display. This may
take a moment. Then, you can select the
desired service and be connected to a spe-
cialist from the Mercedes-Benz Service
Centre.
iContact your Mercedes-Benz Service
Centre for further information on
Mercedes-Benz Contact, the range of serv-
ices offered and on using the function.
Telephone 459
COMAND Online
Z

Demand-actuated service message
To attain the optimal level of support in main-
taining your vehicle, you can arrange a service
appointment directly with the Mercedes-Benz
Customer Centre. As well as a warning in the
instrument cluster, a window appears in the
COMAND display. Here, a message actively
indicates that a service is required and this
message enables you to contact the
Mercedes-Benz Customer Centre directly.
You will see the message: <Service_name>
is due soon. Would you like to make
a workshop appointment?
Arranging a service appointment:
XTo select Call now: turn and press the
COMAND controller.
After your confirmation, the vehicle data is
sent via Mercedes-Benz Contact, and a
Customer Centre employee personally
deals with your appointment. The informa-
tion is then sent to your desired service
outlet.
They will then contact with you within 24
hours to confirm the following details:
Rscope of service
Rlength of stay
Rprice
XTo arrange a service appointment
later: select Call later and confirm with
W.
The window is hidden, then reappears after
a certain amount of time.
XTo not arrange a service appointment:
select No and confirm with W.
The window is hidden and does not show
this maintenance requirement again.
Mercedes-Benz emergency call sys-
tem
Overview
The Mercedes-Benz emergency call system
can help to decisively reduce the time
between an accident and the arrival of emer-
gency services at the site of the accident. It
can also help locate an accident site in places
that are difficult to see.
The emergency call can be made automati-
cally or manually and is transmitted to the
Europe-wide private Mercedes-Benz emer-
gency call number. The vehicle position data
is simultaneously transmitted by text mes-
sage and DTMF to the Mercedes-Benz emer-
gency call centre. The Mercedes-Benz emer-
gency call centre transmits the vehicle posi-
tion data to one of the Europe-wide public
emergency call centres. In almost all coun-
tries, the voice connection can be made in the
respective country's language. This allows
measures for rescue, recovery or towing to a
Mercedes-Benz Service Centre to be initiated
quickly.
If the Mercedes-Benz emergency call system
function is operational, you see the SOS
READY display message in the basic tele-
phone menu (Y page 463).
Information on service availability in Europe
(Y page 460).
iNote that manual emergency calls should
only be used if you or others are in need of
rescue, not e.g. in the event of a break-
down.
Service availability in Europe
The Mercedes-Benz emergency call system is
available for your vehicle for 15 years after
the initial date of production, if:
Rit is equipped with COMAND Online
Rit was originally produced for the European
market
You can find more information on the regional
availability of the Mercedes-Benz emergency
call system at http://www.mercedes-
benz.com/connect_ecall.
Conditions
Equipment requirements
460 Telephone
COMAND Online

You need:
Ra Bluetooth®-capable mobile phone which,
if possible, supports the MAP profile (Mes-
sage Access Profile) for sending text mes-
sages, or
Rif the vehicle is equipped with permanently
installed/SAP telephony, a SIM card or a
suitable mobile phone
Functional requirements
The vehicle has GPS reception.
Check the following:
RCOMAND Online is switched on
Rwhen using the Bluetooth® interface, the
mobile phone must be authorised for and
connected with COMAND Online, and log-
ged into a mobile phone network
Connecting a mobile phone (Y page 426)
Reconnecting the mobile phone automati-
cally (Y page 430)
If your vehicle is equipped with permanently
installed/SAP telephony, one of the following
conditions must be fulfilled:
Rin "telephone module with Bluetooth® (SAP
profile)", a SIM card has been entered and
is logged into the mobile phone network.
SAP (SIM Access Profile)
Ra suitable SAP-capable mobile phone is
connected to "telephone module with Blue-
tooth® (SAP profile)" via the SAP profile and
is logged into the mobile phone network.
Rif your vehicle is equipped with a mobile
phone bracket: the mobile phone bracket
is connected and the mobile phone is inser-
ted.
iSAP telephony is described in the sepa-
rate operating instructions.
If the mobile phone is connected, you see the
SOS READY display message in the basic tele-
phone menu in front of the name of the mobile
phone (Y page 463).
iFurther information on suitable mobile
phones can be obtained from a Mercedes-
Benz Service Centre or at http://
www.mercedes-benz.com/connect.
iBefore using this function, make sure that
your mobile phone contract:
Rpermits calls, text messages and roam-
ing from both your country of residence
and from abroad, and
Rthat these functions have been activated
Automatic emergency call
! If an emergency call has been made: pro-
vided the road and traffic conditions at the
accident site allow it, remain in the vehicle
until the voice connection with the operator
at the emergency call centre has been
established.
On the basis of the call, the operator can
decide whether it is necessary to deploy
rescue teams and/or the police to the acci-
dent site.
iDepending on the severity of the acci-
dent, it can take between one and three
minutes until the operator can speak with
you.
REQUIREMENT: the ignition is switched on.
If restraint systems have been triggered dur-
ing an accident, the Mercedes-Benz emer-
gency call system can automatically dial the
Europe-wide private Mercedes-Benz emer-
gency call number. Restraint systems
include, for example, airbags or belt tension-
ers. The emergency call system can establish
a voice connection between the vehicle occu-
pants and the Mercedes-Benz emergency call
centre.
The accident data is sent to the Mercedes-
Benz emergency call centre by SMS and
DTMF while the voice connection is operat-
ing. The accident data contains metre-precise
GPS positioning data for the moment it is
sent, as well as the type of vehicle involved in
the accident.
iIf your vehicle is equipped with an SOS
button in the overhead control unit, it
Telephone 461
COMAND Online
Z

flashes until the emergency call has been
completed.
iIt is not possible to end an automatic
emergency call.
iIn the following cases, you see a corre-
sponding message on the COMAND dis-
play:
Ra connection to the Mercedes-Benz
emergency call centre could not be made
Rnor has a call been automatically forwar-
ded to the public emergency call centre
In such circumstances, dial the emergency
number 112 on your mobile phone.
Manual emergency call
! If an emergency call has been made: pro-
vided the road and traffic conditions at the
accident site allow it, remain in the vehicle
until the voice connection with the operator
at the emergency call centre has been
established.
On the basis of the call, the operator can
decide whether it is necessary to deploy
rescue teams and/or the police to the acci-
dent site.
Vehicles equipped with an SOS button
If your vehicle is equipped with the SOS but-
ton in the overhead control unit:
XPress and hold the SOS button for at least
one second.
The manual emergency call is triggered.
The indicator lamp in the SOS button
flashes until the emergency call is conclu-
ded.
iIn the following cases, you see a corre-
sponding message on the COMAND dis-
play:
Ra connection to the Mercedes-Benz
emergency call centre could not be made
Rnor has a call been automatically forwar-
ded to the public emergency call centre
In such circumstances, dial the emergency
number 112 on your mobile phone.
In the address book
XCall up the address book (Y page 452).
The 1st entry, Mercedes-Benz emer‐
gency call, is highlighted.
XPress the controller.
The emergency call to the Mercedes-Benz
emergency call centre is triggered.
iIf you have accidentally made a manual
emergency call, you can end it in the fol-
lowing ways:
Rby pressing the ~ button on the tele-
phone keypad
Rby pressing the ~ button on the mul-
tifunction steering wheel
iIn the following cases, you see a corre-
sponding message on the COMAND dis-
play:
Ra connection to the Mercedes-Benz
emergency call centre could not be made
Rnor has a call been automatically forwar-
ded to the public emergency call centre
In such circumstances, dial the emergency
number 112 on your mobile phone.
Transmitted data
Depending on how the data is transmitted
(text message or DTMF), different data is
transmitted to the Mercedes-Benz emer-
gency call centre.
Text messages transmit the following:
Rthe vehicle's GPS position data
Rthe direction of travel
Rthe vehicle identification number
Ra Mercedes-Benz Contact coding
Ran indication of whether the call was trig-
gered automatically or manually
Ra time stamp
Rthe language settings on COMAND Online
DTMF sends a reduced data package that
does not contain the vehicle identification
number and time stamp.
462 Telephone
COMAND Online

Displays in the COMAND display
If the Mercedes-Benz emergency call is avail-
able, you see the SOS READY display message
in the basic telephone menu.
If a Mercedes-Benz emergency call is trig-
gered either automatically or manually, you
also see the Mercedes-Benz emergency
call active display message.
If position and vehicle data are sent to the
Mercedes-Benz emergency call centre, you
see the Mercedes-Benz emergency call
Sending data display message.
If the Mercedes-Benz emergency call con-
nects with the Mercedes-Benz emergency
call centre, you see the Mercedes-Benz
Emergency Call Connected display mes-
sage.
Online and Internet
Features of your COMAND Online
These operating instructions describe all
standard and optional equipment available
for your COMAND Online system at the time
of purchase. Country-specific differences are
possible. Please note that your
COMAND Online system may not be equip-
ped with all the features described. This is
also the case for systems and functions rele-
vant to safety. Therefore, the equipment on
your COMAND Online system may differ from
that in the descriptions and illustrations.
Should you have any questions concerning
equipment and operation, please consult a
Mercedes-Benz Service Centre.
General notes
Conditions for access
GWARNING
Operating the integrated information systems
and communications equipment in the vehicle
while driving will distract you from traffic con-
ditions. You could then lose control of the
vehicle. There is a risk of an accident.
Only operate these devices if road traffic con-
ditions permit. If you are unsure about the
surrounding conditions, pull over to a safe
location and make entries only while the vehi-
cle is stationary.
You must observe the legal requirements for
the country in which you are currently driving
when operating COMAND Online.
The COMAND Online Mercedes-Benz Apps
and Internet access are available via the Blue-
tooth® interface or via the data-enabled MB
SAP module.
In order to use the functions, the following
conditions are necessary:
RThe mobile phone supports the DUN Blue-
tooth® profile (Dial-Up Networking) and is
connected to COMAND Online via the Blue-
tooth® interface (Y page 426). The DUN
Bluetooth® profile enables the mobile
phone to establish a dial-up connection to
the Internet.
RYou need a valid mobile service contract
with a data option, which is used to calcu-
late the associated connection costs.
RThe access data of the mobile phone net-
work provider must be set on COMAND
Online for the connected mobile phone
(Y page 464).
iIf the connected mobile phone supports
the PAN Bluetooth profile (Personal Area
Network), you can use the automatic con-
figuration function.
iYou can obtain more detailed information
about suitable mobile phones on the Inter-
net at http://www.mercedes-
benz.com/connect or from your
Mercedes-Benz Service Centre.
iIf you use incorrect access data, addi-
tional costs may be incurred. This can hap-
pen when you use details that are different
from the contract or details from another
contract/data package.
Online and Internet 463
COMAND Online
Z
iThe availability of individual Mercedes-
Benz Apps may vary depending on the
country.
iThe terms of use are shown when
COMAND Online is used for the first time
and then once a year thereafter. Only read
and accept the terms of use when the vehi-
cle is stationary.
iThe driver cannot have Internet pages
shown on his side of the vehicle while it is
in motion. The front passenger can use this
function via SPLITVIEW (Y page 364).
Connection difficulties while the vehi-
cle is in motion
The following could be the cause of call dis-
connection:
Rinsufficient GSM/UMTS network coverage
Rthe vehicle has moved into a GSM cell with
no free channels
Rthe SIM card used is not compatible with
the network available
Ryou are using a mobile phone with "Twin-
card" and the mobile phone with the sec-
ond SIM card is logged into the network at
the same time.
Function restrictions
You will not be able to use the mobile phone,
will no longer be able to use the mobile phone,
or you may have to wait before using it, in the
following situations:
Rif the mobile phone is switched off
Rif the "Bluetooth®" function is switched off
in COMAND Online
Rif the Bluetooth® function is switched off on
the mobile phone while you are using Blue-
tooth® interface telephony
Rif the mobile phone is not logged into a
mobile phone network
Rif neither the mobile phone network nor the
mobile phone allow simultaneous use of a
phone and an Internet connection
iIt is possible that you may not be able to
receive calls when an Internet connection
is active. This depends on the mobile phone
and the mobile phone network used.
Roaming
When you are driving your vehicle in a differ-
ent country and using the COMAND Online
Internet and online functions, you may incur
additional costs (roaming fees). When you are
in a different country, your SIM card must be
enabled for data roaming. If your mobile
phone network provider does not have a data
roaming agreement with the roaming partner,
it may not be possible to establish an Internet
connection. Deactivate this function on your
mobile phone if you want to avoid data roam-
ing when you are in a different country.
Setting access data
Introduction
To use online and Internet functions, you
need Internet access data for the connected
mobile phone. You can obtain this from your
mobile phone network provider.
A selected/manually set mobile phone net-
work provider is only valid for the mobile
phone connected when the selection/setting
is made. The mobile phone network provider
is set automatically upon reconnection.
iWhen you are driving your vehicle in a dif-
ferent country and using the online and
Internet functions on COMAND Online, you
may incur additional costs (roaming fees).
iWhile initialising the mobile phone for the
Internet connection, access data which is
already on the mobile phone may be over-
written. You should therefore check the
settings on the mobile phone (see the
mobile phone operating instructions).
iAdjust the access data settings when the
vehicle is stationary. You may otherwise be
distracted from the traffic conditions,
464 Online and Internet
COMAND Online
cause an accident and injure yourself and
others.
Selecting/setting Internet access data
Calling up the list of mobile phone net-
work providers
XTo select ® Tel from the main function bar:
turn and press the controller.
XTo select the Internet: turn and press the
controller.
The carousel menu for the Internet func-
tions appears.
XSelect Settings by sliding ÆV and turning
cVd the COMAND controller and press
W to confirm.
When you connect the mobile phone to
COMAND Online for the first time
(Y page 426), there is no mobile phone net-
work provider preset. Provider is followed
by the words Not selected.
If a mobile phone is connected and a mobile
phone network provider has been selected,
the name of the mobile phone network is
shown after Provider.
XPress W the COMAND controller.
The list of mobile phone network providers
appears.
List of mobile phone network providers (empty)
In order to set the access data of the mobile
phone network provider you can:
Rselect the predefined access data of the
mobile phone network provider
(Y page 466)
Rfor automatic configuration – this option
only appears in the list of providers if the
connected mobile phone supports the
Bluetooth® PAN (Personal Area Network)
profile (Y page 465).
Rmanually set the access data of the mobile
phone network provider (Y page 468)
Configuring access data automatically
Requirement: your telephone must be con-
nected to COMAND Online via Bluetooth®
and must support the Bluetooth® PAN profile.
Option 1 if your telephone is not yet config-
ured for Internet access:
XSelect the ® icon in the main function bar
by sliding ZV and turning cVd the
COMAND controller and press W to con-
firm.
You will see a message informing you that
automatic configuration is possible.
XSelect Yes and press W to confirm.
Option 2:
XIn the list of mobile phone network provid-
ers, select Autom. configuration
<Device_name> by turning cVd the
Online and Internet 465
COMAND Online
Z
COMAND controller and press W to con-
firm (Y page 465).
The configuration data is transferred from
the mobile phone. If the configuration is
successful, a # dot appears in front of
Autom. configuration
<Device_name>.
Selecting access data of the mobile phone
network provider
Searching for providers
XSelect Search for providers in the
mobile phone network providers list by
turning cVd the COMAND controller and
press W to confirm (Y page 465).
A list of countries appears.
XSelect the country of your mobile phone
network provider, e.g. Germany, and press
W to confirm.
The list of available mobile phone network
providers appears.
iThe access data for the mobile phone net-
work provider is selected once for the
mobile phone connected and is loaded
again each time the mobile phone is con-
nected (Y page 465).
iYou must set the access data of the
mobile phone network provider who pro-
vides the SIM card and the associated data
package (access settings) for the connec-
ted mobile phone. The access data remains
the same if you are in a different country
(roaming). The access data of another net-
work is not selected.
There are mobile phone network providers
who offer multiple access data. This
depends on the data package used, for
example.
The mobile phone network provider only
has one access setting
XSelect the mobile phone network provider
by turning cVd the COMAND controller
and press W to confirm.
A menu appears.
XTo check preset access data: select
Edit and confirm with W.
The list of access data appears
(Y page 468).
XCheck the access data.
466 Online and Internet
COMAND Online
X If the access data is correct: press the
% reset button or the & symbol and
press W to confirm.
You can now accept the access data of the
mobile phone network provider.
XSelect Save and press W to confirm.
The list of mobile phone network providers
appears; the access data of the provider
has been accepted.
X To edit the access data: proceed as
described for manually entering the access
data (Y page 468).
When you confirm the edited access data,
the list of mobile phone network providers
appears and displays the selected provider.
If, after selecting a mobile phone network
provider, several access settings are dis-
played:
XSelect the appropriate access setting by
turning cVd the COMAND controller and
press W to confirm.
A menu appears.
XTo check access settings: select Edit
and press W to confirm.
The list of access data appears
(Y page 468).
XCheck the access data.
XIf the access data is correct: press the
% reset button or the & symbol and
press W to confirm.
You can now accept the access data of the
mobile phone network provider.
XSelect Save and press W to confirm.
The list of mobile phone network providers
appears; the access data of the provider
has been accepted.
XTo edit the access data: proceed as
described in "Manually setting the access
data of the mobile phone network provider"
(Y page 468).
When you confirm the edited access data,
the list of mobile phone network providers
appears and displays the selected provider.
List of mobile phone network providers with the
selected provider
The currently selected access settings (# dot
in front of the entry) are used for the connec-
ted mobile phone.
XTo return to the carousel view: press the
% back button twice.
or
XPress W the COMAND controller and then
the % back button.
Online and Internet 467
COMAND Online
Z
Manually setting the access data of the
mobile phone network provider
List of access data (new provider)
Calling up the list of access data
XConfirm Create new provider in the list
of mobile phone network providers by
pressing W the COMAND controller.
The list of access data appears. The stand-
ard name Provider <x> is automatically
entered into the Provider field. You can
now make the entries.
iThe access data of the mobile phone net-
work provider is set once for the connected
mobile phone.
Explanation of the access data
Input field Meaning
Provider: Name of the provider to
be displayed in the list of
mobile phone network
providers. The name can
be freely selected.
The standard entry is
Provider <x>.
Ph. number: Access number for estab-
lishing the connection
iThe access number
depends on the mobile
phone used. For GSM/
UMTS mobile phones,
*99***1# is used as a
standard.
Access
point:
APN network access point
(Access Point Name)
You can obtain this infor-
mation from your mobile
phone network provider.
iEntry is not necessary
for all mobile phone
network providers and
mobile phones.
User ID: The user identification
can be obtained from your
mobile phone network
provider.
iEntry is not necessary
for all mobile phone
network providers.
Password: The password can be
obtained from your
mobile phone network
provider.
iEntry is not necessary
for all mobile phone
network providers.
468 Online and Internet
COMAND Online
Input field Meaning
DNS address: The DNS addresses
(Domain Name Service)
can be negotiated auto-
matically or entered man-
ually. The required infor-
mation can be obtained
from your mobile phone
network provider.
iMost mobile phone
network providers sup-
port the Automatic
function. If you selected
the Manual option, you
are usually required to
enter a DNS address.
DNS 1:
DNS 2:
Fields for entering the
DNS server addresses
manually. The address
can be obtained from your
mobile phone network
provider.
Entering access data
XIn the list of access data, confirm the Pro‐
vider input field by pressing
W(Y page 468).
An input menu appears.
XEnter the provider (Y page 369).
XTo enter the phone number: in the list of
access data, select the Ph. number: input
field by sliding ÆV or turning cVd the
COMAND controller and press W to con-
firm.
The input menu for the phone number
appears.
XEnter the telephone number.
XTo enter the access data: in the list of
access data, select the Access point:
input field and confirm by pressing W .
XEnter the access data.
XTo enter the user ID: in the list of access
data, select the User ID: input field and
confirm by pressing W .
XEnter the user ID.
XTo enter the password: in the list of
access data, select the Password: input
field and confirm by pressing W .
XEnter the password.
XTo set the DNS address: select Auto‐
matic or Manual with the COMAND con-
troller and press W to confirm.
Automatic: the DNS address is set auto-
matically.
Online and Internet 469
COMAND Online
Z
Manual: uses the entries in DNS 1 and DNS
2.
Entering the DNS1
Entering the example DNS
XAfter selecting Manual, select the DNS1
input field with the COMAND controller and
press W to confirm.
XEnter 172.28.4.81, for example.
Internet access data for other mobile
phones
If the access data is already available in the
list of mobile phone network providers, you
can use it for additional mobile phones.
The following prerequisites are required for
this:
Rthe additional mobile phone must be con-
nected.
Rthe access data must apply to the mobile
phone contract of the currently connected
mobile phone.
XSelect a provider from the list of mobile
phone network providers by turning cVd
the COMAND controller and press W to
confirm (Y page 466).
After you select the provider, the list of
mobile phone network providers is closed.
The selected provider is entered.
Managing access data of the mobile
phone network provider
Overview
The access data of the mobile phone network
provider can be:
Redited
Rcopied, then edited and accepted for a new
provider name
Rdeleted
iChanges that you make to the access
data of a mobile phone network provider
apply to all mobile phones that use this
access data.
iWhen the Internet connection is active,
you cannot edit or delete the access data
of the currently set mobile phone network
provider.
Editing the access data
XSelect a provider from the list of mobile
phone network providers by turning cVd
the COMAND controller (Y page 466).
XSelect the symbol to the right of the entry
by sliding VY the COMAND controller and
press W to confirm.
XConfirm Edit by pressing W.
The access data is displayed.
XEdit the access data. A description of the
entry can be found under "Manually setting
the access data of the mobile phone net-
work provider" (Y page 468).
470 Online and Internet
COMAND Online
Saving access data under a new provider
name
XSelect a provider from the list of mobile
phone network providers by turning cVd
the COMAND controller (Y page 466).
XSelect the symbol to the right of the entry
by sliding VY the COMAND controller and
press W to confirm.
XConfirm Copy provider entry by press-
ing W.
The access data is displayed.
XEdit the access data. A description of the
entry can be found under "Making entries"
in the "Manually setting the access data of
the mobile phone network provider" sec-
tion (Y page 468).
Deleting the access data of the mobile
phone network provider
XSelect a provider from the list of mobile
phone network providers by turning cVd
the COMAND controller (Y page 466).
XSelect the symbol to the right of the entry
by sliding VY the COMAND controller and
press W to confirm.
XConfirm Delete by pressing W.
A prompt appears asking whether you wish
to delete the access data.
XSelect Yes or No and press W to confirm.
Selecting the length of time for auto-
matic disconnection from the Internet
If a preset time has elapsed during which nei-
ther the online functions nor the Internet have
been used, COMAND Online automatically
disconnects from the Internet.
XSelect Settings in the carousel view by
sliding ÆV and turning cVd the COMAND
controller and press W to confirm.
XSelect Disconnect automatically
after: and press W to confirm.
The # dot indicates the current setting.
XSelect 5 min, 15 min or Off and press
W to confirm.
Off switches the function off.
An active Internet connection is identified by
the double arrows on the top right of the dis-
play.
Establishing/ending the connection
Establishing the connection
The conditions for establishing a connection
are described in "General notes"
(Y page 463).
A connection can be established by:
Rentering a web address (Y page 480).
Rcalling up the Mercedes-Benz Mobile web-
site (Y page 479)
Rcalling up a Mercedes-Benz App
(Y page 479).
Rcalling up a Favourite (Y page 480).
Rcalling up the Internet radio .
XTo cancel the connection: while the con-
nection is being established, select Can‐
cel.
or
XPress the ~ button on COMAND Online
or on the multifunction steering wheel.
iIf a phone call is made at the same time
as the active Internet connection, the ¡
symbol is displayed in :. The Internet con-
nection remains active depending on the
Online and Internet 471
COMAND Online
Z

mobile phone and mobile phone network
used.
Ending the connection
XPress the ~ button on COMAND Online
or on the multifunction steering wheel.
or
XTo select the scissors symbol on the bot-
tom right of the carousel view: turn and
press the controller.
iIf the mobile phone Internet connection is
cancelled, COMAND Online tries to recon-
nect. You should therefore always close the
connection on COMAND Online or via the
multifunction steering wheel.
Google™ Local Search
Calling up the local search menu
XIn the main function bar, select and confirm
the ® symbol using the controller.
The carousel view appears.
XBring the Mercedes-Benz Apps panel to
the front by turning the COMAND controller
and pressing to confirm.
The Mercedes-Benz Apps menu appears.
XBring the Google Local Search panel to
the front and press to confirm.
XTo exit the menu: select Back using the
controller.
Search
Entry restriction
It is only possible to enter a search term in
the input menu when the vehicle is stationary.
Entering a search term
XIn the Local Search menu, select Search.
The input menu appears.
XTo enter using the character bar: enter
the search term.
XTo enter characters using the number
pad: press the number keys in rapid suc-
cession.
The character appears when the key is
pressed. The first available character is
highlighted.
XAfter entering the search term, select
¬and confirm with the controller.
A menu appears. Here, you can select
where the destination search should begin.
Selecting a search position
XAfter a search term has been entered and
confirmed, a menu appears.
COMAND Online searches for available
POIs for the search term entered:
Rnear the current vehicle position
Ralong the calculated route
If a destination has previously been
entered, the function is available.
Rnear the destination
If a destination has previously been
entered, the function is available.
Rnear an address
Rnear the current vehicle position
Rnear the destination
If a destination has previously been
entered, the function is available.
Rnear another location
XAfter selecting Near destination, enter
an address and confirm.
The search results are displayed.
XAfter selecting Other town, enter an
address and confirm.
The search results are displayed.
Using search results
XSelect an entry from the list of search
results using the controller (turn).
A menu appears.
472 Online and Internet
COMAND Online

XTo display details: select Details.
The address of the selected entry is dis-
played.
XTo use a search result as the destina-
tion: select Use as destination.
You then switch to navigation mode and
can start route calculation.
iThe search result is stored in the
"Last destinations" memory at the same
time (Y page 417). You can take the desti-
nation from this memory and save it per-
manently in the contacts (Y page 417).
XTo call a destination: select Call.
You then switch to the telephone function
and make the call (Y page 435).
iIf there is no phone number available, the
menu item cannot be selected.
XTo import a destination: select Import.
You can choose whether you want to save
the POI as a personal POI on the SD mem-
ory card or in the address book.
The entry is stored in the address book. The
<Destination x> was imported into
the address book message appears.
XConfirm with OK.
iIf there is no SD memory card in the slot,
the As personal POI menu item cannot
be selected.
XInsert the SD memory card (Y page 495).
XTo save as a personal POI: confirm Save
as personal POI.
The entry is saved as a personal POI on the
SD memory card.
iYou can use a personal POI in navigation
mode for route calculation.
If the personal POI is saved on the SD mem-
ory, you can also use it for route calculation
in another vehicle.
XSave to address book: select Add to
address book.
The entry is stored in the address book.
Popular searches
This function allows you to search using pre-
defined search criteria.
XBring Popular searches in the local
search menu to the front by turning the
controller and pressing to confirm.
A menu displays the available search crite-
ria.
XSelect and confirm search criteria.
XProceed as described in the "Selecting the
search position" section (Y page 472). If
the vehicle is stationary, the search results
can be supplemented manually, e.g. "Hotel
Adler".
Proceed as described in the "Selecting the
search position" section (Y page 472). If
the vehicle is stationary, the search results
can be supplemented manually, e.g. "Hotel
Sakura".
Search history
This function offers you the previous search
queries.
XIn the Local Search menu, select Last
search queries.
The previous search queries are shown
with the most recent at the top.
XSelect and confirm search criteria.
XProceed as described in the "Selecting the
search position" section (Y page 472). If
the vehicle is stationary, the search results
can be supplemented manually, e.g. "Hotel
Adler".
Proceed as described in the "Selecting the
search position" section (Y page 472). If
the vehicle is stationary, the search results
can be supplemented manually, e.g. "Hotel
Sakura".
Destination/route download
Online and Internet 473
COMAND Online
Z

Weather
Introduction
COMAND can receive weather forecasts any-
where in the world via online connection and
display them in an information chart (current
day, 5-day forecast) or in the weather map.
The weather map can display the following
weather data with symbols:
Rhazard icons (e.g. storms, slippery condi-
tions)
Rprecipitation radar (e.g. rain, snow)
Ratmospheric pressure conditions
Rtemperatures
Rcloud cover
Rwind direction and speeds
Switching the weather display on/off
XTo switch on: in the main function bar,
select the ® symbol with the controller
and press the confirm.
The carousel view appears.
XTurn the controller until Mercedes-Benz
Apps is brought to the front and press to
confirm.
The Mercedes-Benz Apps carousel view
appears.
XTurn the controller until Weather is brought
to the front and press to confirm.
The information chart shows the current
weather at the current vehicle position (fac-
tory setting). You can change the default
view and the default location in the Options
menu (Y page 477).
You see the following information:
Rthe time of the current weather report
Rthe current temperature
Rinformation on the weather (e.g. cloudy,
rain)
Rthe maximum daytime temperature
Rthe minimum daytime temperature
Rthe probability of rain
Rthe forecast for the current day (three time
intervals)
XTo switch to a five-day forecast: select
5-day.
The information chart displays the forecast
for the next five days in the currently selec-
ted location.
XTo return to the current weather infor-
mation: select Current.
XTo switch off: press the % button.
or
XSelect Back.
Irrespective of the option chosen, the car-
ousel view will appear.
Displaying additional information
In addition to the current temperatures, you
can also display information such as humidity
and air quality (if the information is available).
XIn the information chart, select Info.
The information chart displays information
for the selected location.
Selecting the location
Introduction
You can select the following options for the
weather forecast:
Rthe current vehicle position
Rthe destination
Ra winter sports area
Ra location anywhere in the world
You can select the location from the informa-
tion chart (Y page 474) or the map
(Y page 475). Weather information is sup-
plied by the nearest weather station.
Selecting the location from the informa-
tion chart
XIn the information chart, select Position.
A menu appears.
474 Online and Internet
COMAND Online
XTo select the current vehicle position:
confirm Current position.
XTo select a destination: select Near des‐
tination.
iIf a route has been calculated, you can
select Near destination. The menu item
is otherwise greyed out.
XTo select a winter sports area: select In
winter sports area.
A list of countries appears.
XSelect a country, e.g. ANDORRA, and press
to confirm.
The available winter sports areas are dis-
played.
XSelect a winter sports area from the menu.
The information chart shows information
on:
Rtype of skiing
Rsnow conditions
Rtemperatures
XTo select a location: select Other loca‐
tion.
An input menu appears.
XEnter the search area. Character entry
(Y page 371).
The information chart with the weather
forecast appears when the search area has
been entered.
Entry Example
Postcode 10117
City Berlin
Address Unter den Linden
Airport code TXL (Tegel Airport)
Selecting the location from the weather
map
XCall up the weather map and move to the
desired location (Y page 475).
XPress the controller.
The menu bar is shown.
XPress the controller again and confirm
Display weather.
The information chart displays the current
weather for the selected location.
Weather map
Calling up the weather map
XIn the information chart, select Map.
The map appears in a scale of 20 km.
XTo display the crosshair: slide ZV the
controller.
XTo scroll the weather map: slide
XVY,ZVÆ or aVb the controller.
The weather map moves in the correspond-
ing direction under the crosshair.
XTo change the map scale: as soon as you
turn the controller, the scale bar appears.
XTurn until the desired scale is set.
iThe data is downloaded again from the
server for these functions. This can delay
the display of the weather map.
Showing/hiding the menu in the weather
map
XTo show: press the controller in the
weather map.
XTo hide: slide ZV the controller.
Switching to the weather information dis-
play in the map
XDisplay the menu on the weather map
(Y page 475).
XSelect View
Online and Internet 475
COMAND Online
Z
Weather char-
acteristic
Display in the map
Hazard icons Shows warnings
Weather
radar
Displays the rain radar as
a coloured area on the
map
Atmospheric
pressure
Displays air pressure
with isobars and as a col-
oured area on the map
Temperatures Displays the tempera-
tures
Cloud cover Displays the cloud cover
Winds Displays wind direction
with an arrow and wind
speed with colouring
iThe hazard icon display is preset in the
factory. This presetting can be changed in
the Options menu (Y page 477).
XSelect the weather characteristic.
The # dot indicates which weather charac-
teristic is currently displayed on the map.
You can select one weather characteristic
at a time.
Legend
XDisplay the menu on the weather map
(Y page 475).
XSelect View
XSelect Legend.
The legend is displayed in accordance with
the currently selected weather character-
istic.
XTo switch back to the information
chart: display the menu on the weather
map (Y page 475).
XSelect Display weather.
Memory functions
Storing a location in the memory
You can save locations that are called up fre-
quently in ten preset positions (0, 1 – 9).
XSelect the location (Y page 474).
XPress and hold a number key.
When the location is saved, the number of
the selected preset comes before the name
of the place in the caption.
Selecting a location from the memory
XQuick select: when the weather display
(COMAND Online) is switched on and an
entry is available, press a number key, e.g.
l.
The information chart appears and displays
the weather information.
XFrom the weather memory: in the infor-
mation chart, select Position.
XSelect Memory.
XSelect a preset position that has an entry
with the controller and press to confirm.
The information chart appears and displays
the weather information.
Options
Introduction
You can select options for the following
Mercedes-Benz Apps on COMAND Online:
RLocal search (Y page 477)
RWeather (Y page 477)
RDestination/route download
(Y page 478)
You can reset the selected options to the
default settings (Y page 478).
476 Online and Internet
COMAND Online

Calling up the Options menu
XIn the main function bar, select and confirm
the ® symbol using the controller.
The carousel view appears.
XBring the Mercedes-Benz Apps panel to
the front by turning the controller and
pressing to confirm.
XSelect Options.
Selecting options for the local search
Setting the search radius
XIn the Options menu, select Local
search.
The menu shows the current settings.
XConfirm the entry after Search radius:.
The # dot indicates the currently selected
search radius.
XSelect the desired entry.
The selected setting is accepted.
XTo exit the menu: select Back.
Selecting a service provider
XIn the Options menu, select Local
search.
The menu shows the current settings.
XSelect the entry after Service Pro‐
vider:.
The # dot indicates the currently selected
service provider.
iIf the entry is greyed out, you cannot
select the service provider.
XSelect and confirm the entry.
The selected service provider is accepted.
XTo exit the menu: select Back.
Deleting/saving search queries
XSelect the entry Delete search quer‐
ies.
A prompt appears, asking whether you
really wish to delete the search queries.
XSelect Yes or No and press to confirm.
Selecting options for the weather dis-
play
Setting the default view
You can specify which view is called up after
activating the weather display (Y page 474).
You can make the following settings:
Rcurrent weather
Rfive-day forecast
Rinfo view
Rlast view
XIn the Options menu, select
Weather(Y page 477).
The menu shows the current settings.
XConfirm the entry after Default view:.
The # dot indicates the currently selected
default view.
XSelect an entry with the controller and con-
firm.
The selected view is accepted.
XTo exit the menu: select Back.
Setting the default location
You can make the following settings:
Rcurrent position
Rcurrent destination
Rpresets
XIn the Options menu, select
Weather(Y page 477).
The menu shows the current settings.
XSelect the entry after Default loca‐
tion:.
The # dot indicates the currently selected
default location.
XSelect an entry with the controller and con-
firm.
The selected location is accepted.
XTo exit the menu: select Back.
Online and Internet 477
COMAND Online
Z

Selecting weather data for the map view
The weather map can display the following
weather data:
Rhazard icons (e.g. storms, slippery condi-
tions)
Rprecipitation radar (e.g. rain, snow)
Ratmospheric pressure conditions
Rtemperatures
Rcloud cover
Rwind direction and speeds
You can select one feature each for the map
view.
The availability of weather information is
country-dependent.
XIn the Options menu, select
Weather(Y page 477).
The menu shows the current settings.
XSelect the entry after Map view:.
The # dot indicates the currently selected
feature.
XSelect and confirm the entry.
The selected feature is accepted.
XTo exit the menu: select Back.
Setting options for destination/route
download
Specifying the ID for the download
You can replace the vehicle identification
number (ID) with your e-mail address. The
vehicle identification number is usually
entered.
XIn the Options menu, select Download
destination/routes with the controller
and confirm (Y page 477).
The menu shows the current settings.
XConfirm the entry next to ID:.
An input menu appears.
XEnter an e-mail address. Character entry
(Y page 369).
XAfter entry, select ¬ and confirm.
The e-mail address is entered in the menu.
An e-mail will be sent to your e-mail address
shortly afterwards. You must confirm it
within 48 hours. Otherwise, your previous
ID will continue to be used.
XTo complete the settings, check your mail-
box and follow the link in the e-mail.
XTo exit the menu: select Back.
Setting the type of import
You can choose between manual and auto-
matic importing.
XSelect the entry after Import:.
The # dot indicates the current setting.
XSelect Manual or Automatic.
The setting is accepted.
XTo exit the menu: select Back.
Deleting/keeping POIs after they have
been imported to the server
XSelect the entry after Import and
delete:.
The # dot indicates the current setting.
XSelect Yes or No and confirm.
The setting is accepted.
Yes deletes the POIs after importing to the
server.
No does not delete the POIs on the server.
XTo exit the menu: select Back.
iRoutes and destinations are automati-
cally deleted on the server after seven
days.
Resetting adjustments
The reset function resets all Mercedes-Benz
Apps settings to the factory settings. After
resetting, Google™ can only send routes and
destinations to the vehicle identification num-
ber (ID) once you have activated your e-mail
address again (Y page 478).
478 Online and Internet
COMAND Online
XIn the main function bar, select and confirm
the ® symbol using the controller.
The carousel view appears.
XBring the Mercedes-Benz Apps panel to
the front by turning the controller and con-
firm.
XSelect Options.
XSelect Reset.
A prompt appears asking whether you
really wish to reset.
XSelect Yes or No and confirm.
If you select Yes, the settings are reset.
If you select No, the process will be cancel-
led.
Mercedes-Benz Apps
Mercedes-Benz Mobile Website
The COMAND Online functions contain the
Mercedes-Benz Mobile Website as a prede-
fined favourite.
XIn the main function bar, select and confirm
the ® symbol using the controller.
The carousel view appears.
XBring the Mercedes-Benz Mobile Web‐
site panel to the front by turning the
COMAND controller and pressing to con-
firm.
The Mercedes-Benz home page appears.
iYou cannot delete the Mercedes-Benz
Mobile Website panel.
Further Mercedes-Benz Apps
You can call up additional Mercedes-Benz
Apps, such as Facebook, or Google™ serv-
ices, such as Street View or Panoramio, here.
The following examples show how to call up
a Mercedes-Benz App, for example Facebook,
and generally how to call up Google™ serv-
ices.
XTo call up Facebook: in the main function
bar, select the ® symbol with the control-
ler and press to confirm.
The carousel view appears.
XSelect the Mercedes-Benz Apps panel.
The Mercedes-Benz Apps menu appears.
XConfirm the Facebook entry.
The Facebook homepage appears.
XTo call up Google™ services: this is done
through Google™ Local Search
(Y page 473).
iFacebook is a social networking website.
This App allows you to log in from your
vehicle and use Facebook's many func-
tions.
Google™ Street View allows you to view
streets in 360-degree panoramas.
Google™ Panoramio expands Google Local
Search to include photos at the selected
position.
Online and Internet 479
COMAND Online
Z
Internet
Calling up a website
Display restriction
Internet pages cannot be shown while the
vehicle is in motion.
Calling up the carousel view
XIn the main function bar, select the ® sym-
bol using the controller.
The carousel view appears.
You can now enter a web address
(Y page 480).
To select in the carousel view, you must first
create favourites (Y page 482).
Entering a web address
You can enter the web address using either
the character bar or the number keypad
(Y page 371).
XCall up the carousel view (Y page 480).
XSelect www with controller and press.
An input menu appears.
XTo enter using the character bar: enter
the web address in the input line. Character
entry (Y page 369).
As soon as the first letter has been entered
in the input line, a list appears below it. The
list shows web addresses that begin with
the letters you have entered and web
addresses that have already been called
up.
The list is empty the first time you call it up.
XTo enter characters using the number
pad: press the number keys in rapid suc-
cession.
The character appears when the key is
pressed. The first available letter is high-
lighted. Enter the character using the char-
acter bar (Y page 371).
XAfter entering the web address, confirm the
¬ symbol using the controller.
The website is called up.
XTo select a web address from the list:
slide ZV the controller in the input menu
with character bar.
The list is activated.
XSelect and confirm the web address.
The web address is entered in the input line.
XPress the controller.
The website is called up. The Establish‐
ing data connection to <provider
name>... message appears.
Selecting favourites
You must create at least one favourite in the
carousel view for this function (Y page 482).
XCall up the carousel view (Y page 480).
XIn the carousel view, bring a favourite to the
front with the controller and press to con-
firm.
The website is called up.
Menu functions
Calling up a menu
XTo call up the shortcut: highlight the
selectable item on the page with the con-
troller and press to confirm.
XTo call up the entire menu: when the
shortcut is displayed, slide VÆ the control-
ler.
or
XSelect a free area on the website with the
controller ZVÆ, XVY or aVb.
Opening
Opens the website to the selectable item.
XCall up the menu (Y page 480).
XSelect Open.
Entering a URL
XCall up the menu (Y page 480).
XSelect Enter URL.
XEnter a web address (URL) (Y page 480).
480 Online and Internet
COMAND Online

Calling up the previous website
XCall up the menu (Y page 480).
XSelect Previous.
Calling up the next website
XCall up the menu (Y page 480).
XSelect Next.
View
You can use this function to:
Rposition a selection window on websites
that are larger than the display
Rselect a window that is already open
XCall up the menu (Y page 480).
XSelect View
or
XPress the z key on the number keypad.
iYou cannot use the z key if a phone
call is being made.
XTo position the selection window: select
Full-screen view of current page.
A selection window appears on the web-
site.
XSlide XVY, ZVÆ or aVb the controller and
position the selection window on the web-
site.
XPress the controller.
The selected section is enlarged.
XTo display and select open windows:
select Display open windows.
The carousel view appears.
XPress the controller.
The website is displayed.
Exiting the menu
XCall up the menu (Y page 480).
XSelect End.
The Internet browser is closed. If other win-
dows are opened in the background,
another prompt appears.
Other menu functions
Opening in a new window
You can open up to five windows simultane-
ously.
XCall up the menu (Y page 480).
XSelect Open in new window.
XTo select the window: select View.
XIn the carousel view, select the websites
with the controller.
Add to favourites
Adds the current website to the favourites.
The website can then be called up using the
carousel view. You can save up to 20 favour-
ites in the carousel view.
XCall up the menu (Y page 480).
XSelect Add to favourites.
The following message appears: The page
has been added as a favourite.
Display favourites
XCall up the menu (Y page 480).
XSelect Display favourites.
The favourites are shown in the carousel
view.
Further information on favourites
(Y page 482).
Reloading a website
XCall up the menu (Y page 480).
XSelect Refresh.
Close active window
XCall up the menu (Y page 480).
XSelect Close active window
or
XPress the j button to the right of the
COMAND controller.
iYou cannot use the j button if a
phone call is being made.
Online and Internet 481
COMAND Online
Z

Displaying the complete web address of the
selected link
XCall up the menu (Y page 480).
XSelect Link details.
The URL appears.
XPress the controller and close the display.
Settings
The settings are described in a separate sec-
tion (Y page 483).
Favourites
Introduction
Favourites are frequently visited websites.
You have the following options for creating a
favourite:
Rin the carousel view (Y page 482)
Rvia the menu item Add to favour‐
ites(Y page 481)
Before creating a favourite in the carousel
view, you must first close active connections
(Y page 472).
You can select and edit favourites that you
have created.
Creating favourites
Creating favourites in the carousel view
XCall up the carousel view (Y page 480).
XBring the Create new favourite panel to
the front with the controller cVd or XVY.
XPress the controller.
An input menu appears.
XEnter the web address (URL) and name
using either the character bar or the num-
ber keypad. Character entry (Y page 369).
XConfirm the ¬ symbol with controller.
The favourite has been created.
Adding a favourite via the menu
XWhen a website is displayed, call up the
menu.
XSelect Add to favourites from menu
(Y page 481).
Selecting favourites
XCall up the carousel view (Y page 480).
XSelect a favourite from the carousel display
with the controller.
The favourite is opened.
Editing favourites
Editing favourites in the carousel view
XCall up the carousel view (Y page 480).
XSelect Edit.
An input menu appears.
XEnter the web address (URL) and name
using either the character bar or the num-
ber keypad (Y page 369).
Editing favourites in the Favourites menu
XCall up the menu (Y page 480).
XSelect Display favourites.
The favourite is displayed.
XPress the controller.
The Favourites menu appears.
XSelect Edit.
or
XPress the g key on the number keypad.
An input menu appears.
XEnter the web address (URL) and name
using either the character bar or the num-
ber keypad. Character entry (Y page 369).
Other functions in the Favourites menu
Opening current favourites
XCall up the Favourites menu (Y page 482).
XSelect Open.
Opens the current favourites in a new win-
dow.
Opening in a new window
XCall up the Favourites menu (Y page 482).
XSelect Open in new window.
482 Online and Internet
COMAND Online

Calling up details
XCall up the Favourites menu (Y page 482).
XSelect Details.
or
XPress the z button.
The detailed display appears.
Exiting
XCall up the Favourites menu (Y page 482).
XSelect End.
or
XPress the % button to the left of the
controller.
The Favourites menu closes.
Deleting favourites
Deleting favourites in the carousel view
XCall up the carousel view (Y page 480).
XSelect Delete.
A query appears.
XSelect Yes and confirm.
The favourite is deleted.
If you select No, the process will be cancel-
led.
Deleting favourites in the Favourites
menu
XSelect Delete.
or
XPress the j button.
The favourite is deleted.
Settings
Settings menu
XCall up the menu (Y page 480).
XSelect Setup.
You can activate/deactivate the following
settings:
RDownload images automatically
It may take some time to download the
contents of websites that contain a large
number of images. Therefore, it may be
useful to deactivate this option.
RBlock popups
Popups are windows (usually with adver-
tisements) which are displayed automati-
cally when you call up a website. You can
block these displays.
REnable JavaScript
JavaScript makes it possible to display and
interact with dynamic content on the web-
site.
REnable cookies
Some websites save information in small
text files (cookies) in COMAND Online. You
can determine whether cookies may be
stored.
RCharacter size
You can select the font size which is used
when displaying the website.
RCharacter code
You can select a different character set
here, e.g. if the characters of a website
appear distorted.
RDeleting private data
Deletes data which has been saved by the
browser during Internet use.
Changing settings
XSelect the controller settings.
Switch the setting on O or off ª.
XSelect Character size or Character
code with the controller.
iIf you change the settings, the websites
may not be displayed correctly.
Deleting private data
XSelect Delete private data.
A menu appears.
Online and Internet 483
COMAND Online
Z
XSelect the setting with the controller.
The # dot in front of an entry indicates
which setting is active.
or
XSelect Delete all data on exiting.
Switch the setting on O or off ª.
Option Function
All Deletes all private
data.
Cache Deletes data in the
temporary storage.
Cookies Deletes cookies that
are created by web-
sites which you have
called up.
Websites visited Deletes all websites
visited (path).
ODelete all
data on exiting
If this function is
activated O, all pri-
vate data is deleted
when you exit the
Internet browser.
iIf you reset COMAND Online to the fac-
tory settings (reset function), these set-
tings are deleted (Y page 380).
Calling up the carousel view and closing
the Internet browser
XTo call up the carousel view: press the
% button for longer than two seconds.
XTo close the Internet browser: press the
% button again for longer than two sec-
onds.
Radio
Radio mode
Switching to radio mode
XPress the $ button.
The radio display appears. You will hear the
last station played on the last waveband
selected.
484 Radio
COMAND Online
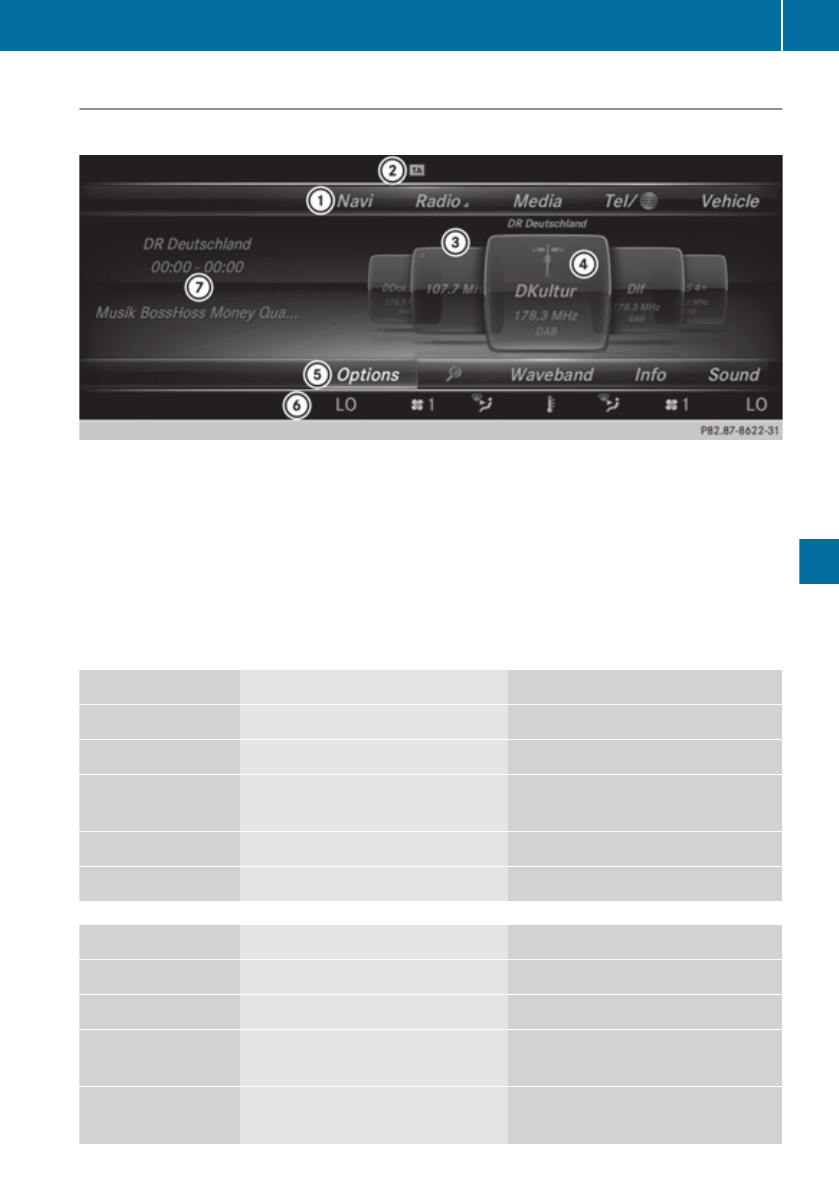
Radio basic display
XTo activate the main function and menu bar: in radio mode, slide ZVÆ the controller.
:Main function bar
;Status bar with active traffic announcements
=Main display field with available stations and additional displays
?Display of radio station selected
ARadio menu bar
BClimate control status bar
CContext display with additional radio text information
Radio menu overview
Main function bar Submenu Commentary
Radio FM/DAB radio FM/DAB radio mode
AM radio SW/MW/LW radio mode
Radio station memories 99 preset positions for radio sta-
tions
Info on radio Digital Owner's Manual
Internet radio Web radio
Menu bar Submenu Commentary
Options Tag these tracks Creates link to iTunes Store
Frequency entry Manual frequency entry
Current station list with
EPG
Station list with programme pre-
view
Start this application
from another seat
Starts COMAND Online at a differ-
ent seat
Radio 485
COMAND Online
Z
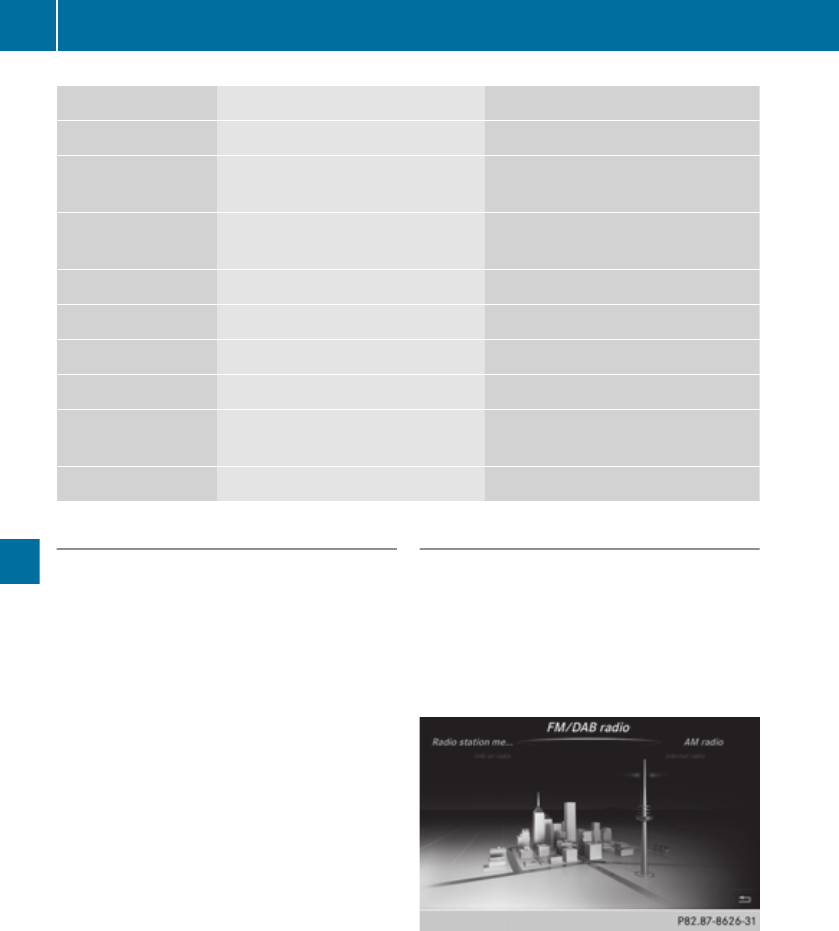
Menu bar Submenu Commentary
Station tracking Station tracking options
Display artist and track Switches artist and track display
on and off
TA Switches the traffic announce-
ments on/off
Sorting Sorts the list of stations
Edit Selects and edits station presets
èSearches for station by name
Waveband Selection of radio sources
Info Switches radio text plus informa-
tion on/off
Sound Sound and balance control
Switching to DAB radio mode
Using the function button
XPress the $ button.
The radio or DAB radio display appears.
You will hear the last station played in the
last ensemble selected.
DAB (Digital Audio Broadcasting) is an opti-
mised digital transmission standard designed
for the mobile reception of radio transmis-
sions. Several programmes are combined
into so-called ensembles and transmitted on
a single frequency.
Some stations only transmit programmes at
certain times. If you have selected a station
that has subsequently been removed from
the ensemble, it will no longer be received.
You will continue to receive the other pro-
grammes in the ensemble. You will then need
to select a different programme.
iDAB cannot be received everywhere in
Europe.
Setting the waveband
Using the function button
XPress the $ button again.
You switch between FM/DAB radio, AM
radio, Radio station memories, Info
on radio and Internet radio.
or
ADDITIONAL SETTING OPTIONS:
Using the main function bar
XIn radio mode: slide ZV the controller.
The main function bar and menu bar
appear. Radio is active.
XPress the controller.
The carousel menu appears with a selec-
tion of FM/DAB radio, AM radio, Radio
486 Radio
COMAND Online
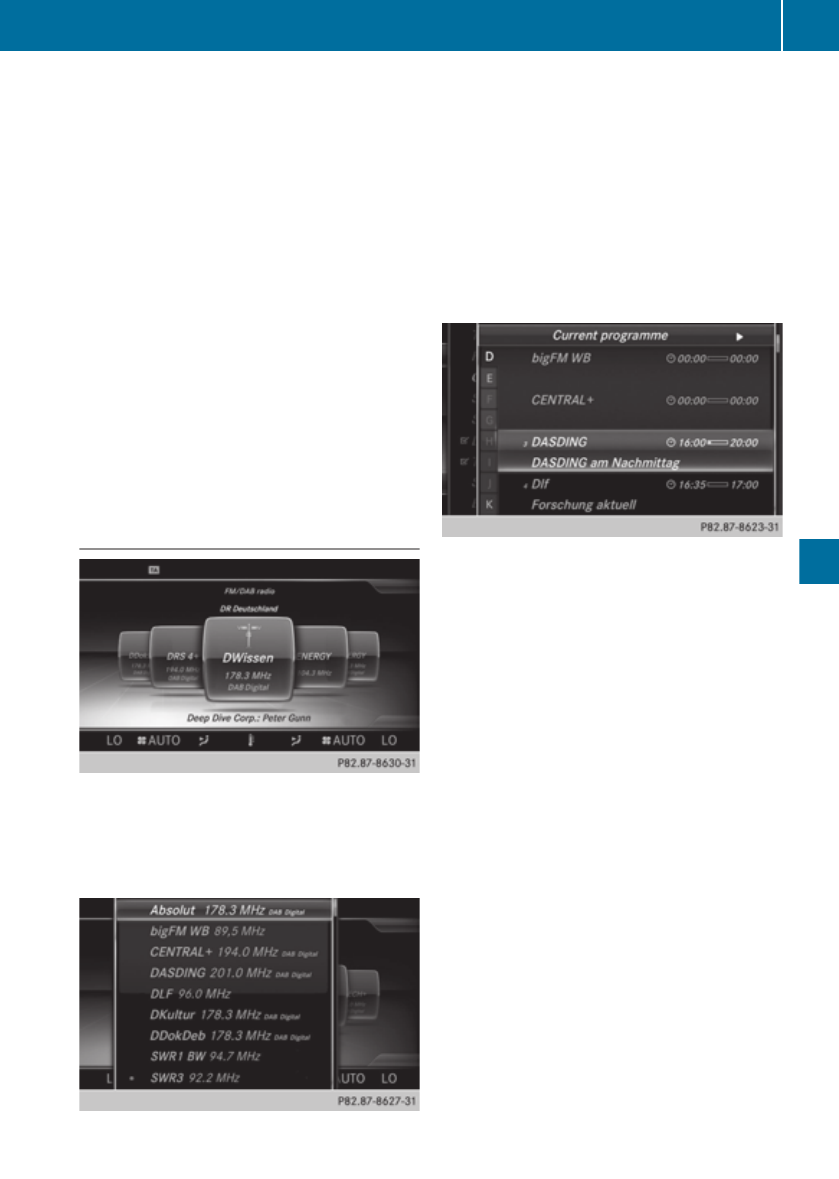
station memories, Info on radio and
Internet radio.
XTurn the controller until the required wave-
band is in the centre and press to confirm.
or
Via the menu bar
XIn radio mode: slide VÆ the controller.
The main function bar and menu bar
appear.
XTo select the Waveband: turn the controller
and press to confirm.
The carousel menu appears with a selec-
tion of FM/DAB radio, AM radio, Radio
station memories, Info on radio and
Internet radio.
XTurn the controller until the required wave-
band is in the centre.
Setting a station
From the main display field
XTurn the controller until the required sta-
tion is in the centre.
or
From the station list
iThe station list is only available in the FM/
DAB waveband. It includes all stations that
can be received.
XIn radio mode: press the controller.
The station list appears with the stations
currently available.
XTo select the desired station: turn and
press the controller.
From the current station list with EPG
XIn radio mode: slide VÆ the controller.
XSelect Options.
XSelect Current station list with
EPG.
XTo select the station: turn and press the
controller.
The loudspeaker symbol in front of a preset
position shows the station currently set.
The title of the current programme appears
below the station name. In addition to the
station name, there is also a timeline with
a progress bar.
XTo switch between Current programme
and Preview: slide XVY the controller.
Using frequency entry
XIn radio mode: slide VÆ the controller.
The radio menu bar appears.
XTo select Options: turn and press the con-
troller.
XSelect Frequency entry.
XEnter the station frequency in the entry
field using the telephone keypad or
Radio 487
COMAND Online
Z
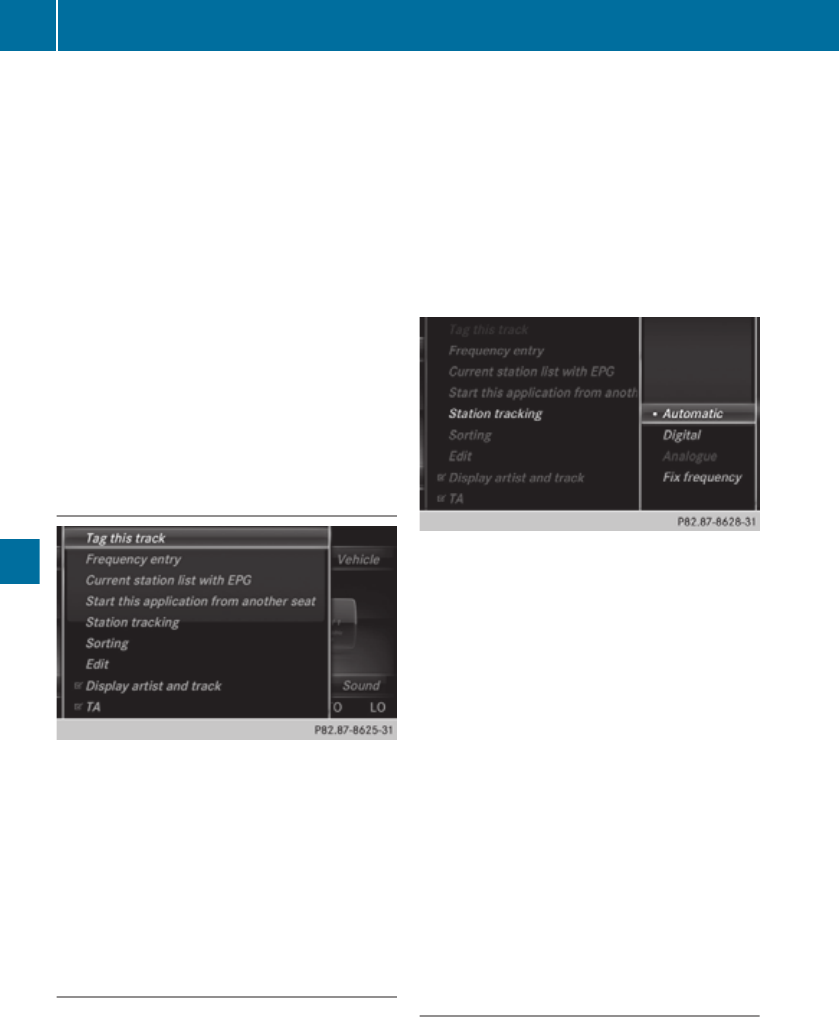
COMAND remote control, and press the
controller.
Using the search function
XIn radio mode: slide VÆ the controller.
The radio menu bar appears.
XSelect è and enter the first letters of the
required station using the controller.
As soon as there are enough characters
entered, COMAND Online automatically
recognises and enters the available sta-
tions.
Using station presets
XQuick setting:
Briefly press a number key, e.g. l.
The station stored in second place is set.
Tagging music tracks
If an Apple device is connected, the music
tracks displayed in the radio text can be pur-
chased from the iTunes Store.
XIn radio mode: slide VÆ the controller.
XSelect Options.
XSelect Tag this track.
A message will appear about connecting to
the iTunes Store.
Radio Data System (RDS)
General notes
The Radio Data System (RDS) provides inaud-
ible additional information in the FM wave-
band.
This includes, for instance, reception quality
and RDS data such as programme names and
alternative frequencies. COMAND Online
saves the data and is therefore able to switch
quickly to an alternative frequency with a bet-
ter signal.
iRDS only functions for stations which
transmit RDS data.
Switching RDS on/off
XIn radio mode: slide VÆ the controller.
XSelect Options.
XSelect Station tracking.
Automatic
Switching between alternative frequencies in
the analogue (FM) and digital (DAB) wave-
bands takes place automatically.
Digital
Station tracking only searches in the digital
waveband.
Analogue
Station tracking only searches in the ana-
logue waveband.
Frequency fix
COMAND Online stays with the stations set
even if reception is poor and does not change
to a frequency with better reception quality.
Display artist and track
XIn radio mode: slide VÆ the controller.
XSelect Options.
XYou can determine whether or not radio
text plus information is shown in the main
488 Radio
COMAND Online

display area with O or ª before Show
artist and title.
Switching traffic announcements on/
off
iYou can receive traffic announcements
(TA) from a number of FM stations. TA in
the status bar indicates that traffic
announcement reception is switched on.
XIn radio mode: slide VÆ the controller.
XSelect Options.
XYou can switch the traffic announcements
on or off with O or ª before TA.
If the traffic announcement function is
switched on, the symbol TA appears in the
status bar.
or
XPress and hold the 8 button on the
multifunction steering wheel until the
TA display in the status bar lights up or goes
out.
A warning tone sounds. If the traffic
announcement function is switched on, the
TA symbol appears in the status bar.
iWhen traffic announcements are
switched on, a traffic announcement will
interrupt the currently activated radio or
media source.
Telephone conversations and navigation
announcements are not interrupted.
Interrupting a traffic announcement
XBriefly press the 8 button on the multi-
function steering wheel.
COMAND Online switches back to the sta-
tion that was selected before the
announcement. Any subsequent new
announcements will continue to interrupt
the station.
Sorting
XIn radio mode: slide VÆ the controller.
XTo select Options: turn the controller and
press to confirm.
XSelect Sorting.
ABC/123
The current list of stations is ordered alpha-
betically.
Genre
The current list of stations is ordered accord-
ing to genre, such as Pop/Classic/Info etc.
Storing a station
iThe most important stations for your
region are already saved in COMAND
Online. There are 99 preset positions avail-
able.
XQuick store: press the number key, e.g.
l, until you hear a tone. The station is
saved to second place in the radio station
presets.
XTo save using edit: in radio mode, slide
VÆ the controller.
XTo select Options: turn the controller and
press to confirm.
XSelect Edit.
The list of saved stations appears.
XTo select the preset: turn the controller and
press.
A tone confirms that the currently selected
station has been saved to the radio station
presets.
Any preset already occupied is overwritten
by the newly saved station.
Radio 489
COMAND Online
Z
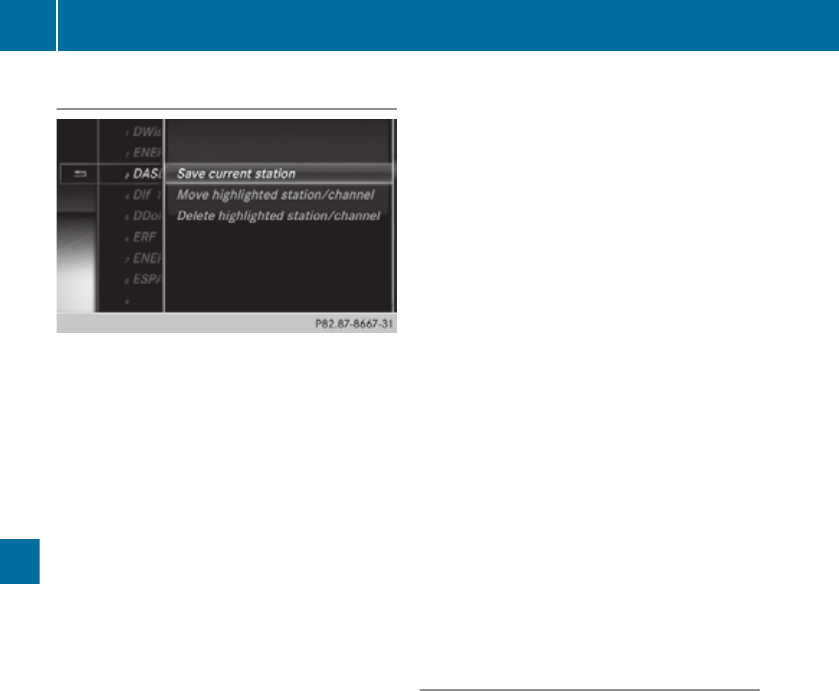
Managing preset entries
Storing current stations
XIn radio mode: slide VÆ the controller.
XTo select Options: turn the controller and
press to confirm.
XSelect Edit.
XSelect the position of the required preset:
turn the controller.
This can also be a preset position that is
already occupied, which is then overwritten
by the current station.
XSlide VY the controller.
An additional menu appears.
XTo select the Save current station
option: turn and press the controller.
The currently set station is stored in the
selected preset position. A tone signals a
successful preset entry.
Moving marked stations
XIn radio mode: slide VÆ the controller.
XTo select Options: turn the controller and
press to confirm.
XSelect Edit.
XTo select the required preset entry: turn the
controller.
XSlide VY the controller.
An additional menu appears.
XTo select the Move highlighted sta‐
tion/channel option: turn the controller
and press to confirm.
The list of stored stations appears again.
XTo move the marked station to the new
position: turn the controller and press to
confirm.
A tone signals the successful transfer of the
station to the new position in the storage
list.
Deleting marked stations
XIn radio mode: slide VÆ the controller.
XTo select Options in the menu bar: turn
and press the controller.
XSelect Edit.
XTo select the required preset entry: turn the
controller.
XSlide VY the controller.
XTo select the Delete highlighted sta‐
tion/channel option in the additional
menu: turn and press the controller.
A tone signals the successful deletion of
the station from the list.
Radio text/radio text plus
The function is available in FM mode and in
DAB radio mode.
Radio text is additional data that, in addition
to displaying the artist and track, also
includes information on the current program.
If the station supports radio text plus, only the
artist and track are displayed.
XTo switch on radio text: in radio mode, slide
VÆ the controller.
The Radio menu bar is shown.
XTo select Info: turn the controller and
press to confirm.
490 Radio
COMAND Online
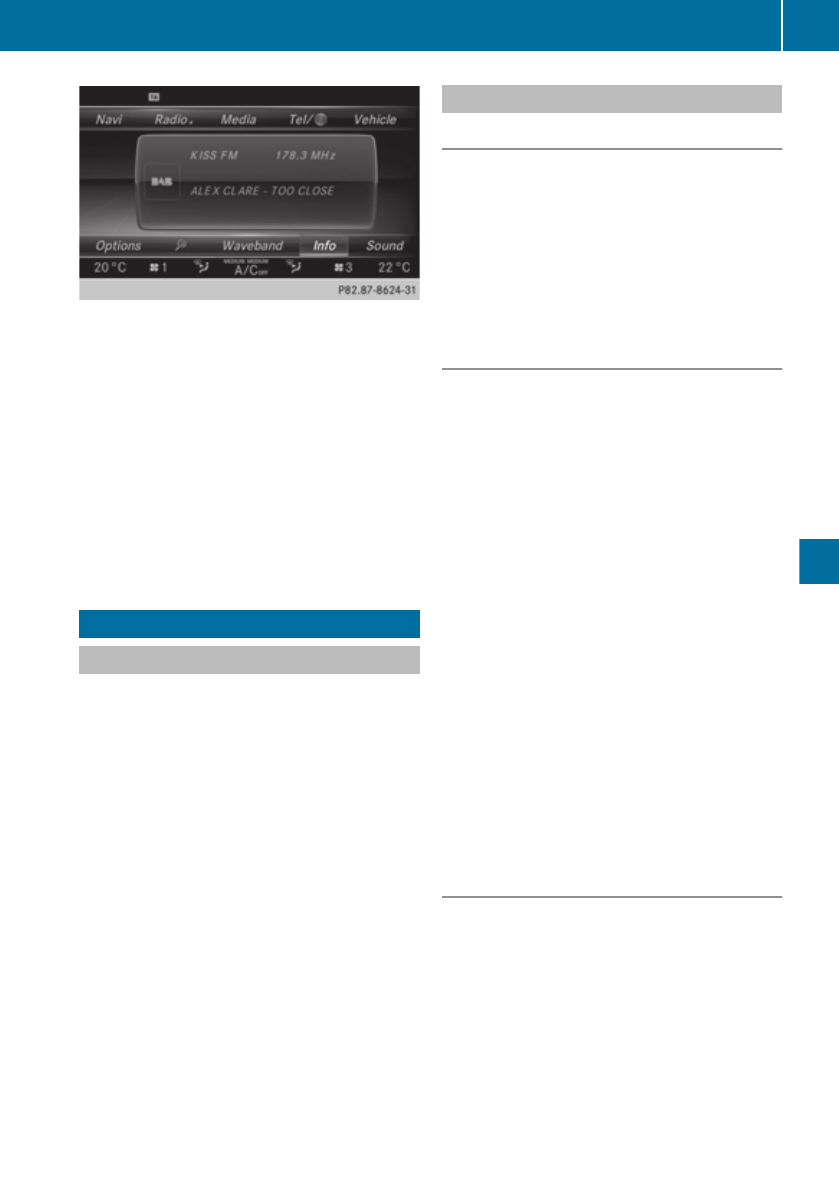
With an active Info button, a larger view of
the radio stations set will be shown together
with radio text information in place of the
radio station overview. The frequency is visi-
ble in the context display.
XTo switch on radio text plus: in radio mode,
slide VÆ the controller.
The Radio menu bar is shown.
XSelect Info.
The display switches back to the radio sta-
tion overview with radio text information.
Media
Features of your COMAND Online
These operating instructions describe all
standard and optional equipment available
for your COMAND Online system at the time
of purchase. Country-specific differences are
possible. Please note that your
COMAND Online system may not be equip-
ped with all the features described. This is
also the case for systems and functions rele-
vant to safety. Therefore, the equipment on
your COMAND Online system may differ from
that in the descriptions and illustrations.
Should you have any questions concerning
equipment and operation, please consult a
Mercedes-Benz Service Centre.
Activating media mode
General notes
There are several ways to activate media
sources using COMAND Online.
The relevant sections of the Owner's Manual
describe the simplest way to activate a media
source.
This section describes all options for activat-
ing media sources.
Using the MEDIA button
XPress the Õ button.
The menu for the last accessed media
source appears.
XTo select the media source: keep pressing
the Õ button until the required media
source has been set.
The media sources appear in the following
order:
RCD
RMemory card
RMedia Register
RMedia Interface 1
RMedia Interface 2
RBT audio
RAux
If playable music files are found, they will
be played by COMAND Online.
XTo display the function bars: slide V¬ the
controller.
Switching on automatically
XWhen an external media source is connec-
ted, this media mode is automatically
switched on by COMAND Online.
External media sources:
RApple devices (e.g. iPhone)
RUSB devices (e.g. USB stick, MP3 player)
RSD cards
Media 491
COMAND Online
Z
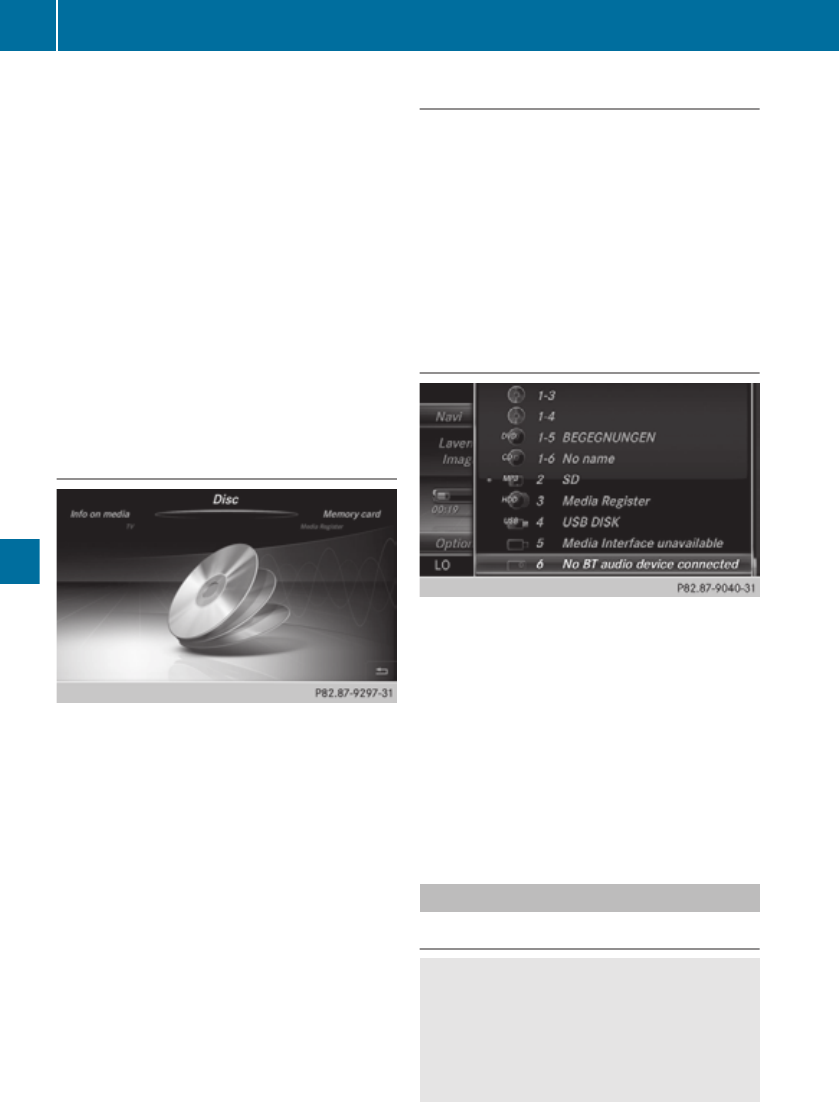
Rvia AUX cable (automatic activation
depends on the device connected)
Rvia devices connected by Bluetooth
If playable music files are found, they will
be played by COMAND Online.
If a media function is already switched on
in COMAND Online, this will be interrupted
and the basic display of the newly connec-
ted device will appear.
If COMAND Online is being operated in
another function, such as navigation, when
an external media source is connected, the
basic display will not change. Only the
music from the newly connected data car-
rier will play
Using the main function bar
Display of media sources in the carousel menu
XTo select Media: turn the controller and
press to confirm.
The carousel menu appears with the avail-
able media sources.
XSelect the media source.
If the disc contains music or video files,
these will be played. The corresponding
basic menu will be shown.
Using the number keypad
XTouch any number key when in media
mode.
You see the numbered keypad. The active
disc is marked.
XTo select a disc: press the corresponding
number key.
If the disc contains music or video files,
these will be played. The corresponding
basic menu will be shown.
Using the device list
XIn media mode, slide VÆ the controller.
The media menu bar appears.
XTo select Devices : turn the controller and
press to confirm.
The available media sources will be shown.
The # dot indicates the current setting.
XSelect the media source.
If the disc contains music or video files,
these will be played. The corresponding
basic menu will be shown.
Audio CD/DVD and MP3 mode
Safety notes
GWARNING
The CD/DVD drive is a class 1 laser product.
If you open the housing of the CD/DVD drive,
invisible laser beams may be released. These
laser beams may damage your retina. There
is a risk of injury.
492 Media
COMAND Online

You must not open the casing. Always have
maintenance work and repairs carried out at
a qualified specialist workshop.
GWARNING
Only when the vehicle is stationary should
you:
Rload a disc
Reject a disc
There is a risk of being distracted from the
road and traffic conditions if this is done while
the vehicle is in motion.
Inserting and removing a disc from the
single CD/DVD drive
XTo insert: press the þ button on the
single drive.
If there is a disc already inserted, it will be
ejected.
XInsert a disc into the disc slot with the prin-
ted side facing upwards.
The drive closes and the disc is played.
If the CD/DVD is operated in Media mode,
the corresponding basic menu will be
shown. If the CD/DVD is started using
another application (e.g. Navi), the display
will not change.
iThe drive may not be able to play discs
with copy protection.
XTo remove: press the þ button.
The drive ejects the disc.
XRemove the ejected disc from the slot.
If you do not take the disc out of the slot, it
is drawn in again automatically after a short
while.
Media 493
COMAND Online
Z
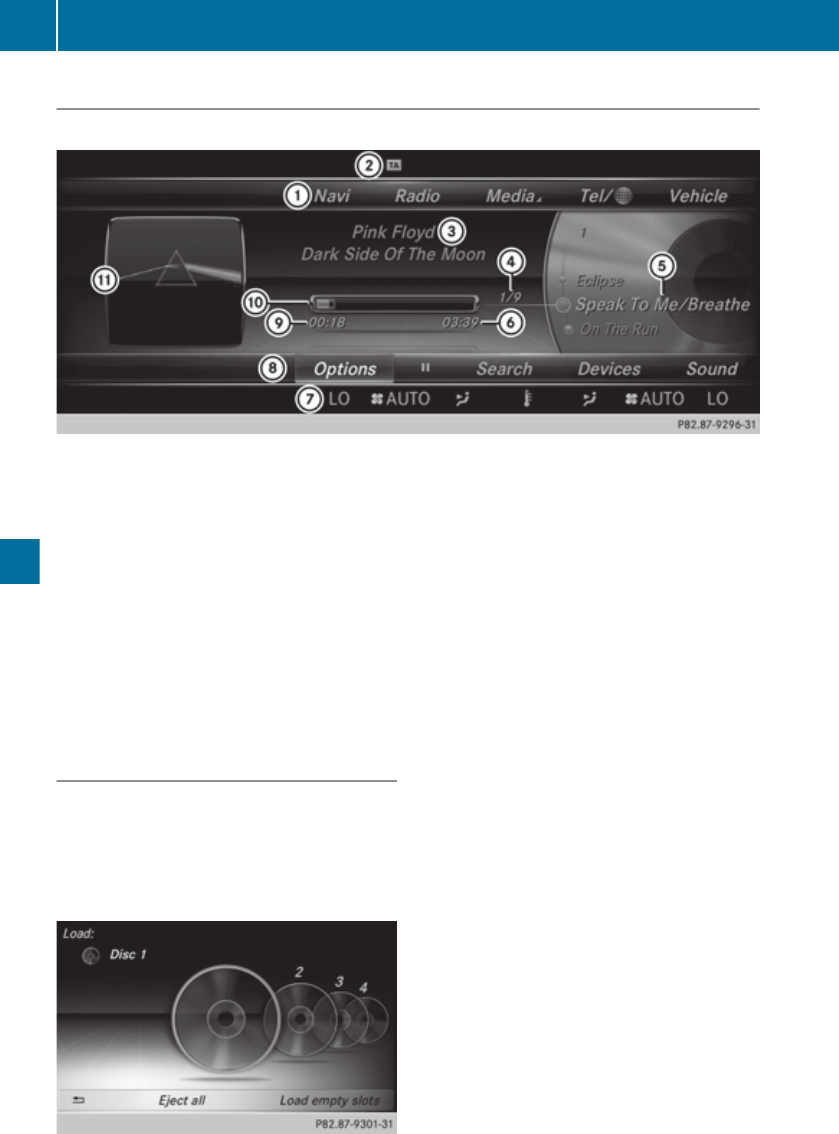
Menu overview
CD mode basic display
:Main function bar
;Status bar with active traffic announcements
=Artist and album
?Track number/number of songs in the track list
ATrack display on the disc
BPlayback time for the current title
CClimate control status bar
DMedia menu bar
EElapsed playback time for the current title
FGraphic time display
GAdditional display area with cover view
Inserting discs into the DVD changer
The DVD changer has a magazine with six
trays.
XTo insert the CD/DVD into the maga-
zine tray: press the V button.
The magazine menu appears.
XTo select the magazine tray: turn the
controller and press to confirm.
The DVD changer switches to the selected
magazine tray.
You see the Please wait... message.
You then see the Please insert disc
<<x>> message.
XInsert a disc into the disc slot with the prin-
ted side facing upwards.
494 Media
COMAND Online
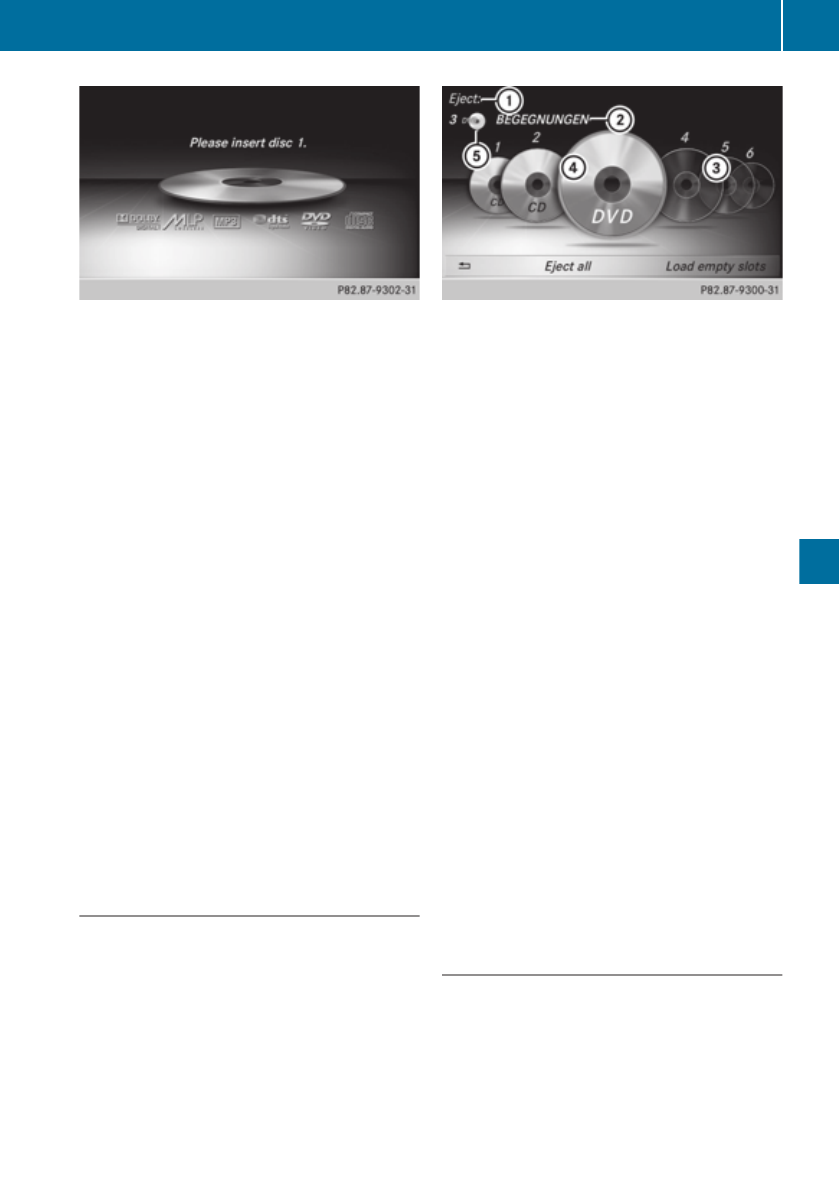
XTo load the empty magazine trays: press
the V button.
The magazine menu appears.
XTo select Load empty slots: slide V¬,
turn and press controller.
COMAND Online switches to the next
empty magazine tray.
You see the Please wait... message.
You then see the Please insert disc
<<x>> message.
XInsert a disc into the disc slot with the prin-
ted side facing upwards.
Once the disc is loaded, the DVD changer
switches to the next empty tray.
XRepeat these steps until all magazine trays
are filled.
The DVD changer plays the last inserted
disc.
XTo cancel the loading process: press the
V button.
or
XTo select % in the magazine menu: turn
and press the controller.
Ejecting discs from the DVD changer
If you remove one disc while playing another
disc, the DVD changer interrupts playback.
Playback continues once the disc has been
ejected.
XTo eject a single CD/DVD: press the
V button.
The magazine menu appears. The current
disc is marked.
:Data medium type
;Active ejection
=Disc name
?Empty tray no. 4
ACurrent disc
XTo select a disc: turn the controller and
press to confirm.
The DVD changer ejects the disc.
XTake the disc out of the slot.
XTo eject all CDs/DVDs: press the V
button.
The magazine menu appears.
XSelect Eject all.
The last selected disc is ejected.
The Please remove disc <<<<x>>>>
message appears.
XRemove the disc.
The DVD changer ejects the disc.
XRepeat the last step until the magazine is
empty.
XTo exit the menu: press the V button.
or
XSelect % in the magazine menu.
Inserting and removing an SD memory
card
General notes
COMAND Online supports SD memory cards
(Secure Digital) and SDHC memory cards
(Secure Digital High Capacity).
Media 495
COMAND Online
Z
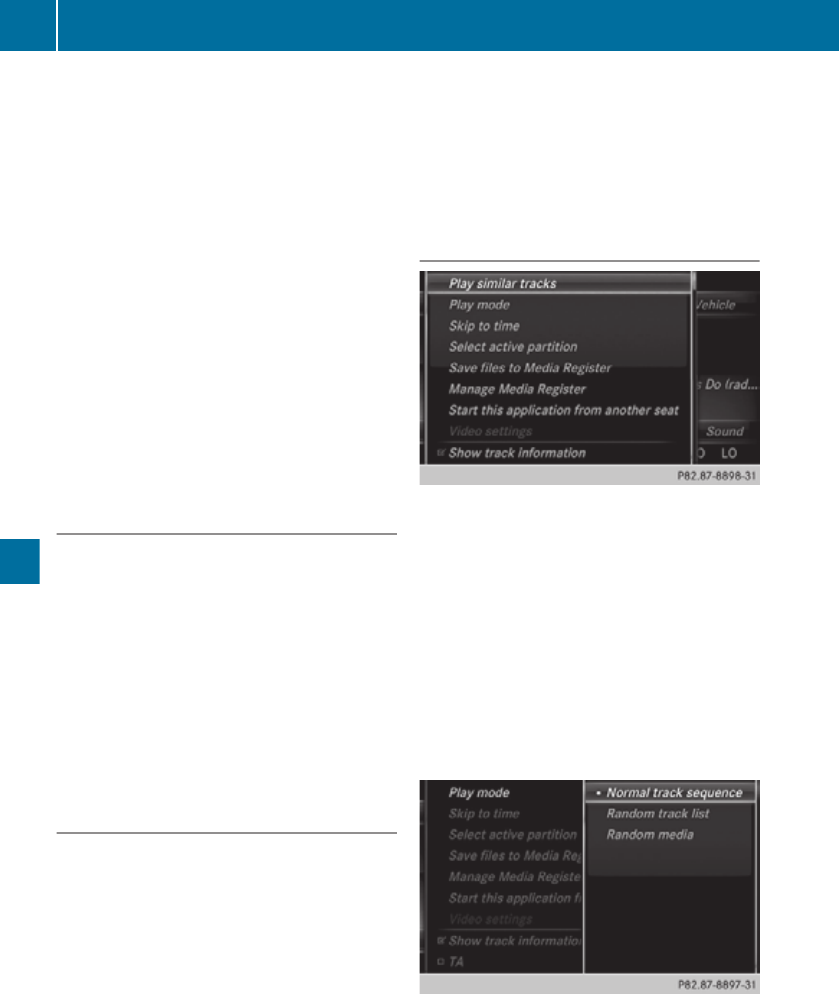
iIf you are no longer using the SD memory
card, you should remove it. High tempera-
tures can damage the card.
Insert an SD memory card
XInsert the memory card into the slot on the
control panel until the SD memory card
engages into place. The side with the con-
tacts must face downwards.
The music is played while the files are loa-
ded in the background. If there are no sup-
ported audio/video files, you will see a
message to this effect.
Ejecting an SD memory card
XPress the memory card.
The memory card is ejected.
XRemove the memory card.
Connecting USB devices
There are two USB ports located in the stow-
age compartment in the centre console.
XConnect the USB device to the USB port.
The music is played while the files are loa-
ded in the background. If there are no sup-
ported audio/video files, you will see a
message to this effect.
iMP3 players must support Media Transfer
Protocol (MTP).
Switching to audio CD/audio DVD or
MP3 mode
Switching on automatically
When an external media source is connected,
the media mode is automatically switched on
by COMAND Online.
XInsert CDs/DVDs: (Y page 493)
or
XInsert a SD memory card: (Y page 495)
or
XConnect a USB device: (Y page 496)
COMAND loads the medium inserted and
starts to play it automatically.
FURTHER OPTIONS FOR SWITCHING ON:
RUsing the number keypad: (Y page 492)
RUsing the main function bar: (Y page 492)
RUsing the device list: (Y page 492)
RUsing the Õ button: (Y page 491)
Options menu
XIn Media mode, slide VÆ the controller.
The media menu bar is shown.
XTo select Options: turn the controller and
press to confirm.
Playing similar tracks
XSelect Play similar tracks.
COMAND Online automatically creates and
plays a track list with similar tracks. If there
are no comparable tracks on the data car-
rier, you will see a message to this effect.
XSelect the required track.
Play mode
XTo select Play mode: turn the controller
and press to confirm.
XSelect Normal track sequence.
496 Media
COMAND Online
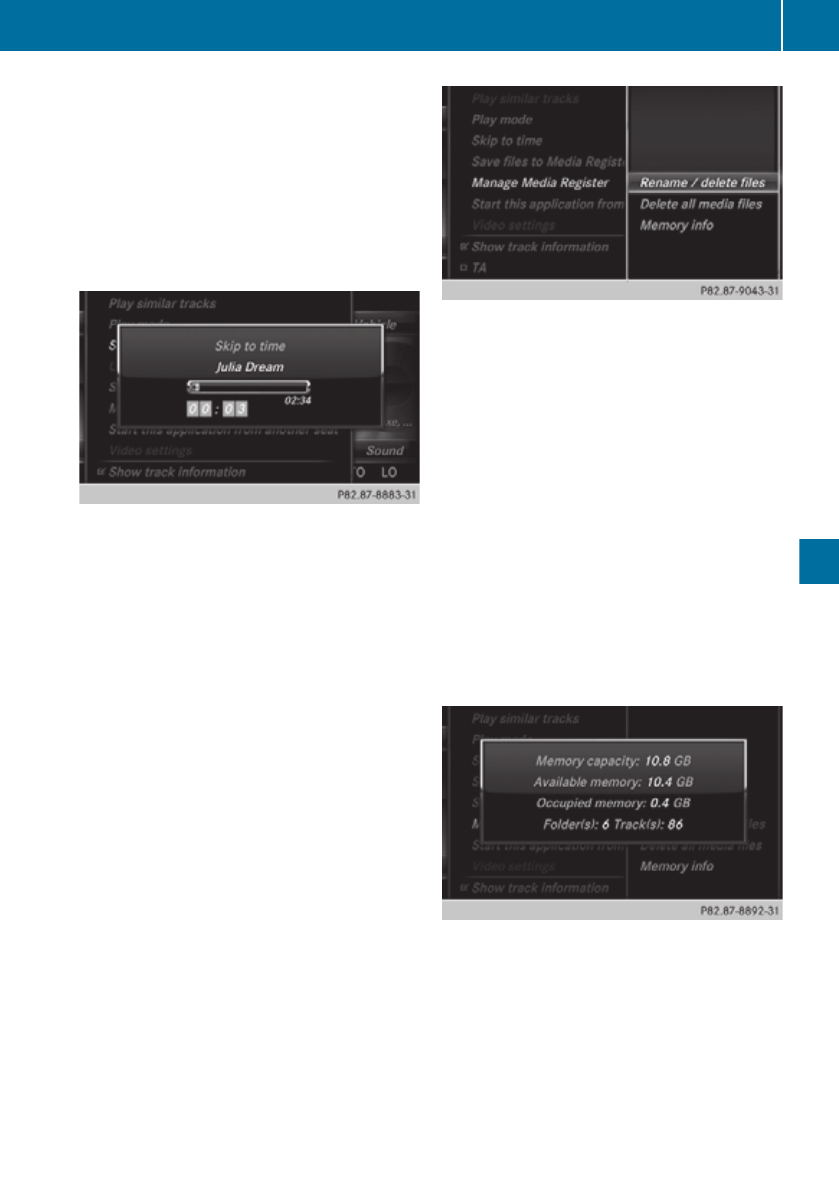
The current tracklist is played in the order
it appears on the data medium.
XTo select Mix track list.
The current track list is played in random
order.
XSelect Random media.
All tracks on the data medium are played in
random order.
Skip to time
XSelect Skip to time.
A pop-up menu appears.
XTo set the time: turn the controller.
or
Set the desired time using the number key-
pad.
Select active partition
XWith the Select active partition
option, you can select a partition in the USB
data medium.
Save files to Media Register
iWith the Save files to Media Regis‐
ter option, you can transfer supported
audio/video/image files to the COMAND
Online hard drive.
XTo select the option Save files to
Media Register: turn and press the con-
troller
A menu opens (Y page 504).
Managing the Media Register
XTo select Rename / delete files: press
the controller.
The contents are shown. Using the control-
ler, files and folders can be renamed or
deleted.
A pop-up window appears when the file is
renamed. The characters are entered using
the controller.
XTo select Delete all media files: turn
and press the controller.
Files and folders can be completely deleted
from the Media Register.
XSelect Memory info: important parame-
ters for your COMAND Online hard drive are
shown.
Start at a different seat
Link to....
Show track information
Checking or unchecking the box before Show
track information displays or hides the
information on the track, artist and album in
the main display field.
Media 497
COMAND Online
Z
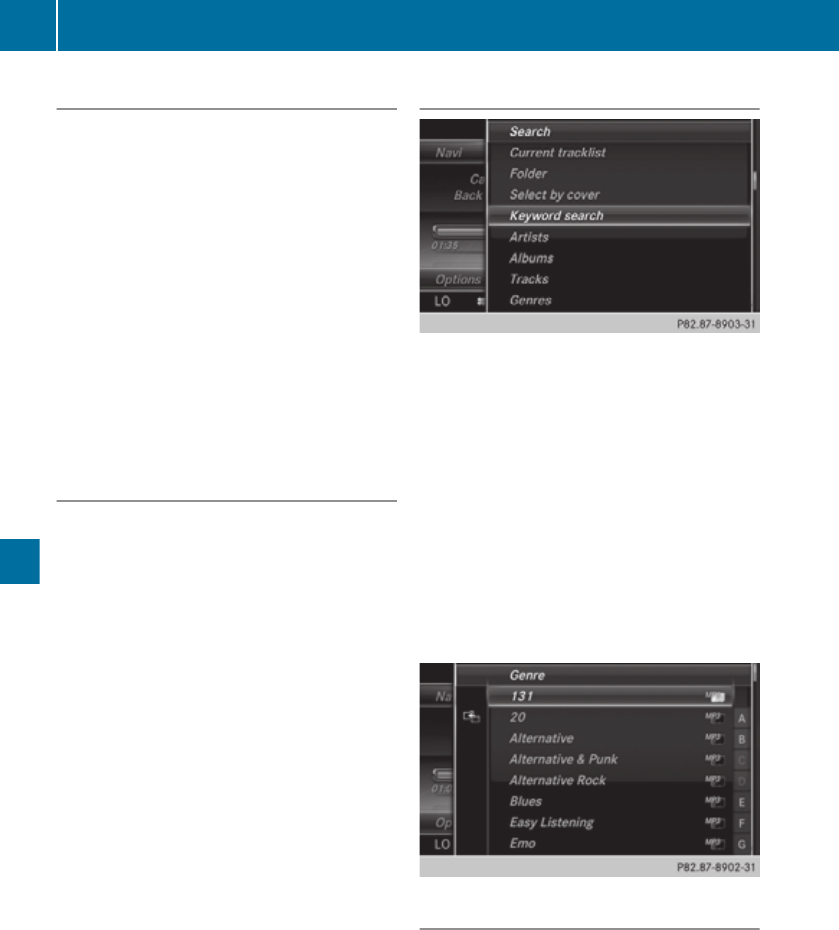
Stop and playback function
XTo stop playback: in audio/video mode,
slide VÆ the controller.
The media menu bar is shown.
XTo activate Ë in the media menu bar:
turn the controller and press to confirm
Playback is interrupted here. The display
changes to Ì.
XTo continue playback: in audio/video
mode, slide VÆ the controller.
The media menu bar is shown.
XTo activate Ì in the Media menu bar:
turn and press the controller.
Playback is continued from the point of
interruption. The symbol changes to Ë.
Selecting a track
Selecting by skipping to a track
XTo skip forwards or backwards to a track:
turn or briefly slide XVY the controller in
the media basic display.
Selecting a track using the number key-
pad
XPress the ¯ key on the number keypad.
A numerical entry field appears. The num-
ber of positions offered corresponds to the
number of tracks on the CD/DVD. Only
numbers that correspond to a track num-
ber on the CD/DVD can be entered.
XEnter the desired track number using the
number keys.
The track plays after the last possible num-
ber is entered.
iPressing and holding a number key for
more than 2 seconds completes the entry,
and the corresponding track is played.
The search menu
XIn media mode, slide VÆ the controller.
The media menu bar is shown.
XTo select Search: turn the controller and
press to confirm.
The category list is shown.
XSelect a category, e.g. Genres.
Sub-categories appear with the selection of
the main category (depends on the
COMAND Online default settings and the
music tracks available).
XSelect a sub-category, e.g. Blues.
If the sub-category Blues includes music
tracks, these will be shown.
Gracenote Media Database
General notes
This function is only available in audio CD
mode.
There is a version of
Gracenote® music recognition technology,
Emeryville, California, USA on the
COMAND Online hard disk. You will recognise
498 Media
COMAND Online
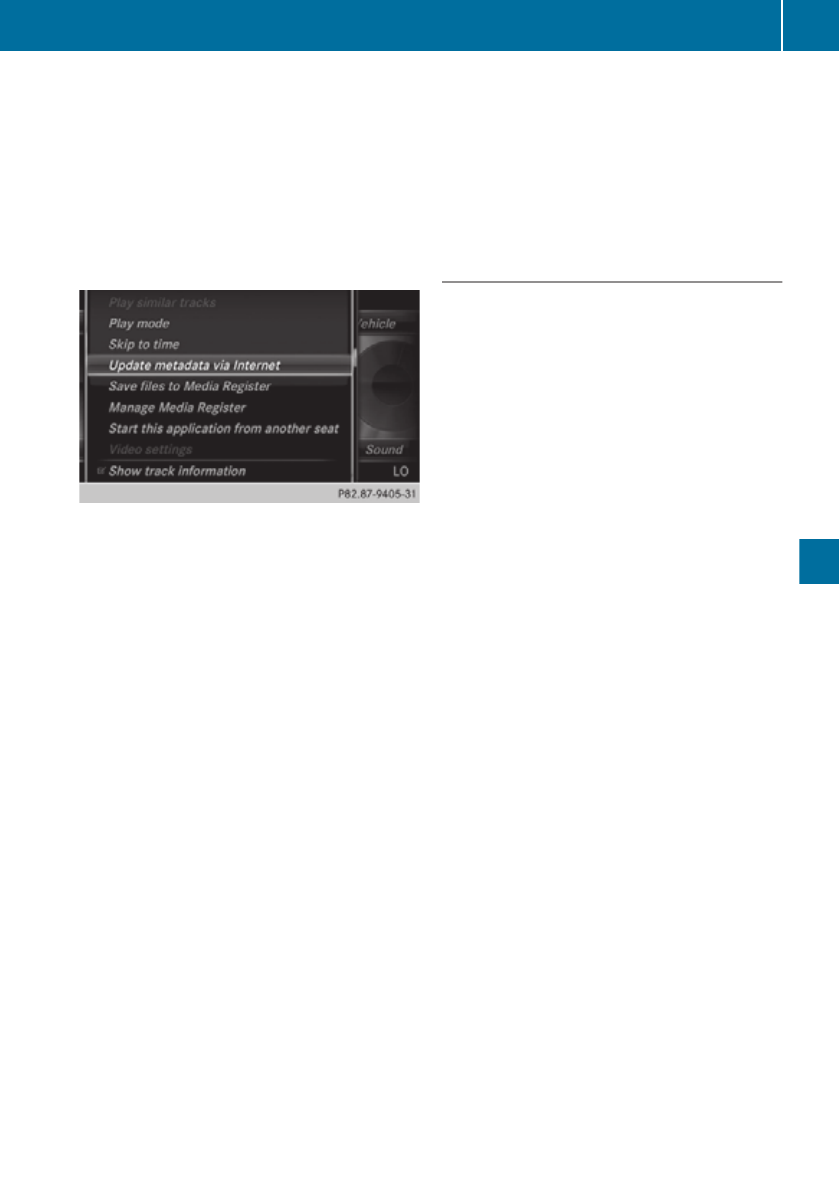
this by the logo in the bottom right-hand cor-
ner of certain audio displays.
If the audio CD does not contain any CD text
information, COMAND Online can use the
Gracenote® Media Database to identify
unknown audio tracks when in audio CD
mode.
Internet update of metadata
With the option Internet update of meta
data, the CD-A meta data that is not available
(cover, track, album, artist, etc.) can be reloa-
ded to the internal Gracenote database. An
Internet connection is required for this. See
Selecting Internet update of meta data
XIn media mode, slide VÆ the controller.
The media menu bar is shown.
XTo select Options: turn the controller and
press to confirm.
XIn the selection list, select Update meta‐
data via Internet.
A connection with the Gracenote data
server is established. The missing data is
loaded, saved and displayed in the main
display field.
If there is no data found or there is no Inter-
net connection, a corresponding error mes-
sage will appear.
Switching the Gracenote® data display
on/off
XSwitch on audio CD mode .
XTo select Gracenote Media Database:
turn and press the controller.
XTo switch the display off: select None.
In the basic display, Track 1, Track 2 etc.
are shown instead of the Gracenote® data,
for example.
XTo switch on the display: press the control-
ler.
Notes on MP3 mode
Permissible data carriers
RCD-R and CD-RW
RDVD-R and DVD-RW
RSD memory card
RUSB storage device
Permissible file systems
RISO 9660/Joliet standard for CDs
RUDF for audio and video DVDs
RFAT16, FAT32, exFAT and NTFS for SD
memory card and USB storage media
Multisession CDs
For multisession CDs, the content of the first
session determines how COMAND Online will
process the CD. COMAND Online plays only
one session and gives priority to the audio CD
session.
File structure of a disc
When you create a disc with compressed
music files, the tracks can be organised in
folders. A folder may also contain subfolders.
The disc may contain no more than eight
directory levels. Files beyond the eighth level
will not be recognised by the system.
iCOMAND Online loads up to 15,000 files
from USB/SD storage media.
Track and file names
When you create a disc with compressed
music files, you can assign names to the
tracks and folders.
If MP3 or WMA files are stored in the root
directory itself, the root directory will also be
treated as a folder.
Media 499
COMAND Online
Z

You should observe the following when
assigning track names:
Rtrack names must have at least one char-
acter.
Rtrack names must have the ending of a
supporting audio/video format, e.g.
mp3m, mp3, aac or wma.
Rthere must be a full stop between the track
name and the extension.
Example of a correct track name:
"Track1.mp3".
Permissible formats
COMAND supports the following formats:
RMP3
RWMA
Radditional music files in AAC format with
the file extensions .aac, .mp4, .m4a
and .m4b, but not copy-protected iTunes
music files with the extension .m4p.
Permissible bit and sampling rates
COMAND supports MP3 files of the following
types:
Rfixed and variable bit rates from 32 kbit/s
to 320 kbit/s
Rsampling rates of 8 kHz to 48 kHz
COMAND Online supports WMA files of the
following types:
Rfixed bit rates from 5 kbit/s to 384 kbit/s
Rsampling rates of 8 kHz to 48 kHz
COMAND Online does not support WMA files
of the following types:
RDRM (Digital Rights Management) encryp-
ted files
Rvariable bit rate
RWMA Pro
R5.1 Surround
iOnly use tracks with a bit rate of at least
128 kbit/s and a sampling rate of at least
44.1 kHz. Lower rates may cause a notice-
able deterioration in quality. This is espe-
cially the case if you have activated a sur-
round sound function.
Selecting an active partition (USB mass
storage devices only)
You can select this function for USB storage
devices when the storage device is parti-
tioned. Up to 9 partitions (primary or logical,
FAT, FAT32 and NTFS) are supported.
Select active partition
XTo select Options in the menu media bar:
turn and press the controller.
XSelect active partition.
Notes on copyright
Audio/video files that you create or repro-
duce yourself for playback are generally sub-
ject to copyright protection.
In many countries, reproductions, even for
private use, are not permitted without the
prior consent of the copyright holder.
Make sure that you know about the applicable
copyright regulations and that you comply
with these.
Notes on CDs/DVDs
! COMAND Online is designed to play discs
which comply with the EN 60908 standard.
Therefore, you can only use discs with a
maximum thickness of 1.3 mm.
If you insert thicker discs, e.g. those that
contain data on both sides (DVD on one
side and audio data on the other), they can-
not be ejected and can damage the device.
Only use round discs with a diameter of
12 cm. Do not use discs with a diameter of
8 cm, even with an adapter.
Discs with copy protection are not compati-
ble with the CD standard and therefore may
not be able to be played by COMAND Online.
You may encounter playback problems when
playing copied discs.
There may be playback problems if you play
CDs that you have copied yourself with a stor-
age capacity of more than 700 MB.
iCOMAND Online is able to play back
audio CDs in multichannel audio format.
500 Media
COMAND Online
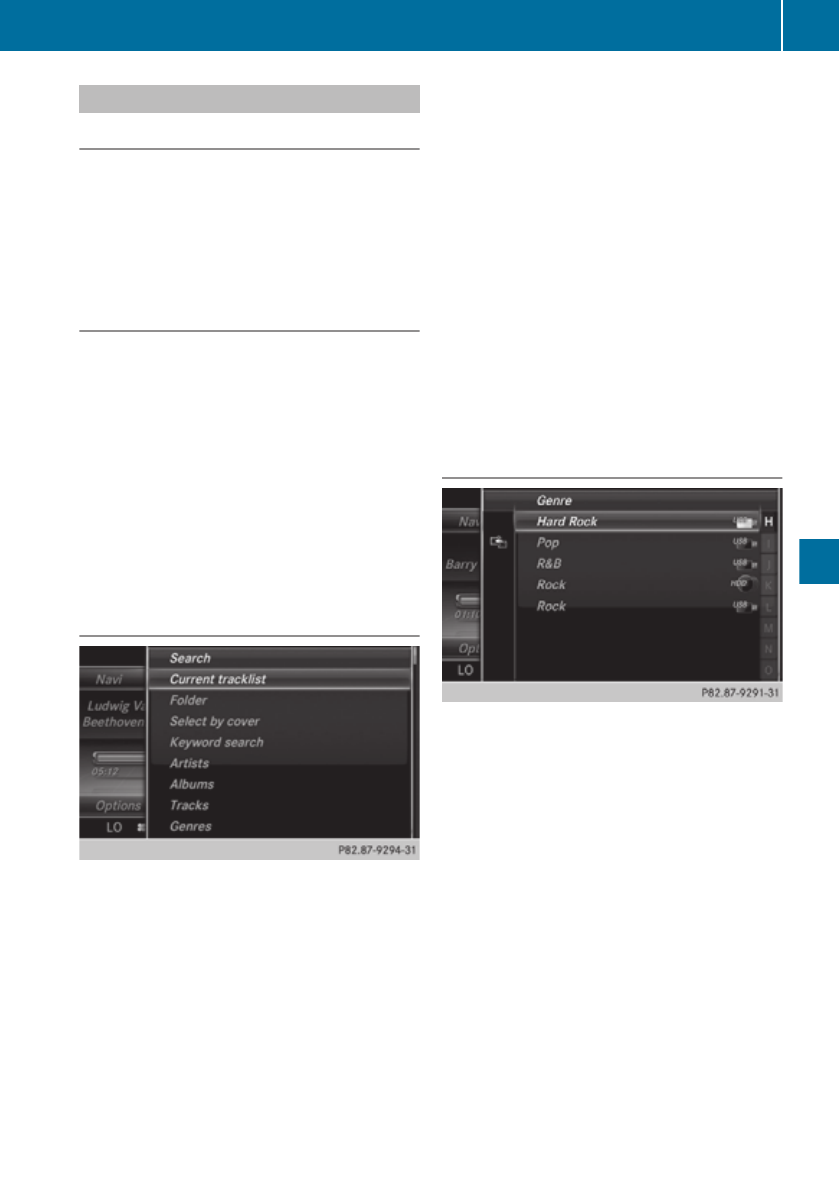
Music search
Starting a music search
XIn Media mode, slide VÆ the controller.
The media menu bar appears.
XTo select Search: turn the controller and
press to confirm.
The category list appears.
General notes
COMAND Online reads media files from the
following data carriers:
RDisc (CD/DVD Audio)
RMemory card
RMEDIA REGISTER
RUSB memory
RApple devices (folder, year and photos are
not available)
The categories are displayed according to the
data available.
Category list
Depending on the connected media sources
and files, the following categories are listed:
RCurrent tracklist
RFolder
RSelect by cover
RKeyword search
RPlaylists
RArtists
RAlbums
RTracks
RGenres
RYear
RComposers
RVideos
RPhotos
iThe functions are available as soon as the
entire media content has been read and
analysed.
If the same device is reconnected with
unchanged media content, these functions
are available more quickly.
When connecting Apple® devices, the cat-
egories “Folder”, “Year” and “Photos” are
not available.
Searching by genre
XTo select Genre in the category list: turn
and press the controller.
COMAND Online searches all media sour-
ces. A selection list with Genre and media
sources appears.
XTo select the desired Genre: turn and press
the controller.
A selection list with music tracks from the
selected genre appears.
XSelect a music track.
The track is played. The basic menu for the
active media source is shown.
XTo exit the selection list: press the %
button.
To search for other categories, proceed as
described in the example for "Searching by
genre".
Media 501
COMAND Online
Z

Search by current track list
XTo select Current track list in the cat-
egory list: turn and press the controller.
The selection list appears.
XSelect the required track.
Searching by folder
Here, the search covers the entire directory
and the tracks available from the active data
medium.
XTo select Folder in the category list: turn
and press the controller.
The folder list appears.
XSelect the required folder.
The track list appears.
XSelect the required track.
Keyword Search
XTo select Keyword search from the cate-
gory list: turn the controller and press to
confirm.
The input field appears.
XTo select all required characters: turn and
press the controller for each letter
(Y page 369).
X¬ .
The search results are displayed.
The numbers behind the results, as shown
in the example Artists (2/0), represent 2
results that match the keyword exactly and
0 results that are similar.
XSelect one of the results.
Any entries already included in the results
list are shown in the Search history and
can be directly selected.
XSelect one entry, e.g. Artists.
Albums and covers (if available) are shown.
XSelect an album.
The tracks are listed.
XSelect a track.
The basic display appears and playback
starts.
502 Media
COMAND Online

Media Register
General notes
iKeep your original music files, photos and
video files in a secure location. An error in
COMAND Online may result in the loss of
music files stored in the MEDIA REGISTER.
Mercedes-Benz is not liable for any loss of
data.
You can store music files, photos or video files
in the MEDIA REGISTER. The memory has a
capacity of 10 GB.
Switching the MEDIA REGISTER on
XPress the Õ button repeatedly until the
MEDIA REGISTER is switched on.
Pressing the button repeatedly changes
the operating mode in the following order:
RDisc
RMemory card
RMedia Register
RMedia Interface 1
RMedia Interface 2
RBluetooth audio
RAux
If music files are available, playback begins at
the point last listened to.
If there are no files, you will see a message to
this effect.
FURTHER OPTIONS FOR SWITCHING ON:
RUsing the number keypad: (Y page 492)
RUsing the main function bar: (Y page 492)
RUsing the device list: (Y page 492)
RUsing the Õ button: (Y page 491)
Media 503
COMAND Online
Z
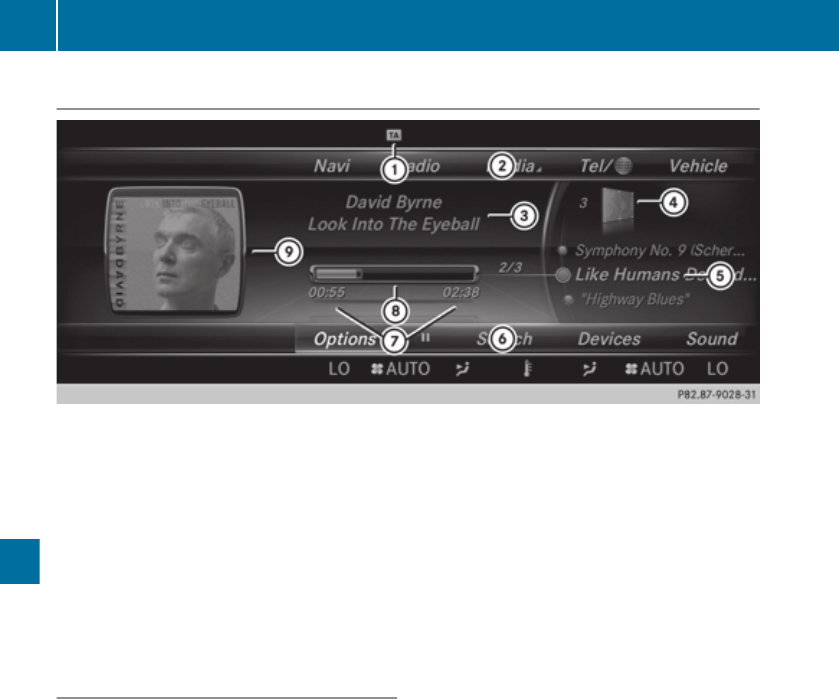
MEDIA REGISTER basic display
:Status bar with traffic announcements switched on
;Main function bar
=Artist and album
?Display for the active data medium
ADisplay of current track in the track list
BMedia menu bar
CNumerical time display
DGraphic time display
EAdditional display area with cover view
Copying files to the MEDIA REGISTER
General notes
You can copy photos, music files and videos
from the following media:
Rdiscs in a CD/DVD changer or a single CD/
DVD drive
RSD memory card
RUSB memory
RMP3 player
iData can only be copied from an MP3
player if this can be configured as a mass
storage device.
Video files from DVD-V cannot be copied.
While copying, several functions will not be
available. If this is the case, you will see a
message to this effect.
1. Selecting a data medium
XTo switch on media mode: keep pressing
the Õ button until the required media
mode has been switched on.
XSlide VÆ the controller.
The media menu bar appears.
XTo select Options: turn the controller and
press to confirm.
XSelect Save files to Media Register.
The media list appears. A data medium
from which files can be copied is selected
automatically.
iThe function Save files to Media
Register can be accessed from any media
application.
504 Media
COMAND Online
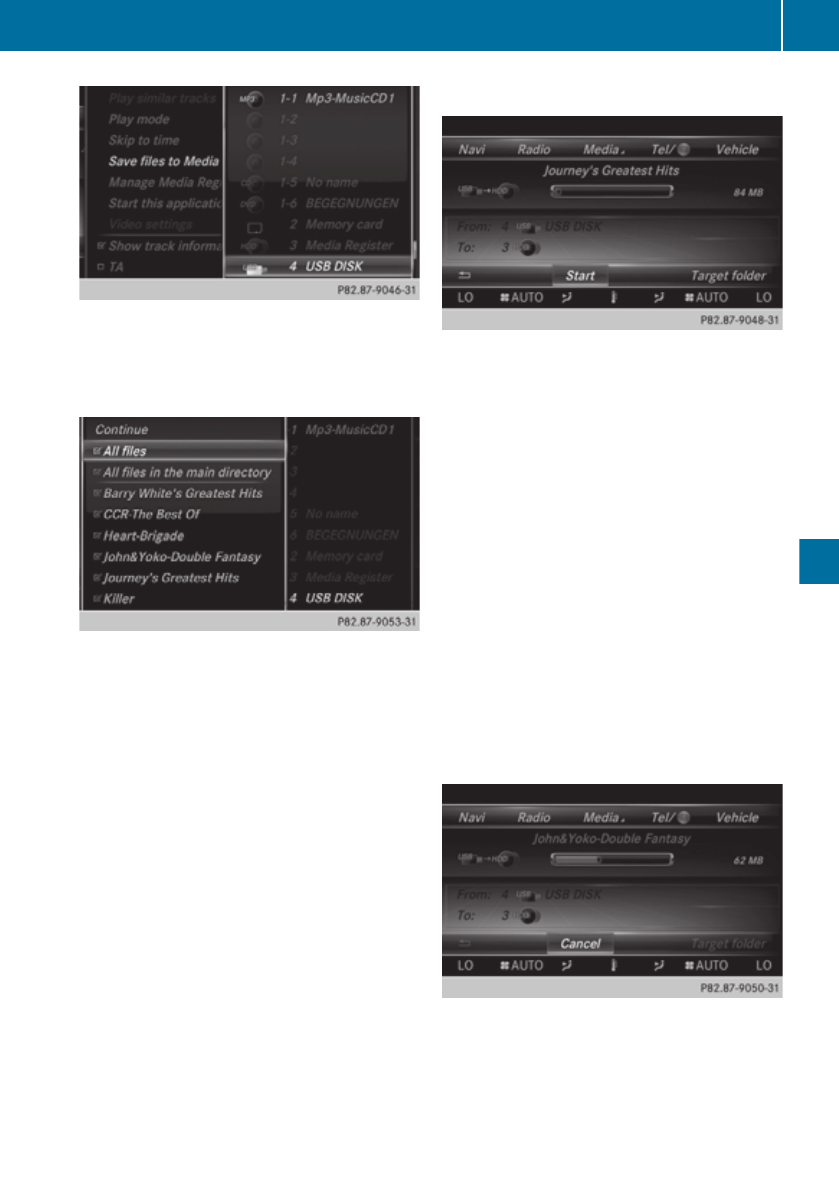
XSelect the displayed data medium.
The data medium is loaded.
If the data medium contains files that can
be copied, you will see a selection menu.
2. Selecting files
XTo select All files: turn the controller
and press to confirm
This command copies all files from the
selected data medium. The symbol in front
of All files is filled in. All subsequent
entries have a tick O beside them.
XSelect a folder.
A tick O next to the folder entry highlights
the selection.
iThe selection of a target folder is optional.
If there is no target folder given, the selec-
ted files are saved to the main directory of
the Media Register.
3. Confirming your selection
XTo select Continue: turn the controller and
press to confirm.
The copying menu appears.
4. Starting the copying process
In the example, files are copied from a USB
stick to the MEDIA REGISTER.
XTo select Start: press the controller.
If there is no target folder given, the selec-
ted files are saved to the main directory of
the Media Register.
XTo select Target folder: turn and press
the controller.
XSelect a folder.
XSelect Continue.
XTo select Start: press the controller.
Copying begins. The progress bar indicates
the status of the copying procedure.
It may take some time for the copying proc-
ess to be completed, depending on the
amount of data. If there is not enough mem-
ory space, you will see a message to this
effect.
Once copying is complete, you hear the first
track of the copied album. You can now copy
more files to the MEDIA REGISTER.
Media 505
COMAND Online
Z
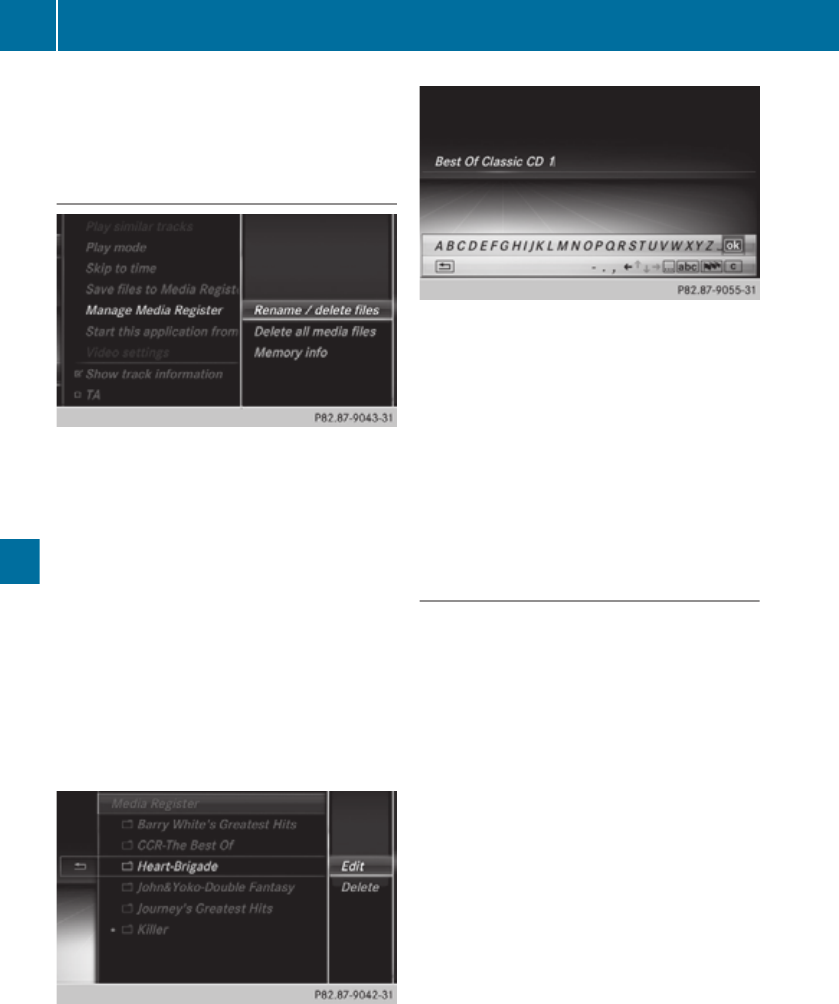
XTo cancel copying: select Cancel.
Files are stored in the MEDIA REGISTER up
until the point of cancellation.
Renaming/deleting files
XTo switch on Media mode: keep pressing
the Õ button until the required media
mode has been switched on.
XSlide VÆ the controller.
The media menu bar appears.
XTo select Options: turn the controller and
press to confirm.
XSelect Manage Media Register.
XSelect Rename / delete files.
The file list is displayed.
XTo highlight the selected files: turn and
press the controller.
XSlide VY the controller.
You can select either Edit or Delete.
XTo select the Edit file: turn and press the
controller.
The following entry field appears.
XRename the file.
XTo save changes: press ¬with the con-
troller.
Renaming a file only changes the name.
Depending on whether or not the Show
track information option has been
selected, this change may not be seen in
the main display field.
XTo select the Delete file: press the con-
troller.
Deleting all files
! In order to prevent malfunctions, do not
use COMAND Online during this time.
This function deletes all files from the MEDIA
REGISTER.
XTo switch on media mode: keep pressing
the Õ button until the required media
mode has been switched on.
XSlide VÆ the controller.
The media menu bar appears.
XTo select Options: turn the controller and
press to confirm.
XSelect Manage Media Register.
XSelect Delete all media files.
A query appears. No is highlighted.
If you select Yes, all files are deleted. You
see the Please wait... message. You
will then see the Data successfully
deleted message.
If you select No, the process will be cancel-
led.
506 Media
COMAND Online
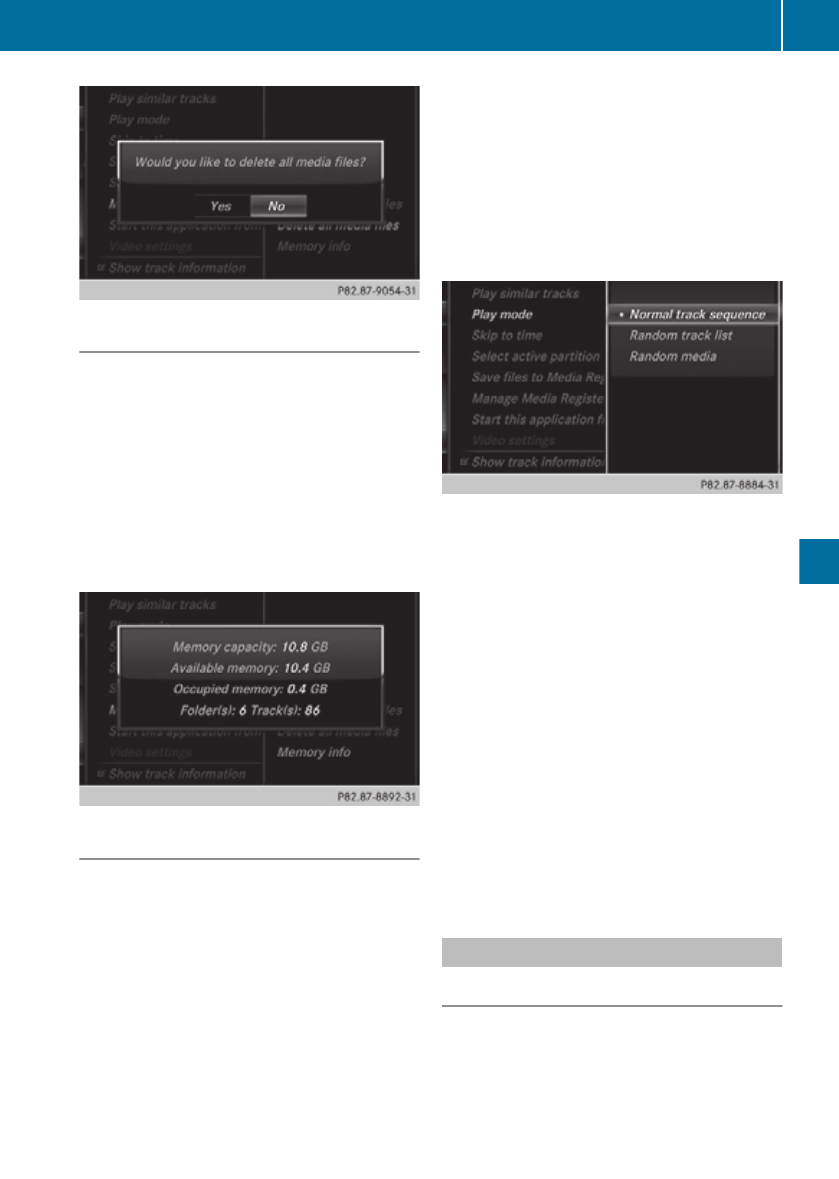
Calling up memory space information
XTo switch on media mode: keep pressing
the Õ button until the required media
mode has been switched on.
XSlide VÆ the controller.
The media menu bar appears.
XTo select Options: turn the controller and
press to confirm.
XSelect Manage Media Register.
XSelect Memory info.
Selecting a playback mode
XTo switch MEDIA REGISTER on: press the
Õ button repeatedly until the MEDIA
REGISTER is switched on.
XSlide VÆ the controller.
The media menu bar appears.
XTo select Options: turn the controller and
press to confirm.
XSelect Play mode.
The options list appears. The # dot indi-
cates the current setting.
XSelect the desired option.
The option is switched on. For all options
except Normal track sequence, you will
see a corresponding icon in the main dis-
play.
iThe Normal track sequence option is
automatically selected when you change
the disc you are currently listening to or
when you select a different medium. If an
option is selected, it remains selected after
COMAND Online is switched on or off.
The following options are available:
RNormal track sequence
The tracks are played in the normal order
(e.g. track 1, 2, 3 etc.).
RRandom media
All the tracks on the medium are played in
random order.
RRandom track list
The tracks in the currently active track list
are played in random order.
Operation with Bluetooth® audio
Connecting Bluetooth® audio devices
Conditions
Bluetooth® audio mode requires a Blue-
tooth®-capable audio device.
Media 507
COMAND Online
Z

Before using Bluetooth® audio mode, you
must check your Bluetooth® audio device for
the following (see the Bluetooth® audio devi-
ce's operating instructions):
RBluetooth® audio profile
The Bluetooth® audio device must support
the A2DP and AVRCP Bluetooth® audio
profiles.
RBluetooth® visibility
Certain Bluetooth® audio devices require
more than simply activating the Blue-
tooth® function. In addition, your device
must be made "visible" to other devices.
RBluetooth® device name
This device name is predetermined but can
usually be changed. To make a clear selec-
tion of the Bluetooth® device possible,
Mercedes-Benz recommends that you cus-
tomise the device name (see the Blue-
tooth® audio device's operating instruc-
tions).
iA2DP (Advanced Audio Distribution
Profile): Bluetooth® audio profile for audio
data transmission
AVRCP (Audio Video Remote Control
Profile): Bluetooth® audio profile for audio
data playback
iThe Bluetooth® device must be visible for
authorisation. It will then be subsequently
found by COMAND Online whether it is visi-
ble or not.
On COMAND Online
XActivate the Bluetooth® function in
COMAND Online (Y page 379).
General notes
Before using your Bluetooth® audio device
with COMAND Online for the first time, you
will need to authorise it.
When you authorise a new Bluetooth® audio
device, it is connected automatically. Con-
nection involves first searching for a Blue-
tooth® audio device and then authorising it.
You can authorise up to fifteen Bluetooth®
devices.
iIf you authorise a mobile phone that sup-
ports Bluetooth® audio, the A2DP and
AVRCP Bluetooth® audio profiles are con-
nected automatically.
The mobile phone is then entered:
Rin the Bluetooth® telephone list
(Y page 426)
Rin the Bluetooth® device list
(Y page 508)
Mercedes-Benz recommends authorising a
mobile phone in Bluetooth® telephony
(Y page 428).
iIf the mobile phone that is connected only
supports two Bluetooth® profiles at the
same time, COMAND functions may
behave as follows:
Rwhen connecting to the Internet, play-
back is stopped on the Bluetooth® audio
device (Y page 471).
Rwhen starting playback on the Blue-
tooth® audio device, the Internet con-
nection is ended (Y page 472).
Searching for and authorising a Blue-
tooth® audio device
Example: Bluetooth® device list
:Bluetooth® audio player within range and
already authorised
;Newly detected mobile phone with Blue-
tooth® audio function in range
508 Media
COMAND Online
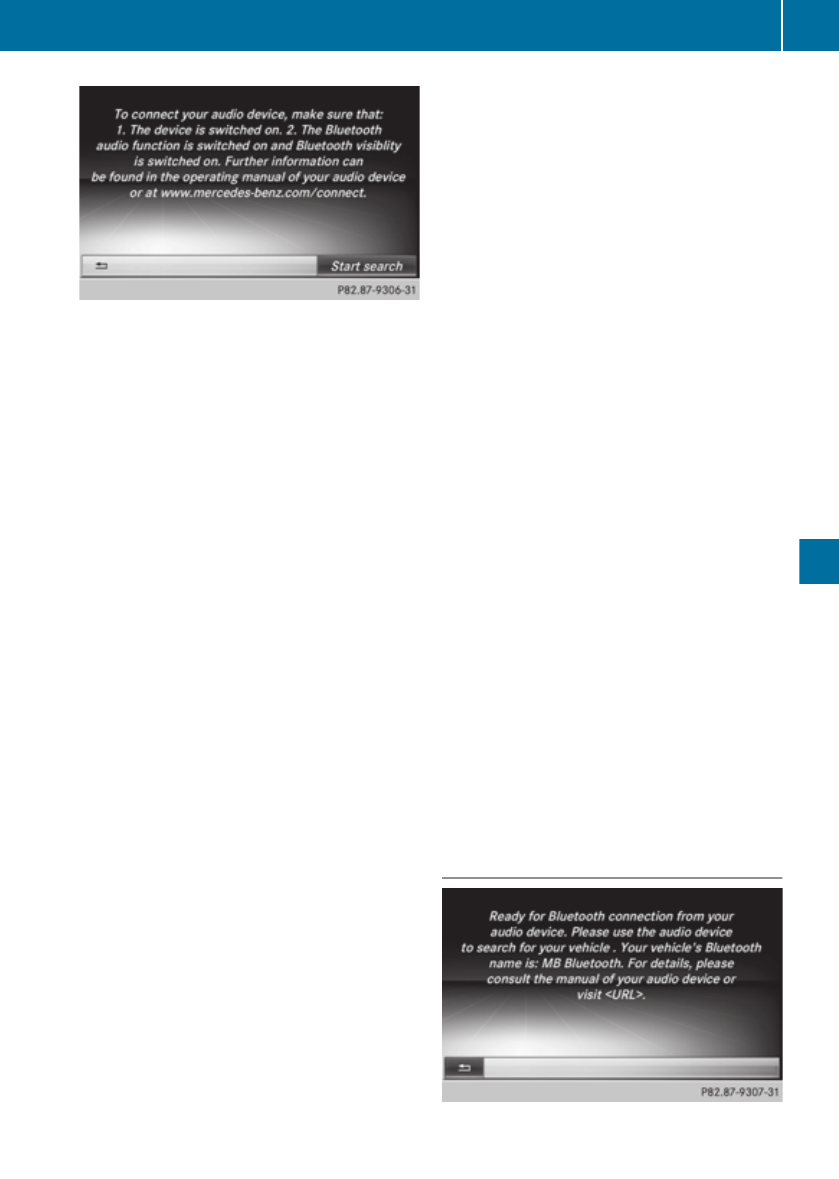
The Bluetooth® device list displays all author-
ised devices, whether they are within range
or not. After a device search, devices which
are within range but not authorised are also
displayed.
XSwitch on Bluetooth® audio mode
(Y page 511).
If you see the No Bluetooth audio
device authorised message, you will
need to authorise the Bluetooth® audio
device first.
XTo select Options from the Bluetooth®
audio menu: slide V¬ and press the con-
troller.
XTo select Bluetooth audio devices:
press the controller.
A new menu appears.
XTo search: select Search for audio
devices.
A display with text appears.
XSelect Start search.
COMAND Online searches for Bluetooth®
audio devices within range and adds them
to the Bluetooth® device list.
The duration of the search depends on the
number of Bluetooth® audio devices within
range and their characteristics.
iWith some Bluetooth® audio devices,
playback must first be started on the device
itself so that COMAND Online can play the
audio files. Sometimes, Bluetooth® must
also be given as a media output location on
the audio device.
XTo authorise: select a Bluetooth® audio
device that has not yet been authorised
from the list (in example ;).
Authorisation starts.
XDepending on the Bluetooth® audio device
used, you now have two options for con-
tinuing with authorisation.
XOption 1: enter the passkey. You can find
information on this in the "Authorising (reg-
istering) a mobile phone" section
(Y page 428).
After successful authorisation, the Blue-
tooth® audio device is connected and
starts playing.
XOption 2 (Secure Simple Pairing): if the
digit codes displayed in COMAND Online
and on the Bluetooth® audio device are the
same, select Yes.
If you select Yes, authorisation continues
and the Bluetooth® audio device is connec-
ted. Playback starts.
If you select No, authorisation will be can-
celled.
iThe Bluetooth® audio device must sup-
port Bluetooth® version 2.1 for connection
via Secure Simple Pairing.
COMAND Online creates a six-digit code,
which is simultaneously displayed on both
devices that are to be connected.
For some Bluetooth® audio devices, the
pairing must be confirmed within 10 sec-
onds.
External authorisation
Media 509
COMAND Online
Z
If COMAND Online does not find your Blue-
tooth® audio device, this may be due to par-
ticular security settings on your Bluetooth®
audio device. In this case, check whether your
Bluetooth® audio device can locate the
COMAND Online system.
The Bluetooth® device name for
COMAND Online is MB Bluetooth.
XSwitch on Bluetooth® audio mode
(Y page 511).
XTo select Options: slide V¬ and press
the controller.
XTo select Bluetooth audio devices:
press the controller.
XTo select Connect via audio device:
turn and press the controller.
XTo authorise: start the authorisation on
the Bluetooth® audio device; see the oper-
ating instructions of the Bluetooth® audio
device.
After successful authorisation, the Blue-
tooth® audio device is connected and
starts playing.
iWith some Bluetooth® audio devices,
playback must first be started on the device
itself so that COMAND Online can play the
audio files.
Reconnecting a Bluetooth® audio
device
The Bluetooth® audio profiles are connected
automatically under the following circum-
stances:
Rone of the last two mobile phones to have
been connected has also been used as a
Bluetooth® audio player (if the function is
supported by the mobile phone).
Rthe mobile phone is automatically connec-
ted. The Bluetooth® audio player is then
connected.
iFor an automatic connection with
COMAND Online, the telephone must be
within range.
If the No Bluetooth audio device con‐
nected message appears, you have two
options to reconnect the Bluetooth® audio
device:
XTo confirm Connect last device in the
basic display: press the controller.
If COMAND Online can locate the Blue-
tooth® audio device, it will be connected
and will start playing.
or
XTo select Options: slide V¬ and press
the controller.
XTo select Bluetooth audio devices:
press the controller.
XTo select a Bluetooth® audio device: turn
and press the controller.
If the Bluetooth® audio device has been
authorised, playback starts.
Bluetooth® audio device and simultane-
ous search for mobile phones
During the search for mobile phones, the con-
nection with the Bluetooth® audio device is
terminated (Y page 426). In the Bluetooth®
audio basic display, you will see the No Blue‐
tooth audio device connected message
and the Connect last device menu item
cannot be selected.
Displaying details
XTo select a Bluetooth® audio device from
the Bluetooth® device list: turn the control-
ler.
XTo select the symbol to the right of the
Bluetooth® audio device: slide VY the con-
troller.
XTo select Details: turn and press the con-
troller.
The following information concerning the
selected mobile phone is shown:
RBluetooth® name
RBluetooth® address
510 Media
COMAND Online
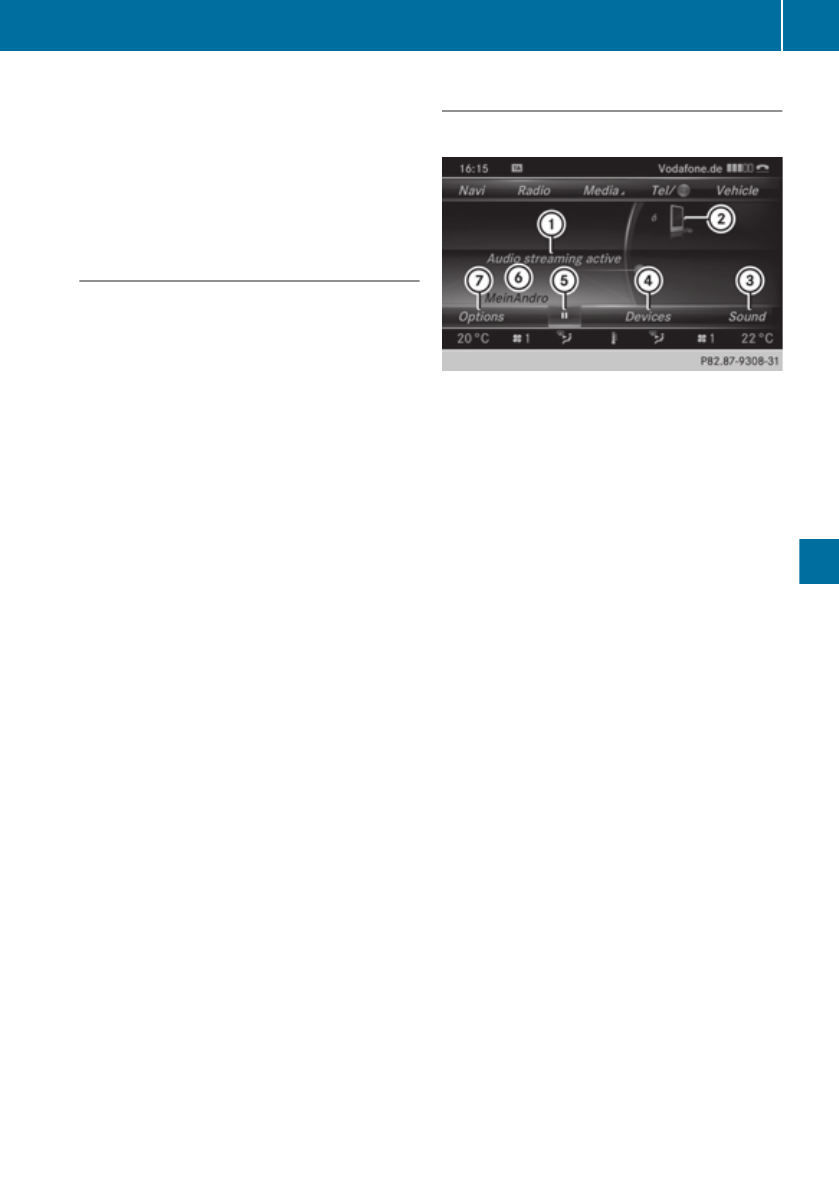
Ravailability status (shown after an
update)
Rauthorisation status
XTo close the detailed display: press the
% button.
De-authorising (de-registering) a Blue-
tooth® audio device
XTo select a Bluetooth® audio device from
the Bluetooth® device list: turn the control-
ler.
XTo select the symbol to the right of the
Bluetooth® audio device: slide VY and
press the controller.
XTo select De-authorise: press the con-
troller.
A prompt appears, asking whether you
really wish to de-authorise this device.
XTo select Yes or No: turn the controller and
press to confirm.
If you select Yes, the device will be deleted
from the Bluetooth® device list.
If you select No, the process will be cancel-
led.
iBefore re-authorising the Bluetooth®
audio device, you should also delete the
device name MB Bluetooth from your
Bluetooth® audio device's Bluetooth® list
(see the Bluetooth® audio device's operat-
ing instructions).
Switching to Bluetooth® audio mode
Note
Example: Bluetooth® audio basic display
:Audio transmission status (depending on
the Bluetooth® audio device, also title
name and artist)
;Data carrier position in the media list
=Sound settings
?Device list
ATo stop Ë or start Ì playback
BName of the connected Bluetooth® audio
device
COptions menu
Some mobile phones only support two Blue-
tooth® profiles at the same time (e.g. Hands-
Free Profile for Bluetooth® telephony and
Bluetooth® audio profile for audio streaming).
If you activate Bluetooth® audio mode and
there is already an active Internet connection,
this can cause the connection to be termina-
ted.
Activating Bluetooth®
XConnecting Bluetooth® audio devices
(Y page 507)
or
XTo select Bluetooth Audio from the car-
ousel menu: turn and press the controller.
COMAND Online activates the Bluetooth®
audio device. The basic display then
appears. Playback starts.
iIf the Bluetooth® audio device connected
supports metadata and if the correspond-
Media 511
COMAND Online
Z
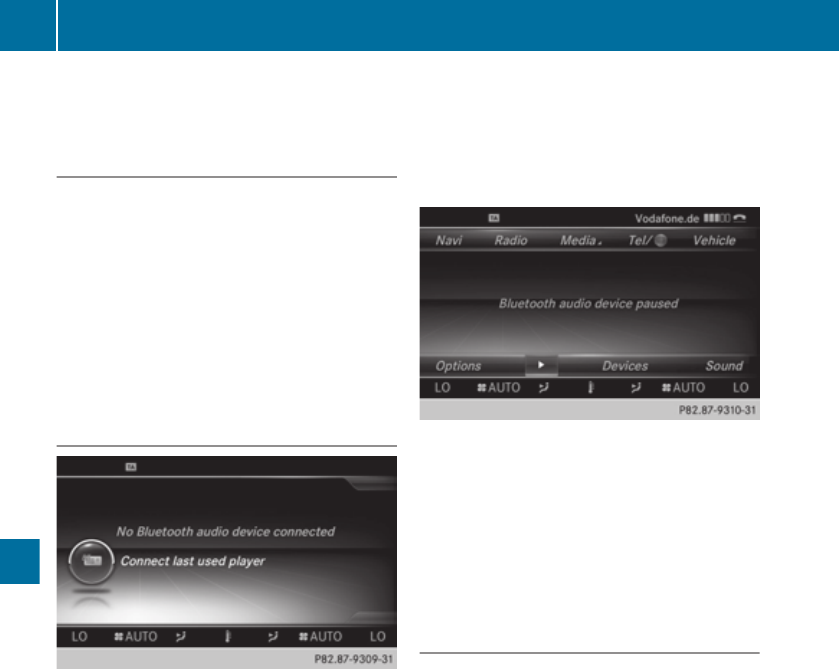
ing data is available, then the artist, track
and album name can be displayed.
Starting/stopping playback
XTo select Start playback:Ì: turn and
press the controller.
Playback starts. Ë is selected.
XTo stop playback: select Ë.
A message appears. Ì is selected.
XTo continue playback: select Ì.
A message appears. Ë is selected.
Starting playback if the Bluetooth®
audio device has been stopped
During the search for mobile phones, the con-
nection with the Bluetooth® audio device is
terminated (Y page 426). In the Bluetooth®
audio basic display (Y page 511), you will see
the No Bluetooth audio device connec‐
ted message and the Connect last used
player menu item cannot be selected.
When the search is finished, the Bluetooth®
audio device can be reconnected.
XTo start playback: select Ì.
Playback resumes from the beginning.
XTo select Connect last used player:
press the controller.
Depending on the Bluetooth® audio device
used, playback starts immediately or you
need to start playback manually.
In this case, you will see the Bluetooth
audio device paused message.
iIf there is an Internet connection and the
mobile phone that is connected only sup-
ports two Bluetooth® profiles at the same
time, the Internet connection is interrup-
ted.
iThe connection to the Bluetooth® audio
device can also be interrupted if:
Rthe connected mobile phone only sup-
ports 2 Bluetooth® profiles at the same
time
Ryou connect to the Internet using
COMAND Online (Y page 471).
Selecting a track
The function is not supported by all Blue-
tooth® audio devices.
Some mobile phones impair function with
regard to the following criteria:
Rthe number of tracks that can be selected.
Rthe time period until the next or previous
track is played.
XTo skip forwards or backwards to a
track: briefly press the 9 or : but-
ton on the multifunction steering wheel.
XRapid scroll: press and hold the 9
or : button on the multifunction steer-
ing wheel until the desired track is reached.
If you press and hold the 9 or : but-
tons, the rapid scrolling speed increases
after a short time.
iThere are no playback times shown for
tracks that have been played. This is avail-
able as an optional function starting with
512 Media
COMAND Online

AVRCP Version 1.3. There is also no music
search option available with Bluetooth®
Audio.
Selecting playback options
If the Bluetooth® audio device supports the
corresponding function, the following options
are available:
RNormal track sequence
The tracks are played in the normal order
(e.g. track 1, 2, 3 etc.).
Audio data playback is determined by the
order in which the tracks are written to the
data carrier. Alphabetical order is the most
common. Once all the tracks in a folder
have been played, the tracks in the next
folder are played.
RRandom tracks
The current track list is played in random
order (e.g. 3, 8, 5 etc.).
RRandom medium
All tracks on the data carrier are played in
random order (e.g. track 3, 8, 5 etc.).
Random media is an optional function and
is not supported by all Bluetooth® audio
devices.
XTo select Options: turn and press the con-
troller.
XSelect Play back music.
The dot#indicates the option selected.
XSelect the desired option.
If you select Random tracks, you will see
a corresponding symbol in the display/
selection window.
Increasing the volume using COMAND
XTo select Options: slide V¬ and press
the controller.
XTo select Volume: turn and press the con-
troller.
A menu appears. The # dot indicates the
current setting.
XSelect Standard or Boost.
Information on sound settings .
Further information: "Audio AUX mode"
(Y page 519).
Media 513
COMAND Online
Z
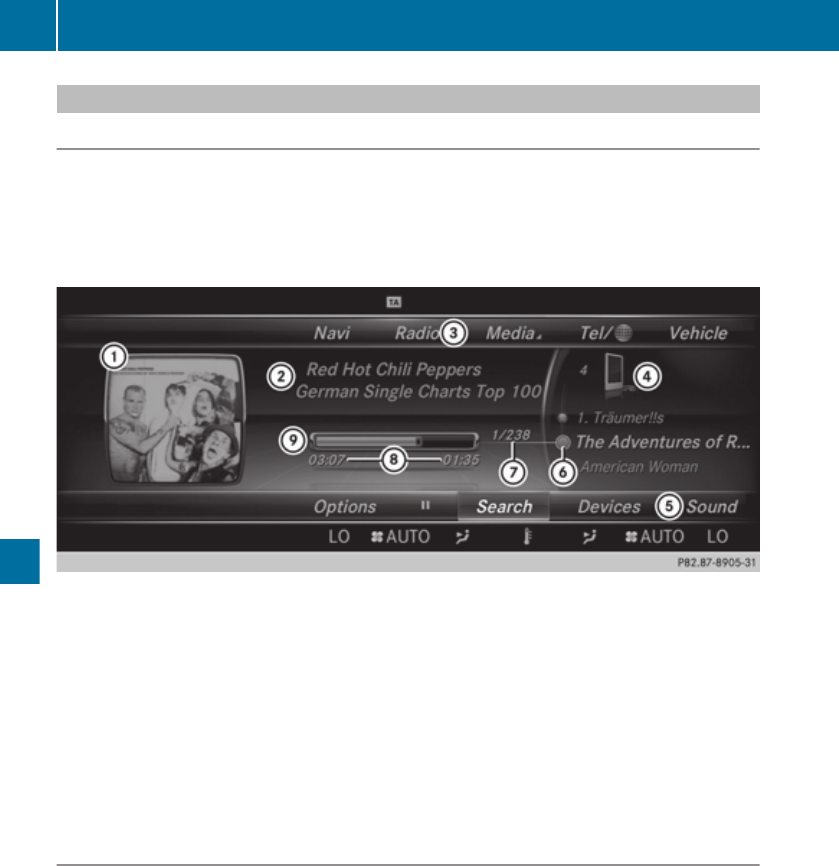
Media Interface mode
Prerequisite
An iPod®, iPhone®, USB device or MP3 player must be connected to the Media Interface. You
will find two USB connection sockets in the centre console stowage compartment.
Basic display once an Apple device is connected
Media Interface is a universal interface for the connection of mobile audio and video devices.
The COMAND Online Media Interface has two USB connections.
:Additional display area with cover view
;Artist and album
=Main function bar
?Display for the active data medium
AMedia menu bar
BTitle display in the media list
CTrack number
DNumerical time display
EGraphic time display
Switching to Media Interface
Media Interface is a universal interface for the connection of mobile audio and video devices.
Media Interface in COMAND Online has two USB connections. The USB connection sockets
are located in the stowage compartment in the centre console.
XTo switch on automatically: COMAND Online switches Media Interface on automatically
once an iPod®, iPhone®, USB device or MP3 player has been connected. If playable media
files are found, they will be played by COMAND Online. If a media source was previously
selected, the Media Interface basic menu will appear. For all other COMAND Online func-
tions, the display will not change.
If you remove a device, the No device connected message appears.
FURTHER OPTIONS FOR SWITCHING ON:
514 Media
COMAND Online
RUsing the number keypad: (Y page 492)
RUsing the main function bar: (Y page 492)
RUsing the device list: (Y page 492)
RUsing the Õ button: (Y page 491)
Supported devices
The following data media can be connected to COMAND Online via the Media Interface:
RiPod®
RiPhone®
RMP3 player
RUSB devices
iiPod® and iPhone® are registered trademarks of Apple Inc., Cupertino, California, USA.
iUSB memory sticks can easily be connected to the Media Interface and removed after
use. Audio files, photos and video files can be played back.
For details and a list of supported devices, visit our website at http://www.mercedes-benz-
mobile.com/. Then follow the instructions in the "Media Interface" section.
Supported data formats
Music mp3, wma
Video mpeg, wmv, mov, avi, mp4
Images jpg, jpeg, bmp, png
Selecting a music file
Selecting with the controller
XTo skip forwards or backwards to a track: turn the controller in the basic display.
Three track titles are shown. The track to the front is played.
Selection with the number keypad
XTo make an entry: press the l button (below left) on the telephone keypad.
The keypad menu with the list of devices will then appear in the additional display area.
The input menu appears in the basic display.
The number of characters available for input depends on the number of stored tracks.
XTo enter a track number: press a number key, e.g. q.
The digit is entered in the first position in the input line.
iPressing and holding a number key for more than two seconds completes the entry, and
the corresponding track is played.
COMAND Online switches to the device displayed on the keypad when a number key is
pressed briefly.
Media 515
COMAND Online
Z

Fast forward/rewind
XWith the media source active in the basic display, slide XVY the controller and hold it until
the desired position has been reached.
Search function
Selecting Search using media menu bar
XSlide VÆ the controller.
The media menu bar appears.
XTo select Search: turn the controller and press to confirm.
Overview
The following categories are listed:
RCurrent tracklist
RFolder
RSelect by cover
RKeyword search
RPlaylists
RArtists
RAlbums
RTracks
RGenres
RYear
RComposers
RVideos
RPhotos
iThe functions are available as soon as the entire media content has been read and ana-
lysed.
If the same device is reconnected with unchanged media content, these functions are avail-
able more quickly.
When connecting Apple® devices, the categories “Folder”, “Year” and “Photos” are not
available.
516 Media
COMAND Online
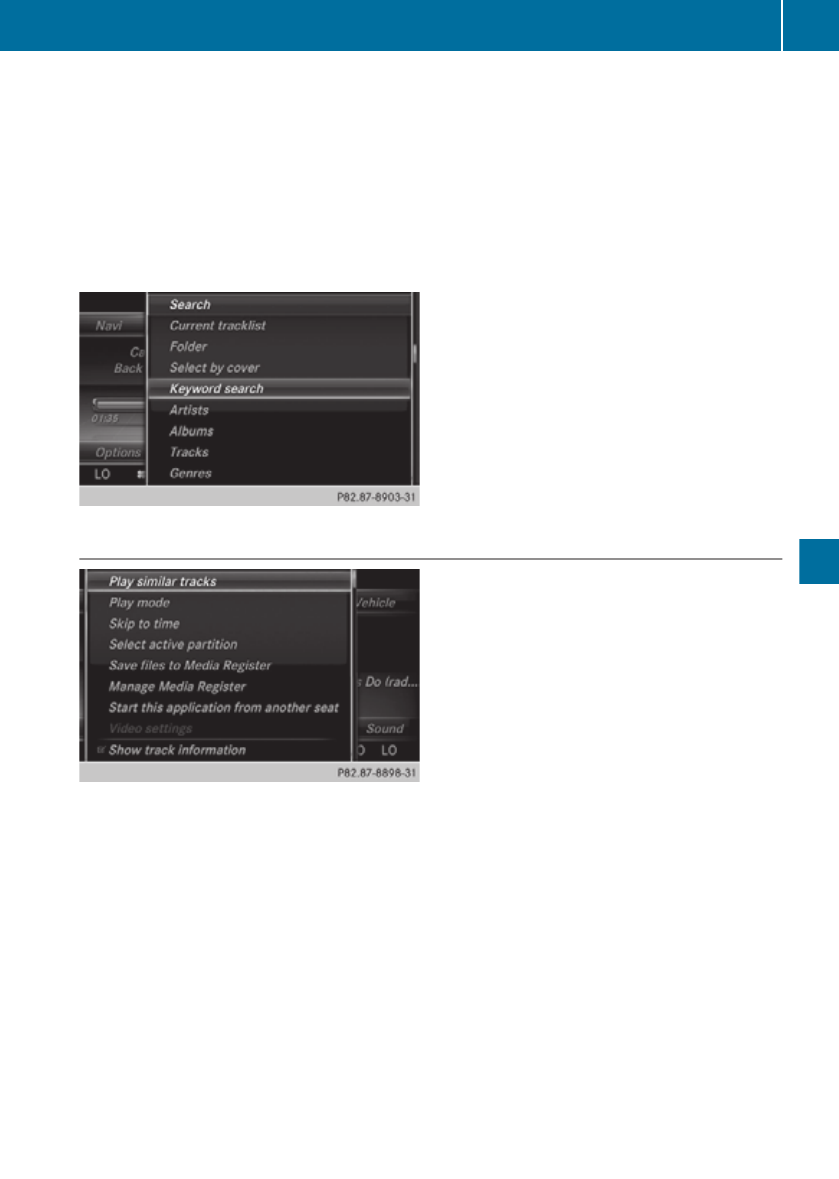
XTo select search criteria: turn and press the controller.
Another selection menu opens.
XSelect the search criterion.
The track list opens.
XTo select the desired track: turn and press the controller.
XKeyword search: using the controller, enter the characters for the desired search term.
Once COMAND Online has found the track you are looking for, it supplies the rest of the
characters and plays the track.
Playback options
XTo select a playback option: with a media source connected, slide V¬ the controller.
The media menu bar is shown.
XTo select Options: turn the controller and press to confirm.
The following options are available:
RPlay similar tracks
If similar music titles are available, a list is shown. You can select the desired track using
the controller.
RPlay mode
You can choose between Normal track sequence, Random tracks and Random media.
RSkip to time
You can skip to any position within a track using the timeline and the option of entering a
point in time numerically.
RSelect active partition
Media 517
COMAND Online
Z
This option can be used if the active data medium is divided into partitions.
RSave files to Media Register(Y page 504)
You can transfer files from a connected data medium to the COMAND Online hard drive.
RManage Media Register
You can Rename / delete files stored on the hard drive, Delete all media files or
display Memory info.
RStart this application in other location
This allows you to move playback of music titles to a different seat.
RVideo settings
You can call up an additional menu if there are video files on the active data medium.
RShow track information
You can determine whether or not title information is shown in the main with O or ª.
Audio AUX mode
Notes on audio AUX mode
GWARNING
External audio sources may have different vol-
umes, which can mean that system messages
such as traffic announcements and navigation
system announcements are much louder. If
necessary, please deactivate the system mes-
sages or adjust their volume manually.
AUX also provides the option of connecting
Media Player to COMAND Online.
To connect an external audio source to the
audio AUX, you will require an audio AUX
cable.
iYou can find more information on the
Internet at http://www.mercedes-
benz.com/connect(Y page 514).
Switching to audio AUX mode
XConnect an external audio source.
The audio AUX jack is located in the stow-
age compartment in the centre console.
The audio AUX is not selected automati-
cally.
XTo select Media in the main function bar:
turn the controller and press to confirm.
The carousel menu appears.
XTo select AUX: press the controller.
The audio AUX menu appears. The medium
in the external audio source is played if the
source is connected and playback selec-
ted.
Please see the respective operating instruc-
tions for how to operate the external audio
source.
518 Media
COMAND Online

Increasing the volume on COMAND
Online
XTo select Options in the AUX display: slide
V¬ and press the controller.
A menu appears.
XTo select Mono/stereo: turn and press the
controller.
A menu appears.
XSelect Mono or Stereo.
The # dot indicates the current setting.
XSelect Volume.
XSelect Standard or Boost.
Standard: the volume of the external audio
source is adjusted to a standard value.
Boost: the volume of the external audio
source is raised by approximately 10 dB.
The # dot indicates the current setting.
XTo switch traffic announcements on or off:
set O to TA or remove.
A device which is connected as an external
audio source may seem quieter or louder in
the vehicle, or the usual maximum volume
cannot be achieved. On some devices, it is
possible to adjust the volume separately. In
this case, start at a medium volume and
increase it gradually. This enables you to
determine whether the system is able to play
the music at high volume without distorting
it.
Video AUX operation
Connecting external video sources
GWARNING
External video sources may have different vol-
umes, which can mean that system messages
such as traffic announcements and navigation
system announcements are much louder. If
necessary, please deactivate the system mes-
sages or adjust their volume manually.
Video AUX is another option for showing vid-
eos using COMAND Online.
To connect an external video source to the
video AUX, you will require a video AUX cable.
iIf you only use an audio AUX cable, you
will only be able to hear the sound from the
video being played.
Video display is not possible on the driver's
side while the vehicle is in motion.
Switching to video AUX mode
XConnecting external video sources.
The socket for the video AUX jack is located
in the stowage compartment in the centre
console.
The video AUX is not selected automati-
cally.
XTo select Media in the main function bar:
turn the controller and press to confirm.
The carousel menu appears.
XTo select AUX: slide V¬ the controller and
press it.
XSelect Audio/video.
A Source type selection menu
appears.
XSelect Video.
The # dot indicates the current setting.
If Video is selected, the video of the exter-
nal video source will appear, as long as the
video source is connected and playback
selected.
Media 519
COMAND Online
Z
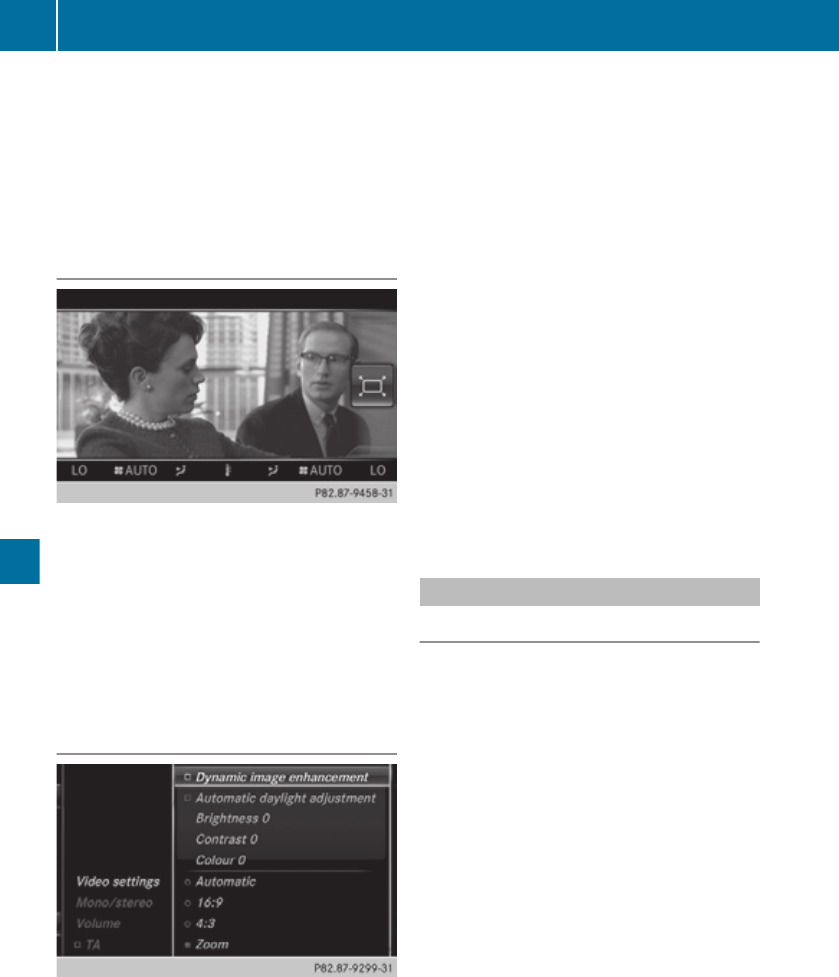
Please see the corresponding device operat-
ing instructions for information on how to
operate the external video source.
Information on:
RSound settings:
Activating/deactivating full screen
mode
XTo activate: in video AUX mode, slide
ZV the controller.
Menu bars are hidden.
XThe full screen symbol is displayed: press
the controller.
The full screen appears.
XTo deactivate: press the controller.
The menu is displayed.
Options menu
XTo select Options in the AUX display: turn
and press the controller.
A menu appears.
XSelect Video settings.
XSelect the preferred screen format, e.g.
16:9 or Automatic daylight adjust‐
ment.
The screen format is adjusted.
The # dot indicates the current setting.
XTo select Mono/stereo: turn and press the
controller.
XSelect Mono or Stereo.
The # dot indicates the current setting.
XSelect Volume.
XSelect Standard or Boost.
Standard: the volume of the external audio
source is adjusted to a standard value.
Boost: the volume of the external audio
source is raised by approximately 10 dB.
The # dot indicates the current setting.
XTo activate or deactivate traffic announce-
ments: set or remove O beside TA.
TV mode
Reception quality
Portable electronic devices in the vehicle may
seriously impair TV reception.
The TV tuner enables reception of digital TV
channels according to the DVB-T standard. If
the reception deteriorates, the TV receiver
automatically switches to an alternative digi-
tal frequency transmitting the same pro-
gramme content with better reception.
iIn some countries, DVB-T may not be
available, or may not be available in all
areas.
The constantly changing reception conditions
while the vehicle is in motion can interrupt the
signal. If the reception is too poor,
COMAND Online can mute the sound and
freeze or hide the picture. To indicate this, a
radio tower with a line through it appears in
the display.
520 Media
COMAND Online
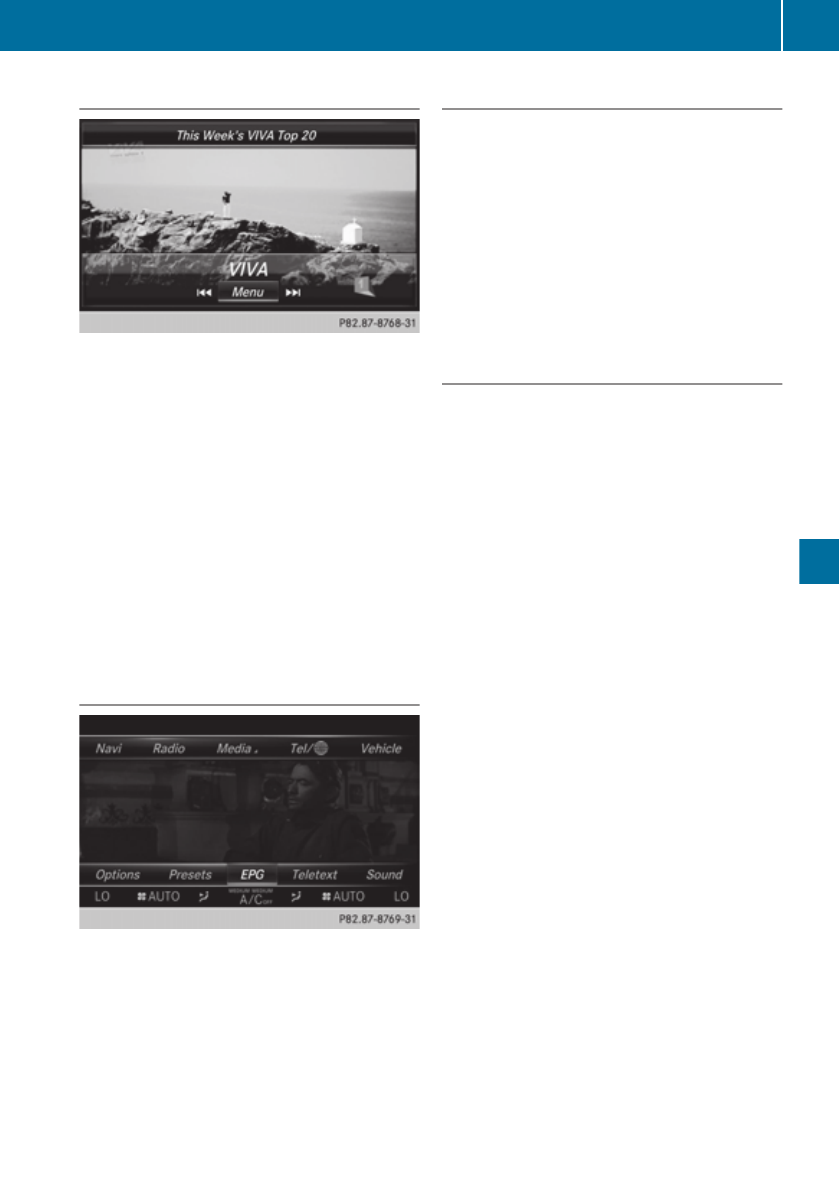
Switching to TV mode
XPress the Õ button repeatedly until the
last TV channel selected appears.
The control menu is displayed in the TV pic-
ture.
XTo hide the control menu: slide ZVÆ the
controller.
or
XWait for approximately eight seconds.
XTo show the control menu: slide ZVÆ or
turn the controller.
iIf you turn the controller, the next/previ-
ous channel is selected.
Showing/hiding the TV menu
To show
XPress the controller.
To hide
XSlide ZV the controller.
XTo select an icon: press the controller.
TV mode in SPLITVIEW
You can start TV mode in SPLITVIEW for the
front passenger. To do so, SPLITVIEW must
be activated.
XShow the TV menu (Y page 521).
XTo select Options: turn the controller and
press it.
XSelect Start this application in
SplitView.
The TV picture is displayed in SPLITVIEW.
Selecting TV channels
In the control menu
XTurn or slide XVY the controller.
The TV tuner selects the previous/next
channel from the channel list. The control
menu appears for eight seconds.
In the channel list
The TV tuner displays all the TV channels and
radio stations with adequate reception in the
channel list.
The channel lists show
Rthe names of the channels/stations with
adequate reception
Rthe preset (if stored)
Rprogramme titles, with start and finish
times
Rfor each channel/station: the titles of the
current and upcoming programmes via the
electronic programme guide (EPG)
The order of the channel list is alphabetical or
country-specific.
The TV tuner requires a certain amount of
time to update the information.
The information can be displayed if:
Rstations/channels are transmitting this
information
Rthe reception conditions are adequate
Media 521
COMAND Online
Z
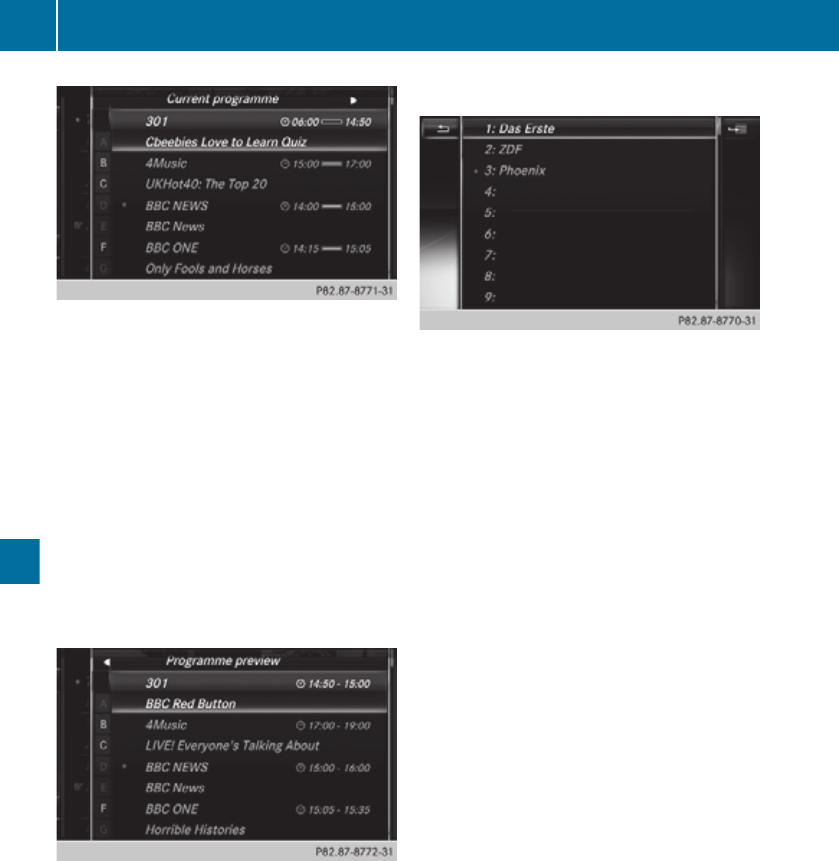
XTo show the menu: press the controller.
XTo select Options: turn the controller and
press it.
XTo display the current programme:
Select TV channel or Radio station.
The selected channel list appears in alpha-
betical order. It shows the current pro-
gramme on the digital TV channels or radio
stations with adequate reception. A dot #
indicates the currently selected channel.
XSelect a station.
The TV tuner selects the channel from the
channel list. The control menu appears for
eight seconds.
XTo display the programme preview: slide
YV the controller.
XTo return to the current programme:
slide XV the controller.
XSelect a station.
The TV tuner selects the channel from the
channel list. The control menu appears for
eight seconds.
In the channel presets
XTo show the menu: press the controller.
XTo select Presets: turn the controller and
press it.
The stored channels are displayed with a
preset number. A dot # is displayed in front
of the channel currently selected.
XSelect a station.
Quick select
iPREREQUISITE: the TV channel is stored
(Y page 523).
You can store a total of 99 TV channels in
preset positions.
XBriefly press one or two number keys on the
telephone keypad.
RTo select a single-digit preset: briefly
press the s number key, for example.
RTo select a two-digit preset: briefly press
the l and m number keys respec-
tively, for example.
The preset number and channel name
appear, and the TV tuner selects the chan-
nel from the channel list.
By entering the channel or programme
number
Several programmes can be transmitted on
one channel with digital TV. This function also
allows the desired programme to be entered
for a channel.
XTo call up the input line: during playback,
press the l key on the telephone key-
pad.
or
522 Media
COMAND Online

XTo show the menu: press the controller.
XTo select Options: turn the controller and
press it.
XSelect Channel entry.
With both options, the input line for the
four-digit channel number appears. The
current programme number is displayed.
XTo enter a channel/programme num-
ber: press number keys one after the other
on the telephone keypad.
A programme is selected depending on the
number entered.
All four digits
entered in full
The selected pro-
gramme of the channel
is automatically selec-
ted.
Two or three dig-
its entered
The first programme
with adequate reception
within a bouquet is
selected.
The Invalid
channel num‐
ber message
appears
The channel number is
not available or not per-
mitted in that country.
XPress the controller
and confirm the mes-
sage.
iBouquet: multiple digital programmes are
combined in a supply bundle.
iYou can enter channel numbers available
in your country even if the reception is cur-
rently not adequate.
Information on channel numbers available
in your country can be found on the web-
sites of the private or public broadcasters,
for example.
Storing TV channels
You can store a total of 99 TV channels in
preset positions. Two presets are preas-
signed.
XQuick save: during playback, press and
hold one or two number keys on the tele-
phone keypad until you hear a tone.
For a single-digit preset: press and hold the
s key, for example.
For a two-digit preset: briefly press the
l key, for example. Then within three
seconds, press and hold the m key, for
example.
The current channel is stored. The TV pic-
ture then reappears.
XIn the channel presets: press the control-
ler.
XTo select Presets: turn the controller and
press it.
The station preset memory appears.
XTo select the preset position: turn the con-
troller.
XTo select a list symbol: slide VY the con-
troller and then press it.
XSelect Store current channel.
A previously saved channel is overwritten.
The TV picture appears.
OTHER FUNCTIONS:
XTo save a channel to a new preset posi-
tion: select the channel in the presets.
XTo select a list symbol: slide VY the con-
troller and then press it.
XSelect Move selected channel.
XTurn the controller.
The channel moves to the new preset posi-
tion as you turn.
XPress the controller.
XTo delete a channel: select the channel in
the presets.
XTo select a list symbol: slide VY the con-
troller and then press it.
XSelect Delete marked channel.
Media 523
COMAND Online
Z
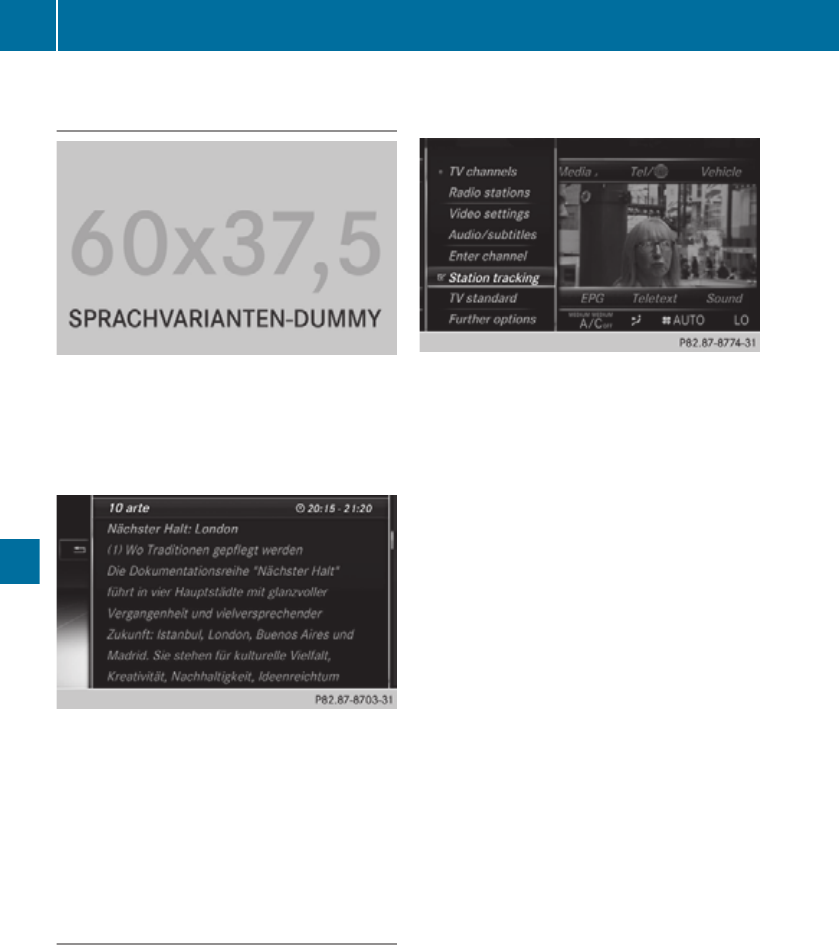
Current programme information for the
selected channel
XTo show the menu: press the controller.
XTo select EPG: press the controller.
If available, you will see up to 13 pro-
gramme information items for the selected
channel.
XTo select programme information: turn
the controller and press it.
If available, you will see detailed informa-
tion on the selected programme.
XTo scroll: turn or slide ZVÆ the controller.
iIt may take a few seconds for the infor-
mation to appear.
Basic TV settings
Channel tracking
Depending on reception quality, the TV tuner
automatically switches to an alternative
channel with the same programme content
but better reception. This enables you to
enjoy the same high-quality reception for a
channel throughout the journey. As a result,
you can receive a channel. Channel track‐
ing allows or prevents the channel currently
selected to be switched over.
XTo show the menu: press the controller.
XTo select Options: turn the controller and
press to confirm.
XSelect Channel tracking.
Switch channel tracking on O or off ª.
Switched on: switching channels is possi-
ble.
Switched off: switching channels is preven-
ted. Channels are marked with Fixed in the
control menu or in the channel presets, for
example.
XTo exit the menu: press the % button
repeatedly until the TV picture and menu
bar appear.
Setting the TV standard
COMAND Online is already set to the correct
TV standard. If you are driving your vehicle in
a different country or region with a different
TV standard, you should reset the TV stand-
ard. If the TV standard is not set correctly,
channels may not be found or characters may
be incorrectly displayed, for example. A
Mercedes-Benz Service Centre can help you
to select the correct TV standard.
XTo show the menu: press the controller.
XTo select Options: turn the controller and
press to confirm.
XSelect TV standard.
A list of available reception areas is shown.
The dot # indicates the currently selected
reception area or country.
524 Media
COMAND Online
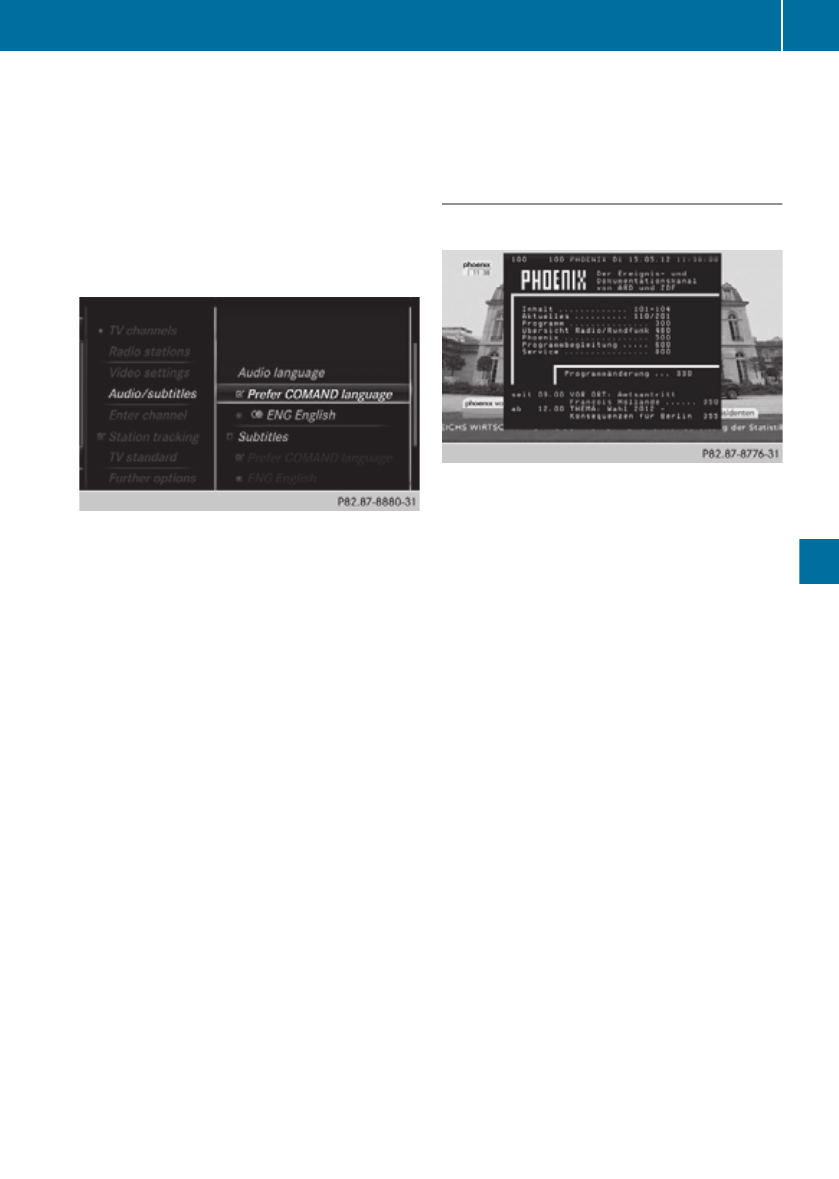
XSelect TV standard.
You will see a message informing you that
if the wrong country is set, correct recep-
tion will not be possible.
XSelect Yes or No.
Yes sets the country.
No calls up the list again.
Setting the audio language/subtitles
XTo show the menu: press the controller.
XTo select Options: turn the controller and
press it.
XSelect Audio/subtitles.
XTo set the audio language: select Pre‐
fer COMAND language or one of the avail-
able audio languages.
Prefer COMAND language selects the sys-
tem language currently set for COMAND
Online. Switch the setting on O or off ª.
If you select one of the available audio lan-
guages, e.g. English, this setting is used for
the current program. If Prefer COMAND
language is activated as well, this setting
is then used for the following program.
XTo set the subtitles: select Subtitles.
Yo switch the subtitles on O or off ª.
XSelect Prefer COMAND language or one
of the available languages for subtitles.
Prefer COMAND language selects the sys-
tem language currently set for COMAND
Online. You switch the setting on O or off
ª.
If you select one of the available languages
for subtitles, e.g. English, this setting is
used for the current program. If Prefer
COMAND language is activated as well, this
setting is then used for the following pro-
gram.
Teletext
Switching teletext on/off
XTo switch on: press the controller.
The menu is shown.
XTo select Teletext: turn the controller and
press it.
XTo switch off: press and hold the %
button.
The TV picture appears with the control
menu.
Selecting a teletext page
XTo access a page directly: press the num-
ber keys one after the other.
XTo call up the previous/next page: turn
the controller.
iYou can only enter pages that are permis-
sible for teletext between 100 and 899.
Dynamic teletext page
A dynamic teletext page consists of several
subpages.
XTo select a subpage: slide
XVY the controller.
Digital teletext (MHEG-5)
In addition to TV and radio programmes, you
can also use interactive multimedia applica-
tions such as weather forecasts, news
reports and sports results.
It may take some before all the pages load.
Media 525
COMAND Online
Z
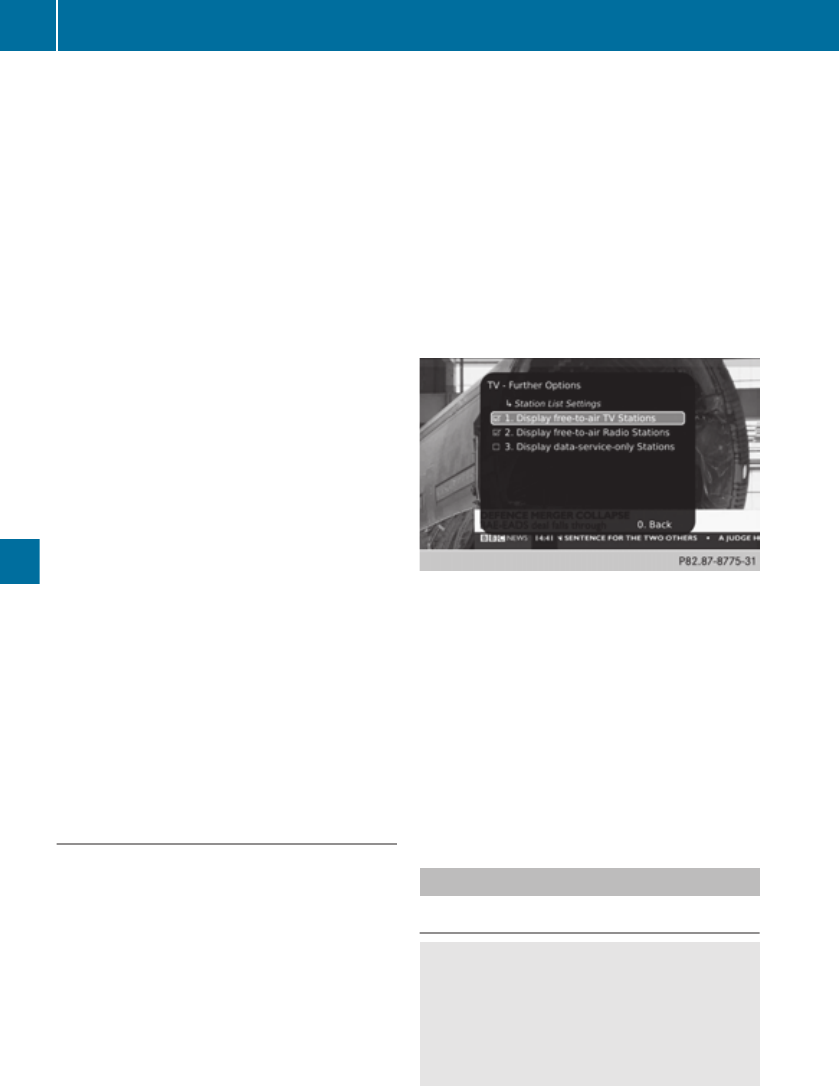
Digital teletext is only available in some coun-
tries, e.g. the UK and New Zealand.
XTo switch on: press the controller.
The menu is shown.
XTo select Teletext: turn the controller and
press it.
XWhen the data contents are displayed, turn
the controller.
The menu bar appears at the bottom of the
picture.
XTo select a colour: turn the controller and
select Red, Green, Yellow or Blue.
XPress the controller.
The contents of the selected colour are dis-
played.
XTo navigate to the page: when the menu
bar is displayed, slide ZVÆ the controller.
The menu bar disappears.
XSlide ZVÆ the controller and select con-
tents from the page.
XPress the controller.
XTo return to the TV programme: turn the
controller.
The menu bar disappears.
XTo select TV: turn the controller and press
it.
or
XPress and hold the % button on the left
next to the controller.
Further options
The "TV - further options" menu
XTo show the menu: when the television
picture is shown, press the controller.
XTo select Options: turn the controller and
press to confirm.
XSelect Further options.
Setting country-specific character sets
This function helps channel names to be dis-
played correctly.
XCall up the "TV - further options" menu
(Y page 526).
XSelect Settings.
XSelect 1. Country-specific charac‐
ter set.
XYou switch the setting on O or off ª.
iYou can change the setting from channel-
specific to country-specific character set
via the TV standard setting.
Channel list settings
This function allows you to switch on/off the
display of free-to-air TV channels and radio
stations in the channel list.
XCall up the "TV - further options" menu
(Y page 526).
XSelect Settings.
XSelect 2. Station List settings.
XSelect Display free-to-air stations
or Display radio stations.
Switch the setting on O or off ª.
Video DVD mode
Important safety notes
GWARNING
The CD/DVD drive is a class 1 laser product.
If you open the housing of the CD/DVD drive,
invisible laser beams may be released. These
laser beams may damage your retina. There
is a risk of injury.
526 Media
COMAND Online

You must not open the casing. Always have
maintenance work and repairs carried out at
a qualified specialist workshop.
GWARNING
Handling discs while driving will distract you
from traffic conditions. You could then lose
control of the vehicle. There is a risk of an
accident.
Handle discs only when the vehicle is station-
ary.
Bear in mind that, at a speed of only
50 km/h, your vehicle is already covering a
distance of 14 m per second.
Notes on discs
! Do not affix stickers or labels to the discs.
They could peel off and damage
COMAND Online. Stickers can cause the
disc to bend, which can result in read errors
and disc recognition problems.
! COMAND Online is designed to play discs
which comply with the EN 60908 standard.
Therefore, you can only use discs with a
maximum thickness of 1.3 mm.
If you insert thicker discs, e.g. those that
contain data on both sides (DVD on one
side and audio data on the other), they can-
not be ejected and can damage the device.
Only use round discs with a diameter of
12 cm. Do not use discs with a diameter of
8 cm, even with an adapter.
The variety of data media, burners and burn
software means there is no guarantee that
the system will be able to play discs that you
have copied yourself.
DVD playback requirements
With DVDs that do not meet the standard
requirements, you may encounter playback
problems.
COMAND Online is capable of playing back
video DVDs produced according to the fol-
lowing standards:
RRegion code 2 (for Europe) or region code
0 (no region code)
RPAL or NTSC standard
You will generally find the relevant details
either on the DVD itself or on the DVD case.
iIf you insert a video DVD with a different
region code, you will see a message to this
effect.
iCOMAND Online is set to region code 2
at the factory. This setting can be changed
at a Mercedes-Benz Service Centre. This
will allow you to play video DVDs with a dif-
ferent region code, provided that they are
produced in accordance with the PAL or
NTSC standard. The region code can be
changed a maximum of five times.
Control options
There are four control menus available in
video DVD mode.
Most DVDs have their own control menu.
The DVD's control menu is operated directly
using the controller or DVD functions.
Control
menu
Function Operation
DVD's con-
trol menu
Title, scene,
language,
subtitles ...
Operation
with the con-
troller
Options
menu
Brightness,
contrast,
colour, for-
mat
Operation
using the
menu bar/
options/
video set-
tings
Media 527
COMAND Online
Z
Control
menu
Function Operation
Video menu Selection of
scene, fast
forward/
rewind
In full-screen
mode, slide
¬ the con-
troller.
DVD func-
tions
Title, scene,
language,
subtitles ...
In full-screen
mode, press
the control-
ler
Function restrictions
Depending on the DVD, certain functions or
actions may not function at all. The symbol
K appears in the display.
Switching to video DVD mode
RInserting and removing a disc from the sin-
gle CD/DVD drive: (Y page 493)
RInserting discs into the DVD changer:
(Y page 494)
REjecting discs from the DVD changer:
528 Media
COMAND Online
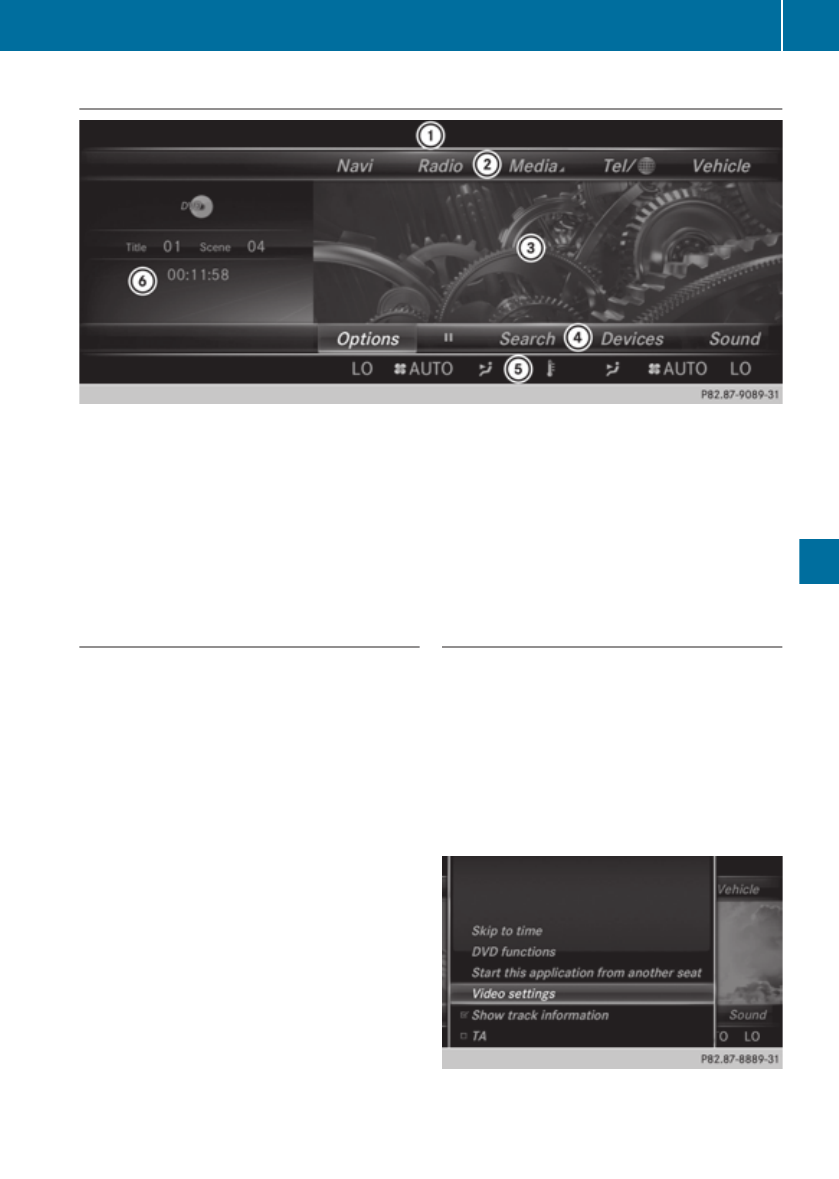
DVD basic display
:Status bar
;Main function bar
=Main display field
?Media menu bar
AClimate control status bar
BAdditional display area with title, scene and time display
The DVD basic display appears once the DVD has been inserted.
DVD full-screen mode
Once the DVD has been inserted, the disc is
played. The video will first appear in the basic
display.
XTo set full-screen mode: slide VZ the
controller.
The main function bar and menu bar are
hidden. A full-screen symbol will be shown.
XPress the controller.
The full-screen mode appears.
XShowing the DVD basic display in full-
screen mode: slide V¬ the controller.
The video menu appears.
XPress the controller.
The basic display appears.
Options menu
XTo select options: in full-screen mode,
slide V¬ the controller.
The video menu appears.
XPress the controller.
The DVD basic display appears.
XTo select Options in the menu bar: turn
and press the controller.
The Options menu appears.
Media 529
COMAND Online
Z
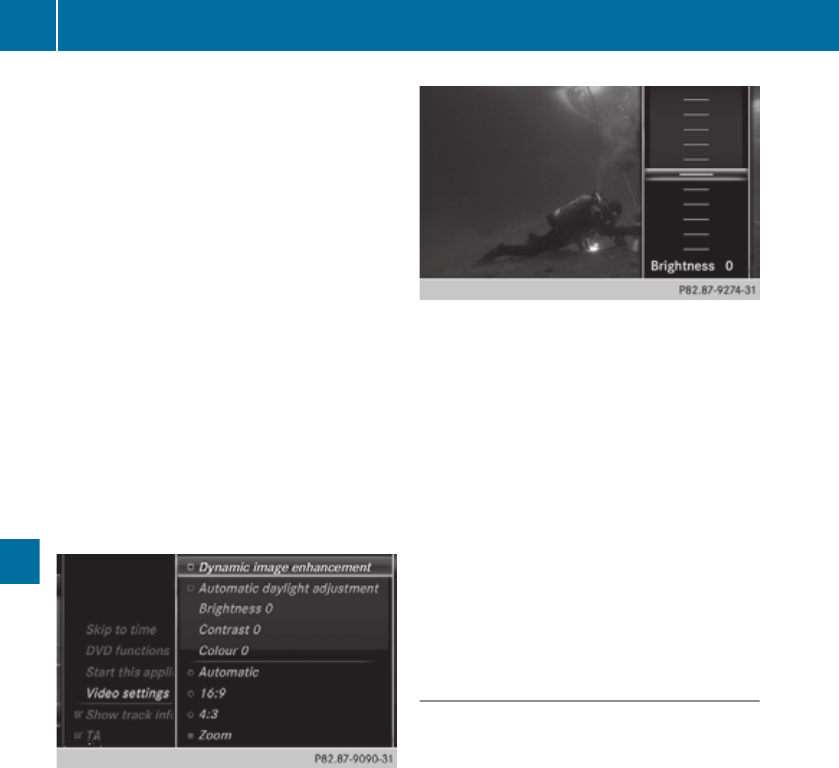
Skip to time
XTo select Skip to time: turn and press the
controller.
A pop-up menu appears.
XTo set the time: turn the controller.
or
Set the desired time using the number key-
pad.
XTo hide the menu: press the % button.
DVD functions
XTo select DVD functions: turn and press
the controller.
A pop-up menu appears.(Y page 531)
Start at a different seat
XTo start the video from another seat: turn
and press the controller.
Video settings
The Dynamic image enhancement function
matches Brightness, Contrast and Col‐
our to the film being played.
Check or uncheck the box for Dynamic
image enhancement to switch it on or off.
Manual image enhancement
In order to manually adjust the brightness,
contrast or colour, the Dynamic image
enhancement function must be switched off.
XTo select Brightness, Contrast or Col‐
our: turn and press the controller.
A sliding menu appears.
XTo select the required value: turn the con-
troller.
XTo exit the sliding menu: slide XV the con-
troller.
XTo switch the Automatic daylight
adjustment on/off: press the controller.
Setting the picture format
The following picture format options are avail-
able for the DVD being played: Automatic,
16:9, 4:3 and Zoom.
XTo set the picture format: turn and press
the controller.
The dot before the menu entry shows the
selected format.
Showing/hiding the video DVD menu
XTo show: in full-screen video mode, slide
VÆ the controller.
XTo hide: slide ZV the controller.
iThis function is not available while the
DVD functions are being displayed.
530 Media
COMAND Online
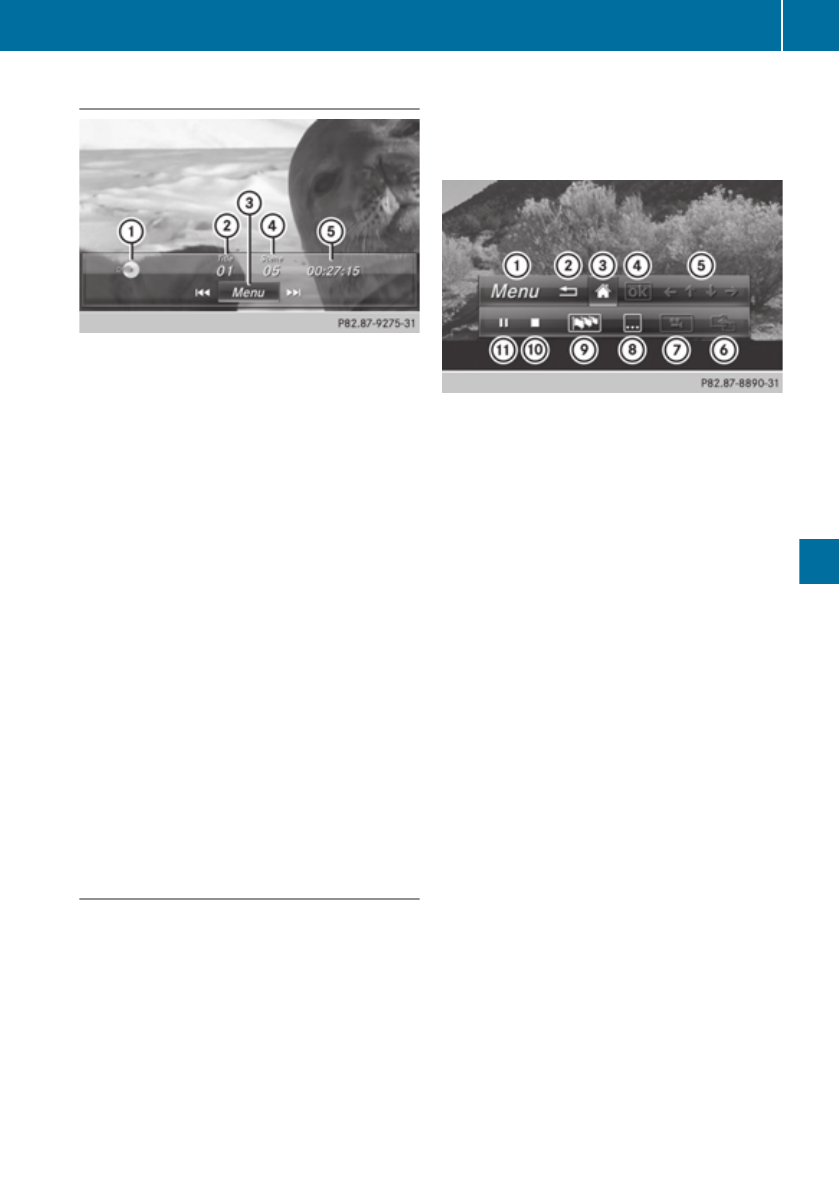
Video menu
:Data medium type
;Current track
=Shows the menu bars for the DVD basic
display
?Current scene
ATrack time
Operating the video menu
XTo select the next scene: turn the controller
to the right.
To select the previous scene: turn the con-
troller anti-clockwise.
XTo fast forward/rewind: slide XVY and
hold the controller until the desired posi-
tion has been reached.
XTo hide the video control menu: slide ZV
the controller.
XTo show the menu bars for the DVD basic
display: press the controller.
The video control menu is hidden and the
DVD basic menu appears.
DVD functions
Showing/hiding the DVD functions
XTo show DVD functions: in full-screen
video mode, press the controller.
is shown.
XTo hide:
To select % from the DVD functions:
turn and press the controller
XTo show the DVD basic display:
To select ò from the DVD functions:
turn and press the controller.
Overview of DVD functions
:Activates DVD control menu
;Hides DVD functions
=Shows the DVD basic display
?Confirms entry in control menu
ANavigates DVD lists
BJumps to the start of the scene
CDisplays camera perspectives
DShows subtitles
ESelects language
FStop function
GPause function
XUsing the DVD functions.
The selection options provided on the DVD
are navigated using the DVD functions.
To select Menu: turn and press the control-
ler.
The DVD control menu is activated. You can
now use the navigation arrows and buttons
for the DVD functions.
XTo navigate the DVD functions: turn and
press the controller.
Stop function
XShow the DVD functions (Y page 531).
XInterrupt playback:
Media 531
COMAND Online
Z

To select É from the DVD functions:
turn and press the controller.
The Ë display changes to Ì. The
video image is hidden.
XTo continue playback: select Ì.
Playback continues from the point where it
was interrupted.
XTo stop playback: select É again while
playback is interrupted.
XTo start playback again: select Ì.
Playback restarts from the beginning.
Pause function
XShow the DVD functions (Y page 531).
XPause playback:
To select Ë: turn and press the control-
ler.
The Ë display changes to Ì.
XTo continue playback: select Ì.
Selecting a scene/chapter
If the film is divided into scenes or chapters,
you can select them directly while the film is
running, or skip forwards step by step. Some
DVDs do not permit this at certain points (e.g.
during the opening credits).
It may also be possible to select the scene/
chapter from the functions stored on the
DVD.
XTo skip forwards or back: in the video
menu, turn the controller.(Y page 530)
The DVD functions can also be used to
make selections: (Y page 531)
Picture viewer
General notes
If there are pictures on the active data
medium, you can view them on the COMAND
Online display.
RData medium: MEDIA REGISTER, CD,
DVD, USB devices, SD memory cards
RSupported image formats: jpeg, jpg,
bmp, png
RMaximum image resolution: 20 mega-
pixels
iIt is not possible to view a picture from
the driver's side while the vehicle is in
motion.
Displaying pictures
XIn the media basic display, press the con-
troller.
The Search with a category list appears.
XTo select Photos in the category list: turn
and press the controller.
A directory list appears. Folders and picture
files can be shown.
XSelect a folder or picture.
If there is no picture on the data medium,
an empty list is shown.
You can search for pictures on other data
media.
Searching for pictures on other data
media
XIn the directory list, slide
XV the controller.
The device list appears.
XTo select a data medium with picture files:
turn the controller and press to confirm.
A directory list appears. Folders and picture
files can be shown.
XSelect a folder or picture.
532 Media
COMAND Online
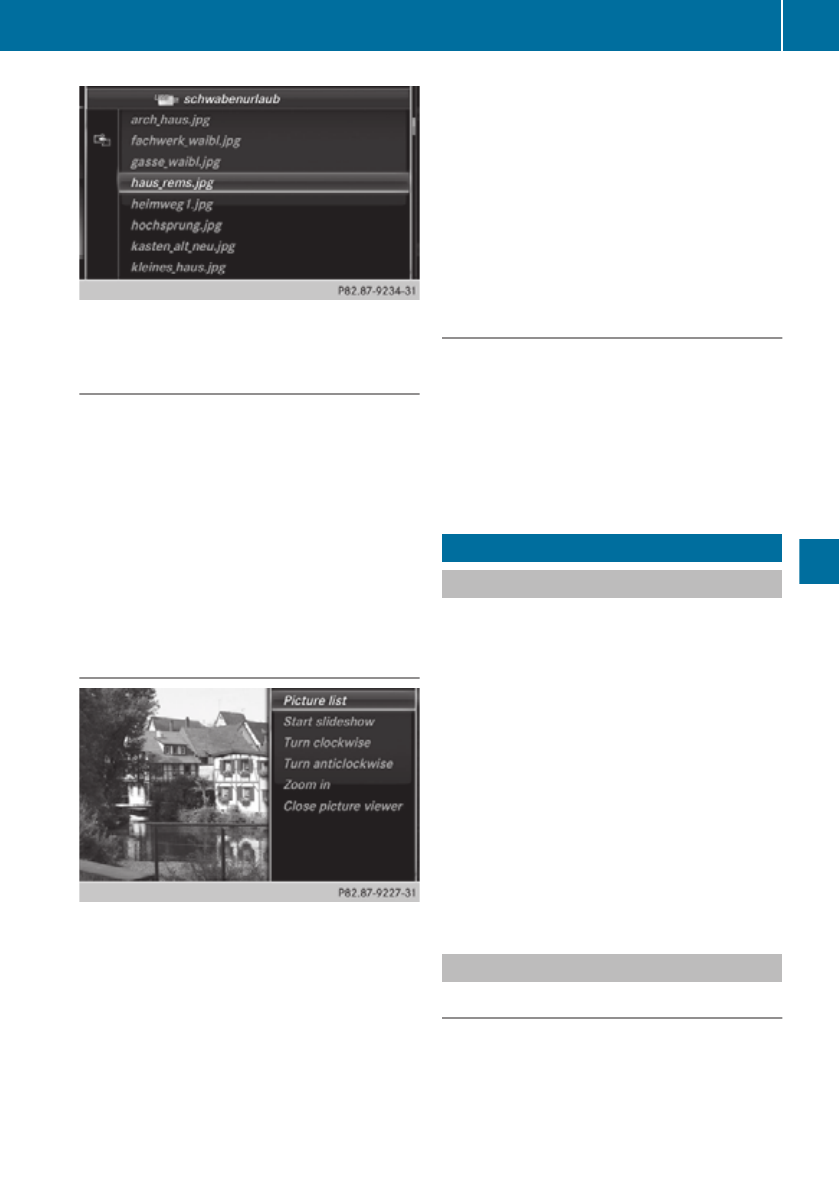
Example: the directory list displays the existing
picture files
Starting a slide show
XWhile viewing a picture, press the control-
ler.
The image menu appears.
XTo select Start slideshow: turn the con-
troller and press to confirm.
The slide show starts.
XTo end the slide show: press the controller.
The image menu appears.
XSelect End slide show.
Changing the picture view
XPress the controller.
The image menu appears.
XTo select Turn clockwise: turn the con-
troller and press to confirm.
The picture rotates 90 degrees.
XSelect Turn anticlockwise.
The picture rotates 90 degrees.
XSelect Zoom In.
The size of the picture increases.
After you have zoomed into the picture, you
can move the section of the picture.
XTo move the section of the picture: slide
ZVÆ and XVY the controller.
XTo revert to the original size: press the con-
troller
or
XPress the % button.
Closing the picture viewer
XPress the controller.
The menu appears.
XTo select Close picture viewer: turn
and press the controller.
COMAND Online returns to the last
accessed media function.
Sound
Features of your COMAND Online
These operating instructions describe all
standard and optional equipment available
for your COMAND Online system at the time
of purchase. Country-specific differences are
possible. Please note that your
COMAND Online system may not be equip-
ped with all the features described. This is
also the case for systems and functions rele-
vant to safety. Therefore, the equipment on
your COMAND Online system may differ from
that in the descriptions and illustrations.
Should you have any questions concerning
equipment and operation, please consult a
Mercedes-Benz Service Centre.
Burmester Sound System
Burmester Premium Sound System
Your vehicle is equipped with the Burmester
Premium Sound System.
It has a total output of 640 watts and is equip-
ped with 13 loudspeakers.
Sound 533
COMAND Online
Z
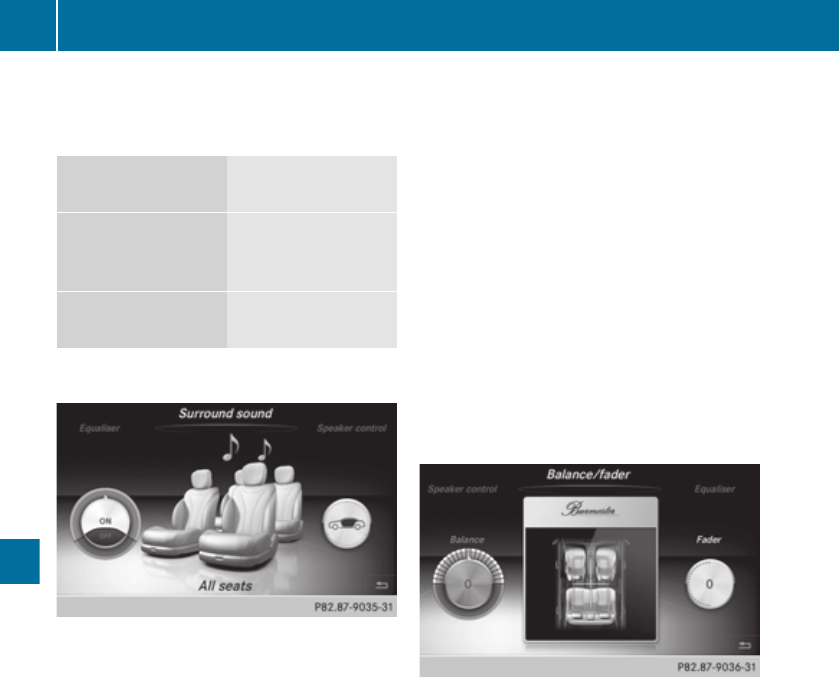
The Burmester Premium Sound System is
available for all functions in the radio and
media modes.
Sound settings for
Premium Sound
Description
Surround sound Subtle surround
sound for mono and
stereo recordings
Sound mode for
Front/All/Rear
Optimised sound for
the selected area
Settings for Burmester Premium Sound
XTo select sound settings: in radio or
media mode, slide VÆ the controller.
The radio or media menu bar appears.
XTo select Soundin the menu bar: turn and
press the controller.
The sound menu appears.
XTo select Surround sound: turn the con-
troller all the way to the right and press it.
You can switch Surround sound on or off
and select various options in Sound mode.
XTo switch Surround sound on or off: turn
the controller and press the on or off panel
to activate.
XTo select options for Sound mode: select
Front,All or Rear with the controller and
press it.
XTo exit the menu: press the % back
button.
XTo adjust treble, mid-range and bass:
select Sound.
The adjustment scales appear.
XTo adjust the settings to the desired levels
using the control knob: turn the controller.
XTo adjust the balance/fader: select
Sound in the menu bar.
XTo select Balance/fader: turn and press
the controller.
XTo define the focus of the sound using the
balance: slide YVX the controller.
XTo define the focus of the sound using the
fader: slide ZVÆ the controller.
XTo exit the menu: press the % back
button.
The balance shifts the focus of the sound
between the driver's side and the passenger
side.
The fader shifts the focus of the sound
between the front and rear seats.
iPlease note the following: you will achieve
the best sound results on your Burmester
Premium Sound System by playing high-
quality audio DVDs and CDs.
MP3 tracks should have a bit rate of at least
224 kbit/s.
When playing back music from an iPod®,
the bit rate should also be at least
224 kbit/s.
For optimum playback quality:
XDeactivate the "EQ" setting on the
iPod®.
534 Sound
COMAND Online
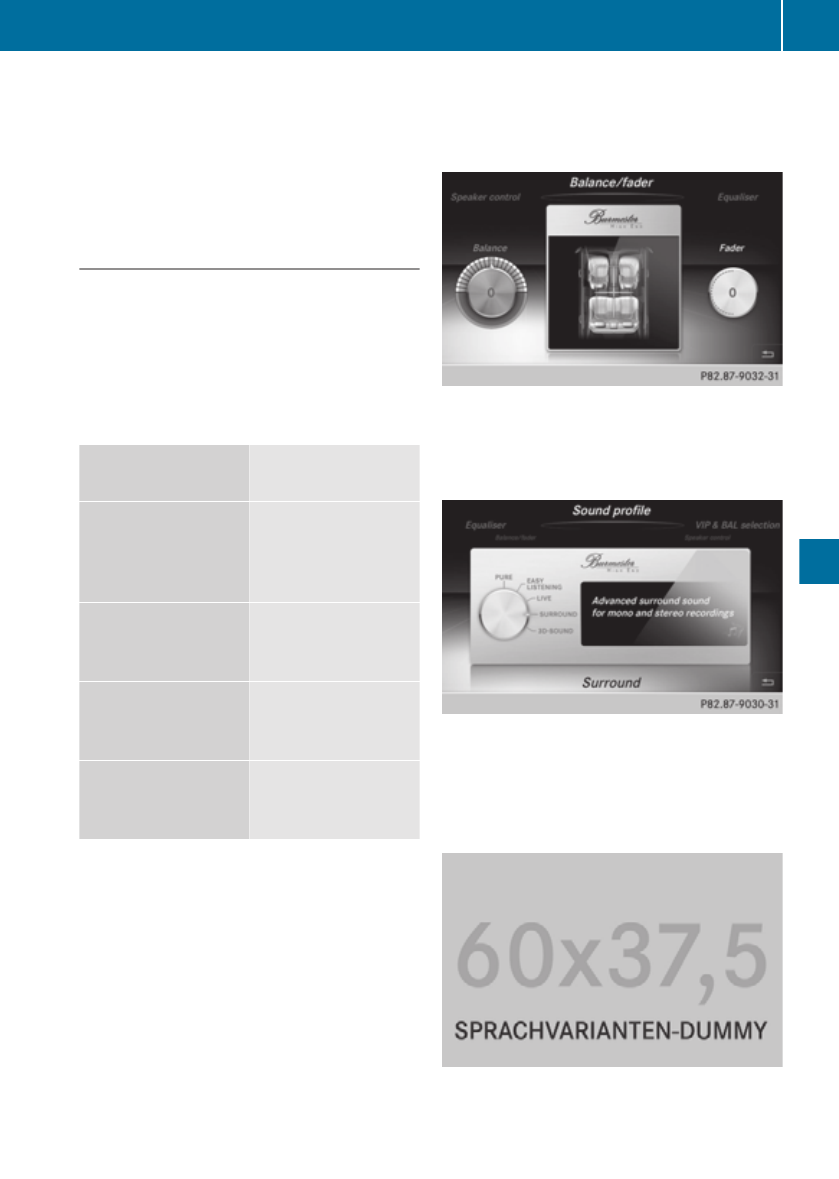
Surround-sound playback does not func-
tion for mono signal sources, such as the
medium wave range in radio mode.
On some stereo recordings, the sound
characteristics may differ from conven-
tional stereo playback.
Burmester High End Sound System
Your vehicle is equipped with the Burmester
High End Sound System.
It has a total output of 1520 watts and is
equipped with 23 loudspeakers.
The Burmester High End Sound System is
available for all functions in the radio and
media modes.
Sound settings for
High End Sound
Description
Live Spectacular sound
settings with live-
performance char-
acteristics
Surround Subtle surround
sound for mono and
stereo recordings
Easy Listening Mild sound settings
for relaxing long-
term listening
Pure Audiophile Hi-Fi
sound without any
effects
Sound settings for Burmester High End
Sound
XTo select sound settings: in radio or
media mode, slide VÆ the controller.
The radio or media menu bar appears.
XTo select Sound in the menu bar: turn and
press the controller.
The menu appears with the following
options:
RSound presets
RVIP/BAL/Fad and
REqualiser
XTo select Sound presets: turn and press
the controller.
The menu with the Burmester High End
sound settings appears.
XTo select sound settings: turn and press the
controller.
XTo select the loud-speaker controls:
using the controller, select VIP/BAL/Fad.
The following menu appears:
Sound 535
COMAND Online
Z
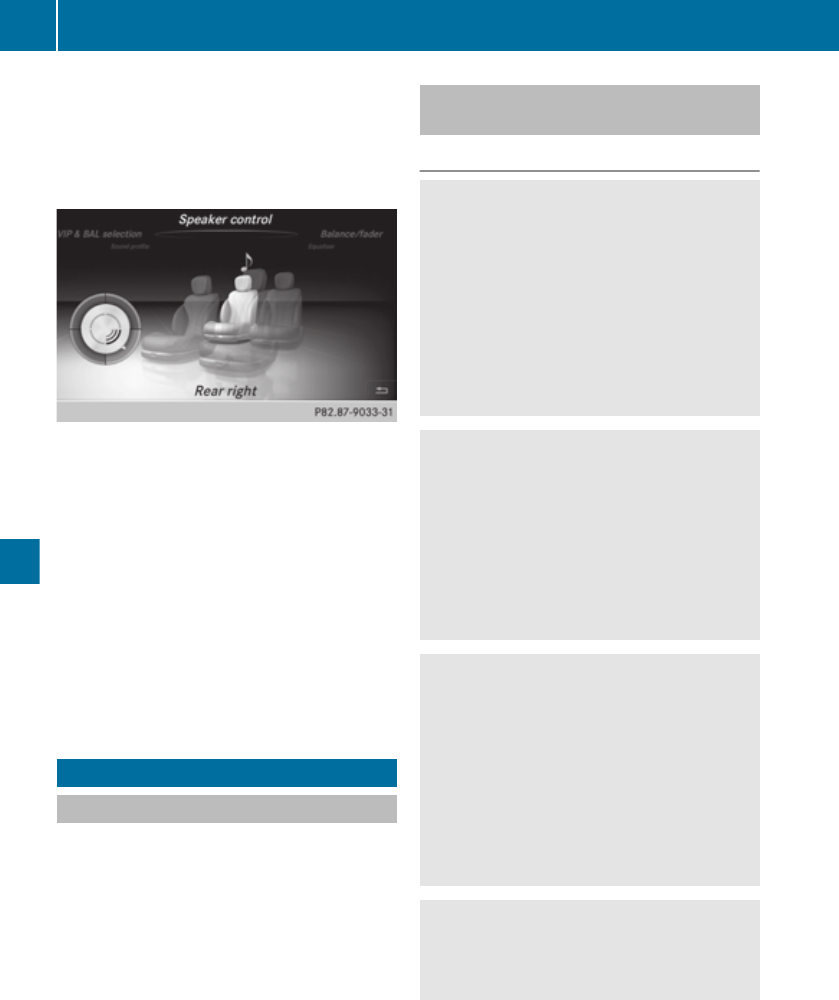
XUsing the controller, select VIP Seat
Selection.
This function allows you to optimise
Burmester High End Sound for a specific
seat.
XTo select the seat: turn and press the con-
troller.
The Burmester High End Sound experience
is now available at the selected seat.
XTo exit the menu: press the % back
button.
Adjusting the balance/fader
XTo select Sound in the menu bar: turn and
press the controller.
XSelect Equaliser.
XSelect Bal/Fad.
Rear Seat Entertainment System
Features of your COMAND Online
These operating instructions describe all
standard and optional equipment available
for your COMAND Online system at the time
of purchase. Country-specific differences are
possible. Please note that your
COMAND Online system may not be equip-
ped with all the features described. This is
also the case for systems and functions rele-
vant to safety. Therefore, the equipment on
your COMAND Online system may differ from
that in the descriptions and illustrations.
Should you have any questions concerning
equipment and operation, please consult a
Mercedes-Benz Service Centre.
Multi-Seat-Entertainment System
overview
Important safety notes
GWARNING
The Rear Seat Entertainment System CD/
DVD drive is a class 1 laser product. If you
open or damage the housing, there is a danger
of exposure to invisible laser radiation.
Do not remove the cover. The Rear Seat Enter-
tainment System CD/DVD drive contains no
parts that you can repair yourself. For safety
reasons, all maintenance work must be car-
ried out by qualified aftersales technicians.
GWARNING
When operating the vehicle, the driver may
under no circumstances wear a Rear Seat
Entertainment System headset. Using a head-
set when driving severely impairs the driver's
ability to react to audible stimuli caused by
traffic (e.g. police/fire engine/emergency
services sirens, other traffic participants'
horns etc.).
GWARNING
Headphones/headsets or external video
sources that are not being used should be
stored in a safe place (e.g. in one of the vehi-
cle's stowage compartments) so that they are
not thrown about in the vehicle in the event
of heavy braking, sudden changes of direction
or an accident. Im Loose objects in the vehicle
interior could cause serious injury to the vehi-
cle occupants.
GWARNING
Due to the risk of potential strangulation, chil-
dren should wear headphones with wires only
under the supervision of adults.
536 Rear Seat Entertainment System
COMAND Online

Components
The Rear Seat Entertainment System
includes:
Rtwo screens for the rear behind the front-
seat head restraints
Ra remote control
Ra CD/DVD drive
RAUX jacks on both screens (AUX display)
and on the CD/DVD drive (AUX drive)
Rtwo sets of cordless headphones
Rear Seat Entertainment System 537
COMAND Online
Z
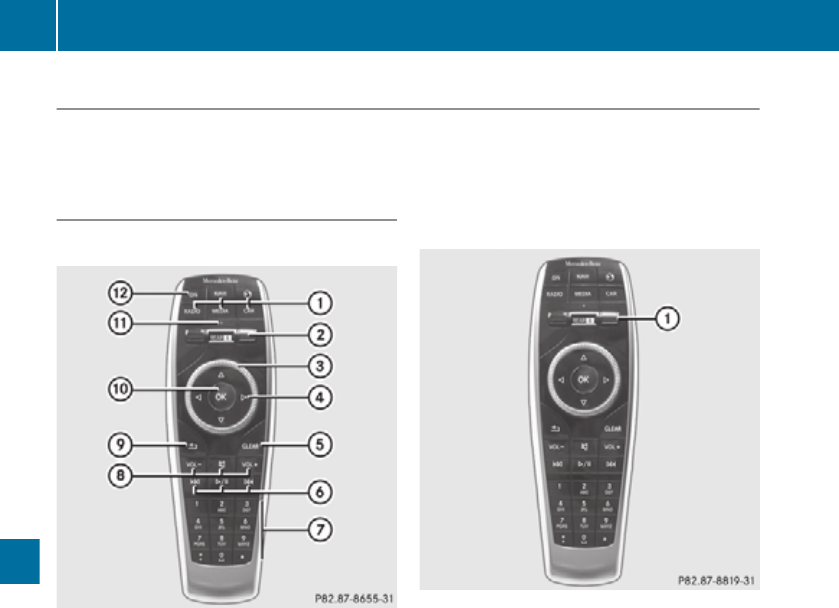
Rear-compartment screens
:AUX jacks, detailed view in the "CD/DVD drive and AUX jacks" section (Y page 540)
;Display
Remote control
Overview
:Selects main menus
;Selects the screen for the remote control
=Selector wheel for selecting a menu or
menu item
?Buttons for selecting a menu or menu
item
ADeletes an entry
BSkips, fast-forward/fast-rewind
CDirect selection using the number keypad
DVolume, switches sound on/off (for cor-
ded headphones)
EBack button
FConfirms the selection
GBattery display
HSwitches the screen on/off
Selecting the screen for the remote con-
trol
You can use the remote control to operate
one of the two rear screens at a time. To do
so, you must switch the remote control to the
desired screen.
XTo select the left-hand screen: turn thumb-
wheel : until "L REAR" appears in the win-
dow.
XTo select the right-hand screen: turn the
thumbwheel until "REAR R" appears.
XTo select the COMAND screen: turn thumb-
wheel : until "COMAND" appears in the
window.
XTo select the SPLITVIEW screen: turn
thumbwheel : until the SPLITVIEW sym-
bol appears in the window.
iPlease be aware that using the thumb-
wheel to select screens may cause unwan-
ted changes to the screens of your occu-
pants.
Up to four remote controls can be used in
the vehicle at the same time.
538 Rear Seat Entertainment System
COMAND Online
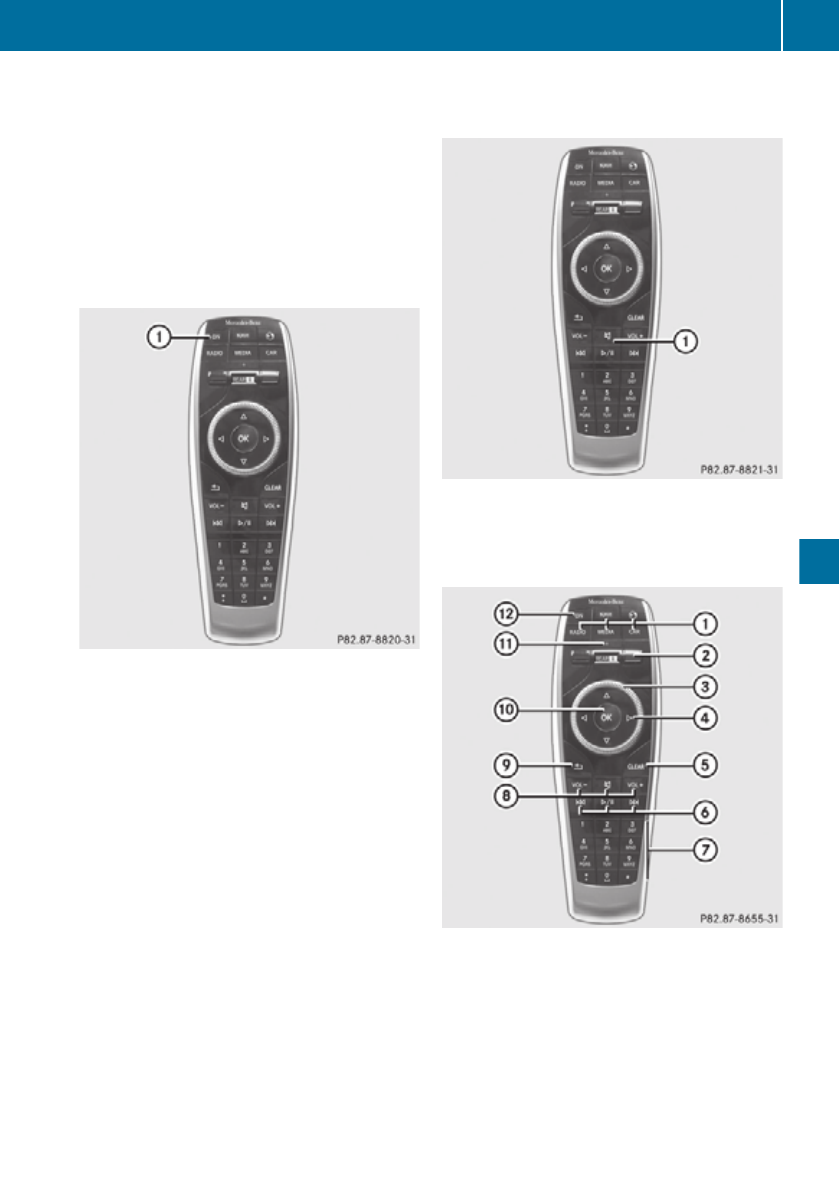
Switching the screen on/off
If the key in the ignition lock is in position 0
or 1, or if the key is not in the ignition lock,
the rear screens will switch off after 30
minutes. Before the screens switch off, they
show a message to this effect.
You can switch the screens back on.
iHowever, this will discharge the starter
battery.
XPress button : on the remote control.
The respective rear screen switches on or
off.
iYou can only switch the screens on using
the remote control if the ignition is
switched on.
Switching the button lighting on/off
XLighting of the remote control buttons is
divided into three areas. The corresponding
area is activated once a button is pressed
and switches off again automatically 5 to
10 seconds after the last button is pressed.
Switching the sound on/off (corded head-
phones only)
XPress button : on the remote control.
The sound is switched on/off.
Selecting a menu/menu item
RYou can use buttons : to directly access
the corresponding main menu.
RUsing selector wheel ; or the
=Ì9: buttons, select a
menu/menu item. To confirm your selec-
tion, press the 9 button.
Rear Seat Entertainment System 539
COMAND Online
Z

CD/DVD drive and AUX jacks
:CD/DVD slot
;AUX, right-hand (R) jack for audio signal
(red)
=AUX, left-hand (L) jack for audio signal
(white)
?AUX, video (V) jack (yellow)
ACD/DVD eject button
The AUX jacks shown are for the AUX drive.
Identical connections can be found on the
right-hand side of the rear-compartment
screens (display AUX) (Y page 538).
540 Rear Seat Entertainment System
COMAND Online
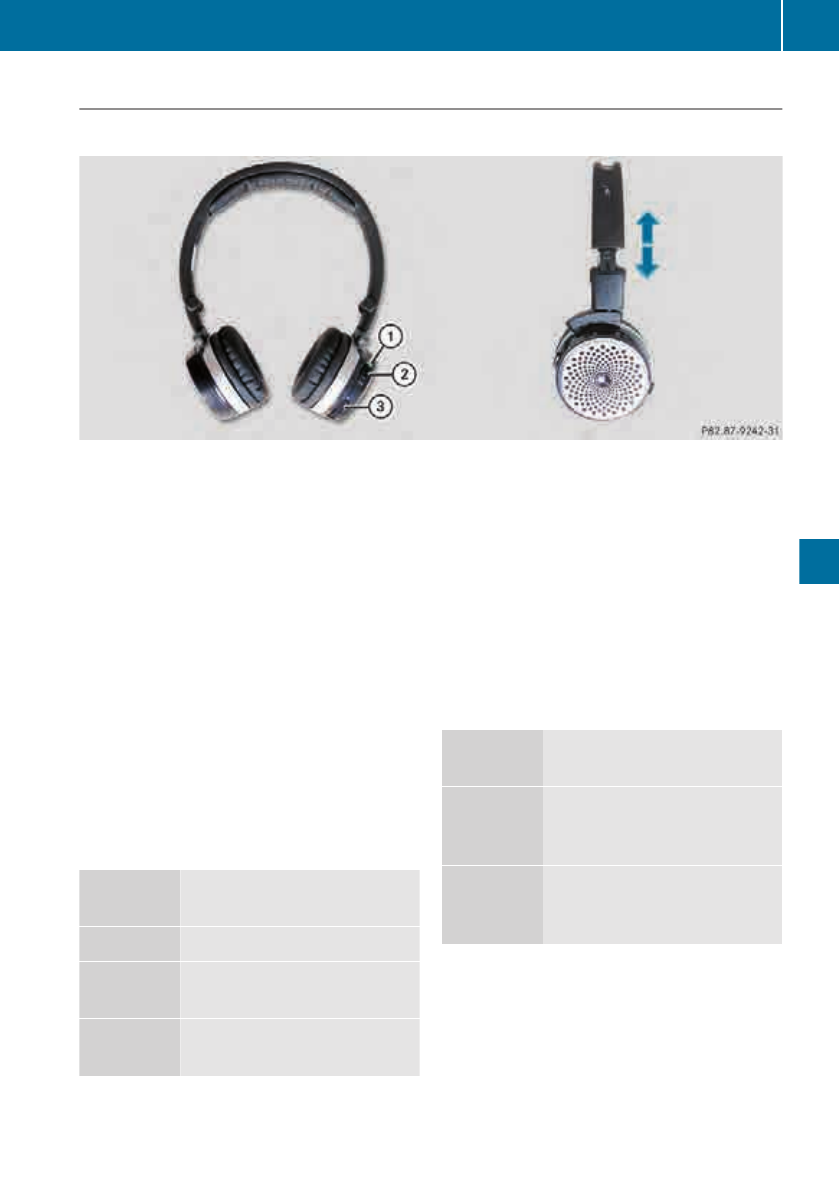
Cordless headphones
Overview
XTo adjust the headphones: open both sides of the headphones.
XAdjust the fit of the headphones by pulling the headphone band in the direction of the arrow.
XTo switch the headphones on/off: press On/Off switch ;.
XTo adjust the volume: turn volume control = until the desired volume is set. If you have
connected corded headphones to a rear-compartment screen, you can adjust the volume
using the remote control (Y page 538).
XTo check the battery charge status: read the charge level of the batteries using indicator
lamp :.
iTo preserve the batteries, the headphones automatically switch off if they have not
received an audio signal for approximately three minutes.
Indicator lamp on the cordless head-
phones
The colour of the indicator lamp shows
whether the device is switched on or off and
indicates the charge level of the batteries
inserted.
LED dis-
play
Status
Green The batteries are fine.
Red The batteries are almost dis-
charged.
Lit continu-
ously
The headphones are switched
on and connected to a screen.
LED dis-
play
Status
Flashing The headphones are search-
ing for the connection to a
screen.
No display
(dark)
The headphones are switched
off or the batteries are dis-
charged.
iThe function of the headphones may be
impaired by other radio-based electronic
devices such as mobile phones or laptops.
Indicator lamp displays on the remote
control
The colour of the indicator lamps shows
whether an entry has been correctly trans-
Rear Seat Entertainment System 541
COMAND Online
Z
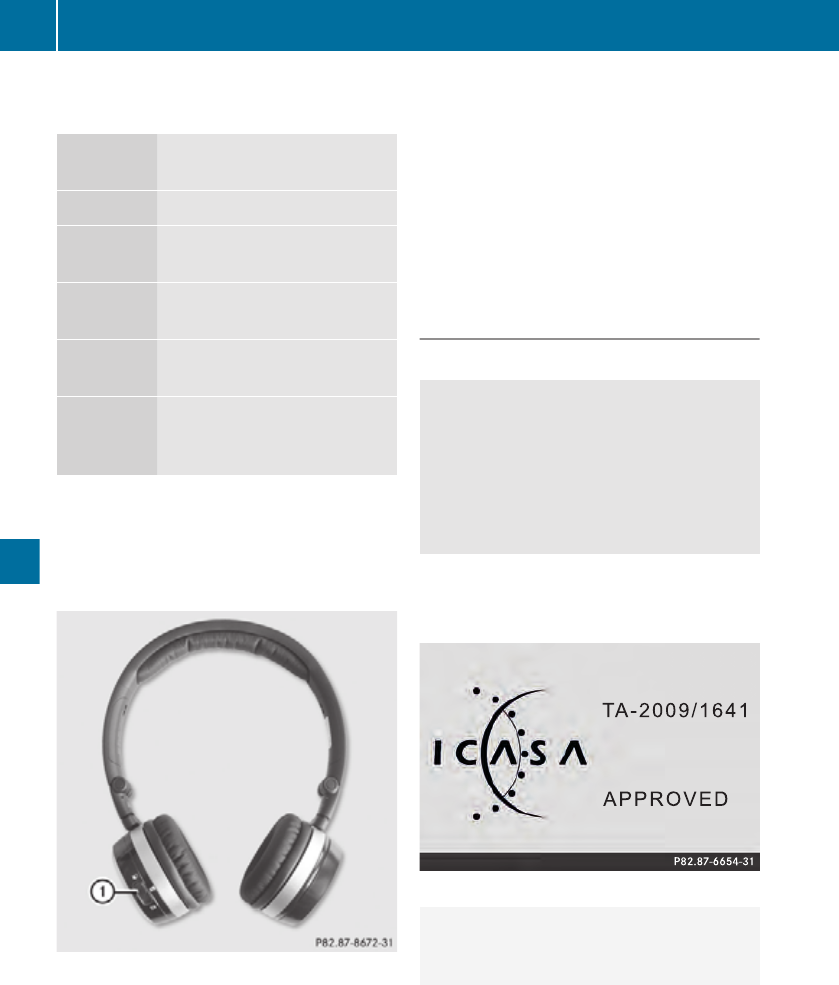
mitted and displays the charge level of the
batteries used.
LED dis-
play
Status
Green The batteries are fine.
Red The batteries are almost dis-
charged.
Flashing
(green)
Entry being transmitted
Flashing
(orange)
Entry not correctly transmit-
ted
No display
(dark)
The remote control is
switched off or the batteries
are discharged.
iThe function of the remote control may be
impaired by other radio-based electronic
devices such as mobile phones or laptops.
Selecting a screen for the headphones
XMove push slider : to L (left-hand screen)
or R (right-hand screen).
iUp to two cordless headphones can be
used at the same time for each screen.
Connecting additional headphones
Up to two cordless headphones can be used
at the same time for each screen.
You can also connect one additional set of
corded headphones to each of the two rear-
compartment screens (Y page 538). The
socket is designed for headphones with a
3.5 mm stereo jack plug and an impedance
of 32 ohms.
Replacing batteries
Notes
GWARNING
Batteries contain poisonous substances.
Swallowing/ingesting batteries can result in
serious personal injury or death.
Always keep batteries away from children. If
a battery is swallowed, seek immediate med-
ical attention.
Batteries are required for the remote control
and for the two sets of cordless headphones.
The batteries can be replaced (Y page 542).
Only valid for South Africa
HEnvironmental note
Dispose of used batteries in an environmen-
tally responsible manner.
542 Rear Seat Entertainment System
COMAND Online
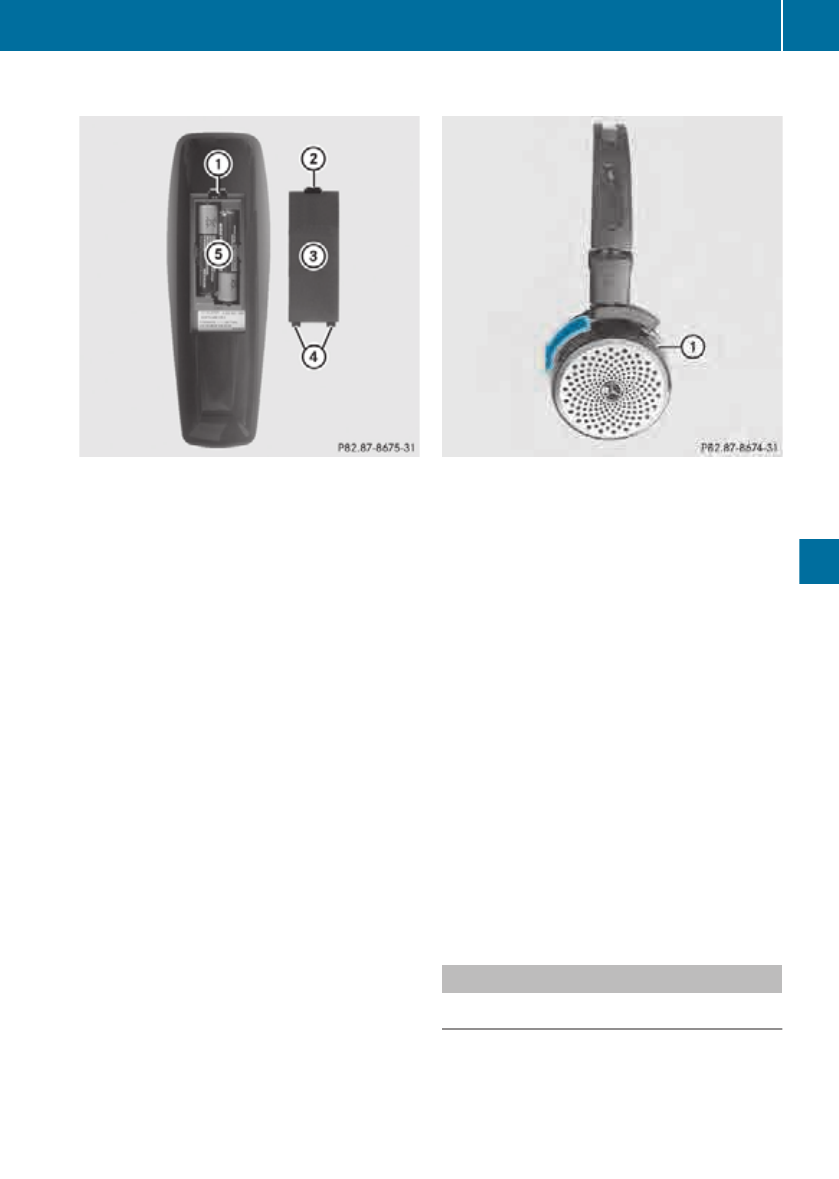
On the remote control
:Battery compartment
;Catch tab
=Battery compartment cover
?Retaining lugs
ABatteries
The remote control contains 2 type AAA,
1.5 V batteries.
XTo open the battery compartment:
remove battery compartment cover = on
the back of the remote control.
XTo do so, push catch tab ; downwards and
take off battery compartment cover =.
XRemove discharged batteries A from the
tray.
XInsert the new batteries. Observe the polar-
ity markings on the batteries and battery
compartment when doing so.
Left-hand battery: the positive pole (+)
must face upwards.
Right-hand battery: the positive pole (+)
must face downwards.
XTo close the battery compartment:
insert battery compartment cover = start-
ing with retaining lugs ? into the battery
compartment and allow catch tab ; to
engage in place.
On the cordless headphones
The battery compartment is located on the
left headphone. The cordless headphones
require 2 type AAA, 1.5 V batteries.
XTo open the battery compartment: turn
battery compartment cover : in a clock-
wise direction and remove.
XRemove the discharged batteries from the
tray.
XInsert the new batteries. Observe the polar-
ity markings on the batteries and battery
tray when doing so.
XTo close the battery compartment:
replace battery housing cover : and turn
it clockwise until it clips into place.
If the batteries have been inserted cor-
rectly, the indicator lamp will light up green
when the headphones are switched on.
iThe operating duration of the headphones
with a set of batteries is up to 40 hours.
Business telephony
Connecting a mobile phone
REQUIREMENTS: in order to make calls with
the handset, a suitable mobile phone must be
connected to COMAND Online as a business
telephone (Y page 425).
Rear Seat Entertainment System 543
COMAND Online
Z
If a mobile phone is connected, you will see
the connected phone in the main menu of the
handset.
To do this, you can:
XSelect a suitable mobile phone on
COMAND Online. Select the option Busi‐
ness telephone(Y page 426)
XConnect a mobile phone via the handset
<Link: connecting handset/mobile phone>
544 Rear Seat Entertainment System
COMAND Online

Use the % button to return to the main
menu of the handset.
Incoming calls
Accepting/rejecting a call
Accepting a call:
XTap on Accept.
or
XPress the 6 button.
Rejecting a call:
XTap on Reject.
or
XPress the ~ button.
If the phone number of the caller is transfer-
red, it appears in the display.
If there is an entry for the caller in the phone
book, you will also see the name.
If the phone number is not transferred,
Unknown appears in the display.
Making a call
Using the number keypad
XIn the main menu of the handset, tap on
Telephone.
XEnter all the digits of the telephone number
in turn using the number keypad display.
XPress the 6 button.
Using call lists
XIn the main menu of the handset, tap on
Call lists.
XTo select the list of incoming or outgoing
calls: tap on the corresponding symbol.
The last incoming or last dialled call
appears at the top of the respective list.
XTo move the list up or down: glide your fin-
ger up or down the list.
XTo select the number: tap on the desired
number.
XTo initiate the call: tap on Send.
Using contacts
XIn the main menu of the handset, tap on
Contacts.
XTo select the contact: glide your finger up
or down the list.
or
XTap on the alphabet bar on the right-hand
side.
XTo select the number: tap on the desired
number.
XTo initiate the call: tap on Send.
Functions available during a call
Rear handset
Overview
Operation
The handset acts as a telephone and also as
a remote control and control panel for the
Rear Seat Entertainment System. It is safely
Rear Seat Entertainment System 545
COMAND Online
Z
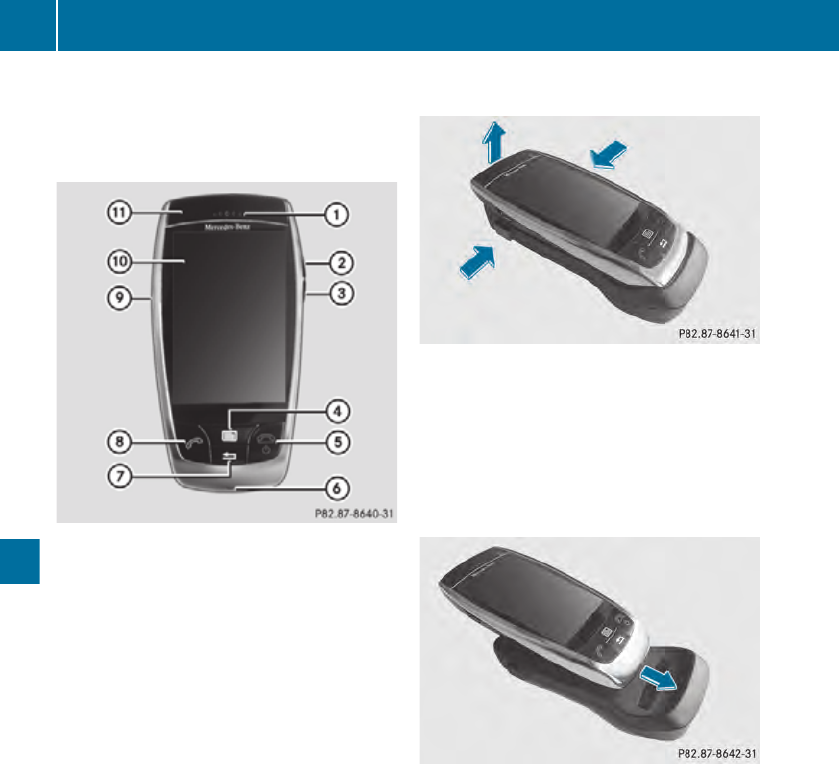
stored and automatically charged in the
mobile phone bracket. [Depending on the
equipment in the mobile phone bracket in the
rear centre console/rear seat armrest.]
:Loudspeaker
;Volume button
=Menu button
?End button
AMicrophone
BBack button
CTransmit button
DUSB socket
ETouchscreen
The handset is operated using both the but-
tons and the touchscreen. While the buttons
on the device are pressed, the touchscreen is
operated by using gestures on the symbols,
menus and lists displayed <Link>.
iIn order to be able to use the handset as
a telephone, it must be connected to a
mobile phone via Bluetooth.
iTo avoid scratching the touchscreen, do
not use any sharp objects.
Removing/inserting the handset
The handset is kept in the mobile phone
bracket, where it is safely stored and auto-
matically charged.
Removing
XTo remove the handset, press the two but-
tons on the mobile phone bracket and lift
the handset out.
Inserting
XTo insert the handset, slide it into the lower
part of the mobile phone bracket.
XGently push the handset down until it snaps
into the mobile phone bracket.
Switching the handset on/off
Switching the handset on
XPress (change symbol)~. The start
screen appears.
After a few seconds, the main menu
appears (->) and the handset is ready for
use.
546 Rear Seat Entertainment System
COMAND Online
Switching the handset off
XPress and hold ~ for more than 3 sec-
onds.
XIn the message which follows, tap on OK to
switch the handset off.
If you do not want to switch the handset off,
tap on Cancel.
If the handset is not used again for a certain
period of time, it automatically switches to
energy-saving mode. The screen is also
switched off. You can set the time that passes
before the handset switches to energy-saving
mode (->)
If you are not going to use the handset for a
relatively long time, you should put it back in
the mobile phone bracket, where it will be
charged and safely stored.
Input and control using the touchscreen
Operating the touchscreen
The touchscreen is operated by gently tap-
ping on it with your finger or using various
gestures:
RTap on icons to select them or to confirm
entries.
RSwipe up or down to move lists up or down.
RUse the virtual selector wheel by dragging
your finger clockwise and anticlockwise in
circles <Link>. Other gestures include
dragging your finger up, down, left and
right.
RYou can enter characters using a virtual
keyboard or handwriting recognition <>
Menus
Using the handset as a remote control
The handset is used to control the functions
of the Rear Seat Entertainment System.
XTap on the remote control symbol in the
main menu of the handset (>).
XTap on : to select the left or right screen
which you want to control using the hand-
set.
If neither of the screens is switched on yet,
you are first asked to select a screen.
The interface for the remote control
appears on the touchscreen.
X
Tapping on the symbols calls up the functions
for:
RNavigation (>)
RRadio (>)
RMedia (>)
Rear Seat Entertainment System 547
COMAND Online
Z
RVehicle (>)
ROnline (>)
The % button takes you to the handset's
main menu.
Online functions of the handset
XTap on Online in the remote control menu.
COMAND connects to the Internet.
XThe various tools can now be used to nav-
igate around webpages.
On-screen keyboard and handwriting rec-
ognition
:Letter keys
;Shift key
=Space bar
?Cancel button
ATo confirm an entry
B
C
You can use the on-screen keyboard to enter
text, numbers and symbols. Rotating the
handset changes the orientation of the key-
board.
Entering characters
XTap on the desired character with the tip of
your finger.
The selected character appears in the entry
field.
iTapping on shift key ; changes back and
forth between upper and lower case. If you
548 Rear Seat Entertainment System
COMAND Online

double tap the shift key, the shift key stays
locked. Tapping it again unlocks it.
Entering numbers and symbols
XTap on ;.
A keyboard is shown with numbers and
symbols. To return to the previous key-
board, tap on button ; again.
Entering special characters
XTap on ;.
A keyboard is shown with numbers and
symbols. To return to the previous key-
board, tap on button ; again.
Settings
Calling up the Settings menu
Menu ...
XTap on Settings in the main menu of the
handset (>).
You will see a list of functions and informa-
tion which you can select. Dragging the list
takes you to the top or bottom of the list.
The Back button takes you back to the hand-
set's main menu.
Language
XTap on the Settings button in the main
menu of the handset.
The Settings menu appears
XSelect Language.
You will see a list of available languages.
The dot # indicates the current language
selected.
Drag the list up or down to display all the
languages.
To exit the language selection without
changing the setting, press the Back but-
ton.
XTap on a language to change the language.
A dot # appears in front of the language.
Press the % button to exit the language
selection.
X
Display
Use the Display setting to adjust the bright-
ness of the handset screen.
XTap on Settings in the handset's main menu
to select it.
XTap on Display.
The screen for setting the display bright-
ness appears.
XDrag the slide to the left or right to adjust
the brightness.
XSelect one of the three options.
RDay mode: set the brightness of the screen
to a value that is suitable for bright condi-
tions.
RNight mode: set the brightness of the
screen to a value that is suitable for dark
conditions.
RAutomatic: the brightness is set automat-
ically depending on the ambient light.
XTap on OK to confirm your selection
To exit the menu without saving the set-
tings that have been changed, tap on Can‐
cel
Call options
You can use the call options to determine
what the handset does when you remove it
from and insert it in the mobile phone
bracket. You can set it so that:
Rincoming calls are accepted when you
remove it from the mobile phone bracket
Rexisting connections are terminated when
you insert it in the mobile phone bracket
Accepting a call when removing the handset
XTap on On to enable this function. Tap on
Off to disable this function.
Terminating a call when inserting the handset
XTap on On to enable this function. Tap on
Off to disable this function.
XTap on OK to confirm your selection.
To exit the menu without saving the set-
tings that have been changed, tap on Can‐
cel
Rear Seat Entertainment System 549
COMAND Online
Z

Power options
The power options settings allow you to set
the time that elapses before the display auto-
matically switches off.
To activate the display again, press the <>
button.
XTap on Power options in the settings
menu
You will see the menu for automatically
switching off the display.
The dot # indicates the setting currently
selected.
XTap on one of the times listed between 15
seconds and 10 minutes to select a time
duration.
XTap on OK to confirm your selection. Tap on
Cancel to exit the menu without accepting
the new setting.
Time and date
Time and date can be used to set the formats
in which the time and date are displayed on
the handset.
XTap on Time and date in the settings
menu
You will see the menu for setting the for-
mats for the time and date.
The dot # indicates the setting currently
selected.
XTap on the desired time or date format to
change the settings.
The dot # jumps to the newly selected set-
ting.
XTap on OK to confirm your selection. Tap on
Cancel to exit the menu without accepting
the new setting.
iThe time and date are set in the handset
automatically.
Device information
You will find the following information about
the handset under Device information:
RSoftware version
RSerial number
RBluetooth address
You cannot alter the settings in this menu.
NFC
The NFC setting is used to enable the wireless
transmission of data using the NFC standard.
XTap on NFC in the settings menu
You will see the menu for switching NFC on
and off.
The dot # indicates the setting currently
selected.
XTap on On to enable NFC or on Off to dis-
able NFC.
XTap on OK to confirm your selection. Tap on
Cancel to exit the menu without accepting
the new setting.
Reset
Via Reset setting you can reset the handset
to the factory settings. All personal settings
will be lost. An overview of the handset's
basic settings can be found here <>.
To reset the settings in COMAND Online, it is
necessary to reset COMAND Online. Link ->
XTap on Reset in the settings menu
The menu for resetting the settings
appears.
XTap on Reset settings on handset to
begin the reset.
XBy tapping on OK, you confirm that you
acknowledge the consequences of reset-
ting. The handset is reset in the next step.
XTap on Yes to confirm that you want to
reset the handset.
All the data stored on the handset will be
deleted.
XPress No to cancel the reset.
550 Rear Seat Entertainment System
COMAND Online
Audio CD/DVD and MP3 mode
Important safety notes
GWARNING
The CD/DVD drive is a class 1 laser product.
Never open the housing. There is a risk of
exposure to invisible laser radiation if the
housing is opened, or if the casing is faulty or
damaged.
The Rear Seat Entertainment System contains
no parts which you can repair yourself. For
safety reasons, all maintenance work must be
carried out by qualified aftersales techni-
cians.
General notes
You will find information on the following top-
ics in the Audio section:
RNotes on CDs/DVDs
RNotes on MP3 mode (Y page 499)
RNotes on copyright
Inserting a CD/DVD
:Disc slot
;Disc eject button
Depending on the vehicle model and equip-
ment level, the CD/DVD drive is found:
Rbehind the centre console in a folding com-
partment, or
Runder the rear bench seat, or
Rin the stowage box between the rear seats.
The CD/DVD drive is a single disc drive. If
there is already a disc inserted, this must be
ejected before another is inserted.
XInsert a disc into the disc slot.
The printed side of the disc must face
upwards. If neither side of the disc is prin-
ted, the side you wish to play must face
downwards.
The CD/DVD drive draws in the disc.
The CD/DVD drive plays the disc:
Rif it has been inserted correctly and is a
permissible disc, and
Rafter you have switched on disc mode
(audio CD/audio DVD/MP3 mode)
(Y page 552).
Data on an MP3 CD first needs to be loaded
by the drive. Loading may take some time,
depending on the number of folders and
tracks.
Rear Seat Entertainment System 551
COMAND Online
Z

Switching to audio CD, audio DVD or
MP3 mode
Example: audio CD mode
:Data medium type _
;Track number
=Track name (only if stored on the disc as
CD text)
?Track time
AGraphic time and track display
BCurrent playback settings (no symbol for
"Normal track sequence")
CTo set the bass
DTo set the treble
EDisc name (if stored on the disc as CD
text)
FTo call up the track list
GPlayback options
XInsert a CD/DVD (Y page 551).
The Rear Seat Entertainment System loads
the inserted disc.
XSelect Disc in the menu using the
9=; buttons on the remote
control and confirm by pressing the 9 but-
ton.
The corresponding mode is switched on.
The Rear Seat Entertainment System plays
the disc.
Example: audio DVD mode
:Data medium type ü
;Track number
=Track name (if stored on the disc)
?Track time
AGraphic time and track display
BCurrent playback settings (no symbol for
"Normal track sequence")
CTo set the bass
DTo set the treble
EDisc name (if stored on the disc)
FTo call up the track list
GStop function
HPause function
IPlayback options
Example: MP3 mode
:Data medium type þ
;Track number
=Track name
?Track time
AGraphic time and track display
552 Rear Seat Entertainment System
COMAND Online

BCurrent playback settings (no symbol for
"Normal track sequence")
CTo set the bass
DTo set the treble
EDisc name or current folder
FTo call up the folder list
GPlayback options, to switch track infor-
mation on/off
iVariable bit rates in MP3 tracks can result
in the elapsed time shown being different
to the actual elapsed time.
Selecting a track
Selecting by skipping to a track
XTo skip forwards or backwards to a
track: press the = or ; button on
the remote control.
or
XPress the E or F button.
The skip forward function skips to the next
track.
If the elapsed track time has passed 8 sec-
onds, the function skips back to the begin-
ning of the track. If the elapsed time is
shorter, it will skip to the start of the pre-
vious track.
If the Random tracks or Random folder
playback option has been selected, the
track order is random.
Selecting by track list
In audio CD mode, the track list contains all
tracks on the disc currently playing.
In audio DVD mode, the track list contains all
tracks in the currently active group.
In MP3 mode, the track list shows all tracks
in the currently active folder as well as the
folder structure, allowing you to select any
track on the MP3 CD.
XSelect Track list (audio CD/DVD mode)
or Folder (MP3 mode) using
the :=; buttons on the remote
control, and confirm by pressing the 9
button.
or
XPress the 9 button when the display/
selection window is active.
The track list appears. The # dot indicates
the current track.
XSelect a track using the 9: buttons
and press the 9 button to confirm.
Making a selection by entering the track
number directly
XPress the h button on the remote con-
trol.
The track entry display appears.
Example: track 2
XPress number button 2.
Example: track 12
XPress the corresponding number keys in
rapid succession.
XWait for approximately three seconds after
making the entry.
You will hear the track that has been
entered. The corresponding basic menu
then reappears.
iIt is not possible to enter numbers that
exceed the number of tracks on the CD or
in the currently active folder.
Fast forward/rewind
XWith the display/selection window active,
press the = or ; button on the
remote control repeatedly until you reach
the desired position.
or
XPress and hold the E or F button
until the desired position is reached.
Selecting a folder
This function is only available in MP3 mode.
Rear Seat Entertainment System 553
COMAND Online
Z
XSelect Folder in MP3 mode using
the :=; buttons on the remote
control and press the 9 button to confirm.
or
XPress the 9 button when the display/
selection window is active.
The folder content appears.
:Folder selection symbol
;Current folder name
=Track symbol
XTo switch to the superordinate folder:
select symbol : using the 9: but-
tons on the remote control and press the
9 button to confirm.
The display shows the next folder up.
:Folder selection symbol
;Folder symbol
XSelect a folder using the 9: buttons
and press the 9 button to confirm.
You will see the tracks in the folder.
XSelect a track using the 9: buttons
and press the 9 button to confirm.
The track is played and the corresponding
folder is now the active folder.
Pause function
This function is only available in audio DVD
mode.
XTo pause playback: select Ë using
the :=; buttons on the remote
control and press the 9 button to confirm.
The Ë display changes to Ì.
XTo continue playback: select Ì and
press the 9 button to confirm.
The Ì display changes to Ë.
Stop function
This function is only available in audio DVD
mode.
XTo interrupt playback: select É using
the :=; buttons on the remote
control and press the 9 button to confirm.
The Ë display changes to Ì.
XTo continue playback: select Ì and
press the 9 button to confirm.
Playback continues from the point where it
was interrupted.
XTo stop playback: while playback is inter-
rupted, select É again and press the
9 button to confirm.
Playback stops and returns to the begin-
ning of the DVD. Ì is highlighted.
XTo restart playback: select Ì and
press the 9 button to confirm.
Playback starts from the beginning of the
DVD.
554 Rear Seat Entertainment System
COMAND Online
Setting the audio format
XSelect DVD-A using the :=;
buttons on the remote control and press
9 to confirm.
XSelect Group using the 9: buttons
and press the 9 button to confirm.
The list of available audio formats appears.
The # dot indicates the format currently
selected.
XSelect an audio format using the
9: buttons and press the 9 button
to confirm.
XTo exit the menu: press the =
or ; button.
Playback options
XSelect CD, DVD-A or MP3 using
the :=; buttons on the remote
control and press the 9 button to confirm.
The options list appears. The # dot indi-
cates the option currently selected.
XSelect Normal track sequence, Random
tracks or Random folder using the
9: buttons and press the 9 button
to confirm.
The option is switched on. For all options
except Normal track sequence, you will
see a corresponding display in the display/
selection window.
iIf you switch the data carrier which you
are currently listening to, the Normal
track sequence option is activated auto-
matically. If an option is selected, it
remains selected after the Rear Seat Enter-
tainment System is switched on or off.
Switching track information on/off
(MP3 mode only)
If the function is switched on, folder and track
names are displayed.
If the function is switched off, disc and file
names are displayed.
XSelect MP3 using the :=; but-
tons on the remote control and press the
9 button to confirm.
XSelect Display track information
using the 9: buttons and press the
9 button to confirm.
The function is switched on O or off ª,
depending on the previous status.
TV mode
General notes
Information on channel reception quality can
be found in the "Media" section
(Y page 520).
Switching to TV mode
XSelect TV using the 9=; but-
tons on the remote control and press the
9 button to confirm.
You see the last TV channel selected, pro-
vided it can still be received.
Showing/hiding the control menu
XTo show: press the 9 or : button
on the remote control.
XTo hide: press the 9 or : button.
or
XAfter approximately eight seconds, the
menu is automatically hidden.
Showing/hiding the menu
XTo show: press the 9 button on the
remote control.
or
XSelect Menu while the control menu is
shown and press the 9 button to confirm.
XTo hide: press the 9 button, select
Full screen and press the 9 button to
confirm.
Rear Seat Entertainment System 555
COMAND Online
Z

Selecting TV channels
Selecting channels using the control
menu
XPress the = or ; button on the
remote control while the display window is
active.
or
XPress the E or F button.
The TV tuner selects the previous or next
channel from the alphabetical channel list.
Setting channels via the channel presets
XTo show the menu: press the 9 button
on the remote control.
or
XSelect Menu while the control menu is
shown and press the 9 button to confirm.
XSelect Presets using the =; but-
tons and press the 9 button to confirm.
The channel preset memory appears. The
# dot indicates where the selected chan-
nel is currently stored.
XSelect a channel using the 9: but-
tons and press the 9 button to confirm.
or
XPress a number button.
Setting a channel from the channel list
Notes on the channel list can be found in the
"Media" section (Y page 521). Information
regarding COMAND Online also applies to the
Rear Seat Entertainment System.
XTo show the menu: press the 9 button
on the remote control.
or
XSelect Menu while the control menu is
shown and press the 9 button to confirm.
XSelect TV using the =; buttons and
press the 9 button to confirm.
XSelect Channel list and press the 9
button to confirm.
The channel list appears. The # dot in
front of a list entry indicates the currently
selected channel. A number before the list
entry shows the memory slot in the channel
presets.
XSelect a channel using the 9: but-
tons and press the 9 button to confirm.
Selecting channels by entering the chan-
nel and programme number
Several programmes can be transmitted on
one channel with digital TV. You can therefore
enter a channel and the desired programme
on this channel.
Only one programme can be transmitted on
a channel with analogue TV. The programme
entry function therefore has no effect.
XTo show the menu: press the 9 button
on the remote control.
or
XSelect Menu while the control menu is
shown and press the 9 button to confirm.
XOption 1: select TV using the =;
buttons and press the 9 button to confirm.
XSelect Channel entry and press the 9
button to confirm.
XOption 2: press the h button while the
TV is playing.
Irrespective of the option, an input bar
appears at the top of the screen.
XTo set a channel: enter the channel num-
ber using the number keys and press the
9 button to confirm.
or
XPress and hold the number key until the
entry line is hidden.
The channel is set.
556 Rear Seat Entertainment System
COMAND Online

iIf you have not entered a programme
number, the first programme with ade-
quate reception will be set for a digital
channel.
iYou can enter channels or programmes
available in your country even if the recep-
tion is currently not adequate.
If you enter channels that are either not
intended for or not allowed in your country,
the Invalid channel number message
appears.
Storing TV channels
Storing channels manually
There are ten preset positions available.
XTo show the menu: press the 9 button
on the remote control or confirm Menu by
pressing the 9 button while the control
menu is shown.
XSelect Presets using the =; but-
tons and press the 9 button to confirm.
The channel preset memory appears. The
# dot indicates under which preset the
currently selected channel is stored.
XTo store a channel: select a preset using
the 9: buttons and press and hold
the 9 button until you hear a tone.
or
XPress and hold a number button until you
hear a tone.
The TV picture then reappears.
Storing channels automatically
This function automatically stores channels
with adequate reception in order of their
reception quality. Any channels stored man-
ually in the preset memory will be lost.
XTo show the menu: press the 9 button
on the remote control or confirm Menu by
pressing the 9 button while the control
menu is shown.
XSelect Presets using the =; but-
tons and press the 9 button to confirm.
XSelect Autostore and press the 9 button
to confirm.
The Rear Seat Entertainment System
searches for channels it can receive. The
available channels are automatically stored
in the preset positions.
Information about the current pro-
gramme
This function is only available on digital TV
channels. If you are watching an analogue TV
channel, this menu cannot be selected.
XTo show the menu: press the 9 button
on the remote control or confirm Menu by
pressing the 9 button while the control
menu is shown.
XSelect Info using the =; buttons
and press the 9 button to confirm.
If the current TV channel provides the cor-
responding information, this will be dis-
played.
iIt can take a few seconds for the infor-
mation to be displayed.
Displaying the current programme or
programme preview
This function is only available on digital TV
channels. The programme preview is also
referred to as the electronic programme
guide (EPG).
XTo show the menu: press the 9 button
on the remote control or confirm Menu by
pressing the 9 button while the control
menu is shown.
XSelect TV using the =; buttons and
press the 9 button to confirm.
XSelect Channel list and press the 9
button to confirm.
The channel list appears. It shows the cur-
rent programme on the digital TV channels
Rear Seat Entertainment System 557
COMAND Online
Z

with adequate reception. The # dot in
front of a list entry indicates the currently
selected channel.
XTo show the programme preview: select
Display programme preview and press
the 9 button to confirm.
The channel list shows the channel's next
programme.
XTo show the current programme: select
Display current programme and press
the 9 button to confirm.
XTo close the display: press the % but-
ton.
Basic TV settings
Fixing the frequency
XTo show the menu: press the 9 button
on the remote control or confirm Menu by
pressing the 9 button while the control
menu is shown.
XSelect TV using the =; buttons and
press the 9 button to confirm.
XSelect Channel fix and press the 9 but-
ton to confirm.
The function is switched on O or off ª,
depending on the previous status. When
the function is switched on, FIX appears in
the display window.
XTo exit the menu: press the =
or ; button.
Setting the reception region
XTo show the menu: press the 9 button
on the remote control or confirm Menu by
pressing the 9 button while the control
menu is shown.
XSelect TV using the =; buttons and
press the 9 button to confirm.
XSelect TV standard and press the 9 but-
ton to confirm.
A list appears showing the reception
regions. The # dot in front of a list entry
indicates the currently selected reception
area or country.
XSelect the reception area and press the
9 button to confirm.
A message appears to inform you that if the
wrong country is set, correct reception will
not be possible.
XSelect Yes or No and press the 9 button
to confirm.
If you select Yes, the Rear Seat Entertain-
ment System switches the country.
If you select No, the country list will appear
again.
Teletext
Switching teletext on/off
XTo show the menu: press the 9 button
on the remote control.
or
XSelect Menu while the control menu is
shown and press the 9 button to confirm.
XTo switch on: select Teletext using the
=; buttons and press the 9 button
to confirm.
The first teletext page is displayed.
XTo switch off: press the % back button.
Selecting a teletext page
XTo select a page directly: press the cor-
responding number keys on the remote
control.
XTo call up the previous/next page: press
the 9 or : button.
iYou can only enter pages that are permis-
sible for teletext between 100 and 899.
Dynamic teletext page
A dynamic teletext page consists of several
subpages. The display automatically changes
to the next page after a certain time.
558 Rear Seat Entertainment System
COMAND Online

Video DVD mode
Important safety notes
GWARNING
The CD/DVD drive is a class 1 laser product.
If you open the housing of the CD/DVD drive,
invisible laser beams may be released. These
laser beams may damage your retina. There
is a risk of injury.
You must not open the casing. Always have
maintenance work and repairs carried out at
a qualified specialist workshop.
General notes
DVD playback requirements
You may encounter playback problems when
playing copied discs. There are a large variety
of discs, DVD authoring software, writing
software and writers available. This variety
means that there is no guarantee that the
Rear Seat Entertainment System will be able
to play video DVDs that you have copied your-
self.
Other information can be found under Video
(Y page 527). Information regarding
COMAND Online also applies to the Rear Seat
Entertainment System.
Function restrictions
Depending on the DVD, it is possible that cer-
tain functions or actions described in this
section will be temporarily blocked or may not
function at all. As soon as you try to activate
these functions or actions, you will see the
K symbol in the display.
Switching to video DVD mode
XInsert a video DVD (Y page 551).
The Rear Seat Entertainment System loads
the disc.
If disc mode was the last mode selected, it
will now be active.
If it was not, switch on video DVD mode as
described in the following instructions.
XSelect Disc in the menu using the
9=; buttons on the remote
control and confirm by pressing the 9 but-
ton.
If the video DVD fulfils the playback criteria:
the film either starts automatically or the
menu saved on the DVD appears. If the
DVD menu appears, you must start the film
manually.
XSelect the corresponding menu item in the
DVD menu.
Showing/hiding the control menu
Control menu
:Data medium type
;Current track
=Current scene
?Track time
AShows the menu
XTo show: press the 9 or : button
on the remote control.
XTo hide: press the 9 or : button.
or
XWait for approximately 8 seconds.
Rear Seat Entertainment System 559
COMAND Online
Z
Showing/hiding the menu
Menu system
:Video DVD options
;Pause function
=Stop function
?To set the treble
ATo set the bass
XTo show: press the 9 button on the
remote control.
or
XSelect Menu while the control menu is
shown and press the 9 button to confirm.
XTo hide: press the 9 button, select
Full Screen and press the 9 button to
confirm.
Fast forward/rewind
XPress and hold the E or F button on
the remote control until the desired posi-
tion has been reached.
You see the control menu.
Pause function
XTo show the menu: press the 9 button
on the remote control.
or
XSelect Menu while the control menu is
shown and press the 9 button to confirm.
XTo pause playback: select Ë and press
the 9 button to confirm.
The Ë display changes to Ì.
XTo continue playback: select Ì and
press the 9 button to confirm.
The menu is hidden.
Stop function
XTo show the menu: press the 9 button
on the remote control.
or
XSelect Menu while the control menu is
shown and press the 9 button to confirm.
XTo interrupt playback: select É and
press the 9 button to confirm.
The Ë display changes to Ì. The
video image is hidden.
XTo continue playback: select Ì and
press the 9 button to confirm.
Playback continues from the point where it
was interrupted. The menu is hidden.
XTo stop playback: while playback is inter-
rupted, select É again and press the
9 button to confirm.
Playback stops and returns to the begin-
ning of the DVD. Ì is highlighted.
XTo restart playback: select Ì and
press the 9 button to confirm.
Playback starts from the beginning of the
DVD.
Selecting a scene/chapter
General notes
Also observe the information on the video
DVD mode (Y page 532).
Skipping forwards/backwards
XPress the = or ; button on the
remote control.
or
XPress the E or F button.
The control menu (Y page 530) appears for
approximately eight seconds.
560 Rear Seat Entertainment System
COMAND Online
Selecting a scene/chapter directly
The examples illustrate how to select scene/
chapter 5.
XOption 1: while the film is playing, press
the h button on the remote control.
XPress the corresponding number key, such
as 5.
XOption 2: while the film is playing, press
the 9 button on the remote control and
show the menu.
XSelect DVD-V and press the 9 button to
confirm.
XSelect DVD functions and press the 9
button to confirm.
XSelect Scene selection and press the
9 button to confirm.
XSelect 5 using the 9 or : button and
press the 9 button to confirm.
In both cases, playback will begin from the
5th scene/chapter after a brief pause.
Selecting a film/title
Option 1:
XPress the 9 button on the remote control
and show the menu.
XSelect DVD-V and press the 9 button on
the remote control to confirm.
XSelect DVD functions and press the 9
button to confirm.
XSelect Title selection and press the
9 button to confirm.
XTo call up the selection list: press the
9 button.
XSelect a film/track.
Option 2:
Example: selecting film 2
XPress button 2.
After a brief pause, the second film is
played.
DVD menu
Calling up the DVD menu
The DVD menu is the menu stored on the DVD
itself. It is structured in various ways accord-
ing to the individual DVD and permits certain
actions and settings.
In the case of multi-language DVDs, for exam-
ple, you can change the DVD language in the
DVD menu.
XPress the 9 button on the remote control
and show the menu.
XSelect DVD-V and press the 9 button on
the remote control to confirm.
XSelect DVD functions and press the 9
button to confirm.
XSelect Menu and press the 9 button to
confirm.
The DVD menu appears.
Selecting menu items in the DVD menu
XSelect a menu item using the
9:=; buttons on the
Rear Seat Entertainment System 561
COMAND Online
Z

remote control and press the 9 button to
confirm.
A menu appears.
XConfirm Select by pressing the 9 button.
The Rear Seat Entertainment System car-
ries out the action or shows a submenu.
XIf available, additional options can now be
selected.
The Rear Seat Entertainment System then
switches back to the DVD menu.
iMenu items that cannot be selected are
shown in grey.
iDepending on the DVD, the menu items:
Back (to the movie), Play, Stop, E,
F or Go up may either not function at
all or may not function at certain points in
the DVD menu. To indicate this, the K
symbol appears in the display.
Stopping a film or skipping to the begin-
ning or end of a scene
XSelect any menu item from the DVD menu.
The menu appears.
XTo stop the film: select the Stop menu
item and press the 9 button on the remote
control to confirm.
XTo skip to the end of a scene: select the
F menu item and press the 9 button
to confirm.
XTo skip to the beginning of a scene:
select the E menu item and press the
9 button to confirm.
Moving up one level in the DVD menu
XShow the DVD menu.
XPress the % back button on the remote
control or select the corresponding menu
item in the DVD menu.
or
XSelect any menu item in the DVD menu and
press W the COMAND controller to con-
firm.
XSelect Go up and press W to confirm.
Going back to the film
XPress the % back button repeatedly
until you see the movie.
or
XSelect any menu item in the DVD menu and
press the 9 button to confirm.
XSelect the Back (to the movie) menu
item in the menu and press the 9 button
to confirm.
Setting the audio format
This function is not available on all DVDs. If it
is available, you can set the audio language
or the audio format. The number of settings
is dependent on the DVD content. It may also
be possible to access the settings from the
DVD menu.
XPress the 9 button on the remote control
and show the menu.
XSelect DVD-V and press the 9 button on
the remote control to confirm.
XSelect DVD functions and press the 9
button to confirm.
XSelect Audio language and press the 9
button to confirm.
A menu appears after a short while. The
# dot in front of an entry indicates the
currently selected language.
XSelect a language using the 9: but-
tons and press the 9 button to confirm.
XTo exit the menu: press the =
or ; button.
Subtitles and camera angle
These functions are not available on all DVDs.
The number of subtitle languages and camera
angles available depends on the content of
the DVD. It may also be possible to access
the settings from the DVD menu.
562 Rear Seat Entertainment System
COMAND Online

XPress the 9 button on the remote control
and show the menu.
XSelect DVD-V and press the 9 button on
the remote control to confirm.
XSelect DVD functions and press the 9
button to confirm.
XSelect Subtitles or Camera angle and
press the 9 button to confirm.
In both cases, a menu appears after a few
seconds. The # dot in front of an entry
indicates the current setting.
XSelect a setting using the 9: but-
tons and press the 9 button to confirm.
XTo exit the menu: press the =
or ; button.
Interactive content
DVDs may also contain interactive content
(e.g. a video game). In a video game, you may
be able to influence events, for example, by
selecting and triggering actions. The type and
number of actions depend on the DVD.
XSelect an action using the
9;:= buttons on the
remote control and press the 9 button to
execute it.
A menu appears and the first entry,
Select, is highlighted.
XPress the 9 button.
Navitainment
Online and Internet functions
Rear Seat Entertainment System 563
COMAND Online
Z

564
User Instruction NTG5
NTG5_UserManual-SV_130307-english.docx Version 1.0
1 Technical Information
1.1 Materials
NTG5 infotainment system está em conformidade com os mais recentes lançamentos de
directivas RoHS (2002/95/EC) e ELV (2000/53/EC), e também o regulamento REACH
(CE) No. 1907/2006.
Marcação de polímero partes acc. a VDA 260, respectivamente EN ISO 1043.Declaration
of Conformity to EC regulation R&TTE.
1.2 Declaration of Conformity to EC regulation R&TTE
Česky [Czech]: HARMAN tímto prohlašuje, že tento NTG5 system je ve shodě se základními požadavky a dalšími
příslušnými ustanoveními směrnice 1999/5/ES.
Dansk [Danish]: Undertegnede HARMAN erklærer herved, at følgende udstyr NTG5 system overholder de væsentlige
krav og øvrige relevante krav i direktiv 1999/5/EF.
Deutsch [German]:
Hiermit erklärt HARMAN, dass sich das Gerät NTG5 system in Übereinstimmung mit den
grundlegenden Anforderungen und den übrigen
einschlägigen Bestimmungen der Richtlinie 1999/5/EG befindet.
Eesti [Estonian]: Käesolevaga kinnitab HARMAN seadme NTG5 system vastavust direktiivi 1999/5/EÜ põhinõuetele ja
nimetatud direktiivist tulenevatele teistele asjakohastele sätetele.
English: Hereby, HARMAN, declares that this NTG5 system is in compliance with the essential requirements and
other relevant provisions of Directive 1999/5/EC.
Español [Spanish]: Por medio de la presente HARMAN declara que el NTG5 system cumple con los requisitos esenciales y
cualesquiera otras disposiciones aplicables o exigibles de la Directiva 1999/5/CE.
Ελληνική [Greek]: ΜΕ ΤΗΝ ΠΑΡΟΥΣΑ HARMAN ∆ΗΛΩΝΕΙ ΟΤΙ NTG5 system ΣΥΜΜΟΡΦΩΝΕΤΑΙ ΠΡΟΣ ΤΙΣ ΟΥΣΙΩ∆ΕΙΣ
ΑΠΑΙΤΗΣΕΙΣ ΚΑΙ ΤΙΣ ΛΟΙΠΕΣ ΣΧΕΤΙΚΕΣ ∆ΙΑΤΑΞΕΙΣ ΤΗΣ Ο∆ΗΓΙΑΣ 1999/5/ΕΚ.
Français [French]: Par la présente HARMAN déclare que l'appareil NTG5 system est conforme aux exigences essentielles
et aux autres dispositions pertinentes de la directive 1999/5/CE.
Italiano [Italian]: Con la presente HARMAN dichiara che questo NTG5 system è conforme ai requisiti essenziali ed alle
altre disposizioni pertinenti stabilite dalla direttiva 1999/5/CE.
Latviski [Latvian]: Ar šo HARMAN deklarē, ka NTG5 system atbilst Direktīvas 1999/5/EK būtiskajām prasībām un citiem ar
to saistītajiem noteikumiem.
Lietuvių [Lithuanian]: Šiuo HARMAN deklaruoja, kad šis NTG5 system atitinka esminius reikalavimus ir kitas 1999/5/EB
Direktyvos nuostatas.
Nederlands [Dutch]: Hierbij verklaart HARMAN dat het toestel NTG5 system in overeenstemming is met de essentiële eisen
en de andere relevante bepalingen van richtlijn 1999/5/EG.
Malti [Maltese]: Hawnhekk, HARMAN, jiddikjara li dan NTG5 system jikkonforma mal-ħtiġijiet essenzjali u ma
provvedimenti oħrajn relevanti li hemm fid-Dirrettiva 1999/5/EC.
Magyar [Hungarian]: Alulírott, HARMAN nyilatkozom, hogy a NTG5 system megfelel a vonatkozó alapvetõ követelményeknek
és az 1999/5/EC irányelv egyéb elõírásainak.
Polski [Polish]: Niniejszym HARMAN oświadcza, że NTG5 system jest zgodny z zasadniczymi wymogami oraz
pozostałymi stosownymi postanowieniami Dyrektywy 1999/5/EC
Português
[Portuguese]:
HARMAN declara que este NTG5 system está conforme com os requisitos essenciais e outras
disposições da Directiva 1999/5/CE.
Slovensko
[Slovenian]:
HARMAN izjavlja, da je ta NTG5 system v skladu z bistvenimi zahtevami in ostalimi relevantnimi določili
direktive 1999/5/ES.
Slovensky [Slovak]: HARMAN týmto vyhlasuje, že NTG5 system spĺňa základné požiadavky a všetky príslušné ustanovenia
Smernice 1999/5/ES.
Suomi [Finnish]: HARMAN vakuuttaa täten että NTG5 system tyyppinen laite on direktiivin 1999/5/EY oleellisten
vaatimusten ja sitä koskevien direktiivin muiden ehtojen mukainen.
Svenska [Swedish]: Härmed intygar HARMAN att denna NTG5 system står I överensstämmelse med de väsentliga
egenskapskrav och övriga relevanta bestämmelser som framgår av direktiv 1999/5/EG.
Íslenska (Icelandic): Hér með lýsir HARMAN yfir því að NTG5 system er í samræmi við grunnkröfur og aðrar kröfur, sem

User Instruction NTG5
NTG5_UserManual-SV_130307-english.docx Version 1.0
gerðar eru í tilskipun 1999/5/EC
Norsk [Norwegian]: HARMAN erklærer herved at utstyret NTG5 system er i samsvar med de grunnleggende krav og øvrige
relevante krav i direktiv 1999/5/EF.
1.3 FCC statements (North America)
(§15.19)
"This device complies with Part 15 of the FCC Rules. Operation is
subject to the following two conditions:
(1) this device may not cause harmful interference, and
(2) this device must accept any interference received, including
interference that may cause undesired operation”
and (§15.21)
“CAUTION TO USERS” / “FCC WARNING”
“Changes or modifications not expressly approved by the party
responsible for compliance could void the user's authority to
operate the equipment “
1.4 Industry Canada (IC) statement
This Class B digital apparatus complies with Canadian ICES-003.
Cet appareil numérique de la classe B est conforme à la norme NMB-003 du Canada.
This device complies with Industry Canada licence-exempt RSS standard(s). Operation
is subject to the following two conditions: (1) this device may not cause interference, and
(2) this device must accept any interference, including interference that may cause
undesired operation of the device.
Le présent appareil est conforme aux CNR d'Industrie Canada applicables aux appareils
radio exempts de licence. L'exploitation est autorisée aux deux conditions suivantes: (1)
l'appareil ne doit pas produire de brouillage, et (2) l'utilisateur de l'appareil doit accepter
tout brouillage radioélectrique subi, même si le brouillage est susceptible d'en
compromettre le fonctionnement.
This equipment complies with FCC and IC radiation exposure limits set forth for an
uncontrolled environment. The antennas should be installed and operated with minimum
distance of 20 cm between the radiator and any person. This transmitter must not be co-
located or operating in conjunction with any other antenna or transmitter.
Cet appareil est conforme aux limites d'exposition aux rayonnements de la IC pour un
environnement non contrôlé. Les antennes doivent être installées de façon à garder une
distance minimale de 20 centimètres entre le radiateur et toute personne. L'émetteur ne
doit pas être colocalisé ni fonctionner conjointement avec une autre antenne ou
émetteur.
“RF EXPOSURE INFORMATION”
“This equipment complies with FCC and IC radiation exposure limits
set forth for an uncontrolled environment. The antennas should be
installed and operated with minimum distance of 20 cm between
the radiator and any person. This transmitter must not be co-
located or operating in conjunction with any other antenna or
transmitter."
User Instruction NTG5
NTG5_UserManual-SV_130307-english.docx Version 1.0
1.5 Type of Equipment User’s Guide for KOREA
Type of Equipment User’s Guide
A급 기기
(업무용 방송통신기자재)
이 기기는 업무용(A급) 전자파적합기기로서 판
매자 또는 사용자는 이 점을 주의하시기 바라
며, 가정외의 지역에서 사용하는 것을 목적으로
합니다.
Class A Equipment
(Industrial Broadcasting &
Communication Equipment)
This equipment is Industrial (Class A) electromagnetic wave
suitability equipment and seller or user should take notice of
it, and this equipment is to be used in the places except for
home.
1.6 Argentina declaration
Certification number:: Aprobado CNC XXXX/YY
(certification number will be included as soon as the homologation is finished)
1.7 Armenia declaration
Manual will be available in Russian language.
1.8 Botswana declaration
Information after homologation is finished - will be included here.
1.9 Brazil declaration
Este equipamento opera em caráter secundário, isto é, não tem direito a
proteção contra interferência prejudicial, mesmo de estações do mesmo tipo, e não pode
causar interferência a sistemas operando em caráter primário.
User Instruction NTG5
NTG5_UserManual-SV_130307-english.docx Version 1.0
1.10 Indonesia declaration
.
Number to be filled after homologation is finished.
1.11 Oman declaration
.
Number to be filled after homologation is finished.
1.12 Russia declaration
Registration Nr. XX-XXXX.
Number to be filled after homologation is finished.
(when GOST-R is applicable then the label will be printed in U/M accordingly)
1.13 United Arabian Emirates - declaration
.
1.14 Mexico declaration
'Para cumplimiento de la Cofetel:
La operación de este equipo está sujeta a las siguientes dos condiciones: (1) es posible
que este equipo o dispositivo no cause interferencia perjudicial y (2) este equipo o
dispositivo debe aceptar cualquier interferencia, incluyendo la que pueda causar su
operación no deseada”
(Translation: To be in compliance with the Cofetel:
The operation of this equipment is subject to the following two conditions: (1) it is possible
that this equipment or device may not cause harmful interference, and (2) the equipment
or device must accept any interference, including interference that may cause undesired
operation).

User Instruction NTG5
NTG5_UserManual-SV_130307-english.docx Version 1.0
1.15 Environmental information
Remote Control and Wireless Headphone -
Batteries contain harmful substances. Please don’t throw into household trash. Use environmental
disposal.