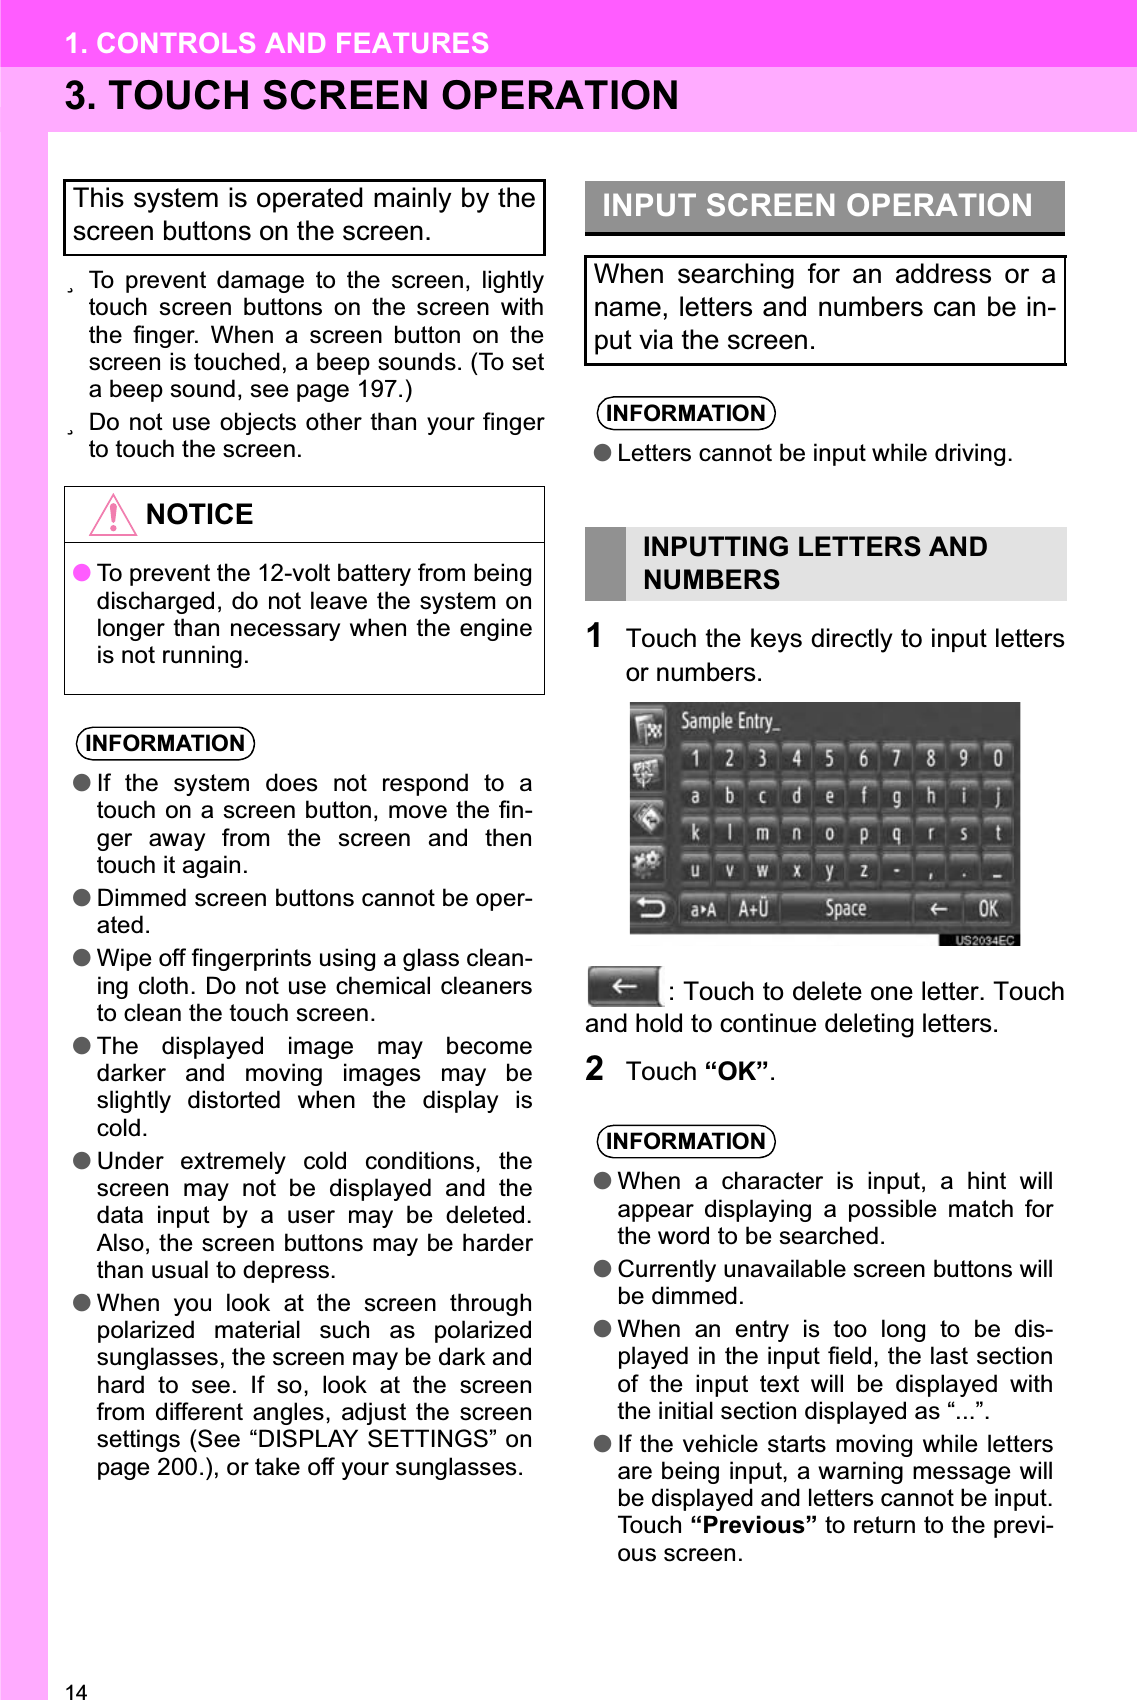
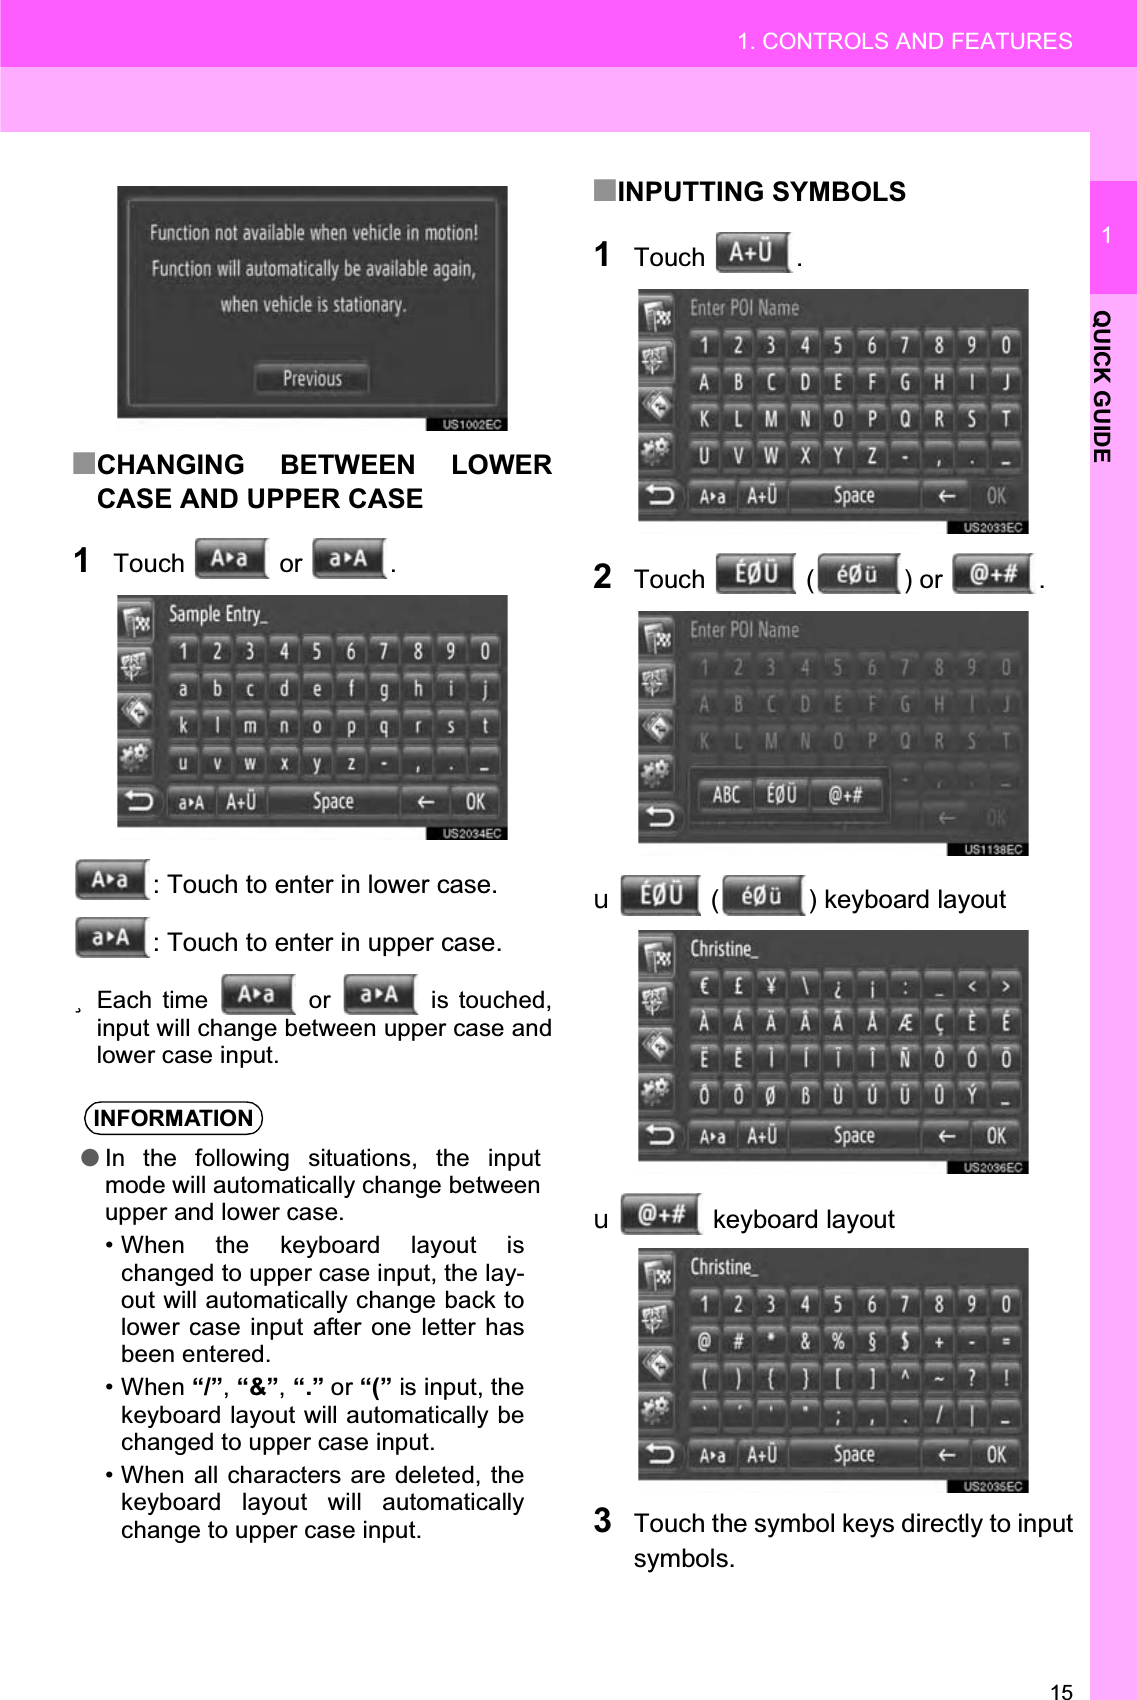
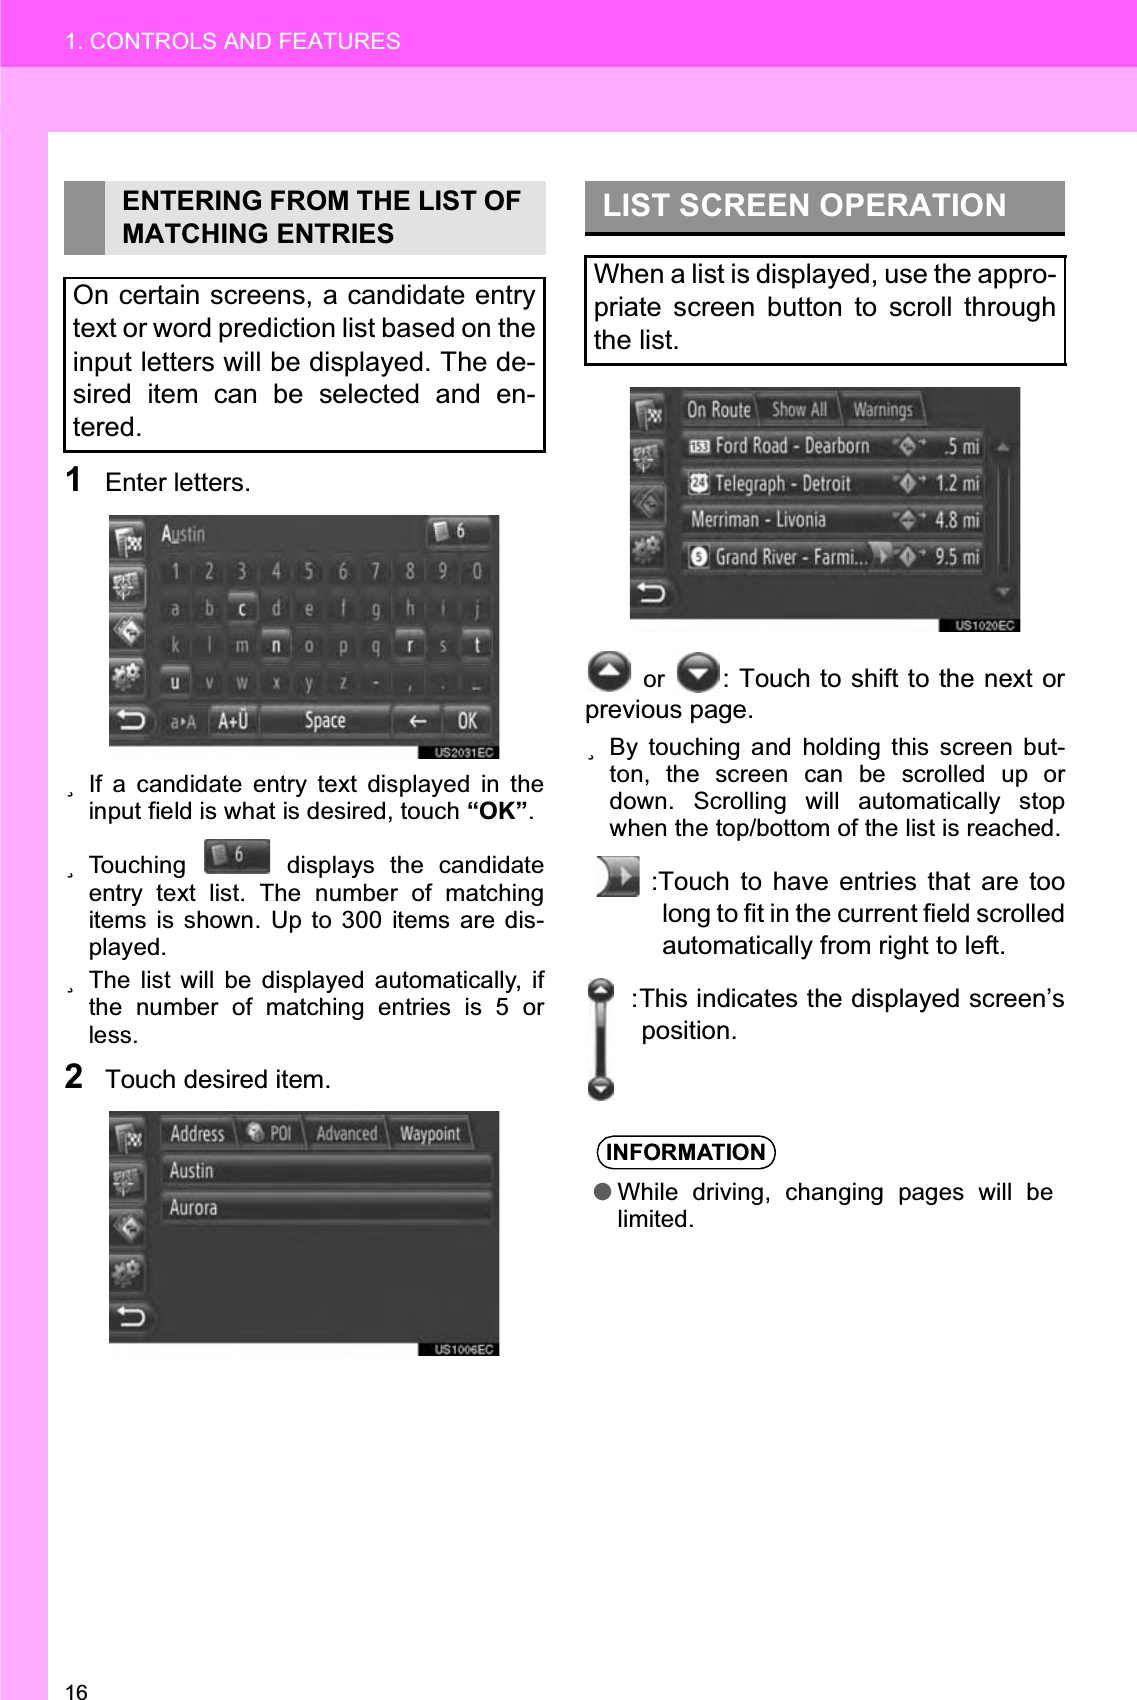
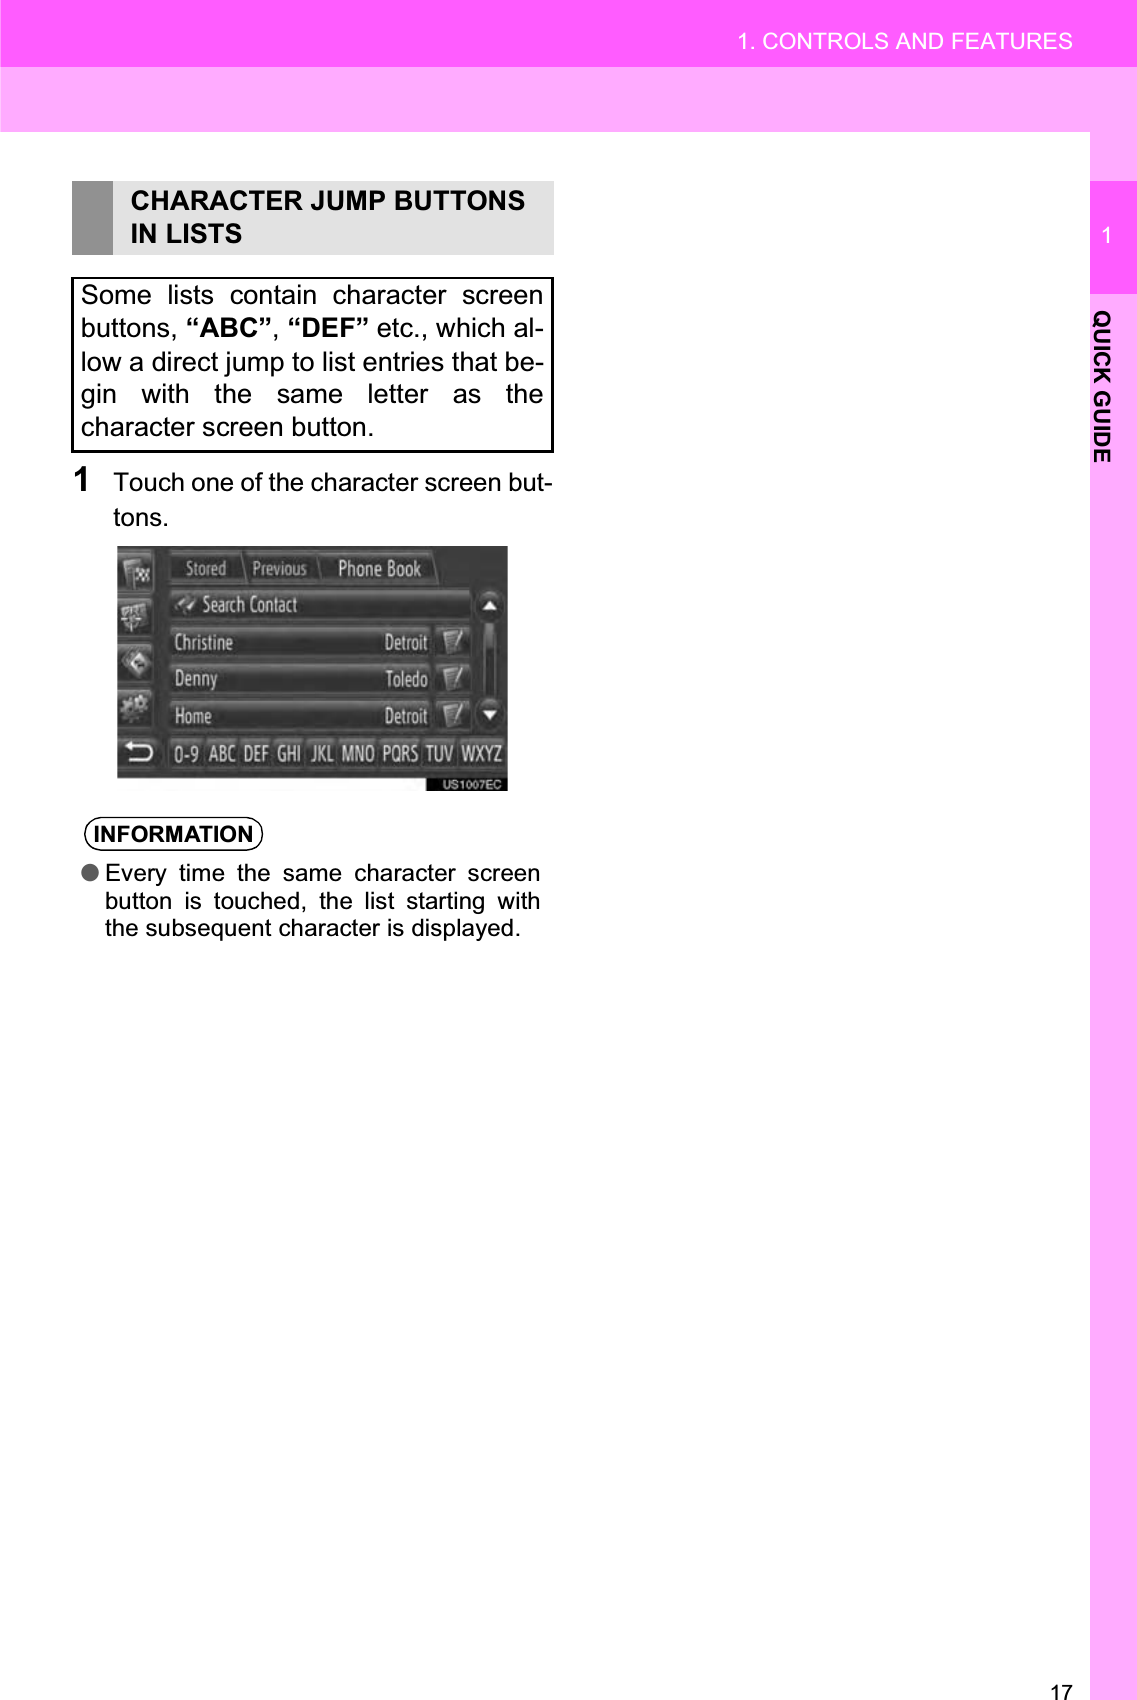
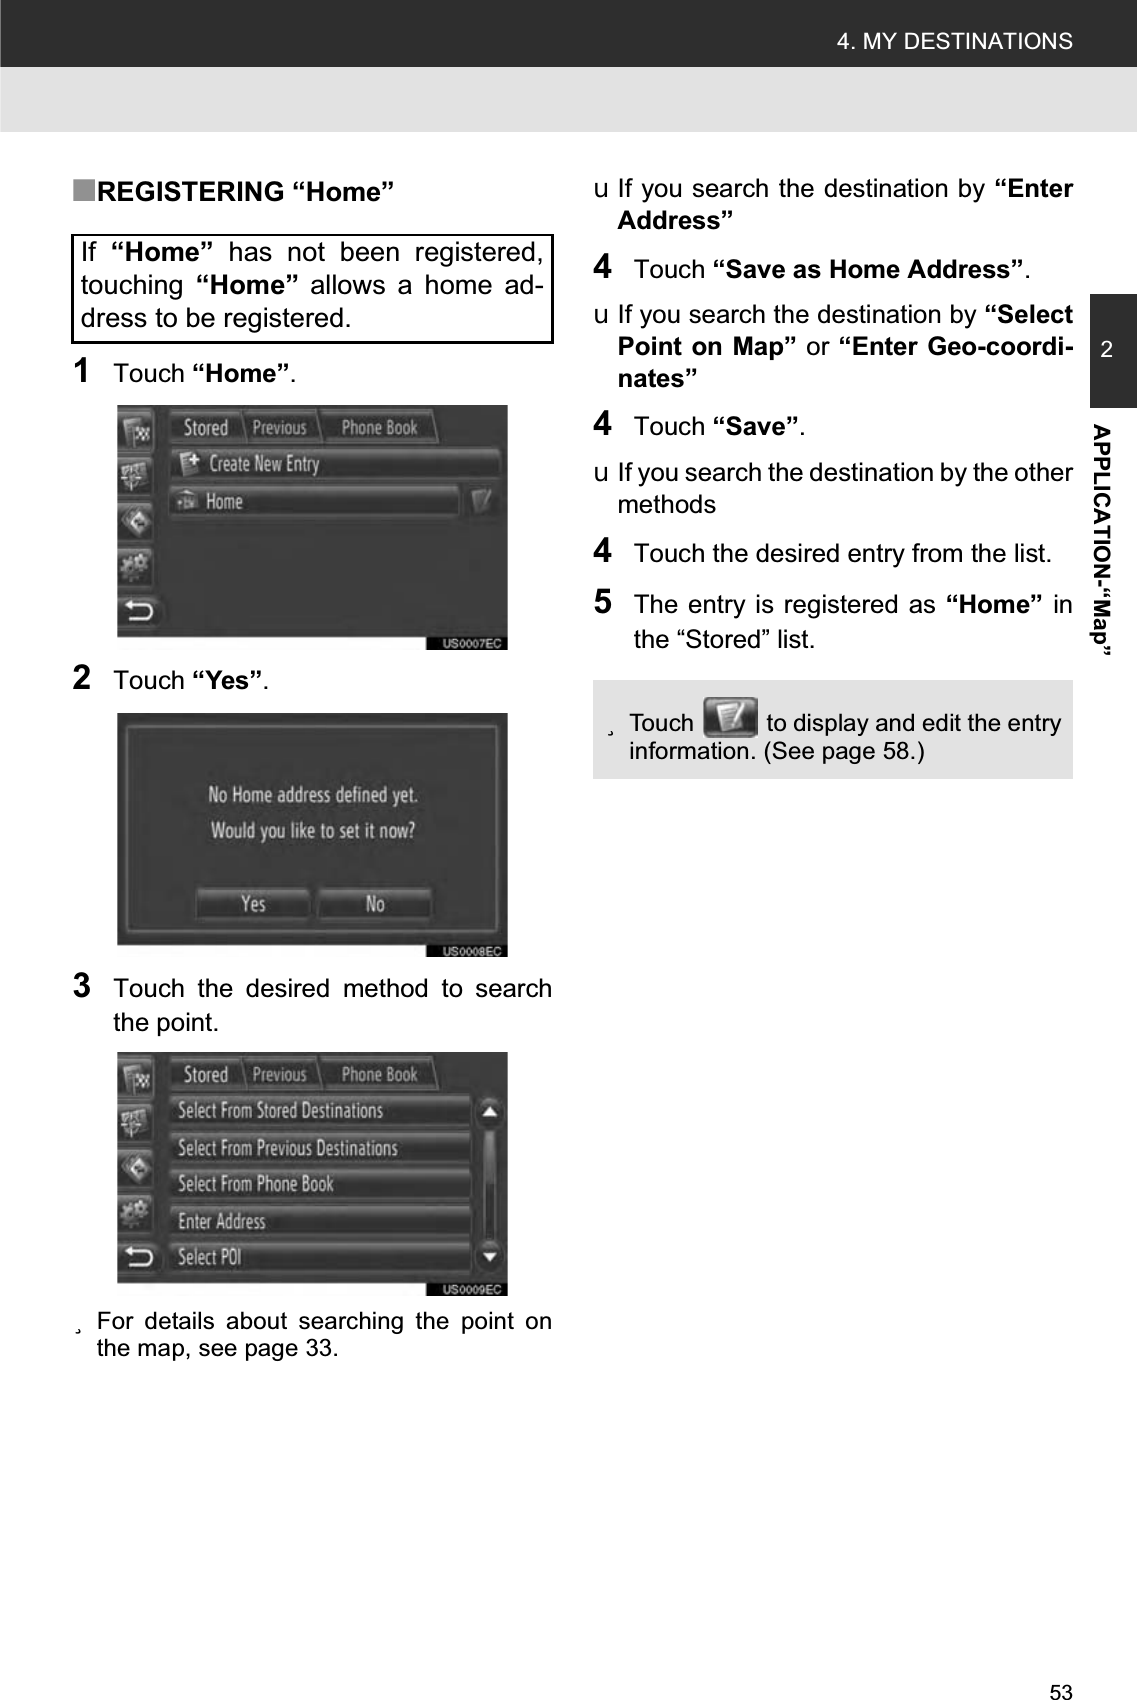
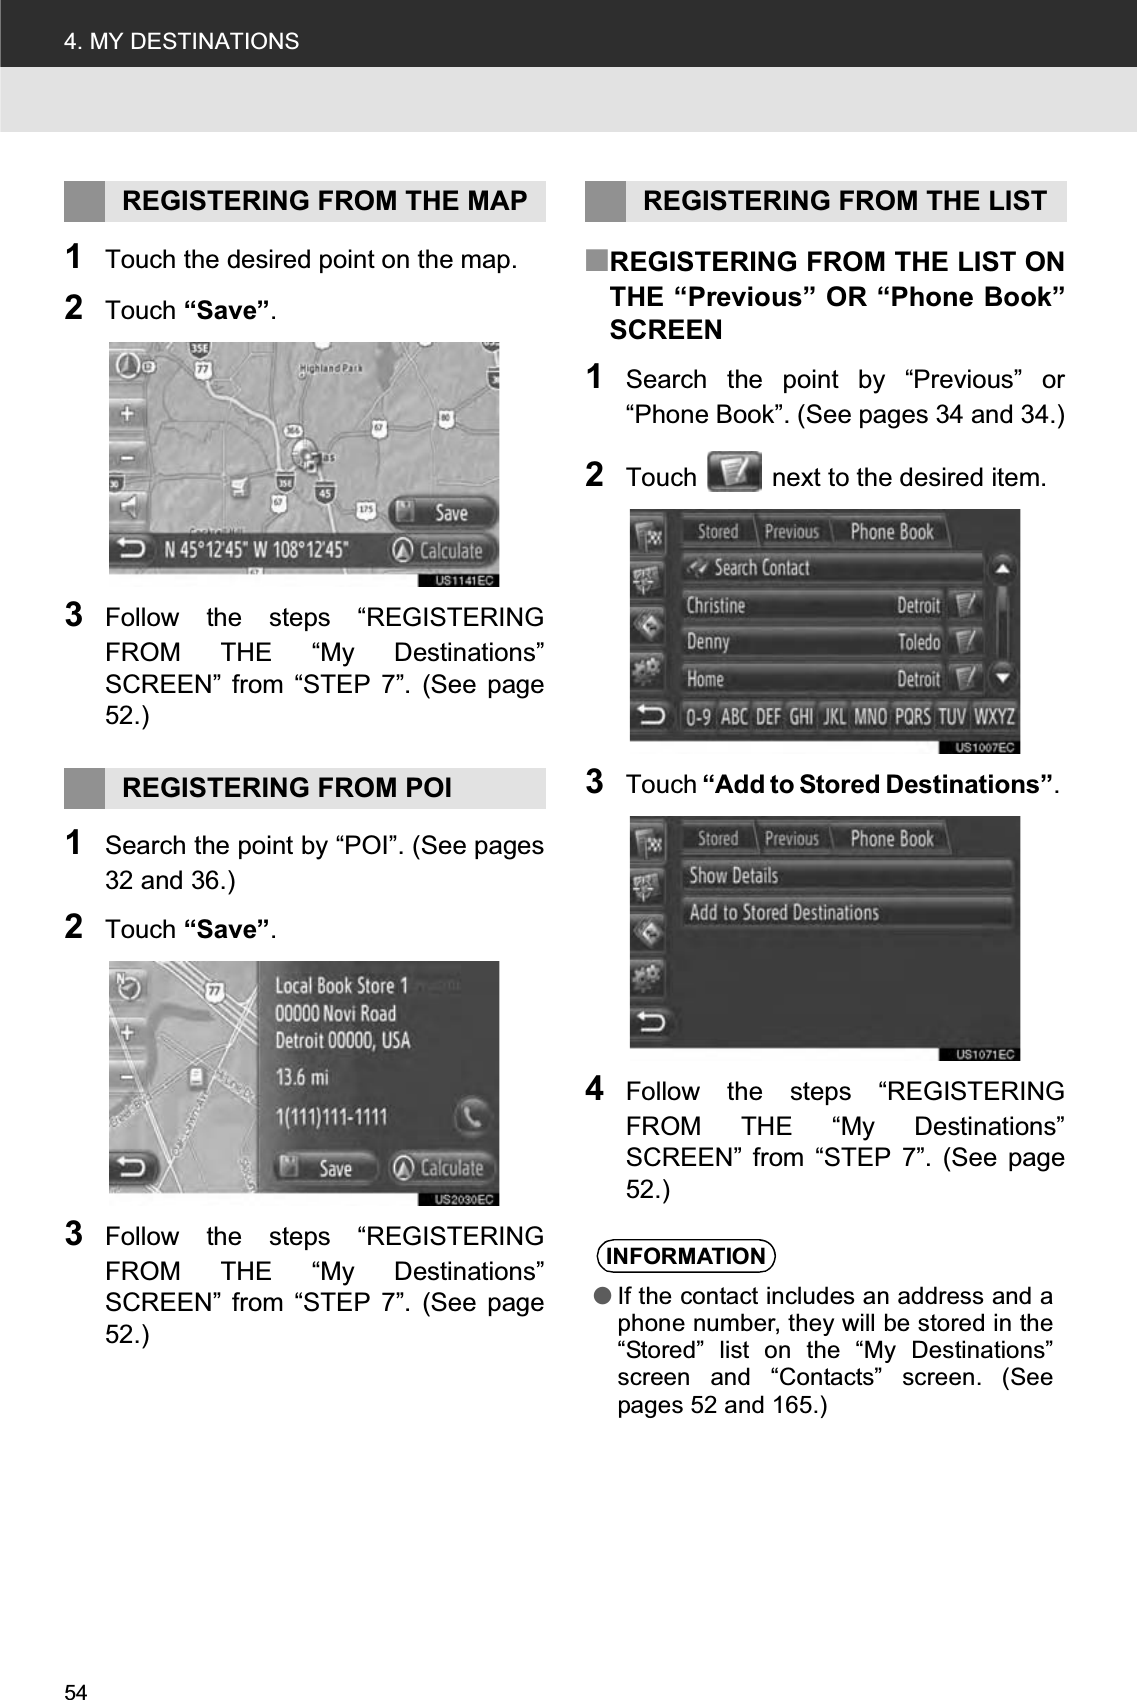
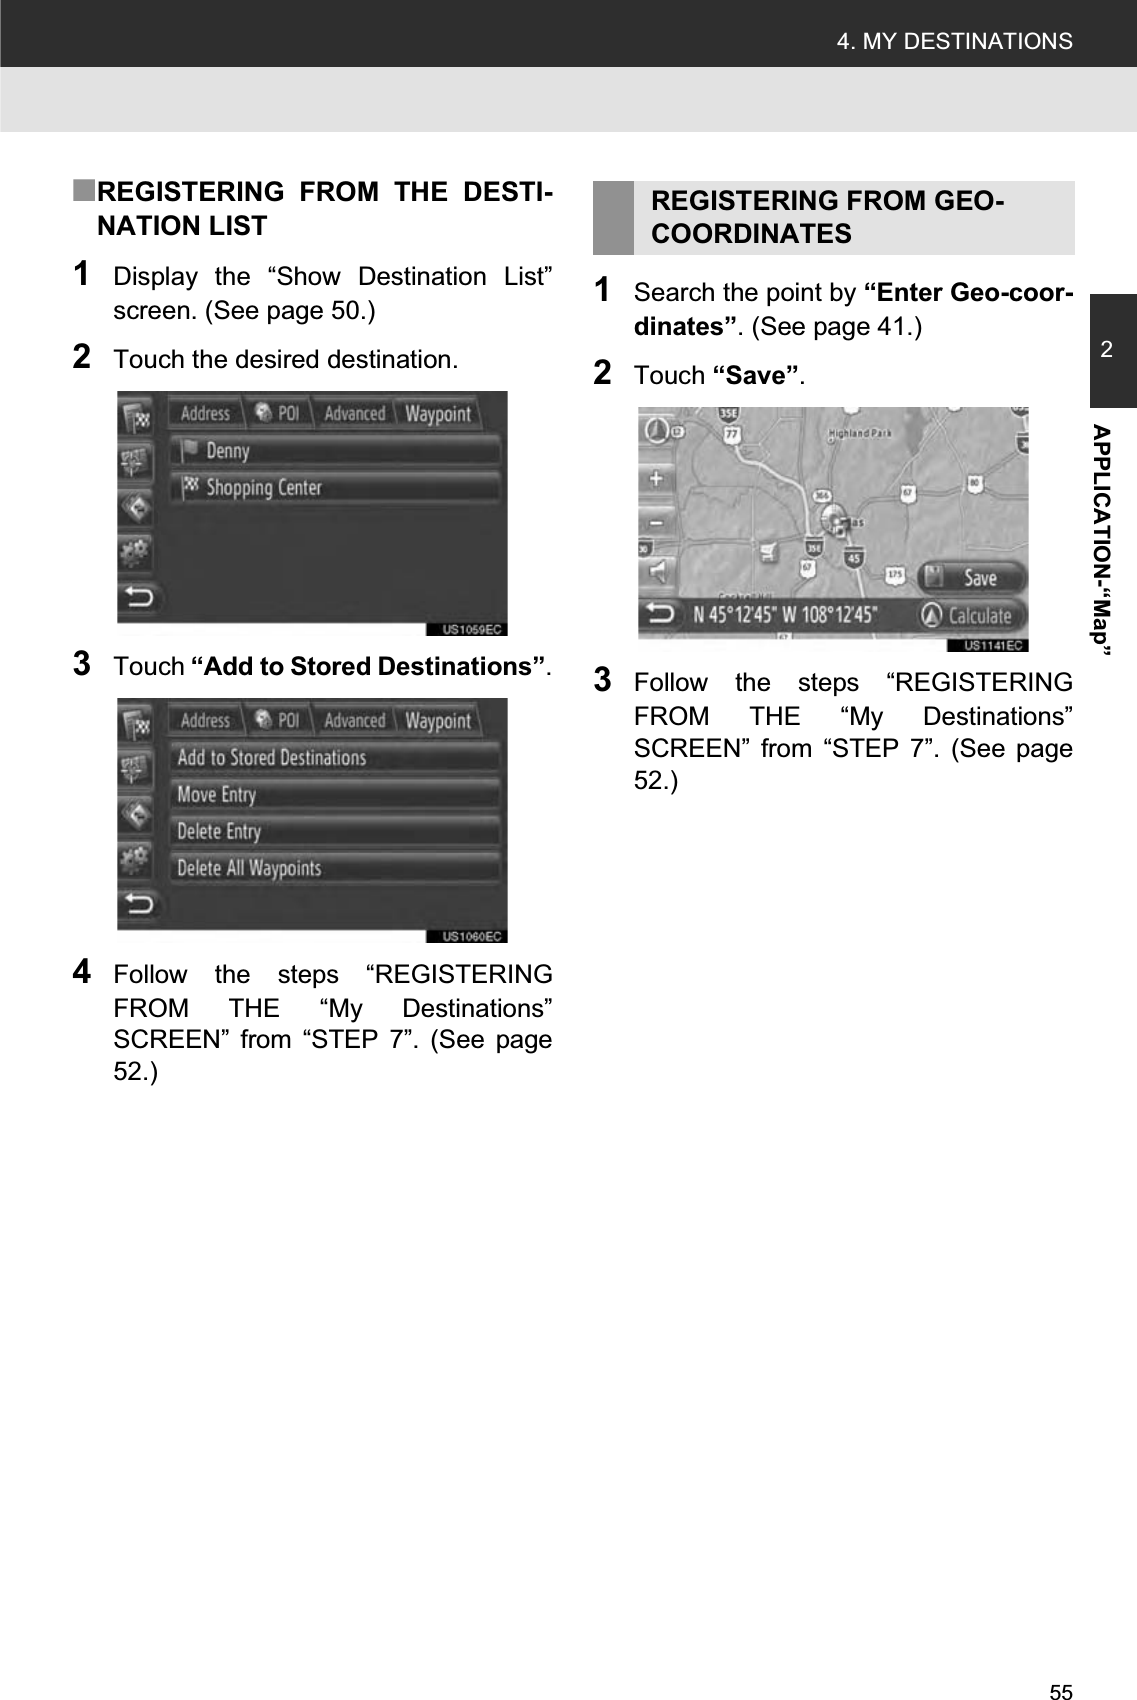
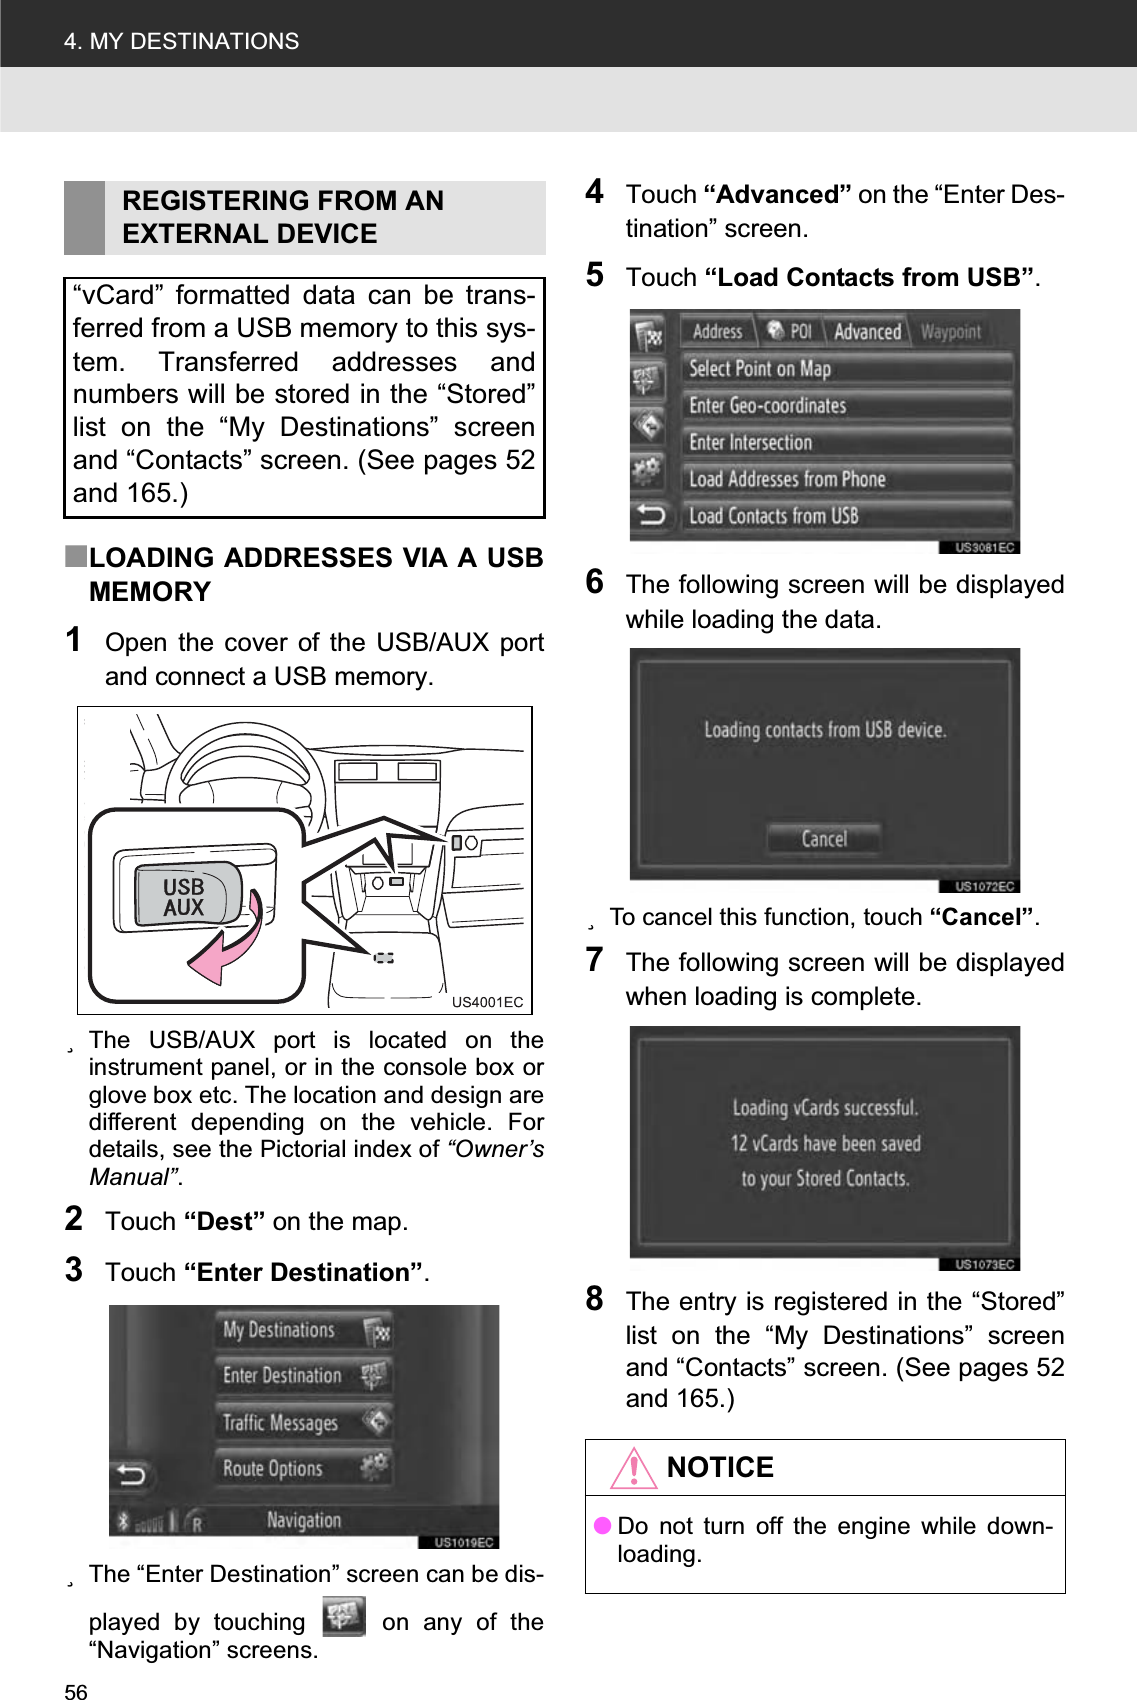
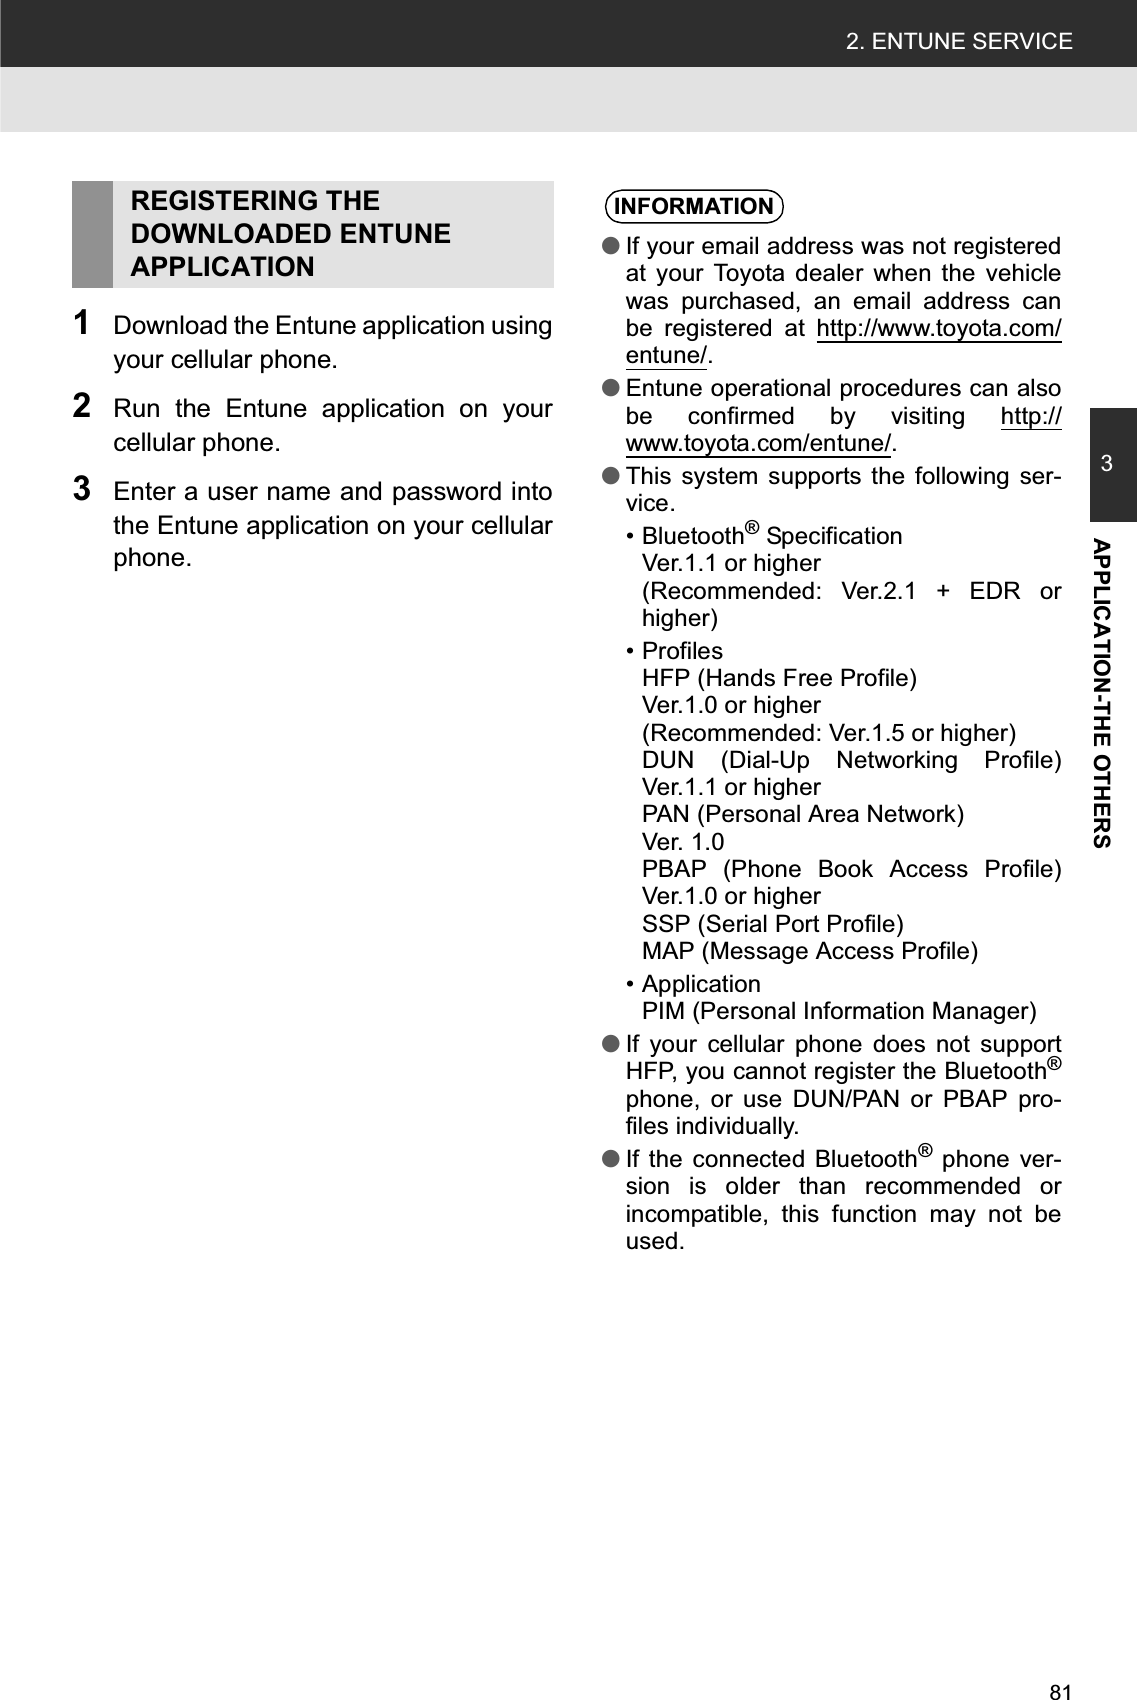
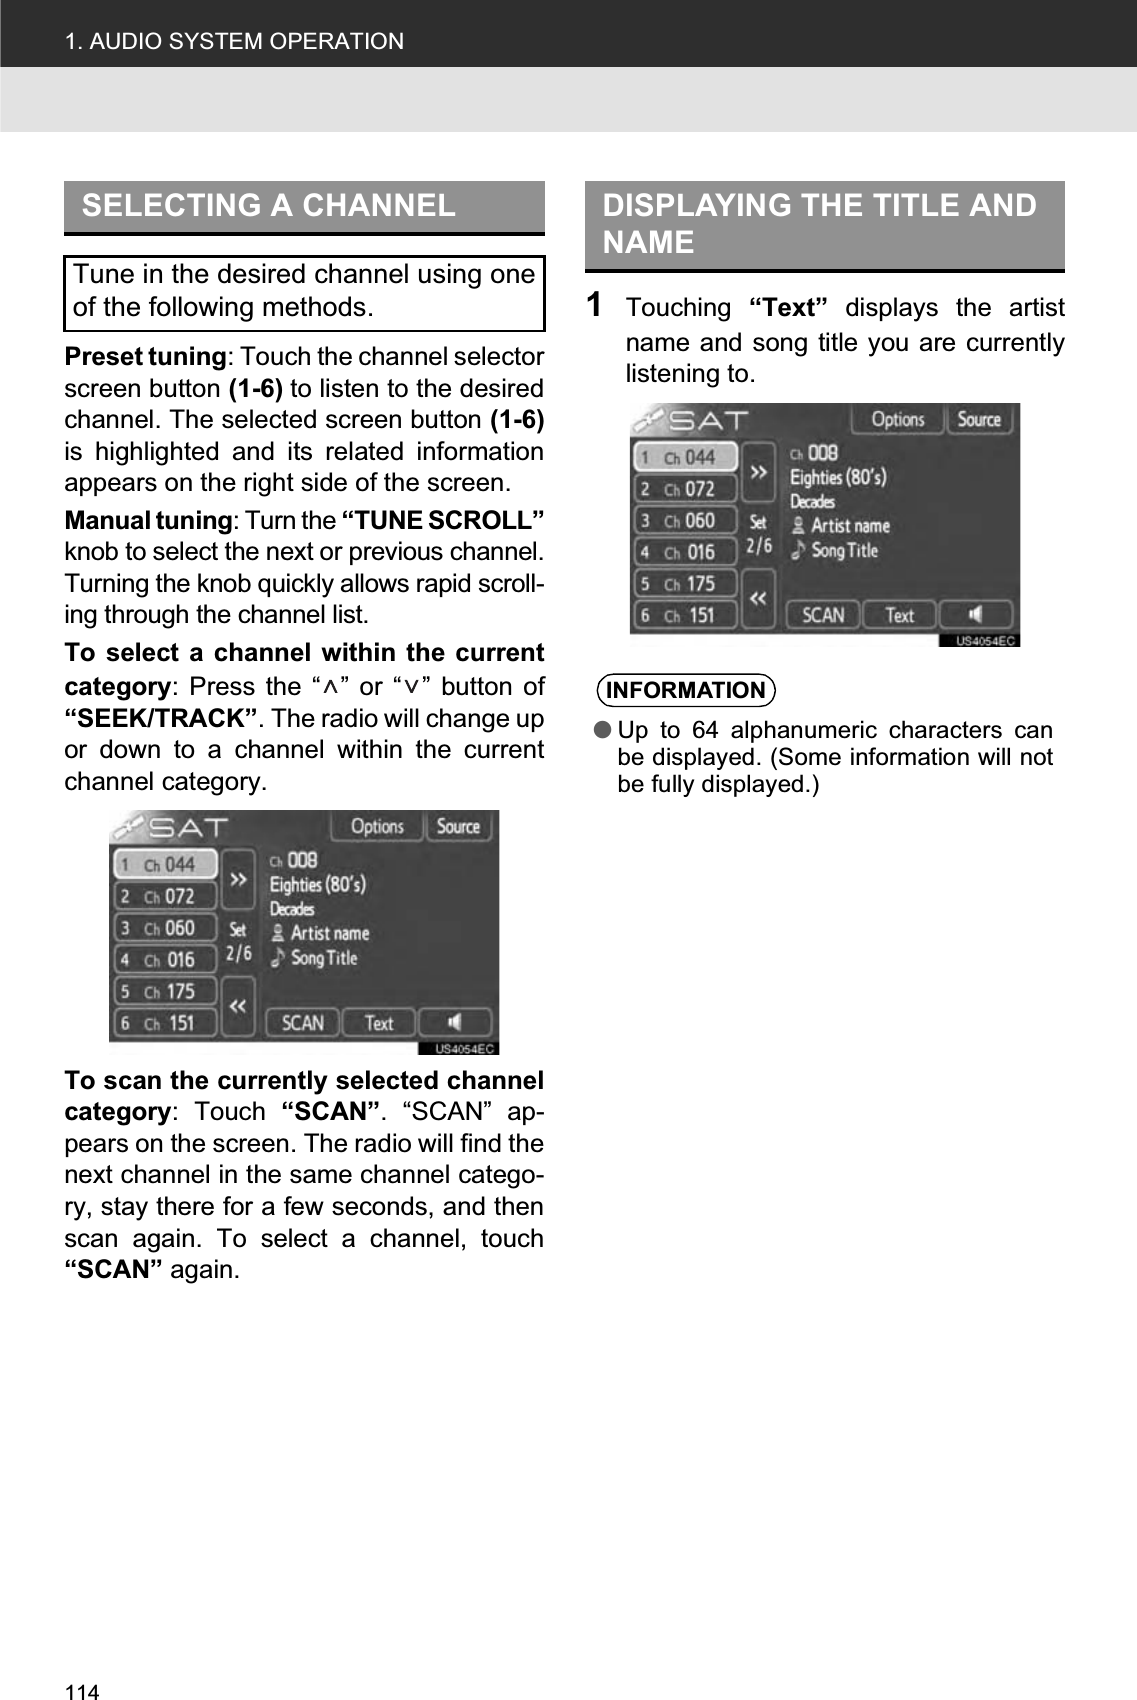
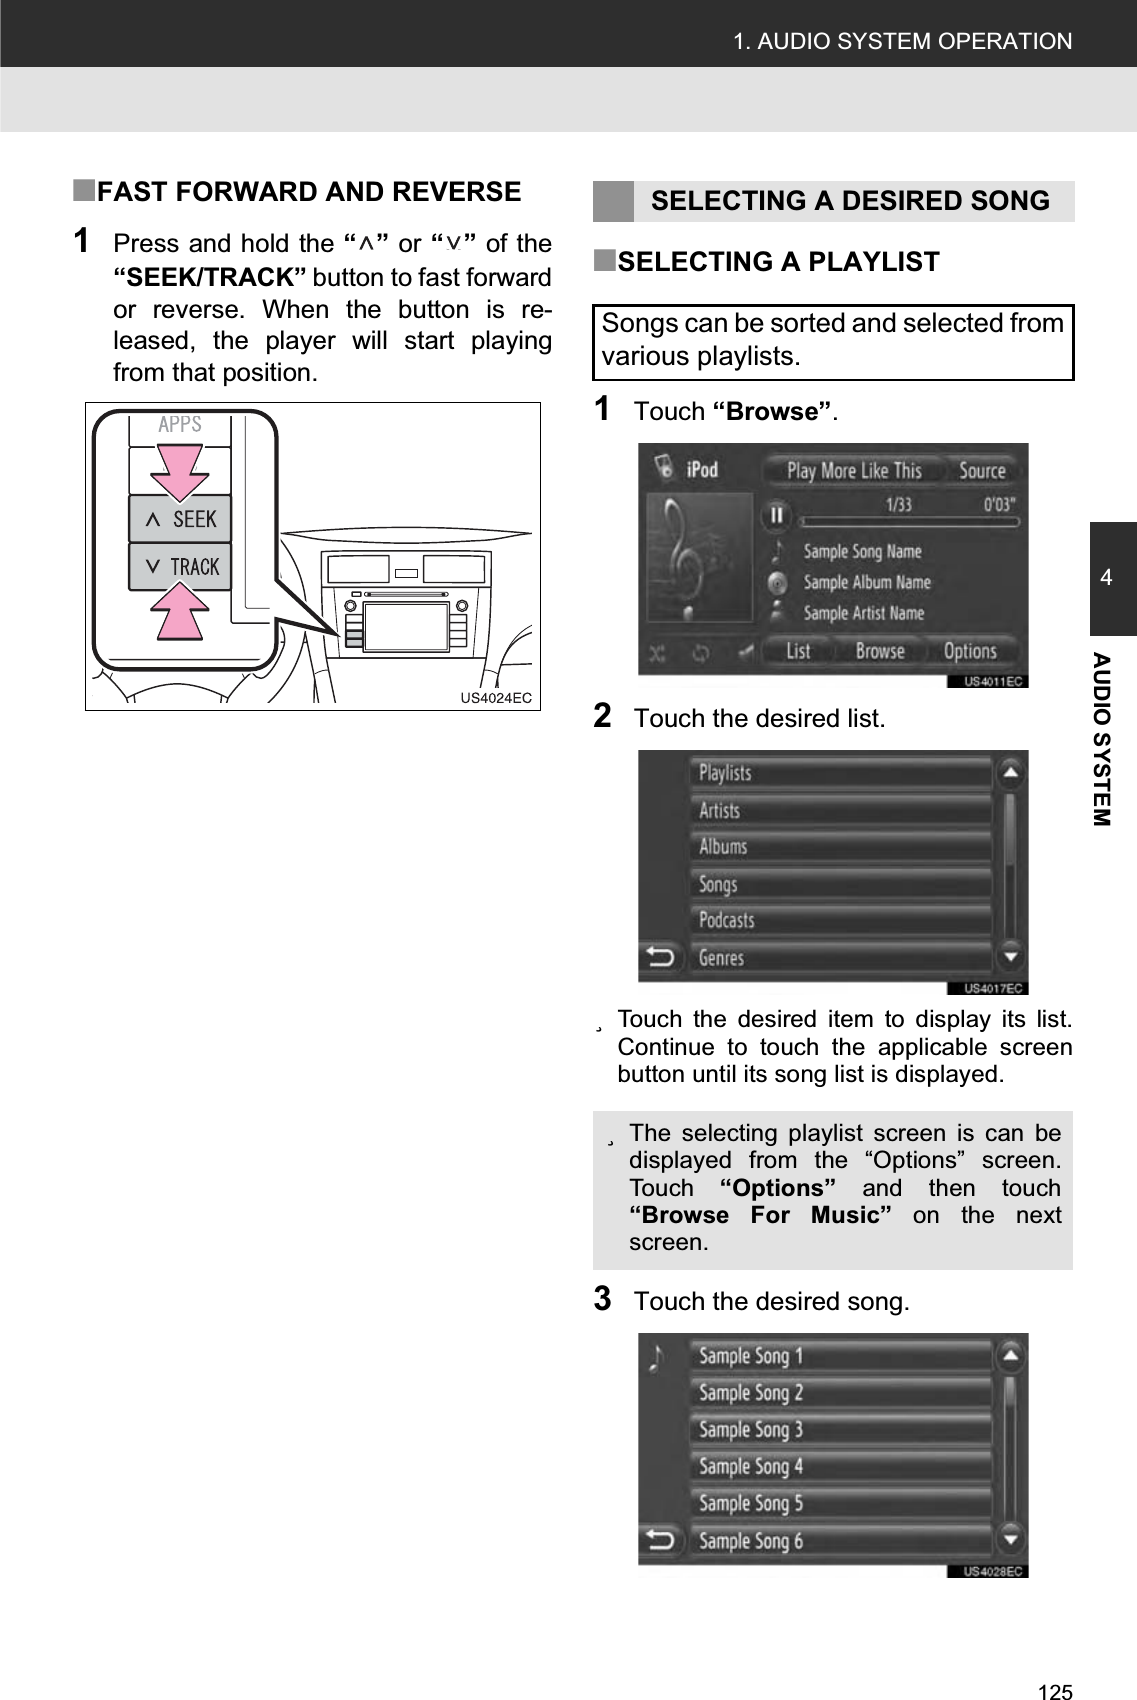
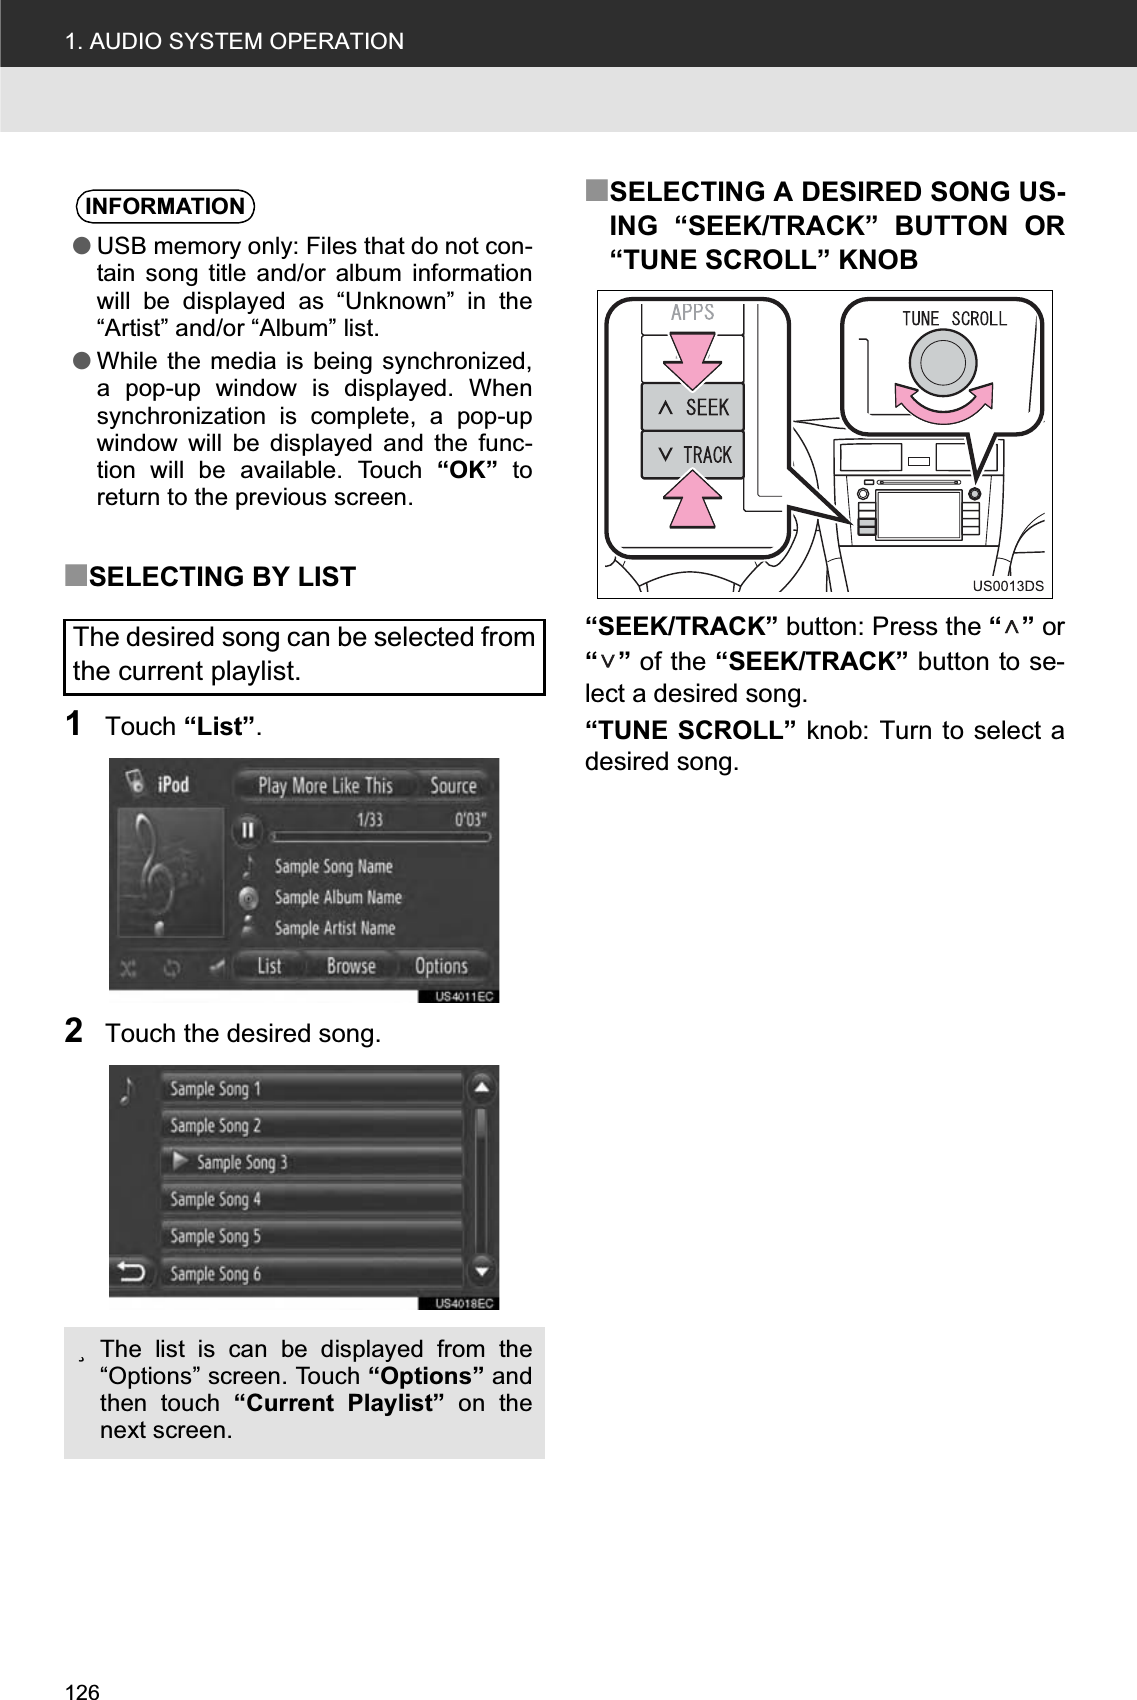
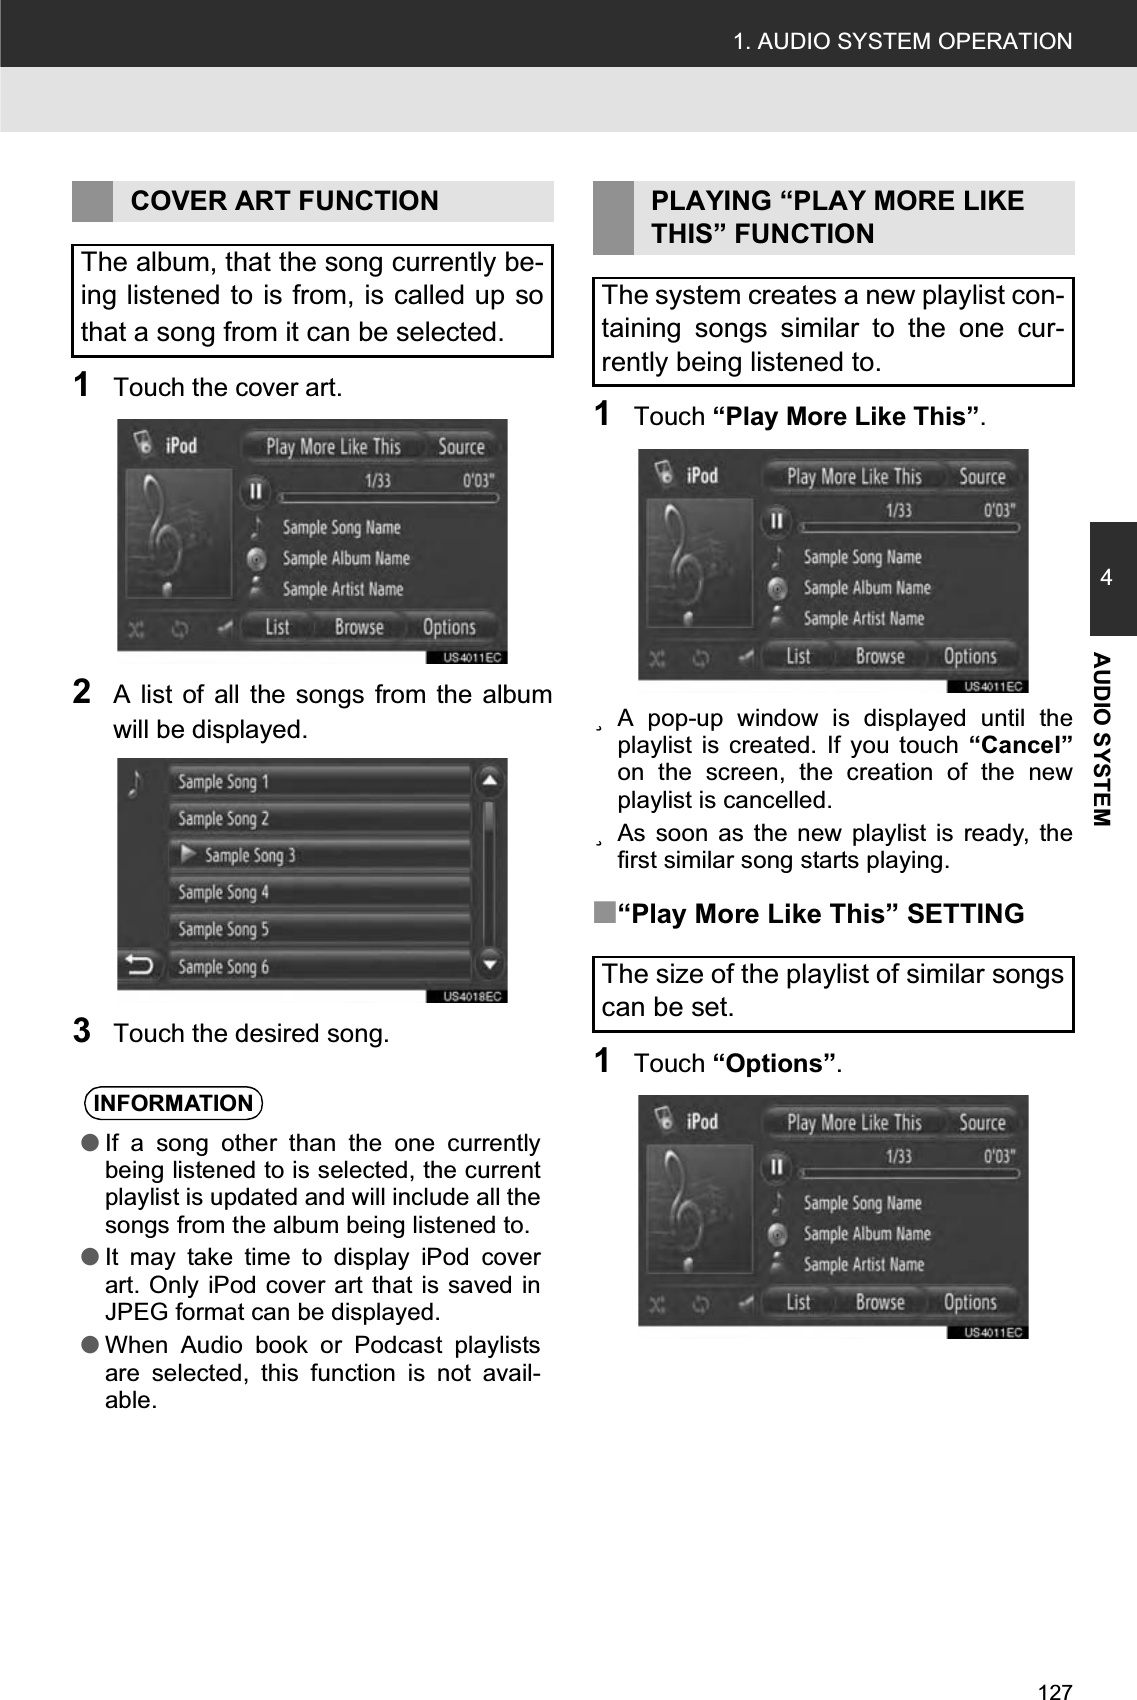
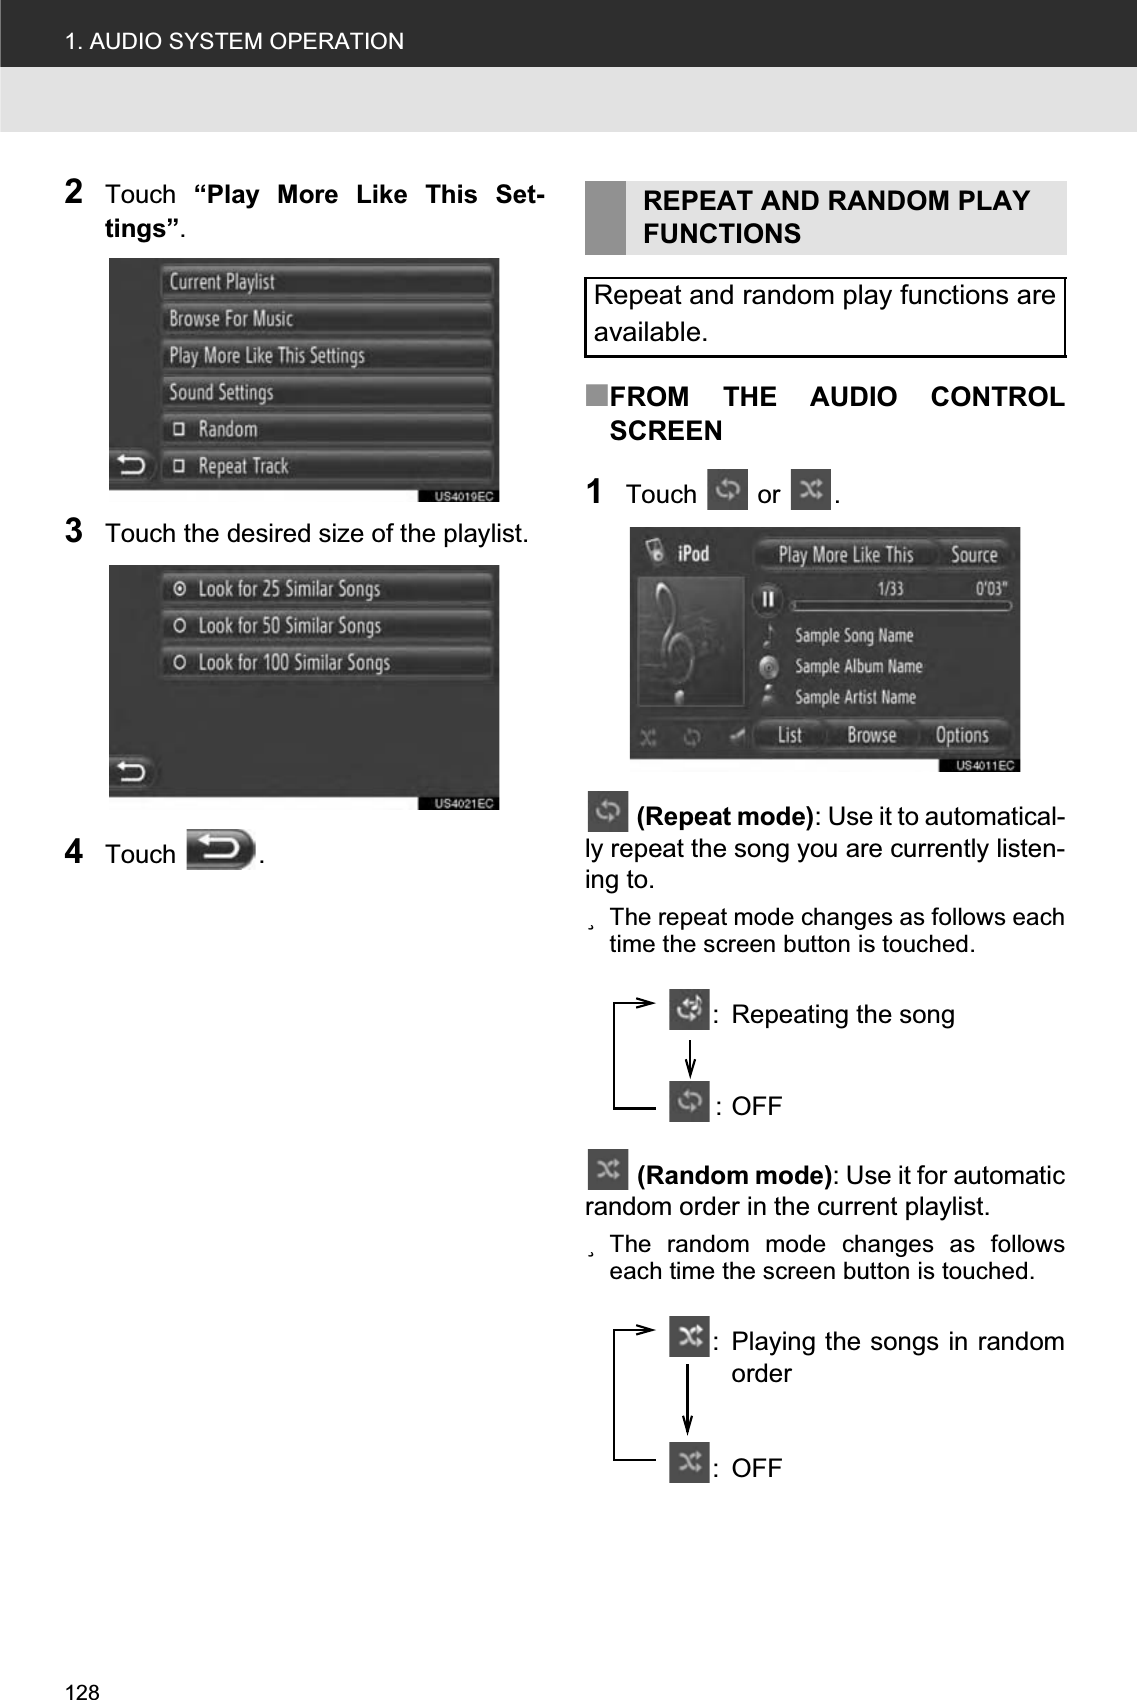
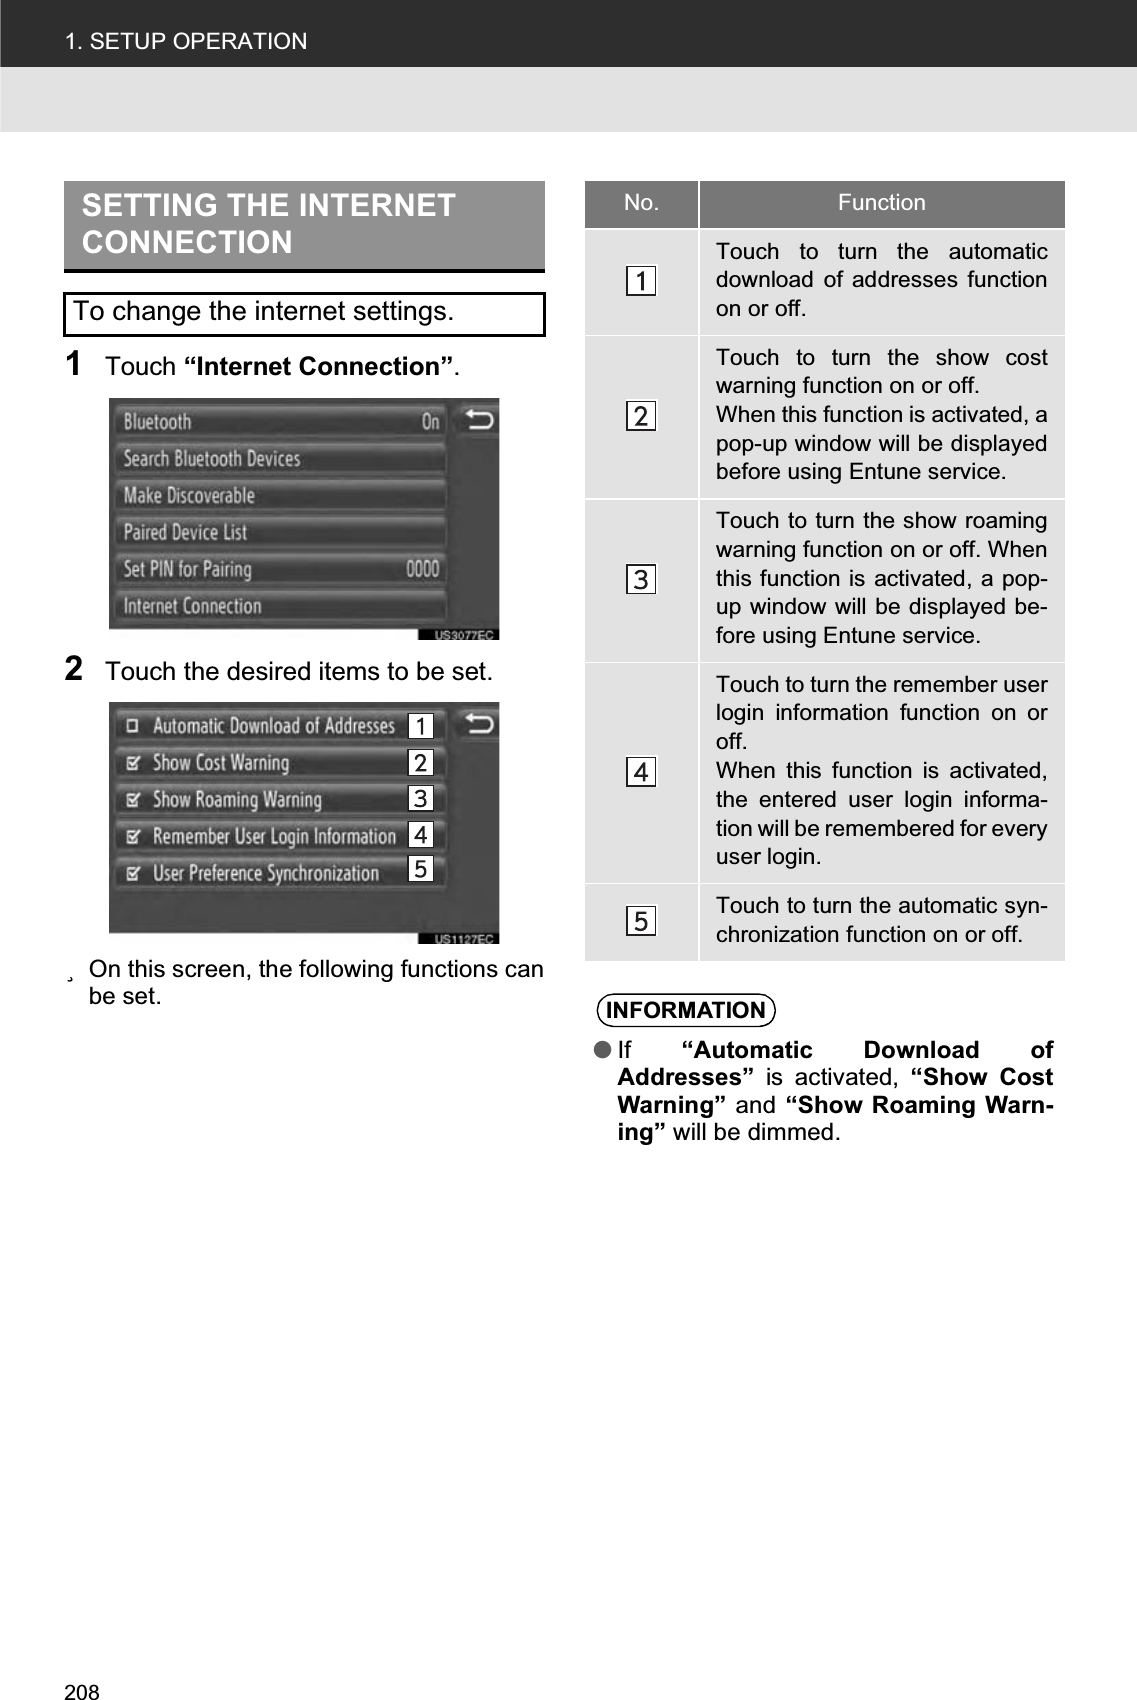
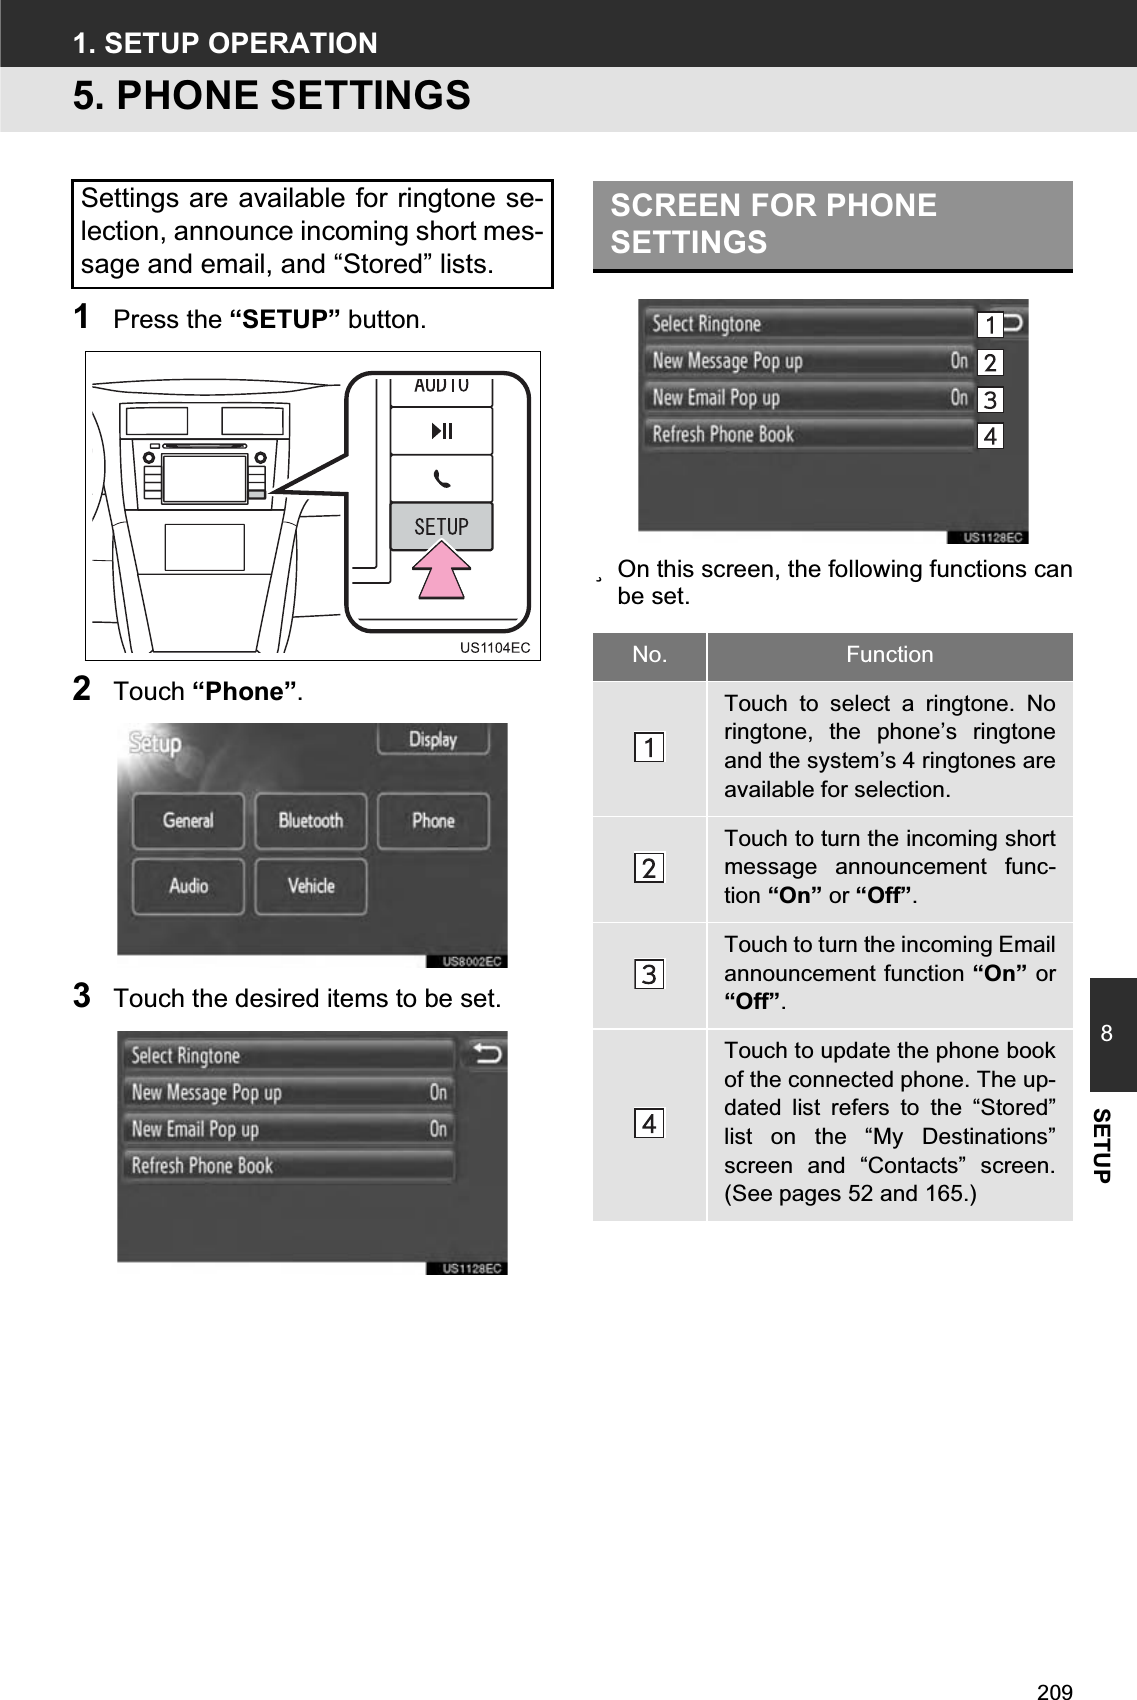
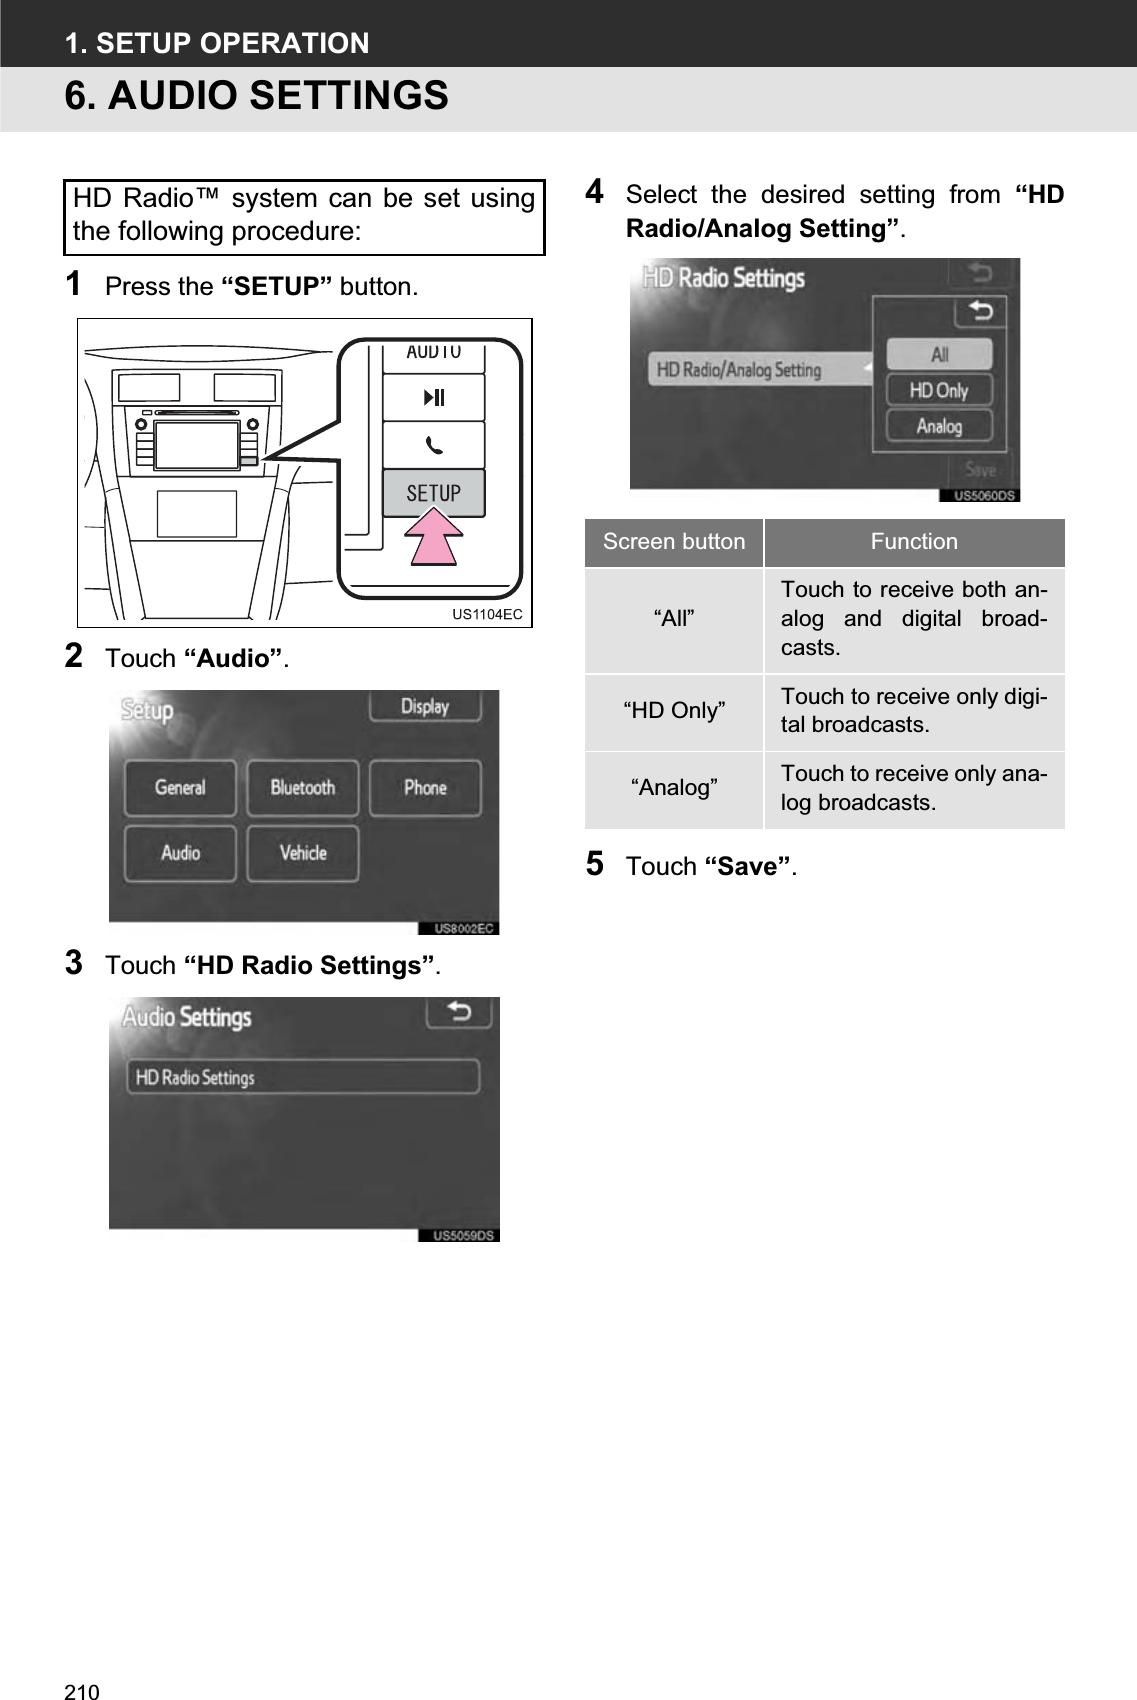
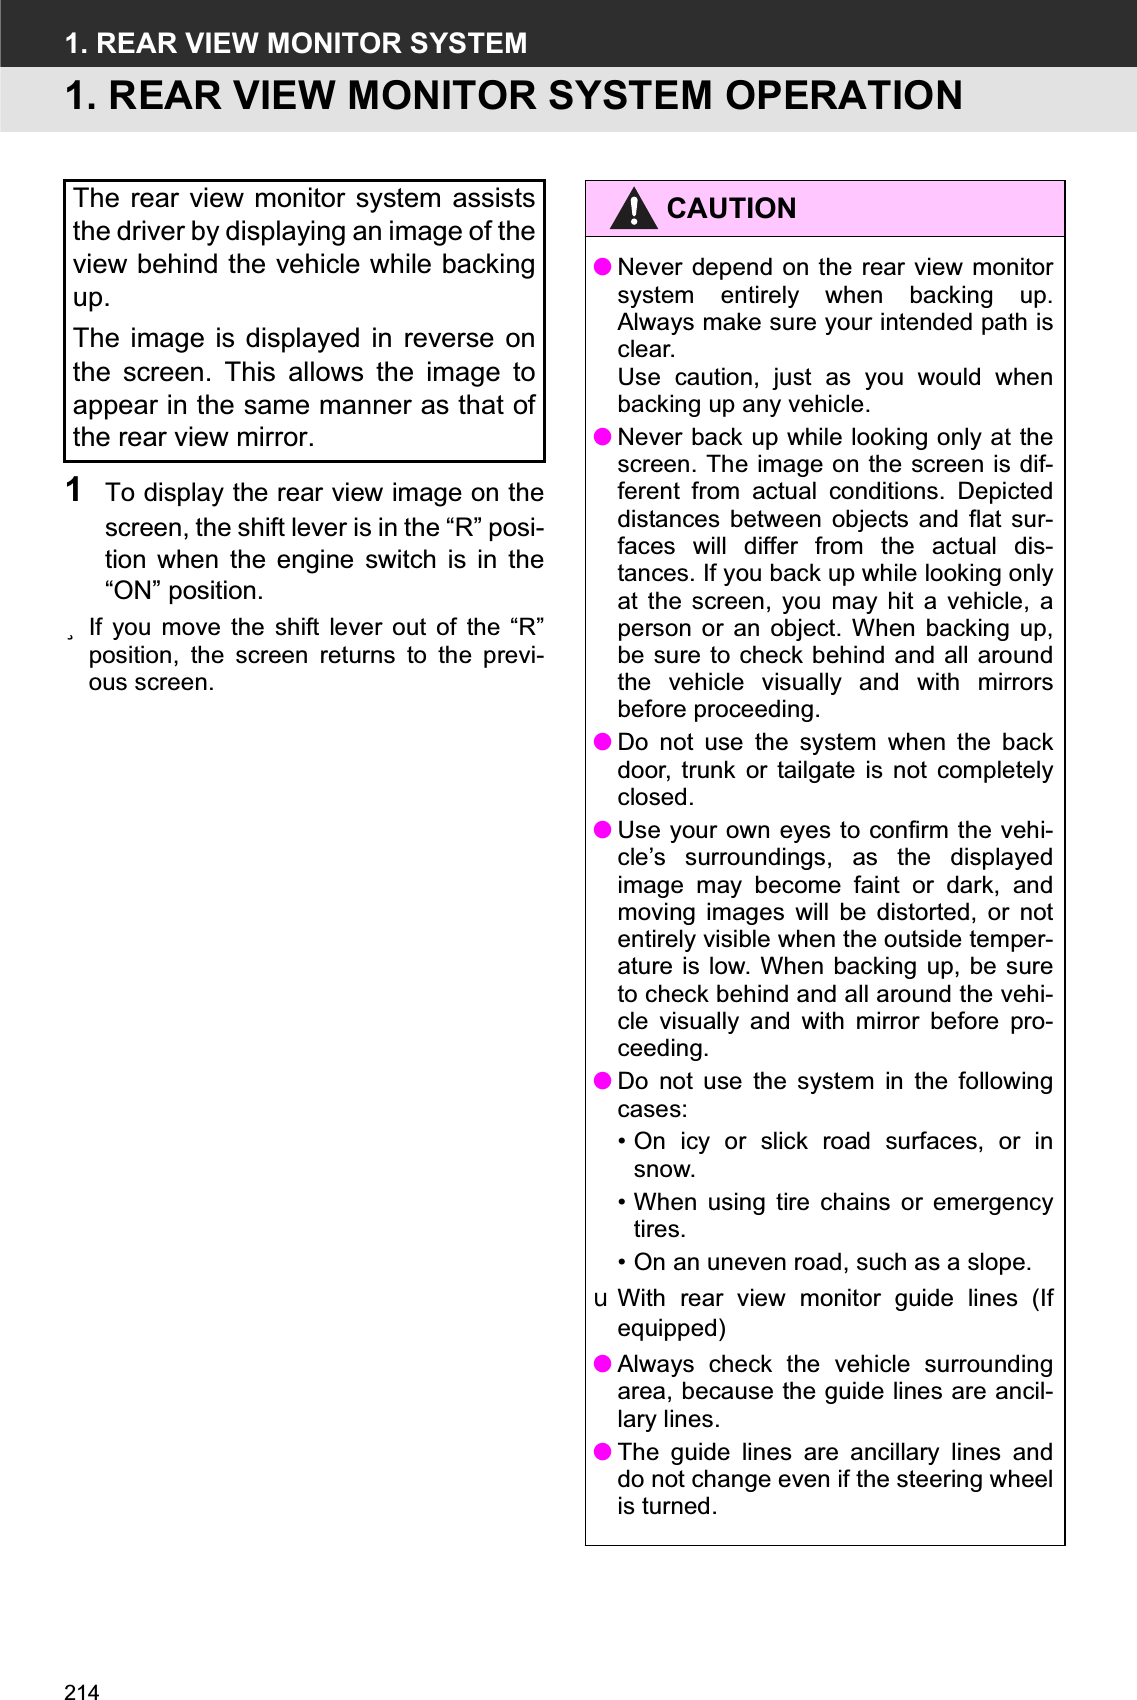
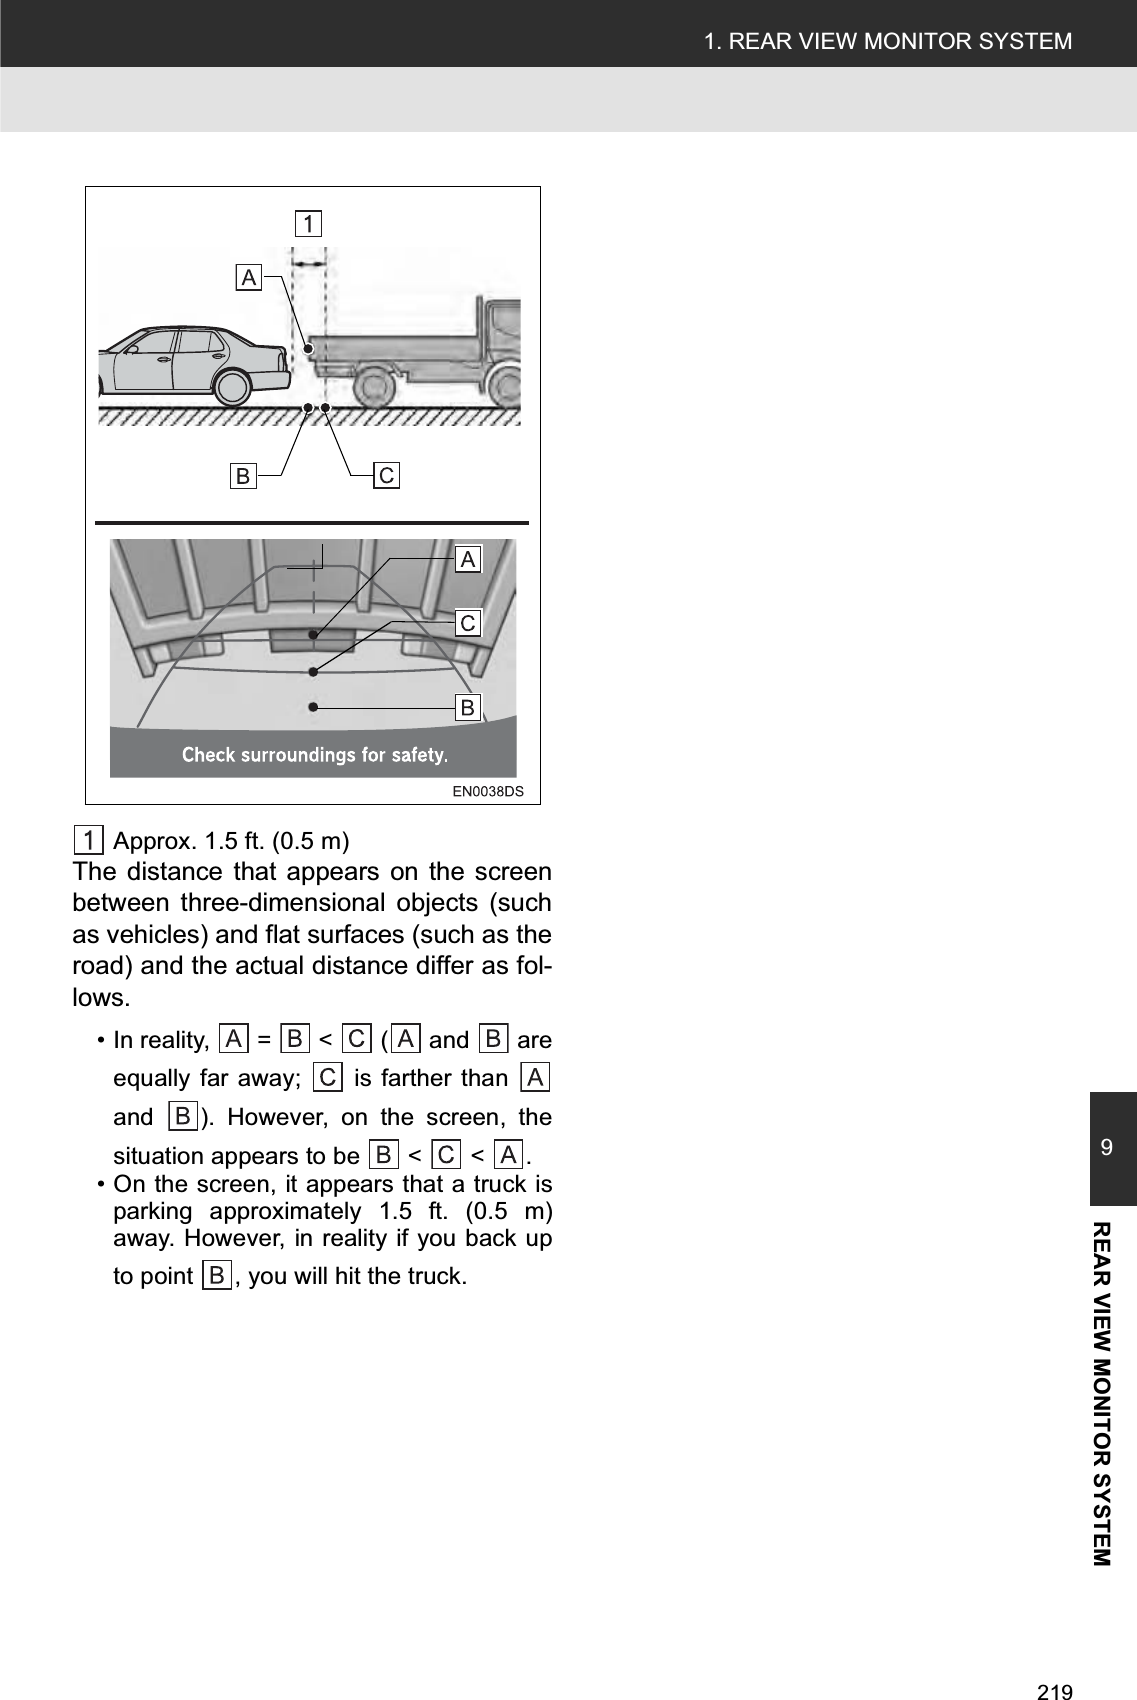
Harman Becker Automotive Systems BE2729 Navigation and Connectivity Box User Manual Display Audio Ext U 33A02U
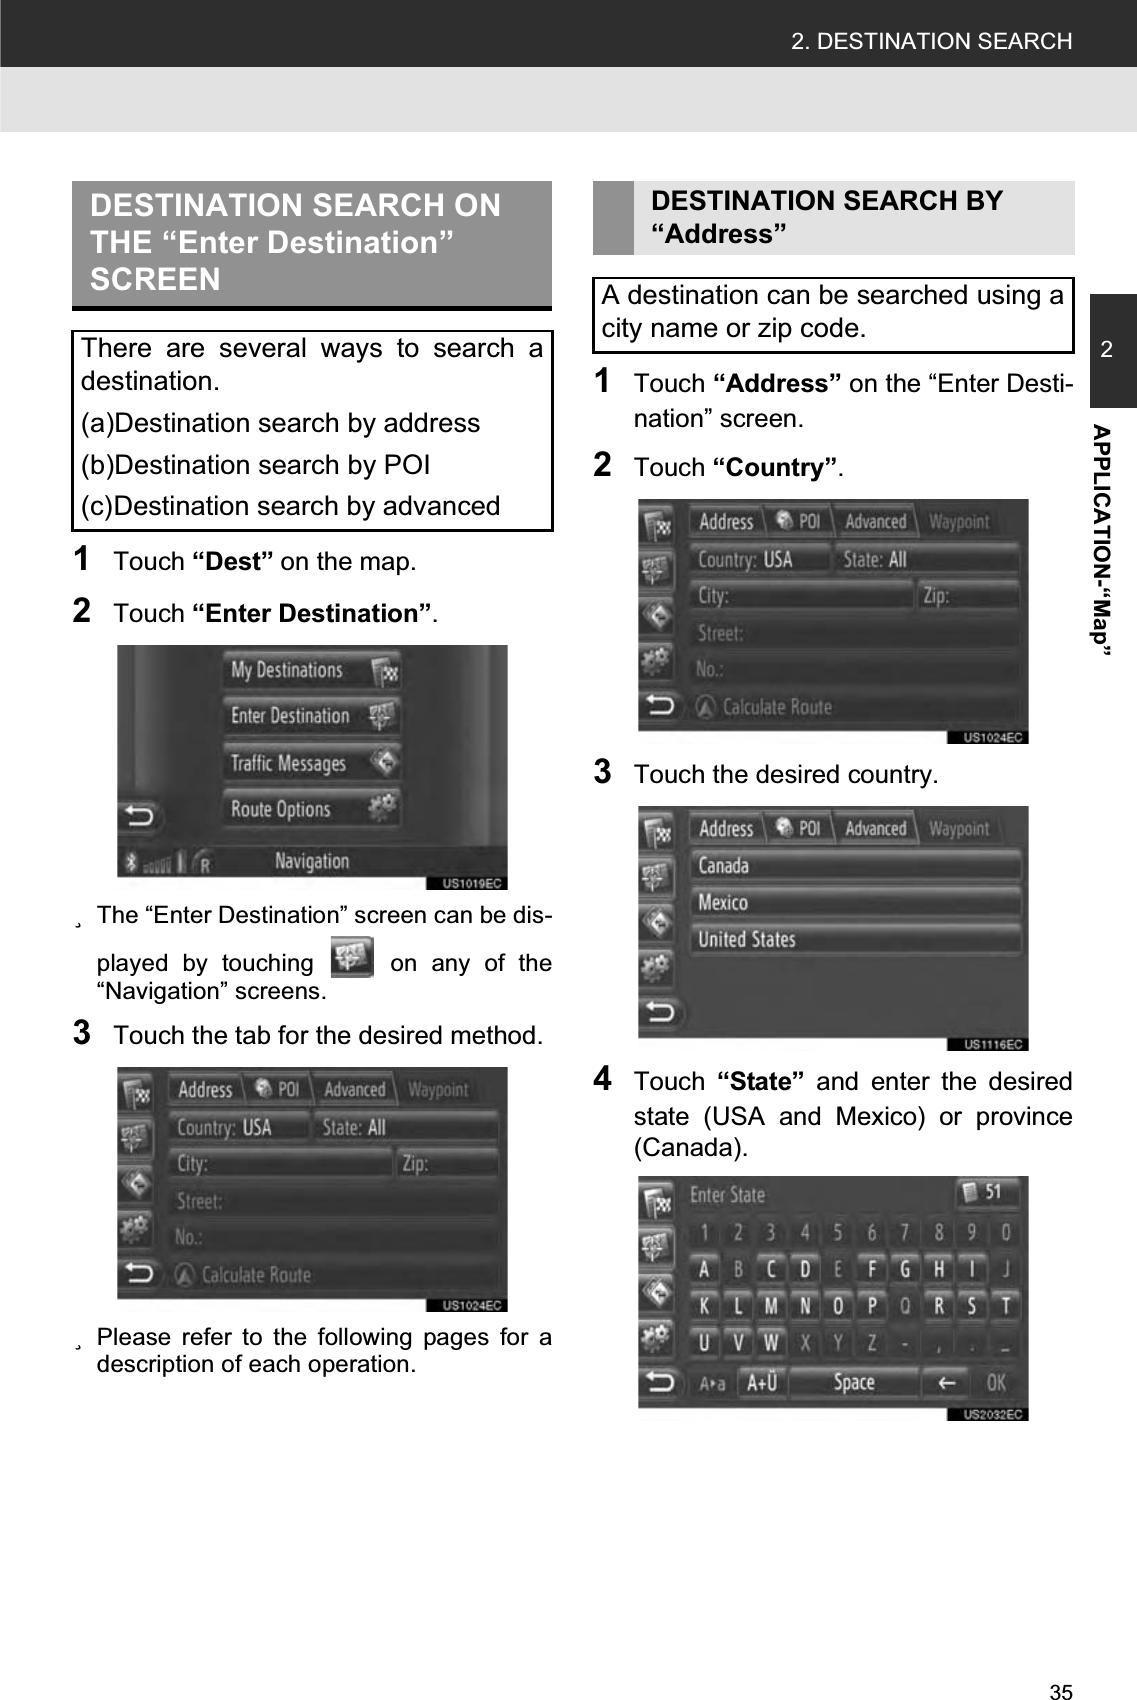
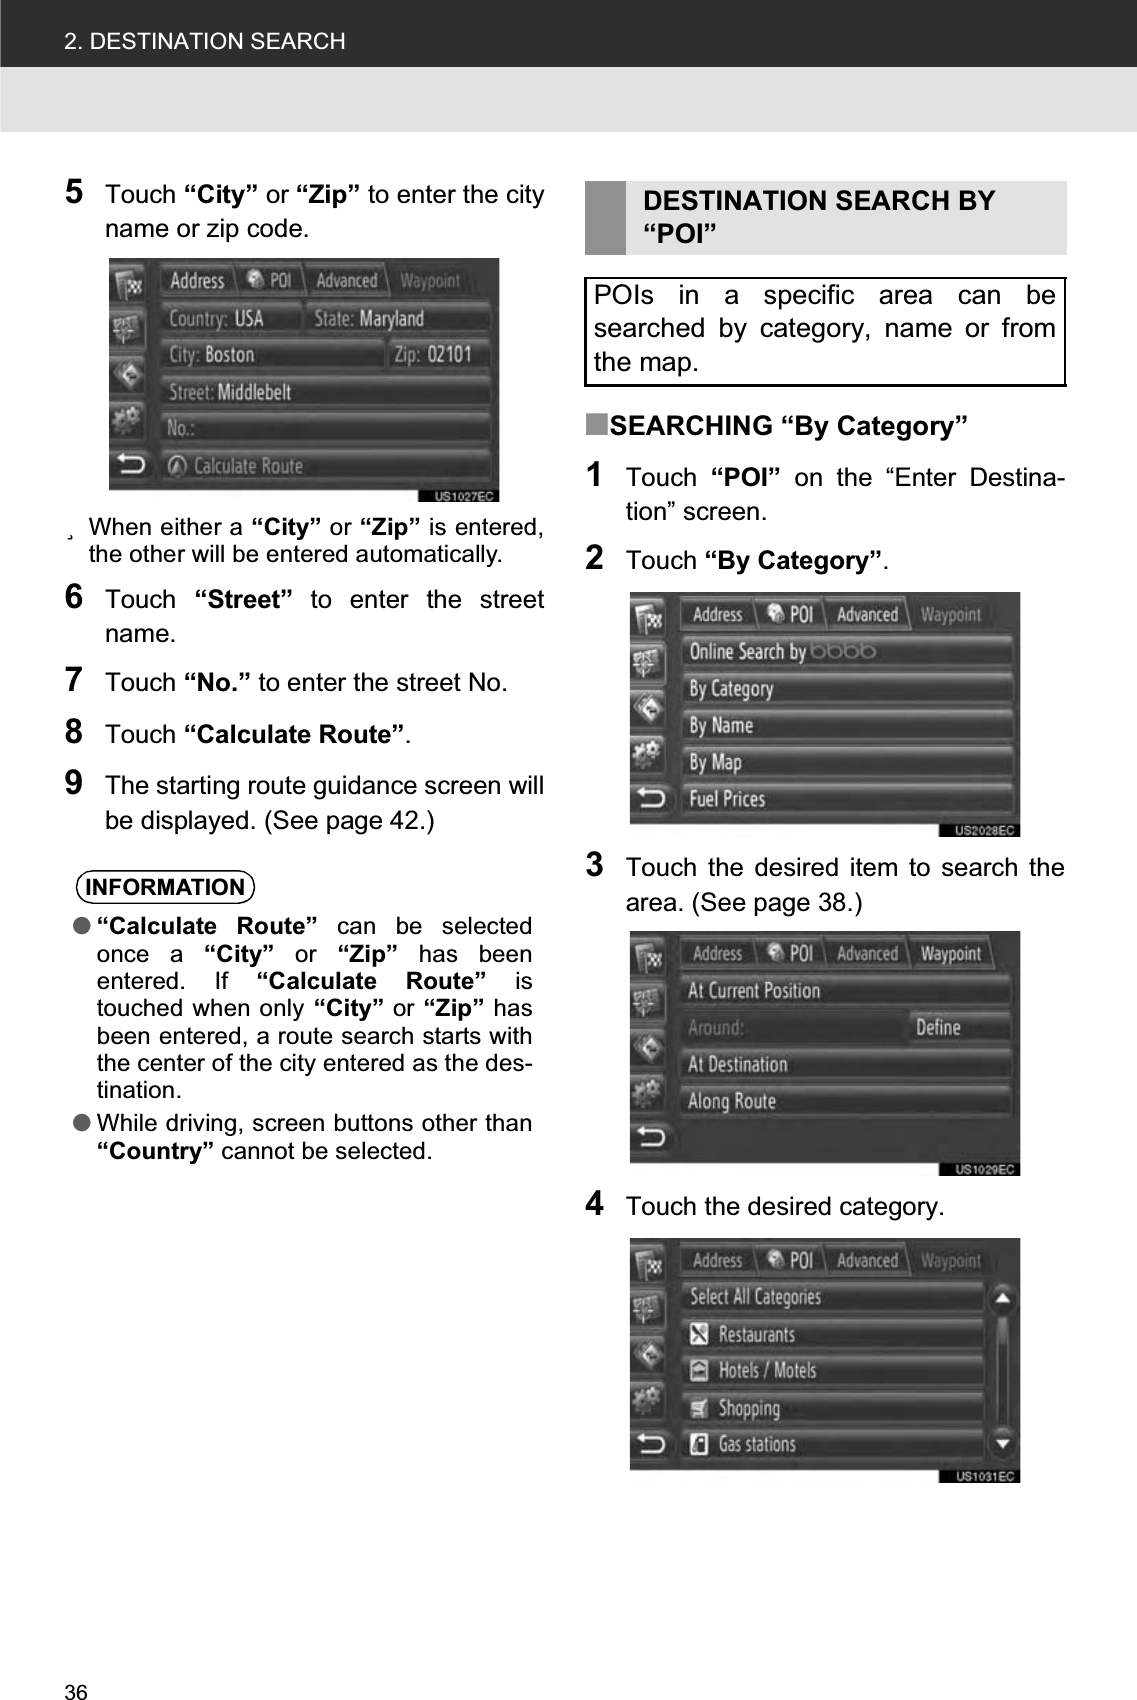
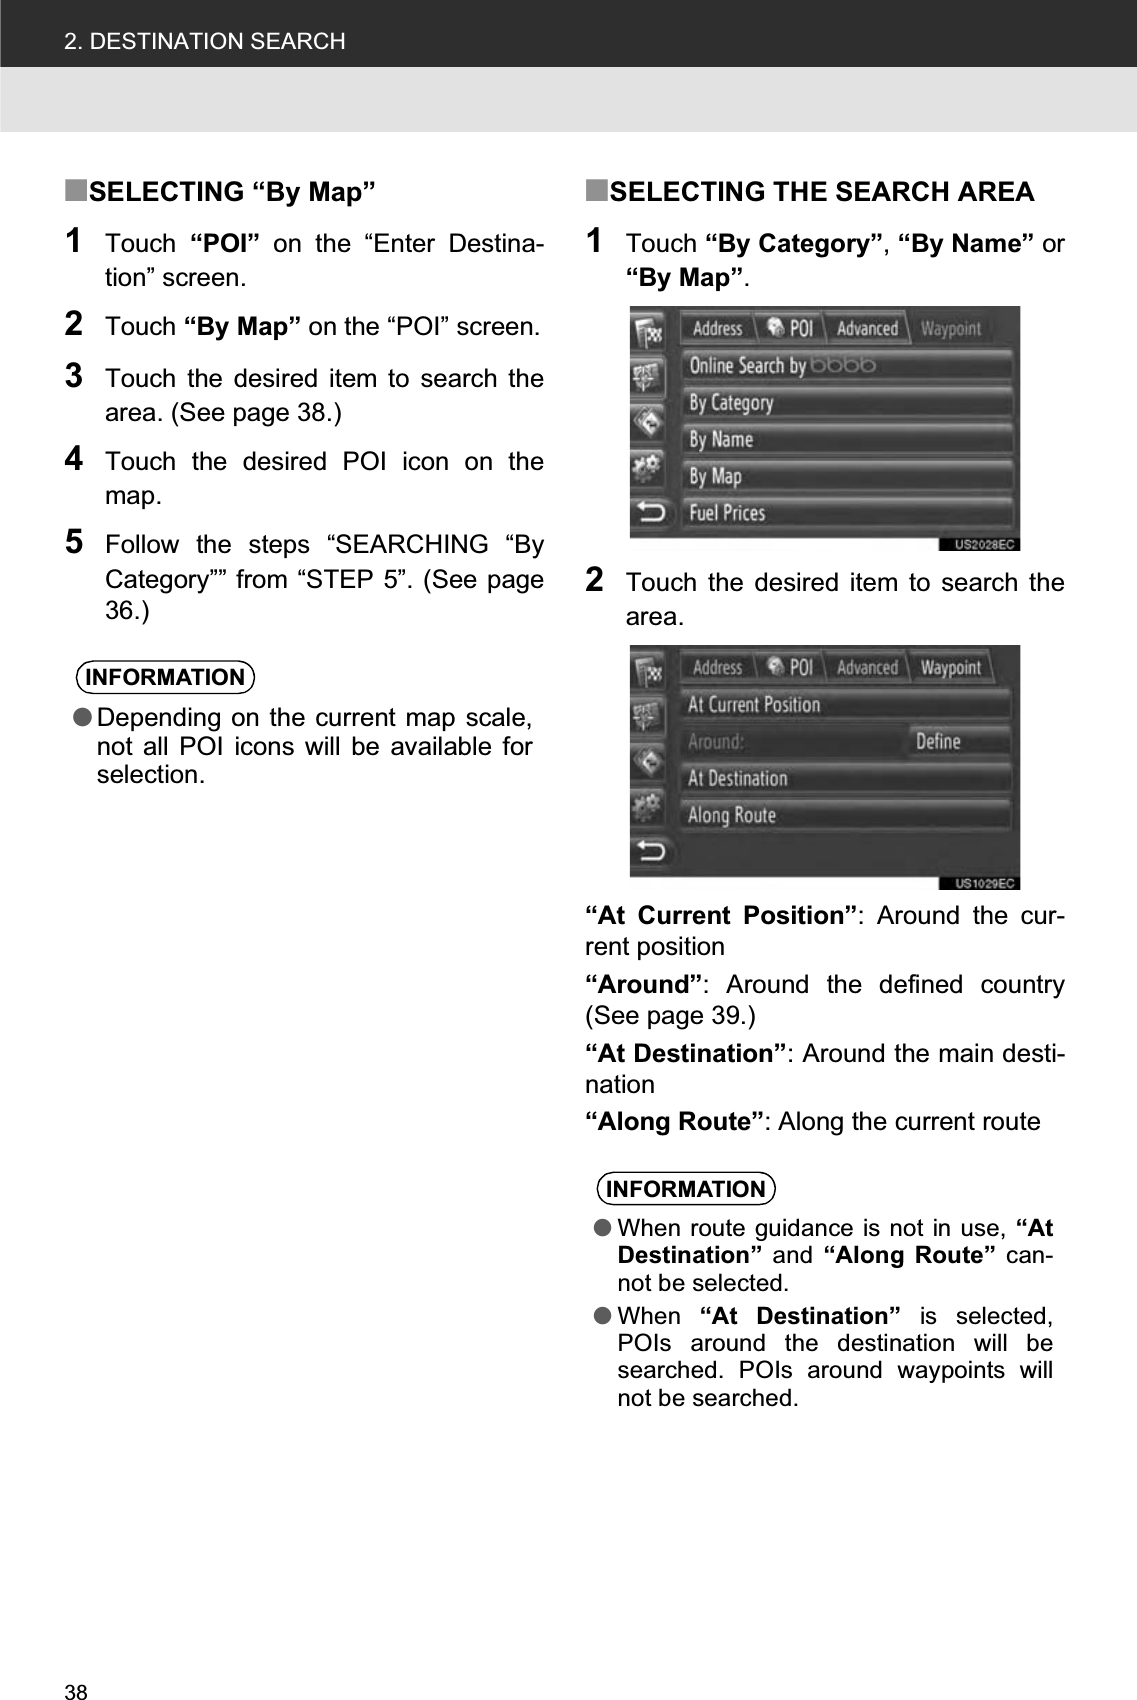
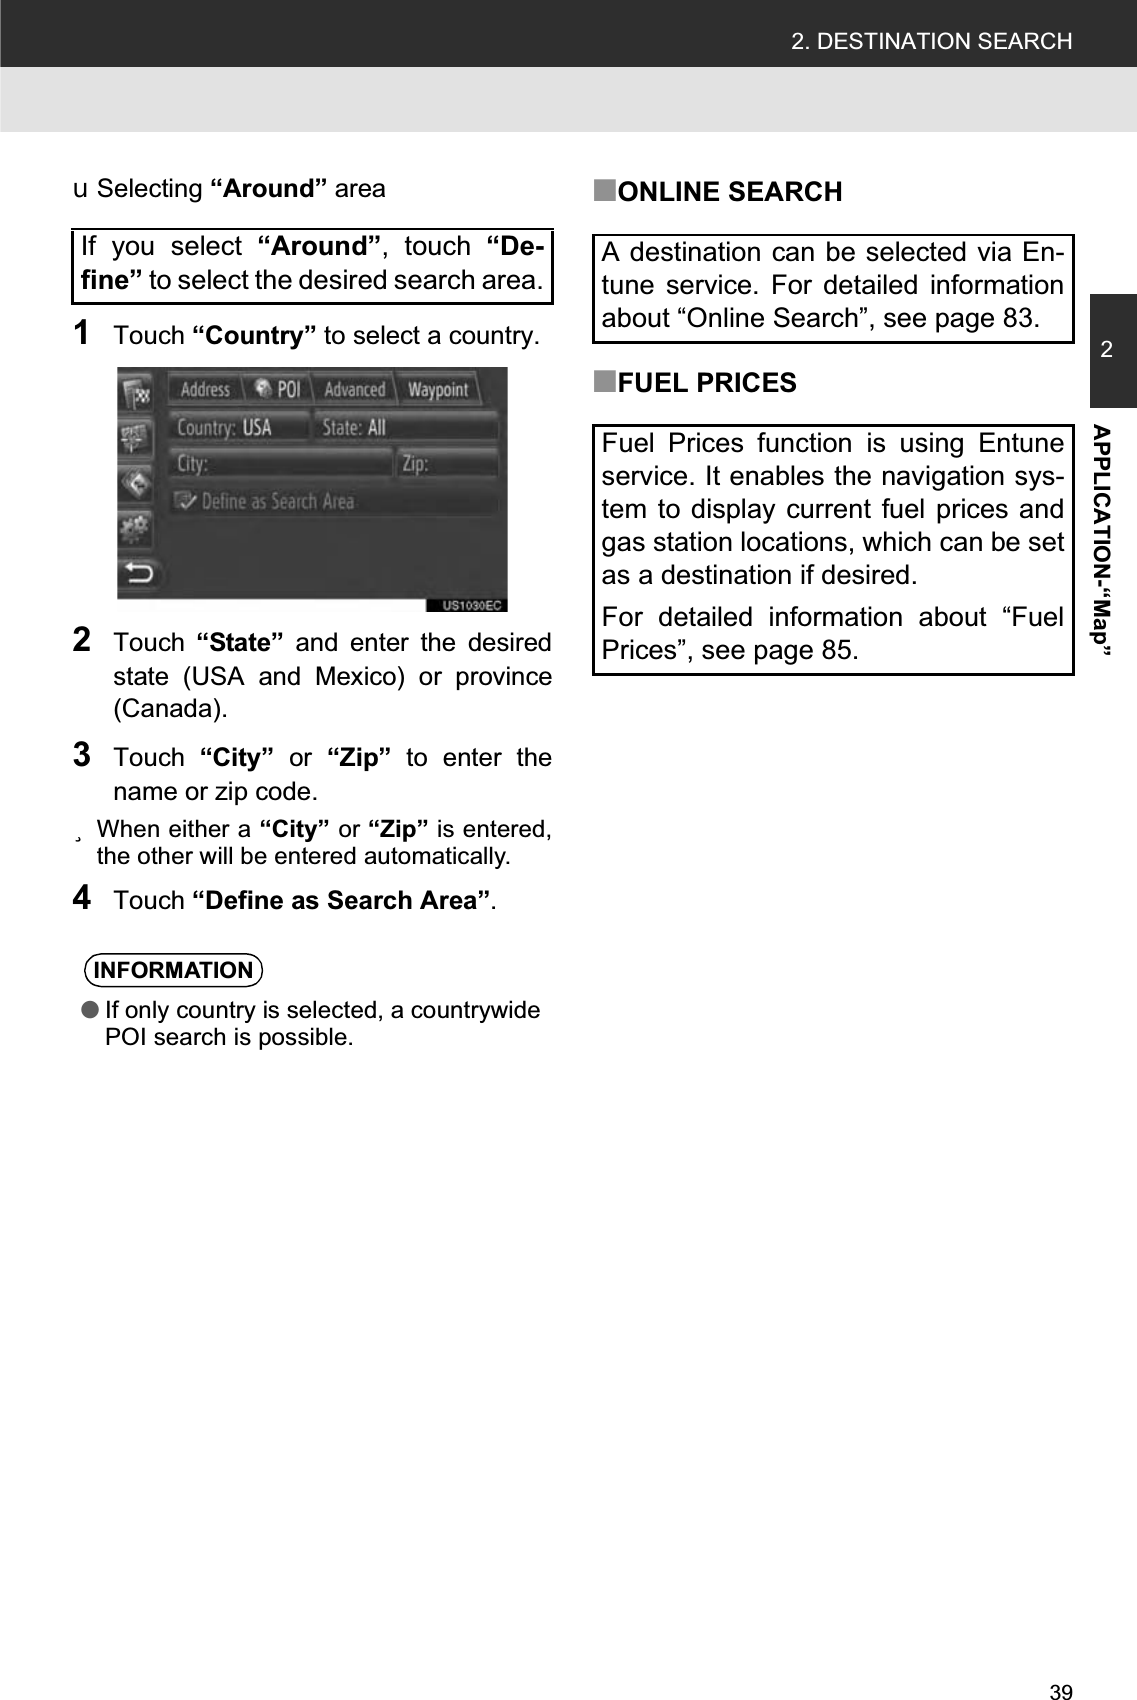
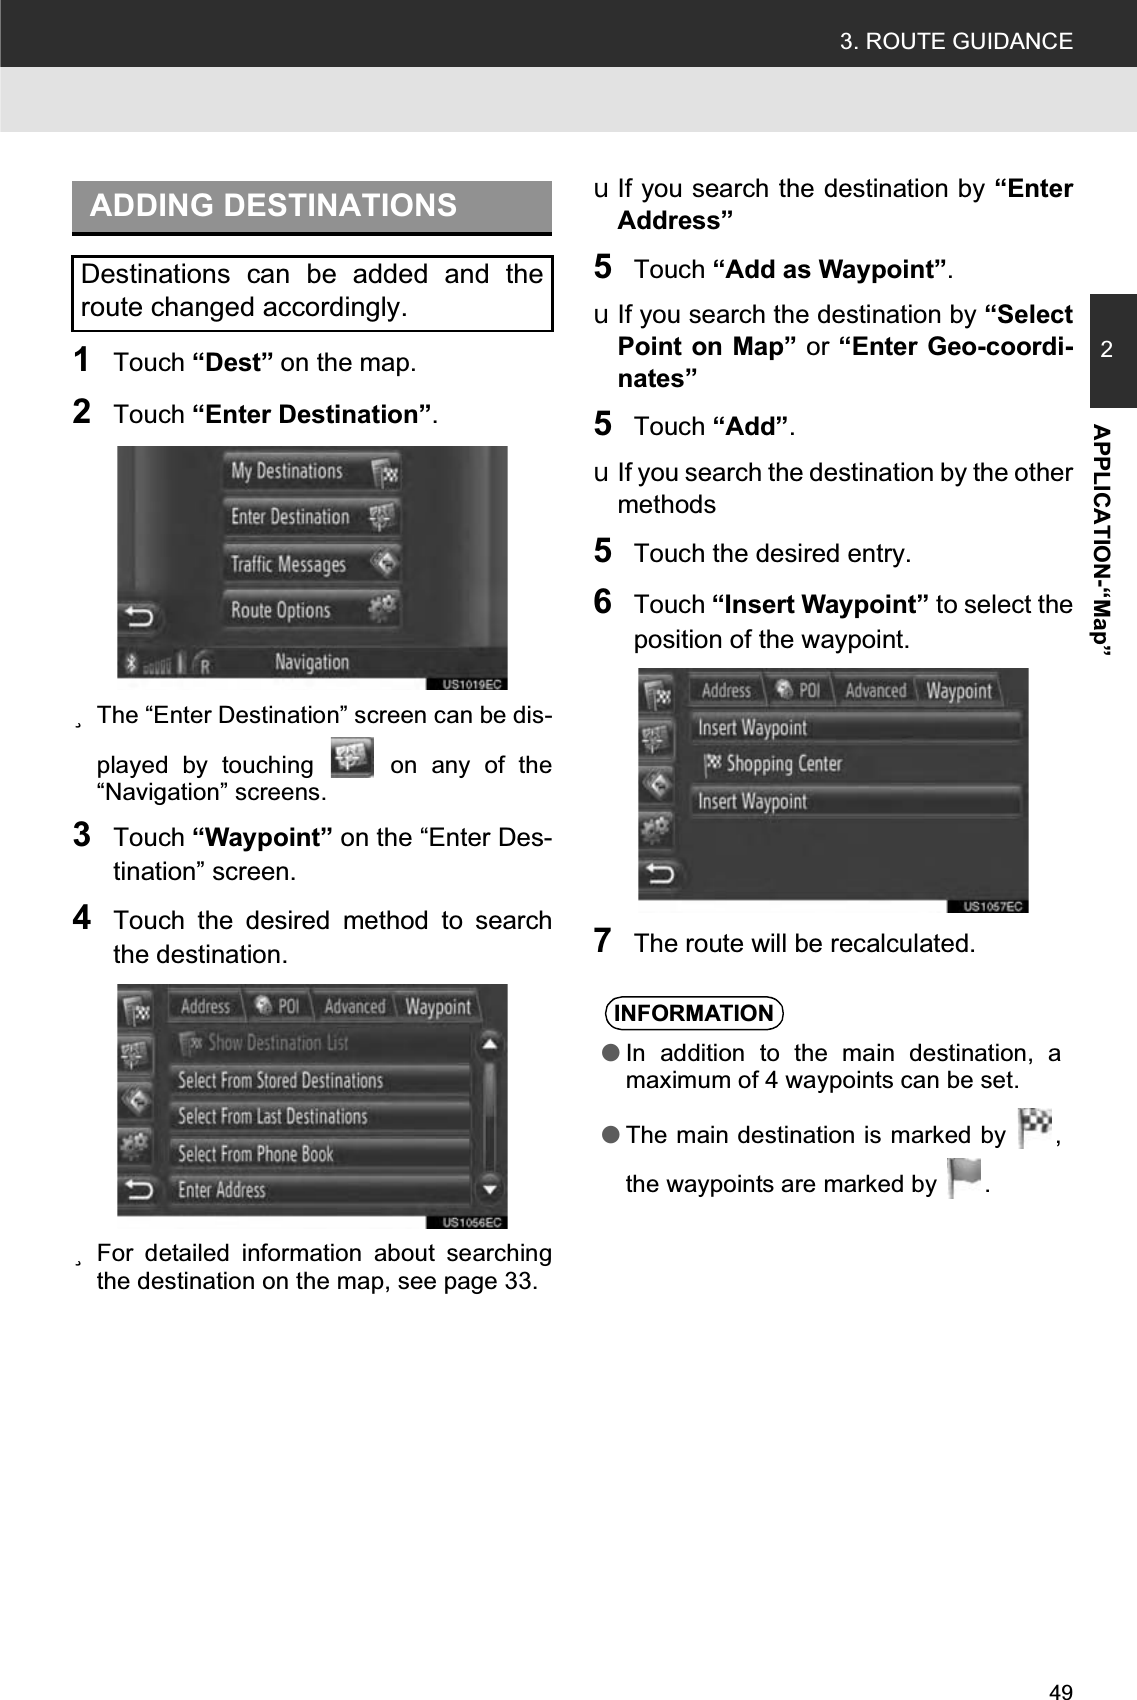
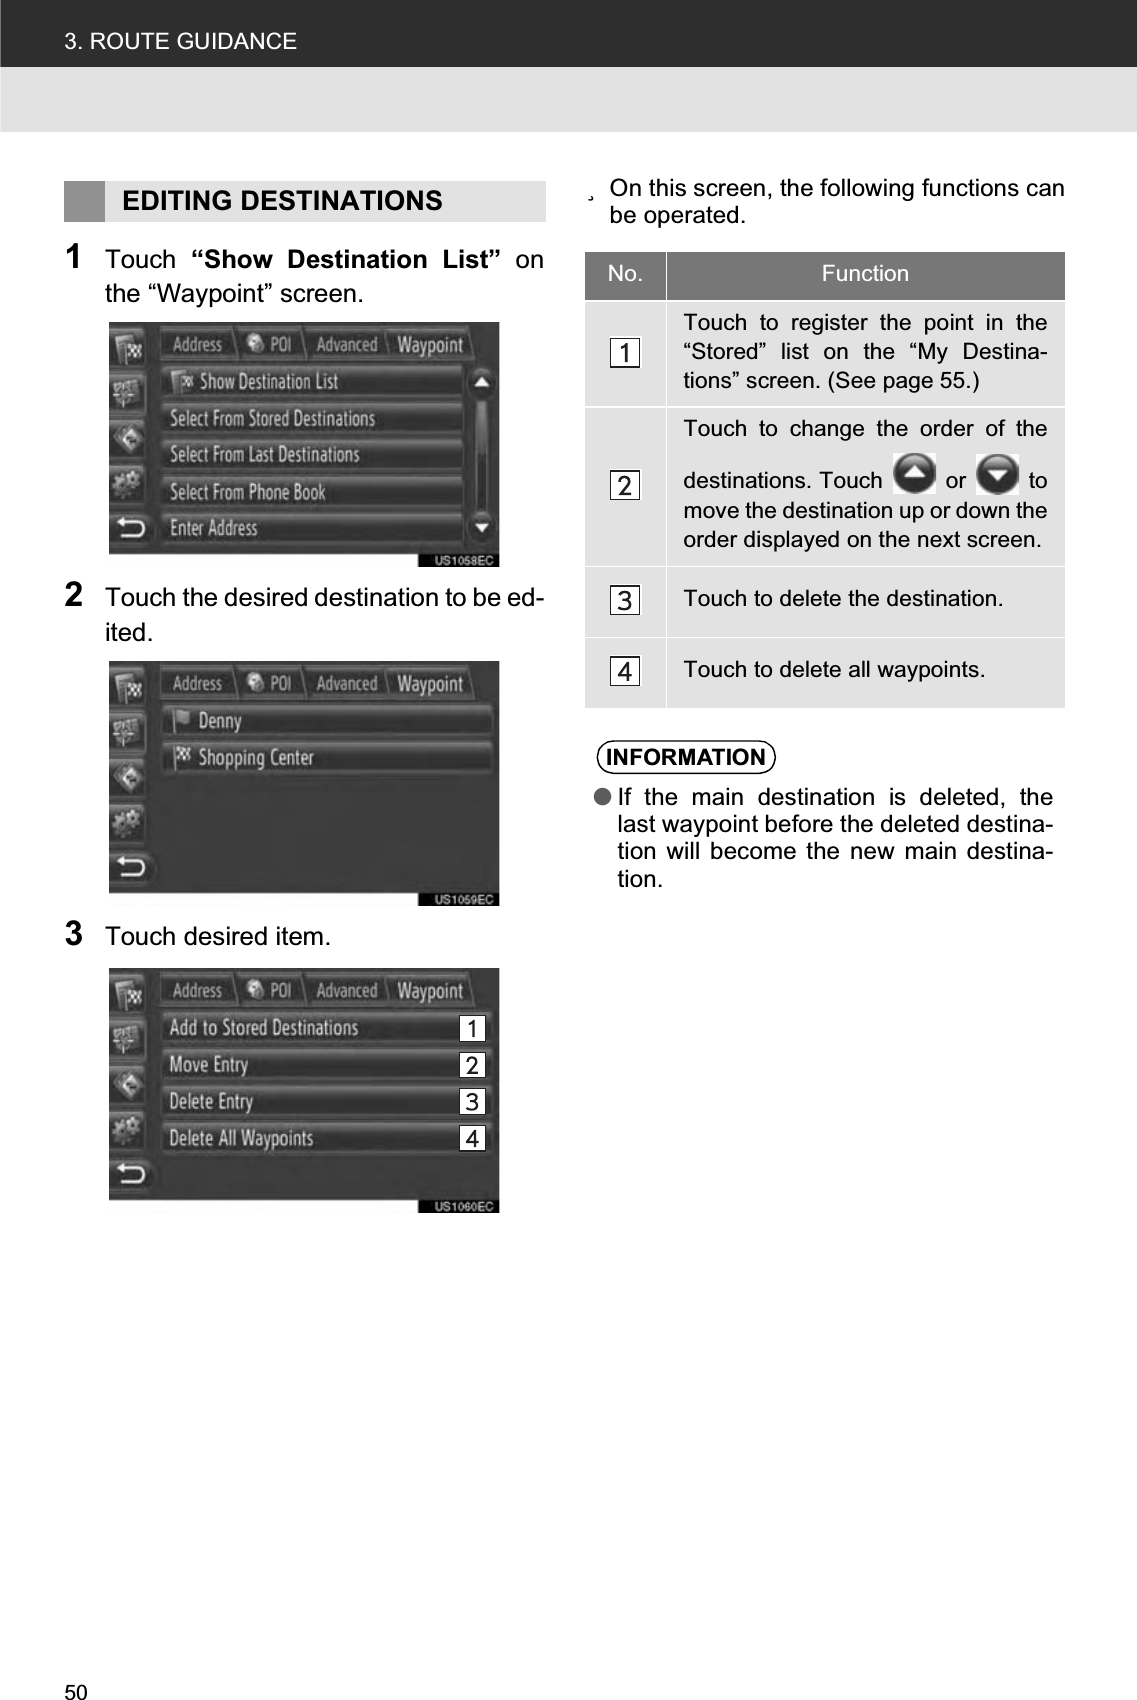
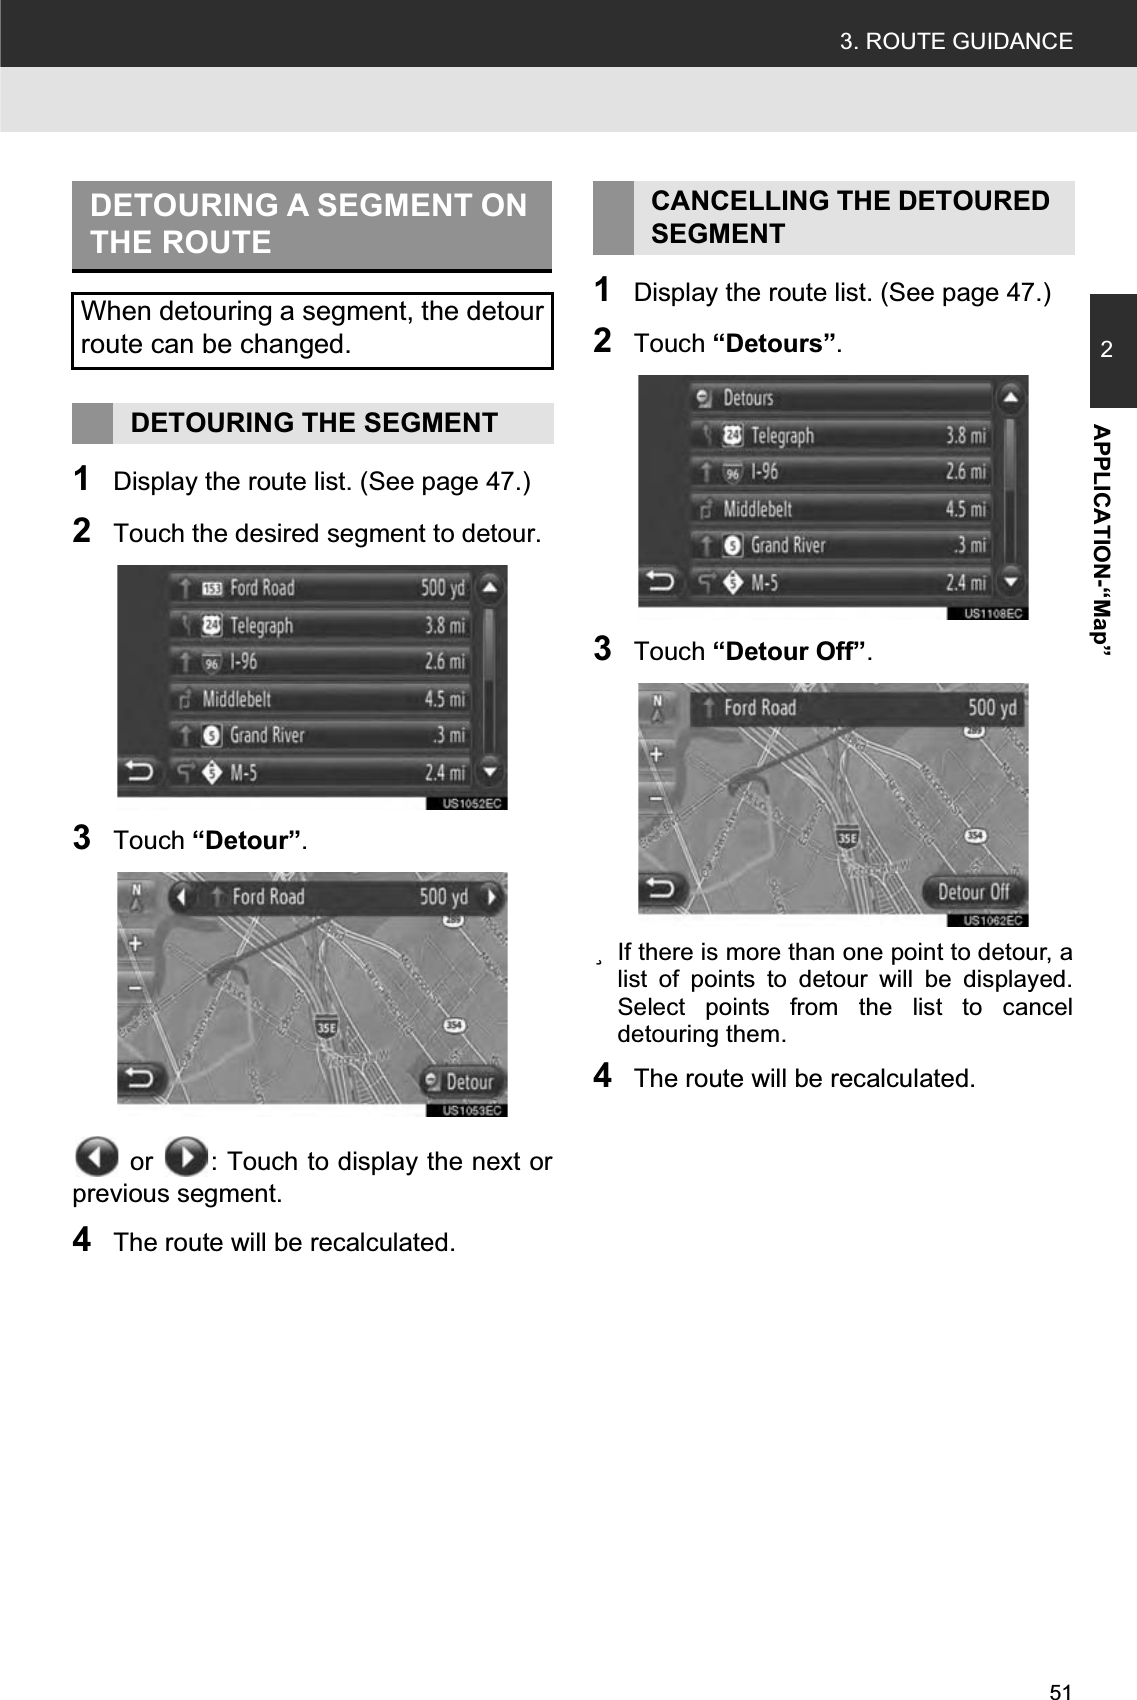
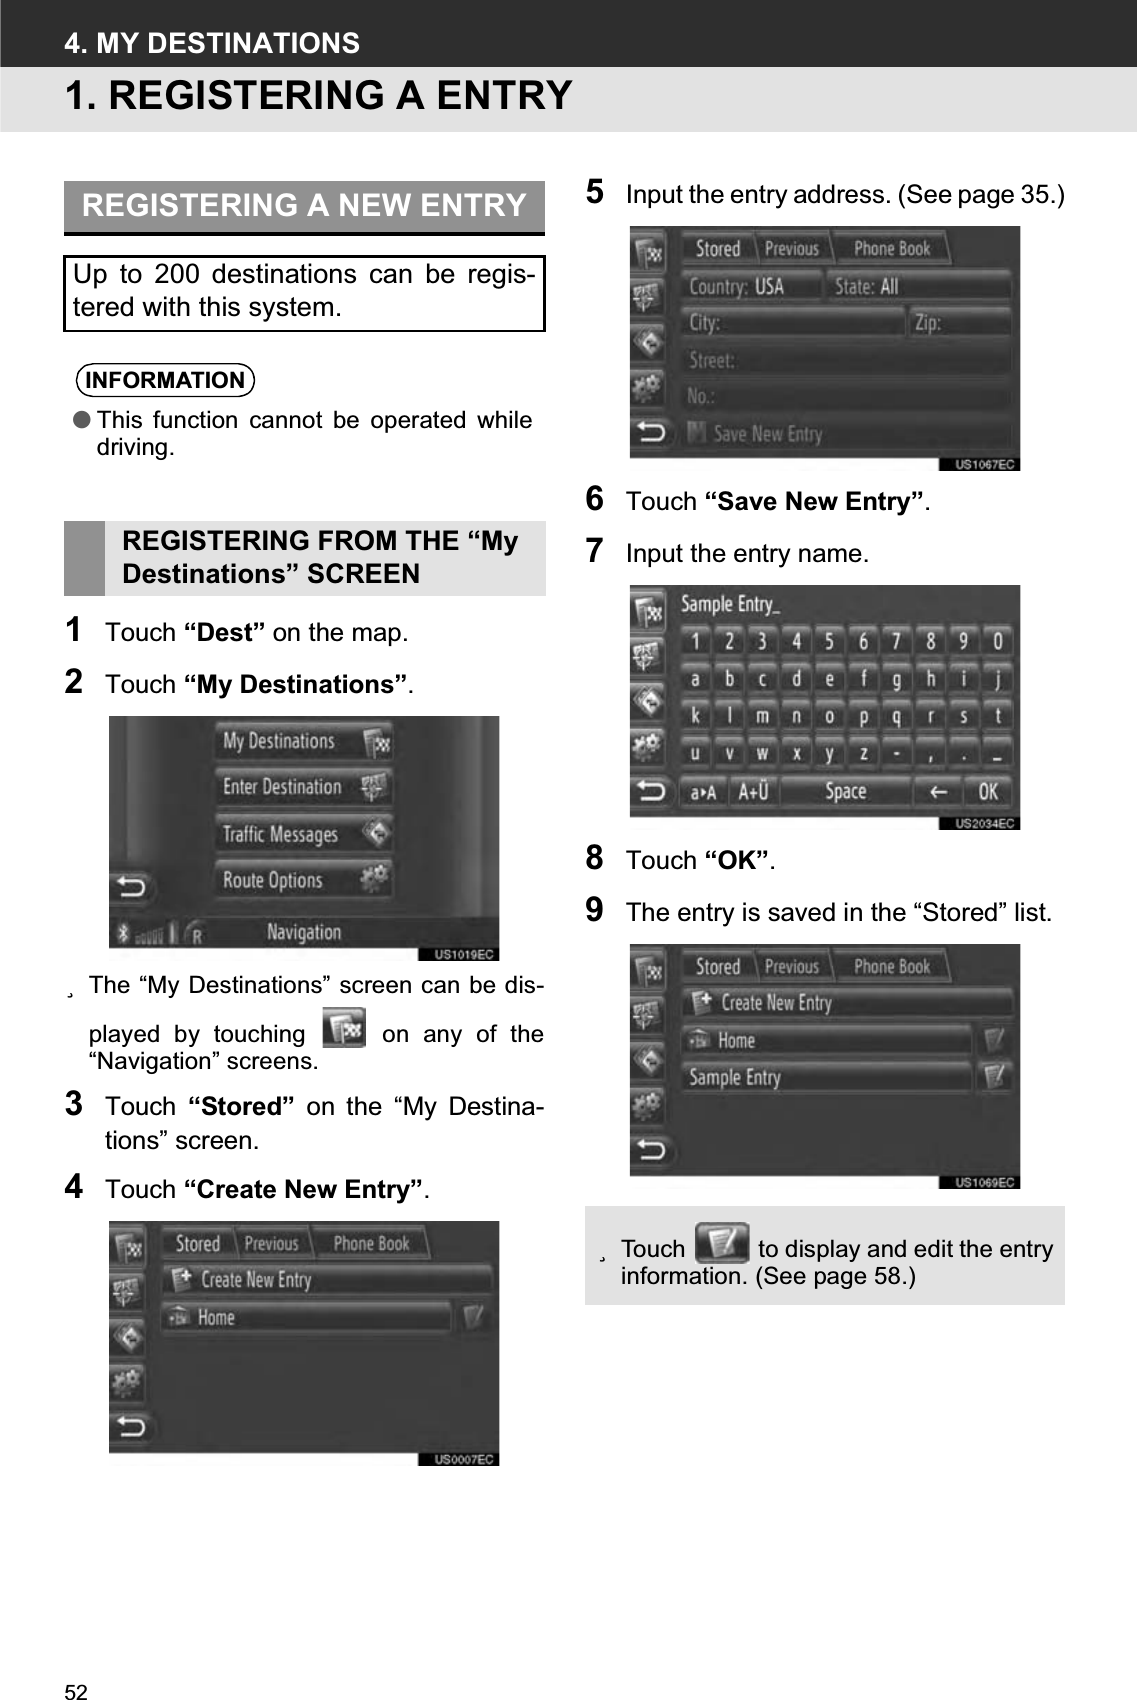
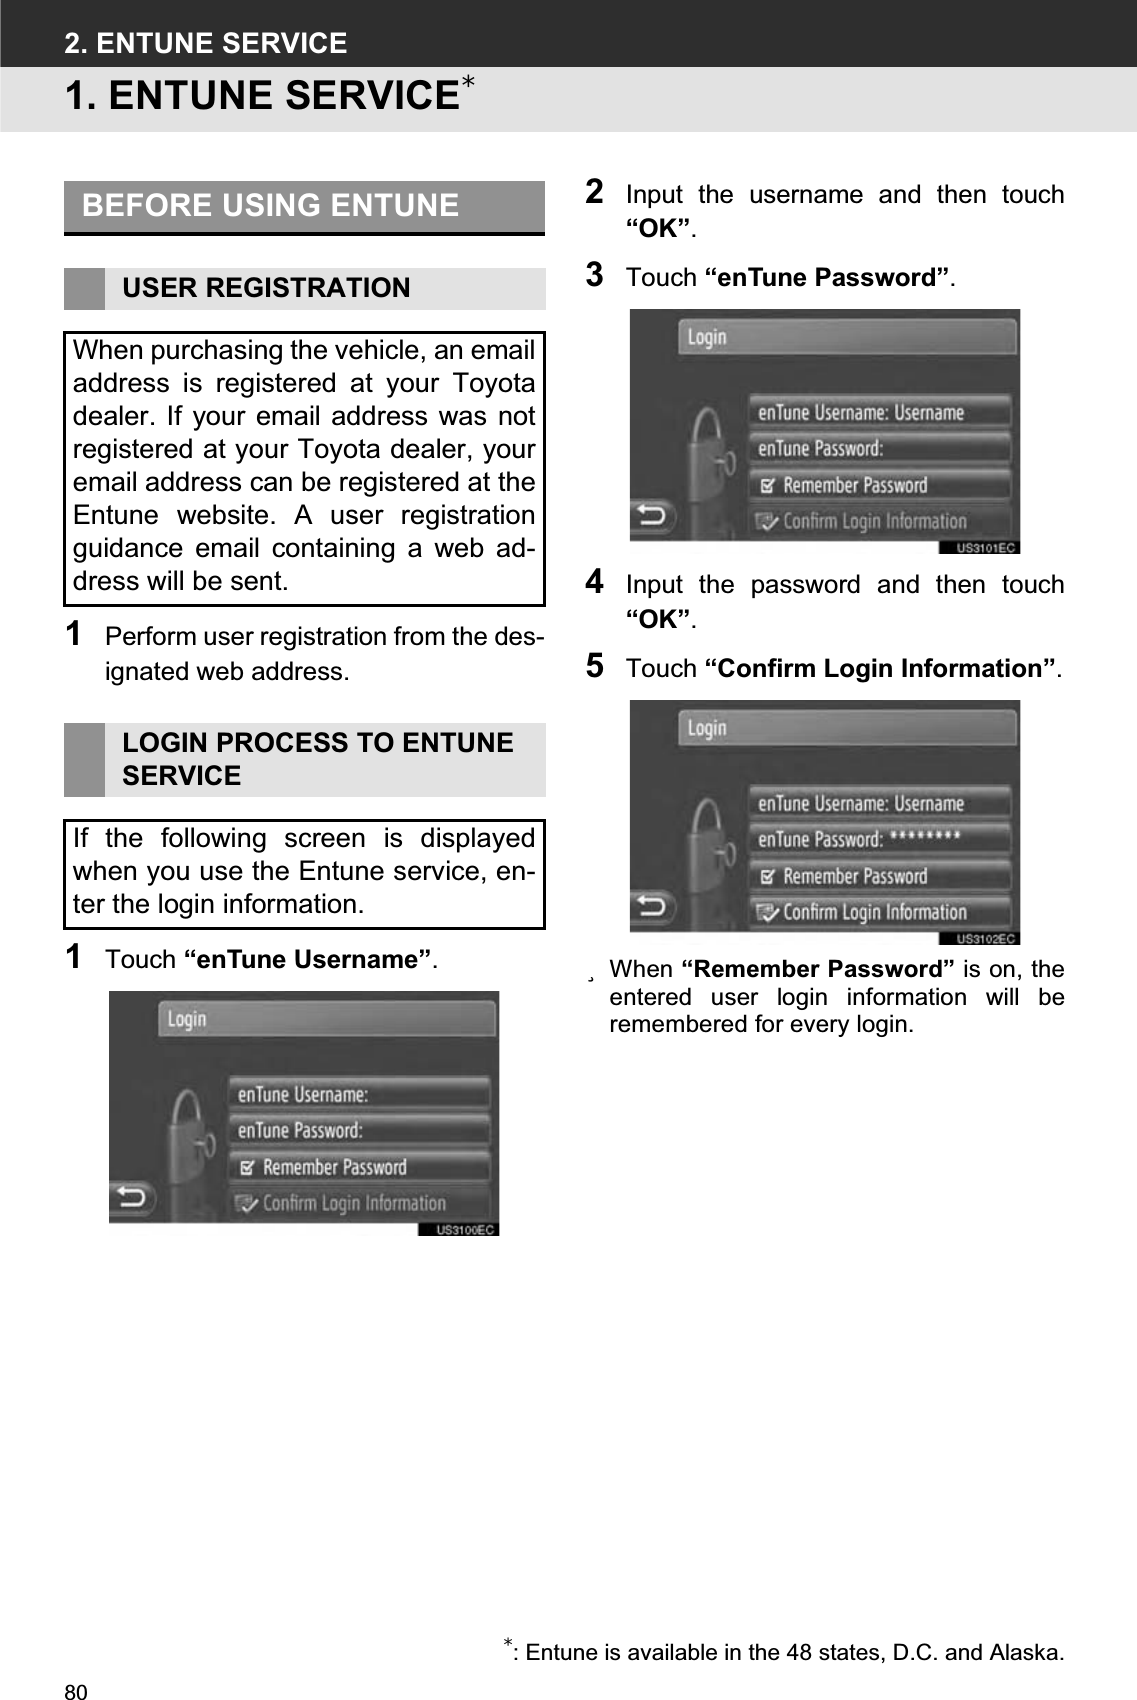
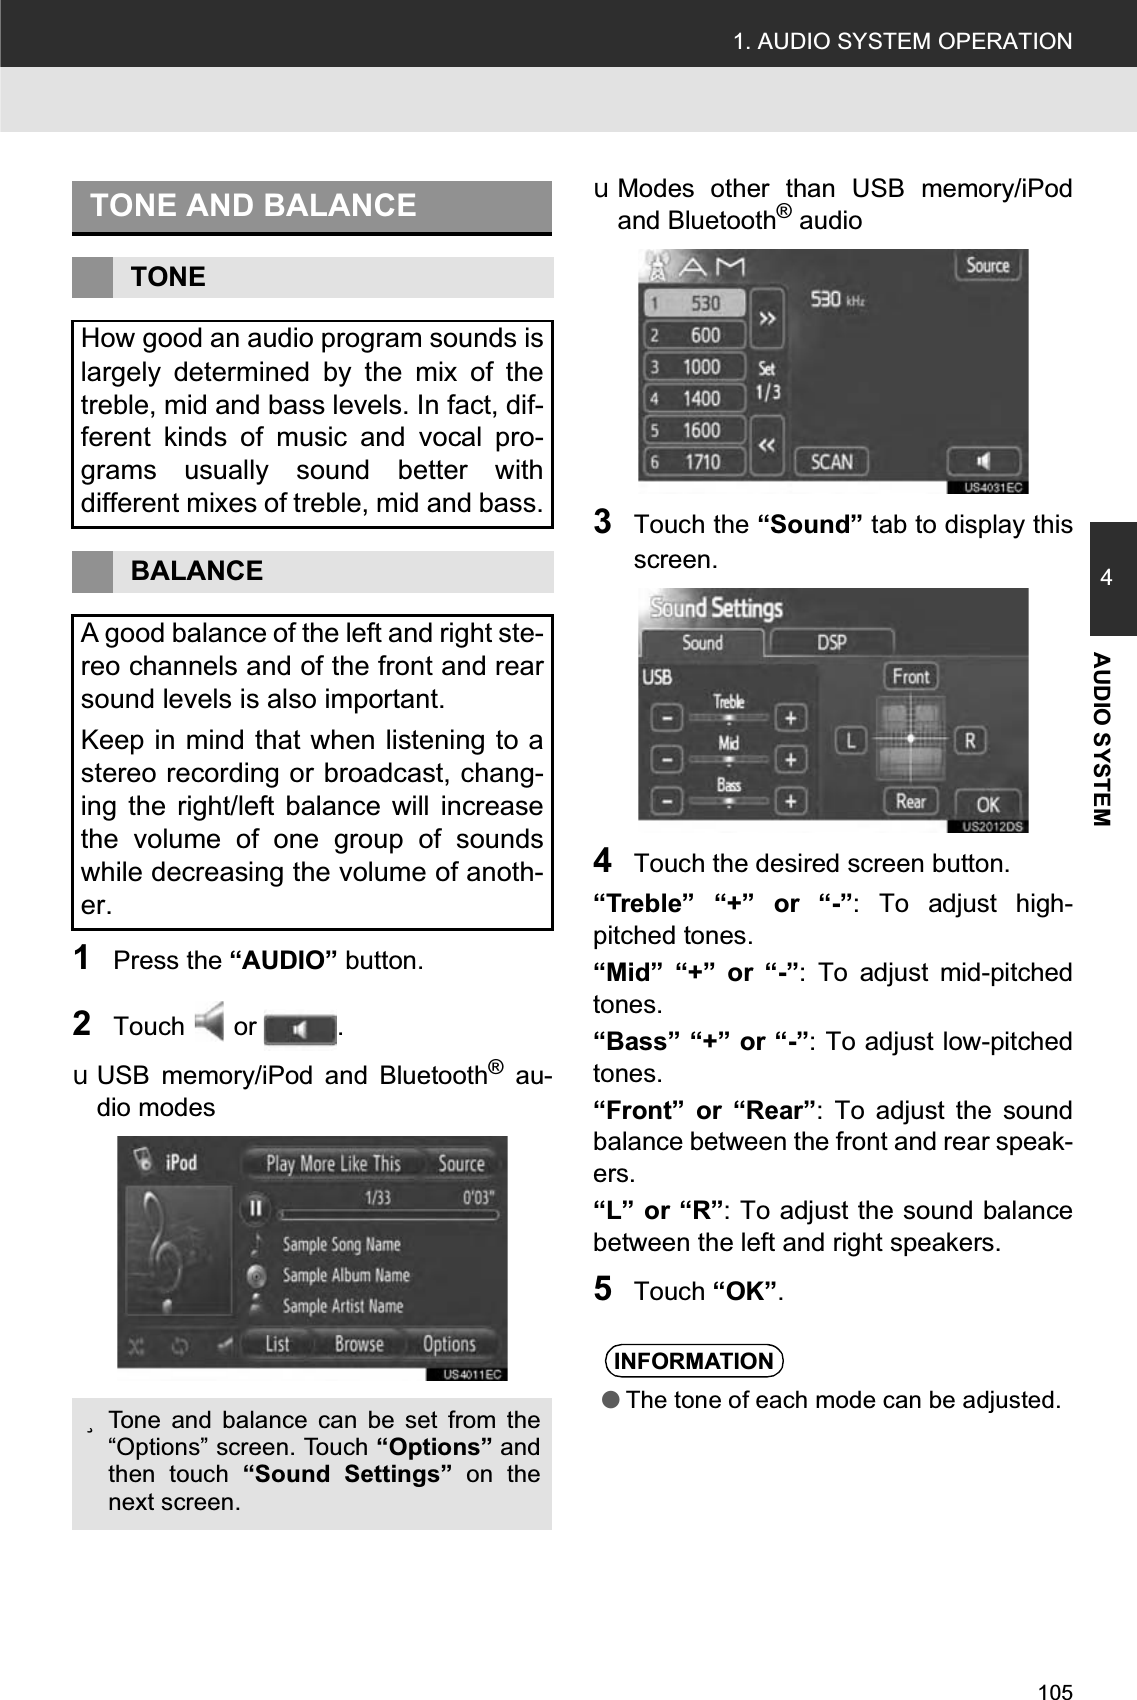
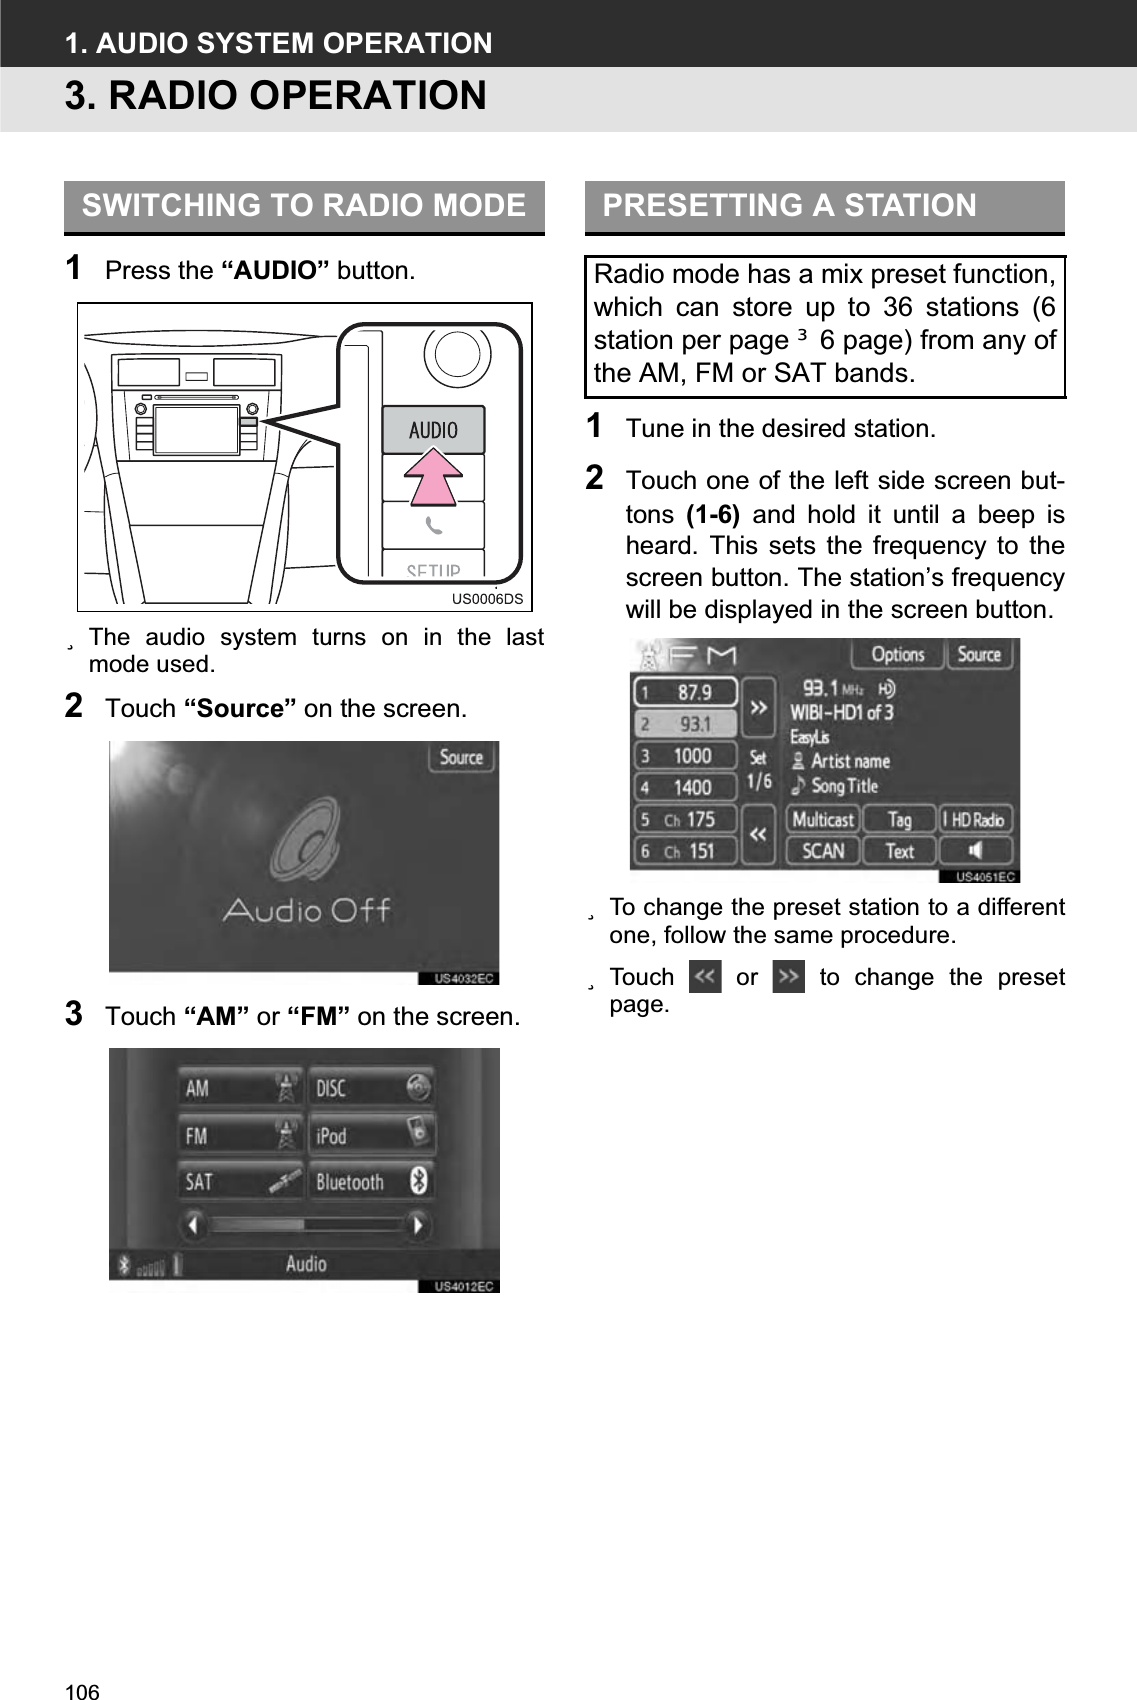
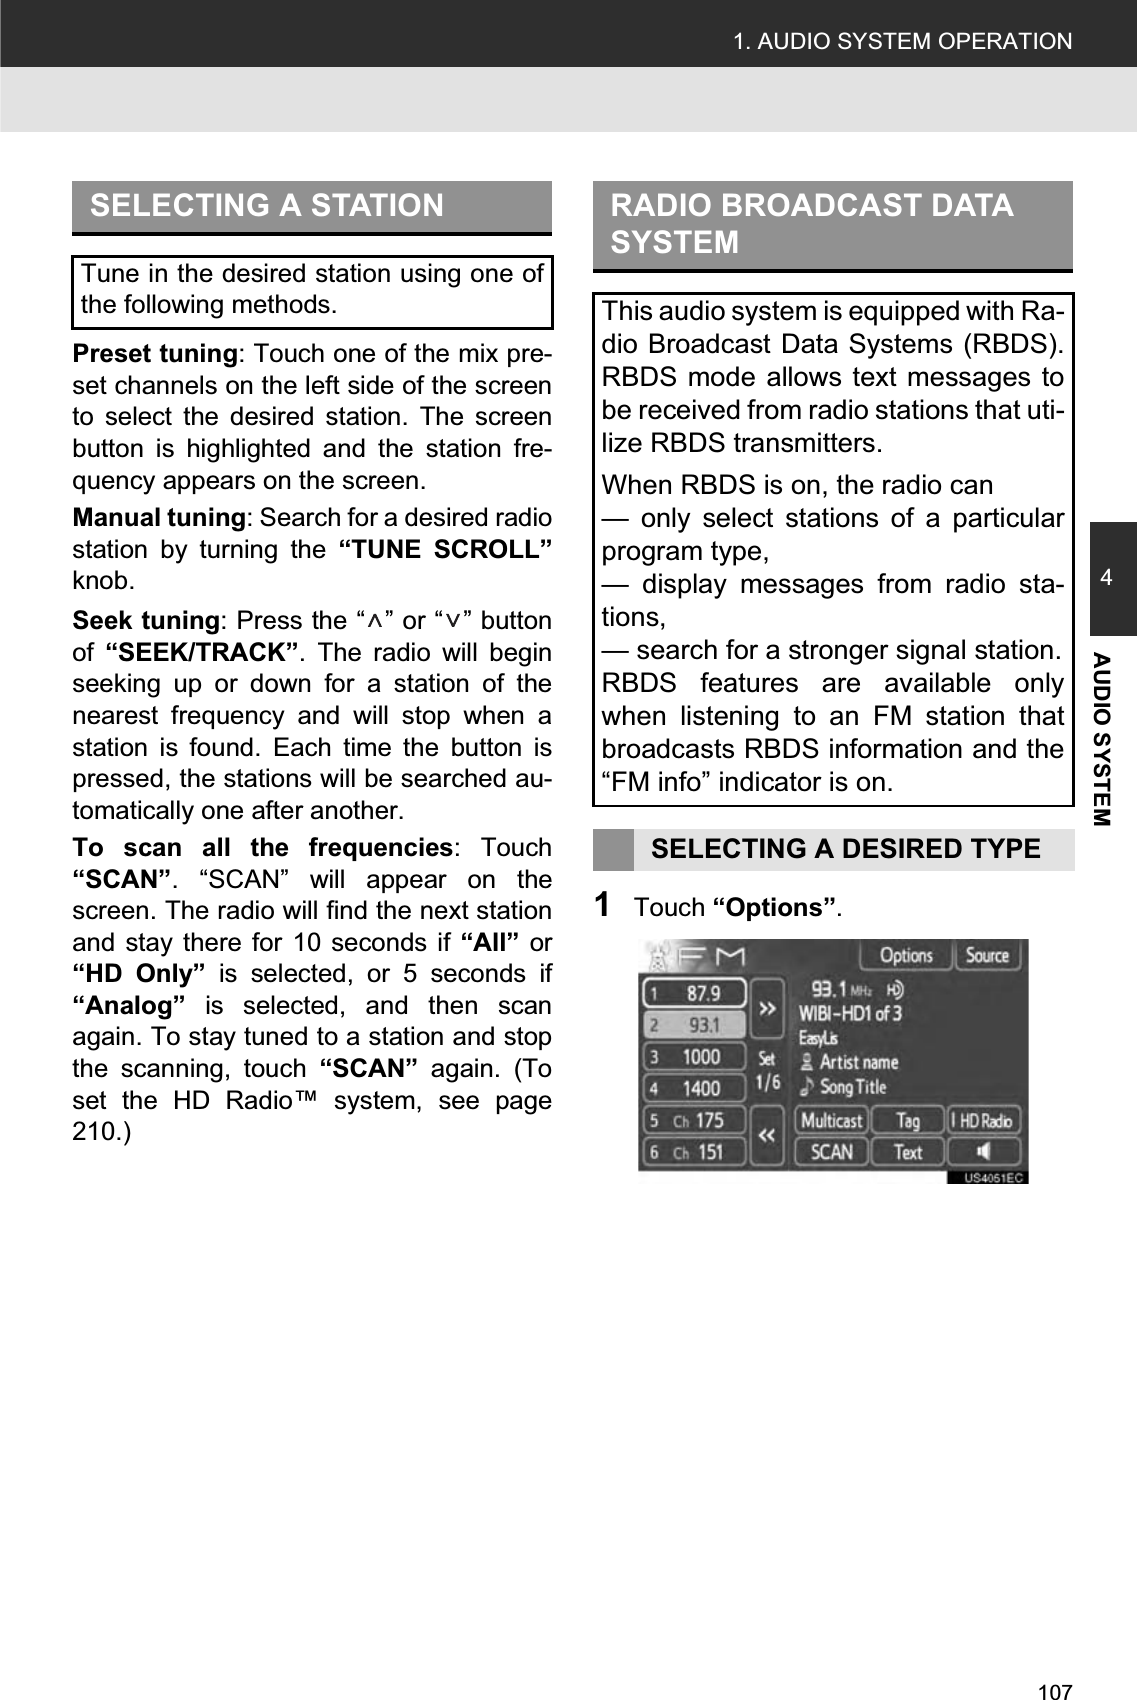
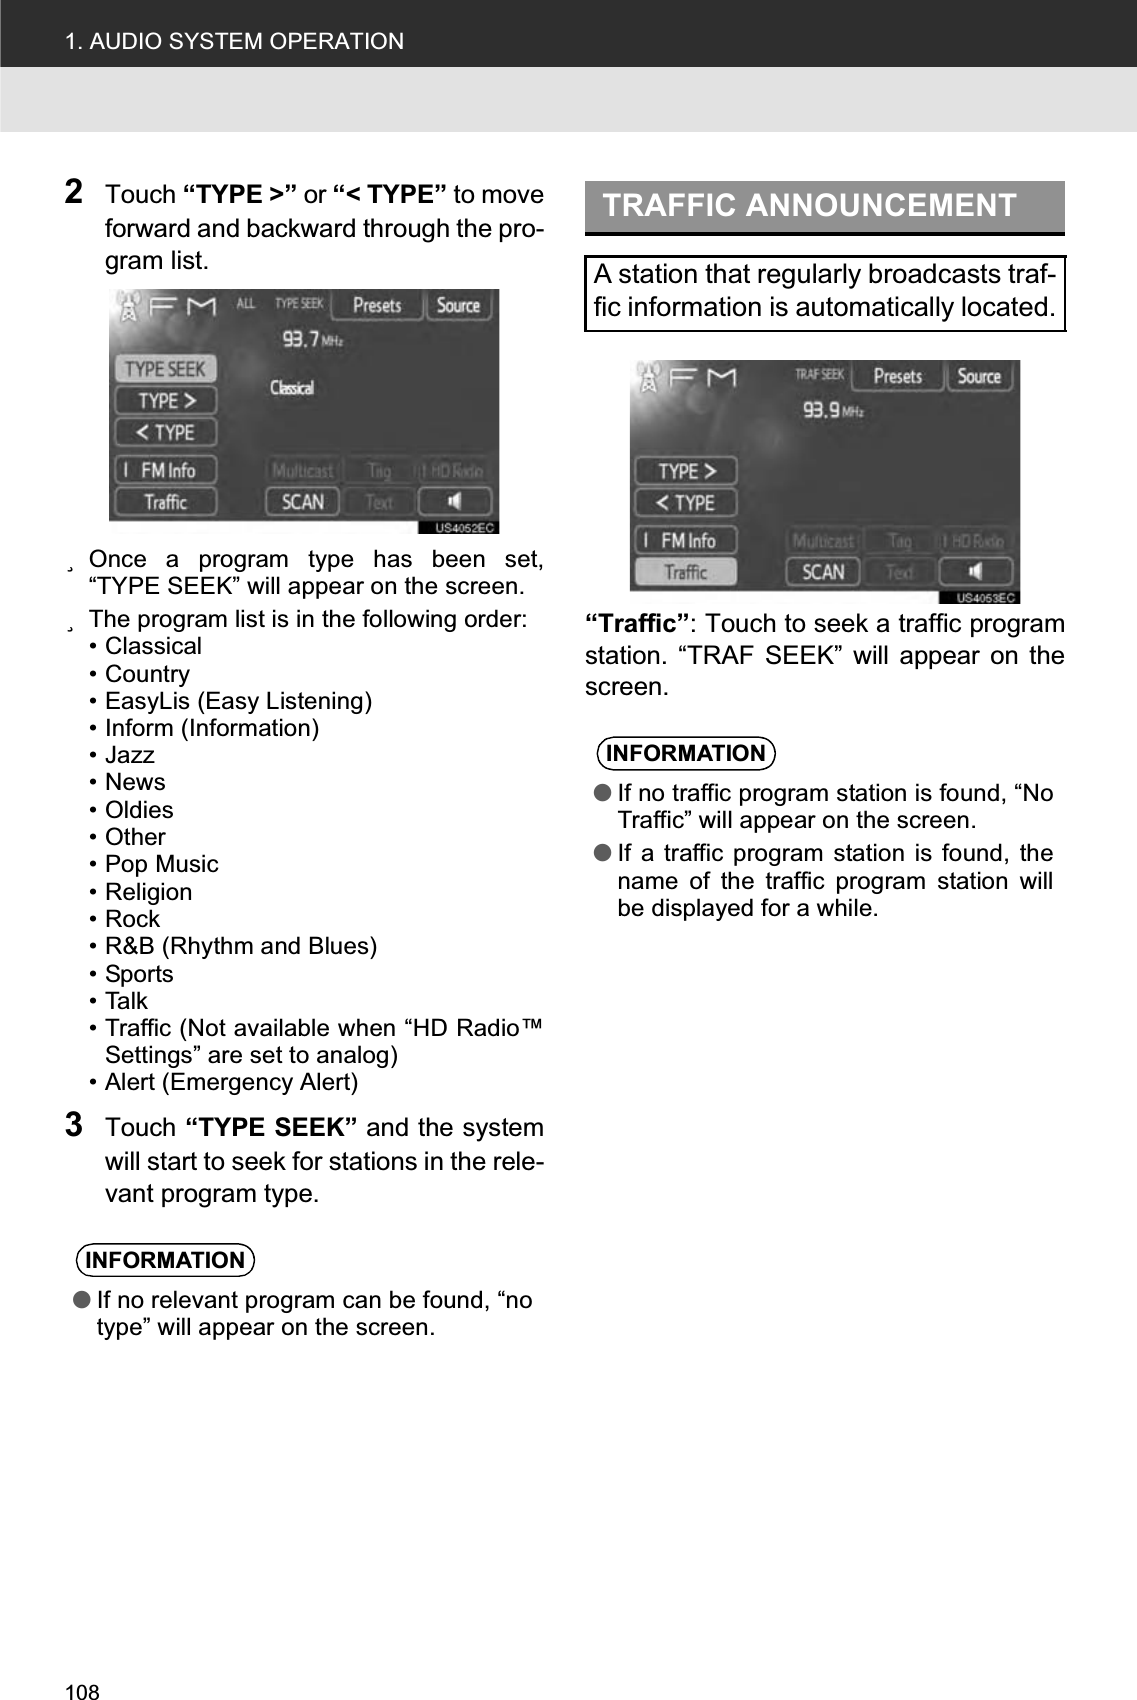
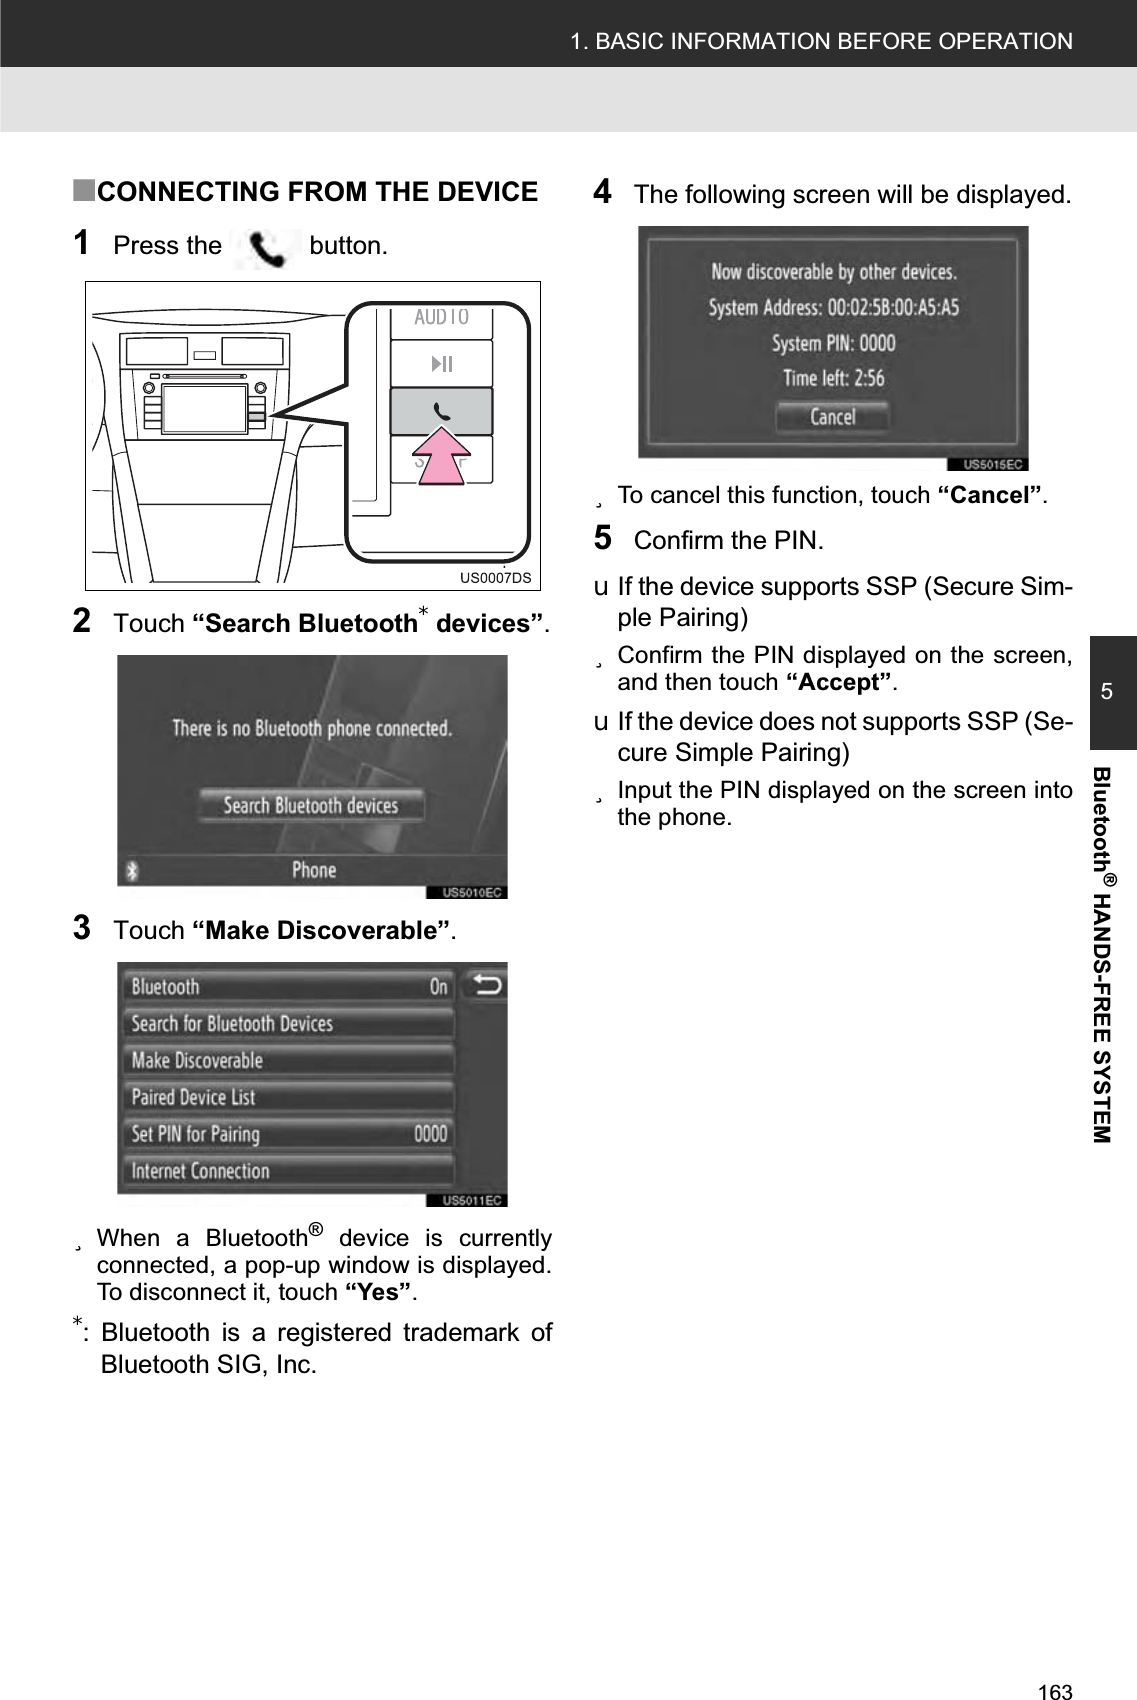
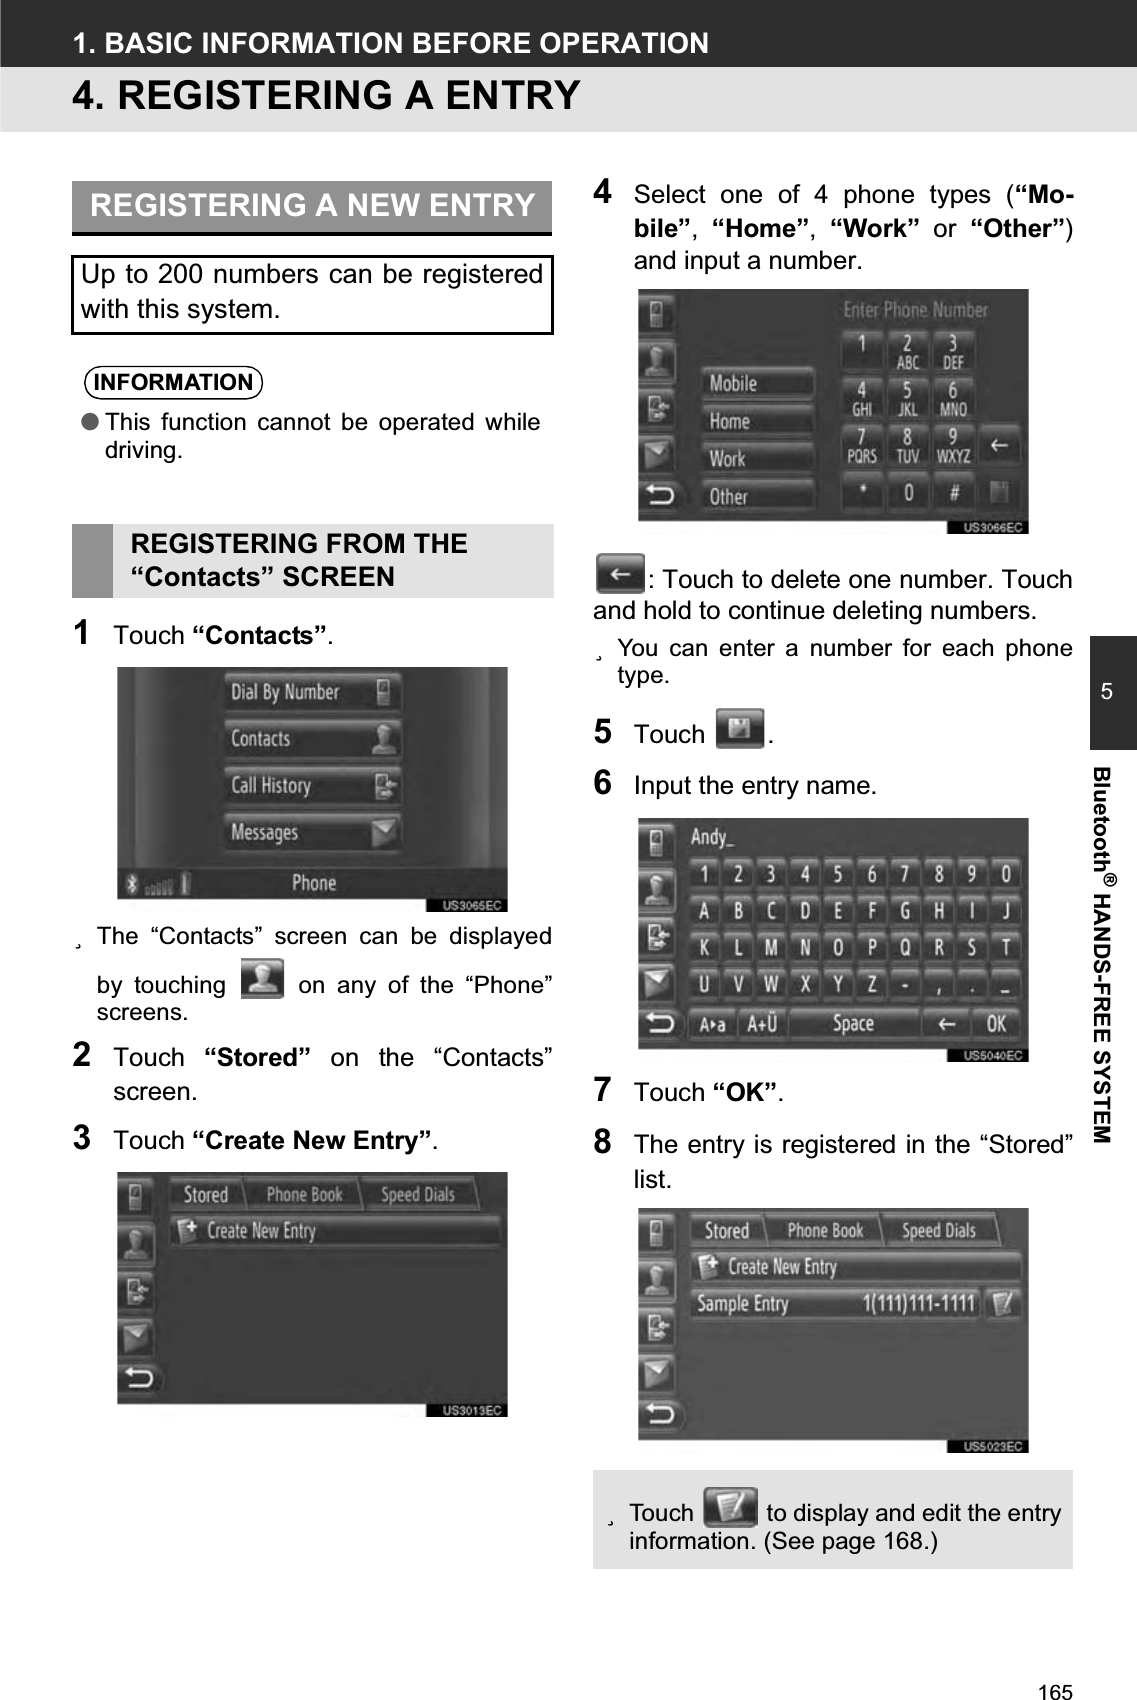
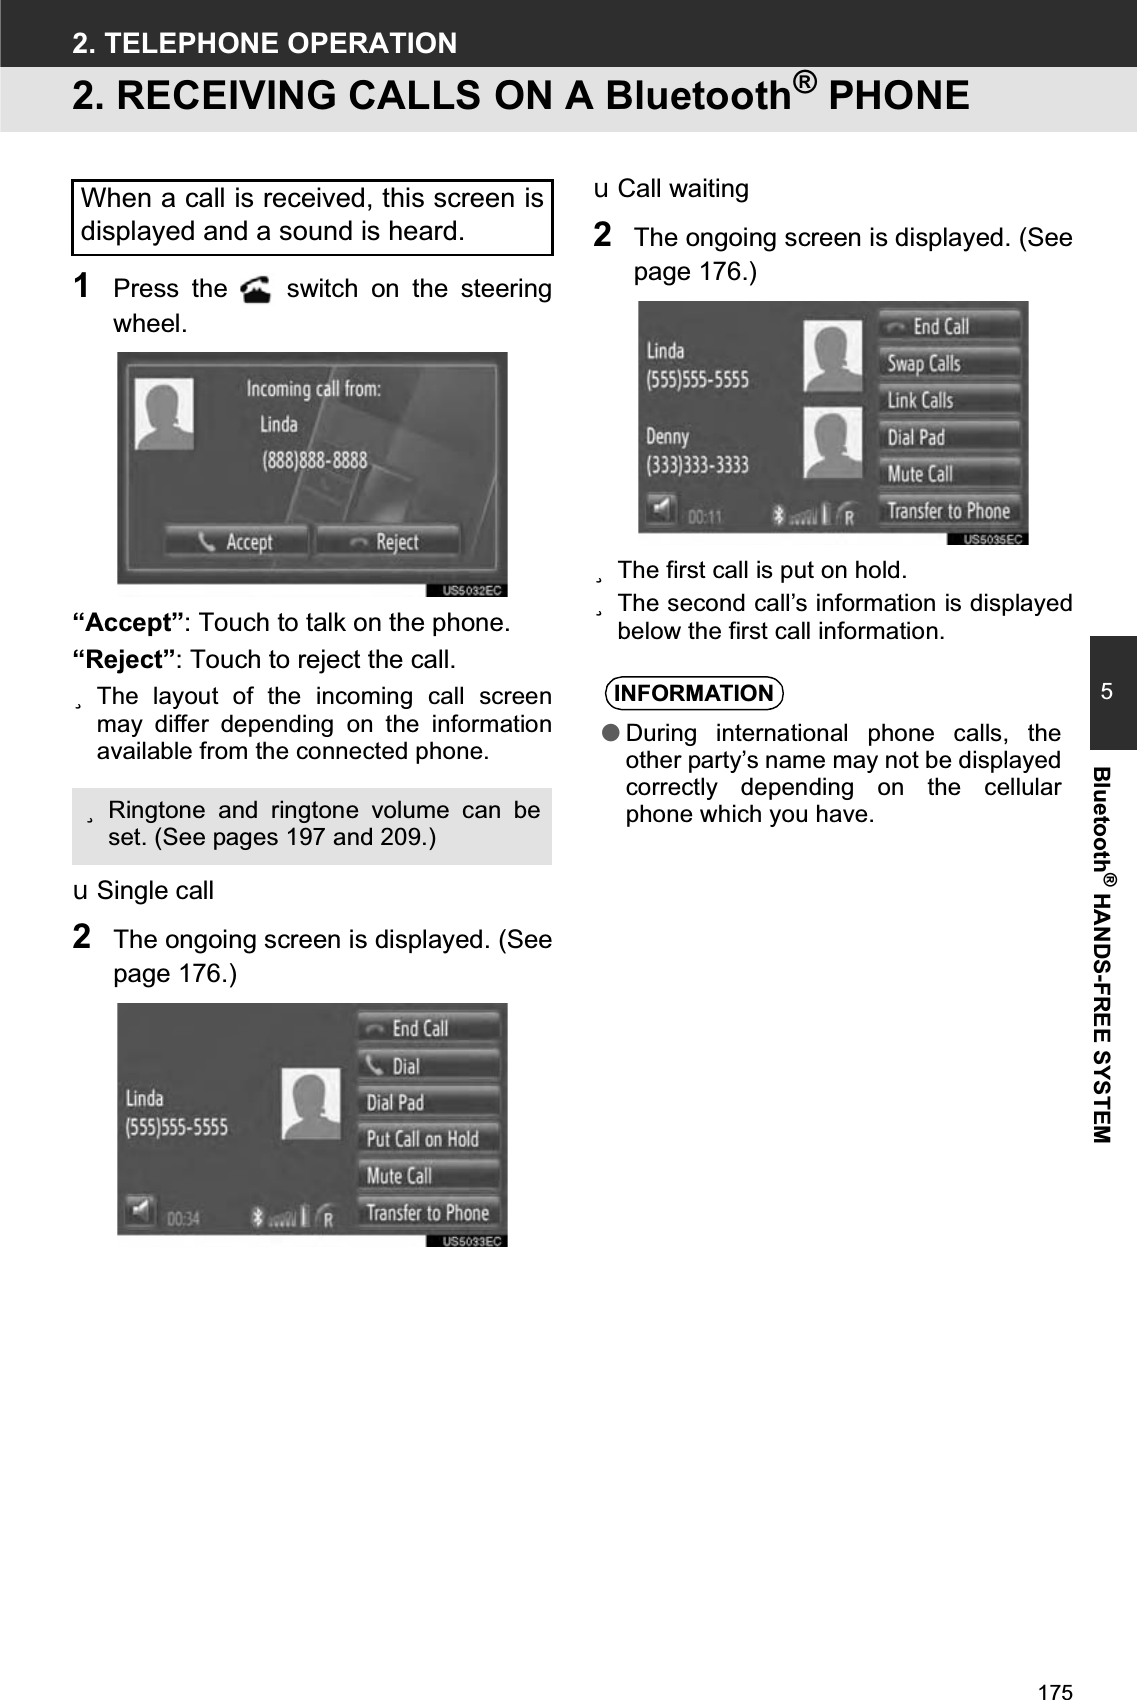
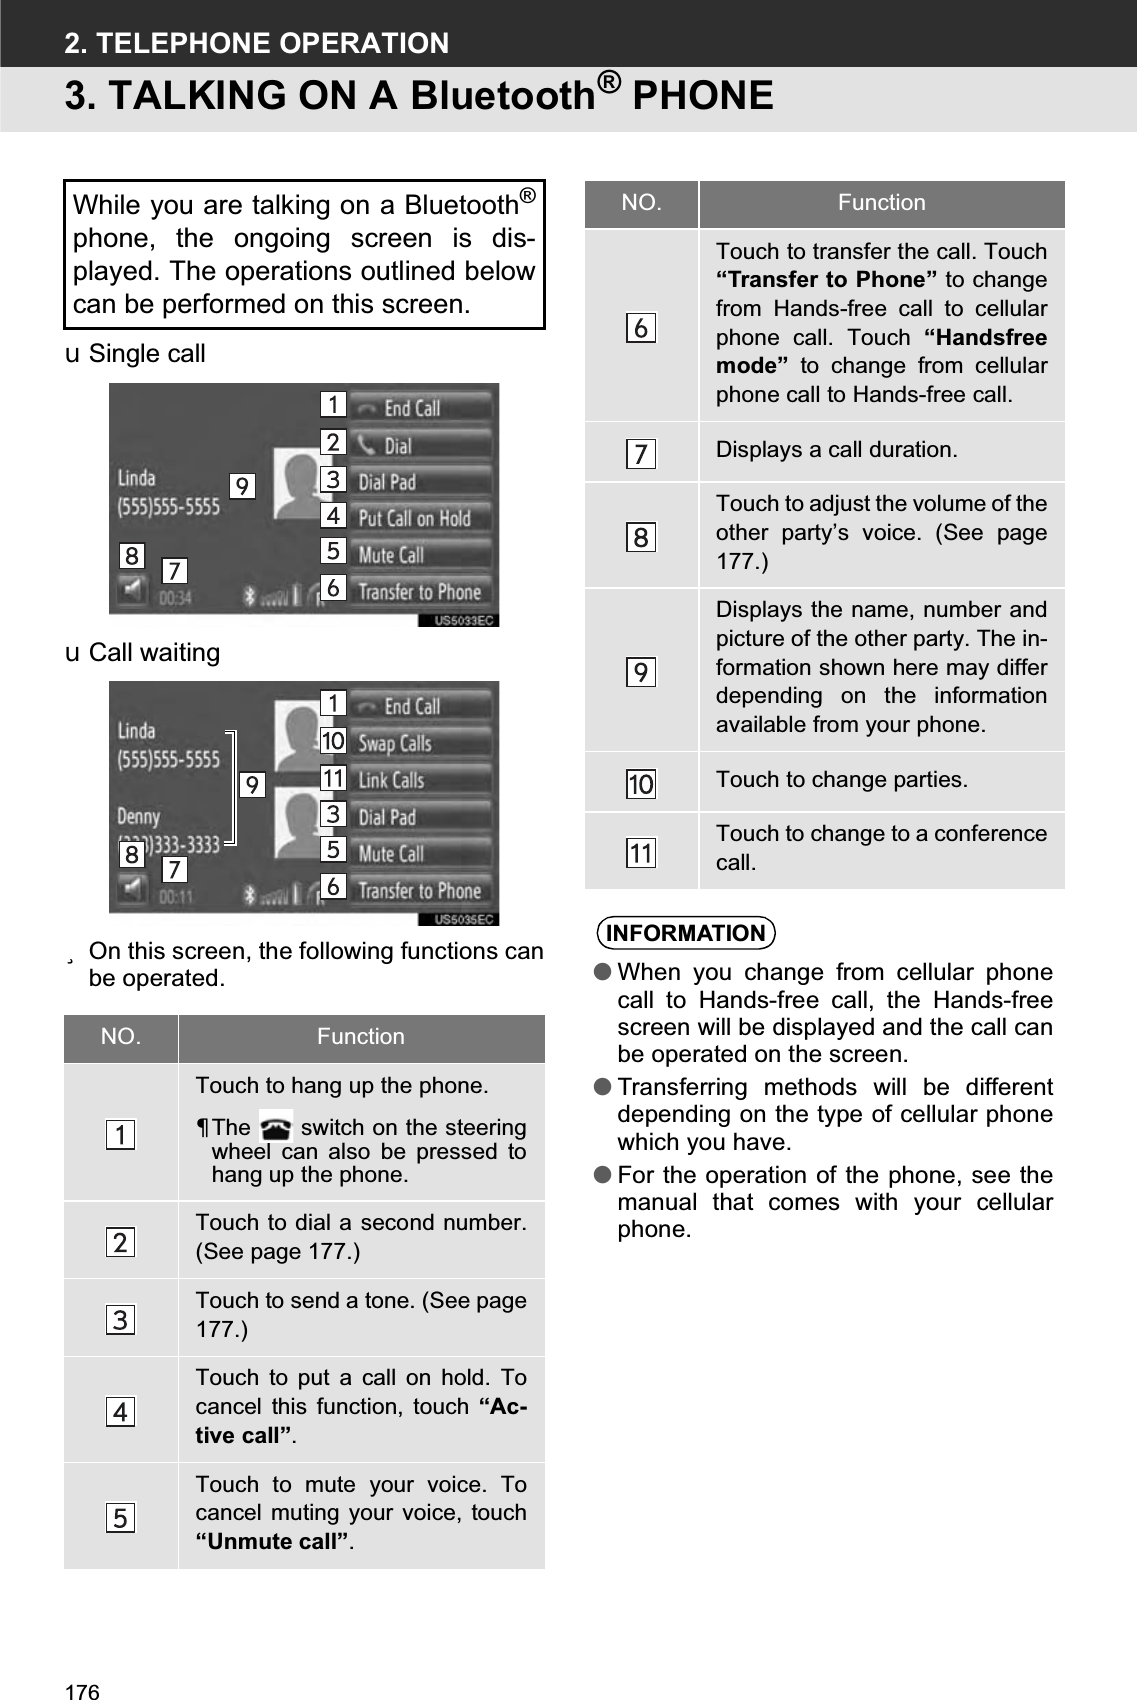
Harman Becker Automotive Systems, Inc. Navigation and Connectivity Box Display Audio Ext U 33A02U
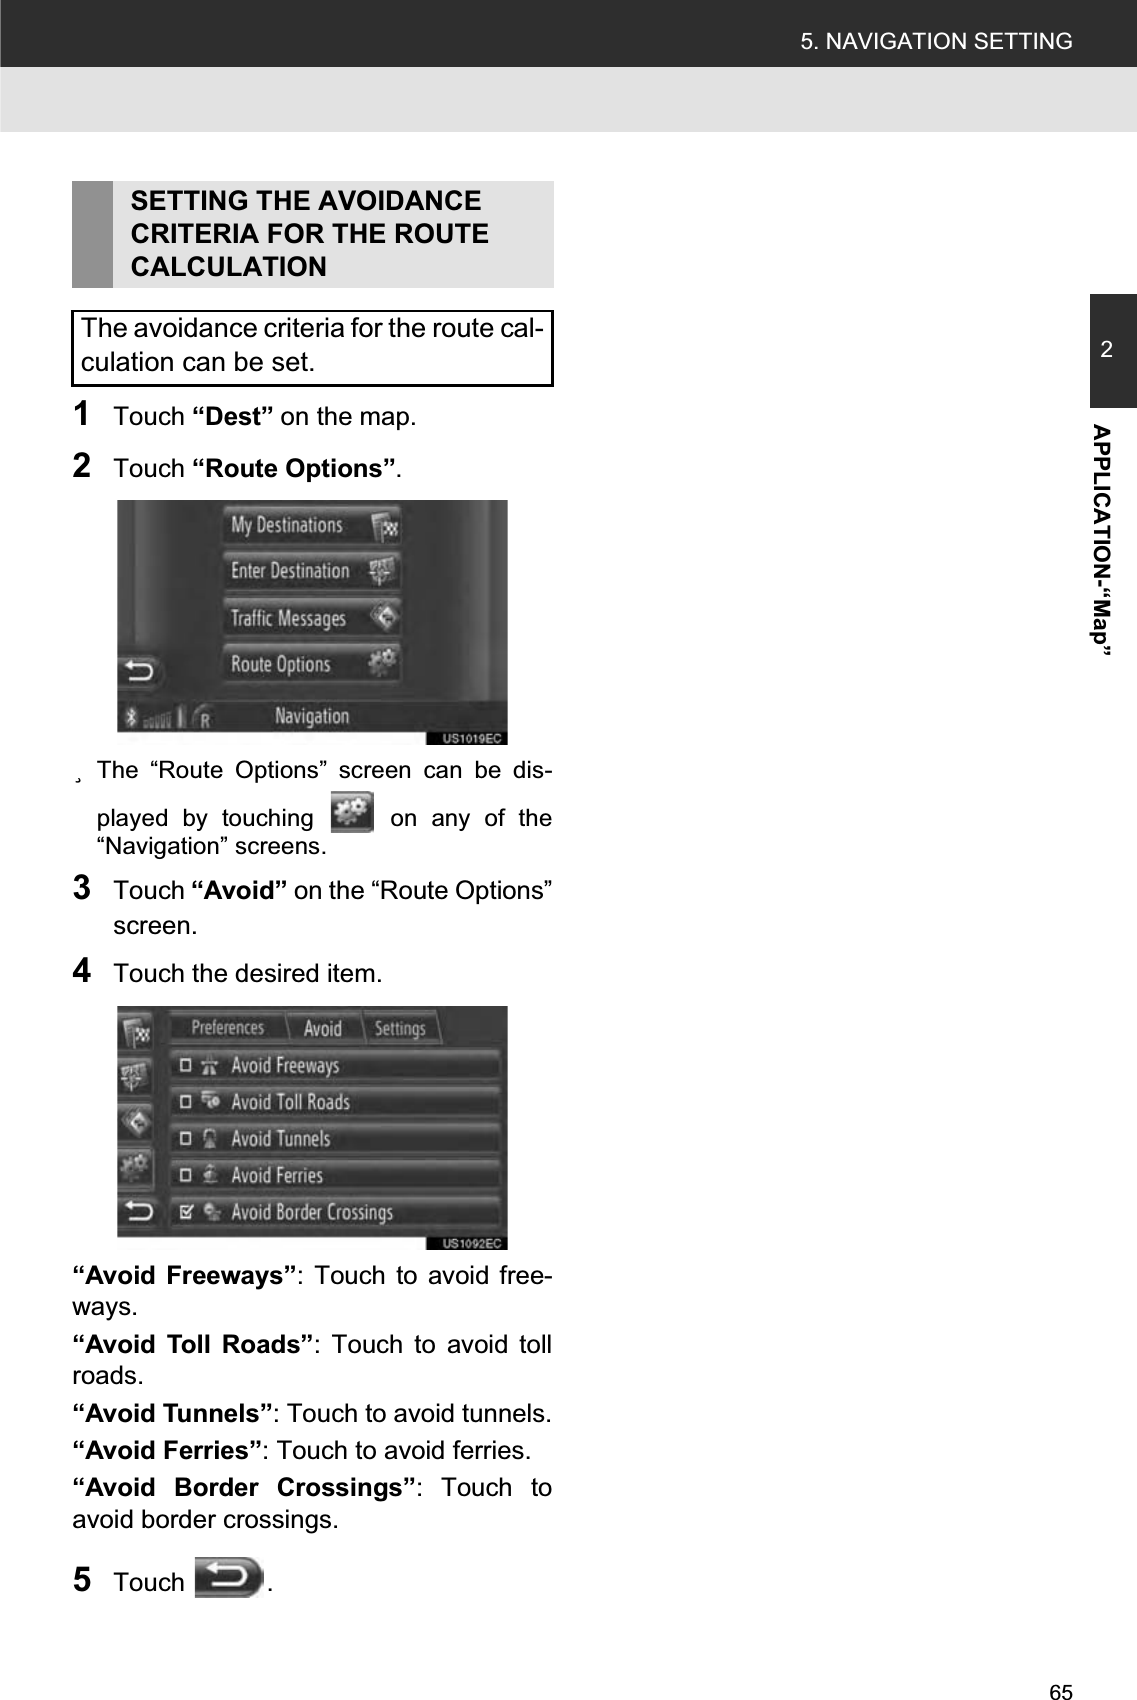
UserManual.wiki
>
Harman Becker Automotive Systems
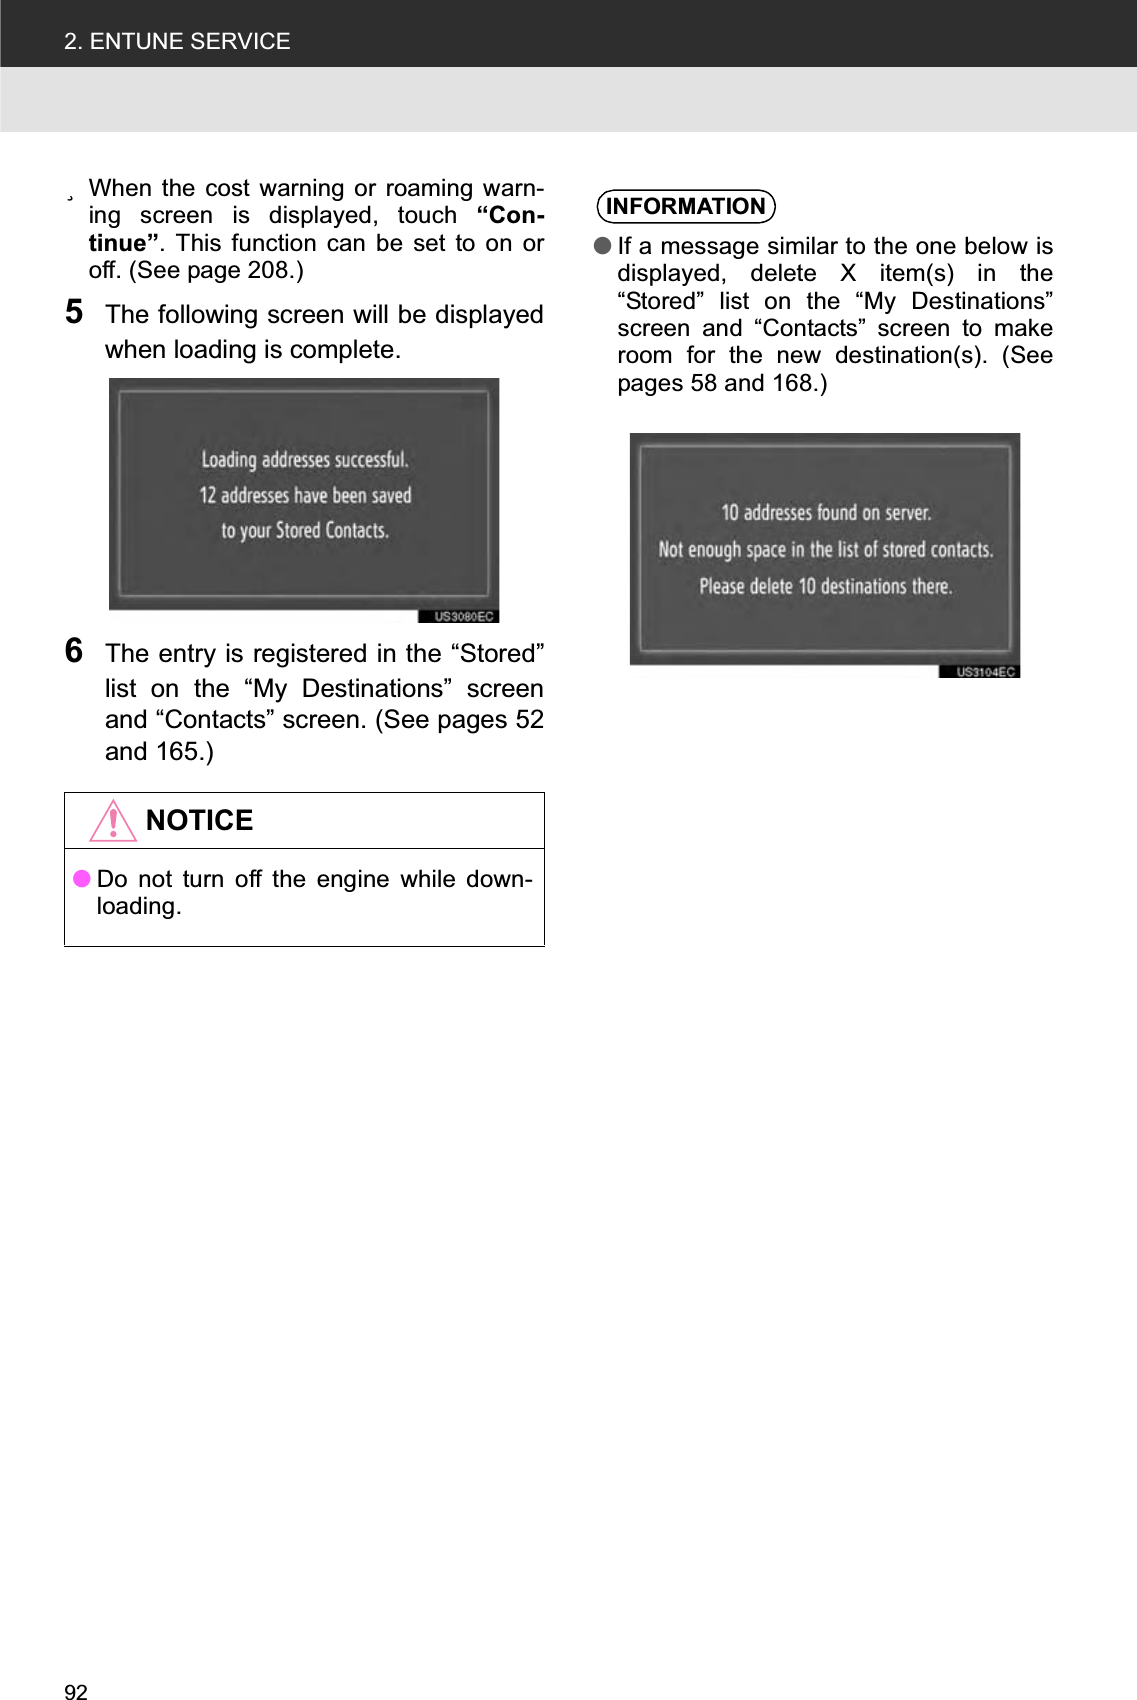
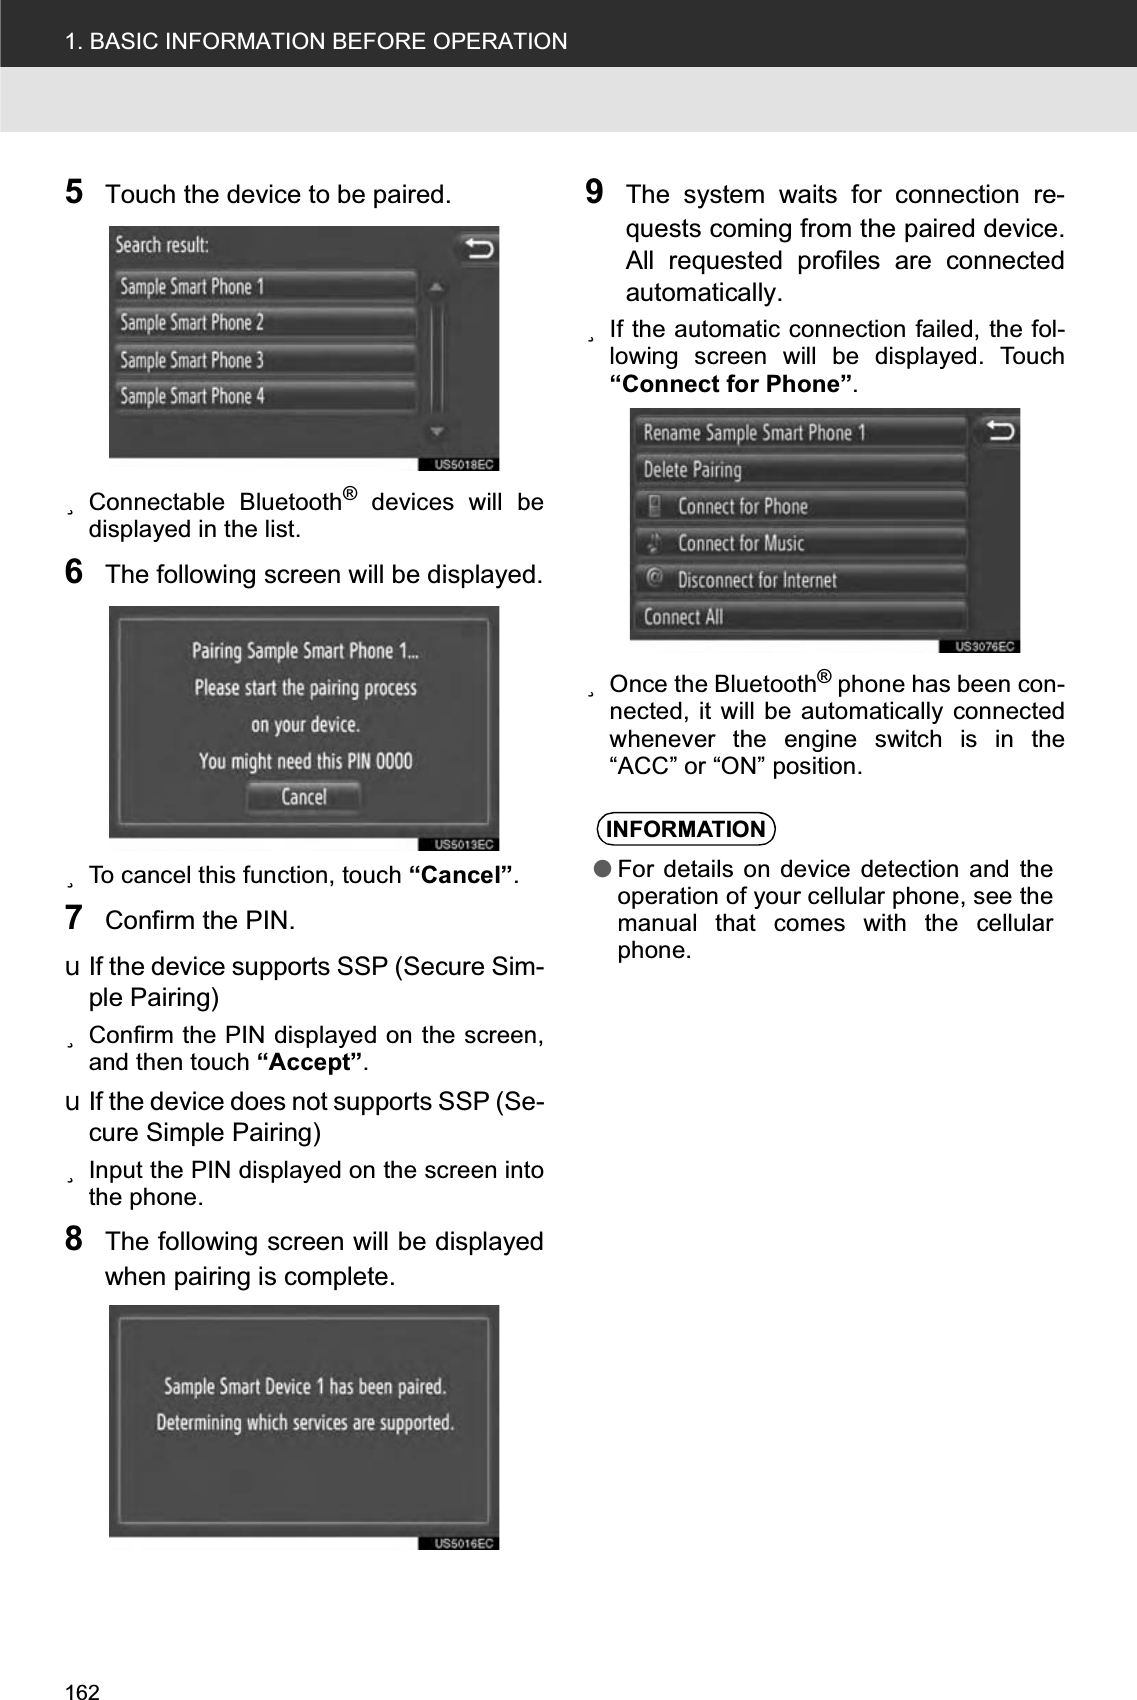
>
BE2729 User Manual
08 user guide
Navigation menu
Upload a User Manual
Namespaces
Wiki Guide
HTML
PDF
Info
Views
User Manual
Discussion / Help
Navigation