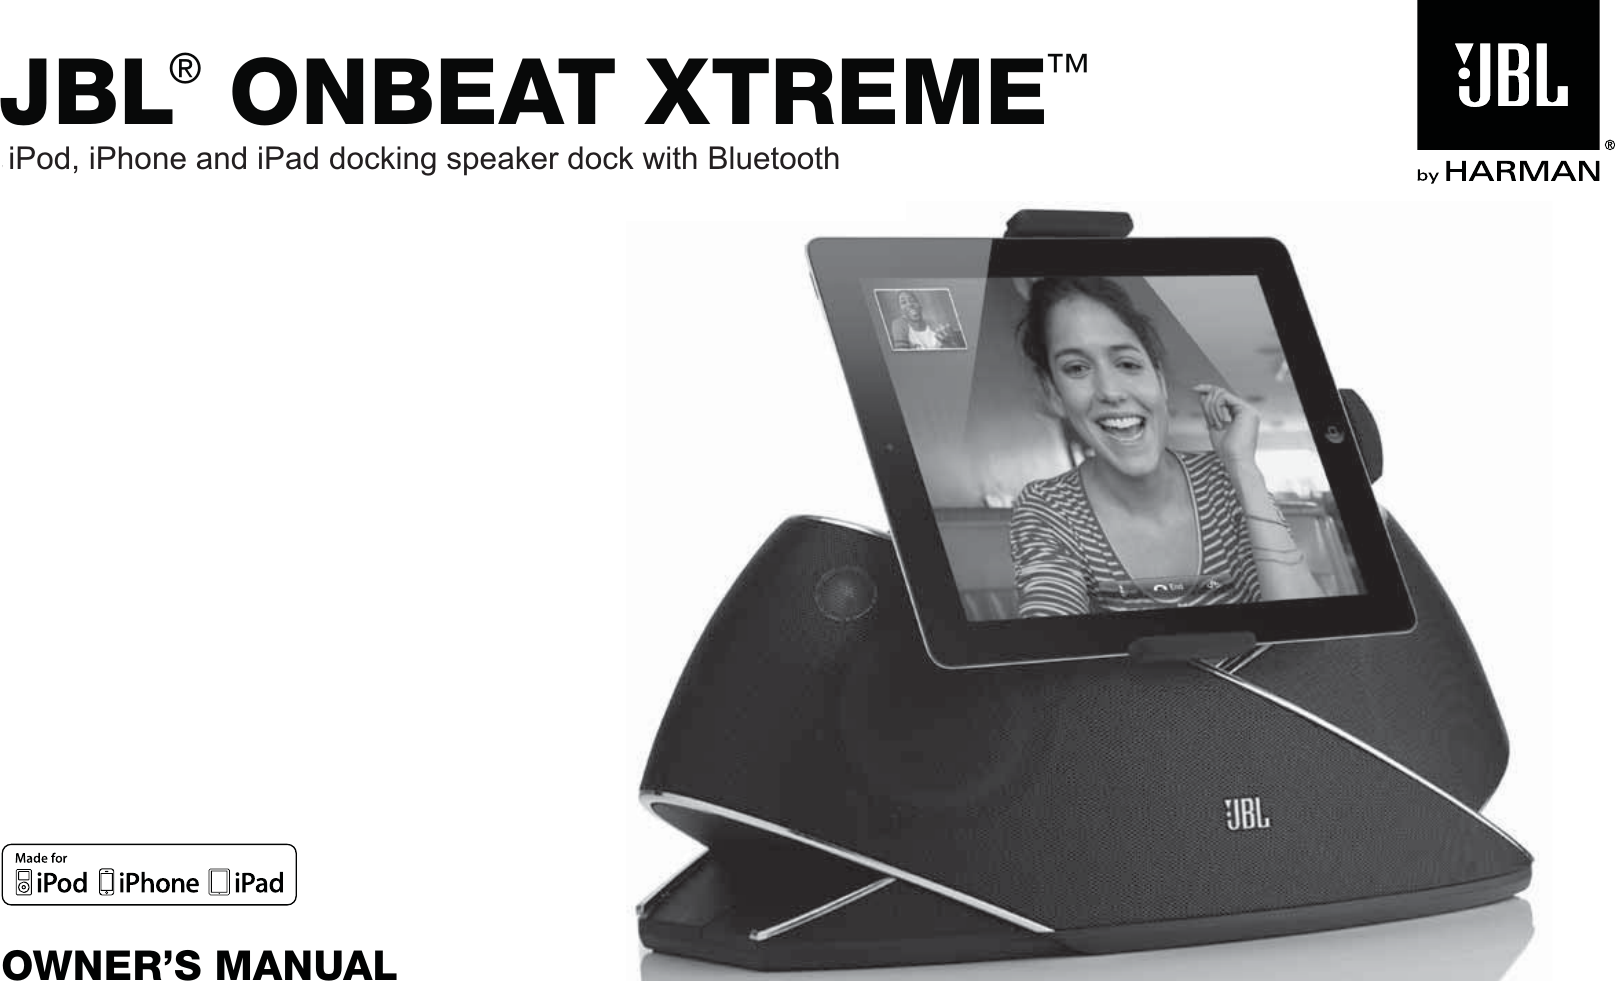
Harman Consumer ONBEATWIAN iPod, iPhone and iPad docking speaker dock with Bluetooth User Manual
Harman Consumer, Inc. iPod, iPhone and iPad docking speaker dock with Bluetooth Users Manual
UserManual.wiki
>
Harman Consumer
>
ONBEATWIAN User Manual
Users Manual
Navigation menu
Upload a User Manual
Namespaces
Wiki Guide
HTML
PDF
Info
Views
User Manual
Discussion / Help
Navigation

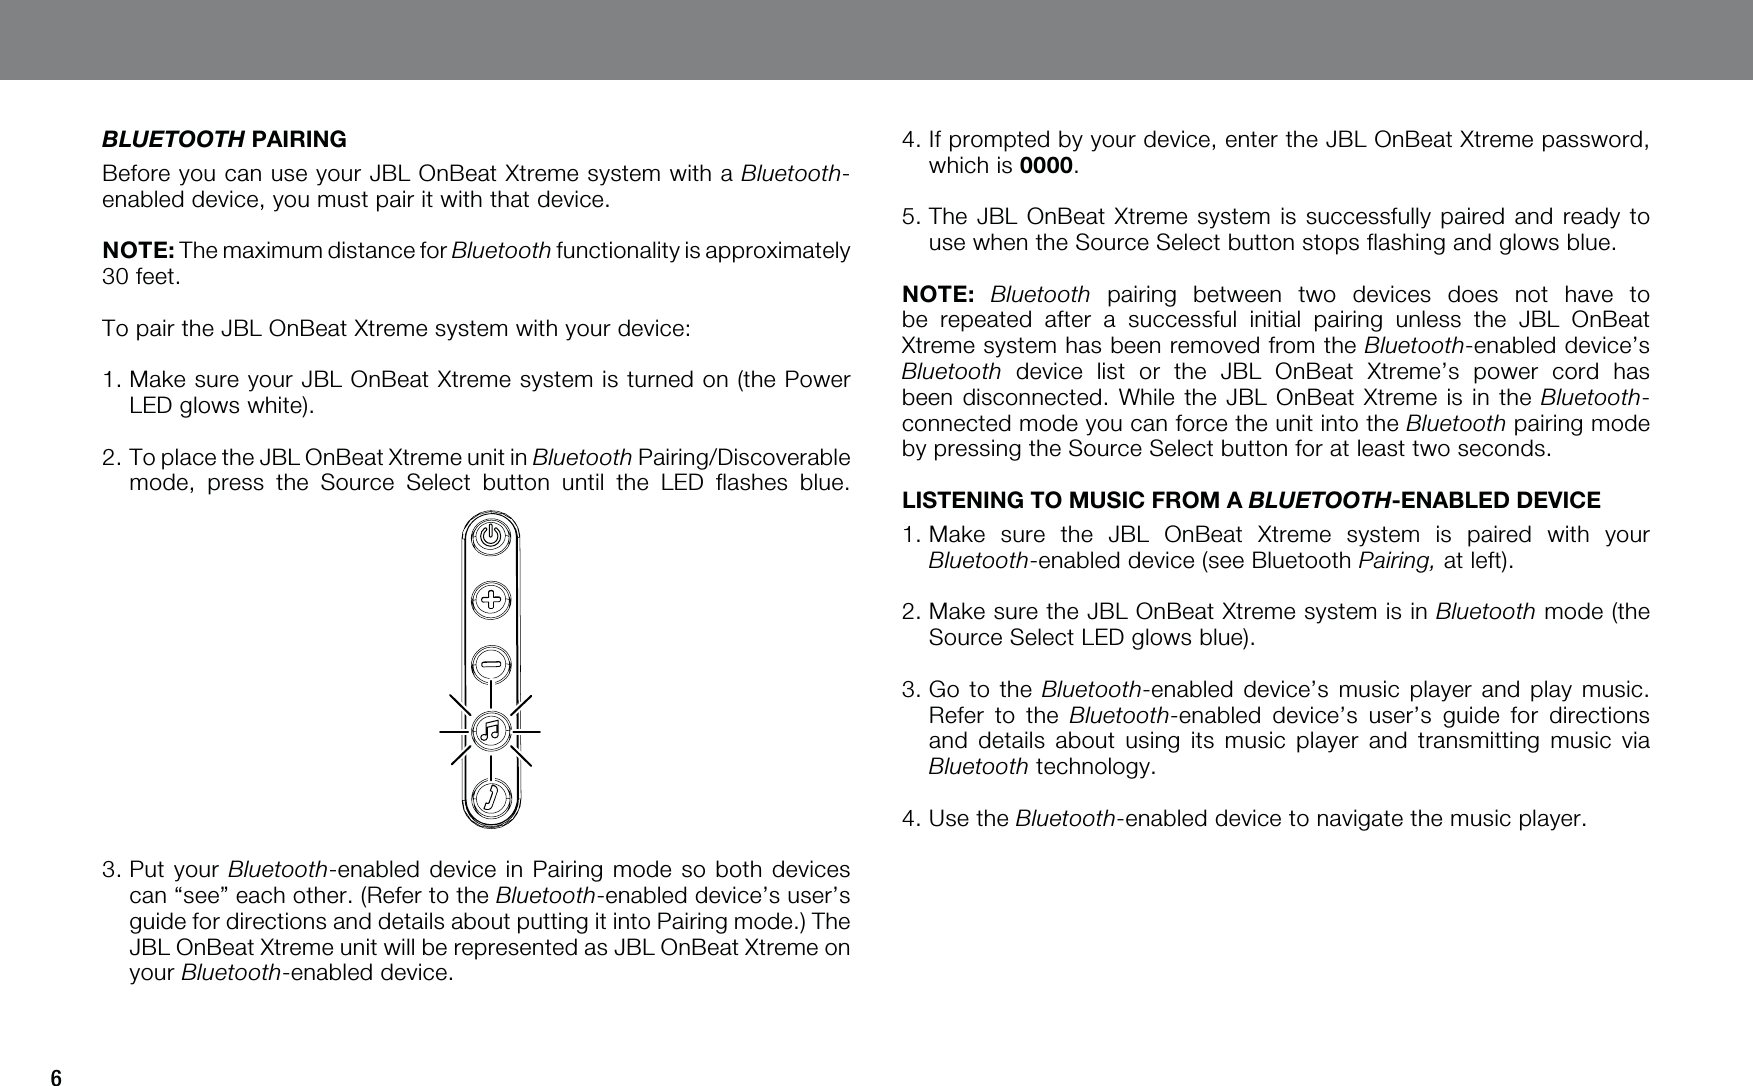
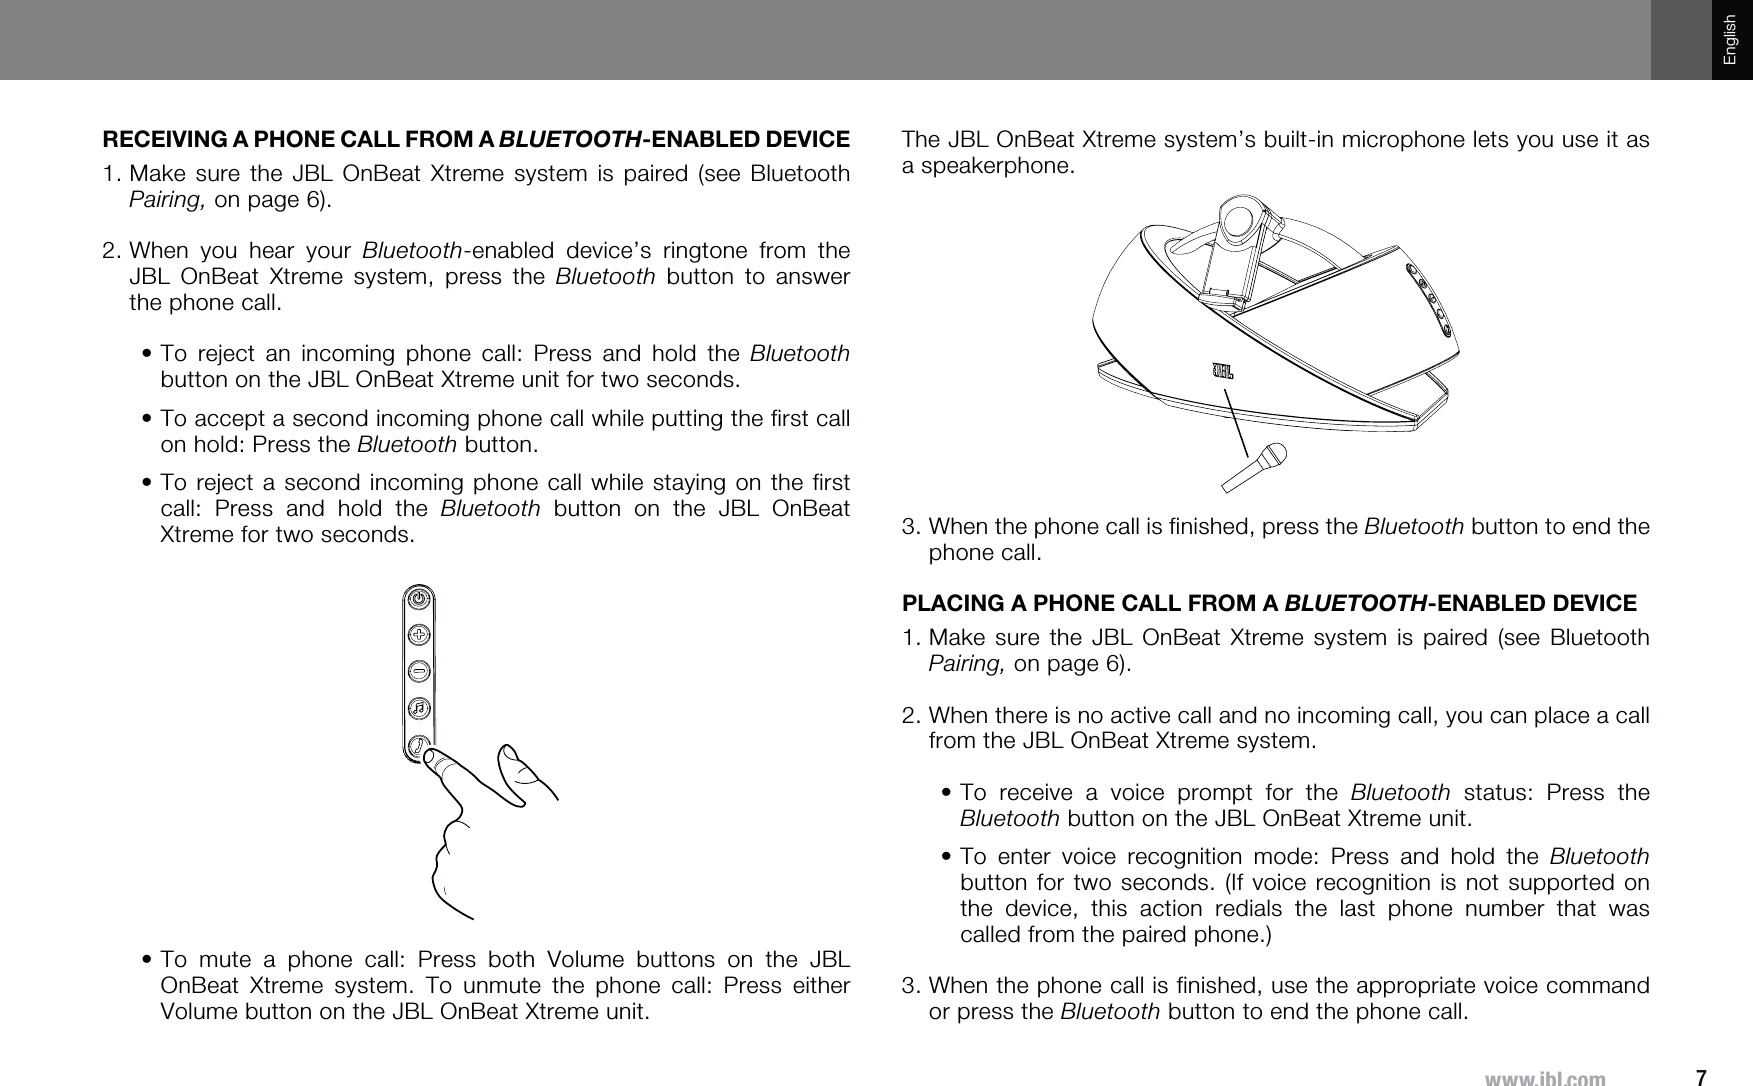
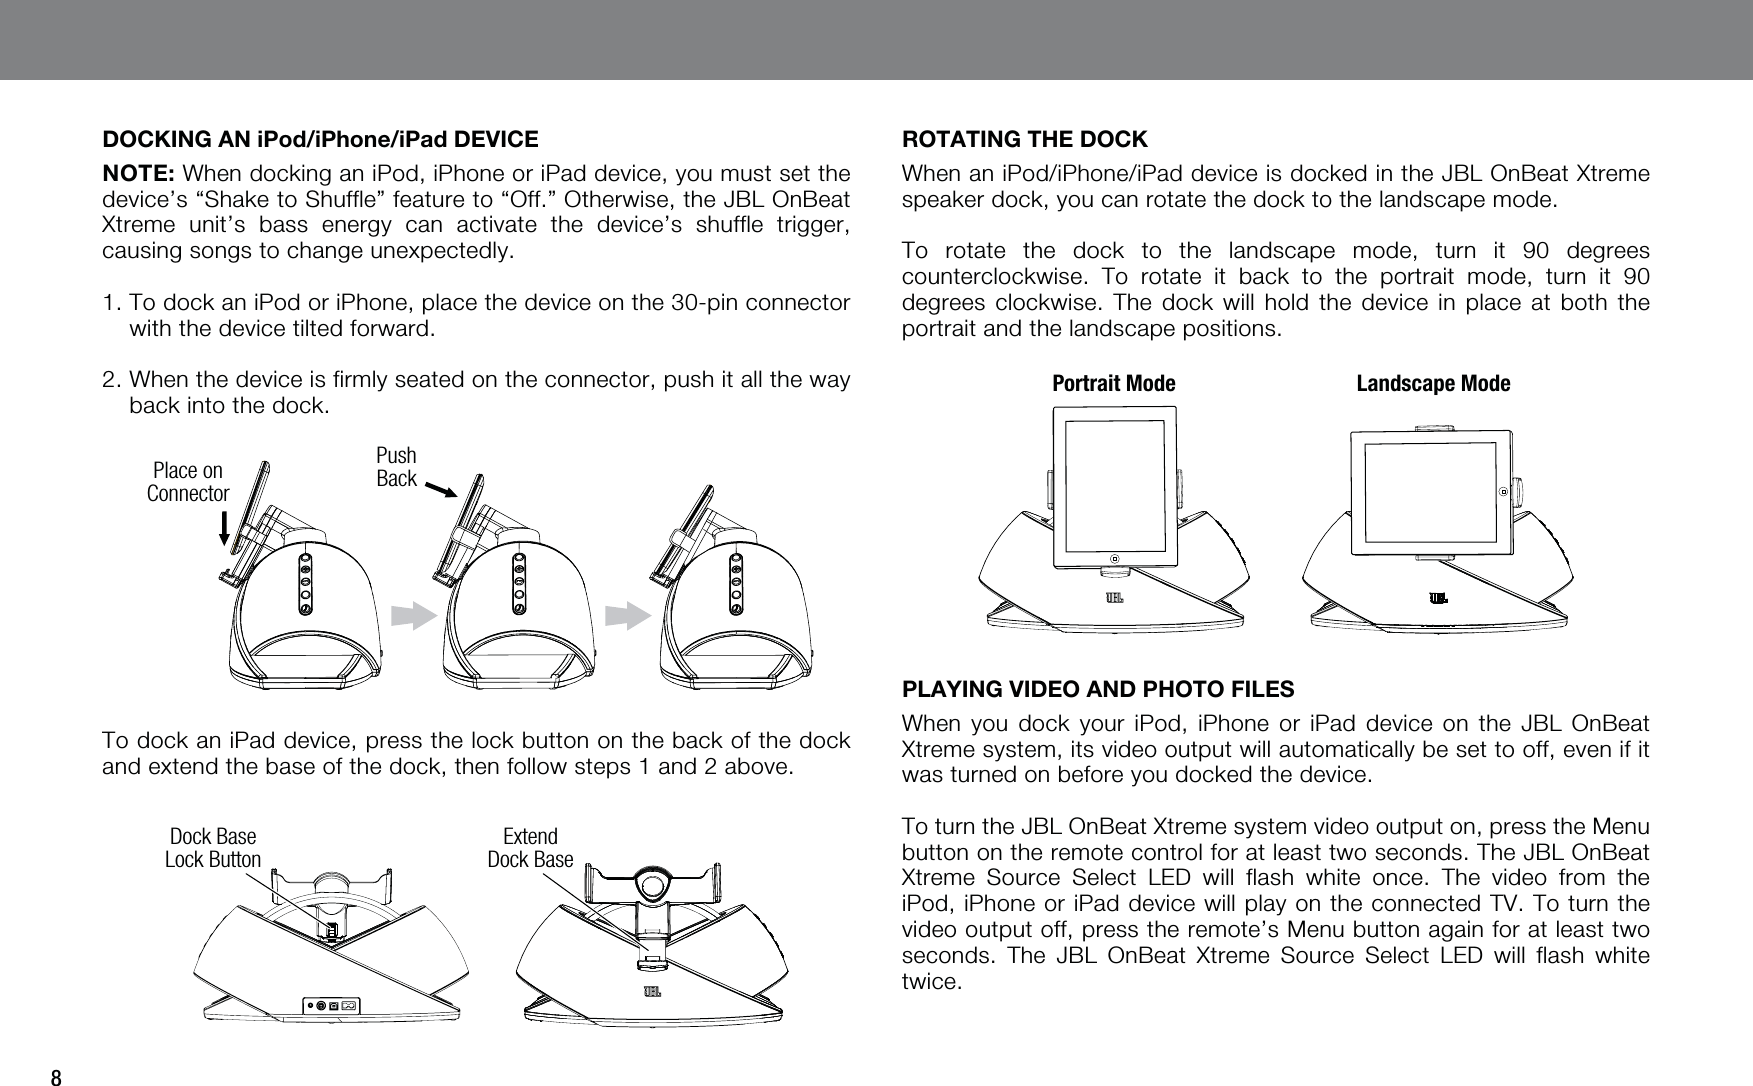
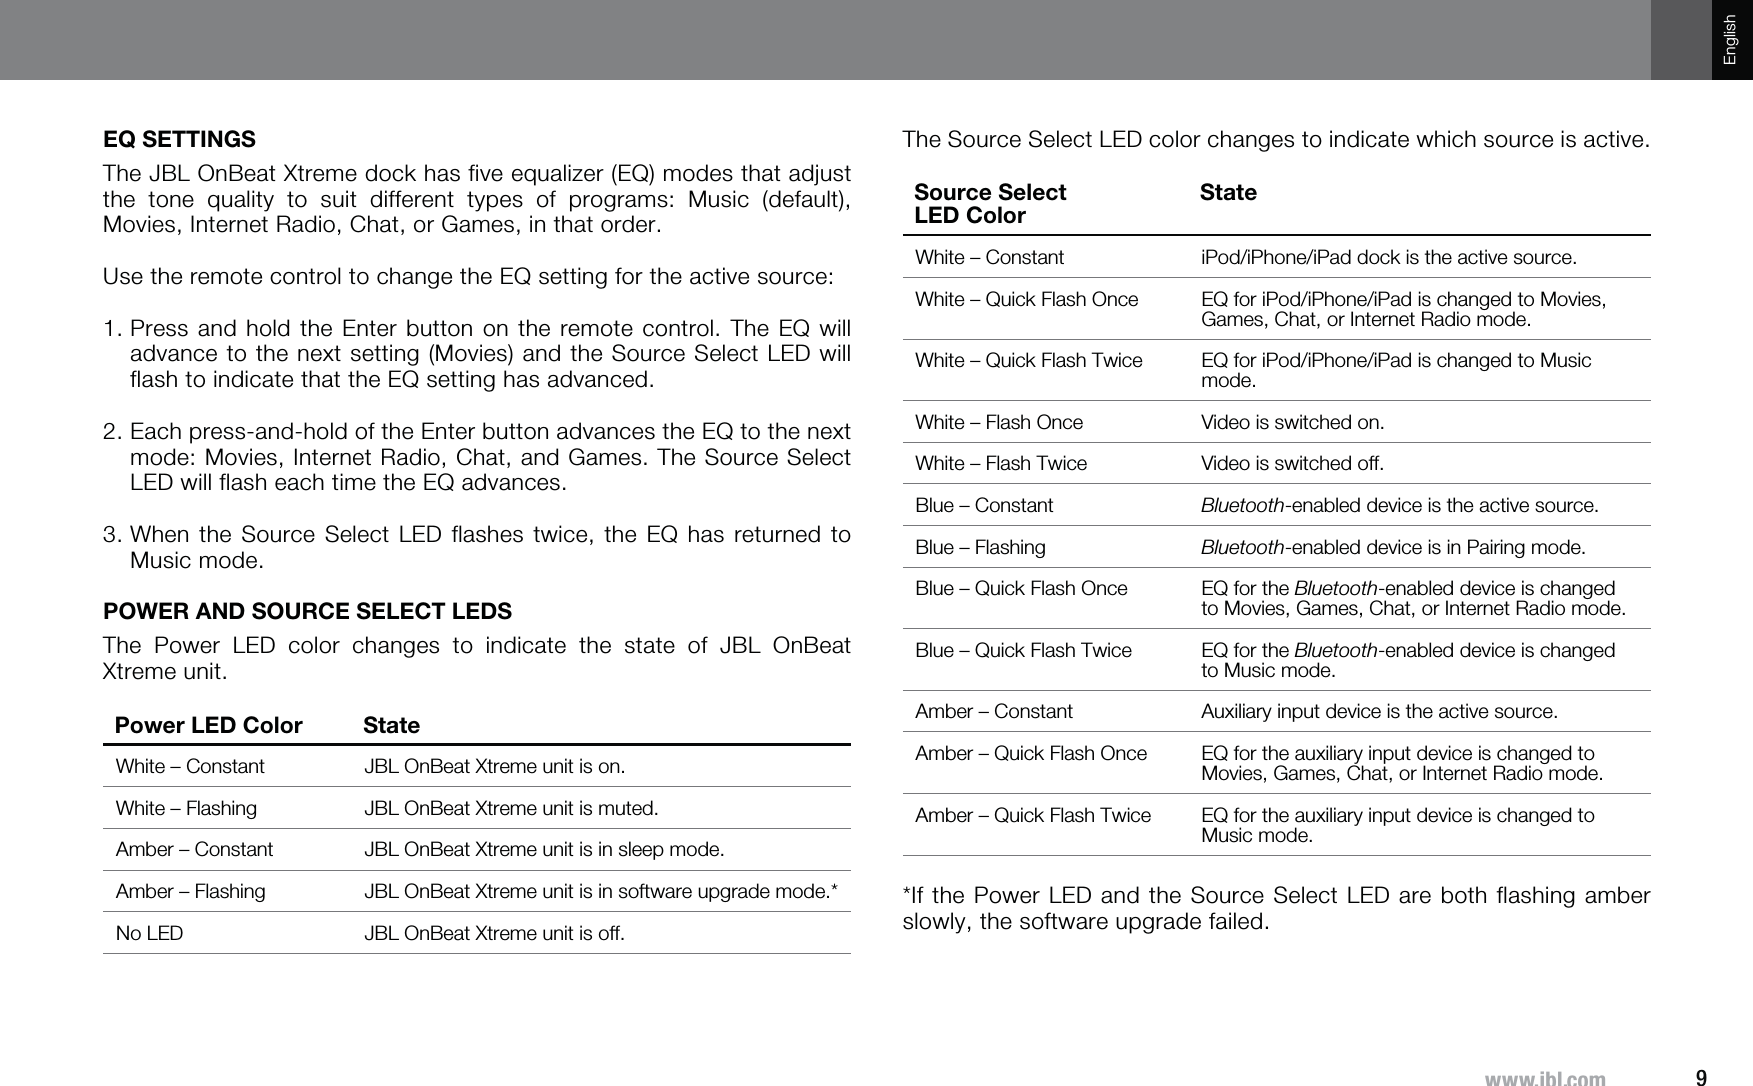
![13^^^QISJVTEnglish© 2011 HARMAN International Industries, Incorporated. All rights reserved. JBL is a trademark of HARMAN International Industries, Incorporated, registered in the United States and/or other countries. Atlas and OnBeat Xtreme are trademarks of HARMAN International Industries, Incorporated.The Bluetooth word mark and logo are registered trademarks and are owned by the Bluetooth SIG, Inc., and any use of such marks by HARMAN International Industries, Incorporated, is under license.iPhone, iPod, iPod nano, iPod classic, iTunes, iPod touch and iPad are trademarks of Apple Inc., registered in the U.S. and other countries. iPod/iPhone/iPad not included.“Made for iPod,” “Made for iPhone” and “Made for iPad” mean that an electronic accessory has been designed to connect specifically to iPod, iPhone and iPad respectively, and has been certified by the developer to meet Apple performance standards. Apple is not responsible for the operation of this device or its compliance with safety and regulatory standards.Wi-Fi is a registered trademark of the Wi-Fi Alliance.Features, specifications and appearance are subject to change without notice.Part No. 950-0344-001HARMAN Consumer, Inc. 8500 Balboa Boulevard, Northridge, CA 91329 USA127( 7KLV HTXLSPHQW KDV EHHQ WHVWHG DQGIRXQG WR FRPSO\ ZLWK WKHOLPLWVIRUD&ODVV%GLJLWDOGHYLFHSXUVXDQWWR3DUWRIWKH)&&5XOHV7KHVH OLPLWV DUH GHVLJQHG WR SURYLGH UHDVRQDEOH SURWHFWLRQ DJDLQVWKDUPIXOLQWHUIHUHQFHLQDUHVLGHQWLDOLQVWDOODWLRQ7KLVHTXLSPHQWJHQHUDWHVXVHVDQGFDQUDGLDWHUDGLRIUHTXHQF\HQHUJ\DQG LI QRW LQVWDOOHG DQG XVHG LQ DFFRUGDQFH ZLWK WKH LQVWUXFWLRQV PD\FDXVHKDUPIXOLQWHUIHUHQFHWRUDGLRFRPPXQLFDWLRQV+RZHYHU WKHUH LV QR JXDUDQWHH WKDW LQWHUIHUHQFH ZLOO QRW RFFXU LQ DSDUWLFXODULQVWDOODWLRQ,IWKLVHTXLSPHQWGRHVFDXVHKDUPIXOLQWHUIHUHQFHWR UDGLR RU WHOHYLVLRQUHFHSWLRQ ZKLFK FDQ EH GHWHUPLQHG E\ WXUQLQJ WKH HTXLSPHQW RII DQGRQWKH XVHU LV HQFRXUDJHGWR WU\ WR FRUUHFWWKH LQWHUIHUHQFH E\ RQHRUPRUHRIWKHIROORZLQJPHDVXUHV5HRULHQWRUUHORFDWHWKHUHFHLYLQJDQWHQQD,QFUHDVHWKHVHSDUDWLRQEHWZHHQWKHHTXLSPHQWDQGUHFHLYHU&RQQHFWWKHHTXLSPHQWLQWRDQRXWOHWRQDFLUFXLWGLIIHUHQWIURPWKDWWRZKLFKWKHUHFHLYHULVFRQQHFWHG&RQVXOWWKHGHDOHURUDQH[SHULHQFHGUDGLR79WHFKQLFLDQIRUKHOS)&&QRWLFHWRXVHUVDQGSURGXFWVWDWHPHQWV7KLVGHYLFHFRPSOLHVZLWKSDUWRIWKH)&&5XOHV2SHUDWLRQLVVXEMHFWWRWKHIROORZLQJWZRFRQGLWLRQV7KLVGHYLFHPD\QRWFDXVHKDUPIXOLQWHUIHUHQFHDQG7KLVGHYLFHPXVWDFFHSWDQ\LQWHUIHUHQFHUHFHLYHGLQFOXGLQJLQWHUIHUHQFHWKDWPD\FDXVHXQGHVLUHGRSHUDWLRQ&KDQJHV RU PRGLILFDWLRQV QRW H[SUHVVO\ DSSURYHG E\ WKH SDUW\UHVSRQVLEOHIRUFRPSOLDQFHFRXOGYRLGWKHXVHUVDXWKRULW\WRRSHUDWHWKHHTXLSPHQW7KLVHTXLSPHQWFRPSOLHVZLWK)&&UDGLDWLRQH[SRVXUHOLPLWVVHWIRUWKIRUDQ XQFRQWUROOHG HQYLURQPHQW 7KLV HTXLSPHQW VKRXOG EH LQVWDOOHG DQGRSHUDWHGZLWKPLQLPXPFPEHWZHHQWKHUDGLDWRUDQG\RXUERG\7KLVWUDQVPLWWHUPXVWQRWEHFROORFDWHGRURSHUDWLRQLQFRQMXQFWLRQZLWKDQ\RWKHUDQWHQQDRUWUDQVPLWWHUXQOHVVDXWKRUL]HGWRGRVRE\WKH)&&IC Warning This device complies with Indusy Canada License-exempt RSS standard(s). Operation is subject to the following two conditions : (1) this device may not cause interference, and (2) this device must accept any interference, including interference that may cause undesired operation of the device.](https://usermanual.wiki/Harman-Consumer/ONBEATWIAN/User-Guide-1453123-Page-13.png)