Harman MLNO519 No.519 User Manual Harmon Manual
Harman International Industries, Inc No.519 Harmon Manual
UserManual.wiki
>
Harman
>
MLNO519 User Manual
>
Harmon Manual
Contents
1.
Harmon Manual
2.
Compliance Statement insert
3.
Harman Manual
4.
Harman Compliance Statement Insert
Harmon Manual
Navigation menu
Upload a User Manual
Namespaces
Wiki Guide
HTML
PDF
Info
Views
User Manual
Discussion / Help
Navigation
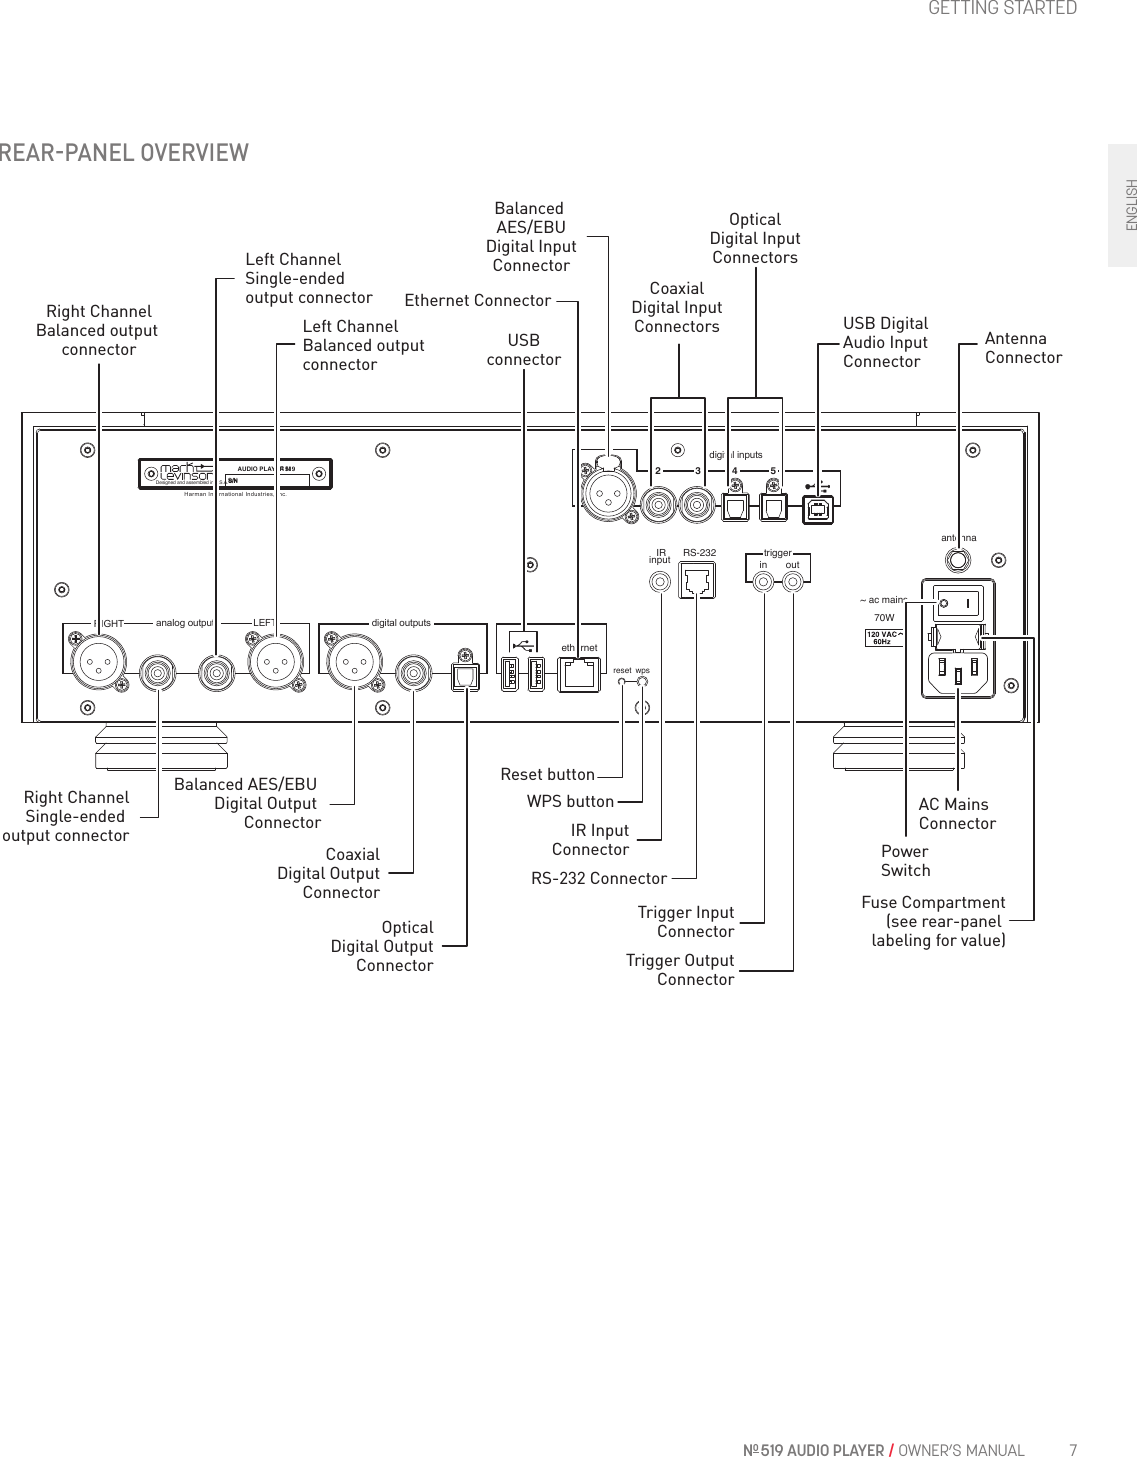
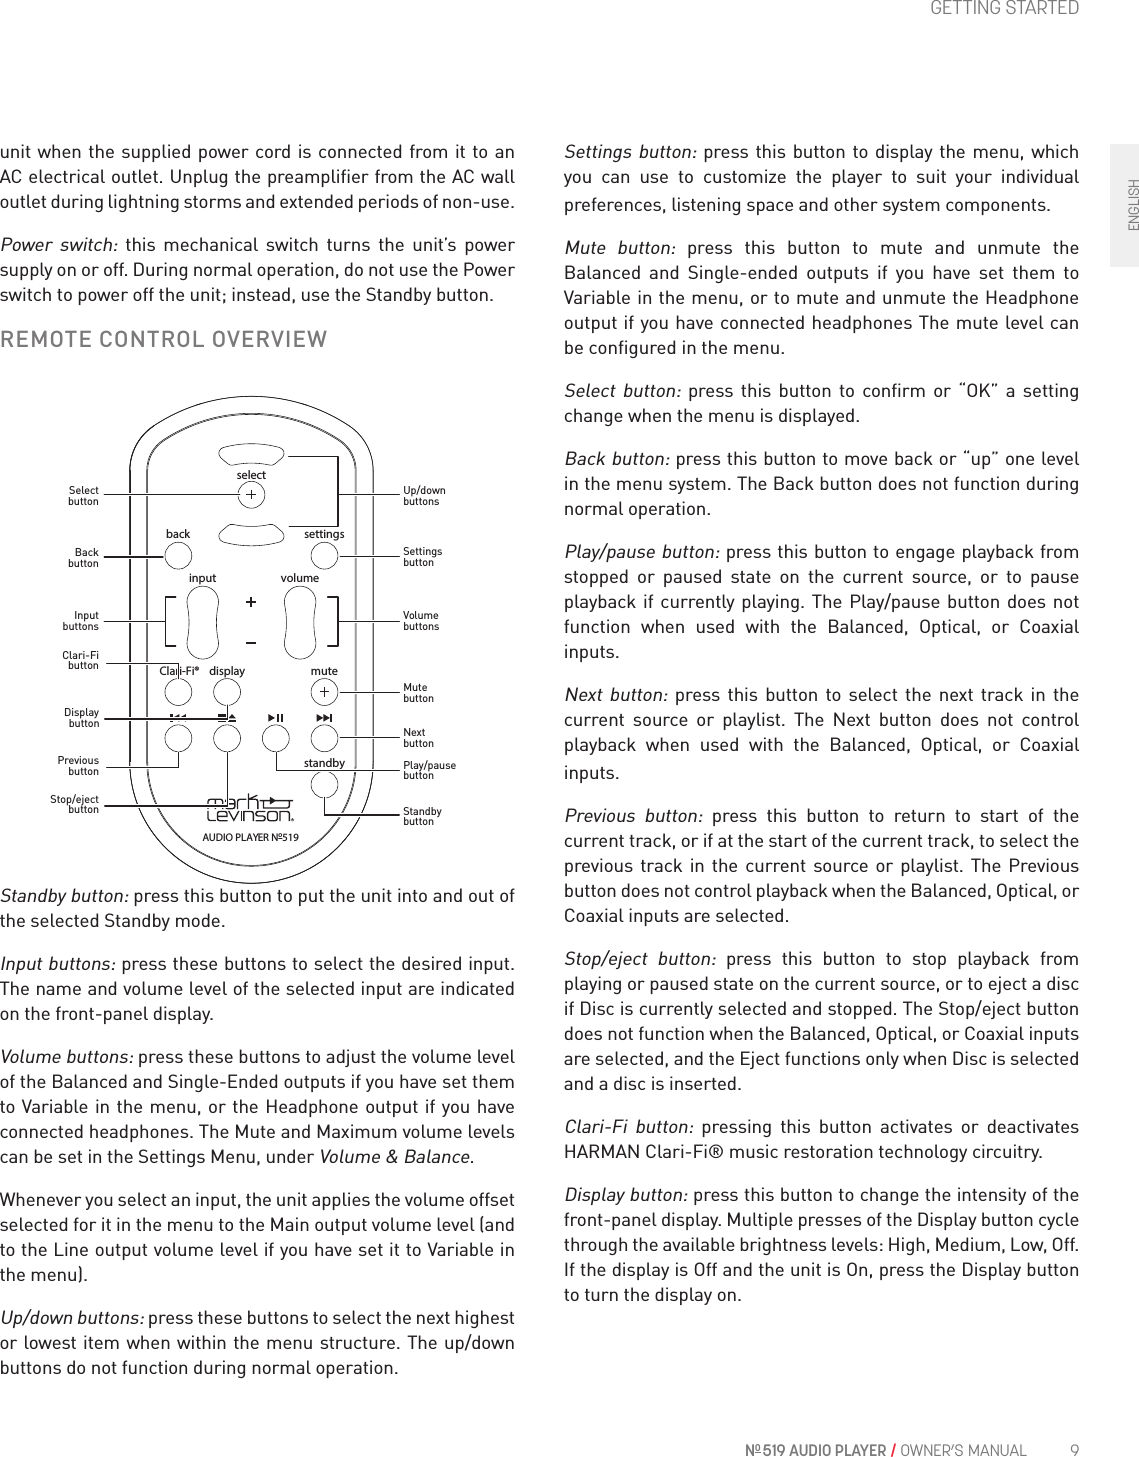
![21N0 519 AUDIO PLAYER / OWNER’S MANUALENGLISHMARK LEVINSON N0 519 SPECIFICATIONS1. Digital input sample rates and bit depth: PCM: 32kHz, 44.1kHz, 48kHz, 88.2kHz, 96kHz, 176.4kHz, 192kHz/up to 32-bit; DSD: Native, single- and double-speed2. Analog audio connectors: 1 pair single-ended line outputs (RCA); 1 pair balanced line outputs (XLR); 1 headphone output (1/4-inch TS phone)3. Digital audio connectors: 1 balanced AES/EBU input (XLR); 2 coaxial S/PDIF inputs (RCA); 2 optical inputs (Toslink); 1 asynchronous USB input (USB-B); 1 balanced AES/EBU output (XLR); 1 coaxial S/PDIF output (RCA); 1 optical output (Toslink)4. Control connectors: 1 RS-232 port (RJ-11 connector); 1 IR input (1/8” TS phone); 2 programmable 12V DC trigger outputs (1/8” TS phone), 100mA maximum; 1 programmable 12 DC trigger input (1/8” TS phone); 1 gigabit Ethernet connector (RJ- 45 connector); 2 USB-A (mass storage, firmware update, and configuration I/O); 1 Micro USB (device discovery) 5. Wireless: Wi-Fi 802.11b/g/n/a, Bluetooth with aptX codec Bluetooth range: 15m/50ft6. Mains voltage: 100V AC, 115V AC, or 230V AC (set at the factory for the region for which the unit is intended)7. Power consumption: WITHOUT WITH HEADPHONE HEADPHONEOn: 39W 50W Normal Standby: 33W 46WPower Save Standby: 10W 10WGreen Standby (Default): 0.4W 0.4W8. Operating temperature range: 50°F (10°C) … 104°F (40°C)9. Unit dimensions: Height: 5.75” [146mm]Width: 17.25” [438mm]Depth: 16” [406mm]Weight: 36 lbs. [16.4kg] With Packaging: Height: 17” [432mm]Width: 26” [660mm]Depth: 26” [660mm]Weight: 56 lbs [25.5kg]SPECIFICATIONS](https://usermanual.wiki/Harman/MLNO519.Harmon-Manual/User-Guide-3136745-Page-23.png)