Harsper HP-420VPM PDP Monitor User Manual ATT E MANUAL
Harsper Co., Ltd. PDP Monitor ATT E MANUAL
UserManual.wiki
>
Harsper
>
HP 420VPM User Manual
Users Manual
Navigation menu
Upload a User Manual
Namespaces
Wiki Guide
HTML
PDF
Info
Views
User Manual
Discussion / Help
Navigation
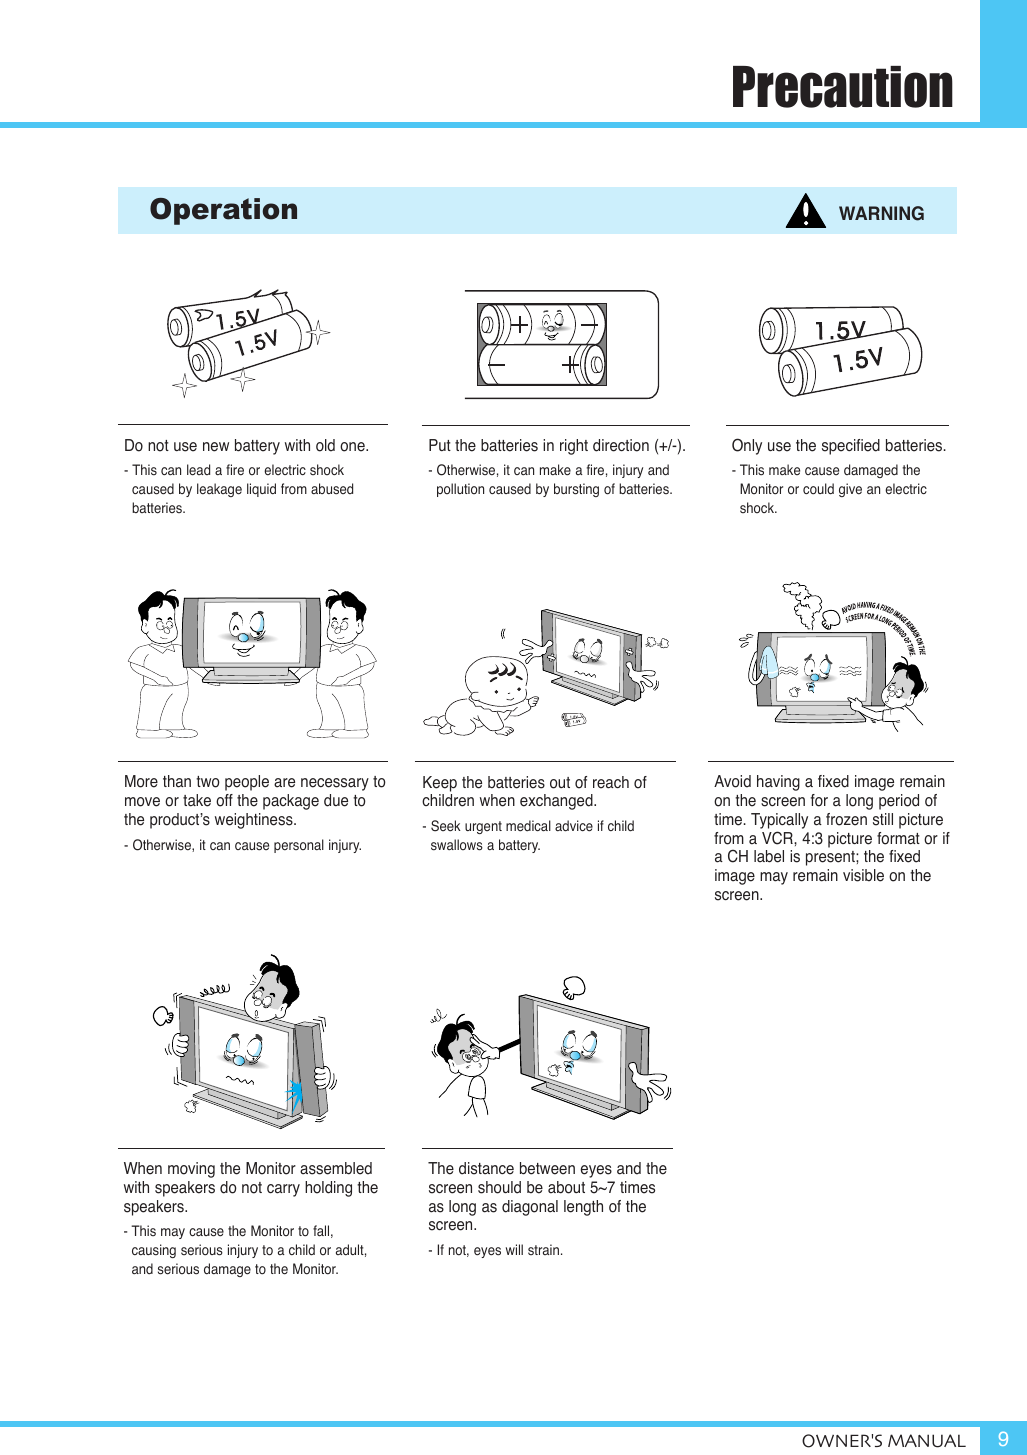
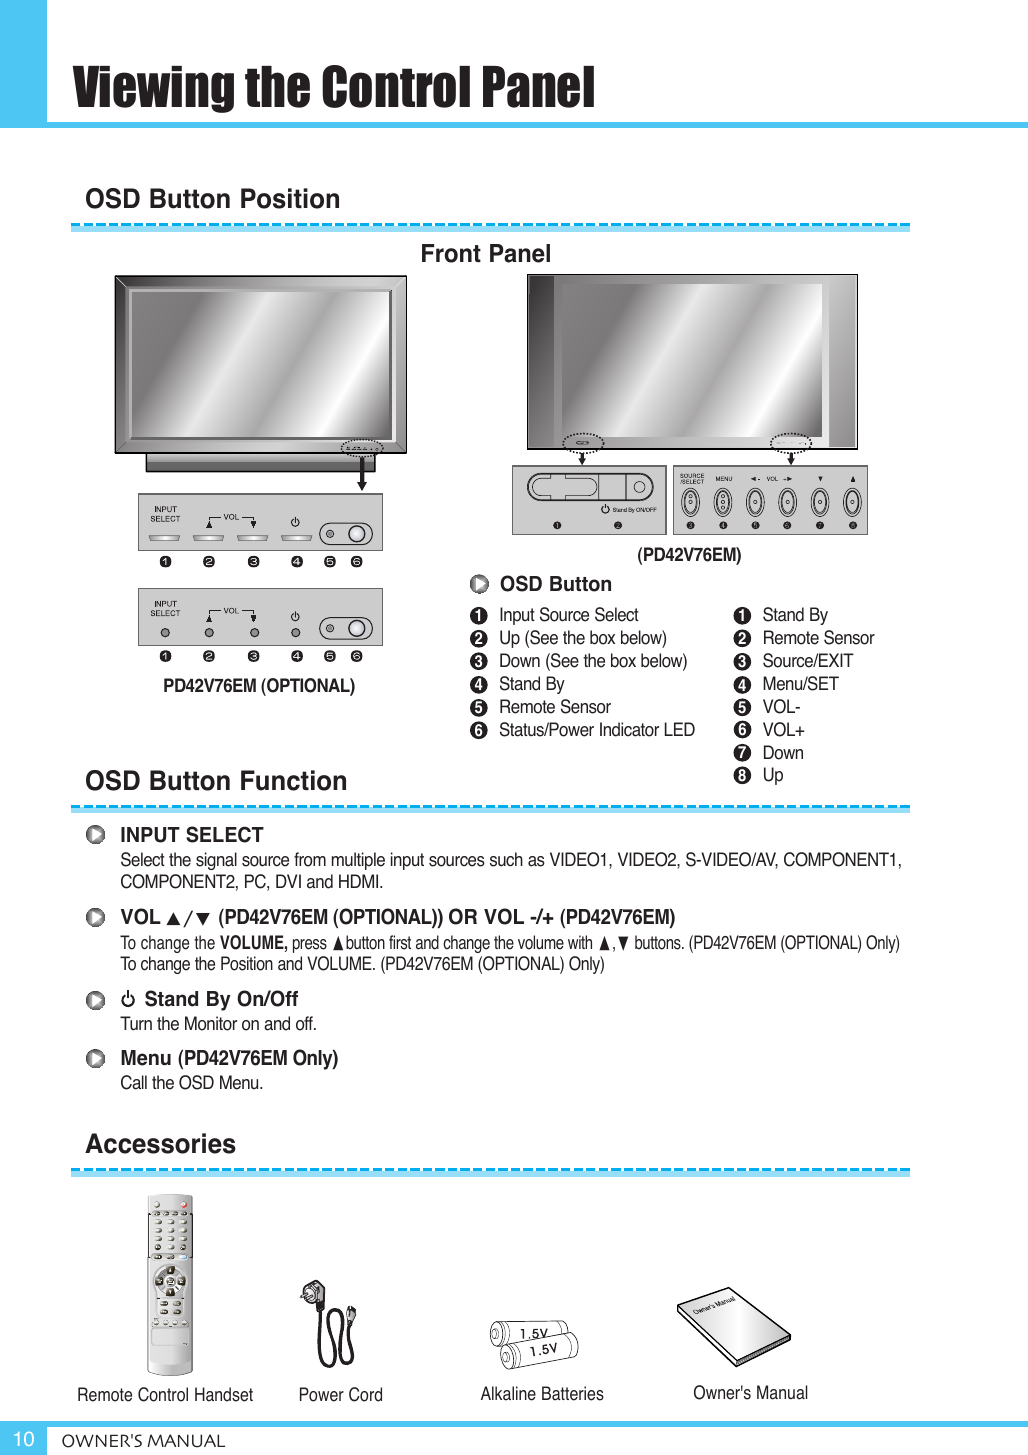
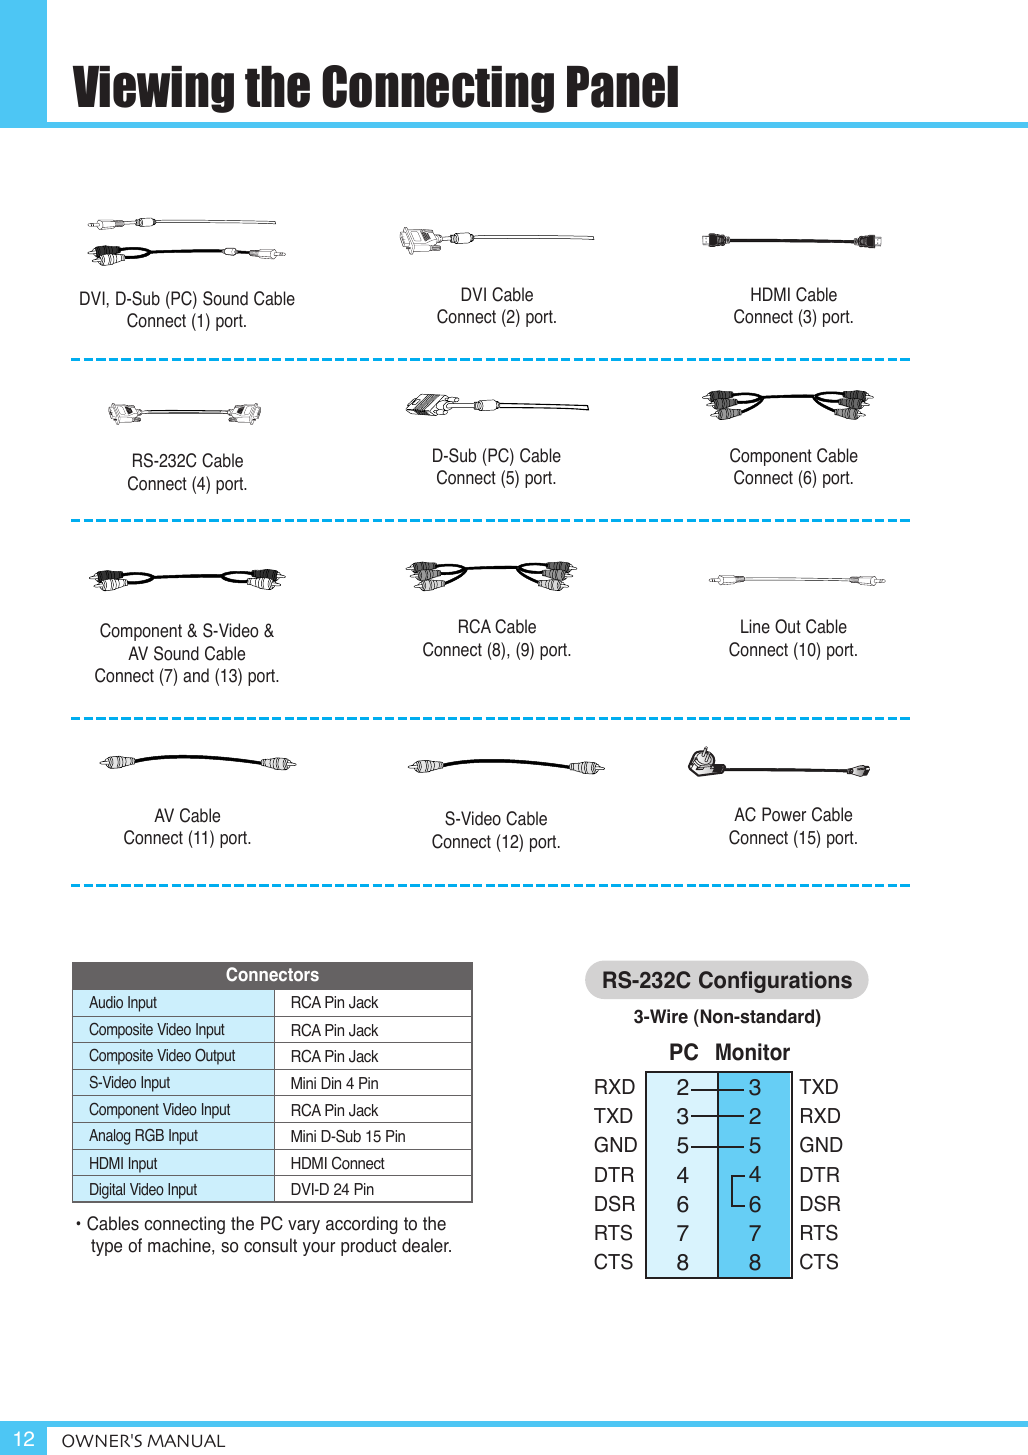
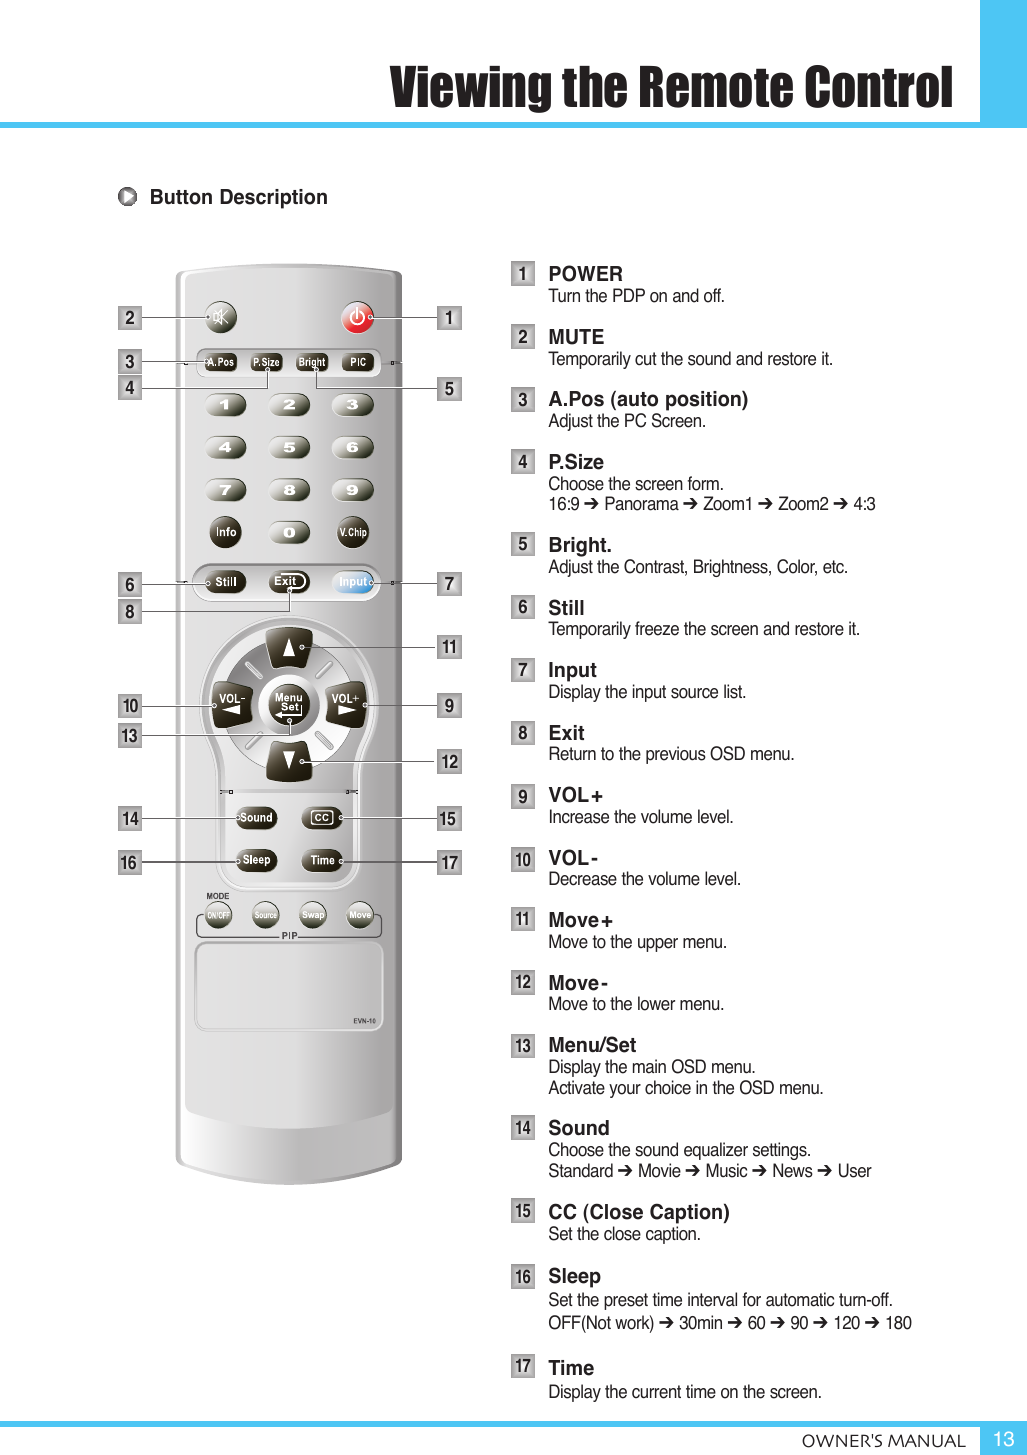
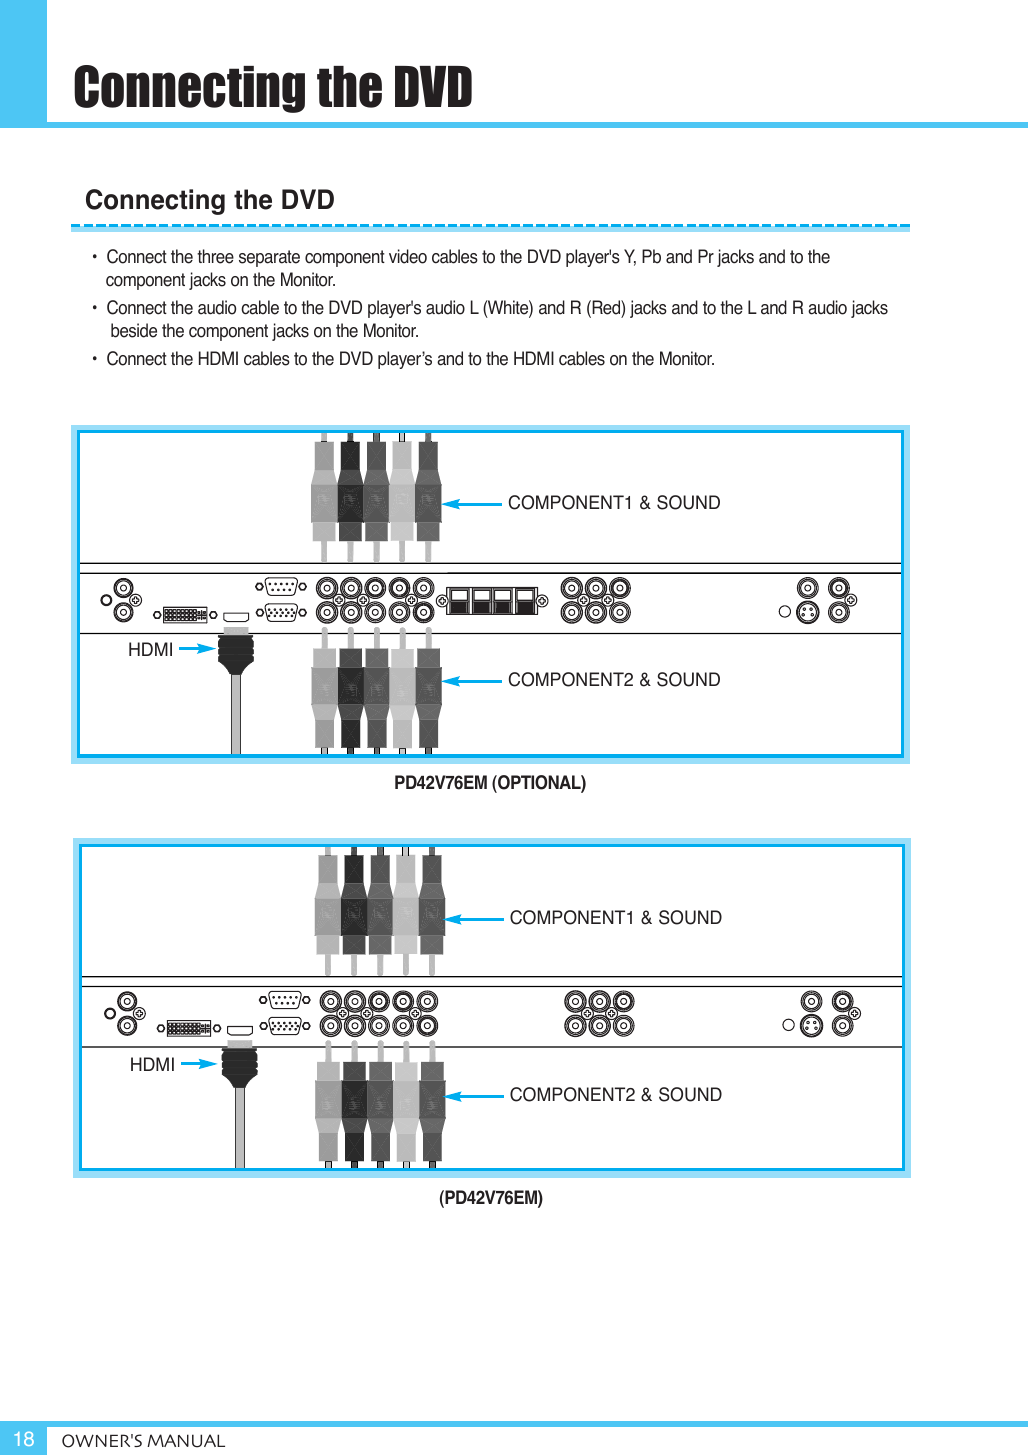
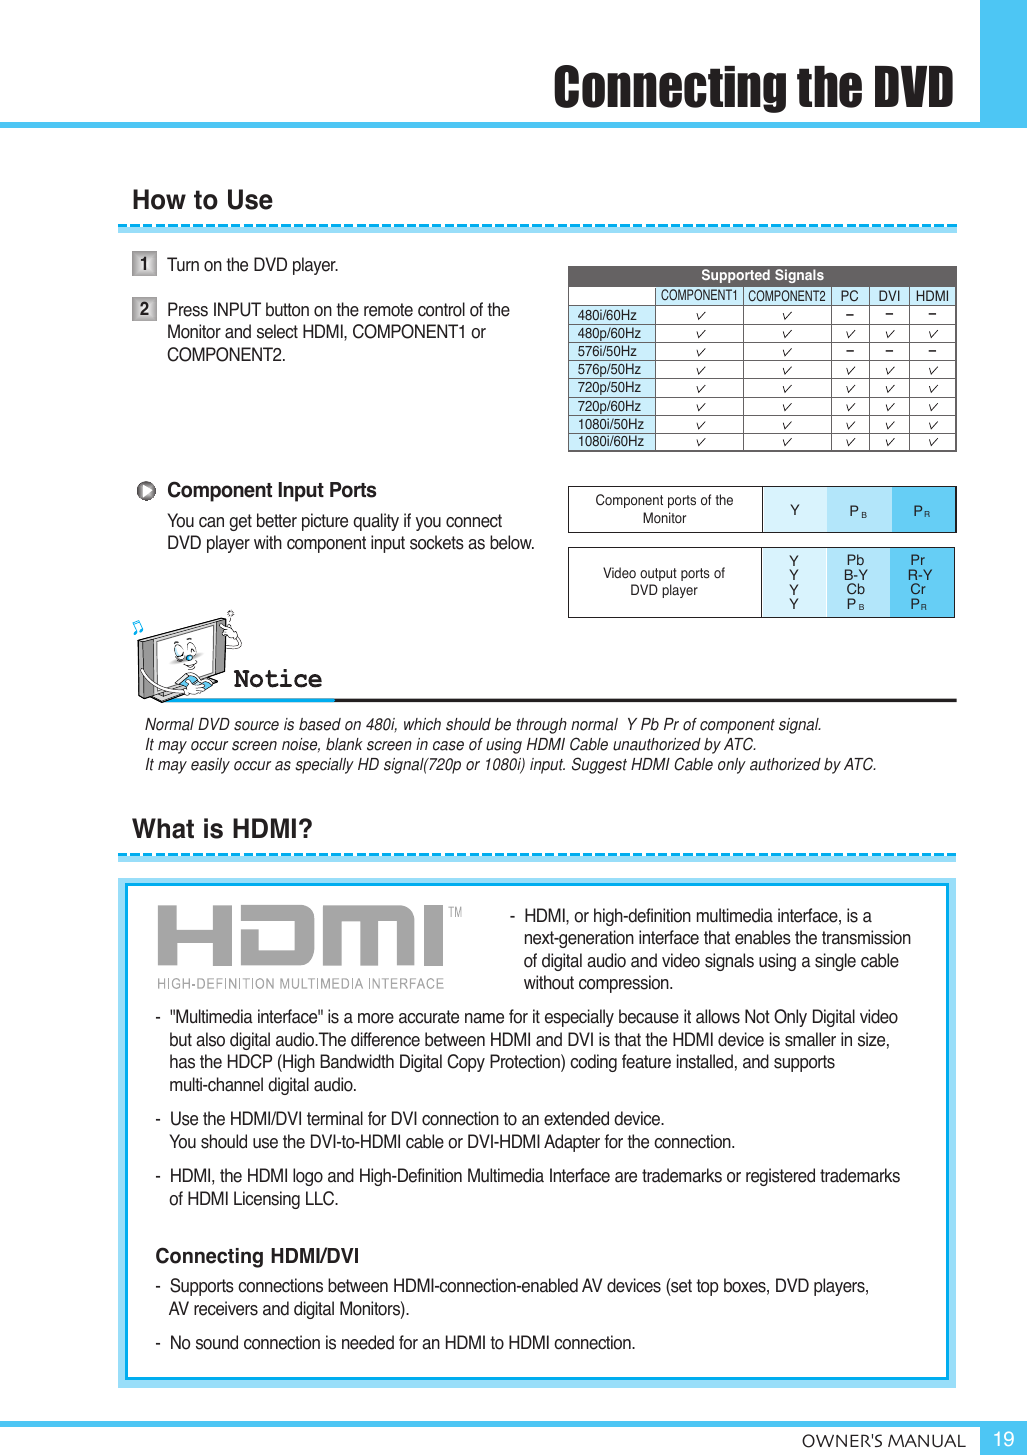
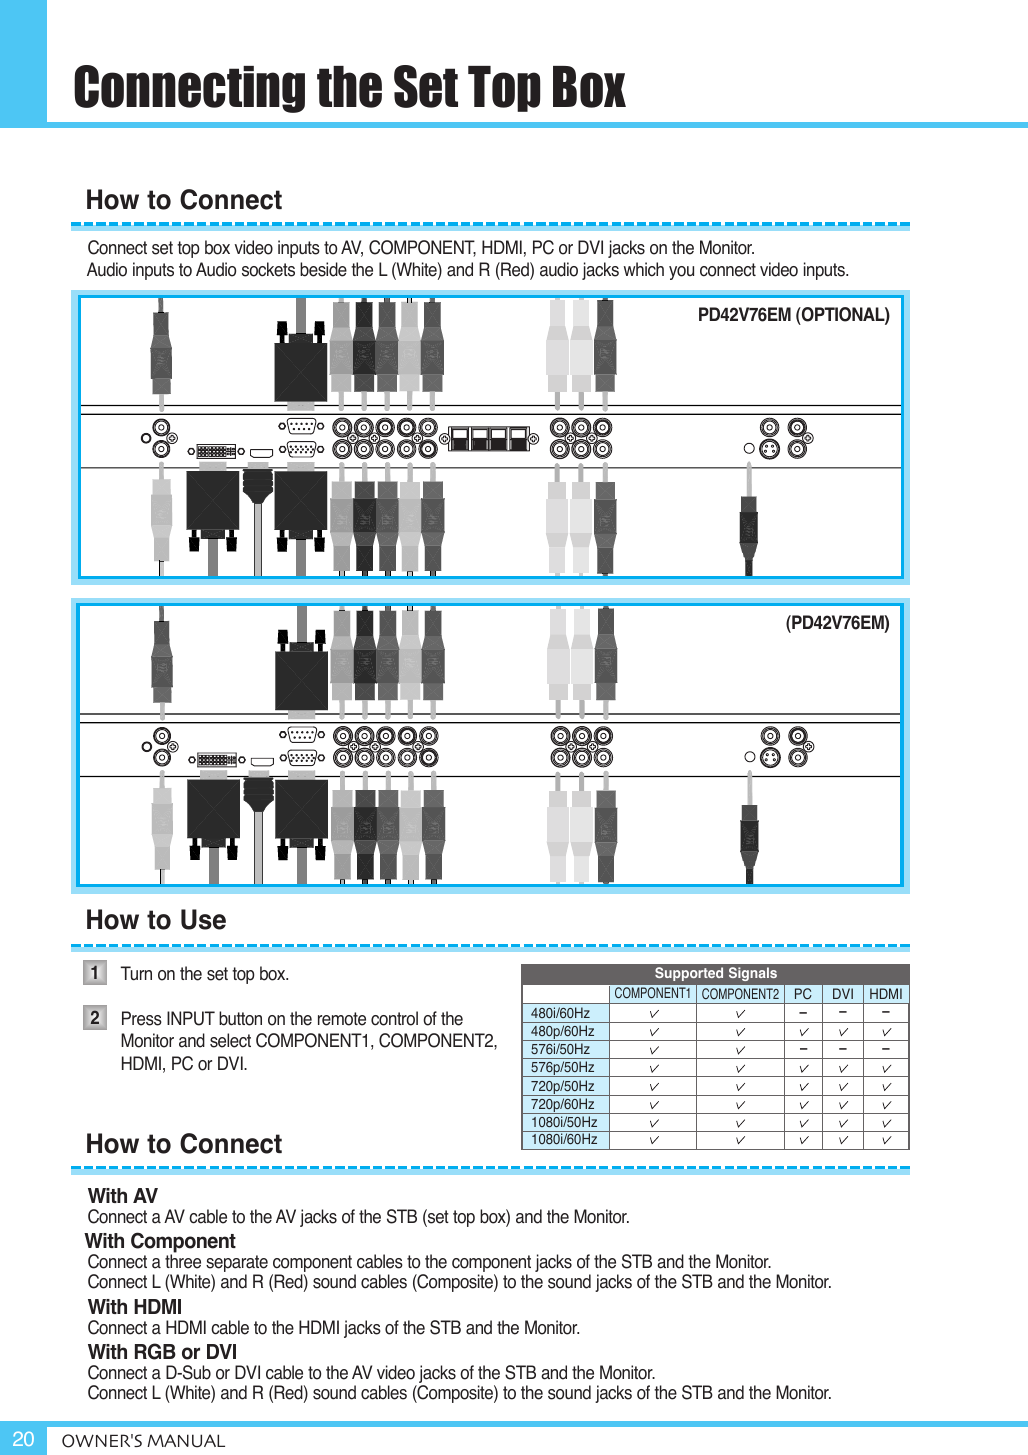
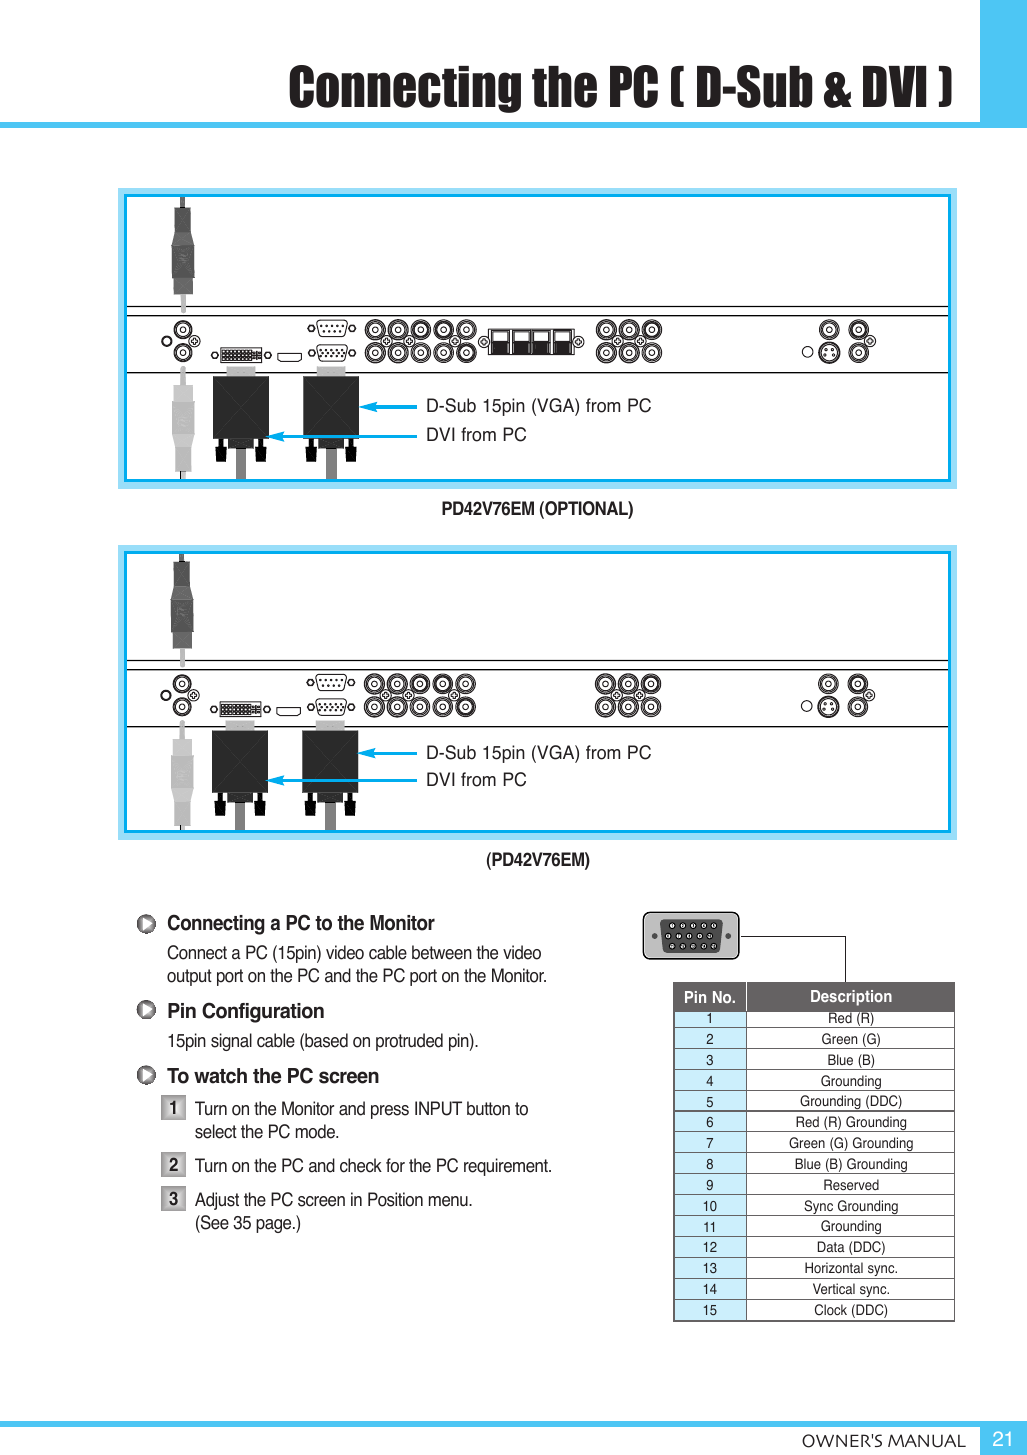
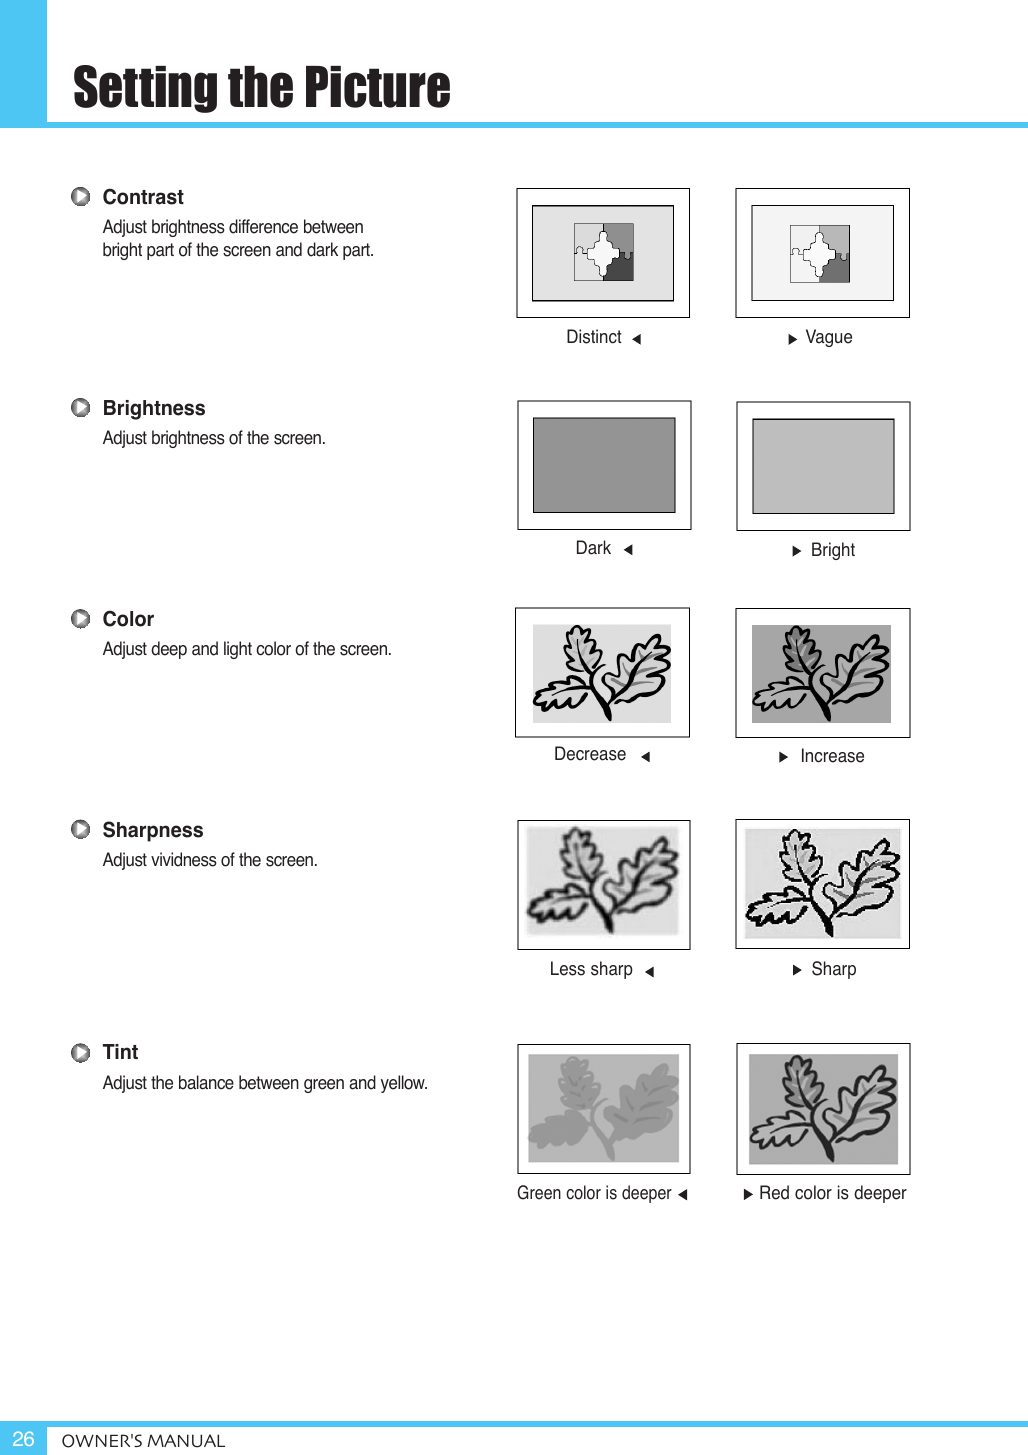
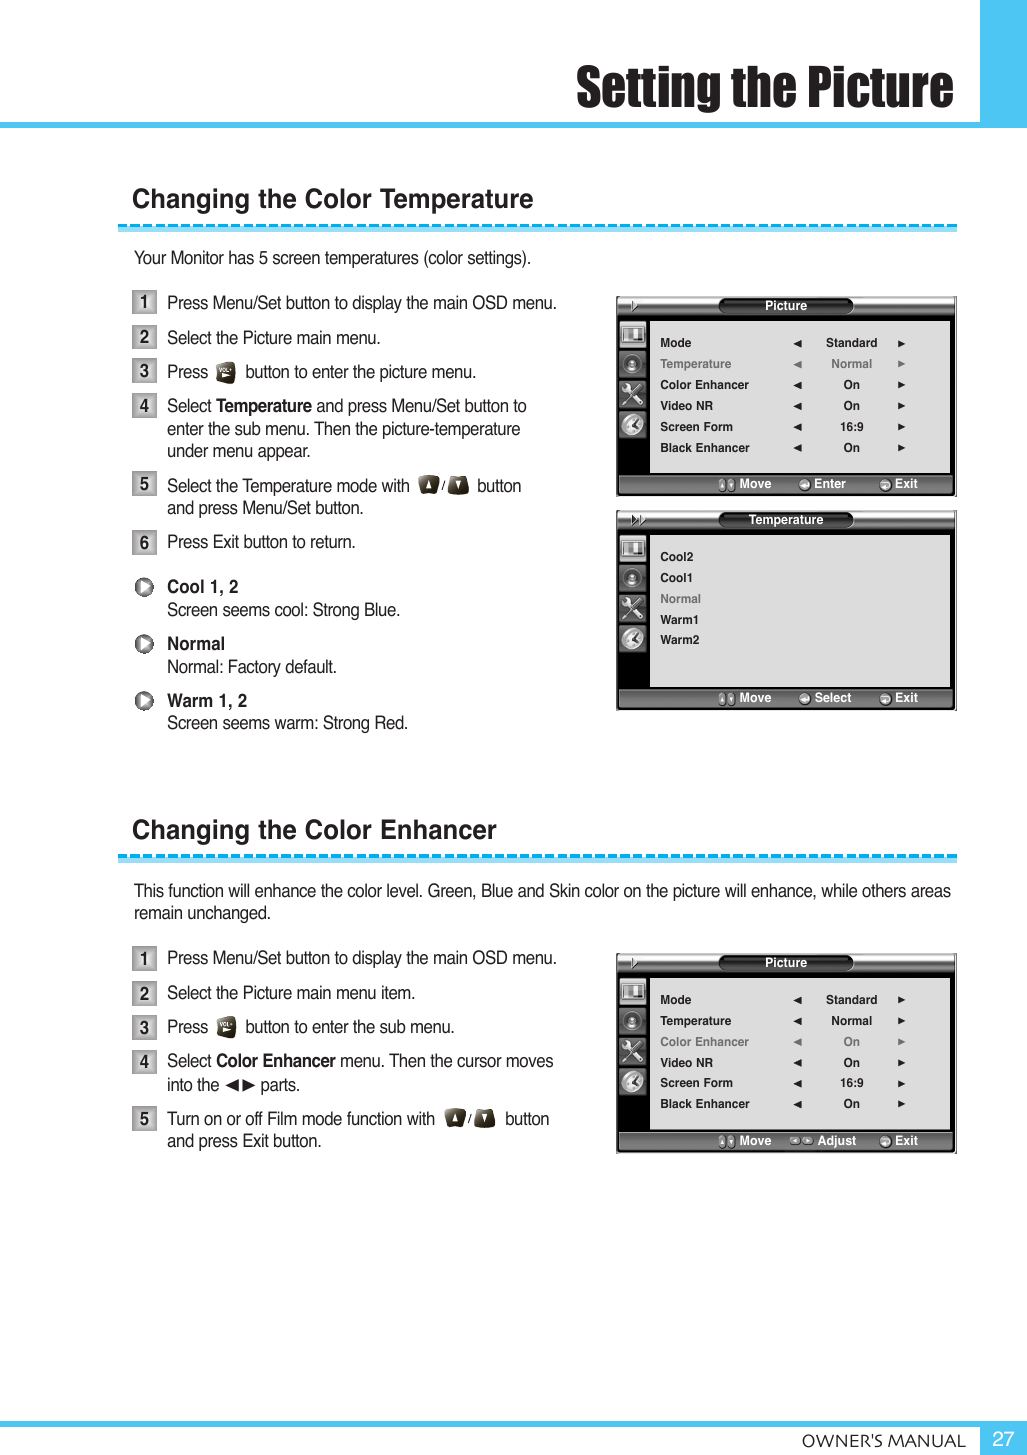
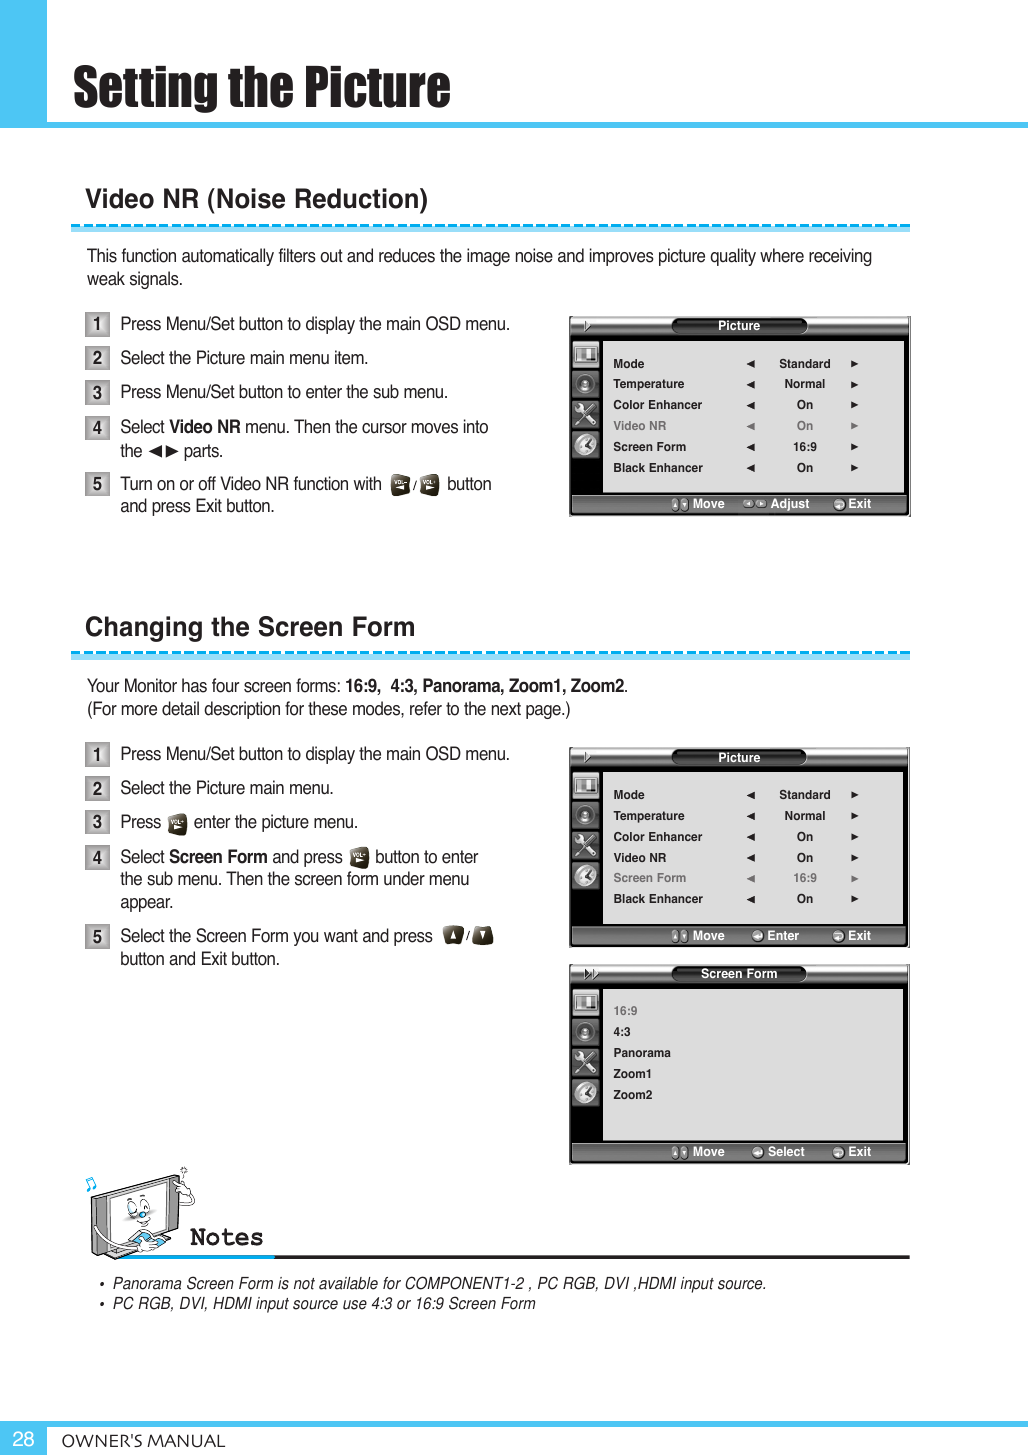
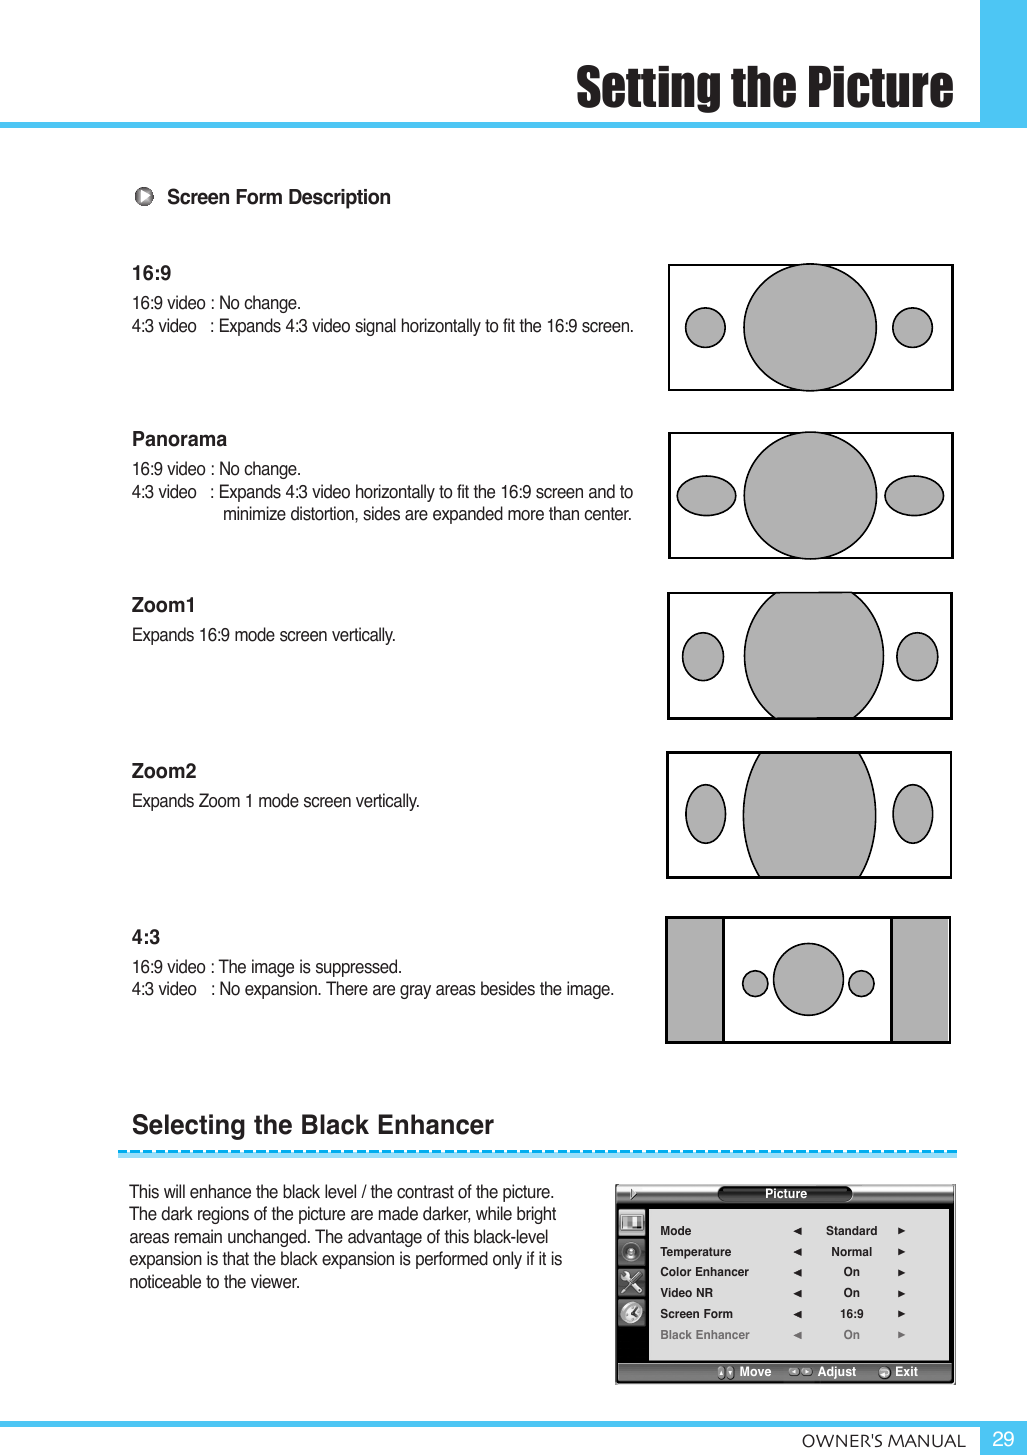
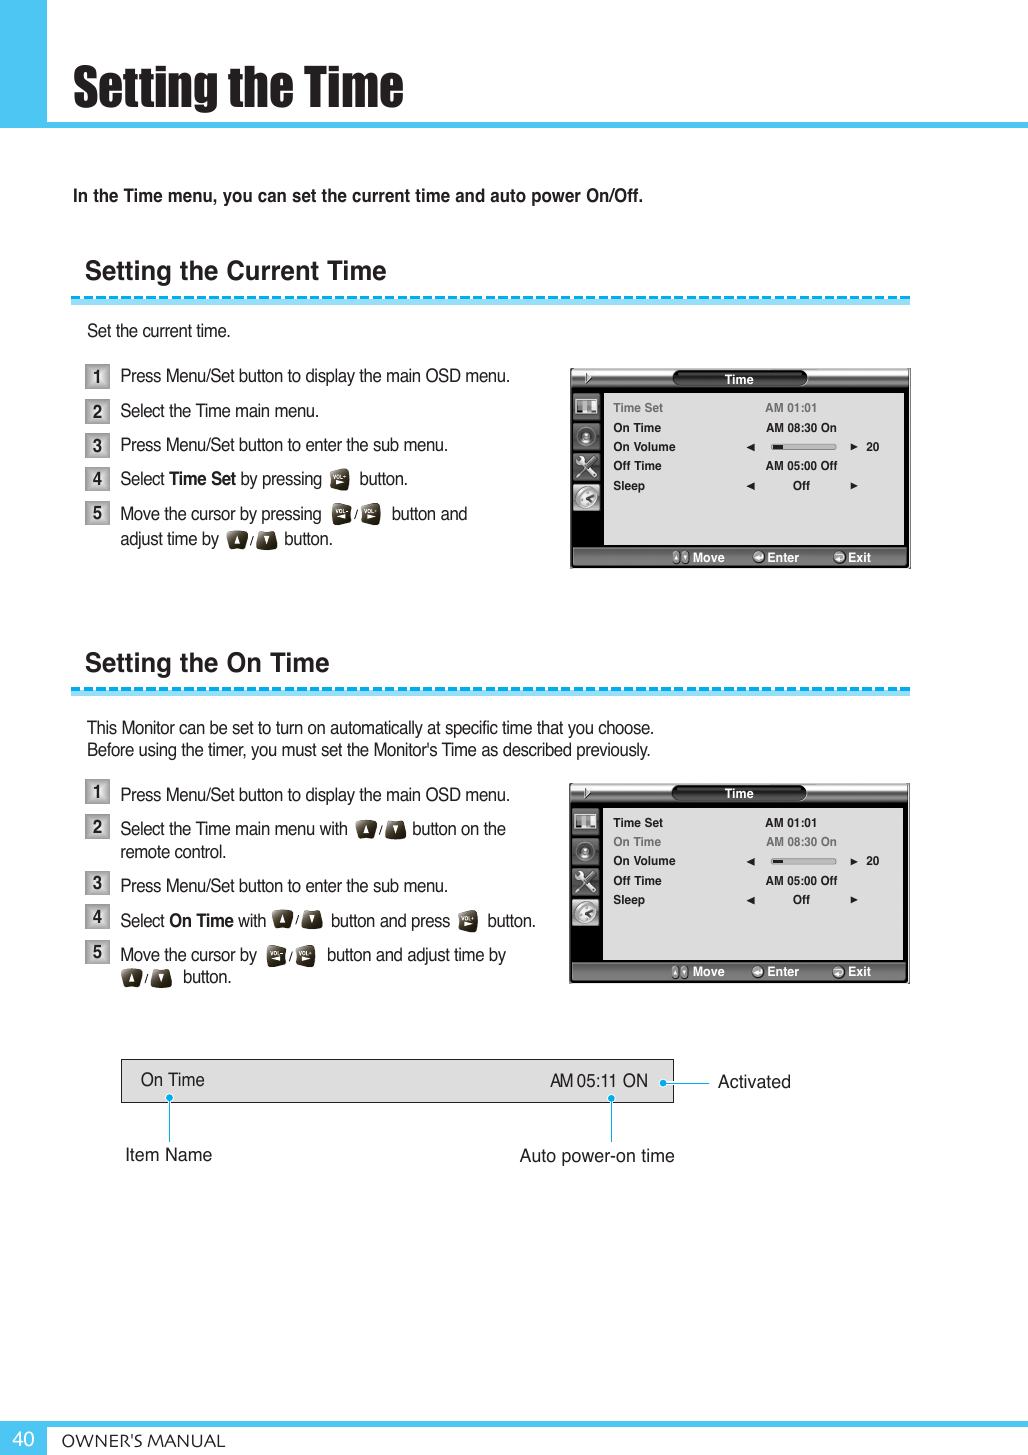
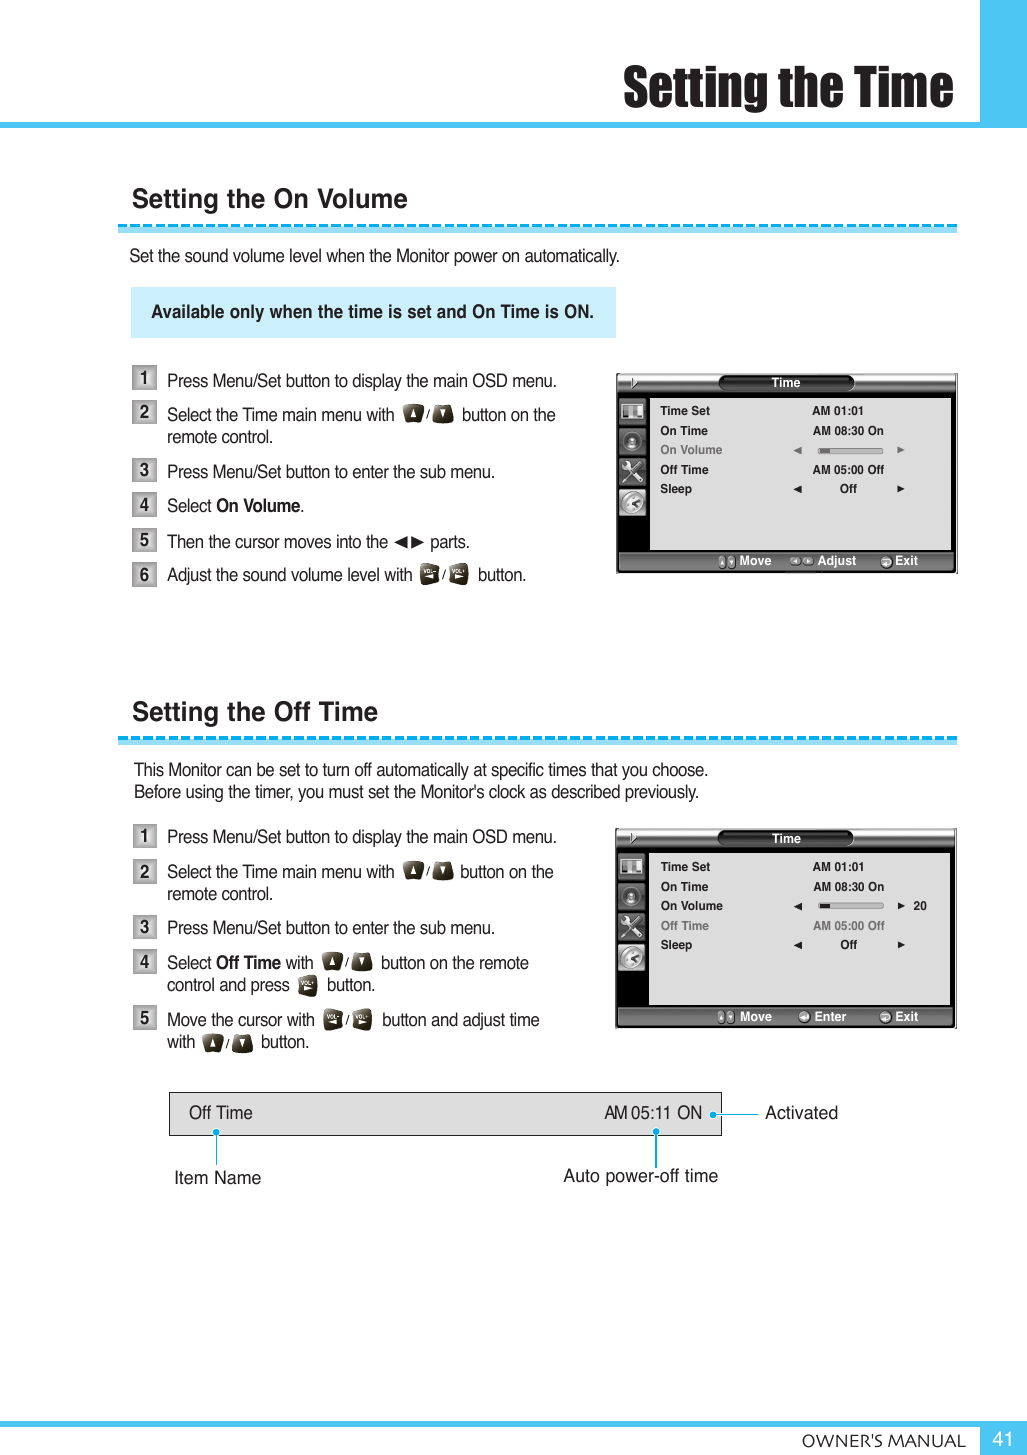
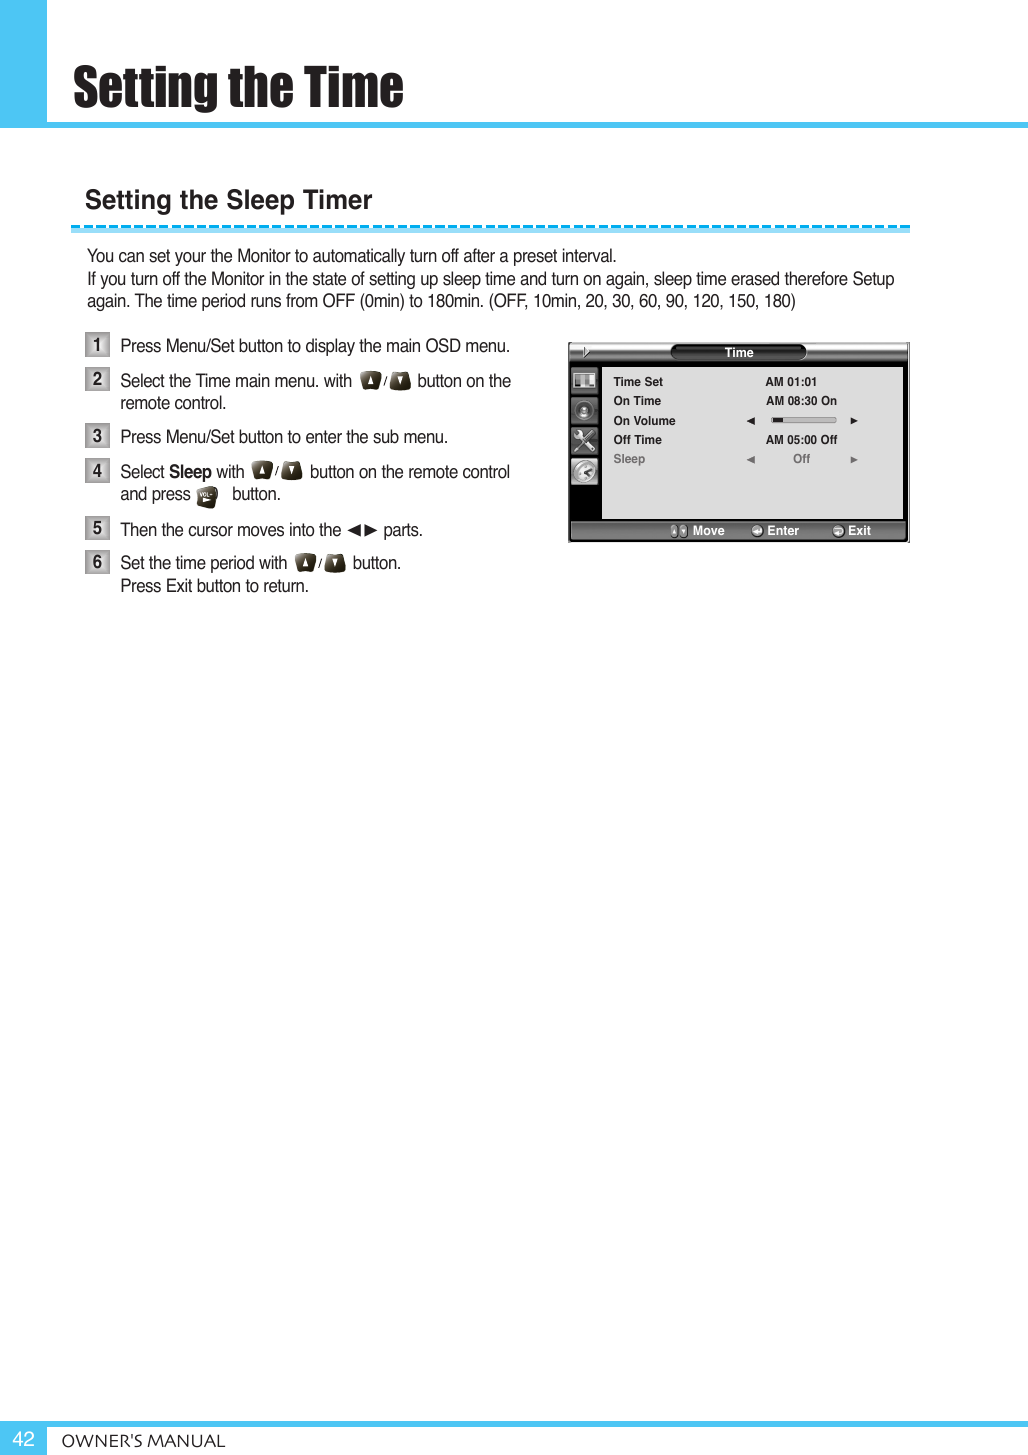
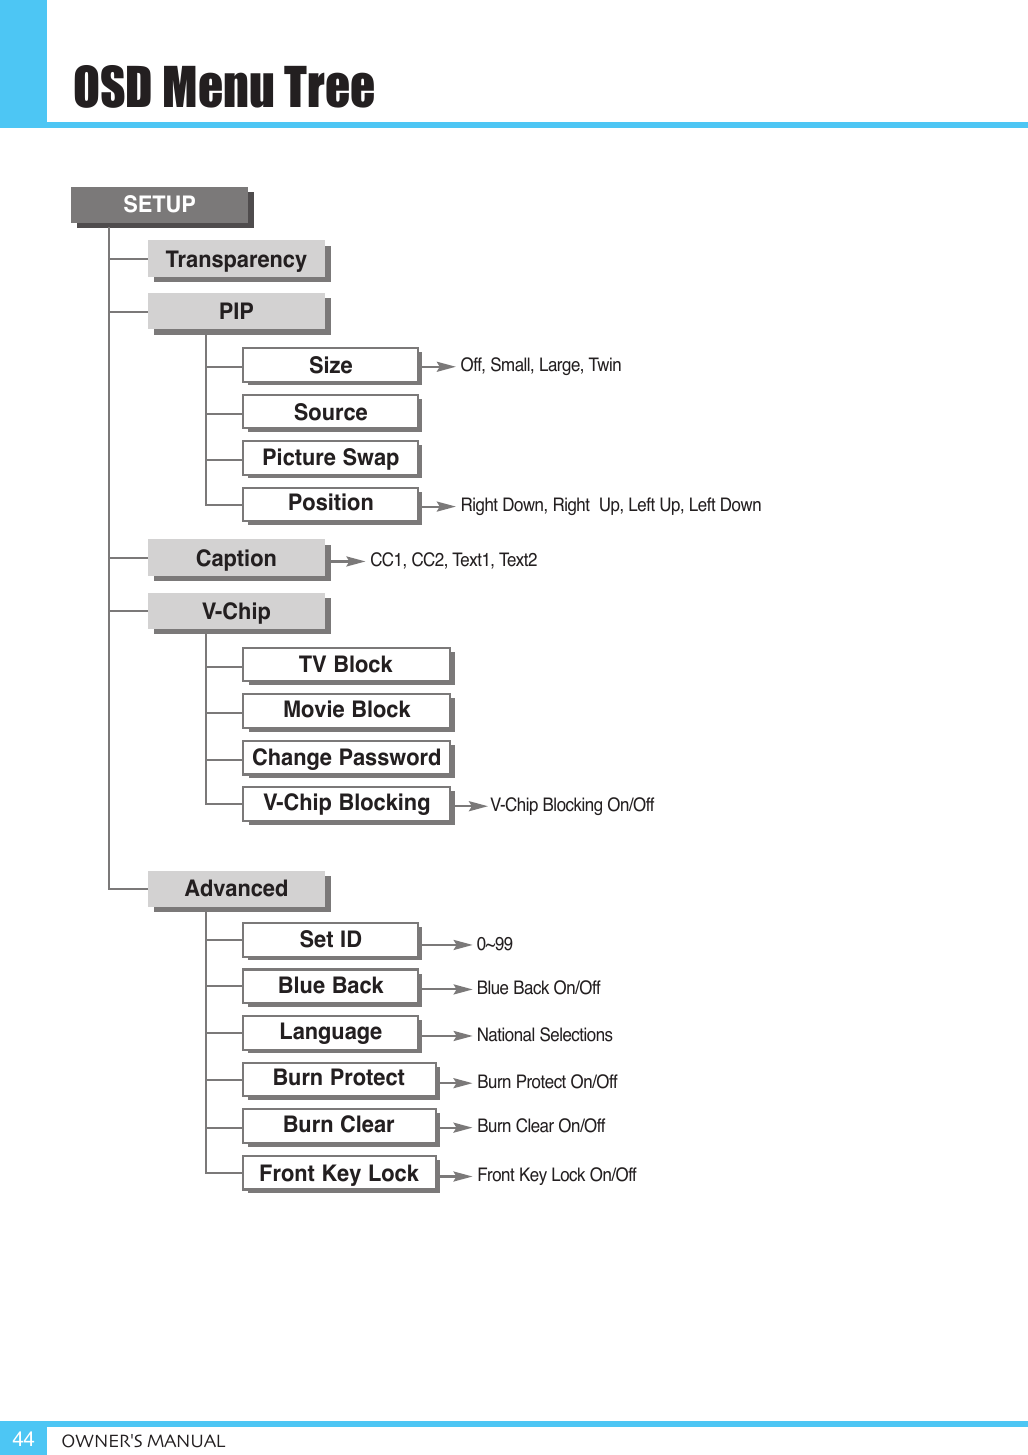
![ContentsOWNER'S MANUAL 1ForewordOverviewing the MonitorBasic OperationConnection the Cable / DevicesInstallationSetting the PictureSetting the SoundCaution ............................................................................................................................................ 3Important Safety Instructions ...................................................................................................... 4Precaution ...................................................................................................................................... 5Viewing the Control Panel ............................................................................................................ 10Viewing the Connecting Panel ................................................................................................................ 11Viewing the Remote Control .................................................................................................................... 13Button Description ...................................................................................................................................... 13Loading the Batteries ................................................................................................................................ 14Reception Range of Remote Control ........................................................................................................ 14Table Stand Installation (optional) ................................................................................................ 15Wall Mount Installation (optional) ................................................................................................ 16Connecting the VCR ...................................................................................................................... 17Connecting the DVD ...................................................................................................................... 18Connecting the Set Top Box ........................................................................................................ 20Connecting the PC [ D-Sub & DVI ] .............................................................................................. 21Displayable Monitor Specification ................................................................................................ 22Basic Operation .............................................................................................................................. 23OSD Menu Structure ...................................................................................................................... 24Changing the Picture Mode .......................................................................................................... 25Adjusting the User Mode ............................................................................................................................ 25Changing the Color Temperature ................................................................................................ 27Changing the Color Enhancer ...................................................................................................... 27Video NR (Noise Reduction) ........................................................................................................ 28Changing the Screen Form .......................................................................................................... 28Selecting the Black Enhancer ...................................................................................................... 28Position .......................................................................................................................................... 30Adjusting the User Mode ............................................................................................................................ 30Adjusting the Sound Balance ...................................................................................................... 32Changing the Sound Mode .......................................................................................................... 32User Adjust .................................................................................................................................... 33Spatial Effect ................................................................................................................................................ 33AVC (Auto Volume Control) ...................................................................................................................... 33](https://usermanual.wiki/Harsper/HP-420VPM/User-Guide-676348-Page-2.png)


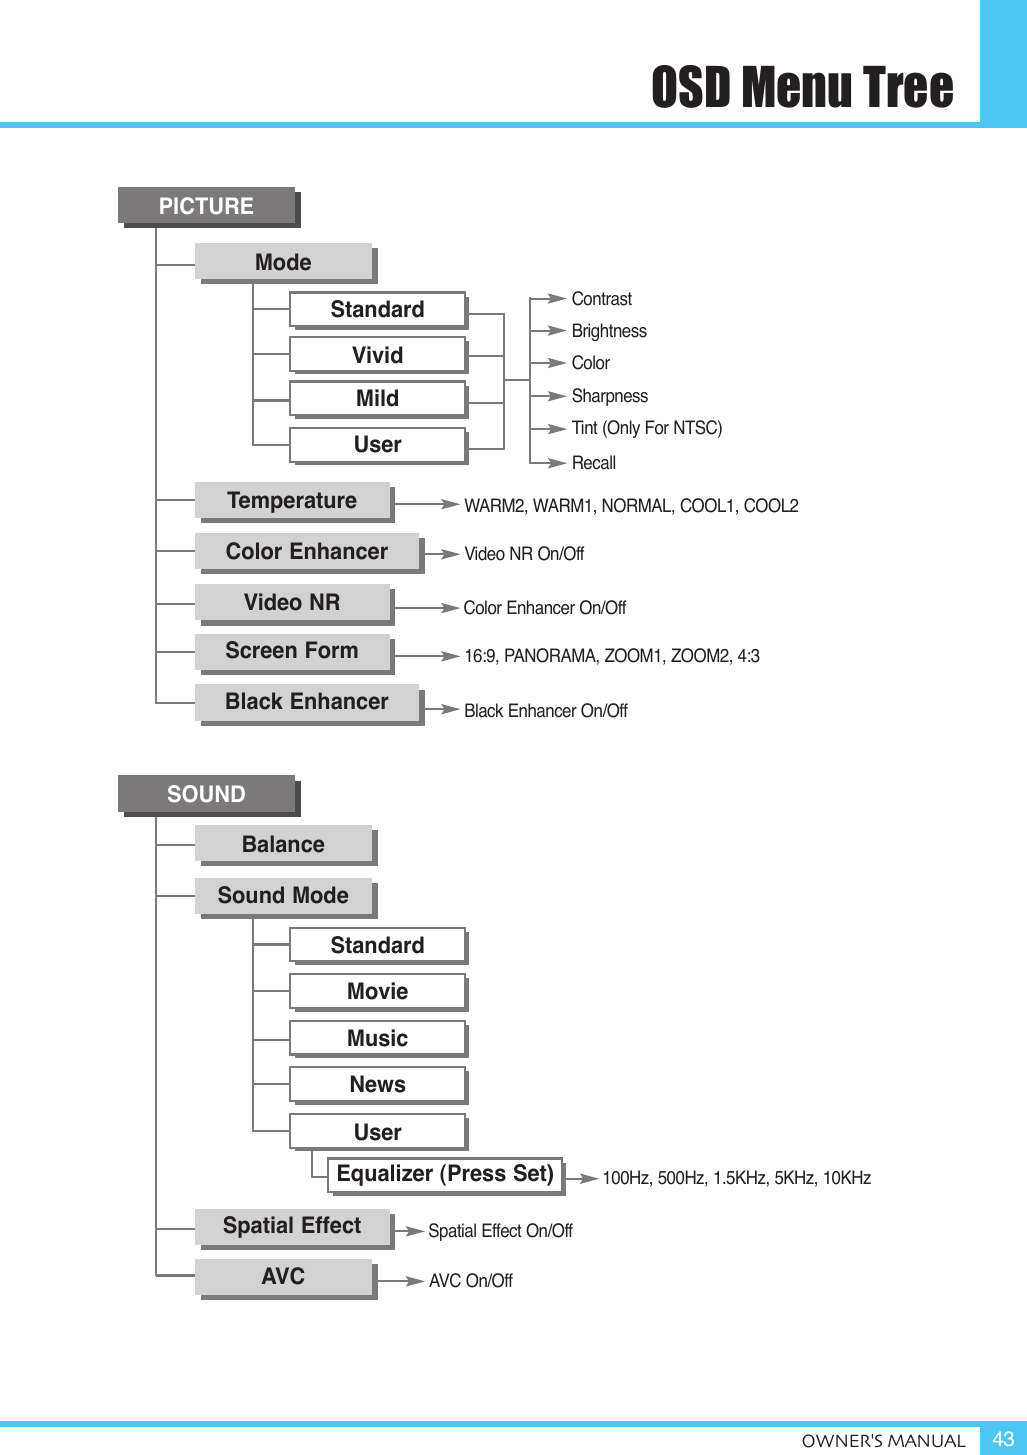
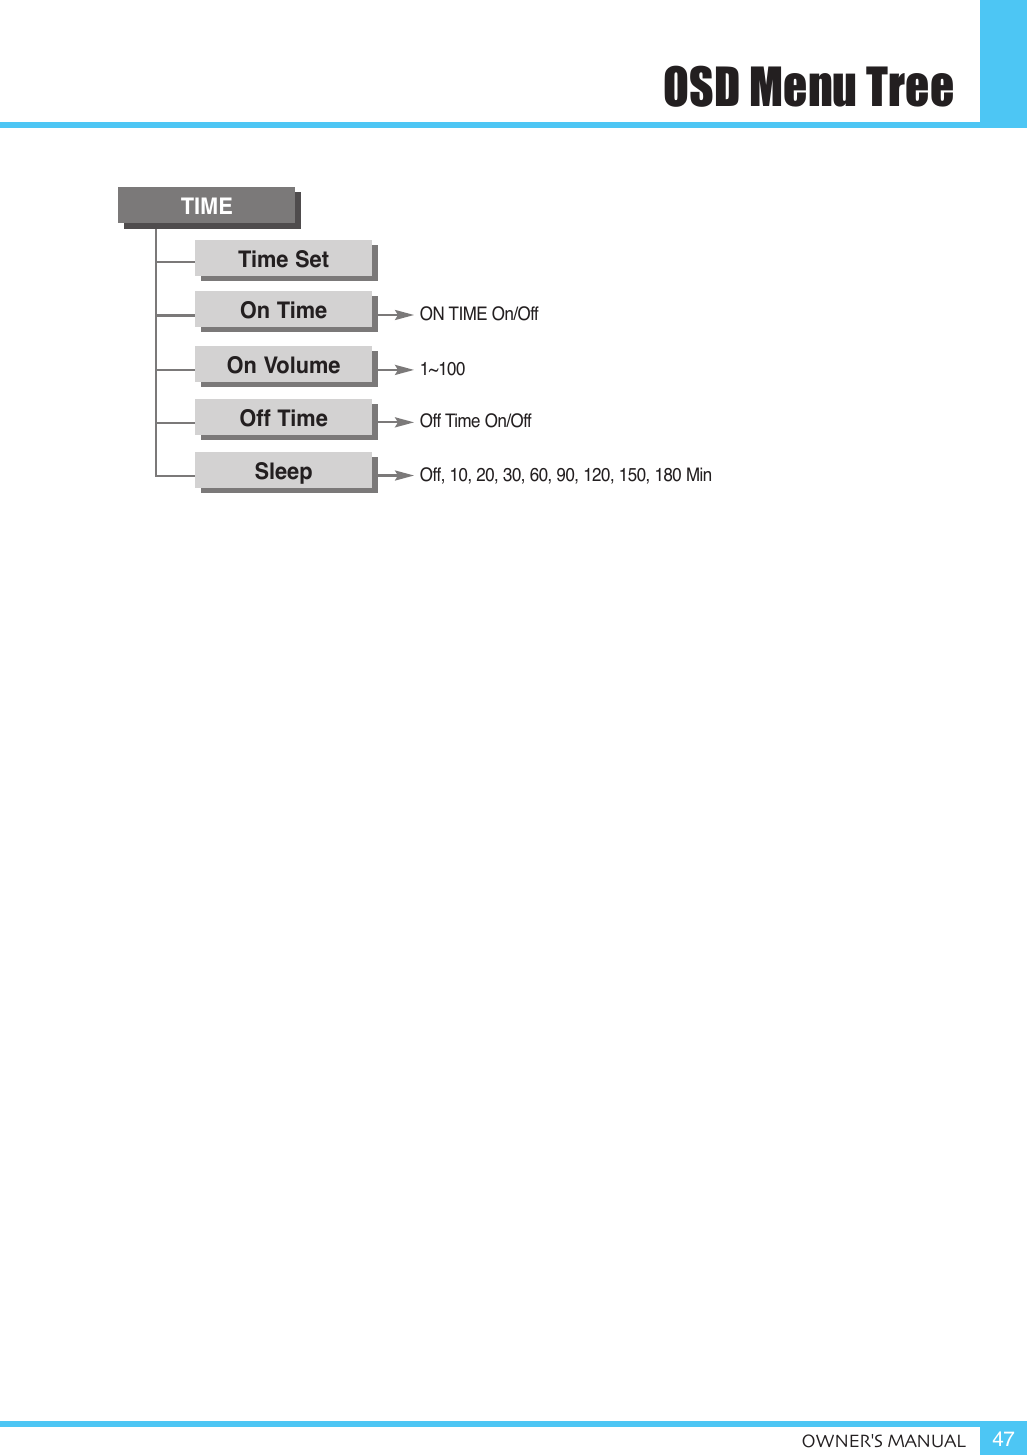
![OSD Menu TreeOWNER'S MANUAL 45TIMETime SetOn TimeOn ChannelOn VolumeOff TimeSleepOn Time On/OffSelection Of Monitor Program1~100Off Time On/OffOff, 10, 20, 30, 60, 90, 120, 150, 180 MinPICTUREModeStandardVividMildUserH-PositionV-PositionDividePhaseAuto AdjustTemperaturePositionWARM2, WARM1, NORMAL, COOL1, COOL2Video NR On/OffScreen Form16:9, 4;3ContrastBrightnessColorSharpnessTint (Only For NTSC)Recall[ PC MODE ]](https://usermanual.wiki/Harsper/HP-420VPM/User-Guide-676348-Page-46.png)